
LED Tails. completed....

Thread Starter
Instructor
Joined: Apr 2006
Posts: 186
Likes: 0
LED Tails. completed....
So i had the wiring done for awhile now, but never mounted them in my tails before. So i finaly stopped being lazy and mounted one in the broken tail light. it was a very quick mounting job so i know it looks crappy. but the video i took is so you can see the completed job in action with the running and brake lights.
http://www.youtube.com/watch?v=TMlDbJzbwh0
Ok i just uploaded the video so it might take a couple minutes to get on youtube. keep checking and let me know what you think. thanks
Rick
http://www.youtube.com/watch?v=TMlDbJzbwh0
Ok i just uploaded the video so it might take a couple minutes to get on youtube. keep checking and let me know what you think. thanks
Rick
Thread Starter
Instructor
Joined: Apr 2006
Posts: 186
Likes: 0
Ok while you wait, here a a pic of my finished backup cam. did not use doms nav device. I have it, but am going to use it for dvd and maybe something else. so i used the navi box for this. check it out.

Trending Topics


Thread Starter
Instructor
Joined: Apr 2006
Posts: 186
Likes: 0
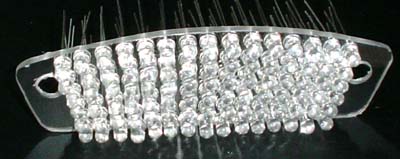
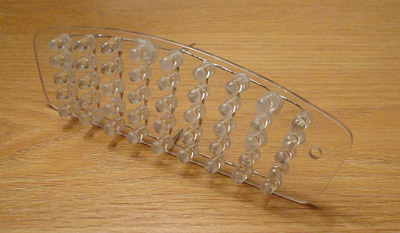
Yea i finaly found a way to make the same led's come on for the running lights, and get brighter for brake lights. I have all 4 sets done already, just can't find a way to get them into the tail light without cutting a very big hole. i thought about cutting off the back, but then the tail light mounts with the back. any suggestions? i heated up the first lens, and the whole tail melted. so i not sure how to split them in a good way.
Thread Starter
Instructor
Joined: Apr 2006
Posts: 186
Likes: 0
Originally Posted by feuss2
Loose the perforated circuit board PLEASE! It gives it an amateur hacked up appearance. Where did you get your info for the dual brightness LED configuration?
I kept trying different things out until finaly something worked. T hen checked my info with my dad. then he helped me make it so no power will run back into the line and blow anything.
Driver/Detailer
Joined: Oct 2003
Posts: 2,474
Likes: 2
From: Sydney
Originally Posted by WICKEDFX
Ok while you wait, here a a pic of my finished backup cam. did not use doms nav device. I have it, but am going to use it for dvd and maybe something else. so i used the navi box for this. check it out.
Thread Starter
Instructor
Joined: Apr 2006
Posts: 186
Likes: 0
The backup camera is probably the easiest thing i have done to this car. especially with the biggest wow facter for so little work. I get excited to use it every day. i'll take pics of the back where the camera is. If anyone needs help doing this, let me know.

Racer
Joined: Jul 2005
Posts: 273
Likes: 0
From: Montreal, Canada
Hey man!! nice job! I too am working on led tails, funny i was only able to obtain the passenger inner tail but i did pretty much what you did.
I took my tails apart by using a heated exacto knife at first, but then kept breaking, so i grinded down a soldering iron tip to make it knife like, that worked ok. However Weller makes a cutting tip for there gun soldering irons, i am going to try that for the next set i do.
Did you use regular 5mm leds?
I will post pics up soon.
Racer
Joined: Jul 2005
Posts: 273
Likes: 0
From: Montreal, Canada
As far as dual brightness, there is two options, two different valued voltage regulators or a pwm, PWM being the more ideal/efficient way of doing it.
To begin with i might just do the dual voltage regulator and then convert to a PWM later on.
To begin with i might just do the dual voltage regulator and then convert to a PWM later on.
Thread Starter
Instructor
Joined: Apr 2006
Posts: 186
Likes: 0
Feuss2, i talked with you awhile back on messenger. if you like, make the led tails with the plastic. I just don't have enough energy to redo all the boards again. but it does look good being clear. I really don't care what the board looks like. I just need to find a good way to put the boards into the tail light without cutting too big a hole. I found out the hard way that heating the tail light does not work.
MTLER: Yes they are just 5mm led's, red.
Also you don't need a bunch of gadgets to do the control of dual brightness. If you open a dual fillament led light bulb you will also see the answer. I just found this out last night. Too bad i didn't stumble on this awhile back. but they are setup the same way i did my wiring.
So if anyone has a good already proven to open tail lights. let me know.
Racer
Joined: Jul 2005
Posts: 273
Likes: 0
From: Montreal, Canada
I am not entirely sure of how they did it perhaps you can enlighten me? i can assure you it most likely isnt an efficient way. Also led bulbs use 3mm leds (cheaper ones) which require less current which produce less heat. shoving 24 leds with resistors in a tight spot they will heat up.
There is a proper way of doing it and the easy way. But for something like led tails where i don't want to have to cut open my housing and re-solder an entire board because somehting died, or worse yet, something melts.
Fuess: That doesnt look bad actually, but most people try and hide the actual led from showing, which is what i plan on doing also i still say wiring on that faux-board will be a pain.
Also i still stand by my method of using a heated knife/ "Weller" brand cutting tip.
Thread Starter
Instructor
Joined: Apr 2006
Posts: 186
Likes: 0
well a dremal would also work. that's what i did. And just incase you didn't know the other guy that had his done did not use 5 or 3mm. the company used high flux leds instead. i wish the guy would take out the housing to see where they opened it at. if you are able to open it with minimal damage, let me know. where do you get this tip from that heats up with soldering iron?
Racer
Joined: Jul 2005
Posts: 273
Likes: 0
From: Montreal, Canada
Yeah the other set used Suplerflux LEDS, which is what i am using as well. I was saying that the LED bulbs people buy from ebay etc use 3mm led or whatever. I know the guy who took his 4th gen TL tails apart used a dremel with a plastic cutting wheel, but i think his were a bit easier to cut.
You can buy the soldering tip at any hardware store which carry's soldering irons (it only fits the gun models though)
You can buy the soldering tip at any hardware store which carry's soldering irons (it only fits the gun models though)


Thread Starter
Instructor
Joined: Apr 2006
Posts: 186
Likes: 0
i'm still trying to find a better way to open the housings before i try and do it to my tails. the extra one i had i had to cut a big section out of the back of it. i don't want to do that to my tails on the car.
I cut a lense with a dremel, and it seems like it will be difficult to get the edge around the outside looking clean for reassembly. The grey plastic melts if you work on a section too long with the cutoff wheel. It looks like cutting the back of the lense out will take away plastic that's needed for the bolts holding the lense to the car--at least on the outers...
Racer
Joined: Jul 2005
Posts: 273
Likes: 0
From: Montreal, Canada
Did you cut it along the seam? (where grey is fused with red) or did you cut it on either side?
In my original attempt i tried cutting it along the seam, i think my next attempt will be to cut on either side, if i cut on the red lense side im sure with some good layers sanding it would look "ok".
I'm just worried about putting it back together and correcting the gap created by cutting, i suppose the sealant would put that "space" back.
Tried cutting right on the seam. It looks like if you cut closer to the grey plastic, it would be easy to damage the silver reflective coating, and closer to the red, you scratch the inside of the lense--damage you see through the front either way

Instructor
Joined: Aug 2007
Posts: 154
Likes: 0
Originally Posted by WICKEDFX
Ok while you wait, here a a pic of my finished backup cam. did not use doms nav device. I have it, but am going to use it for dvd and maybe something else. so i used the navi box for this. check it out.
Instructor
Joined: Aug 2007
Posts: 154
Likes: 0
Originally Posted by WICKEDFX
i mounted it just to the right of the lisence plate. i'll take a picture and put it up for you to see.
ok please do so can u tell me how much is the camera and everything and for installation and if u dont mind take sum pikz in the night so i could see how it looks. thnkzz man
Thread Starter
Instructor
Joined: Apr 2006
Posts: 186
Likes: 0
I wouldn't buy this camera if you want to see at night. It doesn't have night vision. But it is a small camera. Also i did the install myself and tapped into the navigation system instead of using dom's unit. There is a tutorial here on how to do it. night pics will not come out, but i will take a pic of the camera in the day for you. If you live in nor cal i can make the harness and do the install for you.