Body Colored Mud Guard DIY
 07-12-2008, 02:27 PM
#1
Old Man Yelling at Clouds
Thread Starter
Body Colored Mud Guard DIY
Just painted my mud guards to match the paint - here's the process and the pics. In all, it was easy and I think came out great!
Products:
I ordered from here: http://www.automotivetouchup.com/spray_paint.asp
I used:
- 12 oz Aerosol Plastic Parts Adhesion Promoter (the primer)
- 12 oz. Basecoat Color Touch Up Spray Paint
- 12 oz. Touch Up High Gloss Clear Coat Spray Paint
Was about $45 shiped
Process:
I basically followed the instructions on the web site. Cleaned the mud guards very well - soap, water, used some 409 to remove grease, etc. I put on 3 coats of the primer (adhesion promoter). The one mistake I made here was not to sand down the primer. I didn't realize how visible the drips would be. They didn't seem that bad when I primed, but showed up when I painted. They're only visible close up, but still. So, I would recommend following the sanding instructions. I followed with 6 coats of paint, and 3 coats clear coat. When painting, use quick, light sprays. If you go to slow, or put too much on, you get drips that are almost impossible to correct once on (unless you do more sanding). The products were excellent quality, sprayed well, and the color match was excellent.
Pictures:
The products:

After Paint:

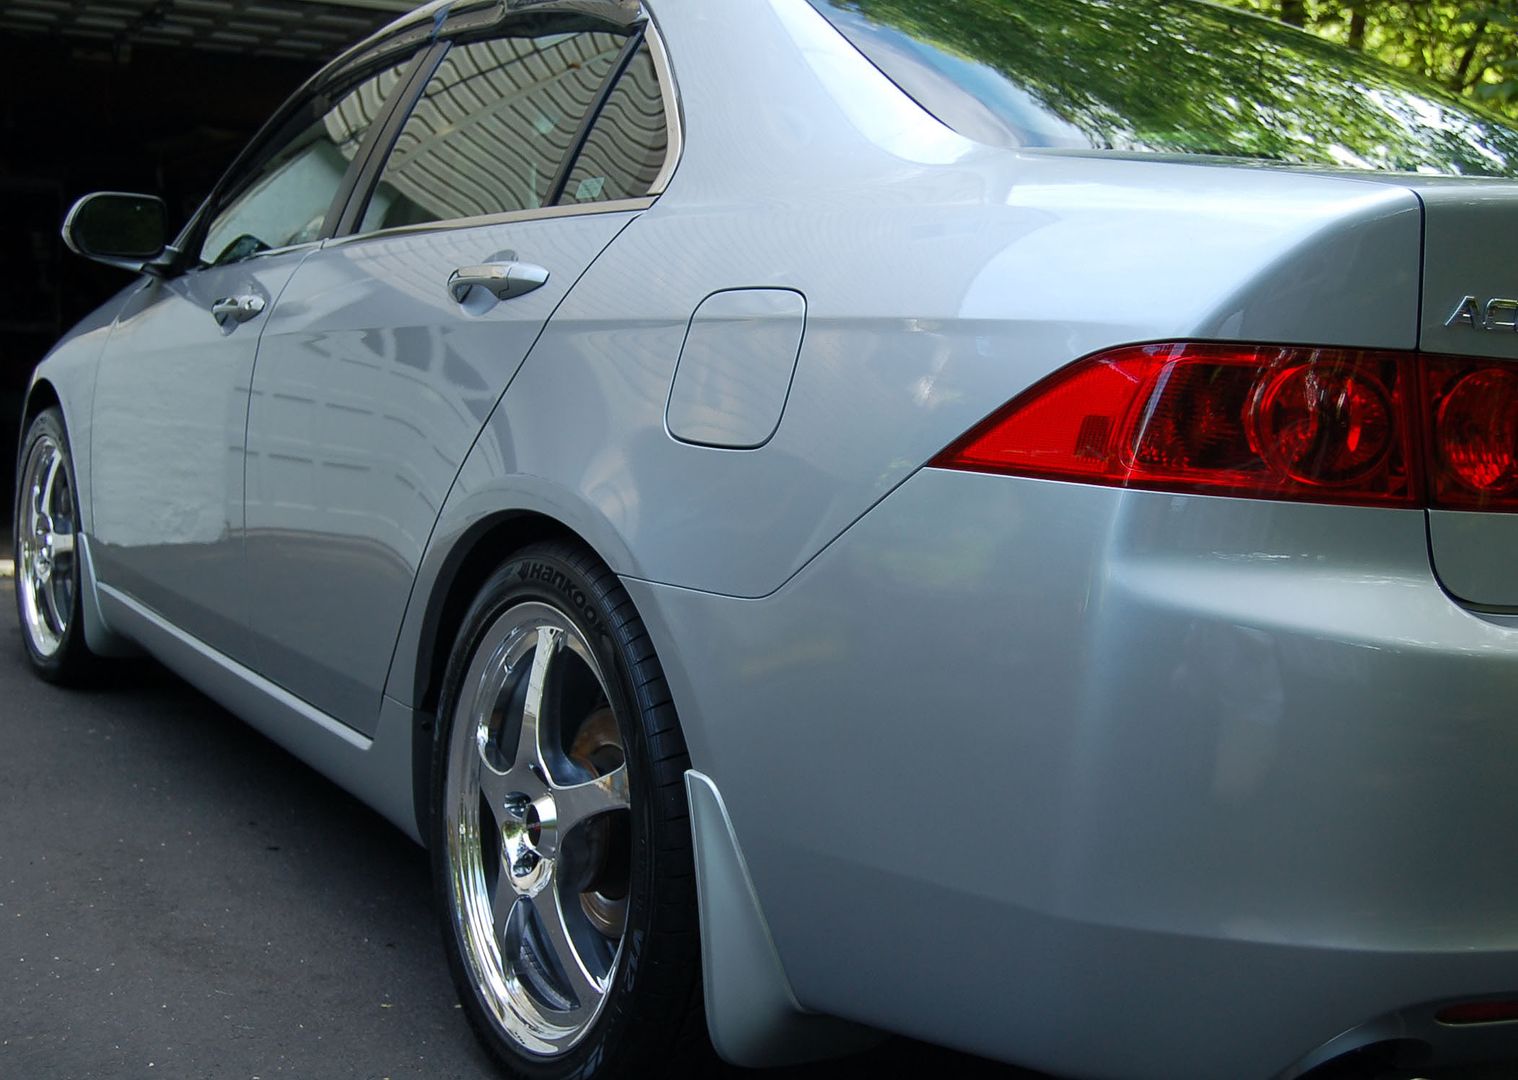
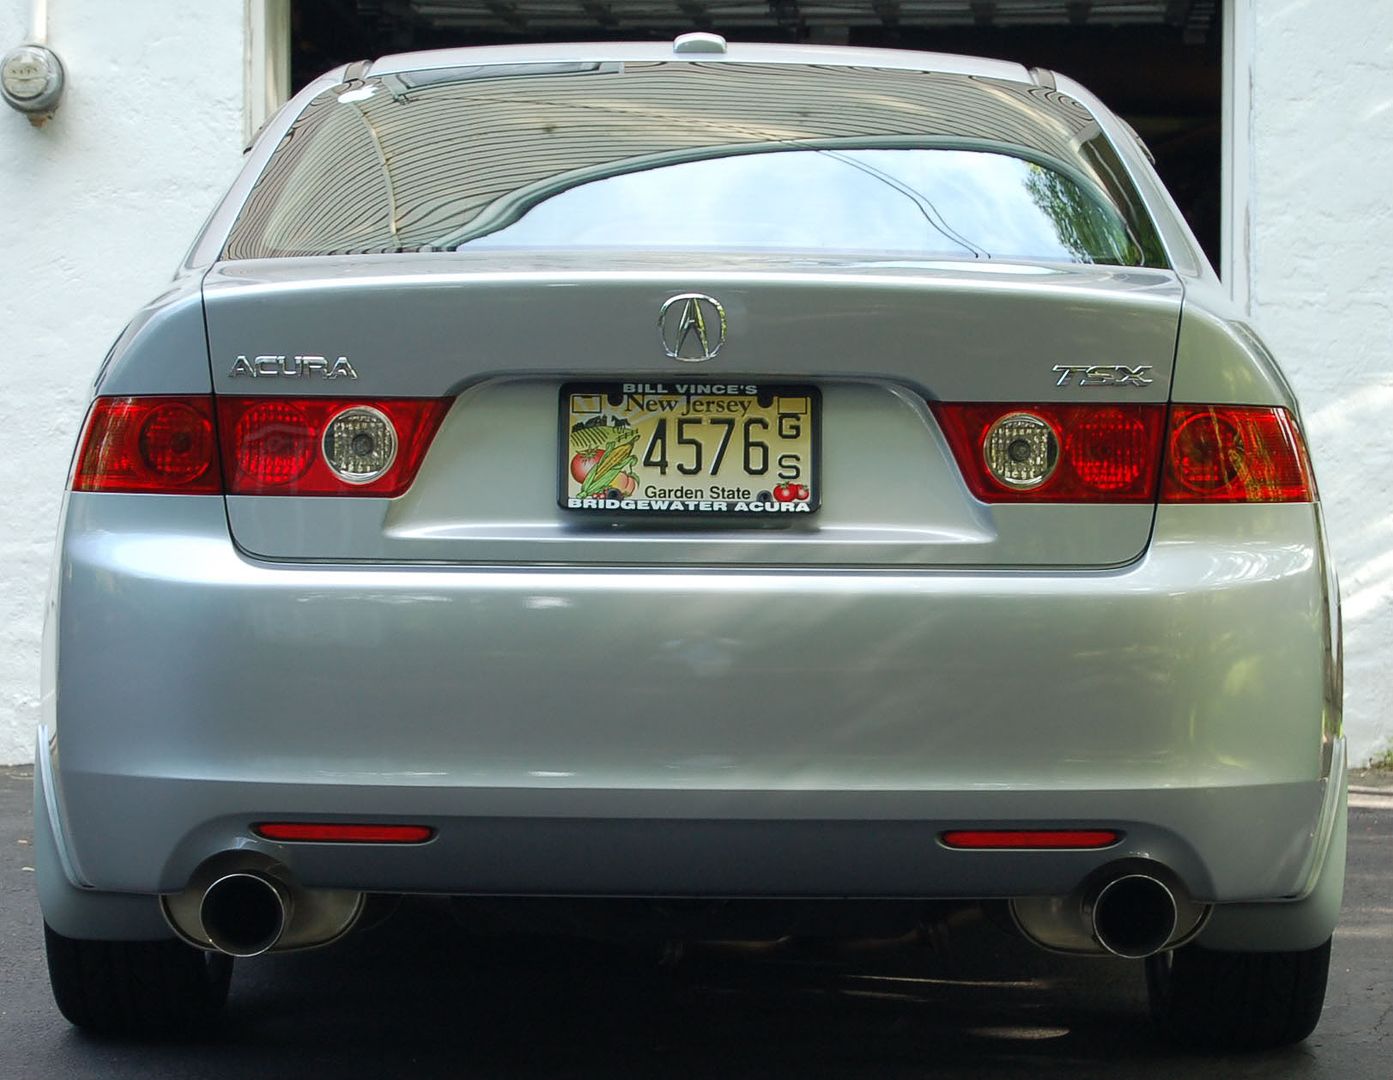
On the car:


Last pic is for those with mud guards - they've been on the car for 2 years and this is what it did - this was on both sides on the front. Rear seemed to be OK.

Products:
I ordered from here: http://www.automotivetouchup.com/spray_paint.asp
I used:
- 12 oz Aerosol Plastic Parts Adhesion Promoter (the primer)
- 12 oz. Basecoat Color Touch Up Spray Paint
- 12 oz. Touch Up High Gloss Clear Coat Spray Paint
Was about $45 shiped
Process:
I basically followed the instructions on the web site. Cleaned the mud guards very well - soap, water, used some 409 to remove grease, etc. I put on 3 coats of the primer (adhesion promoter). The one mistake I made here was not to sand down the primer. I didn't realize how visible the drips would be. They didn't seem that bad when I primed, but showed up when I painted. They're only visible close up, but still. So, I would recommend following the sanding instructions. I followed with 6 coats of paint, and 3 coats clear coat. When painting, use quick, light sprays. If you go to slow, or put too much on, you get drips that are almost impossible to correct once on (unless you do more sanding). The products were excellent quality, sprayed well, and the color match was excellent.
Pictures:
The products:
After Paint:
On the car:
Last pic is for those with mud guards - they've been on the car for 2 years and this is what it did - this was on both sides on the front. Rear seemed to be OK.

 07-13-2008, 01:41 AM
#5

1Louder, nice job. I didn't realize how much the stock mudguards detracted from the overall vehicle looks until I saw them painted. I need to do this to mine (also CGP).
Looks great! Thanks for the DIY.
Looks great! Thanks for the DIY.
07-13-2008, 02:13 AM
#6
Intermediate

Join Date: Oct 2007
Location: Smyrna, TN
Age: 49
Posts: 48
Likes: 0
Received 0 Likes
on
0 Posts
i've been thinkin of doing the same. and i thank you for the DIY project.
Looks sweet! 1 question... did you paint the side of the guards in the inside of the wheel well?
Looks sweet! 1 question... did you paint the side of the guards in the inside of the wheel well?
Trending Topics
07-13-2008, 11:10 AM
#8
Old Man Yelling at Clouds
Thread Starter
Thanks to all for the great feedback!
I did not, but you could. It gets so dirty, I wasn't sure how the paint would hold up and didn't want to chance it flaking off. So I just stuck to the outside.
Originally Posted by orlando
i've been thinkin of doing the same. and i thank you for the DIY project.
Looks sweet! 1 question... did you paint the side of the guards in the inside of the wheel well?
Looks sweet! 1 question... did you paint the side of the guards in the inside of the wheel well?
07-13-2008, 08:29 PM
#10
Old Man Yelling at Clouds
Thread Starter
Here's a couple better pics -


07-13-2008, 11:31 PM
#11
Intermediate
Join Date: Oct 2007
Location: Smyrna, TN
Age: 49
Posts: 48
Likes: 0
Received 0 Likes
on
0 Posts
Originally Posted by 1Louder
Thanks to all for the great feedback!
I did not, but you could. It gets so dirty, I wasn't sure how the paint would hold up and didn't want to chance it flaking off. So I just stuck to the outside.
I did not, but you could. It gets so dirty, I wasn't sure how the paint would hold up and didn't want to chance it flaking off. So I just stuck to the outside.
 07-13-2008, 11:59 PM
#12
E92
Originally Posted by 1Louder
Thanks to all for the great feedback!
I did not, but you could. It gets so dirty, I wasn't sure how the paint would hold up and didn't want to chance it flaking off. So I just stuck to the outside.
I did not, but you could. It gets so dirty, I wasn't sure how the paint would hold up and didn't want to chance it flaking off. So I just stuck to the outside.
07-14-2008, 11:35 AM
#15
Team Owner
That looks darn good. Seeing how the mudguards are pretty flexible I'd be curious how the finish holds up (ie. if you start to get rippling or stretch marks as the mudguards flex.

 05-15-2009, 06:28 AM
#18
it's a car-drive it
very nice-keeping my mudguards black to match the interior. Visited seattle a few weeks ago-nice sunny day touring the space needle, etc. (we are now on our last days of our 9,000+mile cross country road trip)
05-24-2009, 11:33 PM
#21
Old Man Yelling at Clouds
Thread Starter
Sorry all - I somehow lost my subscription to this thread. Wasn't getting notice of any updates.
Yes, they are holding up very well. No chips, cracks, etc. They look as good as they did the day I painted them.
Thanks for the compliments!
Yes, they are holding up very well. No chips, cracks, etc. They look as good as they did the day I painted them.
Thanks for the compliments!
05-24-2009, 11:36 PM
#22
Old Man Yelling at Clouds
Thread Starter
With the new wheels (A-spec)... 

 05-24-2009, 11:37 PM
#23
Old Man Yelling at Clouds
Thread Starter
If you had a sunny Seattle day in May, then you did well! I guess we're less than an 1" away from record rainfall for May. Hope you enjoyed the area!
06-01-2009, 06:42 AM
#25
I'm finishing up my mud guard paint job today, after applying the 3rd clear coat yesterday. I was surprised to see my front mud guards were some-what nicked-up along the edges. Whether they will be that noticeable when installed, after sanding/painting; remains the question. However, new guards are pretty cheap, if anyone wants to return to oem, or paint new, flawless guards. Something I just might do for the front. They do look great matching the body color! Thanks for leading the way, 1Louder. Kudos!
06-01-2009, 01:24 PM
#26
Old Man Yelling at Clouds
Thread Starter
Glad it worked out for you! I'm sure an happy with the results. Would be interested in a pic if you get the chance.
 06-02-2009, 12:36 PM
#28
Old Man Yelling at Clouds
Thread Starter
^^ Those look great!!!!
I can't believe they don't sell this as an OEM option. They'd get a lot of takers....
I can't believe they don't sell this as an OEM option. They'd get a lot of takers....

Thread
Thread Starter
Forum
Replies
Last Post
cycdaniel
1G TSX Performance Parts & Modifications
8
12-17-2019 10:58 AM
siularbar
1/2G MDX (2001-2013)
2
09-11-2015 10:40 AM