88000mcd LED perspex rod brakelight + front fog mod
 07-20-2008, 01:42 AM
#1
Intermediate
Thread Starter
Join Date: Jun 2008
Age: 51
Posts: 36
Likes: 0
Received 0 Likes
on
0 Posts
88000mcd LED perspex rod brakelight + front fog mod
Materials in hand
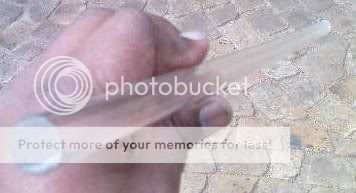
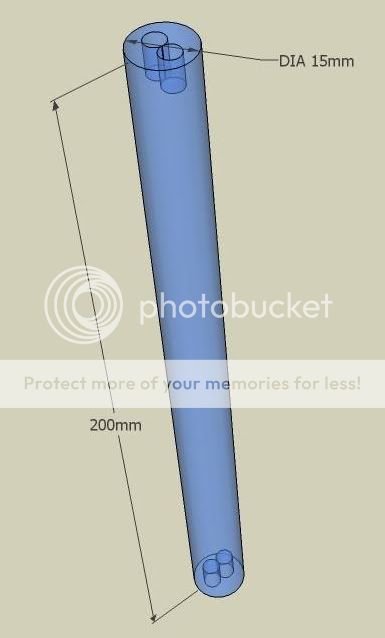
15mm dia 600mm long perspex rod
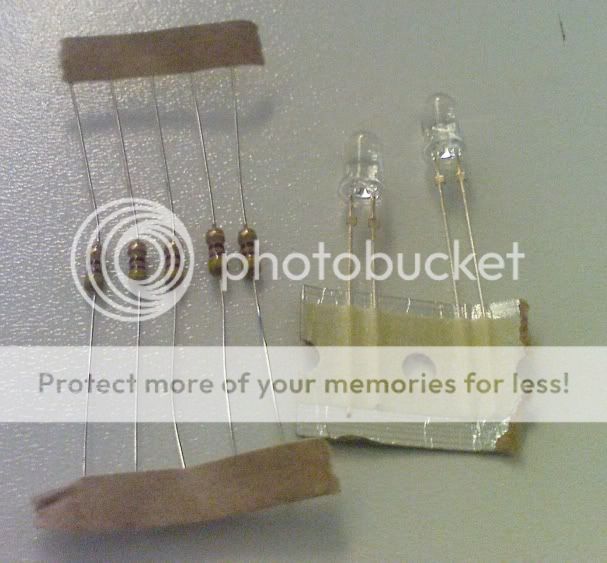
2 x 22000mcd LEDS and resistors
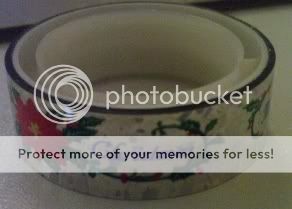
Reflective tape...what's that??? No knows where I am...closest I could find was this (maybe Christmas will come early )
)
Now for the ideas....cos it's Sunday, I have to work the whole day and the shops are closed....will get this going in the week. The scoring along the tube will pick up the light no doubt.
Google Sketchup (my friend)

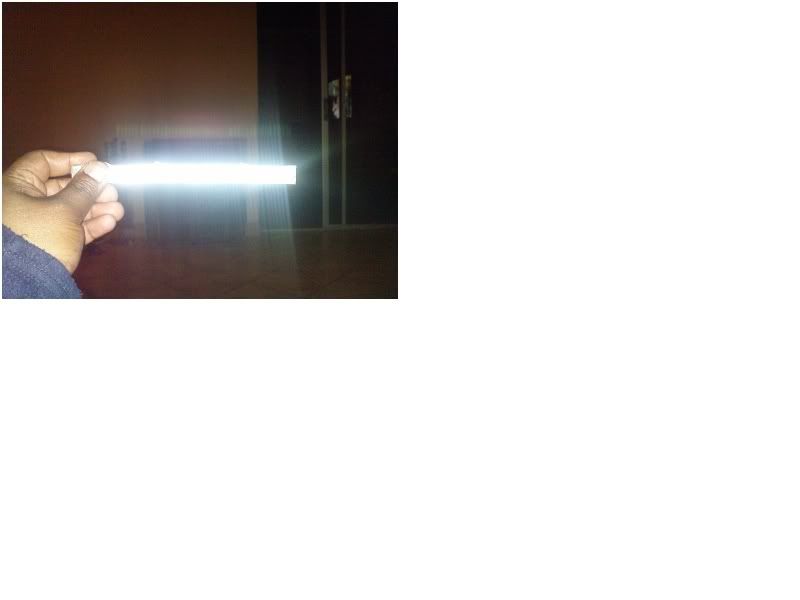
Tried shining a light through the rod last night with my cellphone (P1i)...just as a test....impressive

Questions (your help plz)

 idea....tell me what you think
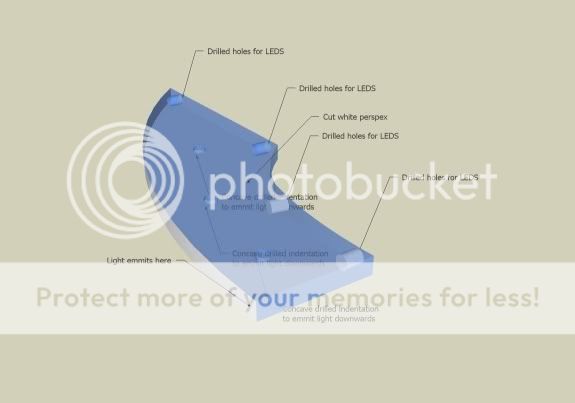
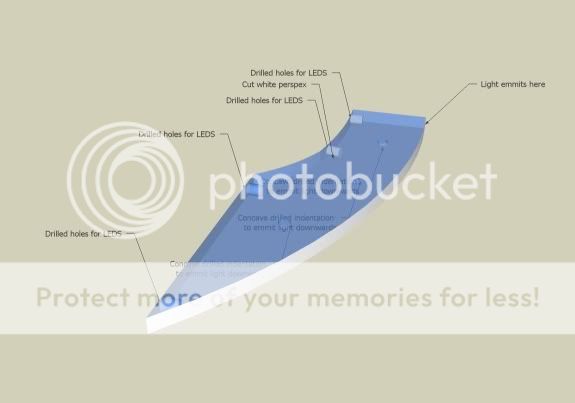
For the fins alongside my existing fogs...


Hope the pics come out ok and is not as big as my last ones on the other post
15mm dia 600mm long perspex rod
2 x 22000mcd LEDS and resistors
Reflective tape...what's that??? No knows where I am...closest I could find was this (maybe Christmas will come early
)Now for the ideas....cos it's Sunday, I have to work the whole day and the shops are closed....will get this going in the week. The scoring along the tube will pick up the light no doubt.
Google Sketchup (my friend)
Tried shining a light through the rod last night with my cellphone (P1i)...just as a test....impressive
Questions (your help plz)
- Wonder if anyone knows if there is a standard high level brakelight, even from another car that can fit on the top of the rear windscreen?? I can always cover the hole on the backboard with a cutout aluminium piece. This way the tube can be longer (Not priority no 1 - getting sidetracked again
 )
)
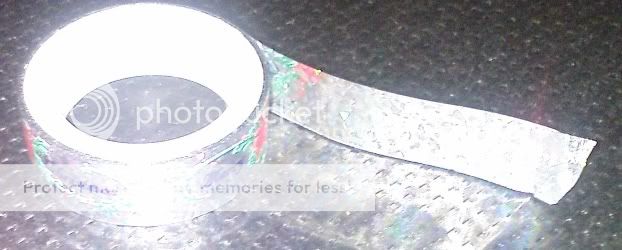
- As I cannot source reflective tape, and the Christmas tape looks dodgy
 .....is there anything else I can use? Was thinking of the mirror finish aluminium that I could bend in a half round shape....will be difficult though me thinks
idea....tell me what you thinkFor the fins alongside my existing fogs...
Hope the pics come out ok and is not as big as my last ones on the other post


 07-20-2008, 01:55 PM
#5
Instructor
Join Date: Mar 2006
Age: 42
Posts: 192
Likes: 0
Received 0 Likes
on
0 Posts
Originally Posted by Quest227
As I cannot source reflective tape, and the Christmas tape looks dodgy .....is there anything else I can use?
.....is there anything else I can use?
07-20-2008, 02:55 PM
#6
Intermediate
Thread Starter
Join Date: Jun 2008
Age: 51
Posts: 36
Likes: 0
Received 0 Likes
on
0 Posts
Originally Posted by intensity2x
3M makes a product called "Scotch Lite", its the reflective striping they put on fire trucks and police cars. Not sure where you could get some, but it is highly reflective and comes in just about any color you could imagine.
perspex rod....they stock the item.
07-20-2008, 11:32 PM
#7
Intermediate
Thread Starter
Join Date: Jun 2008
Age: 51
Posts: 36
Likes: 0
Received 0 Likes
on
0 Posts
Originally Posted by HI OFECR
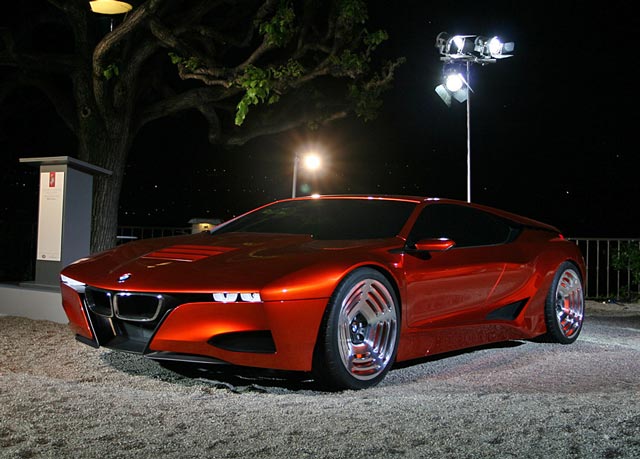
What your talking about for the fogs is done around the BMW m1 concepts headlights.
 the fogs on those look frosted of sandblasted
 ....wonder how the lighting for those babies work?
Anyone know?
Trending Topics
07-22-2008, 02:37 AM
#9
Intermediate
Thread Starter
Join Date: Jun 2008
Age: 51
Posts: 36
Likes: 0
Received 0 Likes
on
0 Posts
Originally Posted by intensity2x
Annnnd we're gonna need some pix when you finish this 
Originally Posted by intensity2x
BTW- Where did you get that rod from?
 08-10-2008, 08:04 PM
#11
2 ideas for the reflector peice:
aluminum foil (shiny side) held in place with clear heat shrink tubing, or maybe packing tape or similar? were you going to sand/score the clear side?
mask off the clear side and paint the rod with chrome paint...
the foglight fins look really cool. nice work with google sketchup
aluminum foil (shiny side) held in place with clear heat shrink tubing, or maybe packing tape or similar? were you going to sand/score the clear side?
mask off the clear side and paint the rod with chrome paint...
the foglight fins look really cool. nice work with google sketchup
08-11-2008, 01:50 AM
#12
Intermediate
Thread Starter
Join Date: Jun 2008
Age: 51
Posts: 36
Likes: 0
Received 0 Likes
on
0 Posts
Originally Posted by feuss2
aluminum foil (shiny side) held in place with clear heat shrink tubing, or maybe packing tape or similar?
Will try the aluminium foil�.didn�t think of that..got the heatshrink tubing from a friend already
Originally Posted by feuss2
were you going to sand/score the clear side?
This would diffuse the light�.I�m already doing this at the back with the scoring, don�t want to loose too much�.but I still have the offcut piece to play with and test theories
Originally Posted by feuss2
mask off the clear side and paint the rod with chrome paint...
Check the pic with the reflective tape�.think it works better
Originally Posted by feuss2
the foglight fins look really cool. nice work with google sketchup
Again, this was a distraction from work on a weekend�..thanks for compliment�..did you see the Sketchup Accords yet on my previous post?

 08-11-2008, 06:24 AM
#14
Intermediate
Thread Starter
Join Date: Jun 2008
Age: 51
Posts: 36
Likes: 0
Received 0 Likes
on
0 Posts
Sorry, this was done in haste...had an unexpected visitor to my desk
Pics in groups of four...should have left a space between them....can see this is difficult to understand now....can't edit the post either...sorry....
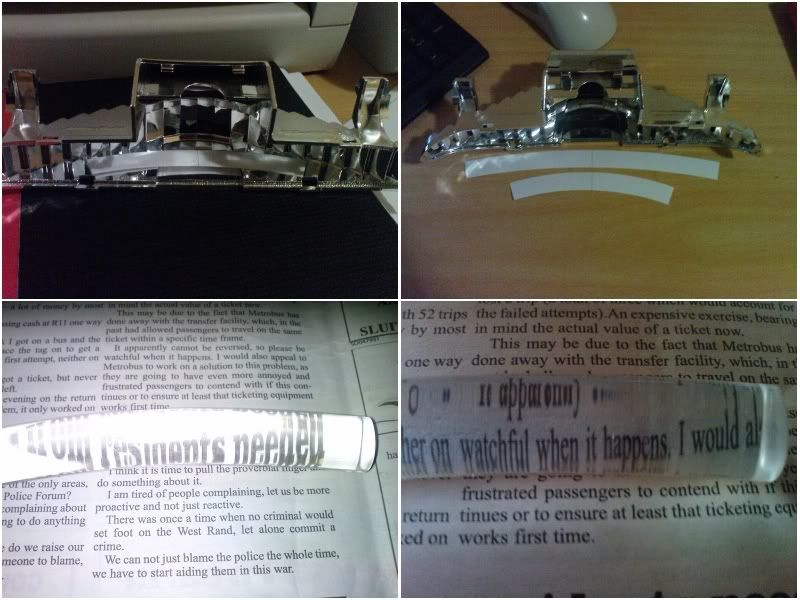
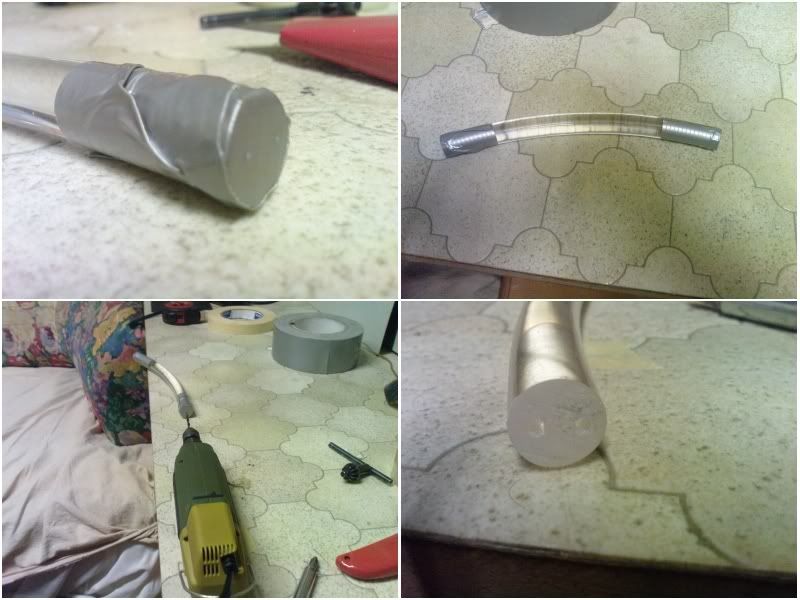
1st Pic
Was the testing of the curve of the perspex rod....cos stupid me cannot change the laws of the universe ie. light travels in a straight line�..it had to be curved or the light will bounce away and not reflect back. This was one @ 180deg celisius for 6 minutes in the oven..and then �bent� around the biggest pot the wife had�Yes I can bake. You will also notice that the rod has excellent magnification properties (might be useful to those that have done the typical led mod)
2nd Pic
Fooling around with cellphone light (P1i)..bottom right pic of test hole in offcut piece�was easy to do with 5.5mm steel drill bit
3rd Pic
This was doen on the test piece
Pilot holes on bottom right with dremel
Bottom left � drill with 5.5mm bit and tape for depth not to overshoot
Top right � leds fit in with a bit of movement(0.5mm)
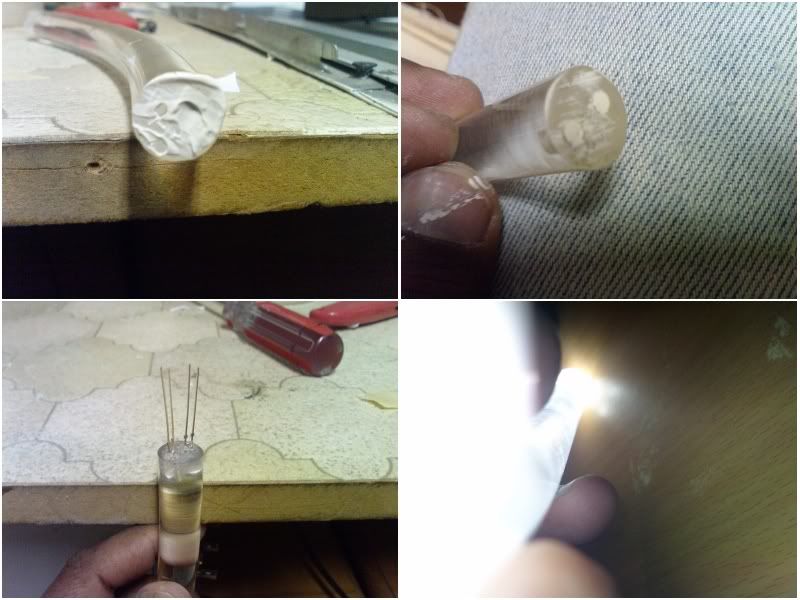
4th Pic
It was becoming obvious that the drilling into the rod was not very easy�think the bending of the rod in the oven caused it to be more brittle and the drill was bouncing around and the holes were inconsistent�.had to cut-off my first attempt and make the rod smaller by 6mm
Top pics � masking tape to hold things together
Bottom pics � Drew this on CAD, and stuck onto duct tape
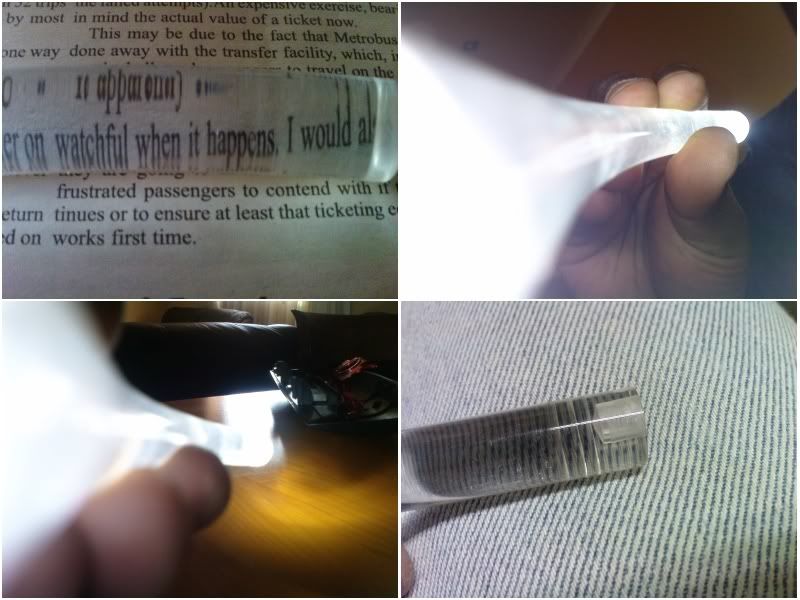
5th pic
Bottom pics - Taped on with 2 pin holes to guide dremel location pilot holes
6th Pic
Wrap up and prepare for pilot holes
Bottom right � pilot holes drilled
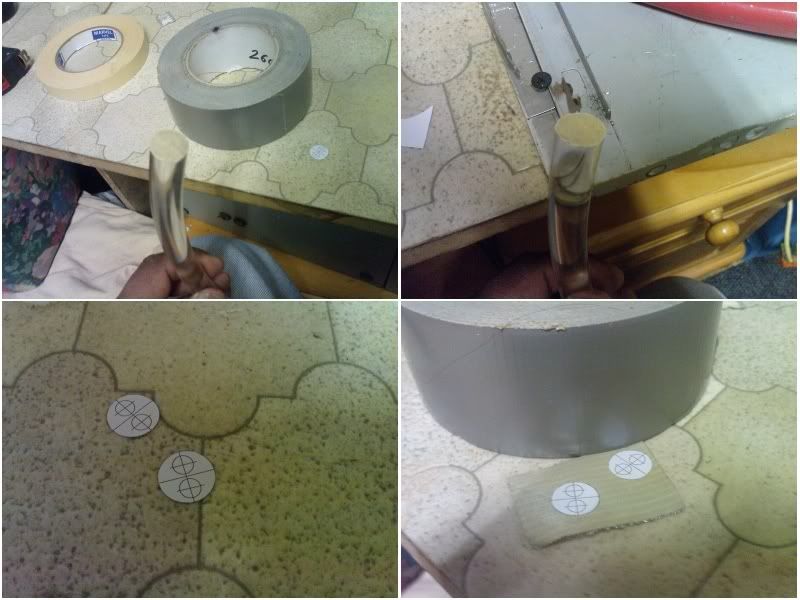
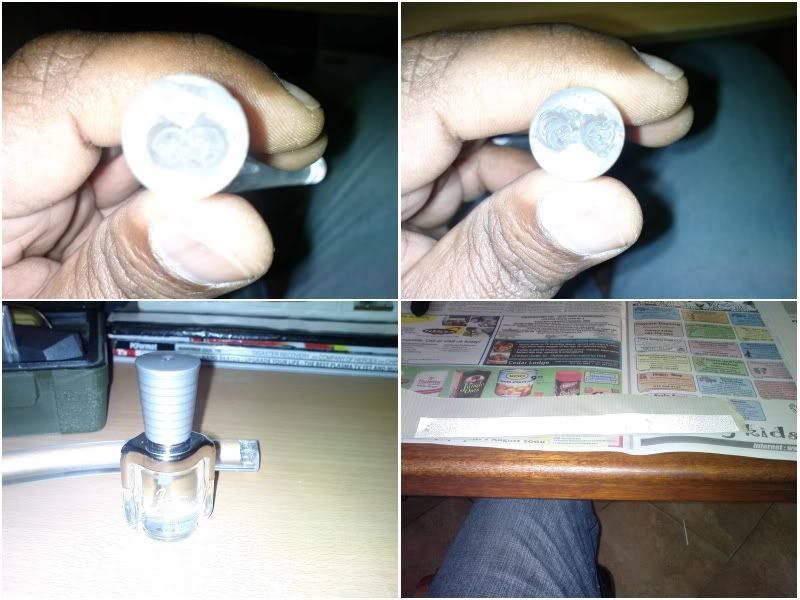
7th Pic
Thought some burnishing compound would help the drill
I was sweating less by now
8th Pic
Drilled holes on both sides
Bottom left � the clear nail polish which the wife did not have�grrrr�..had to buy this for her�.see, I wasn�t totally unselfish by spending the whole day in the garage and not thinking of her.
Nail polish was used to coat the rough drill cut in the Perspex that it looked like glass afterwards
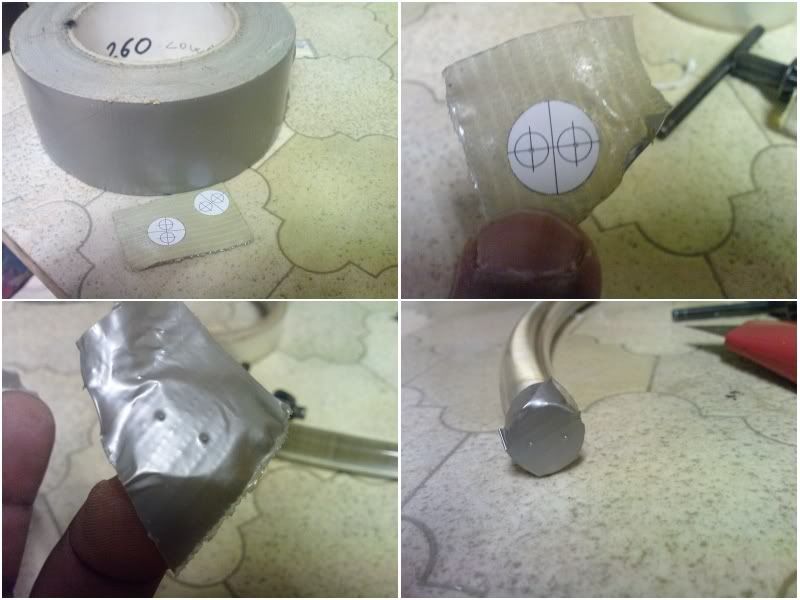
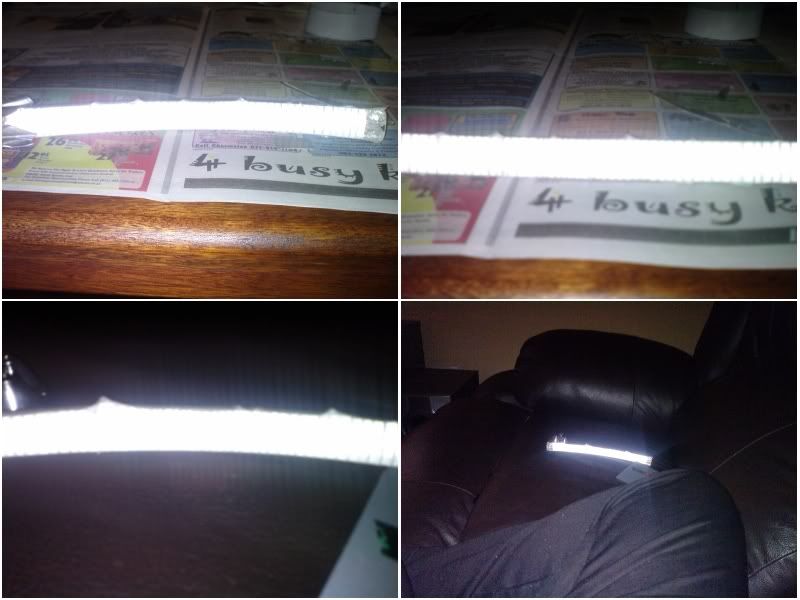
9th / 10th Pics
Dremeled the cuts behind
Put the reflective tape on with duct tape and fooling around with pics�..note, that there is NO leds inserted�the reflection properties of the tape is only shown with the flash of my P1i.
I was planning to finish this this weekend..but alas....must finish this next weekend....Hope you guys can let me know what you think....feuss2 suggested I change to RED leds to make better light dispersion through the red filter, which I am gonna do...thanks feuss2
Pics in groups of four...should have left a space between them....can see this is difficult to understand now....can't edit the post either...sorry....
1st Pic
Was the testing of the curve of the perspex rod....cos stupid me cannot change the laws of the universe ie. light travels in a straight line�..it had to be curved or the light will bounce away and not reflect back. This was one @ 180deg celisius for 6 minutes in the oven..and then �bent� around the biggest pot the wife had�Yes I can bake. You will also notice that the rod has excellent magnification properties (might be useful to those that have done the typical led mod)
2nd Pic
Fooling around with cellphone light (P1i)..bottom right pic of test hole in offcut piece�was easy to do with 5.5mm steel drill bit
3rd Pic
This was doen on the test piece
Pilot holes on bottom right with dremel
Bottom left � drill with 5.5mm bit and tape for depth not to overshoot
Top right � leds fit in with a bit of movement(0.5mm)
4th Pic
It was becoming obvious that the drilling into the rod was not very easy�think the bending of the rod in the oven caused it to be more brittle and the drill was bouncing around and the holes were inconsistent�.had to cut-off my first attempt and make the rod smaller by 6mm
Top pics � masking tape to hold things together
Bottom pics � Drew this on CAD, and stuck onto duct tape
5th pic
Bottom pics - Taped on with 2 pin holes to guide dremel location pilot holes
6th Pic
Wrap up and prepare for pilot holes
Bottom right � pilot holes drilled
7th Pic
Thought some burnishing compound would help the drill
I was sweating less by now
8th Pic
Drilled holes on both sides
Bottom left � the clear nail polish which the wife did not have�grrrr�..had to buy this for her�.see, I wasn�t totally unselfish by spending the whole day in the garage and not thinking of her.
Nail polish was used to coat the rough drill cut in the Perspex that it looked like glass afterwards
9th / 10th Pics
Dremeled the cuts behind
Put the reflective tape on with duct tape and fooling around with pics�..note, that there is NO leds inserted�the reflection properties of the tape is only shown with the flash of my P1i.
I was planning to finish this this weekend..but alas....must finish this next weekend....Hope you guys can let me know what you think....feuss2 suggested I change to RED leds to make better light dispersion through the red filter, which I am gonna do...thanks feuss2
08-11-2008, 08:27 AM
#15
Instructor
Join Date: Mar 2006
Age: 42
Posts: 192
Likes: 0
Received 0 Likes
on
0 Posts
Thats awesome man, looks great. Can't wait to see the finished product. I'm really looking forward to the fog light fins when you get around to that. I think those would look real sharp.
Any tips for removing the brake light housing? I couldn't find any good detailed instructions. I need to get at some rattles under the rear deck...
Any tips for removing the brake light housing? I couldn't find any good detailed instructions. I need to get at some rattles under the rear deck...
08-11-2008, 09:11 AM
#16
Intermediate
Thread Starter
Join Date: Jun 2008
Age: 51
Posts: 36
Likes: 0
Received 0 Likes
on
0 Posts
Originally Posted by intensity2x
Thats awesome man, looks great. Can't wait to see the finished product. I'm really looking forward to the fog light fins when you get around to that. I think those would look real sharp.
Any tips for removing the brake light housing? I couldn't find any good detailed instructions. I need to get at some rattles under the rear deck...
Any tips for removing the brake light housing? I couldn't find any good detailed instructions. I need to get at some rattles under the rear deck...
1- Push the entire centre brake light housing backwards towards the rear of the car
2- you should then be able to lift up the front facing of the housing slightly, just enough to get your fingers underneath (be care the plastic is sharp, i cut myself on it!)
3- you'll see the back of the silver reflector, push that bit towards the rear and pull the black housing back - that should unclip the two prongs that hold the reflector to the housing
4- now slide the whole black housing forward towards the front of the car, the two rear most clips should release, allowing you to lift off the cover
5- you can now take out the reflector housing
NOTE: it will take abit of fiddling/jiggling around to undo the clips, just be firm but careful
And something I found elsewhere
 08-11-2008, 11:56 PM
#22
Intermediate
Thread Starter
Join Date: Jun 2008
Age: 51
Posts: 36
Likes: 0
Received 0 Likes
on
0 Posts
Originally Posted by intensity2x
EXACTLY what I was looking for, thanks!
Originally Posted by JTso
Nice work!
Originally Posted by kennungesser
Dude, you da man!! This is going to look great!!
Originally Posted by Aslam
Hope my car is next on your list when you complete
Originally Posted by litesout
 Beautiful work! I'm going to take a stab and say you're either an mechanical engineer or at least went to school for it.
 Oh, and I am also a MCSE.....did this a few years back..
 09-15-2008, 11:54 PM
#31
Intermediate
Thread Starter
Join Date: Jun 2008
Age: 51
Posts: 36
Likes: 0
Received 0 Likes
on
0 Posts
Sorry guys, haven't been on this post a while....having issues with performance header and exhaust system.....and I am working on a VW motor dealership and 2 high rise apartment blocks @ work..times ate tuff.....Car's in shop atm....getting it back Fri/Sat..
And NO...it's not a BUST.....cos with all the info I have, apart from completing the mod, deciding which direction to go with the many options is also slowing things down...I will connect up this weekend with the white leds...I'll leave the red led Feuss2 option without filter, once I sort out filter cover replacement with the Di-bond material.
And NO...it's not a BUST.....cos with all the info I have, apart from completing the mod, deciding which direction to go with the many options is also slowing things down...I will connect up this weekend with the white leds...I'll leave the red led Feuss2 option without filter, once I sort out filter cover replacement with the Di-bond material.
Last edited by Quest227; 09-15-2008 at 11:55 PM. Reason: Spelling error
01-27-2009, 10:46 AM
#33
Intermediate
Thread Starter
Join Date: Jun 2008
Age: 51
Posts: 36
Likes: 0
Received 0 Likes
on
0 Posts
Sure thing....got everything wired up to test this weekend...also purchased a fluorescent tube (red in colour) based on your advice
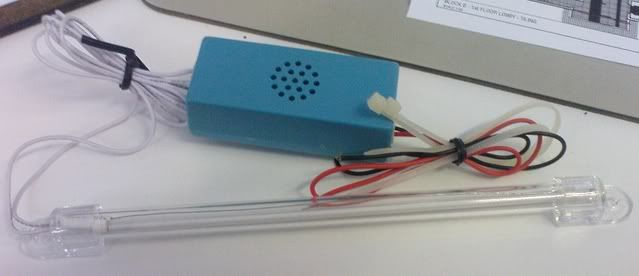

Did a test on the red tube, and it's very bright and lights up almost instantly...I might add a flat perspex rod in front to magnify the effect.
I now have 2 possible options to test...I'll take pics of both setups and post when done to get your opinions
Pic of my ride a month or so back..still have to install the Euro R badges and the puddle lights.

Was in India and Bangkok in Dec and been to R-Style @ MBK Centre - most dissapointing

Did a test on the red tube, and it's very bright and lights up almost instantly...I might add a flat perspex rod in front to magnify the effect.
I now have 2 possible options to test...I'll take pics of both setups and post when done to get your opinions
Pic of my ride a month or so back..still have to install the Euro R badges and the puddle lights.
Was in India and Bangkok in Dec and been to R-Style @ MBK Centre - most dissapointing

Thread
Thread Starter
Forum
Replies
Last Post
TLDude876
Car Talk
134
12-28-2016 03:18 PM
sockr1
Car Parts for Sale
22
10-01-2015 01:31 AM