When you click on links to various merchants on this site and make a purchase, this can result in this site earning a commission. Affiliate programs and affiliations include, but are not limited to, the eBay Partner Network.
Replaced my worn turbo actuator piece and solved my P2263 code issue while also fixing the Check Exhaust, Check SH-AWD warnings and loud exhaust leak sound when off throttle at high RPM. Adjusting the actuator helps with the exhaust leak sound. The car would run in 2WD mode when the Check-SH-AWD light is on. The turbo would noticeably lag more before it was fixed.
I took some pics of the install for reference. My fabricator made a small run of the part, PM me if you need. Hope this helps in keeping more RDXs on the road!
Tools needed:
Coin, for IC cover
10mm socket wrench, to remove hose bracket
2x 10mm wrenches, to adjust the actuator bolts
Small vice-grips and small narrow flat-head screwdriver, for c-clip
Some floss
Instructions
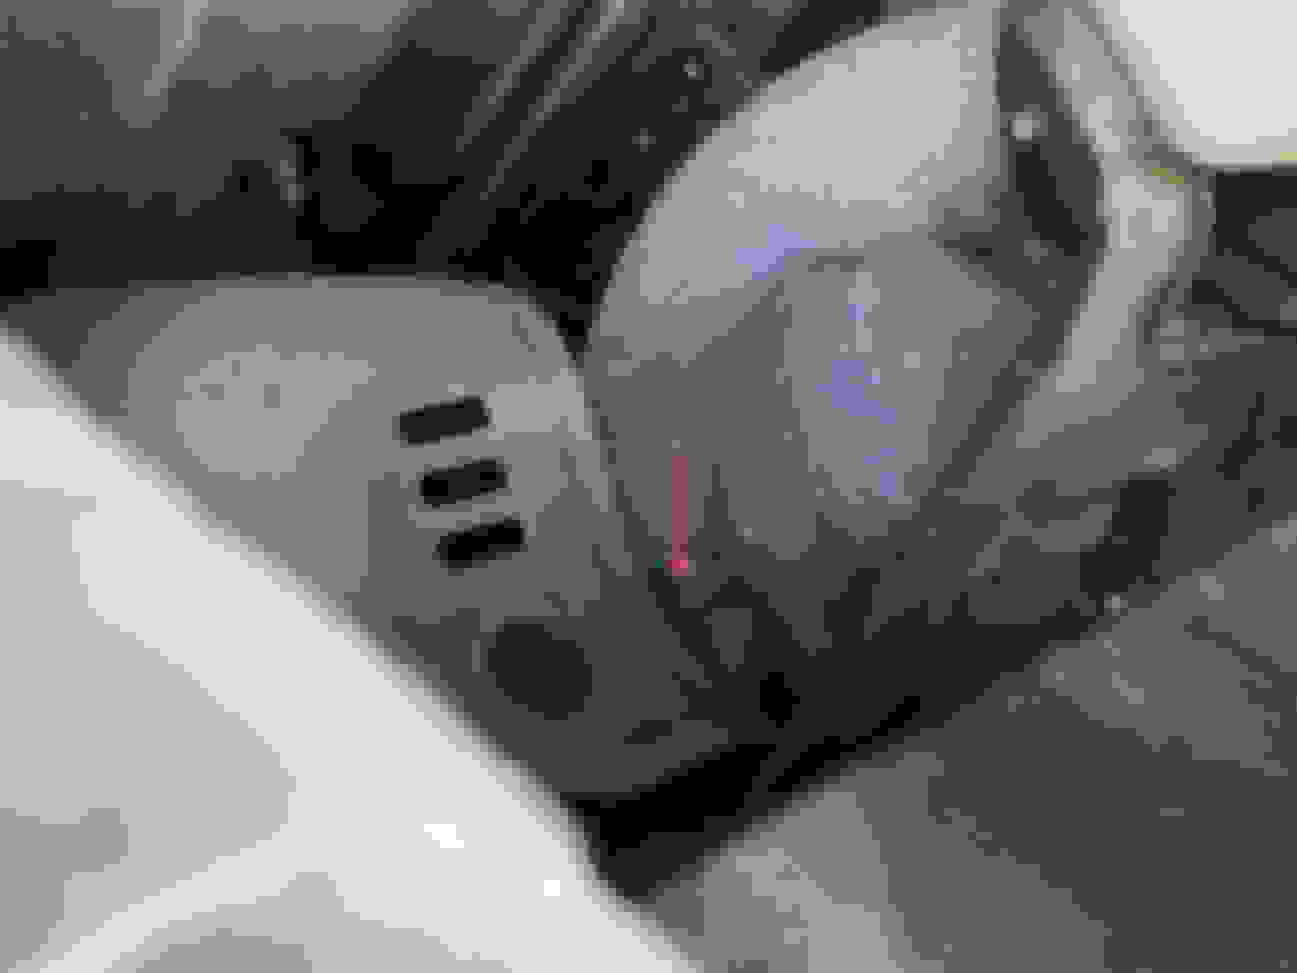
Once the engine is cool enough to work on, remove the IC cover and hose bracket as shown.
Use a flat-head screwdriver to rotate the c-clip, then use the vice-grips to slightly pull the clip off so you have room to tether it with dental floss before removing it completely.
Tether the actuator then loosen the nuts (nuts are reverse thread so when looking down you will need to turn it clockwise to loosen. Back the bottom bolt off a bit then loosen the top bolt just enough as needed to disconnect the part.
It helps to tether the actuator arm to remove/reinstall the part. While pulling up on the arm, push the "shoulder" in towards the spring where it meets the turbo. This will allow the actuator part to slide off.
Swap the nut to the new part and installation is reverse of removal.
Last edited by InfamousJamous; 11-06-2019 at 05:29 PM.
6. Drive the car and check for the exhaust buzzing sound (try driving by a wall on the right with the windows down, in 2nd gear, off-throttle at 5k RPM and letting the RPMs drop). Adjust the nut down if the buzz is loud, and adjust up if it is quiet. Adjust to right below where it makes the sound.
7. Clear any ECU codes that may be present.
Thanks for the informative posts and the part, I'll be changing out my actuator on my 2010 RDX between chemo treatments when I have a good day and can piddle through the process at a slow speed. Your directions and tips are greatly appreciated!
Important: Loosen the collar nut JUST ENOUGH to remove the actuator, count how many turns you make, and make sure it threads onto the new one immediately, and secure with the same number of turns. If you do the wrong number of turns, or twist it over and over without being attached to anything, I believe the actuator will be out of position (the gap between the actuator and the turbo's rod will be wrong).
I suspect many people who still have the code after replacing the actuator might be due to this. I also think people who say "just twist the nut, the code will go away" aren't effectively adjusting anything and will see the code again soon.
The collar nut isn't an "adjustable" piece. It joins an upper threaded rod and a lower threaded rod (the acutator's) together. The gap between the two is the important thing. Twisting the collar nut when everything is assembled doesn't adjust the gap or make a difference, it just slides down one threaded rod while moving up the other.
Feel free to correct me if I'm wrong, but I thought it was worth pointing out.
Ok. I have been on quest to fix this issue on my 07 RDX 140,000 miles for about 6 months now. I have replaced every solenoid, the turbo variable flow actuator noted in this post, and a lot of parts on intake side of turbo per Acura shop manual.
My 07 had similar problems as others in this post. Oil was leaking out of Turbo bypass valve connection to pipe back to intake. I was also losing antifreeze somewhere and had to fill reserve every few weeks. Boost was diminished at high speed on highway or high load situations like going up mountain. Around town the boost would be ok until shifting into fourth gear and then drop significantly. It seemed like something was stuck open intermittently. Gas mileage was not so good too. Several mechanics quoted turbo replacement. Acura shop manual was not incredibly helpful and the shop manual listed about 20 things that could wrong with this code. Caused me to replace a lot of parts probably did not need - Almost bought a new MHI turbo but returned it. Totally ready to sell the car, but love driving it and not quite sold on new RDX.
So to come to the point, solved the underboost emission code issue after addressing multiple problems. Solution did not involve replacing the turbo. Oil issue ended up being combination of PCV and tight exhaust valve clearance. Valve job and new PCV made that issue go away. It did not fix boost problem.
The replacement of the turbo flow actuator did not do anything as well. However did notice temporary decrease in boost problem when used fuel additives and GDI intake cleaner. Started to suspect this issue was a sensor problem. Replaced Turbo Boost sensor and cleaned MAP sensor. Better, but no dice.
In my travels around the engine, noticed that I had an antifreeze leak near turbo on back of engine. Originally thought coolant leak was radiator and replaced that before the boost problem started. Noted that several pipes/hoses go in and out of turbo/exhaust manifold. Replaced the ones I could get to. Still did not fix leak. Finally came to the conclusion after using endoscope this the leak was coming from the gasket between the exhaust manifold and head. Seemed to be an external leak but when looked at shop diagram there is not much metal between coolant chamber and exhaust chamber. Started to suspect coolant was leaking into exhaust manifold, turbo, converters and out exhaust likely fowling air fuel sensor and O2 sensor. According to shop manual air fuel sensor determines “load” on engine and if fouled with coolant might trick ECM into opening variable flow actuator at lower airflow reducing boost by not letting turbo spin up. Who knows maybe Acura engineered ECM that way to save engine from self destructing if the turbo really did blow out.
Pulled air fuel sensor and low and behold the sensor was coated with brown/white residue on one side. Replaced air fuel sensor. The car ran great for about 100 miles and then started throwing code again, though underboost not as bad. Bit the bullet and took car to dealer with explicit instructions to just replace gasket between exhaust manifold/head and O2 sensor. Not cheap, but mostly labor as you need to take entire back of engine apart to remove turbo and exhaust manifold. If that fix did not work, cutting my loses and selling car. At least would not have visible coolant leak anymore for sale.
I’m happy to say car is running great so far - no codes or turbo boost issues. Actually boost and gas mileage getting better the more I drive the car. Did not instruct dealer to replace air fuel sensor - exhaust likely cleaning slightly fouled new sensor.
Not sure this post will help everyone. My antifreeze leak was obvious eventually. Supposed you could pull air fuel sensor and see if coated with white powder on half sensor if no obvious external antifreeze leak from exhaust manifold gasket. Suppose coolant leak could just be internal.
The only theory I can come up with about what caused this problem is that I took car off pavement in mountains and that excursion shook car to an extreme. Where Coolant leak started there is a nut attaching exhaust manifold to head. That nut could easily loosen over time if shook violently.... Probably should getting into habit of torquing that nut every oil change... This car is never going off pavement again - not designed for it.
The car is fun to drive again!!! Love this car. Hoping to milk this car to 200,000 like my wife’s old 04 Odyssey. Keep posted if problem comes back.
The bolt on the Control Actuator is worn but the rod easily moves and rattles so I will get the whole assembly replaced. Glad some people have had success replacing it without having to remove the entire turbo. I have the part and will get the local shop to swap it out for me. Hopefully this takes care of the P2263 code. Thanks for everyone's input on this frustrating issue. Have a great weekend.
Thanks for the detailed information I just know above 6k my truck like to over-boost due to my modifications. I also know I have the actuator rattle but not looking forward to replacing it so I keep it under 4K with no over-boost codes.
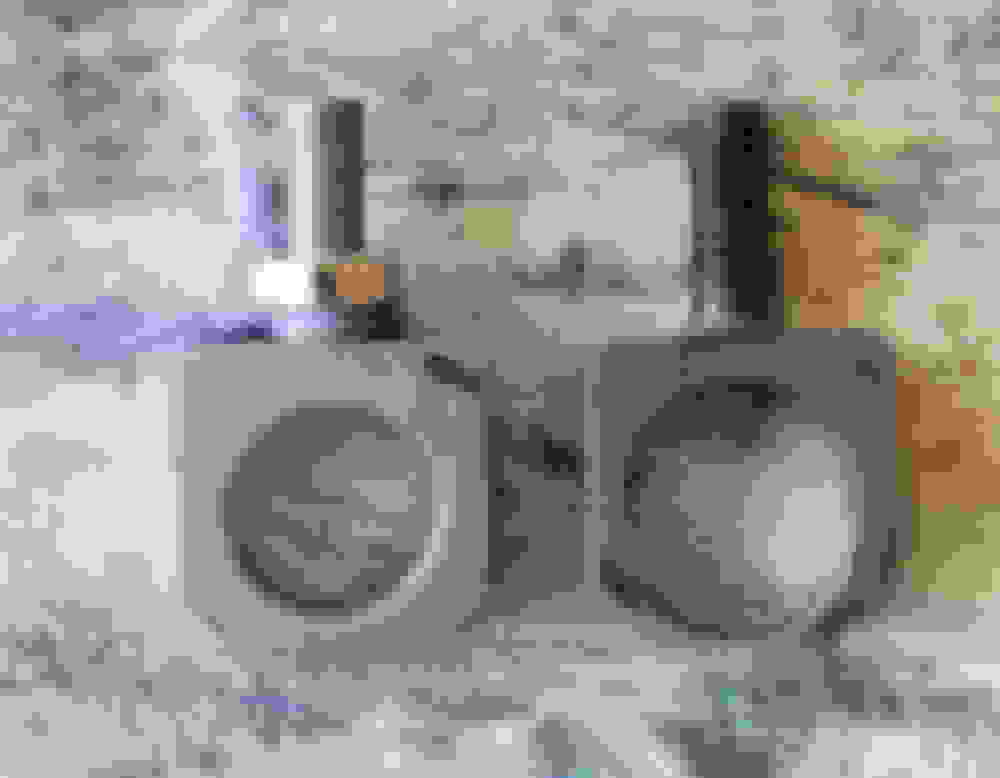
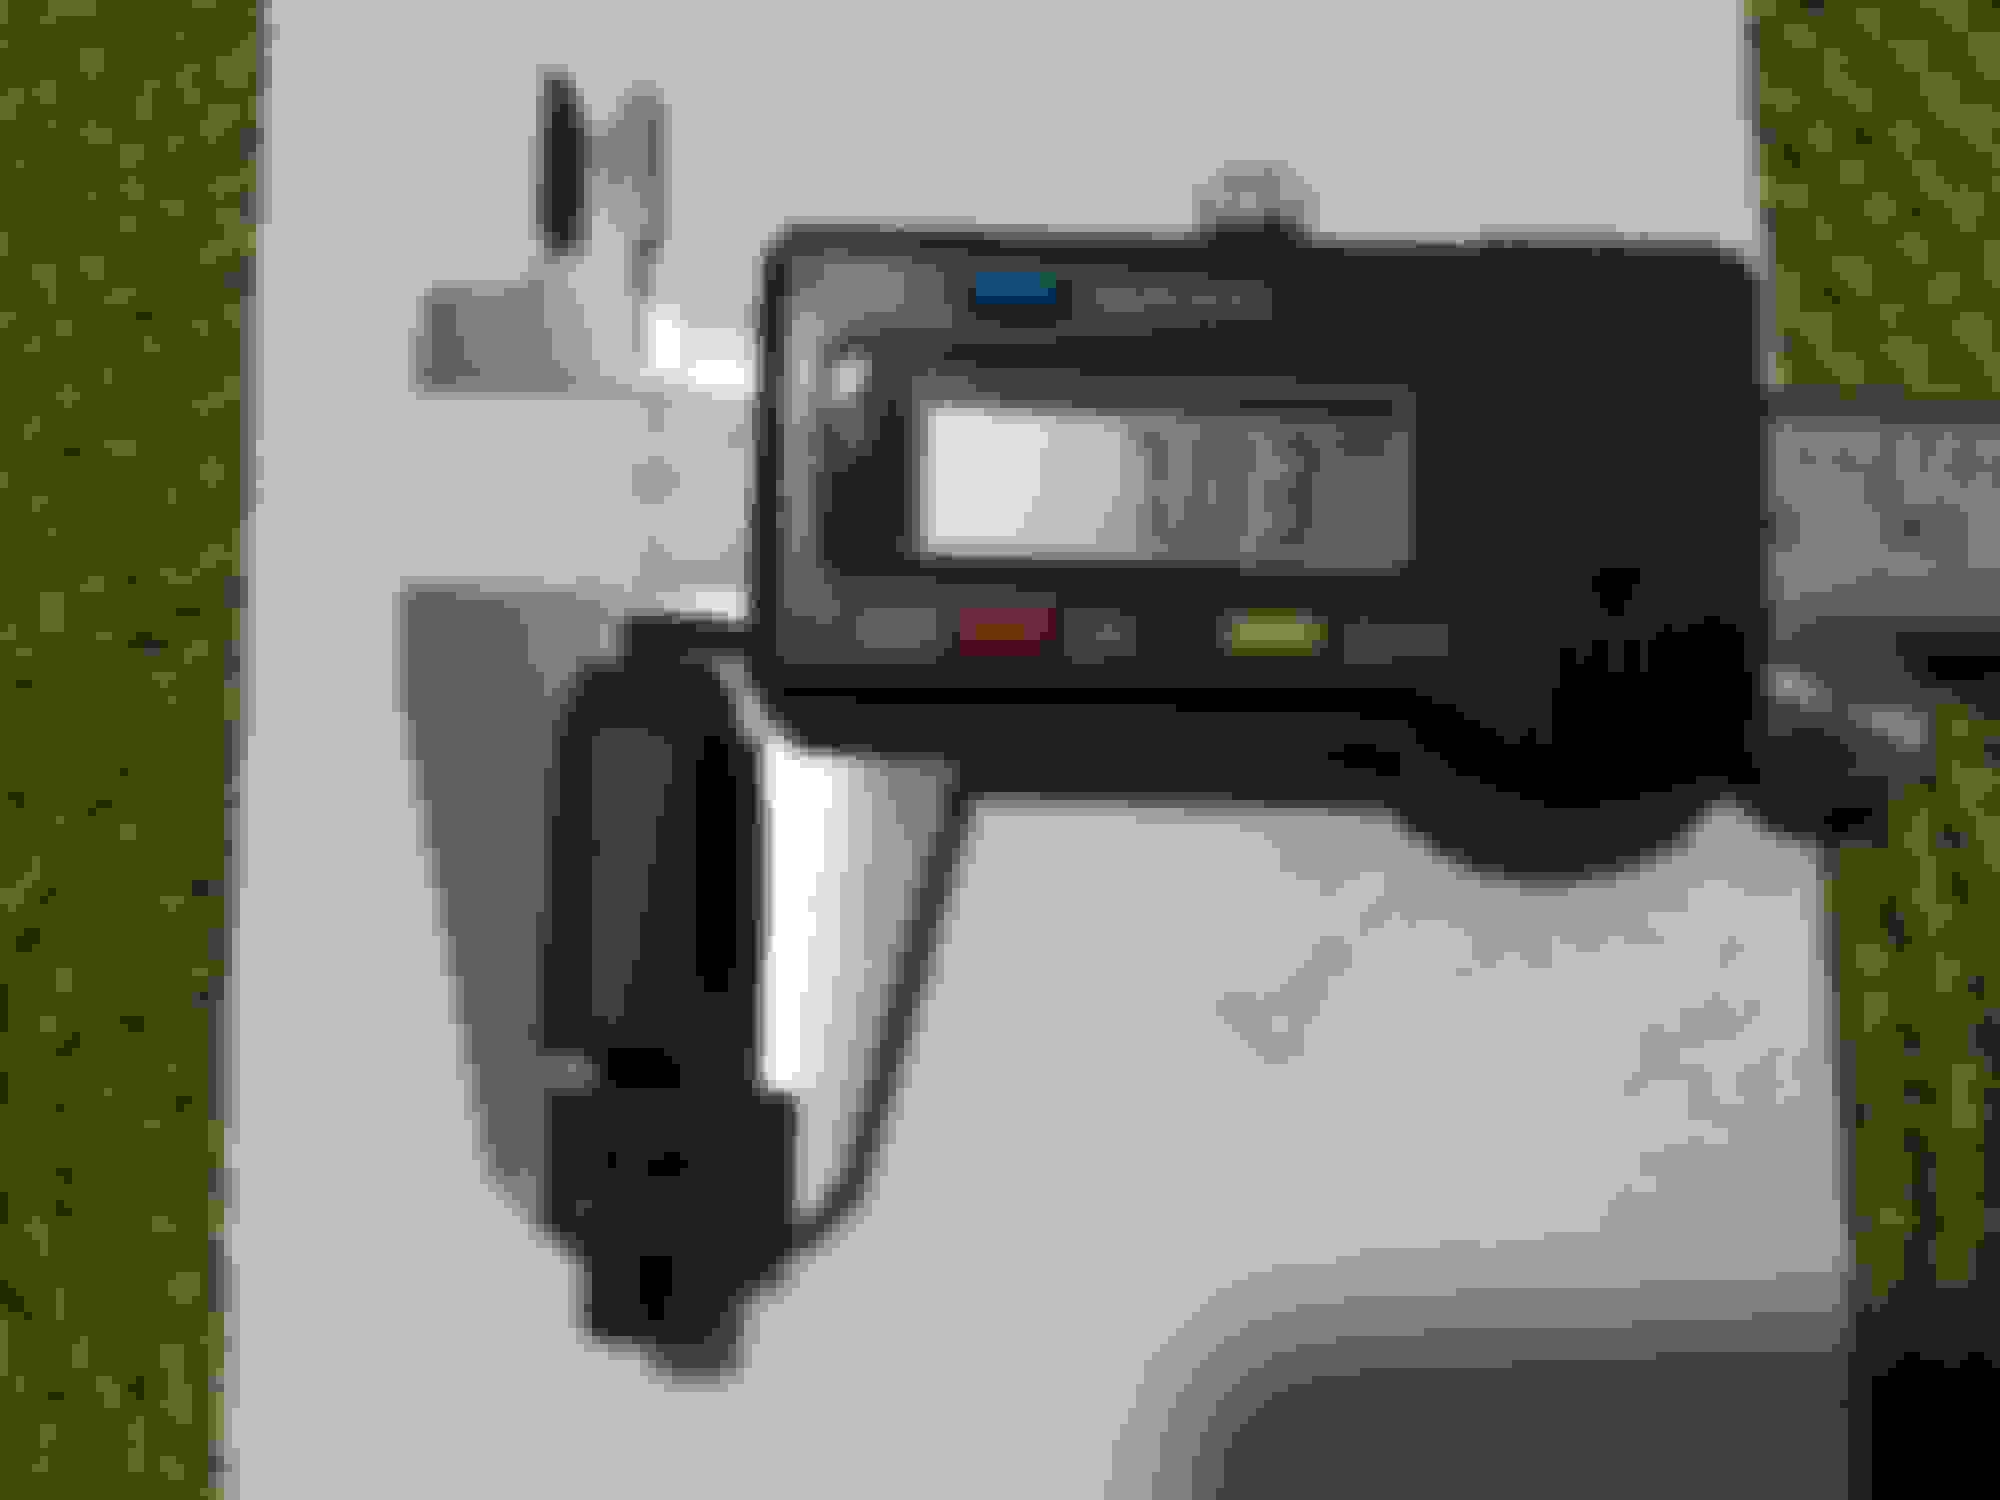
I was able to remove this item and check its condition.
Fortunately, it is in excellent condition.
Disassembly and assembly were difficult. I spent 4 hours in the garage. I had to remove the Intercooler to have better access.
The most difficult is disassembly and assembly of the metal clip, which prevents the Eye Bolt actuator from sliding out.
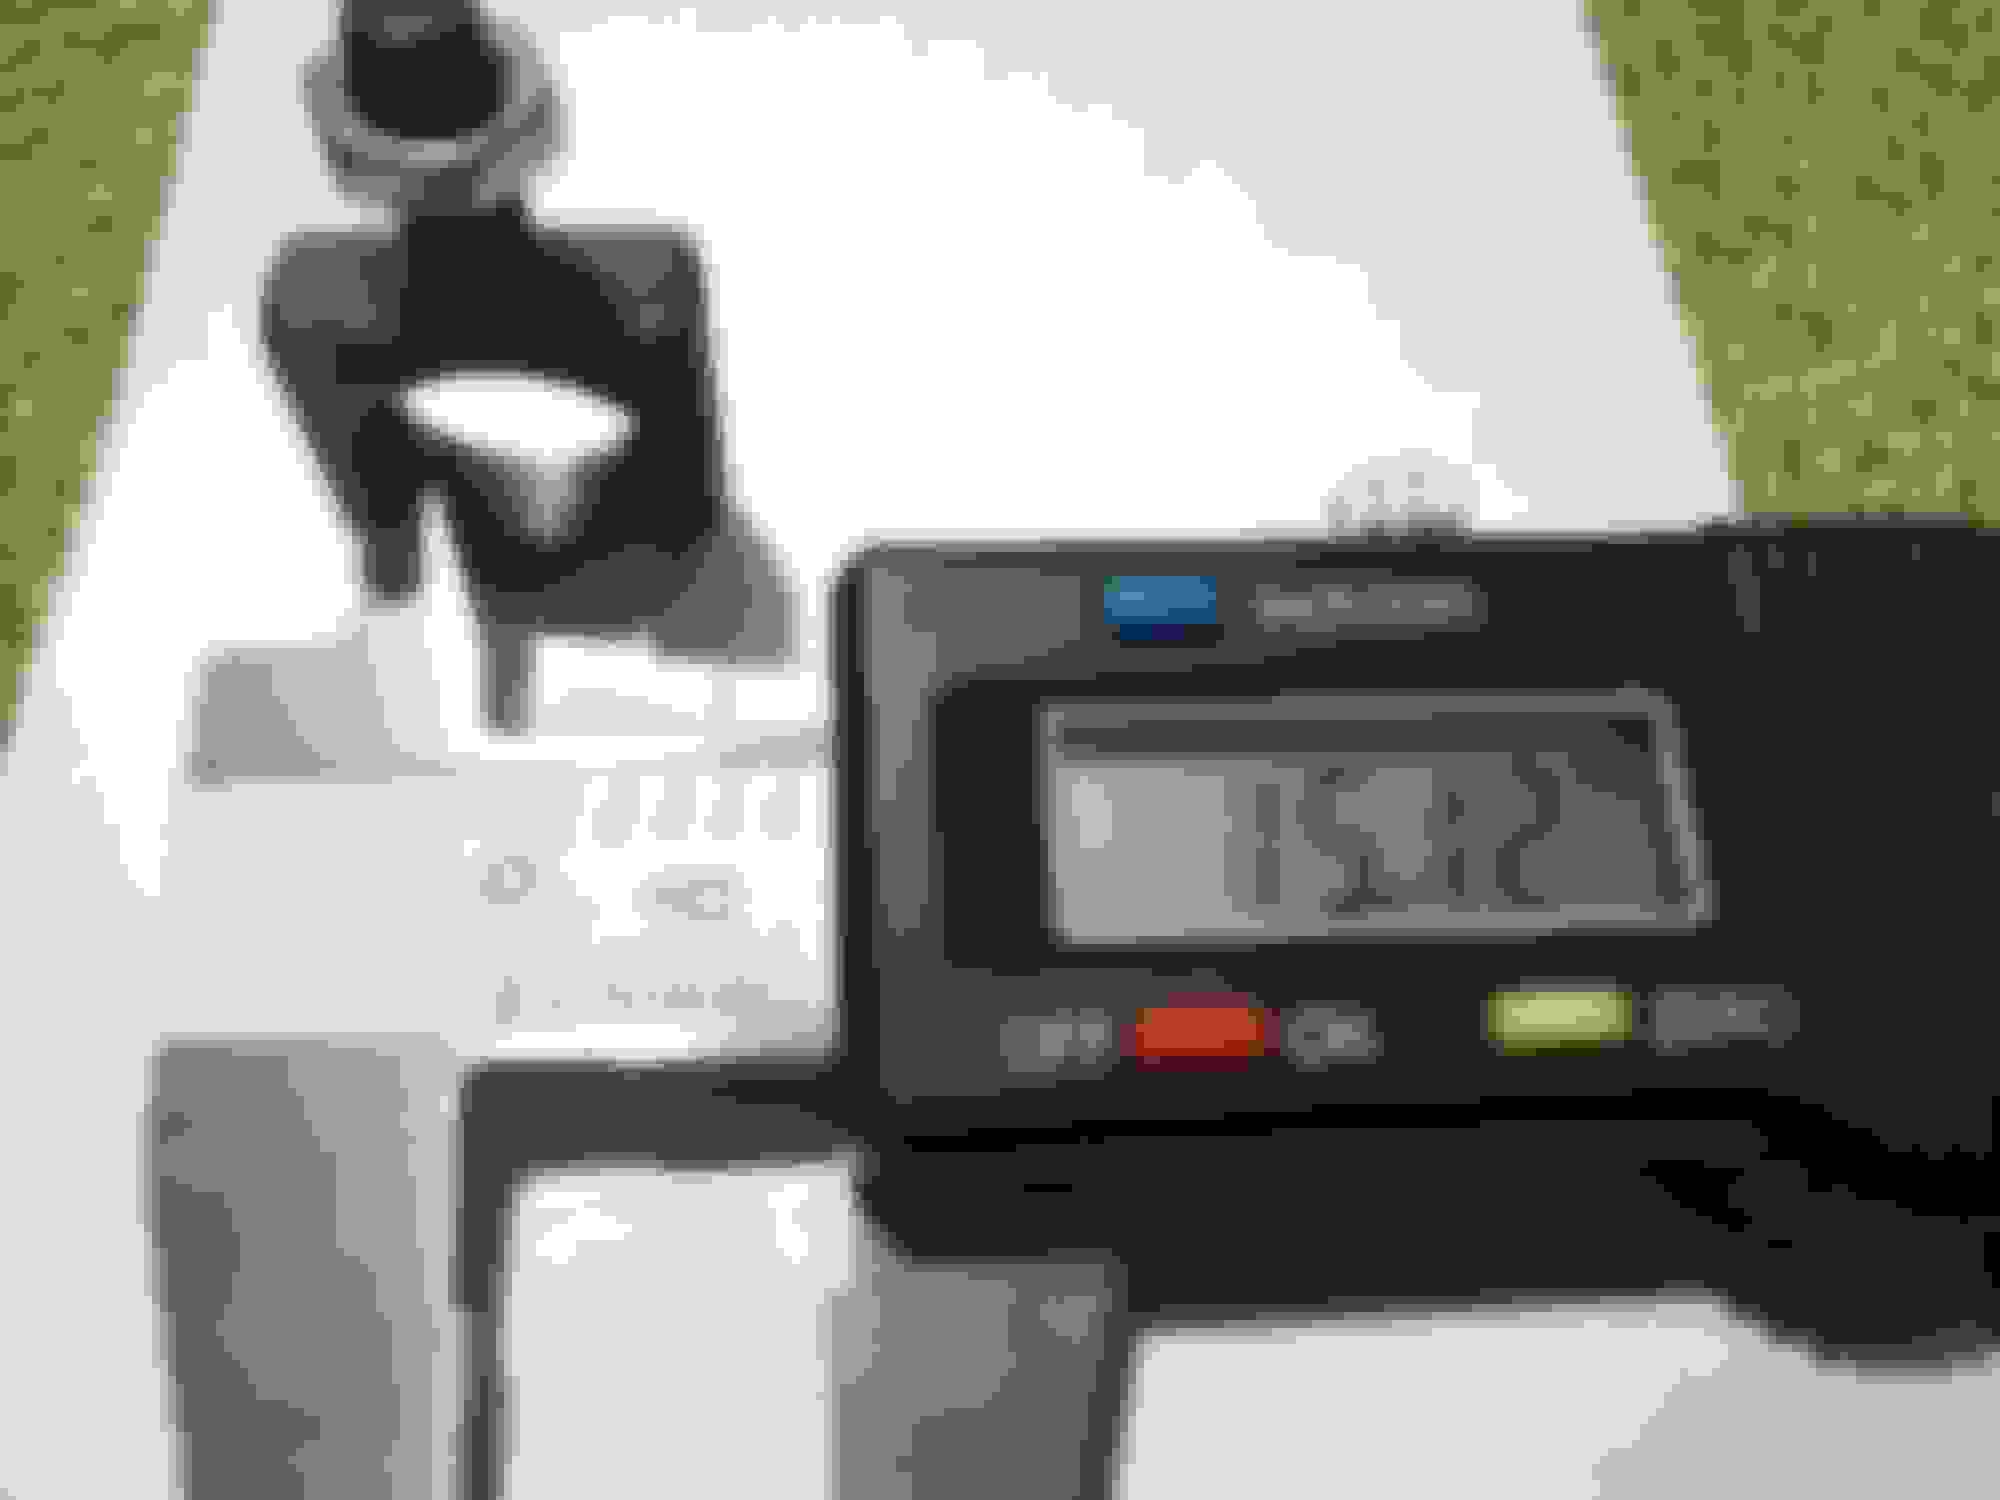
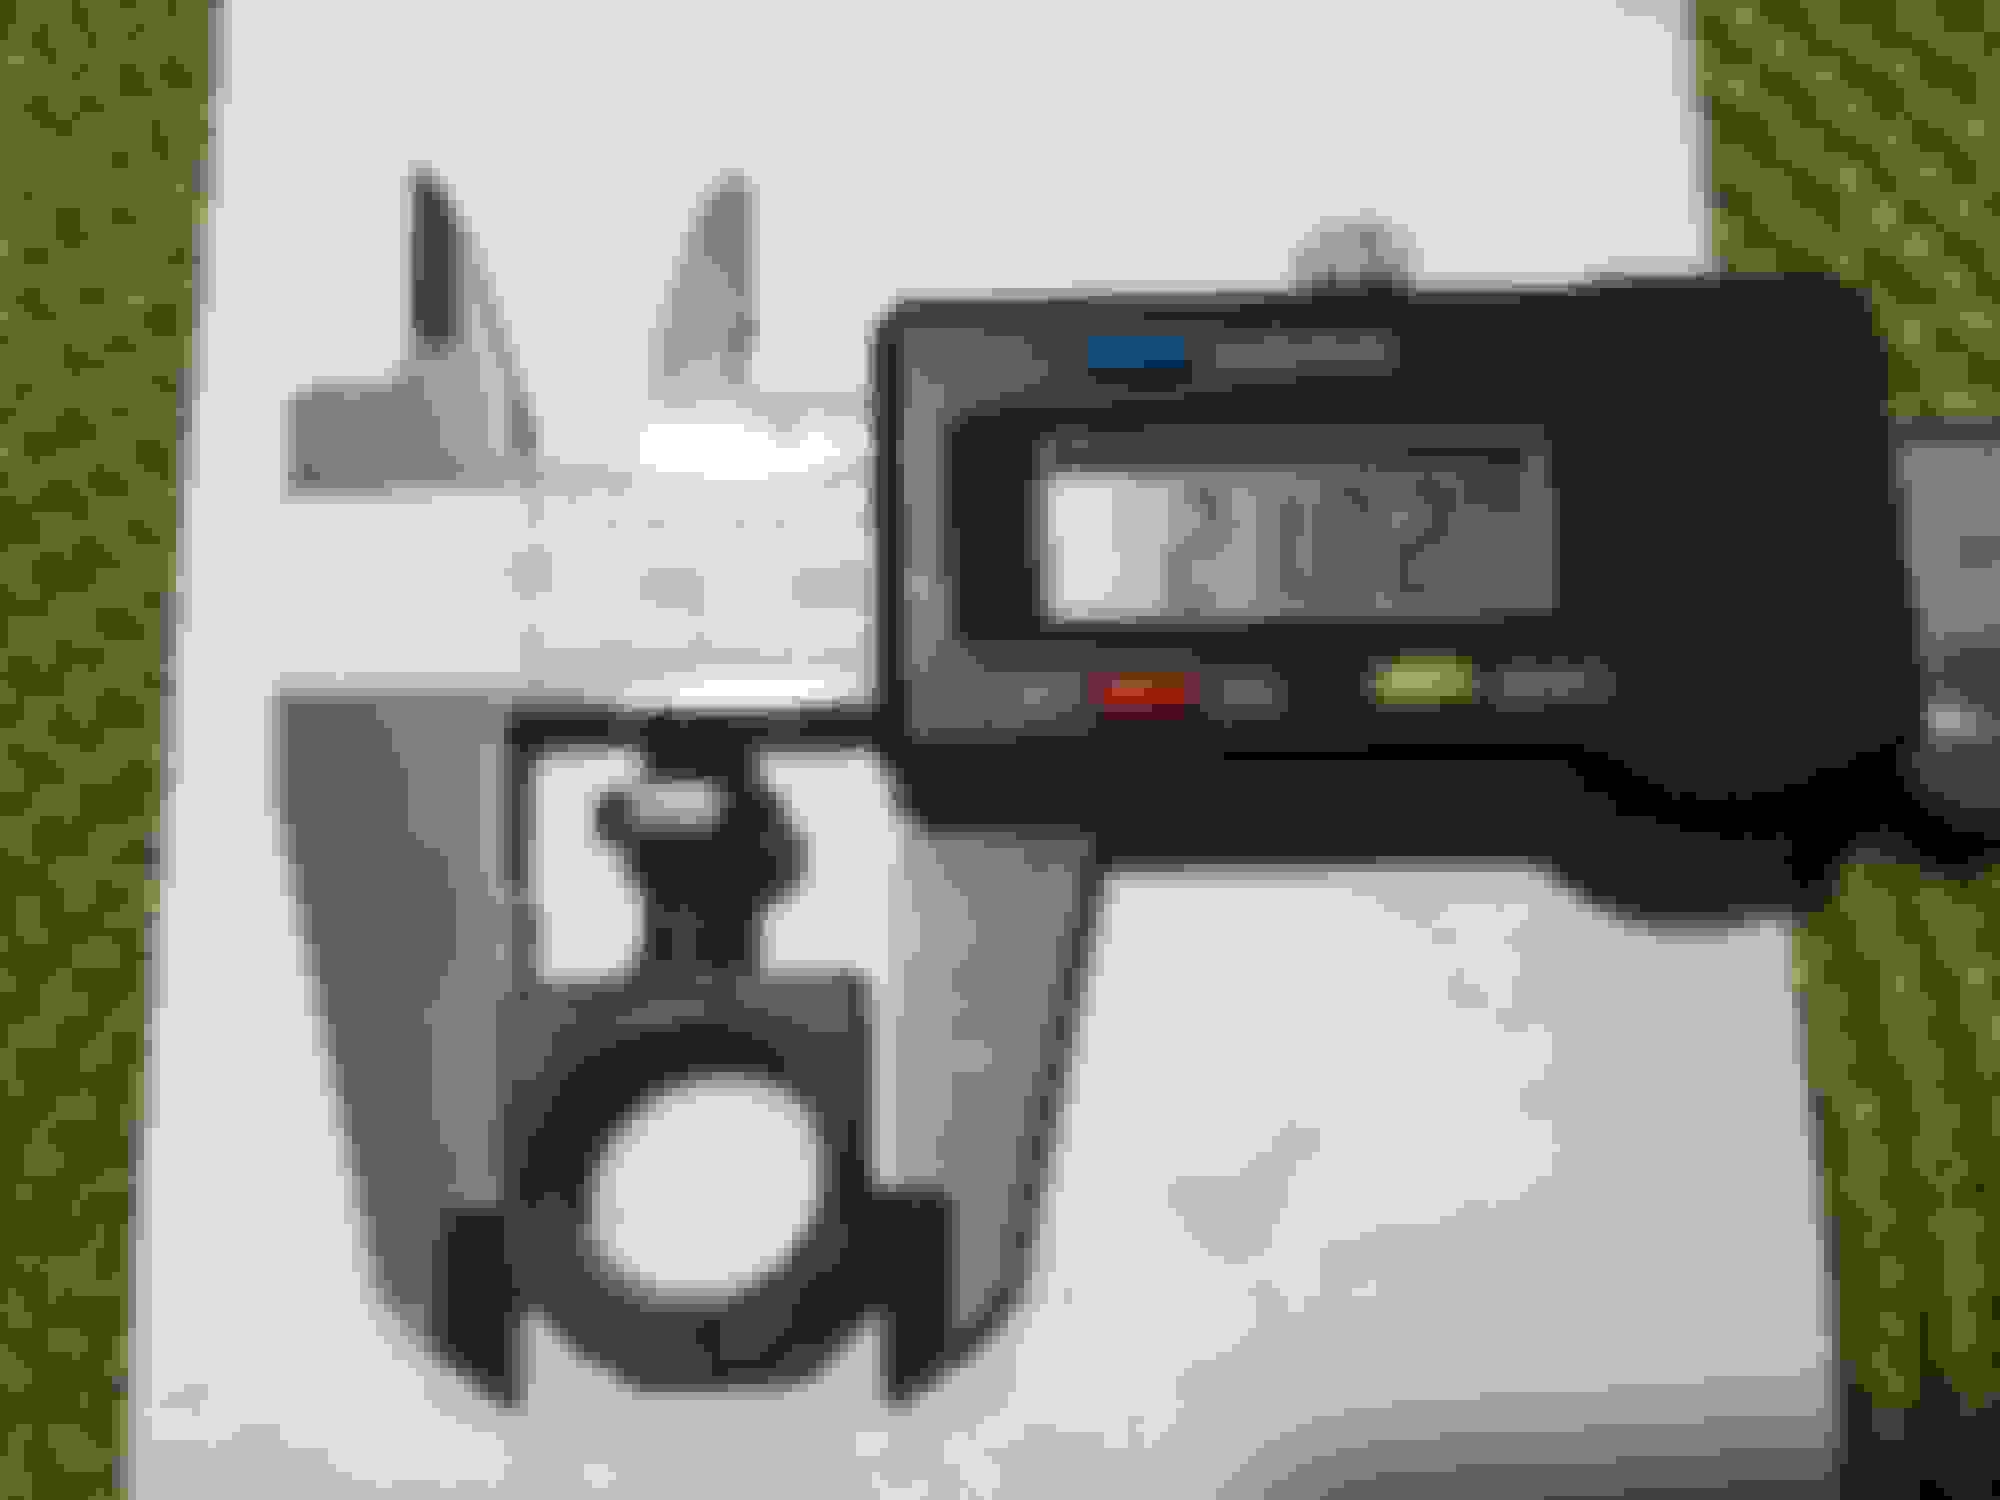
I was able to measure exactly this element. Maybe this information will be helpful.
We have an '11 RDX SHAWD, 117k miles, well maintained, that's been throwing the CEL and SHAWD. CEL seems to be on all the time now, but SHAWD has only come on a few times during the last 500 miles or so since this began. Thanks to @shandias for pointing me to this thread from https://acurazine.com/forums/1g-rdx-.../#post16598151 I spent a few hours last night reading this entire thread; I don't recall anyone mentioning catastrophic failure from the P2263 code, but I want to find out with reasonable certainty from others...
Question: My Acura dealer service tech told me that if we keep driving it, the parts in the turbo could shred and spew metal shards into the engine at any time and ruin the engine as well. Does this seem accurate? It seems like people have driven several thousand miles with CEL and not had any other major issues. We're gonna get it fixed (not at dealer, they first quoted me $9k+ for a new turbo and manifold when it seems like the fix could be relatively simple as outlined by many here including @QFT (thank you)...I'm still trying to ferret out my exact P2263 issue — it could easily be that part in the video — just want to know if those here who have had this issue/are knowledgeable in it are confident enough to take the RDX on errands, short road trips (2 hours each way), etc. with CEL on...until it is fixed. Engine won't likely be ruined, right? I know there are no guarantees, just want opinions. Thanks.
Posted in your other thread, but to confirm, a worn actuator bolt isn't going to cause internal turbo failure. Its only purpose is to restrict the airflow in certain driving scenarios to increase low-rpm response, and then open up the airflow for increased high-rpm power.
Thanks, Tom. I visually checked the actuator bolt, it does indeed appear to be out of round at top. I did not remove any parts, just held the light on it and there's a large gap at the top. There is also the tell-tale rattle/clatter coming off throttle during driving. It came on slowly but is pretty noticeable on every outing now. I've ordered the replacement bolt off eBay, $60 for the one with higher tolerances per Seller info, seems fair to me. Here's what the Acura dealer said they found which seems to be somewhat in line with above:"Took off intercooler, wastegate is defective, turbo boost valve not operating; needs replaced. No defect with exhaust manifold. If replace turbo, recommend replacing exhaust manifold $534." Total cost $9k+.
The turbo does still spool up during driving though not nearly as much as before the issue. It does not spool at all sitting in Park and taking engine up to 5k RPMs. Both of these observations are according to the needle on the dash. I can definitely feel loss of power/smoothness at both idle and driving, though trans seems smooth. This is wife's car so I rarely drive it, or probably would've picked up on this several months back. Also cannot hear the rattle in Park during 5k RPM test; can only hear it during driving. I thought that was kind of odd, but this is not my ken. More comments on this perceived oddity are certainly welcome. Thanks again. I'll post back the results of the fix when that is done.
Over a year later, my codes haven't returned. Replacing the actuator fixed it for me. Here's the installation video I made, hope it helps more people: https://www.youtube.com/watch?v=H4rlQv34Mz4&t=9s
Important: Loosen the collar nut JUST ENOUGH to remove the actuator, count how many turns you make, and make sure it threads onto the new one immediately, and secure with the same number of turns. If you do the wrong number of turns, or twist it over and over without being attached to anything, I believe the actuator will be out of position (the gap between the actuator and the turbo's rod will be wrong).
I suspect many people who still have the code after replacing the actuator might be due to this. I also think people who say "just twist the nut, the code will go away" aren't effectively adjusting anything and will see the code again soon.
The collar nut isn't an "adjustable" piece. It joins an upper threaded rod and a lower threaded rod (the acutator's) together. The gap between the two is the important thing. Twisting the collar nut when everything is assembled doesn't adjust the gap or make a difference, it just slides down one threaded rod while moving up the other.
Feel free to correct me if I'm wrong, but I thought it was worth pointing out.
What happens if you didn't remember the amount of turns and now you're stuck guessing the correct gap size between the two? Replaced the actuator and still getting the code unfortunately.
Thank you everyone contributing to this thread. Lots of great information. I have a quick question for those of you who did replace the actuator rod end piece and had some degree of access to the wastegate arm. Does it move up or down? Does the actuator receive positive pressure and pushes the rod and wastegate arm down during normal operation? Or is it truly a vacuum actuator and it pulls the rod and arm up? If it pushes it down then why do we see the worn out oval shape on the bottom part of the rod end piece? Thanks for your input!
According to the documentation I can find, both the actuator and wastegate are controlled by solenoids managed by the ECU. It's not a purely mechanical connection to the airflow or pressure, but controlled based on a combination of inputs such as engine speed, throttle position, etc (I'm not certain on the actual parameters). In my experience when replacing the actuator bolt, the bottom arm moves pretty freely when not connected to the actuator. So, best reason I can think for the bottom of the bolt wearing quicker is just normal engine vibrations combined with gravity and time.
According to the documentation I can find, both the actuator and wastegate are controlled by solenoids managed by the ECU. It's not a purely mechanical connection to the airflow or pressure, but controlled based on a combination of inputs such as engine speed, throttle position, etc (I'm not certain on the actual parameters). In my experience when replacing the actuator bolt, the bottom arm moves pretty freely when not connected to the actuator. So, best reason I can think for the bottom of the bolt wearing quicker is just normal engine vibrations combined with gravity and time.
Thank you for your reply! This is correct, solenoid driven valves are a part of the operation system and they regulate either pressure or vacuum delivered to the actuators. I am trying to figure out what exactly drives the actuator, whether it is vacuum or positive pressure. In my case, I am only able to push the wastegate arm down and with great resistance. Does this mean the actuator receives positive pressure and pushes the rod and the wastegate arm down when ECU determines the need for adjustment?
So I just want to share my experience (ongoing in a way) with this code and my 2010 rdx 133k. I ordered the actuator to replace the old worn out one on my car and struggled terribly to get the new part on, so i took it to honda (because acura is 2+ hours away) and they were afraid to touch it because they couldn't get enough information from the engine codes.(That's some BS if I ever heard it) Before they touched it they said probably around 700 to attach the part. Ended up taking it to a local shop they got it on for 300 bucks.(Not bad in my opinion) All they had to do was take the valve cover off and they could reach the bolts easier which is what i thought but I chickened out and took it in.( worth noting rdx valve cover gaskets are reusable so no need to worry about that.) My car now is powerful again, more so then the first day I bought it, but it will now throw new codes VSA134, I don't remember the code but throttle position sensor, and it just threw the P2263 code again???? I am so beyond frustrated with this vehicle, but it drives so nice and I don't want to get rid of it hell I've only owned it for about 3 months. I've got a more complete ODBII reader coming today(Bluetooth one doesn't do ABS/TCS/VSA) and hopefully I can get some more information on these codes.
Hi Paul,
I'm having the same problem with my 2011 and I bought the WGT Actuator from turboturbo. From your post #350, I understand that you tried initially but may have gone to a tech to finally resolve. Do you mind providing any other feedback or tips on doing so as I'm having to do the same. I understand that I'll need to remove the intercooler and heatshield, but even so, I'm struggling with understanding how to get to those back bolts and what over considerations I may have if I tackle this on my own.
Was you tech able to remove and install without taking off the turbo? Do you have any other guidance on how it was done?
I am also interested in resolution of this.
I just got the P2263 Code on 2010 RDX 100k miles. Car drives perfect, no issues, builds boost. Drives fine. Do you think its Variable Flow Actuator Eye Bolt wore down? Or the waste gate (Turbo Flow Control Actuator
Check Engine + Check Emmissions + SH-AWD Lights
Just to be on safe side, I will be replacing the Air Filter and will first find then clean the MAF.
Been driving with it for over a year. There was never any rattling noise. Therefore, I always suspect it is NOT the VGT actuator rod/bolt. However, in the last week or so, I am beginning to hear a rattling at idle and at low speed driving.
So my question to others is did you hear the rattling noise first and then get the P2263 later? Or vice versa (as in my case)? Also, since the bolt gets worst and worst, wouldn’t the code be intermittent at first and then become permanent later?
Anyway, thinking of replacing the bolt now. But my eyesight is so bad, no way I can DIY. The challenge would be to find someone who can do it.
I have attached a video of the rattling and a pic. If others can hear and see thes
e, do let me know if you suspect my P2263 issue relates to the actuator bolt.
Wow it�s crazy to see thread years later. I originally started this question ....just an update the original problem was the turbo, the waste gate was getting stuck and I blew my head gasket...The dealer did cover all of it, they replaced the turbo and short block. That was @ 40k now I�m at 100k and I have another turbo problem. Notice smoke coming out my tail pipe only after driving and the car sits. Then when started smoke comes out...at first I thought it was valve stem seals or pcv system. I changed the pcv valve and same problem. Knowing I have a turbo I borescope the engine first to see what�s leaking, all my intake valves were oil free but found oil in my intake manifold. Ran a catch can off the valve cover to the intake side of the turbo still same issue. Every time I take the cac off there is oil present. It not oil residue it�s a smear of oil. However when driving I don�t see any smoke at all. So I�m not sure if it�s blow by when boosting and the oil won�t drain probably or the seal on my turbo is leaking. When I take the oil fill cap off and place my hand there I can feel very little vacuum at idle. Going to use a vacuum gauge and check. I don�t think it�s blow by due to there is no smoke coming out from dip stick or cap. Vacuum gauge on my intake manifold showed -19 hg. Seeing all these turbo problems my guess it�s the turbo again.
I have yet to put the car through its paces and see if the error returns, but according to others this is the fix if your VGT actuator is worn. In a few days I'll put my car through the paces on the highway for an hour to see if the error comes back. I can tell you that the old piece was VERY worn (another year and it may have worn completely off of the linkage), and I was able to install this without removing anything except the intercooler shroud off (4 bolts)
Here's a basic summary:
1. Run wire through old actuator so you don't lose it once it's loose
2. Both the locking bolt and the collar/barrel on the actuator's threaded rod are 10mm. The bottom one functions as a locking nut, the top one is a "barrel" which stays with the valve. Hold the top barrel with one 10MM wrench, loosen the bottom "lock" nut COUNTERCLOCKWISE from your perspective. Now the barrel can be turned.
3. Using a 10mm wrench, twist the upper/barrel CLOCKWISE from your persepective until it's off the VGT actuator's threaded rod. Stop twisting IMMEDIATELY after it's off; this barrel backs up into another threaded rod, and if you get the old one off and the new one on without twisting the barrel excessively while disconnected, the gap/distance *should* remain about the same after you're done with this job.
4. There's a C-clip holding the VGT actuator onto the linkage. Spin the clip around (I had to use a screwdriver) until you can see the part of the clip that has a slot. Run wire through the slot, wrap tightly so you don't lose it, and use a screwdriver on that slot to pop it off the linkage. Save the C-clip, then wiggle the VGT actuator off.
5. Reassemble in reverse order. Make sure your stuff has wire attached so you can fish it out if you drop it (you will). First up, put the old nut all the way onto the new VGT actuator, wrap wire around the threads between the nut and the actuator. Put the it back onto the linkage (stick the hole onto the rod). Then put the C-clip in place. It's kind of a bitch to get back on. My buddy managed to get it set in place, then pop it completely on using a screwdriver.
6. Reconnect the VGT actuator's threaded rod to the 10MM barrel. Remember, don't twist the barrel too much without being connected. Grab the VGT actuator's threaded rod with vice grips, pull it up against the barrel and hold it there. Back the barrel off a couple turns clockwise to help seat it, then turn counterclockwise to thread it down. If it doesn't thread in within a few turns, back the barrel off to your starting position (so your total length will be right) and try again.
7. Your locking nut should be near the bottom of your VGT's threaded rod. Get the barrel down nice and far over the threaded rod, then snug up the locking nut. Remove all of the wires you've got hanging off of your stuff and you're done.
Matt great post, I took some time about 3 hrs yesterday to swap this widget out. It was fiddly and the most difficult part was getting the c-clip back in place. A lot of patience is required and a handy left hand at times. I used 22 gauge jewelry wire which was probably not strong enough in hindsight. I made one mistake in that I unscrewed the collar leaving the widget loose which made getting the wire through the widget way more difficult than it would have been if I had got the wire through first. I did not need to use vice clips, I just gently pulled up on the wire to get the new widget to mate with the rotating collar.
I was able to remove this item and check its condition.
Fortunately, it is in excellent condition.
Disassembly and assembly were difficult. I spent 4 hours in the garage. I had to remove the Intercooler to have better access.
The most difficult is disassembly and assembly of the metal clip, which prevents the Eye Bolt actuator from sliding out.
I was able to measure exactly this element. Maybe this information will be helpful.
I'm contemplating modifying this with a sealed ball bearing insert


 11-06-2019, 05:14 PM


 for a new turbo and manifold when it seems like the fix could be relatively simple as outlined by many here including @QFT (thank you)...I'm still trying to ferret out my exact P2263 issue — it could easily be that part in the video — just want to know if those here who have had this issue/are knowledgeable in it are confident enough to take the RDX on errands, short road trips (2 hours each way), etc. with CEL on...until it is fixed. Engine won't likely be ruined, right? I know there are no guarantees, just want opinions. Thanks.