Any advice for installing front lip kit on 2012 TL

Thread Tools
 
Search this Thread
 
Old Oct 17, 2012 | 01:40 AM
  #1  
yooin14's Avatar
Thread Starter
Racer
 
Joined: Jan 2009
Posts: 272
Likes: 43
From: LA California Korea town
Any advice for installing front lip kit on 2012 TL

Hi all.

I have had 2008 TL type-S. It was a really great car and I really was proud of driving it.

The car has been good shape and I kept interior super clean. But someday..
I had car accident like 6 months ago and some ass made 6 door dings on my right side. At the end.. I have decided to sell it.

After 6 months, I got 2012 TL AWD tech. (2 weeks ago) What a nice car. One thing I really like this car compared 2008 TL type-S is no huge break dust on front.

So.. back to newbi question..

I am thinking of install front lip kit with my friend.
  • is there anything I should be aware of when I install it.?
  • should I put any extra 3m double sided tape on certain corners?
  • Something that can be broken easily when I try to take off bumper?

Thank you for reading my post.
Any advice would be appreciated.
Reply
Old Oct 17, 2012 | 02:13 AM
  #2  
potmilkz's Avatar
Moderator
 
Joined: May 2010
Posts: 7,101
Likes: 1,022
From: Southern Cali 626 area
if you have the instructions then it should be straight forward..

couple of things tho..

make sure you have all the necessary tools.

measure twice, cut/drill once.

2009-2011 is different from 2012 as far as lip kit installation.
2012 i believe requires only drilling of holes. 2009-2011 requires you to cut the rear bumper.

read the directions carefully, do not skimp out on any steps.

i dont think you will need to take off your bumpers to install the 2012 kit. you should be able to just reach under with your hands.

use safe jackstands, do not use a jack to hold the car up.
Reply
Old Oct 17, 2012 | 09:05 AM
  #3  
23109VC's Avatar
Drifting
 
Joined: Jul 2007
Posts: 2,112
Likes: 104
Drink lots of beer during the install!

I've never done an install like this...but just follow I structures and be careful.

You may want to shop around and see what kind of prices local,body shops , or,other places that could do the install would charge. Depending how cheap you could get it done for, it could be worthwhile to pay to have a pro do it.....if you are on a strict budget...go for it, I think several people on this forum have done it themselves....good luck
Reply
Old Oct 17, 2012 | 11:05 AM
  #4  
potmilkz's Avatar
Moderator
 
Joined: May 2010
Posts: 7,101
Likes: 1,022
From: Southern Cali 626 area
i see your in cali but dude bring it to me! i installed mine and also dragonwang's 2009 kit which was much harder..

pm me for price. i can get it done in a couple of hours while you kick it or have a friend come pick you up to go eat or something.

here is what i did for my car. as well as dragonwang's car

https://acurazine.com/forums/showpos...3&postcount=24


Last edited by potmilkz; Oct 17, 2012 at 11:08 AM.
Reply
Old Oct 17, 2012 | 12:03 PM
  #5  
i64X's Avatar
Instructor
 
Joined: Jul 2007
Posts: 212
Likes: 24
From: Michigan, US
The 09-11 kits look so much better. I wish they would have kept the same look with the 12+ kits. I would have one if they would have.
Reply
Old Oct 17, 2012 | 12:43 PM
  #6  
potmilkz's Avatar
Moderator
 
Joined: May 2010
Posts: 7,101
Likes: 1,022
From: Southern Cali 626 area
a revised grill was all they needed..
Reply
Old Oct 17, 2012 | 08:23 PM
  #7  
pimpin-tl's Avatar
Safety Car
15 Year Member
Liked
Loved
Community Favorite
 
Joined: Jun 2006
Posts: 3,995
Likes: 148
From: San Antonio, TX
I installed mine myself. The instructions are a bit vague, but I want to point out a few things. Crawl under the car and disconnect the temp sensor that is in the middle of the bumper almost center of the car. Also have some short chairs or boxes and have the bumper sit on them before removing it. Once you pop it loose form the lights, that sucker will fall on you so have something to catch it so it makes it easier on you. It helps to have two people. I had to do it myself.

Otherwise follow the instructins and it's easy. Behind the bumper it is marked in every spot you need to drill a hole. Start with a small drill bit then work your way up to the size that allows the tie straps to slide through the holes. (yes it has a tie strap type of mounting but it's solid). Start removing half way the red cover off the doublesided tape, and have it hang outside of the edge of the lips. Once you get them through the holes, slide the caps on the end of the straps, and slide them down till really tight. Then slide the red tape off and push it in real well throughout the edges.

Make sure to smooth the holes you make with something so the plastic from the bumper isn't all in the way from the caps to go flush. Otherwise very easy. Use ramps, turn the wheels to one side and get working!

Reply
Old Oct 17, 2012 | 11:48 PM
  #8  
yooin14's Avatar
Thread Starter
Racer
 
Joined: Jan 2009
Posts: 272
Likes: 43
From: LA California Korea town
Originally Posted by pimpin-tl
I installed mine myself. The instructions are a bit vague, but I want to point out a few things. Crawl under the car and disconnect the temp sensor that is in the middle of the bumper almost center of the car. Also have some short chairs or boxes and have the bumper sit on them before removing it. Once you pop it loose form the lights, that sucker will fall on you so have something to catch it so it makes it easier on you. It helps to have two people. I had to do it myself.

Otherwise follow the instructins and it's easy. Behind the bumper it is marked in every spot you need to drill a hole. Start with a small drill bit then work your way up to the size that allows the tie straps to slide through the holes. (yes it has a tie strap type of mounting but it's solid). Start removing half way the red cover off the doublesided tape, and have it hang outside of the edge of the lips. Once you get them through the holes, slide the caps on the end of the straps, and slide them down till really tight. Then slide the red tape off and push it in real well throughout the edges.

Make sure to smooth the holes you make with something so the plastic from the bumper isn't all in the way from the caps to go flush. Otherwise very easy. Use ramps, turn the wheels to one side and get working!

Thank you for very informative advice!

one question.. how do fog lights get disconnected? Do I have to care about this when I take bumper off? instruction doesnt say anything about this..
Reply
Old Oct 18, 2012 | 12:52 AM
  #9  
23109VC's Avatar
Drifting
 
Joined: Jul 2007
Posts: 2,112
Likes: 104
potmilkz-

I'm in so cal. I want to buy a kit and would LOVE to get a "hook up" for an install.

where are you located? I'd be happy to have you help me install one and would also be happy to make it worth your while!
Reply
Old Oct 18, 2012 | 02:42 AM
  #10  
potmilkz's Avatar
Moderator
 
Joined: May 2010
Posts: 7,101
Likes: 1,022
From: Southern Cali 626 area
Originally Posted by 23109VC
potmilkz-

I'm in so cal. I want to buy a kit and would LOVE to get a "hook up" for an install.

where are you located? I'd be happy to have you help me install one and would also be happy to make it worth your while!

sounds like your offering sex for lip kit install.

check your pm.. im in temple city, ca
Reply
Old Oct 18, 2012 | 07:43 AM
  #11  
pimpin-tl's Avatar
Safety Car
15 Year Member
Liked
Loved
Community Favorite
 
Joined: Jun 2006
Posts: 3,995
Likes: 148
From: San Antonio, TX
Originally Posted by yooin14
Thank you for very informative advice!

one question.. how do fog lights get disconnected? Do I have to care about this when I take bumper off? instruction doesnt say anything about this..
IMHO, after you have all the bolts released on the bumper,and under covers,disconnect the lights if you can before removing it. If not when you remove it but make sure to not pull it out too far as there isn't much slack. The temp sensor you must disconnect before hand or you will break its mount like I did since the Instructions didn't mention it.. I was able to fix it though.
Reply
Old Oct 18, 2012 | 10:43 AM
  #12  
potmilkz's Avatar
Moderator
 
Joined: May 2010
Posts: 7,101
Likes: 1,022
From: Southern Cali 626 area
i disconnect everything before i take the bumper off.. just makes it much easier.
Reply
Old Oct 18, 2012 | 12:31 PM
  #13  
pimpin-tl's Avatar
Safety Car
15 Year Member
Liked
Loved
Community Favorite
 
Joined: Jun 2006
Posts: 3,995
Likes: 148
From: San Antonio, TX
Originally Posted by potmilkz
i disconnect everything before i take the bumper off.. just makes it much easier.
Yep. Sadly the instructions said after you remove it.
Reply
Old Oct 20, 2012 | 05:26 PM
  #14  
potmilkz's Avatar
Moderator
 
Joined: May 2010
Posts: 7,101
Likes: 1,022
From: Southern Cali 626 area
just installed YooIn14's front lip.


post up pics OP!
Reply
Old Oct 21, 2012 | 11:10 AM
  #15  
23109VC's Avatar
Drifting
 
Joined: Jul 2007
Posts: 2,112
Likes: 104
Cool

Originally Posted by potmilkz
sounds like your offering sex for lip kit install.

check your pm.. im in temple city, ca
Yeah....that didn't sound right..sorry...

Got your PM! When I get the kit I'll let you know!
Reply
Old Oct 21, 2012 | 02:23 PM
  #16  
yooin14's Avatar
Thread Starter
Racer
 
Joined: Jan 2009
Posts: 272
Likes: 43
From: LA California Korea town


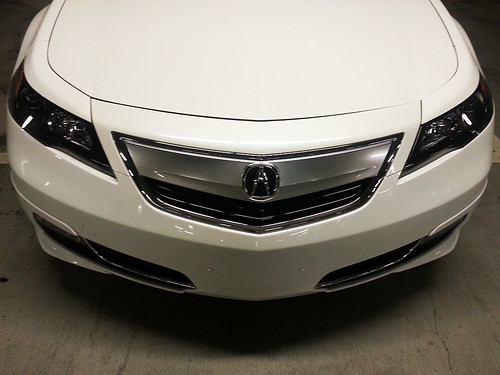
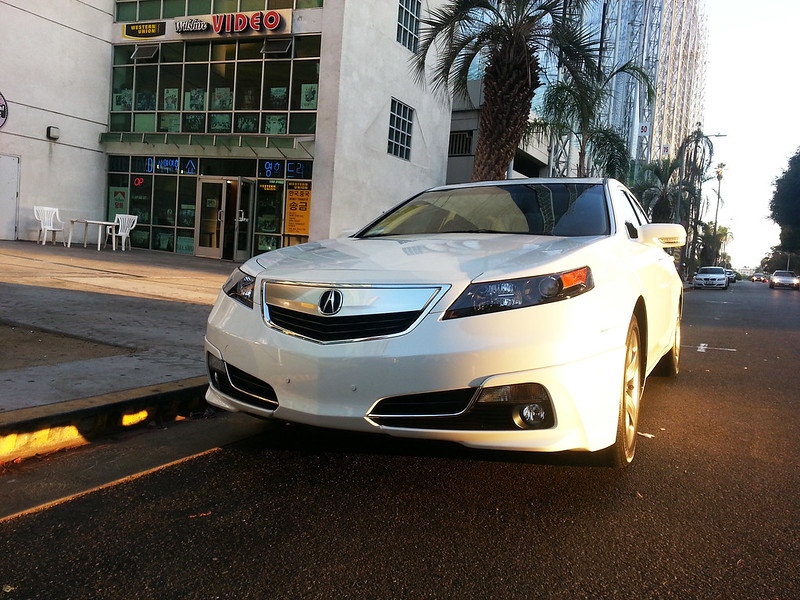
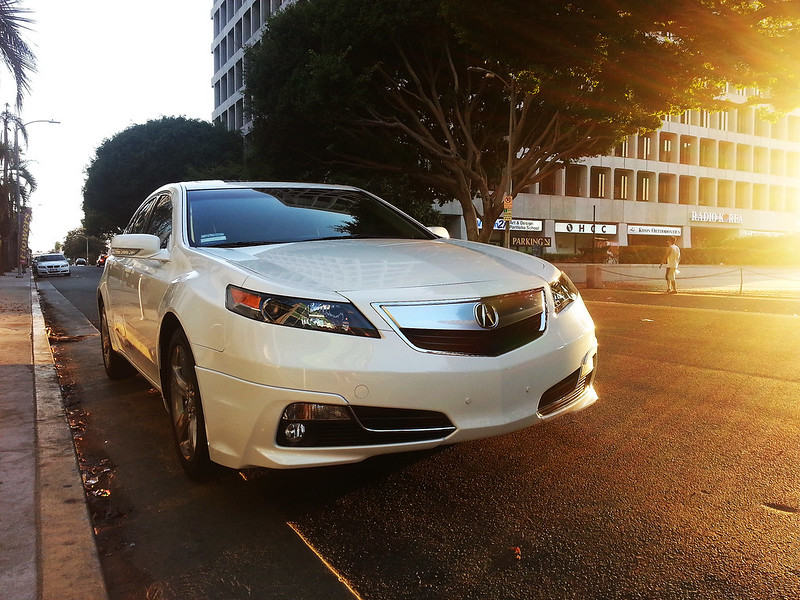
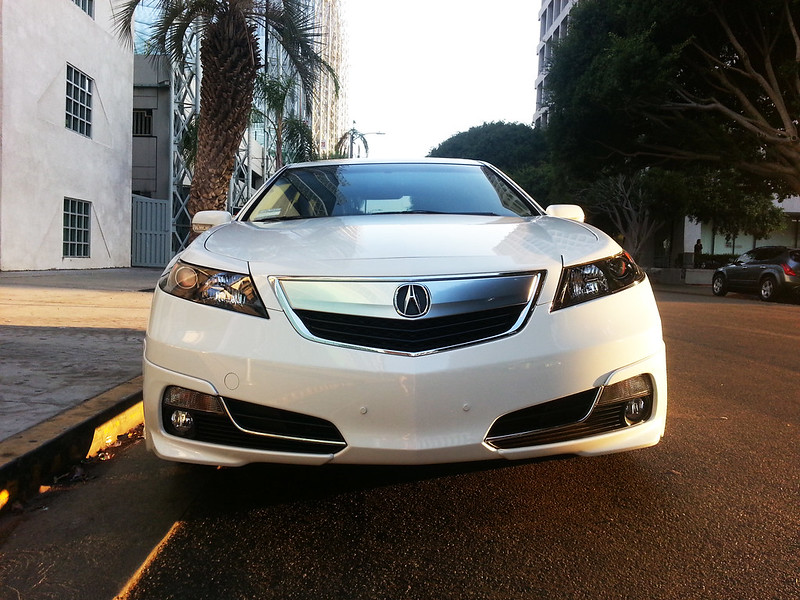
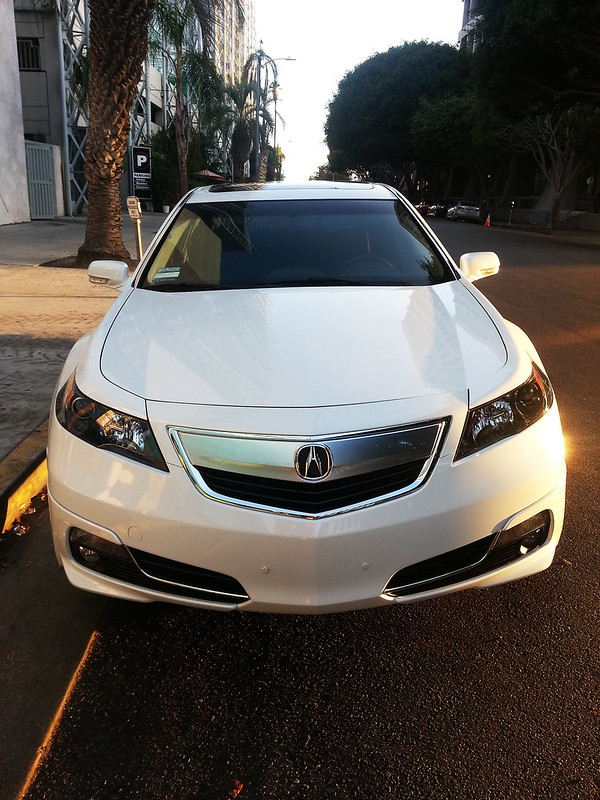
Thank you potmilkz for installing front lip kit. it looks awesome now.
When I get side skirt later, I will definitely call you again!

But I am sorry pics are bad quality lol
Reply
Old Oct 21, 2012 | 08:35 PM
  #17  
yooin14's Avatar
Thread Starter
Racer
 
Joined: Jan 2009
Posts: 272
Likes: 43
From: LA California Korea town


Some more pictures.

Last edited by yooin14; Oct 21, 2012 at 08:38 PM.
Reply
Old Oct 22, 2012 | 01:48 AM
  #18  
23109VC's Avatar
Drifting
 
Joined: Jul 2007
Posts: 2,112
Likes: 104
Post some pics from the side... I'm curious how it looks with the front lip bit no sides....

You could always try putting mudguards on to see if that helps until you do sides and rear kit?

Hiw long did it take to put the front on??
Reply
Old Nov 2, 2012 | 10:42 AM
  #19  
SPAWN's Avatar
Intermediate
 
Joined: May 2012
Posts: 49
Likes: 5
From: The Show Me State
the same thing i wanted to look at, the side.
Reply
Old Nov 17, 2012 | 02:13 AM
  #20  
User Error's Avatar
Racer
 
Joined: May 2012
Posts: 455
Likes: 84
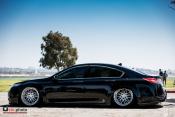
The black one is the 09-11 and the White one is from a 12 right? Does anyone know if the 12 will fit on a 2009? I want it to wrap over the top of the Fog lights to cover some rock chips... I haven't pulled up next to a 12 yet to see if the fog light openings are the same... All I see on the 12 is how much better the Grille is haven't paid much attention to the fog light holes...? Anyone help me out with this one?
Reply
Old Nov 17, 2012 | 03:28 AM
  #21  
potmilkz's Avatar
Moderator
 
Joined: May 2010
Posts: 7,101
Likes: 1,022
From: Southern Cali 626 area
2012 and 09-11 is different you cant fit a 12 lip on a 09-11.

fog lights are different.
Reply
Old Nov 17, 2012 | 02:44 PM
  #22  
potmilkz's Avatar
Moderator
 
Joined: May 2010
Posts: 7,101
Likes: 1,022
From: Southern Cali 626 area
just installed Tomathon's whole kit.

took about 3hr 30 mins to install.

from 7:30 to noon.

here is the results. i only took the front pic. but he can provide more later.

before:


after:


he was happy with it.
Reply
Old Nov 17, 2012 | 09:35 PM
  #23  
Kenstlshawd's Avatar
Instructor
iTrader: (2)
 
Joined: Nov 2012
Posts: 161
Likes: 18
From: SoCal
^Don't see the after pic.
Reply
Old Nov 18, 2012 | 03:15 AM
  #24  
potmilkz's Avatar
Moderator
 
Joined: May 2010
Posts: 7,101
Likes: 1,022
From: Southern Cali 626 area
you dont see two pics? they are different.
Reply
Old Nov 18, 2012 | 08:33 AM
  #25  
Zelaya's Avatar
2012 TL SH-AWD
iTrader: (1)
 
Joined: Mar 2010
Posts: 1,646
Likes: 119
From: Maryland
I can't see the photos as well.
Reply
Old Nov 18, 2012 | 08:59 AM
  #26  
pimpin-tl's Avatar
Safety Car
15 Year Member
Liked
Loved
Community Favorite
 
Joined: Jun 2006
Posts: 3,995
Likes: 148
From: San Antonio, TX
No photos showing.
Reply
Old Nov 18, 2012 | 03:07 PM
  #27  
potmilkz's Avatar
Moderator
 
Joined: May 2010
Posts: 7,101
Likes: 1,022
From: Southern Cali 626 area


Reply
Old Nov 18, 2012 | 05:11 PM
  #28  
Kenstlshawd's Avatar
Instructor
iTrader: (2)
 
Joined: Nov 2012
Posts: 161
Likes: 18
From: SoCal
Now I see the after pic.
Reply
Old Jan 9, 2017 | 06:38 AM
  #29  
Dav!d_5's Avatar
3rd Gear
 
Joined: Jan 2017
Posts: 3
Likes: 0
From: Newark, NJ
2012 TL front lip

Hey guys,

maybe there was a post about it already, but im new to this so my apoligies.
im looking for a front lip for my 2012 TL SH-AWD, any suggestions, link that you guys can recommend? much appreciated
Reply
Old Jan 9, 2017 | 02:53 PM
  #30  
potmilkz's Avatar
Moderator
 
Joined: May 2010
Posts: 7,101
Likes: 1,022
From: Southern Cali 626 area
Bruce at EndlessRPM can help you. google ENDLESSRPM
Reply
Old Jan 19, 2017 | 07:30 AM
  #31  
rondog's Avatar
Former Sponsor
iTrader: (1)
 
Joined: Oct 2001
Posts: 8,320
Likes: 129
From: yonkers, NY
If you are looking for convenience and subtle look, the OEM is great. But if you are looking for the most dramatic improved look without any equal, then the RonJon Sport Design 4th Gen TL Lip kit is the only option. There are slight trimming modifications needed to make this kit fit the 2012, but they are so minor, the difference won't be seen. And the kit needs to be permanently adhered with high strength adhesive that the bodyshops use. So this is a professional job. Here are some pics...


Reply
Related Topics
Thread
Thread Starter
Forum
Replies
Last Post
jspangan
ILX
5
Aug 18, 2020 11:05 AM
HairyMonkey019
Car Parts for Sale
28
Apr 22, 2016 10:50 PM
HOWELLiNC
3G TL Problems & Fixes
12
Sep 10, 2015 01:39 PM
nuldabz
3G TL Tires, Wheels & Suspension
3
Sep 3, 2015 05:49 PM
Pegon95
3G TL (2004-2008)
10
Aug 31, 2015 02:18 PM


All times are GMT -5. The time now is 09:57 PM.