Yungone501's- Excessive infatuation with the J-series
 10-29-2015, 09:52 PM
#1401

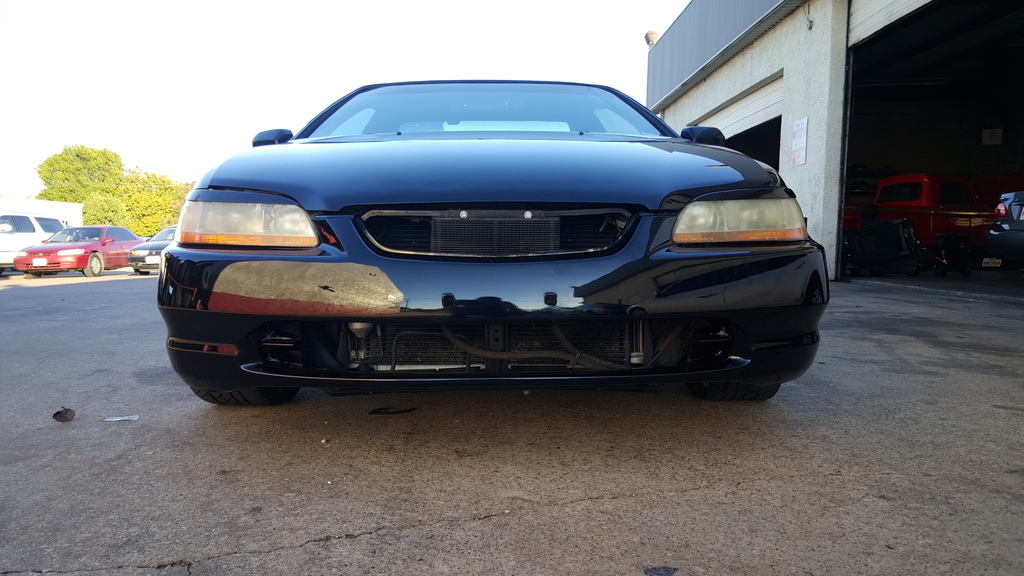
Finally got the freshly painted hood and bumper cover installed. And as you can see, it's added a good amount of cooling system exposure. Even with the j37 intake now installed on the motor, the hood still required 1.25" spacers to fully close. Love the look and functionality however I'd still like to add some aluminum mesh (painted black) to hide some of the cooler hoses, radiator support, wiring, etc. but that's just cosmetics. And I've reconsidered (for the meantime) cutting the bumper cover for the flanged ducts that were going to be used for the intake setup and instead have opted to run a different force fed intake system instead. It will be what's referred to as an inline airbox assembly that, as its name implies, puts the airbox inline to the intake ducting and essentially straightens out the setup to hopefully take full advantage of the ram air effect. Also, instead of using a round flanged duct which requires cutting the bumper cover, I'm going to simply route 4" brake cooling duct from the lower opening in the cover (since there's plenty of air to go around now!) then over to the inline filter mounted as close as possible to the TB then 3.25" between the inline filter to the TB. This way, I have the least amount of restriction by using the 4" duct as much as possible before having to reduce the diameter back down to the TB's O.D. of 3.25".
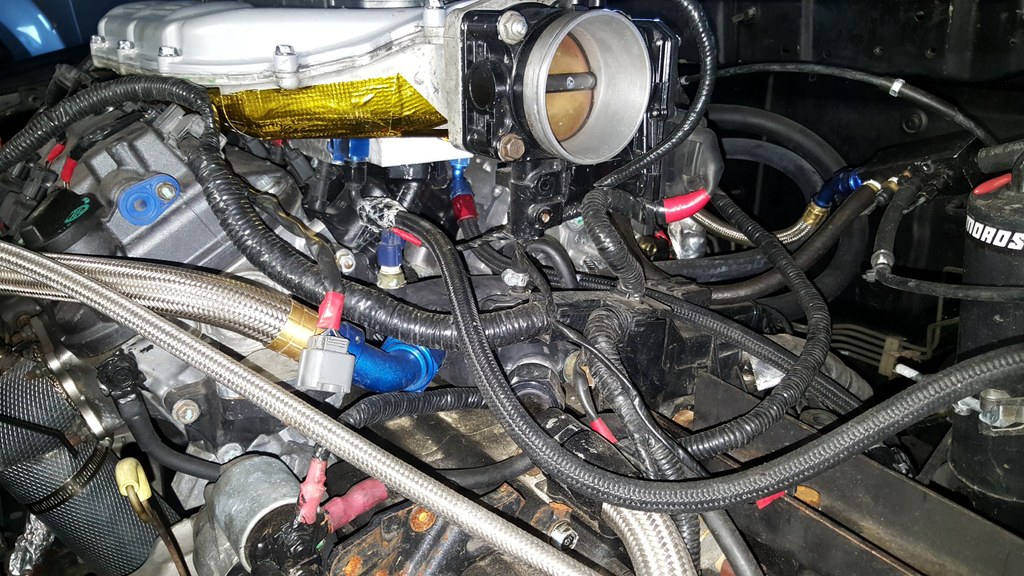
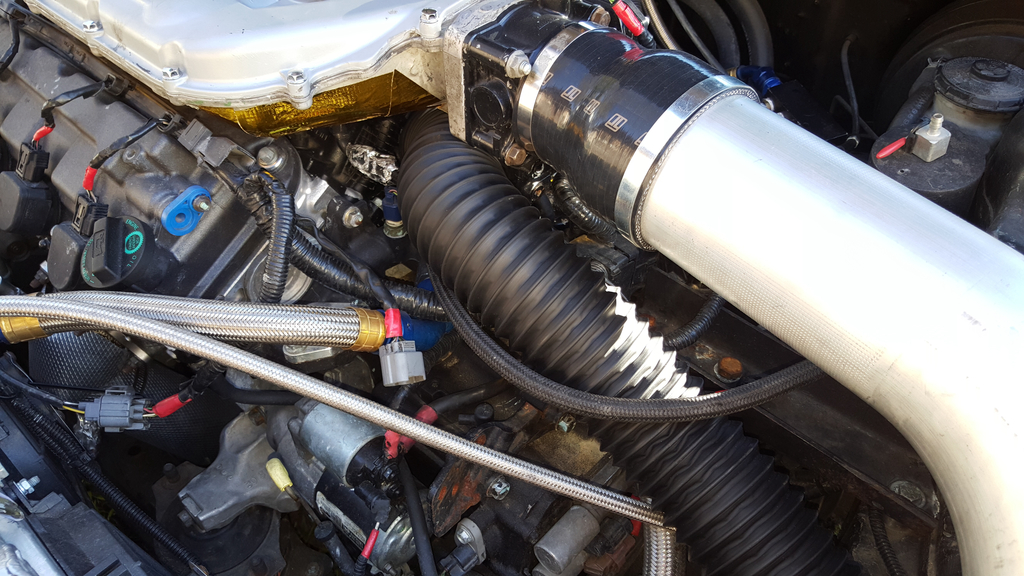
Shot of the intake installed with my custom 1" thermal spacer and authentic gold heat foil. I'm anxious to see the results between this manifold and the sheet metal intake.

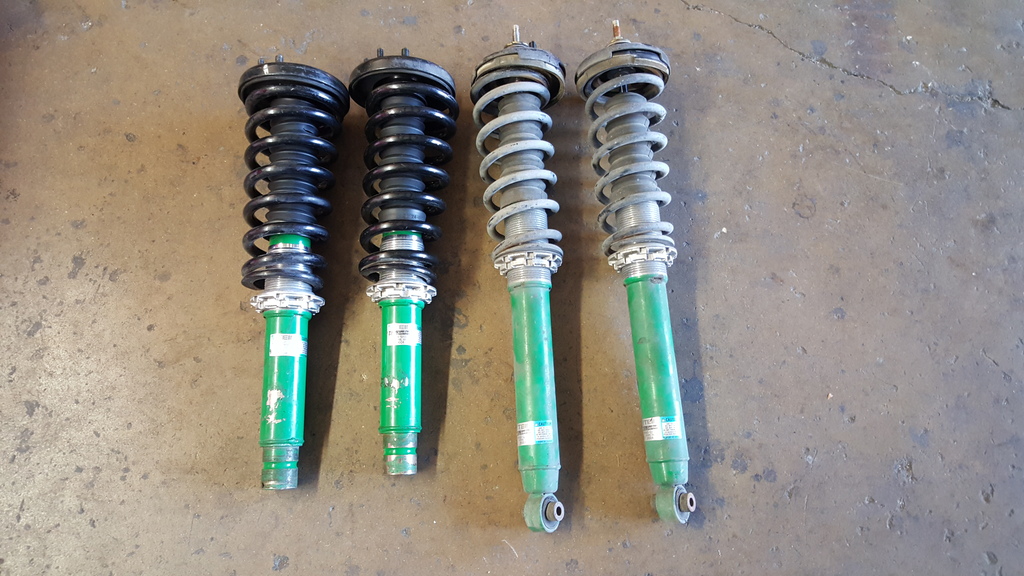
Lastly, I managed to get ahold of some Tein coilovers and at a phenomenal price. They appear to be in pretty damn good condition and seem to have a nice, fluid motion under motion so hopefully I can just install them and GO. We will soon see...
 11-13-2015, 01:15 AM
#1402
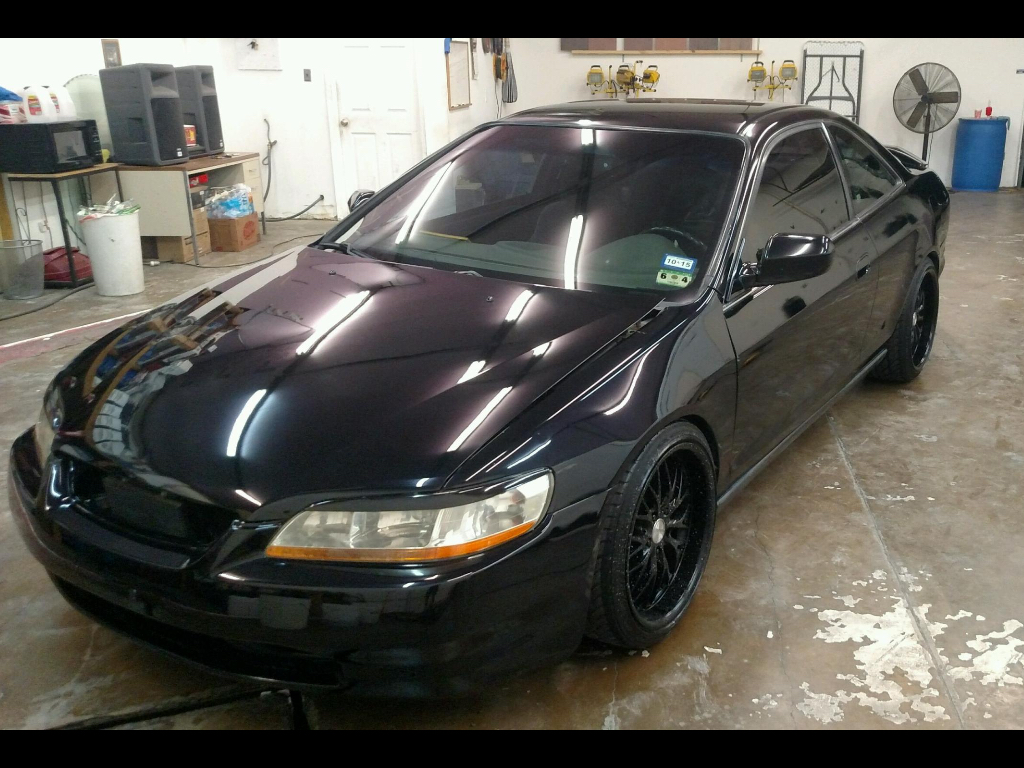
Got my baby all shined up a few nights ago. Had my detailer clay bar, buff and wax it and what a difference that made. This brought back quite a bit of pride in this little money pit and with the coilovers and new front end, it not only looks great but drives like a completely different car!
The best thing I could've ever changed was installing the factory intake with the 1" Teflon thermal spacer. As predicted (and hoped for) it woke up the bottom end and because the IMT valve was functional, it even shaved off time on my 3rd gear runs. To be exact, it removed 1.27 seconds after tuning which is AMAZING! WOT MAP readings showed a decrease in vacuum from 1.8" down to 1.2" so the intake was definitely helpful in restoring VE back into the engine. I've already ordered all the materials needed to run a 4" intake which will be a solid straight over towards the fender well (which of course will be sealed and ducted using a forced air supply) and this is being smoothly transitioned back down to a diameter of 3.25" for the TB mouth. Hopefully this will aid in reducing the MAP vacuum under WOT even more so and get down to that magic number of around .5"-.8". I'm at 650ft elevation so I think that will be feasible considering the improvements I've seen thus far.
I've got a treat for everyone here this weekend. I'll be attaching the GoPro and getting some good footage of the car and one thing I wasted to share was the glorious tune of the exhaust this baby produces and also the effects I've added. Let's just say, I can assure that NOBODY has ever heard a j-motor sound like this one does. It's all in the tune as they always say and man, I've never believed this more than now. I've invested countless hours (more like days when totaled up) into learning this engine and understanding exactly what it is these nasty v6's crave. I'll say that these motors love fuel and though timing is where the power is, they are very "sharp edged" in regards to how much/how far you can take it. It's important to break their tunes down into small sections and throw timing at her until she stops making time improvements. It's definitely a black art on street tuning and I'm 100% confident that there's not a dyno tuner around that could take this tune to the edge any better than I did....that's a fact.
And just to keep things tip-top, I bought some new air-fuel sensors (o2 sensors, up streams) and installed them today so that I could ensure there's no mistakes made in the AFR's. Impressively, even though I've been running the same AF sensors for 3 years now (including under moderate boost levels and nitrous), there was almost NO variation between them and the new sensors reading when matching up to the mapping! I was almost equally surprised when I swapped the plugs a few weeks back and even though I've practically used this motor to really fine tune my tuning skills, they came out light brown in color with great indicators of heat.
Emptied out the factory ATF and refilled with Amsoil synthetic ATF which gave me more responsiveness in shifts. Decided to change from Mobil 1 5w20 over to Motul 0w20 100% fully synthetic too as I've heard nothing but great things. Picked up another .15 seconds (average) off my time on doing these two things alone.
I'll give another update this weekend and drop everyone a video with some cool sounds and shots.
11-13-2015, 01:12 PM
#1403
Looking good can't wait to hear some sound clips of your exhaust, You wrong on the map reading under WOT the magic number is about +25 LBS LOL, would you be interested in making a manifold spacer with individual port injectors for my kids water meth setup ?
11-17-2015, 01:13 AM
#1404

As for the spacer, sorry man, no can do. It was a major PITA bringing home all of the tooling and equipment required just to do the three I did. I can, however, make you a great deal on this last little slab I have from the block I used to make them from. Let me know and I'll gladly help in the manner of making the job possible.
UPDATE:
Sorry for those expecting the exhaust clips, my GoPro suction mount arrived as expected Friday (just in time for the weekend) and to my dismay, I found the adjustment angle lock broken which deemed it unusable! So last night, I ended up JB welding it and wouldn't you know the rain started pouring down this morning as well as tonight and isn't supposed to let up till tomorrow I think. When the weather breaks, I'm all setup ready to go so keep a watchful eye on the thread. Again, the results you guys hear will both surprise and impress. I'll show everyone what some crafty tuning on these little beasts can do. It's killing me not to be able to show everyone!!! Lol.
Few more mods will be added to the list soon. First up is my new 4" intake setup. I was explaining the other night how some recent datalogging revealed slight vacuum in the plenum under a WOT run and so I decided on targeting this to try and improve breathing efficiency. Though I feel like it may actually be the throttle body causing the slight airflow restriction, I've started on the cheapest solution first: the intake tubing size. The j37a4 TB is probably the real culprit since its tapping out at only 3" ID but again, cheapest things first. Especially when it would involve adapting another DBW TB from something else that uses the same TPS readings as well as the motors winding resistance too. Ugh...hope the intake tubing does the trick.
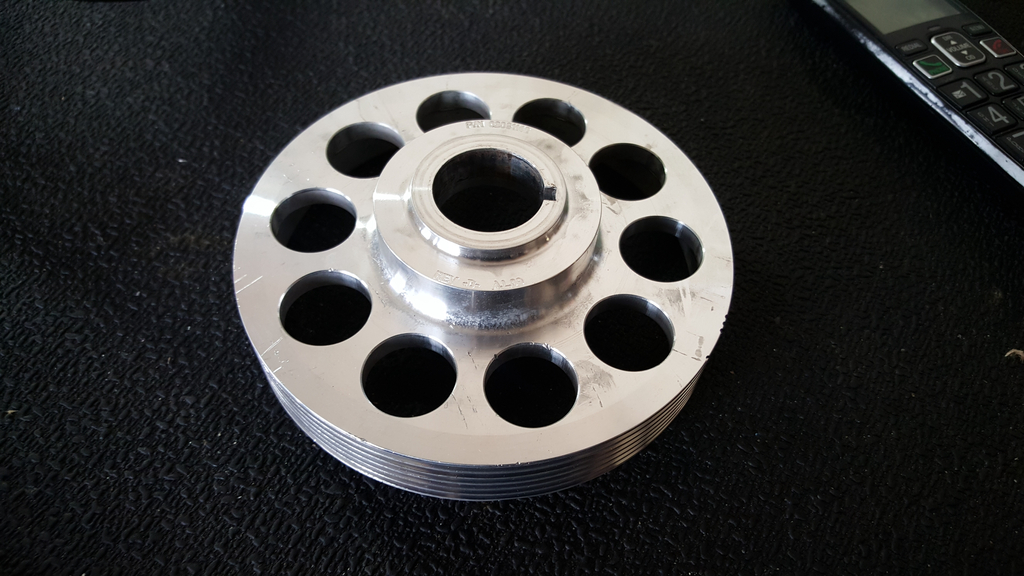
Then next, I finally came across an excellent deal on an underdrive UR crank pulley (with serpentine belt!) for $50 on eBay. What a deal it was. The damn thing was used for one season and came with the belt too....not to mention FREE SHIPPING. HAHA...awesome. Not much in terms of gain but hey, it was cheap horsepower.
And I saved the best for last. Ordered me another pair of j37a4 heads that I'm going to be removing the cams out of to send out to Web Cams for a regrind. The best part about this is that I was fortunate enough to have gathered all the details and specs from HPD's (or rather Real Time Racing) SCCA 2010 TSX with the same damn setup I'm running which is a j35z block and j37a4 heads of which made 350hp and that's NA. Granted they had another 2 points of compression on my setup but that will be the only difference. Heads and cams are on their way to me and as soon as they're cleaned and dismantled, they will be shipped out to Web immediately. All and all, the entire cam regrind process will run me around $1500 but shit, for that much of a proven gain....why not?
The following users liked this post:
teh CL (11-17-2015)
11-17-2015, 10:13 PM
#1405
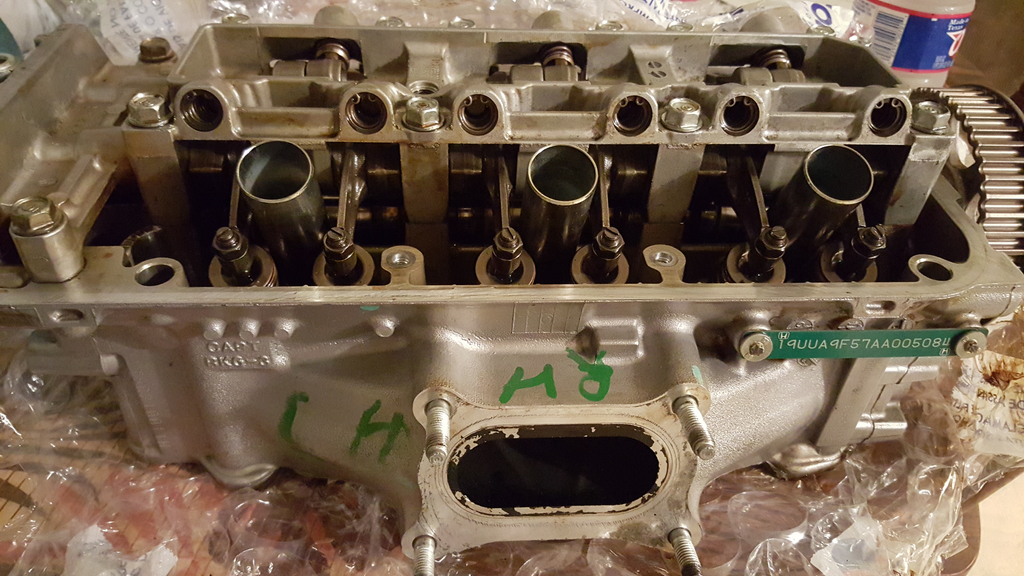
Alright, so my j37a4 heads/cams arrived today. Once I have the opportunity to remove the cams, I'll be shooting them over to Web for some custom tailoring. In the meantime, I'm prepping the heads by resurfacing them and installing some new oem valve seals. After Web cams does their thing, I'll have them recommend some spring specs and get some that can safely rev another 1-2k rpms for experimentation purposes on finding an optimal (yet usable) powerband without the spring pressure murdering my cam lobes. I doubt the powerband will be moved up any further than 1k so the stock internals in the bottom end will remain.
I'm undecided on performance valves and probably won't make my decision on this till my current heads are pulled off. This is because the tune is supplying overrun and though I've heard it's an effective means of cooling the chambers (as well as the exhaust valves) this tune is igniting the mixture due to the timing I'm running at decel so I'm curious to see wether or not this is baking my exhaust valves. I have a good feeling about their well being so I may just end up going back with new factory valves. Guess we will see...
The following users liked this post:
teh CL (11-19-2015)
11-22-2015, 11:27 PM
#1406
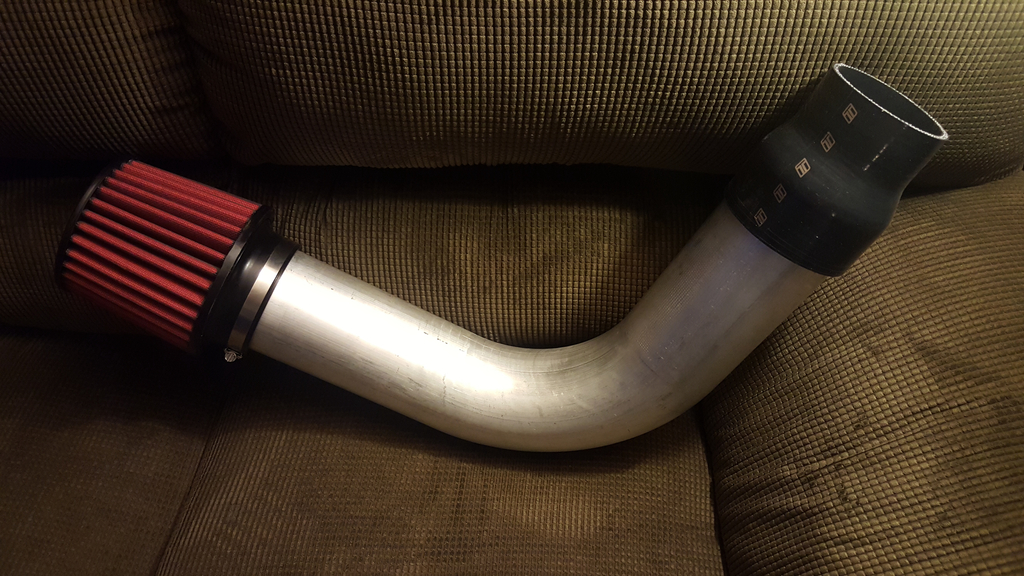
Finally worked my way around to getting the short ram intake done and took a few shots afterwards. First pic shows a size comparison between the previous 3.25" intake and the new 4.00" intake (installed).
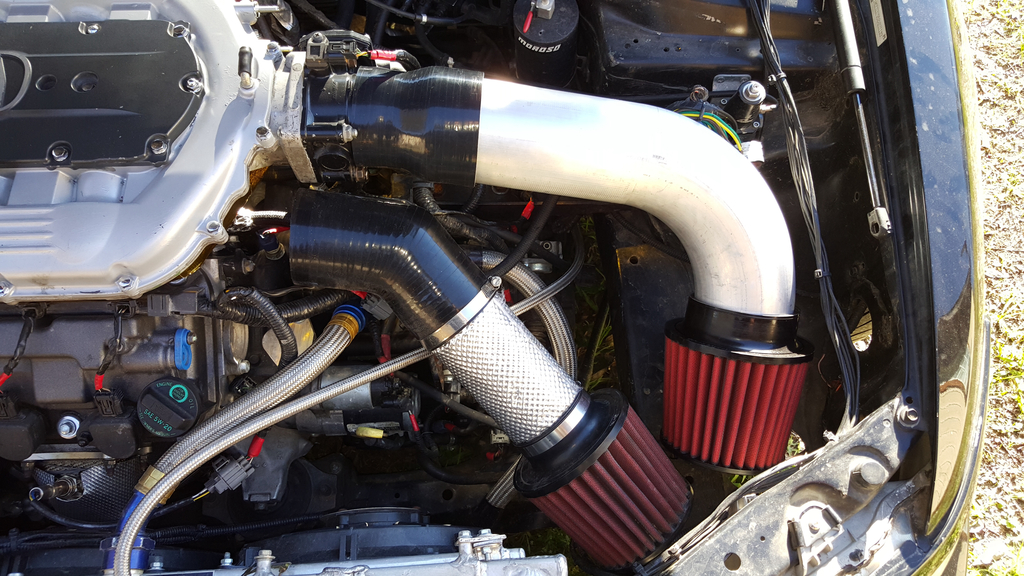
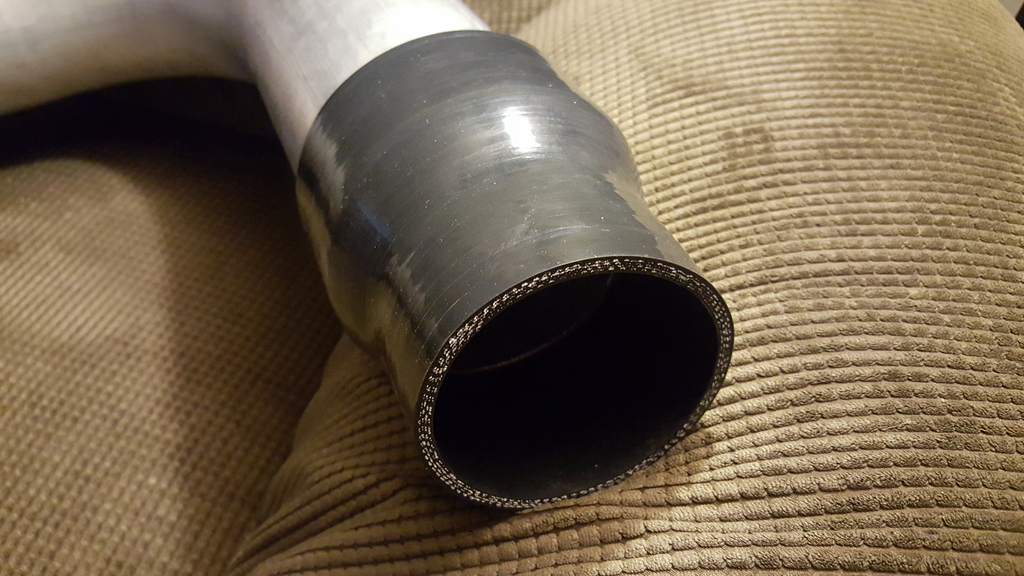
Next is a photo of just the 4" SRI by itself. I decided on the SRI style as it typically creates a higher peak in power due to there being less air volume (and therefore mass) to move at higher rpm's. Eventually, the filter will be boxed in with a duct from the front to supply it with cooler/denser air. Again, doing this over having the intake tubing traveling all the way from the mouth of the TB to the fender well means less air mass to move, creating more power.
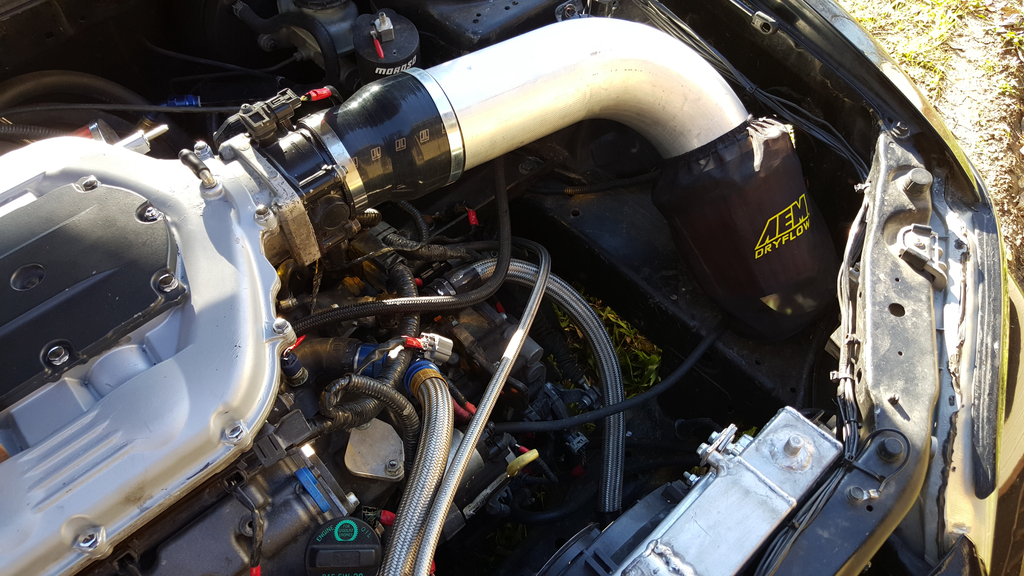
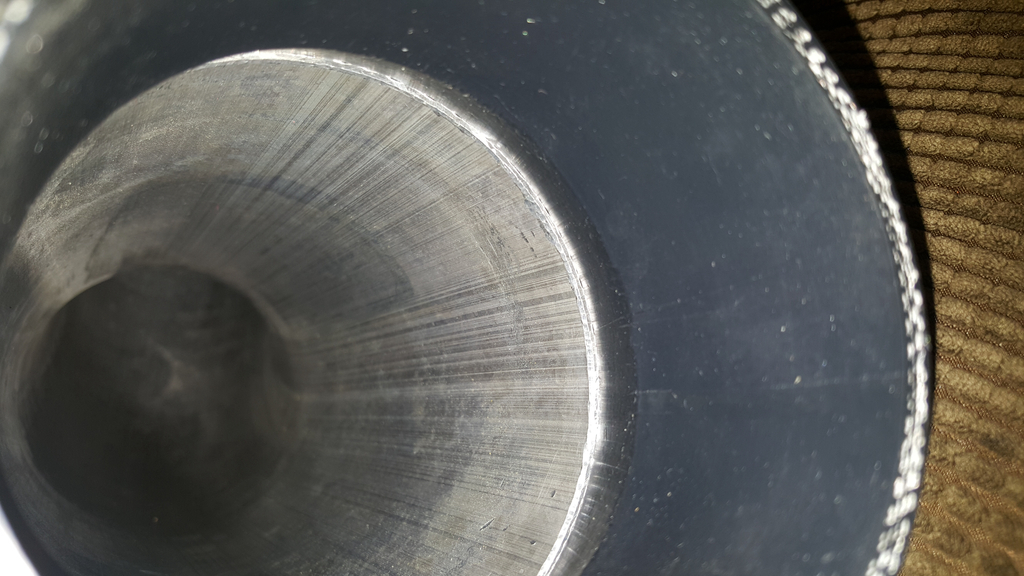
I included this photo because....well, it was a great shot of the intake setup?
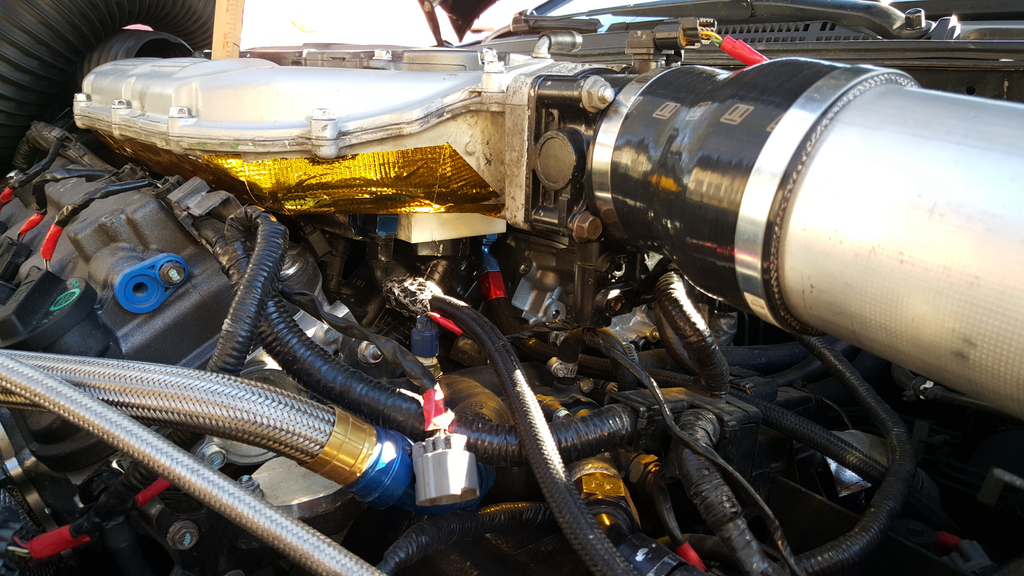
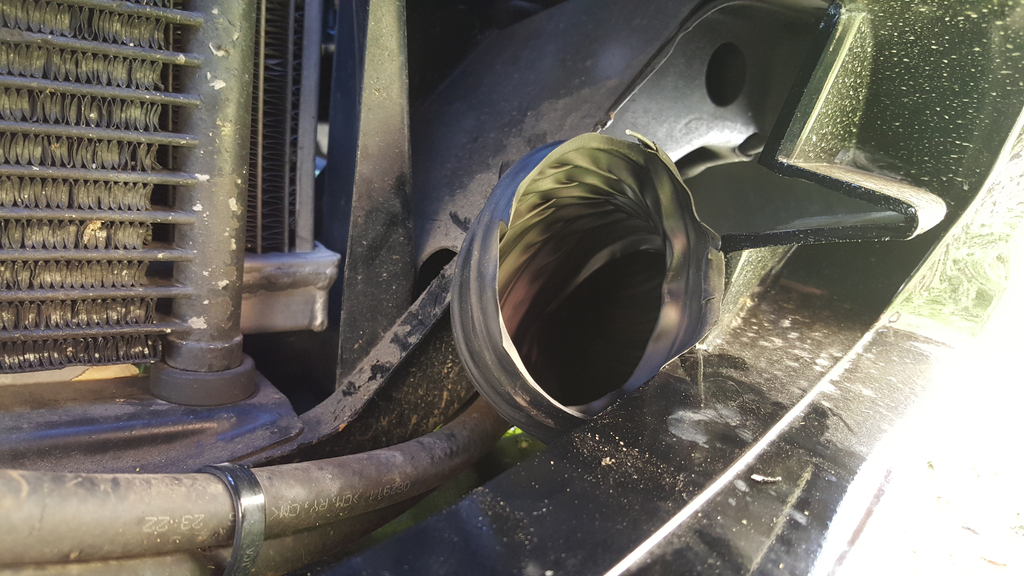
Since I was under the hood, I went ahead and installed this air duct to assist in cooling the lower runners which should further improve IAT's. The duct is positioned in a manner that directs the cooler air to the bottom side of the runners where heat soak is generally at its greatest from the heat of the engine rising not to mention the coolant passage running through there as well. I go to great lengths to reduce heat soak into certain areas and it's all paid off quite a bit through the power this engine produces and keeps regardless of how long it's been driven.
Anyhow, the duct is 3" in diameter and collects its supply from the lower area of the bumper cover. As the pictures show, the duct is routed from the lower runners and makes as straight of a path (with long, curved turns to maintain air velocity) as possible down through the fender well then over towards the bumpers lower grille where it will collect and supply the coolest air possible. And since it's not an air supply that feeds the engine, no special precautions were taken against water entering the duct.

Next is a photo of just the 4" SRI by itself. I decided on the SRI style as it typically creates a higher peak in power due to there being less air volume (and therefore mass) to move at higher rpm's. Eventually, the filter will be boxed in with a duct from the front to supply it with cooler/denser air. Again, doing this over having the intake tubing traveling all the way from the mouth of the TB to the fender well means less air mass to move, creating more power.
I included this photo because....well, it was a great shot of the intake setup?
Since I was under the hood, I went ahead and installed this air duct to assist in cooling the lower runners which should further improve IAT's. The duct is positioned in a manner that directs the cooler air to the bottom side of the runners where heat soak is generally at its greatest from the heat of the engine rising not to mention the coolant passage running through there as well. I go to great lengths to reduce heat soak into certain areas and it's all paid off quite a bit through the power this engine produces and keeps regardless of how long it's been driven.
Anyhow, the duct is 3" in diameter and collects its supply from the lower area of the bumper cover. As the pictures show, the duct is routed from the lower runners and makes as straight of a path (with long, curved turns to maintain air velocity) as possible down through the fender well then over towards the bumpers lower grille where it will collect and supply the coolest air possible. And since it's not an air supply that feeds the engine, no special precautions were taken against water entering the duct.
12-01-2015, 10:20 PM
#1407
Newsflash: The Accord is going back to Mr Matt Hickam this coming weekend. Why? Well, I've re-decided on forced induction. I've removed the turbo setup off of the BM so that it can be modified to fit the j37a4 heads. Yes....it's on (again).
The following users liked this post:
yungone501 (12-02-2015)
 12-07-2015, 07:49 AM
#1412
 12-07-2015, 11:51 PM
#1413
One thing I can say since switching to an SRI from a previous CAI is that the IAT's have increased and typically ranges between 15-25 degrees warmer now since the intake is drawing air from the engine bay rather than the previous location which was from the fender well where the filter was placed directly behind an empty fog light housing. I'd say once the new SRI has the filter pulling air from a partitioned air enclosure (of which will also be ducted by ram air) I will see the full benefits of the larger 4" intake tubing.
Hopefully I'll have time to do the enclosure before moving back over to forced induction but if not, it will be for a DAMN GOOD REASON!
Hell yes it is. And how about that Civic man, you've neglected my updates over the phone man. Let me know something or direct me to a build thread....SOMETHING!
***UPDATE***
Matt and I realized that having the flanges made will take around 1-2 weeks in itself and because he can simply use an oem j37a4 exhaust flange gasket as a template for the programming, I decided on keeping the car until they're cut. At which point, the process should begin.
In the meantime, I've been making an updated Xmas list for my wife (haha) and will try and get the smaller things I've been needing since the setup was installed last year. Of course a LOT of attention is being planned towards thermal management especially now that she's (the car...not the wife) got AC. I'm also on the fence about switching over to e85 this time around which not only is cheaper and more knock resistant but would also allow me to rid the water/meth system and drop some weight. I must first determine which components in the fuel system will need upsizing and then weigh against the cost/work. Using this small basic formula will help me decide on running moonshine over 93 pump. Now that my confidence and comfortability in tuning exists, the decision I make will only affect expected power levels. Also in the formula is the convenience of 93 pump as e85 will be out my way. Decisions, decisions....
 12-28-2015, 12:20 PM
#1414
Instructor

dude i just stayed up to 1am last night reading your whole thread start to finish.
pure awesomeness
I understand reading parts fiche to find that one part that can work on your vehicle that is not custom. Also being willing to try things just to see if they work. My wife of almost 25 years just sighs and goes to bed.
got me inspired to go look for a 3.5 short block
pure awesomeness
I understand reading parts fiche to find that one part that can work on your vehicle that is not custom. Also being willing to try things just to see if they work. My wife of almost 25 years just sighs and goes to bed.
got me inspired to go look for a 3.5 short block
The following users liked this post:
yungone501 (12-29-2015)
12-29-2015, 11:08 PM
#1415
dude i just stayed up to 1am last night reading your whole thread start to finish.
pure awesomeness
I understand reading parts fiche to find that one part that can work on your vehicle that is not custom. Also being willing to try things just to see if they work. My wife of almost 25 years just sighs and goes to bed.
got me inspired to go look for a 3.5 short block
pure awesomeness
I understand reading parts fiche to find that one part that can work on your vehicle that is not custom. Also being willing to try things just to see if they work. My wife of almost 25 years just sighs and goes to bed.
got me inspired to go look for a 3.5 short block
***SIDE NOTE FOR ANYONE ELSE THAT MAY BE ABLE TO HELP***
I've recorded a few good clips that I'd like to post up on my YouTube channel but one of two things keeps happening. Either it doesn't let my large files to finish uploading and if it does, it says that the format (which is .avi files) is not a accepted format. I'm pretty sure all the videos on my channel are mostly avi format as I've pretty much always used the GoPro studio to edit them in the past but I'm not sure what the deal is and I've been DYING to share the sound with everyone! I've even tried editing the clips down to short 15-20 second scenes and still get the same messages about the format. Any helpful advice on changing formats when doing this? Btw, I'm doing this at home on a Windows based laptop "hot spotted" off of my 4g cell. Not sure if that even matters....
01-28-2016, 12:08 AM
#1417
Had my son take this short clip tonight from my phone and was surprised when it was a video I could FINALLY upload to YouTube and actually be watched. Lol. Though it doesn't show the overrun aspect of the tune I've been working on, it does show the flammage it spits at high revs. Now that I know cell clips can be uploaded/viewed, I'll get some other videos for everyone so you can see this beast in action.
Btw, turbo going back in within the next 2 weeks. About to get off here and load the kit up in the car and retire the car by the weekend to begin the process. It's about time...
Btw, turbo going back in within the next 2 weeks. About to get off here and load the kit up in the car and retire the car by the weekend to begin the process. It's about time...
01-30-2016, 05:33 PM
#1418
Got the exhaust system completely removed as well as the intake setup. Turbo is going back in!

Then a shot of a custom inconel heat shield that will be keeping unwanted heat out of the engine bay and in the turbo where it belongs.

Then a shot of a custom inconel heat shield that will be keeping unwanted heat out of the engine bay and in the turbo where it belongs.
The following users liked this post:
thisaznboi88 (01-30-2016)
The following users liked this post:
yungone501 (01-30-2016)
01-30-2016, 07:57 PM
#1420
Btw, i have a set of 4g TL/8g Accord PCD's and long tube j-pipe for sale. VERY little usage on all. Anyone interested, please PM me for first grabs before theyre posted up for sale in the black market.
Watch for more updates on the turbo install...the will be coming quick.
Watch for more updates on the turbo install...the will be coming quick.
01-30-2016, 10:38 PM
#1421
Like the heat shield, looks good
The following users liked this post:
yungone501 (01-31-2016)
The following users liked this post:
m_rgaan (02-04-2016)
01-31-2016, 09:18 PM
#1425
I know, I've been creepin your thread. Looking good so far.
Cleared.
Just wanted to add that I've got my work cut out for the next few days or so. I've got to reinstall my AFR, boost pressure, fuel pressure, oil pressure and oil temp gauges still. I've also picked up some EGT sensors and have them to install plus their own module. Have to slant the radiator forward to make up for the new cooling fan shroud I've added since last time around. My oil cooler and thermostat needs to be installed....another heat exchanger to the already crowded space up front. This will make a total of six heat exchangers and I'm afraid I'll be forced to do something extreme such as relocation on one of them if I begin to have cooling issues. And because it would be cooling issues that will drive the decision, it would be smart to do something such as a rear (trunk) mounted setup and not ever have to worry about the problem again. The of course means a LOT of work.

The following users liked this post:
teh CL (02-02-2016)
 . MPG? Idle? smog?
The following 3 users liked this post by yungone501:
02-05-2016, 07:15 PM
#1435
Originally Posted by ThinJim
Nice work. Are you or anyone interested in these rockers for the J? They increase lift with a 2mm larger roller and you are always on the vtec lobe. I have a source.
No VTEC and aluminum...
02-05-2016, 09:51 PM
#1437
I'm sure they're the same. See this article:
1991 Acura NSX - Race To The Clouds
Under "Bolts and Washers" for the powertrain, it lists parts/mods and one of them is "Accord VCM aluminum rocker arms". The MDX and RDX with J35 use them too.
1991 Acura NSX - Race To The Clouds
Under "Bolts and Washers" for the powertrain, it lists parts/mods and one of them is "Accord VCM aluminum rocker arms". The MDX and RDX with J35 use them too.
The following users liked this post:
teh CL (02-06-2016)
02-05-2016, 09:59 PM
#1438
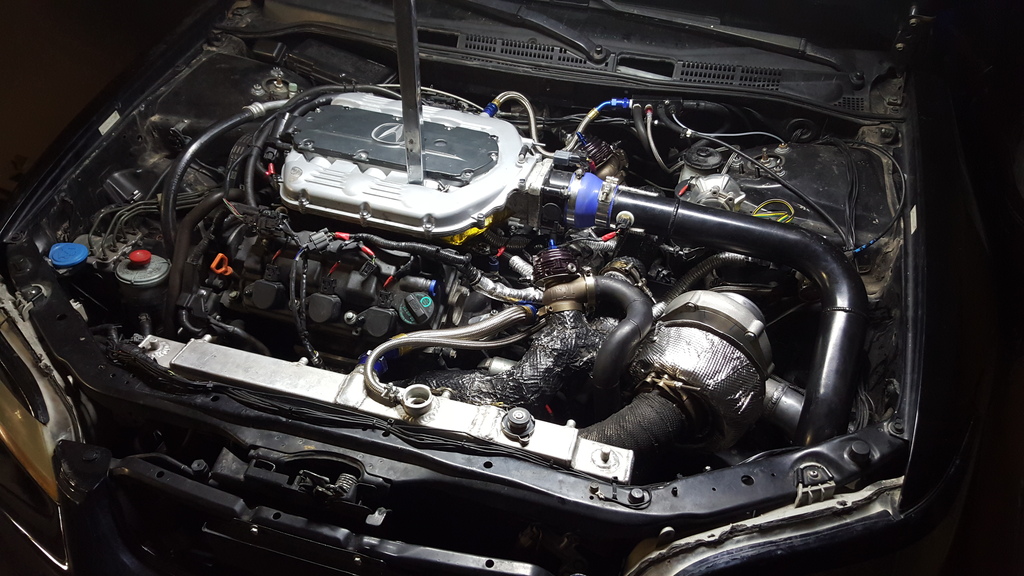
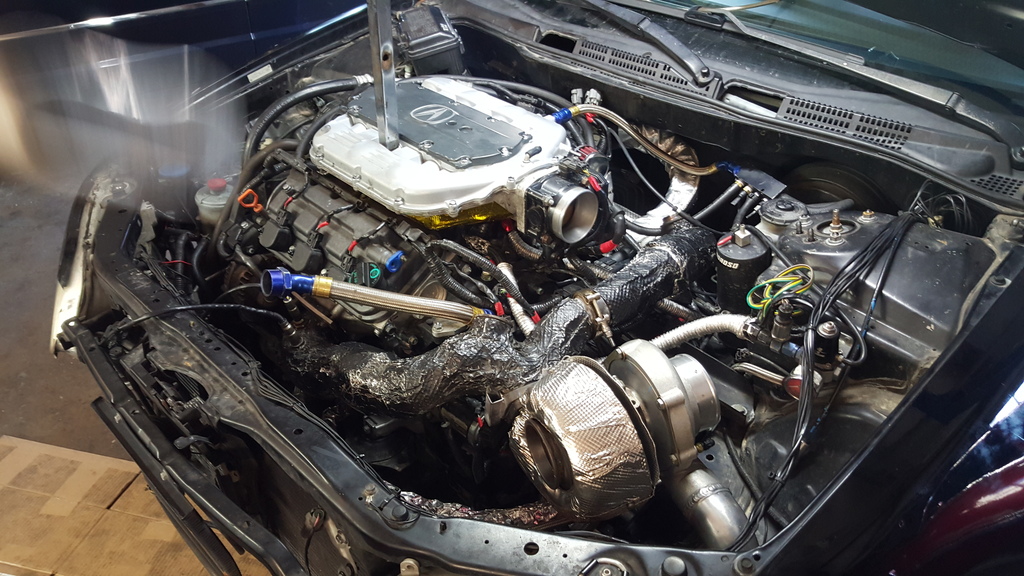
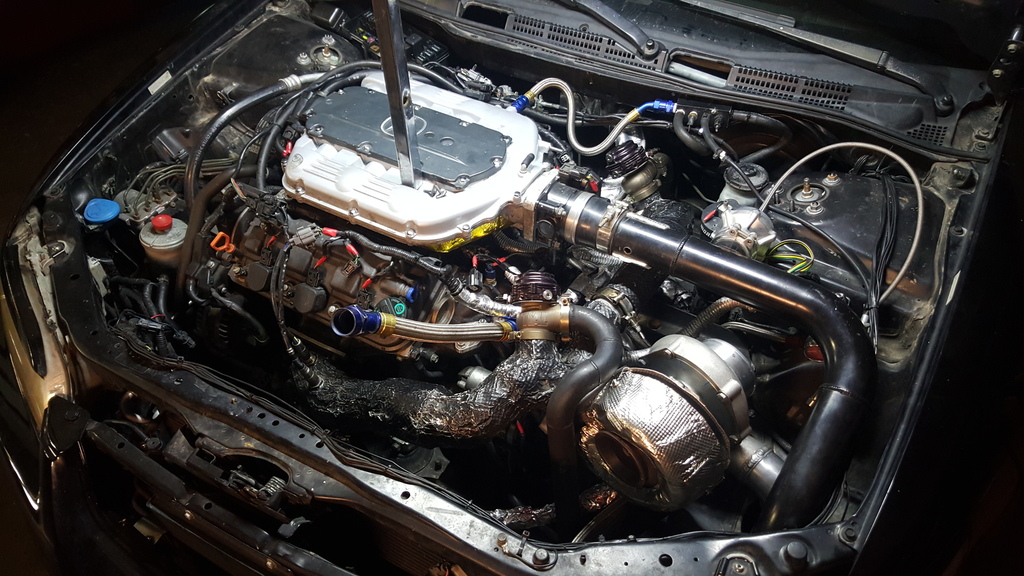
Here's an updated picture of how things are going with the Accord. The radiator is installed but there wasn't enough room to install the shroud/fans so I'll be doing what I can tomorrow to modify them in hopes of decreasing their height so they can be installed. Though hopeful, I'm not entirely sure it's possible as I literally have one area in front of the downpipe that has less than 3/4" between it and the rear of the radiator itself. Aside from that, I have the wastegate and blow off valve lines to connect and then add the necessary fluids to the engine left before starting her up. Though I'm pretty damn anxious to drive it, I'm concentrating hard on not rushing any part of the process or skipping any steps so that I can ensure a reliable setup. Should have the tuning process started this weekend and this I can't wait for.
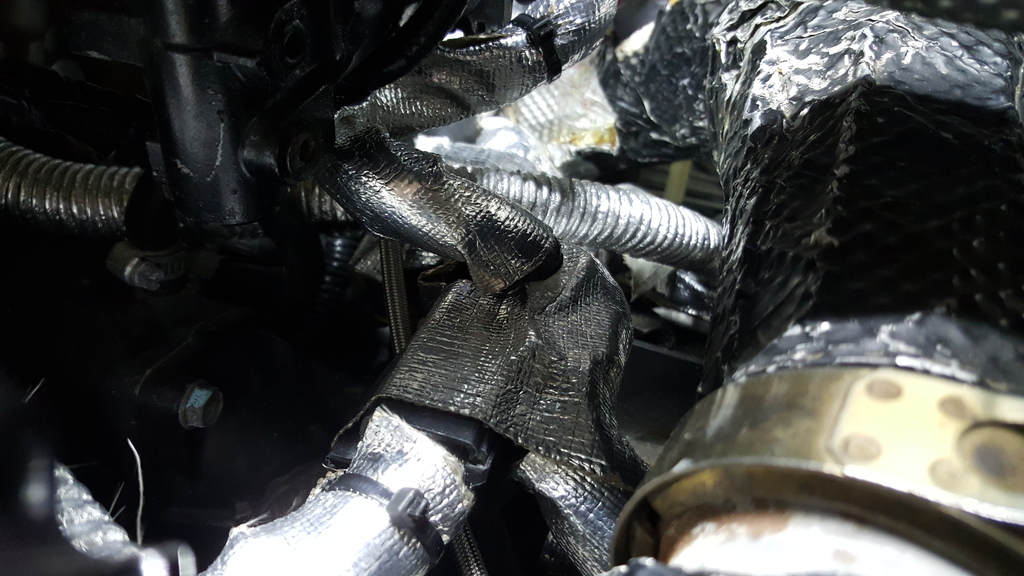
Figured I'd take a pic to show the extent at which the heat shielding was done to protect the wiring harnesses as well as other things "too close for comfort". I also ordered a silicone based coating that's originally made for furnace resurfacing and use it to protect/improve the appearance of the turbo manifolds. It can withstand temps well over 2000 F and though I've never used the product before, it's looked like a perfect product to coat the already existing manifold heat shielding. We will see...

A quick snap of the front showing the intercooler and bumper fitment. It's good to see her back like this again!
Last edited by yungone501; 02-05-2016 at 10:04 PM.
The following users liked this post:
teh CL (02-06-2016)
02-08-2016, 10:31 PM
#1439