Acura TL 2009-2014: How to Replace Starter
You turn the key and hear the starter click, but it doesn't whir to life and start the engine. Sometimes a tap on a solenoid with a stout screwdriver can fix it temporarily, but usually, even after this works a couple of times, without the starter you'll become stranded. Changing the starter out isn't too difficult, but there are some issues involved. Read through this how-to to discover what's involved.
This article applies to the Acura TL (2009-2014).
The starter is the part that gets things going in your engine. The starter uses electricity to spin a small gear against the flywheel, which in turn spins the engine to life. Usually a starter will either work or it won't. Sometimes you can coax them back into working, but that's usually only temporary. Changing it out yourself, while being a little bit of a chore, can not only be rewarding but can also save you some money in the process.

Materials Needed
- Metric tool set
- Breaker bar
- Nitrile gloves
- New starter
Step 1 – Retrieve the radio/navigation codes
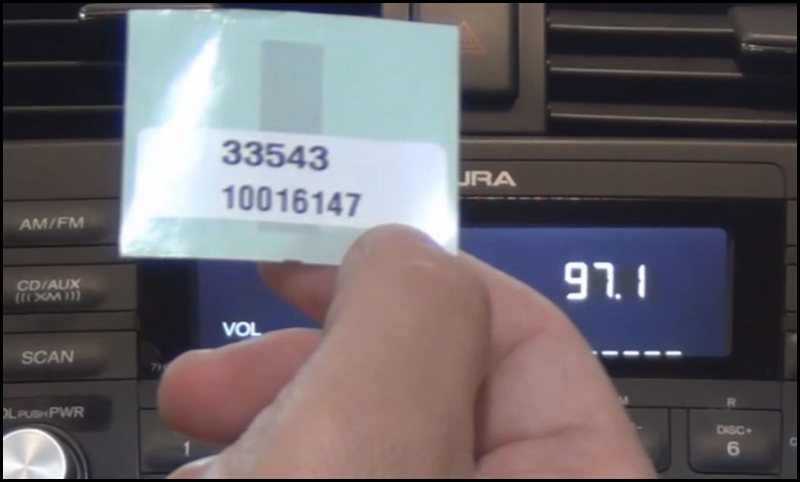
If you don't already have them, retrieve the five digit radio and four digit navigation codes. There are three basic places where the code might be. First, look in the owner's manual. Originally, there was a card which came from the factory with the code on it along with the serial number. Second, it may have been written in the maintenance manual by the technician who first worked on the car when it was received by the dealership. Third, the code may be on a nondescript white sticker, which would have been placed either in the glove box or in the trunk, again, by the first technician.
If the code cannot be found in any of these places, all is not lost. Retrieve the serial number of the radio from the radio itself by pressing the 1 and 6 buttons at the same time, then pressing the "on" button. The eight digit number will appear in the display in two segments. Call Acura Client Services at 1-800-382-2238 with your VIN as well as the serial number and they can give you the code. After you are sure you have the radio code, disconnect the battery.
Step 2 – Remove the battery
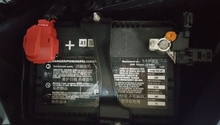
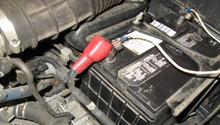
Open the hood. Remove the engine cover which runs on the driver's side and down the front of the engine bay. In front of the battery, remove the four plastic rivets, then remove the air filter intake vent (Figure 2). Starting with the negative terminal, disconnect the battery cable. Then remove the positive battery cable. Loosen the J-bolts at the front and back of the battery which are used for the battery tie down. Once these are loose enough, you should be able to unhook them at the bottom which will allow you to pull the J-bolts, retaining strap, and battery out of the vehicle. Remove the protective battery shield/cover as well.
Step 3 – Remove the battery tray
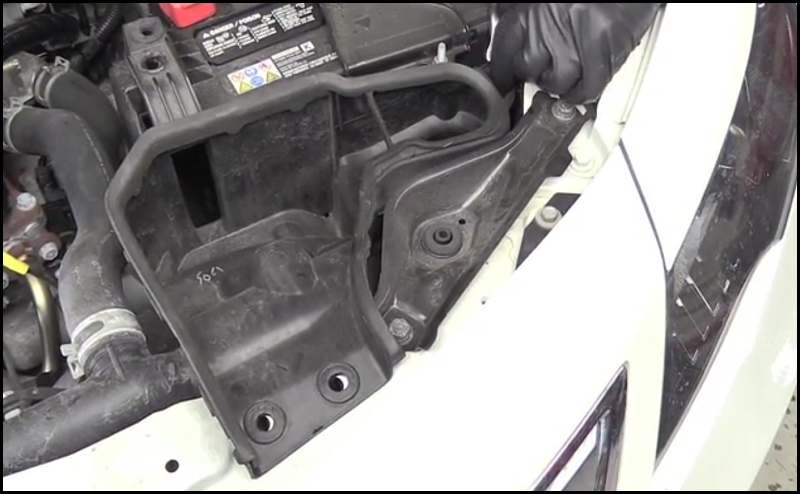
The battery tray is a little more difficult due to having to reach two bolts which reside under the battery tray. These two bolts better hold the battery tray support to the body of the vehicle. To find these two bolts, you have to reach around and under the tray. The holes for these two bolts can be seen where the green arrows point in Figure 3.
There are three bolts up top which will need to be removed, as seen in Figure 4. The red arrows are the same positions (from the opposite side) of the battery tray in both Figure 3 and Figure 4. The fastener in the orange circle in Figure 4 will also need to be removed. This supports one side of the air filter assembly.

Figure 3. Battery tray bolt locations. 
Figure 4. Battery tray top bolt locations.
Step 4 – Replace the starter
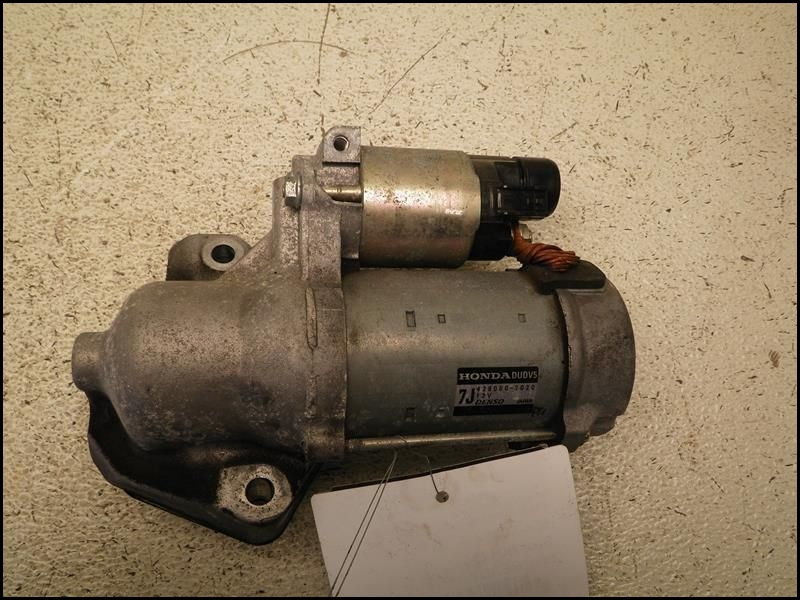
With the battery tray removed, find the starter to the left of where the tray was located, bolted to the engine. Remove the solenoid connection, which is a slip connector: it will pull right off. Next, loosen and remove the nut on the solenoid where the main battery lead connects to it. Pull the wire from the starter. Loosen and remove the two bolts holding the starter to the engine. Remove the starter (Figure 5).
Put the new starter into place and secure using the bolts. Reconnect the main battery lead and slip the solenoid connection back into place.
Step 5 – Reassemble
Replace the battery tray, remembering to use all five bolts. There is one bolt which can be left in place to help align the tray support as the hole in the tray is slotted (Figure 3). Ensure this is in place first and reassembly becomes much easier. Replace the bottom part of the battery shield and battery onto the tray, then reconnect the J-bolts hooking them into place before tightening. Reconnect battery cables, starting with the positive lead first, then the negative. Replace the top part of battery shield. Replace the air filter intake vent. Replace engine cover.
Step 6 – Re-code the radio
Using the code obtained in Step 1, turn on the vehicle to see "code" in the display. Input the five digit code and the radio should become live again. Recode the Navi if so equipped.
Featured Video: How to Replace Starter on Honda/Acura V6
Related Discussions
- Long Cranking Before Starts Also Chirping Noises Engine - AcuraZine.com
- 4G TL Screech Cold Start - AcuraZine.com
- Car Won't Start - Help! - AcuraZine.com