Mothers Powerball Headlight Restoration Kit (Before and After Pictures)
 10-15-2012, 05:36 PM
#1
Moderator
Thread Starter
iTrader: (3)

I'm no pro detailer by any means but I figured I would give a look into this product that I've been using for about a year now.
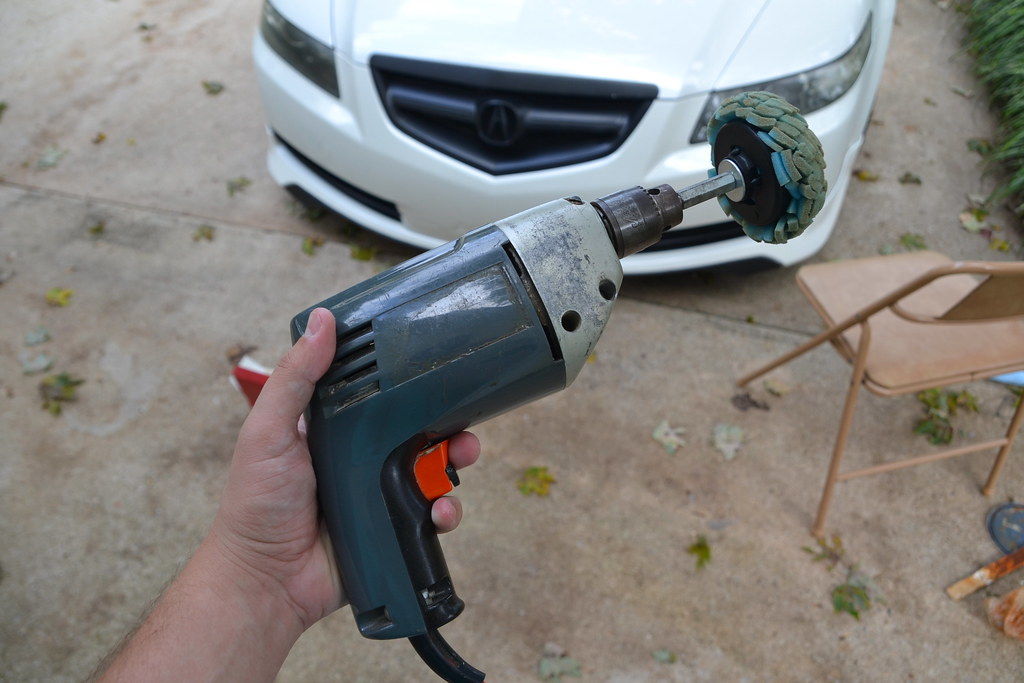
MAKE SURE YOU HAVE A POWER DRILL BEFORE BUYING THIS PRODUCT!

I bought mine at AutoZone but you can get it at Wal-Mart. Price hovers around $20, give or take a few bucks. Here's what you get...

So it's pretty basic and easy to use. You apply the liquid to he headlight and buff it off with the foam ball. Make sure you constantly move the ball around so you don't heat the plastic too much. I do the headlights two times. I don't have fancy detailer lingo as you can see so just take my word for it on how easy it is

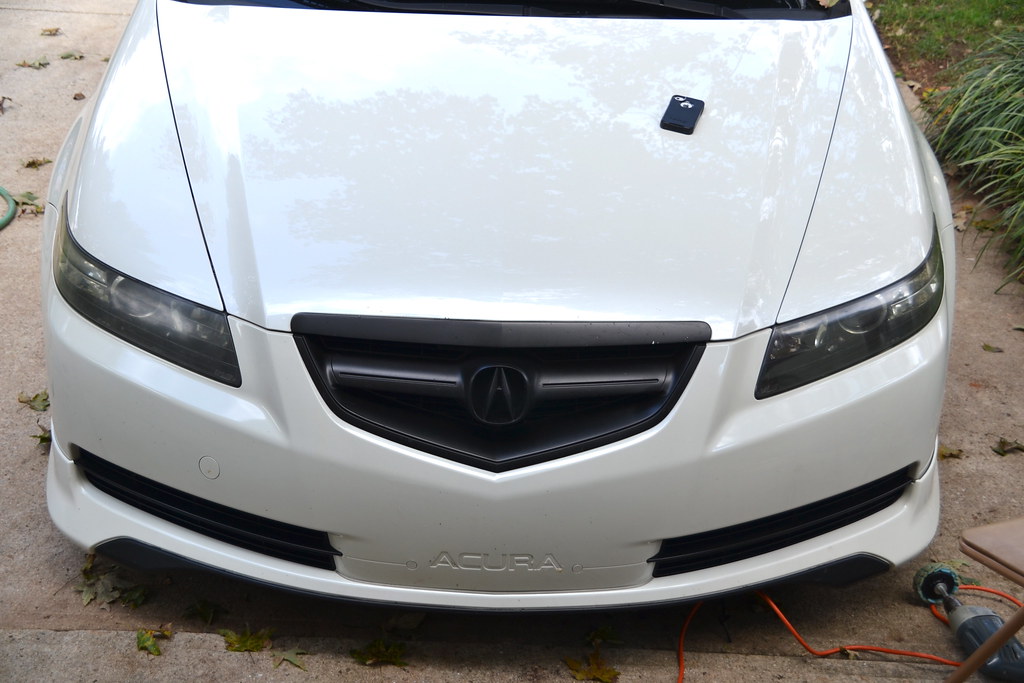
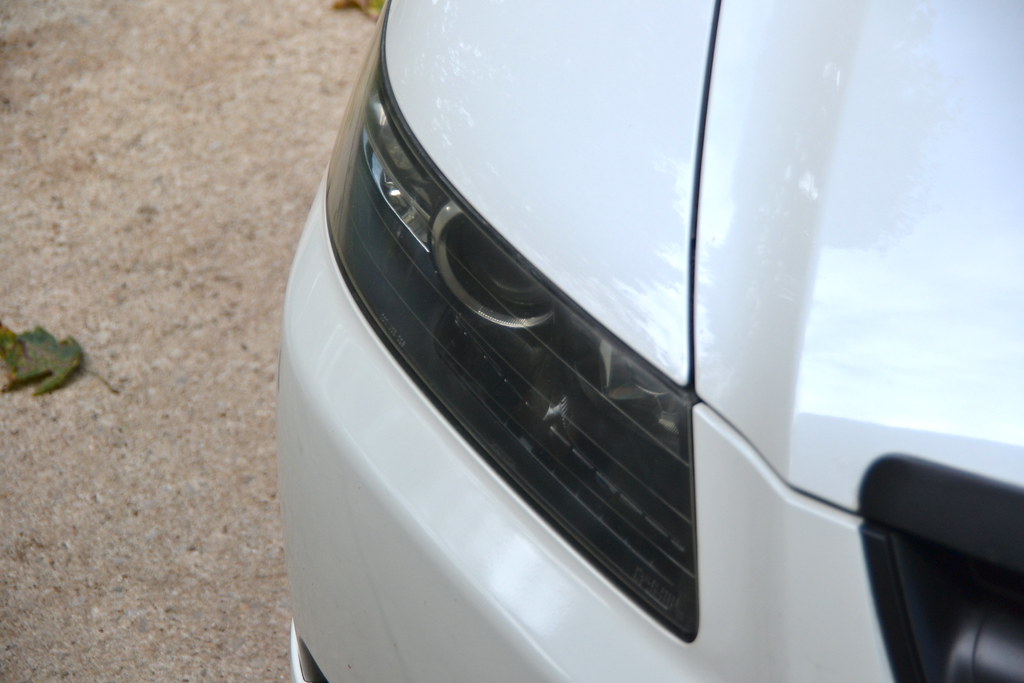
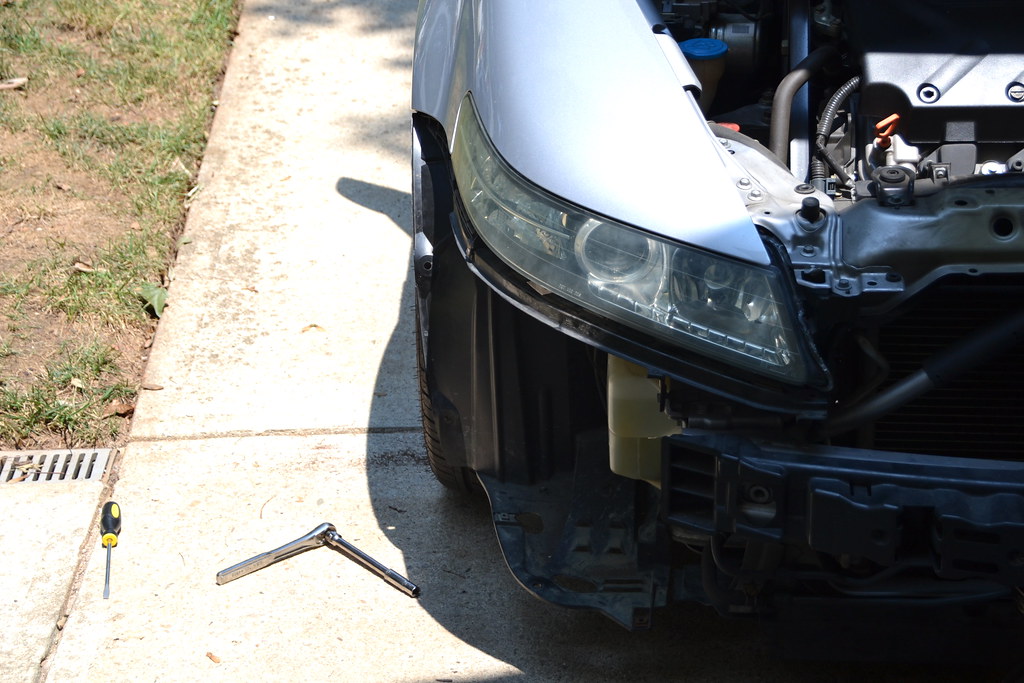
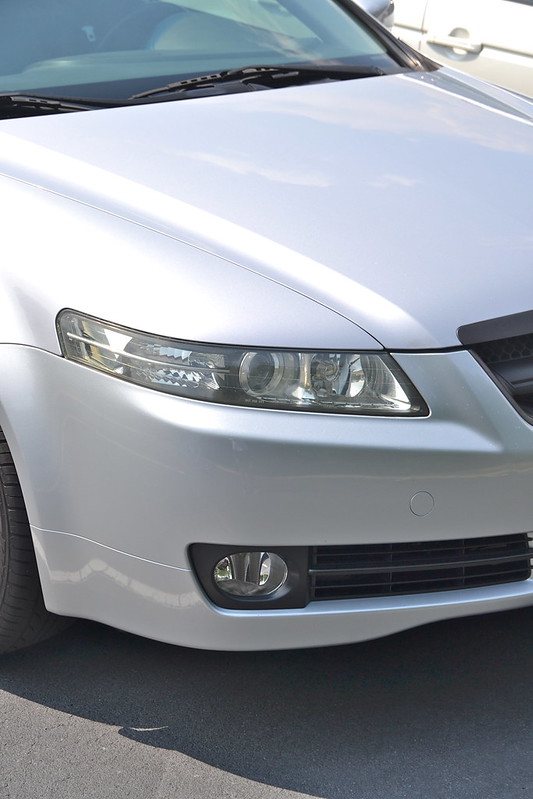
First I used it on my 2004 TL. Before...
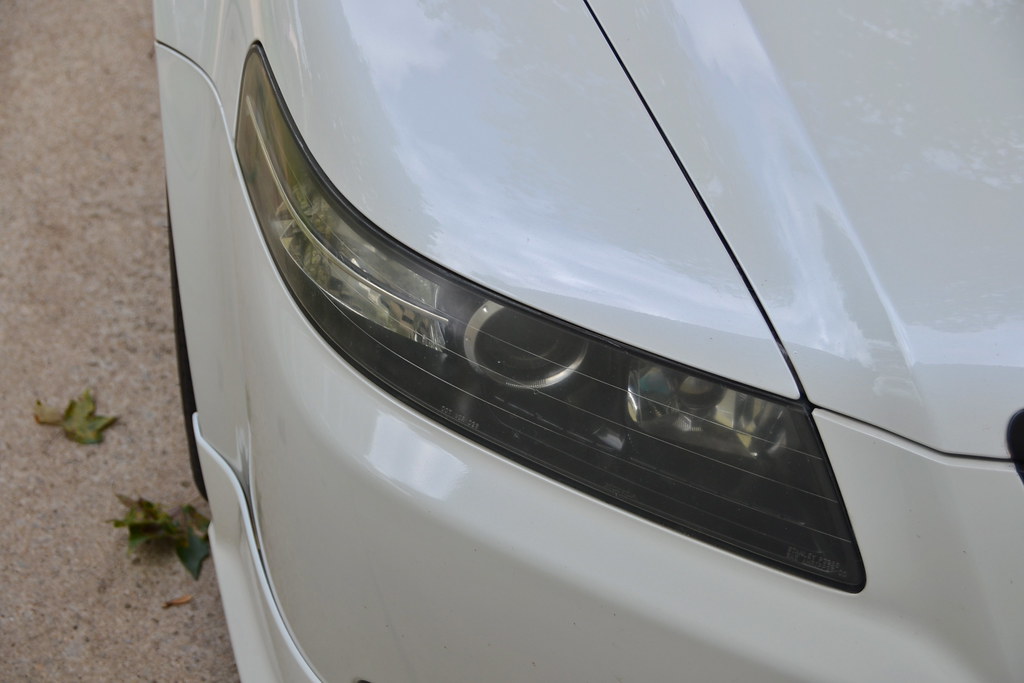
They don't look that bad but they were

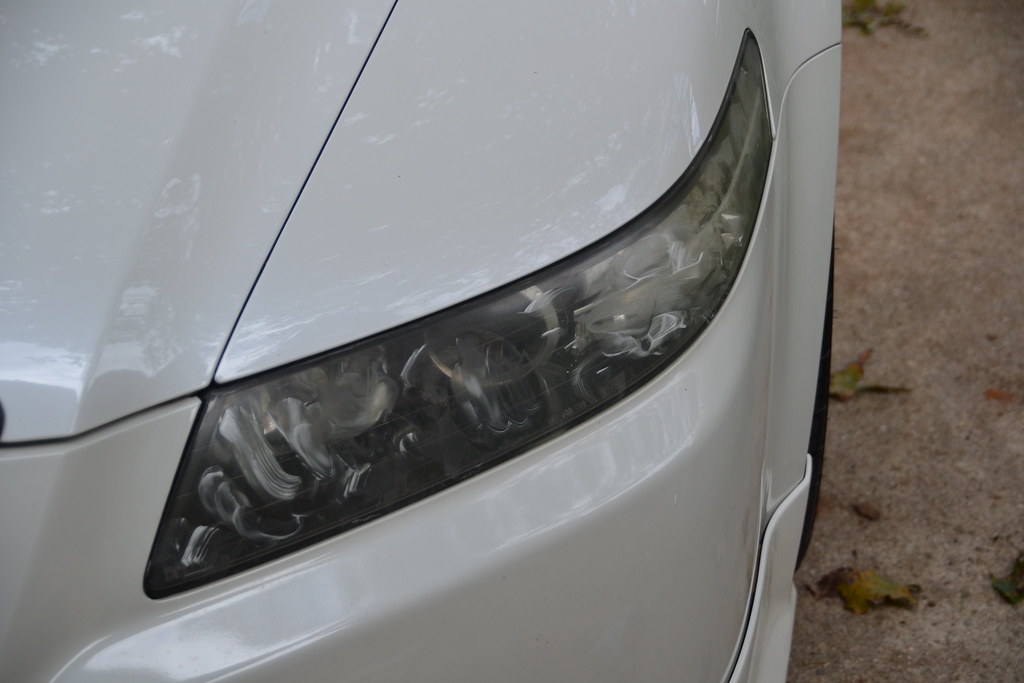
Next applied the polish. As you can see, I use A LOT more than recommended. I'm a rebel

My suh-weet drill...
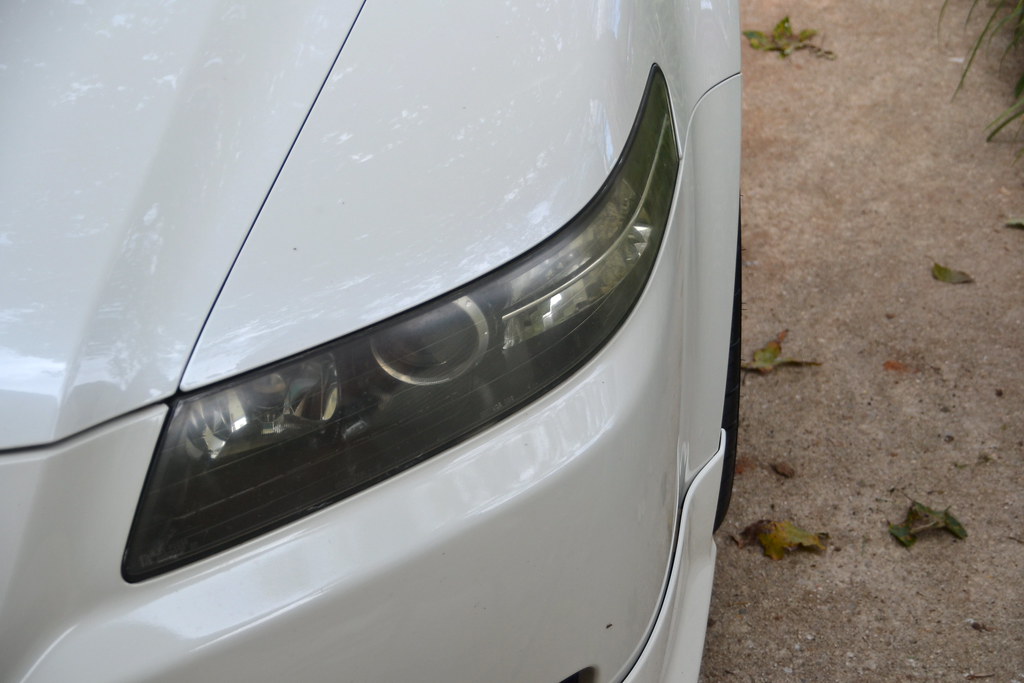
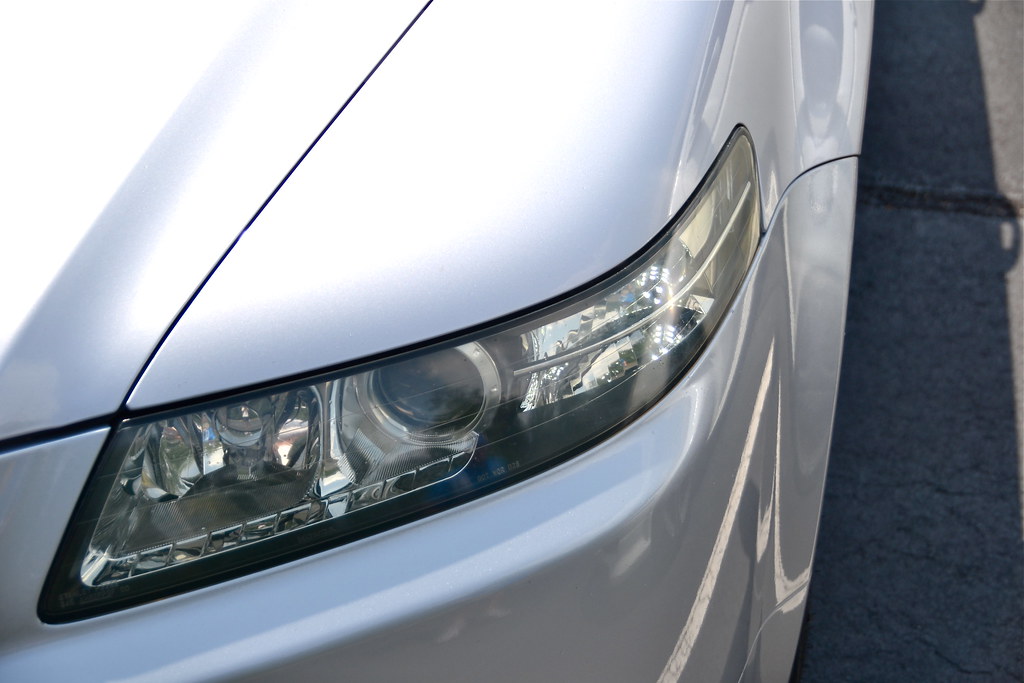
Driver's side done, passenger side untouched...

Once again, this is the passenger side that hasn't been done yet...
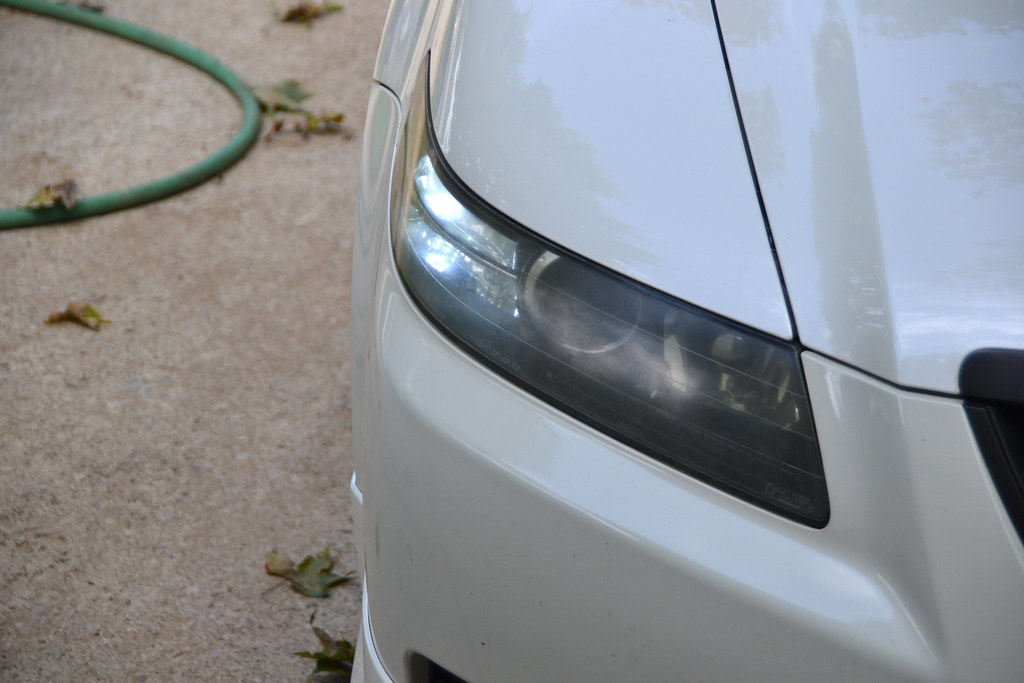
Drivers side done...
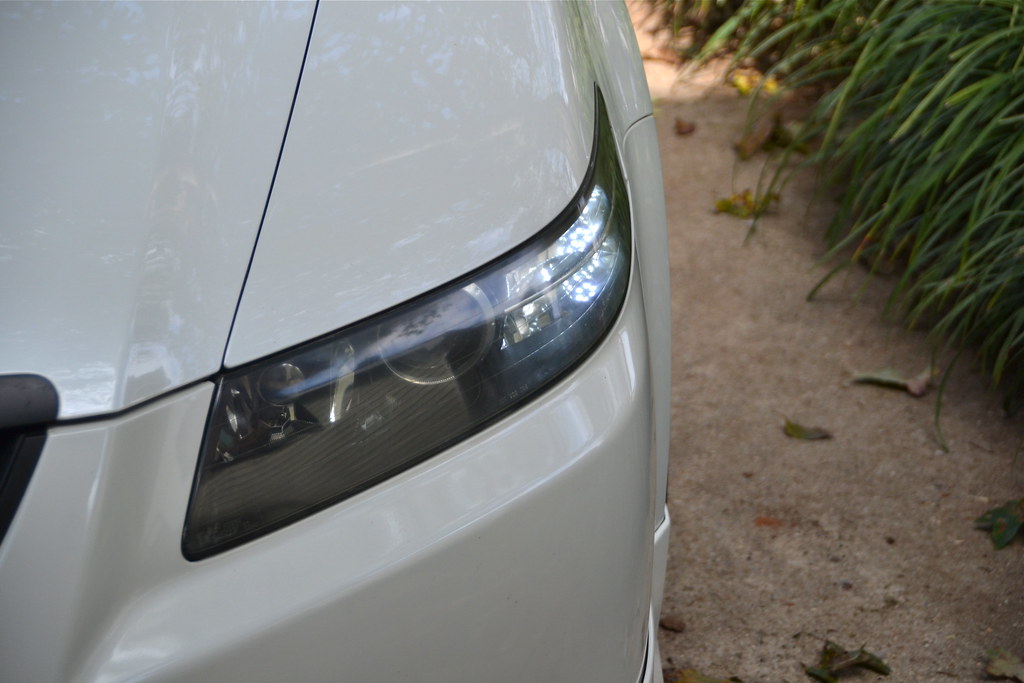
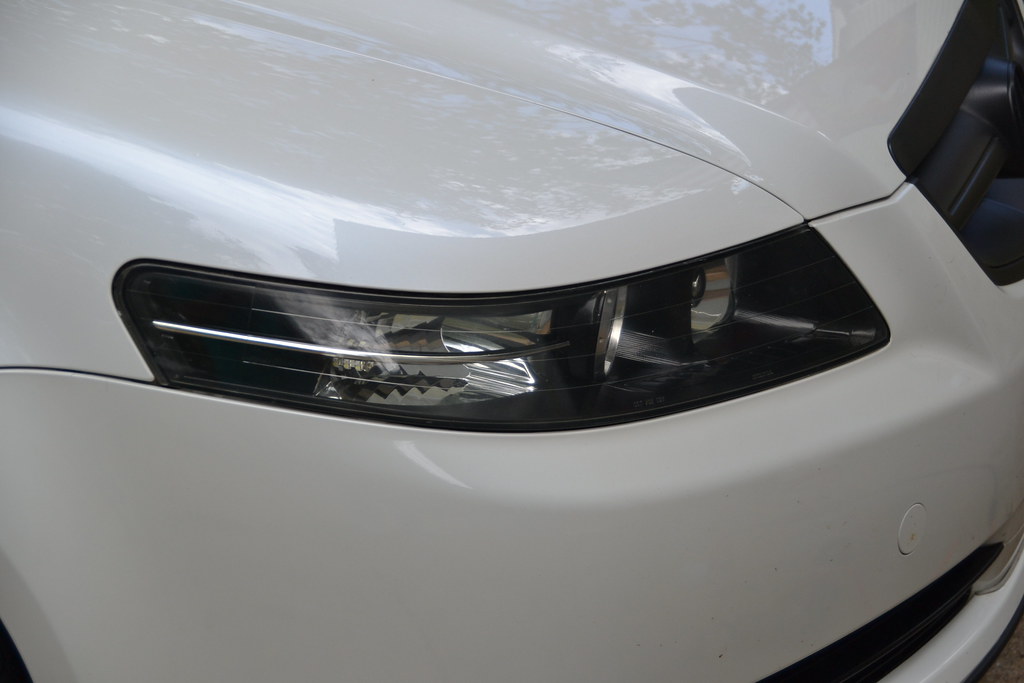
BOTH lights done...

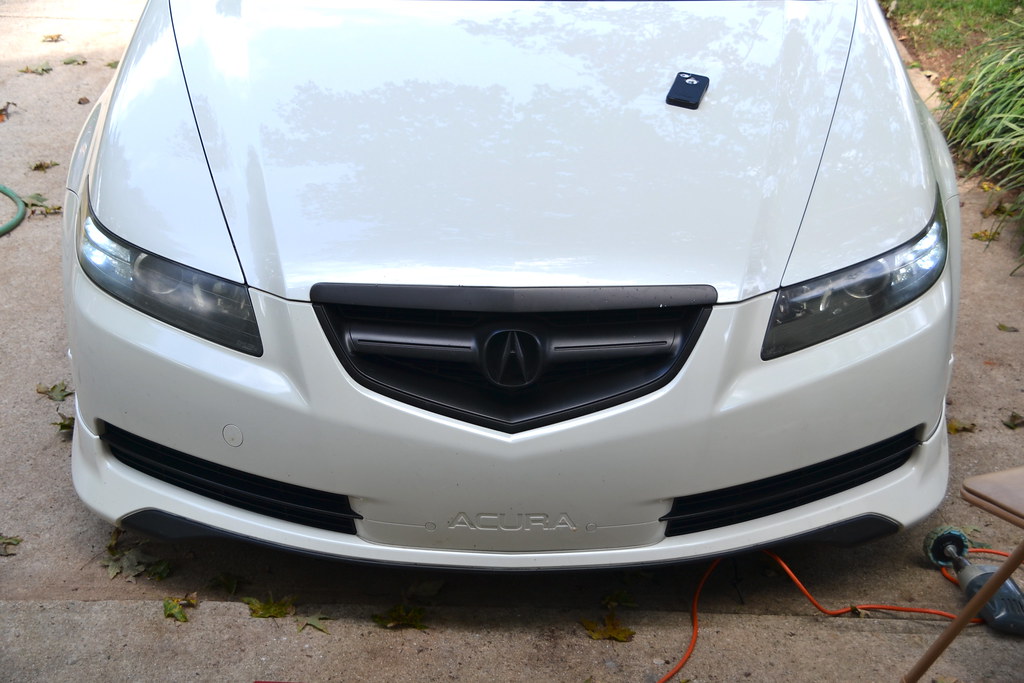
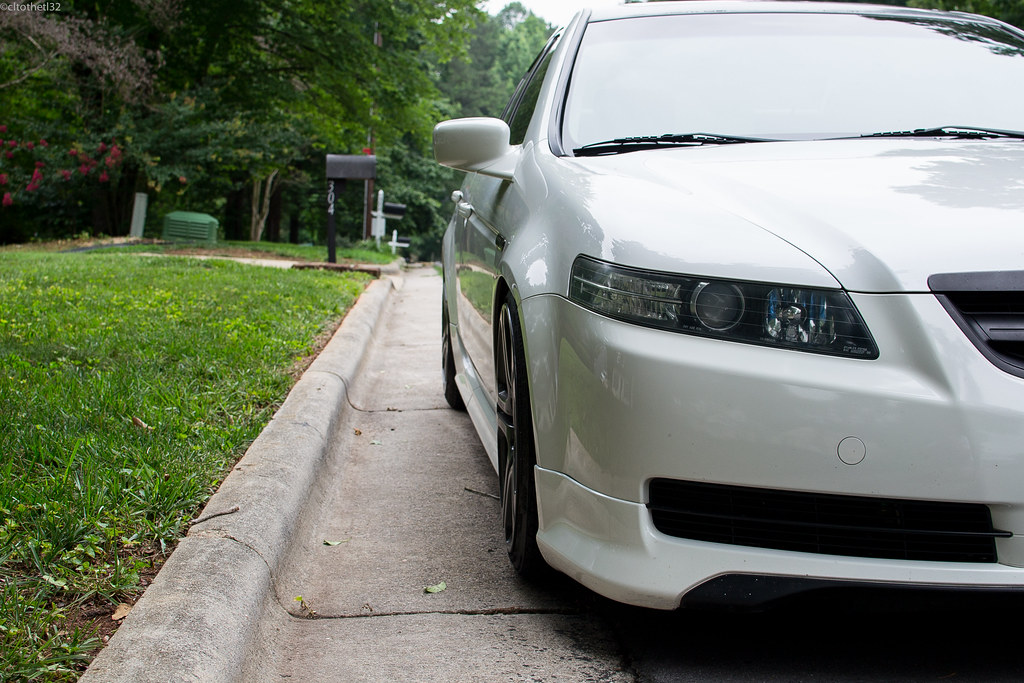
Before...
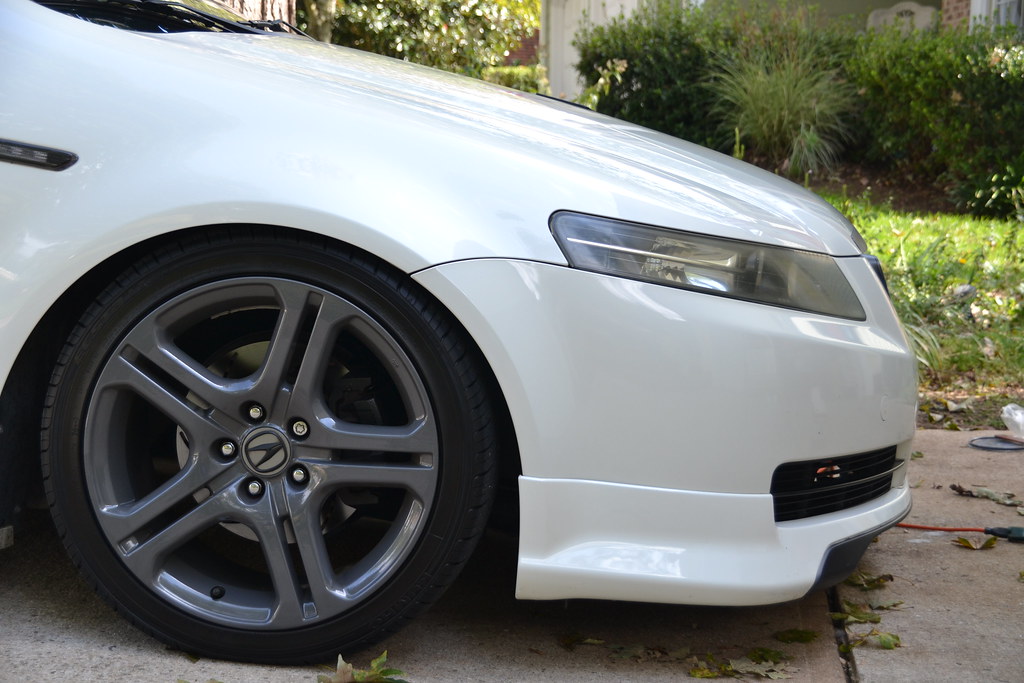
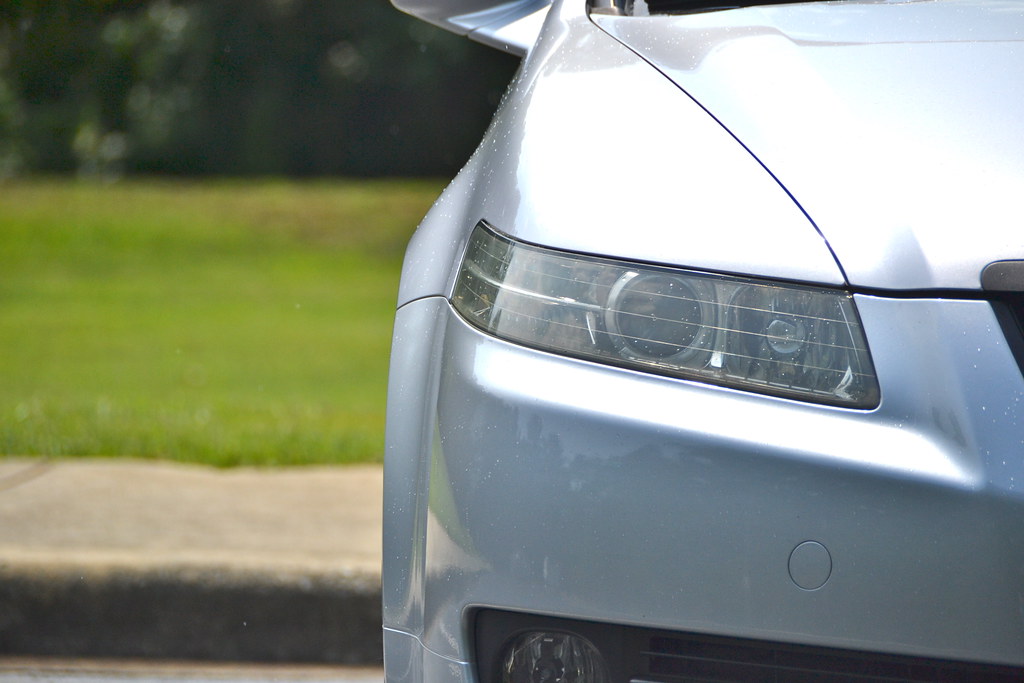
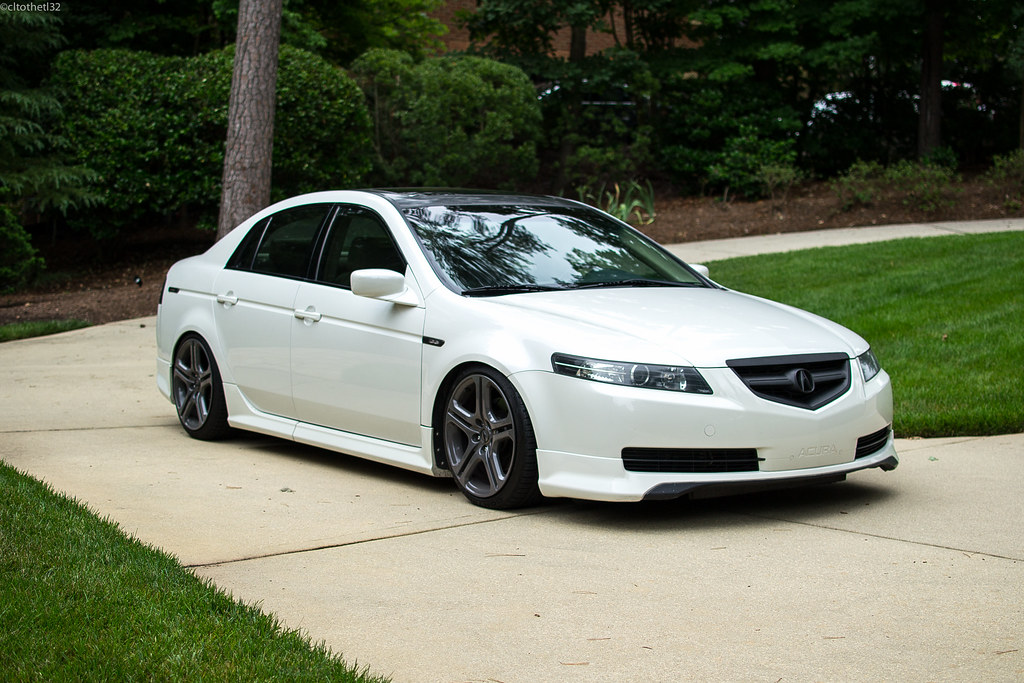
After...
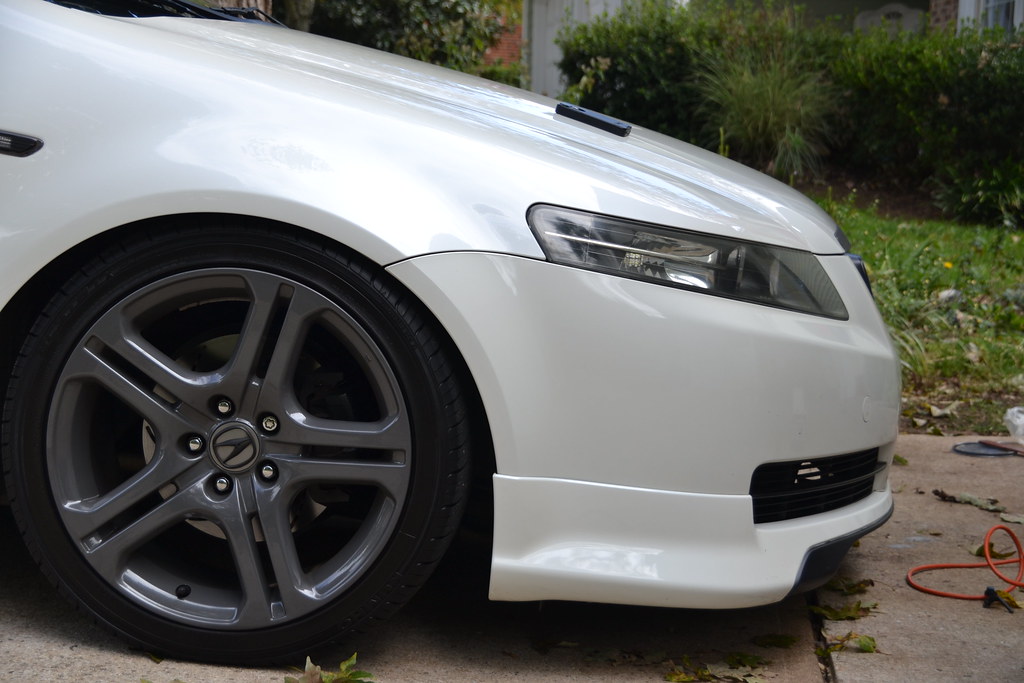
Yes I know my front lip doesn't fit perfectly and I know my front grill has a chip. My car is nowhere near perfect.
And if the TL wasn't enough, I did my mom's 1997 Dodge Intrepid as well

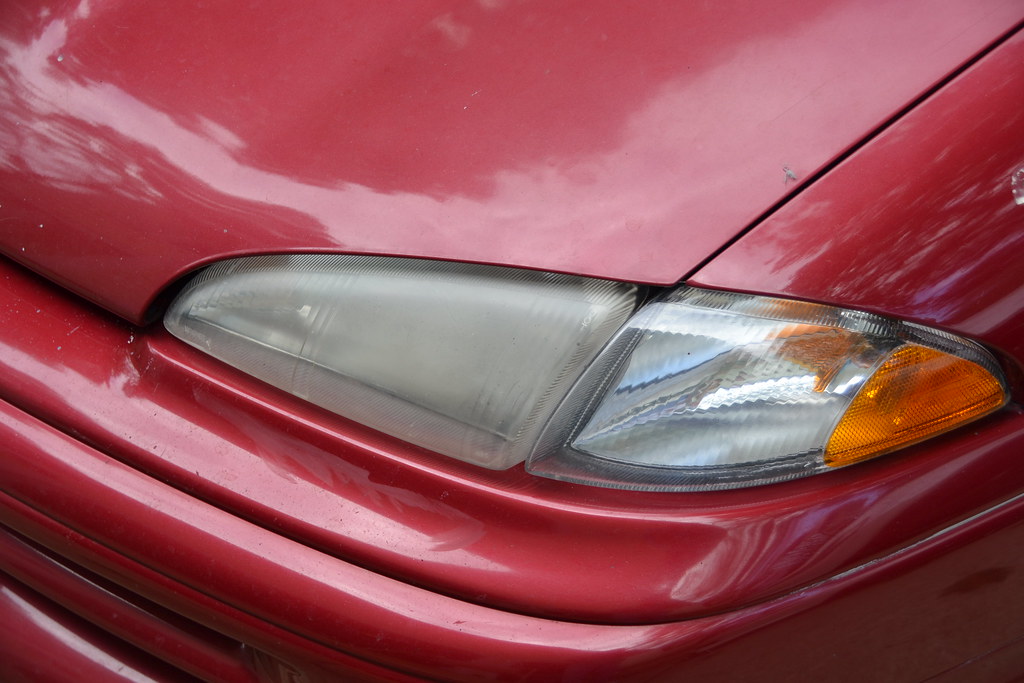
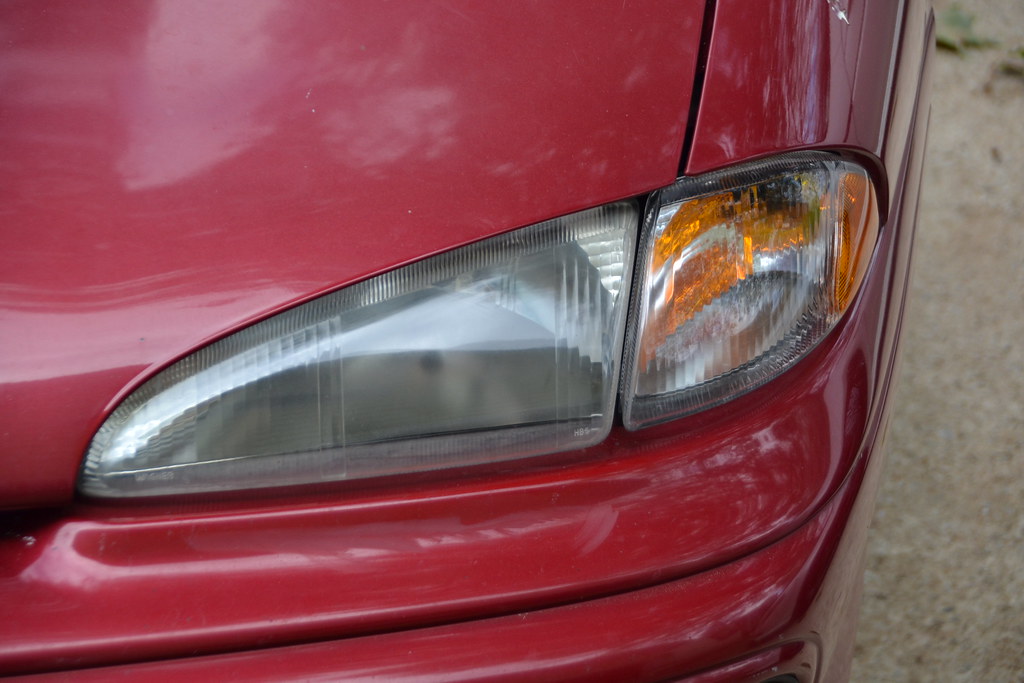
Drivers side done, passenger side untouched...
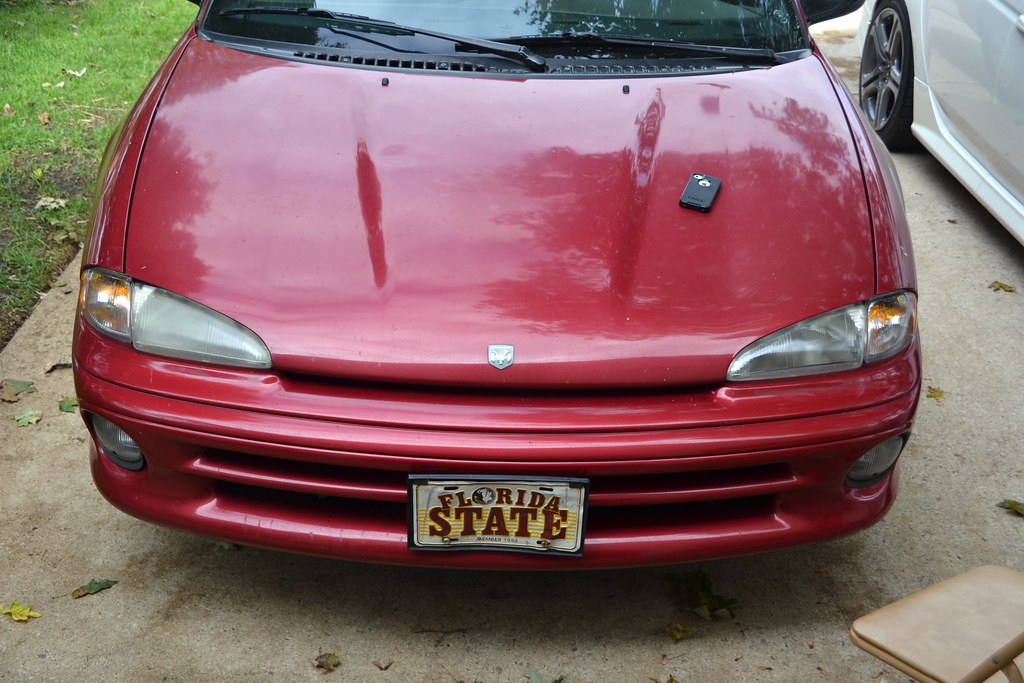
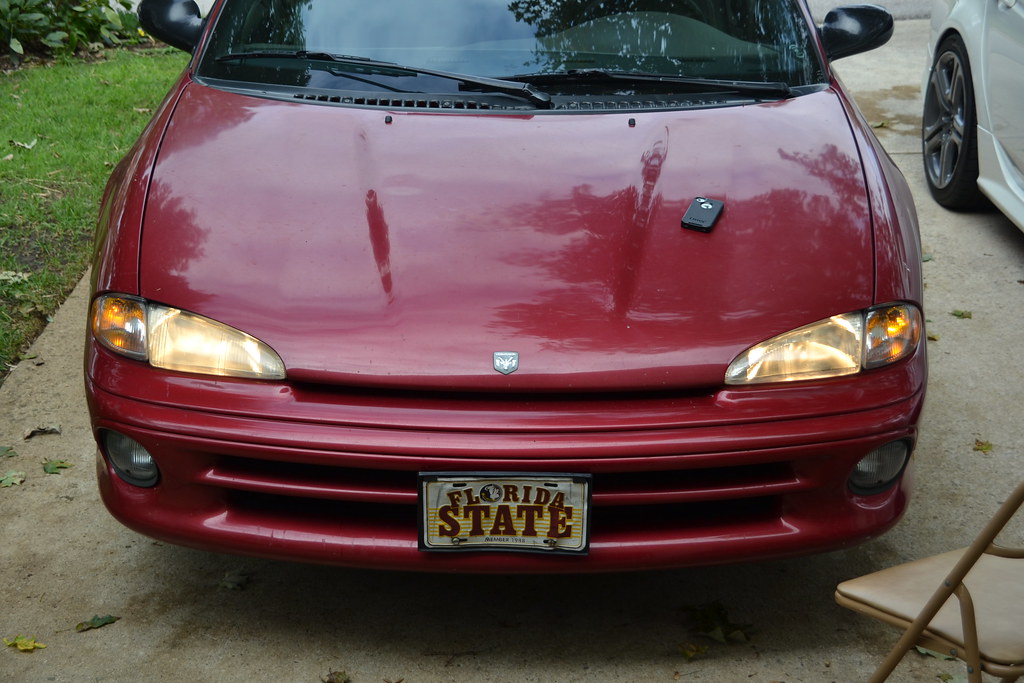
Both done...
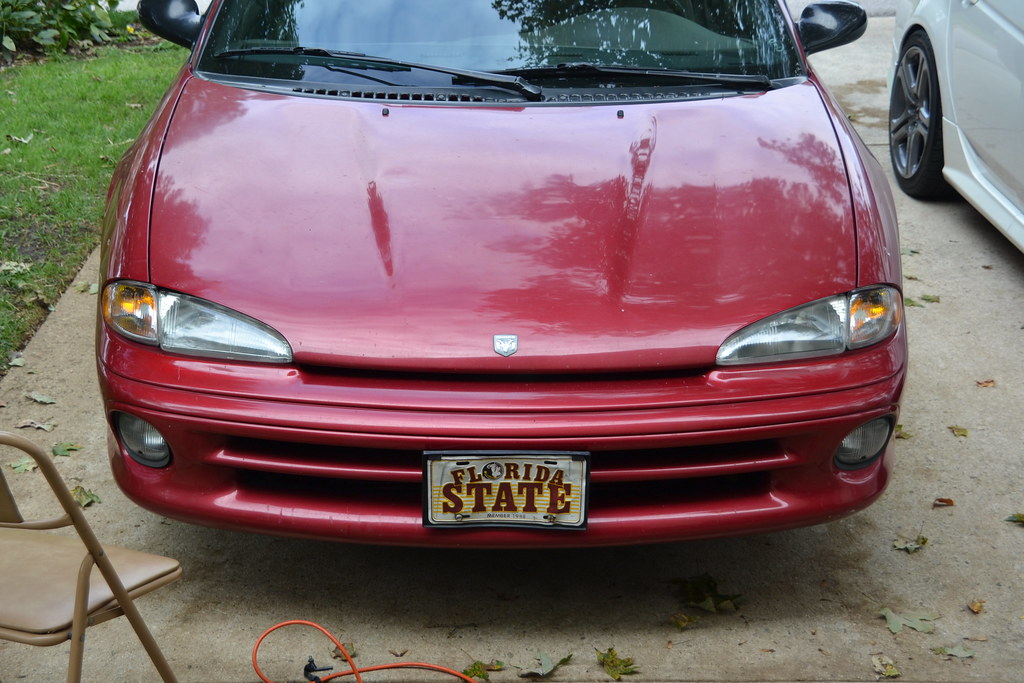
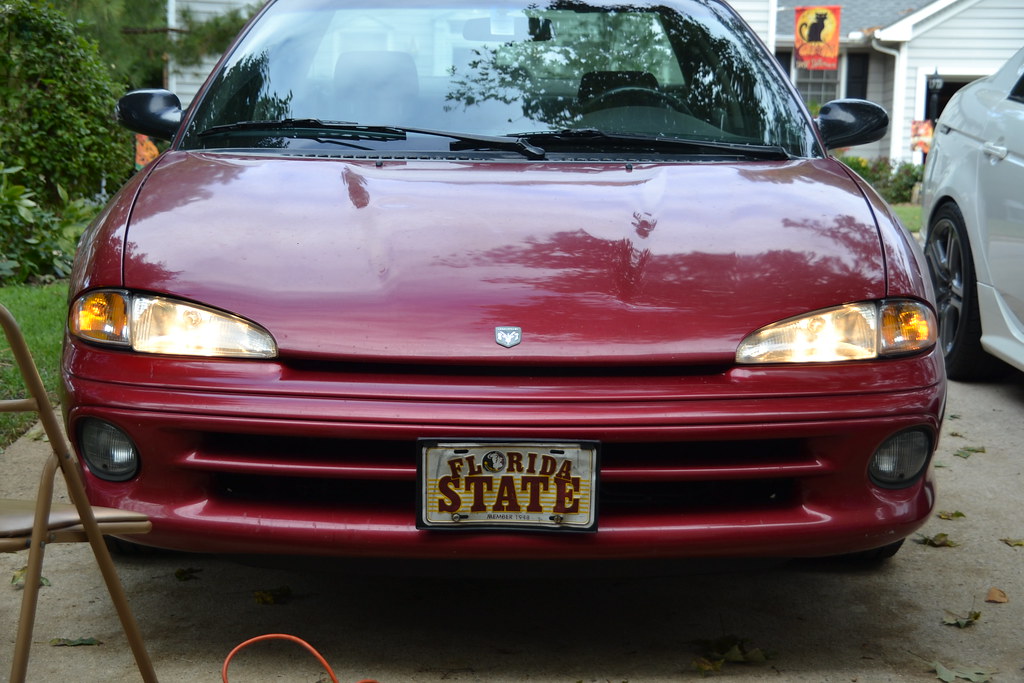
Yes the front plate is bent. A truck blew a tire on the highway about 12 years ago and we hit it. Battle scars ftw.
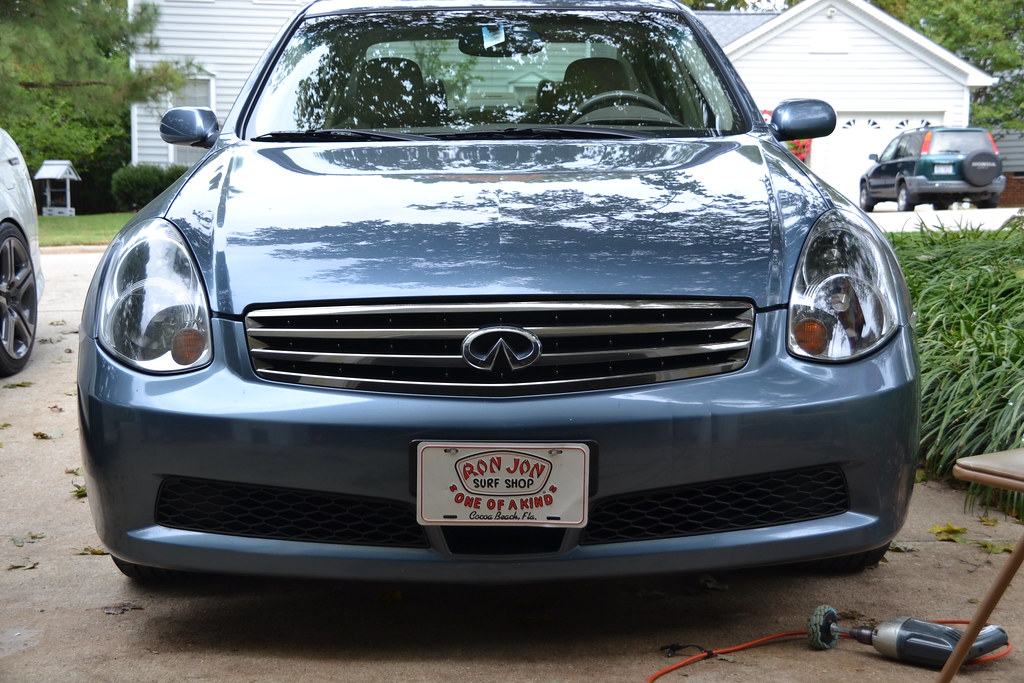
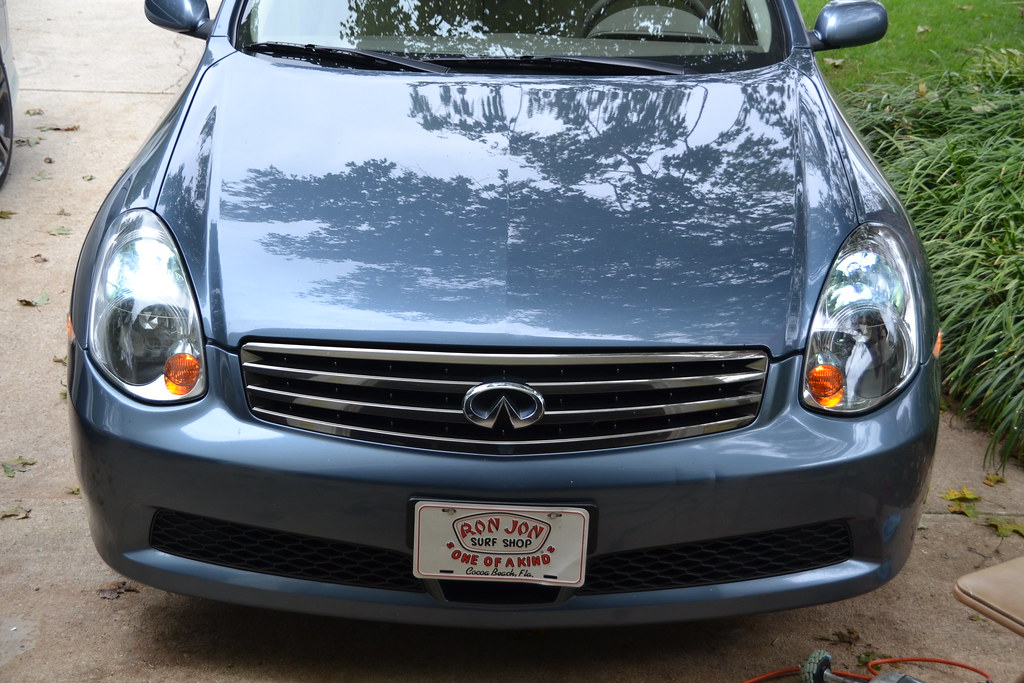
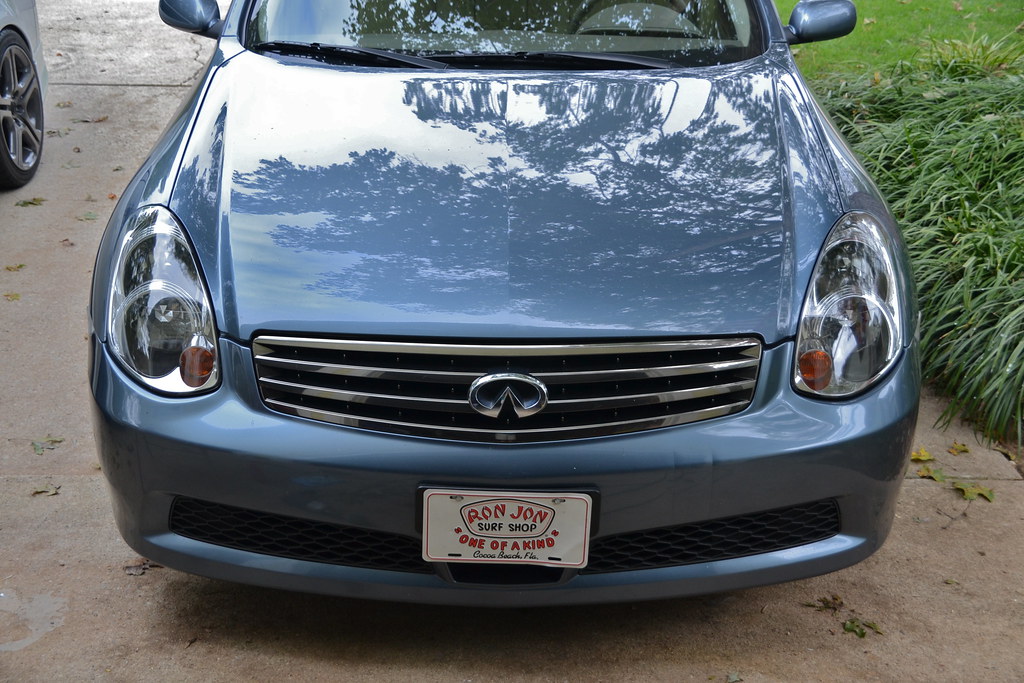
And just when you didn't think I had more pictures, I did my dad's 2005 Infiniti G35x as well

Before...
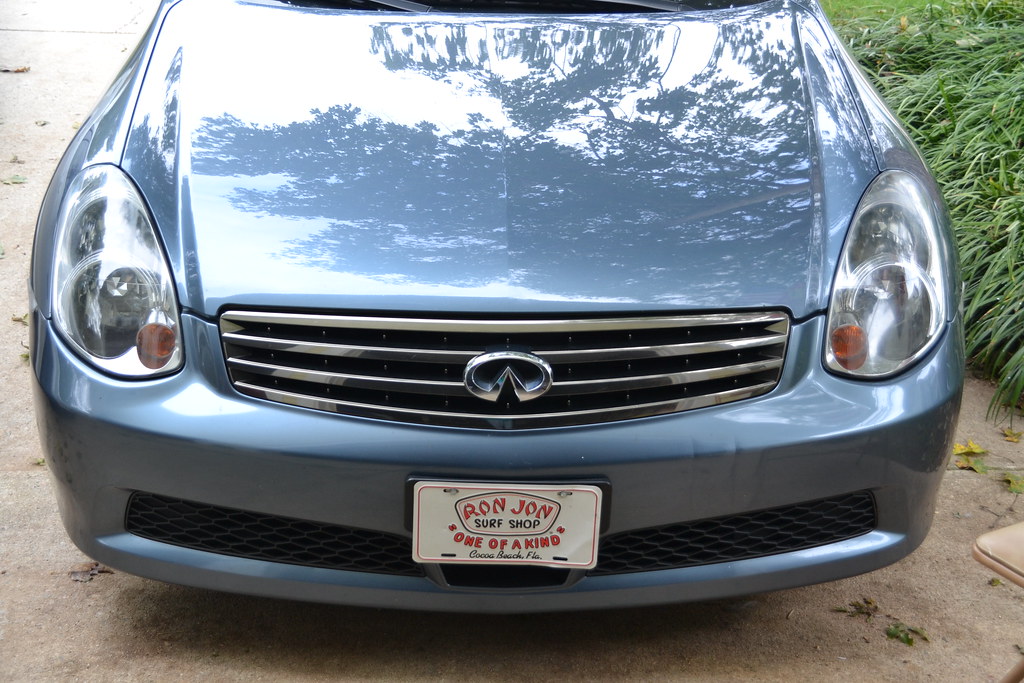

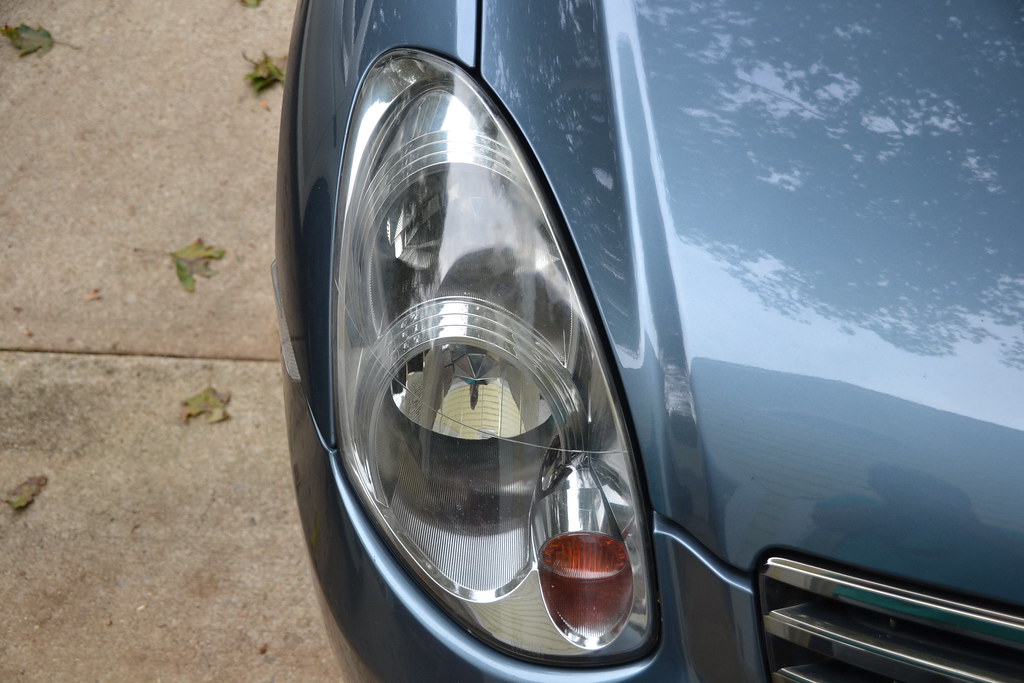
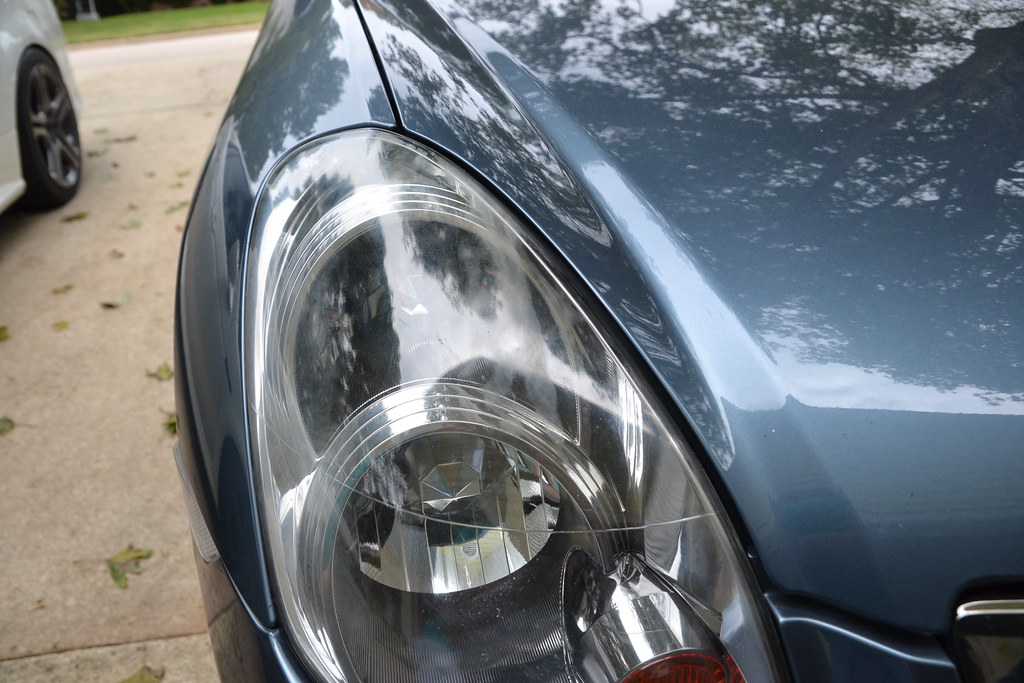
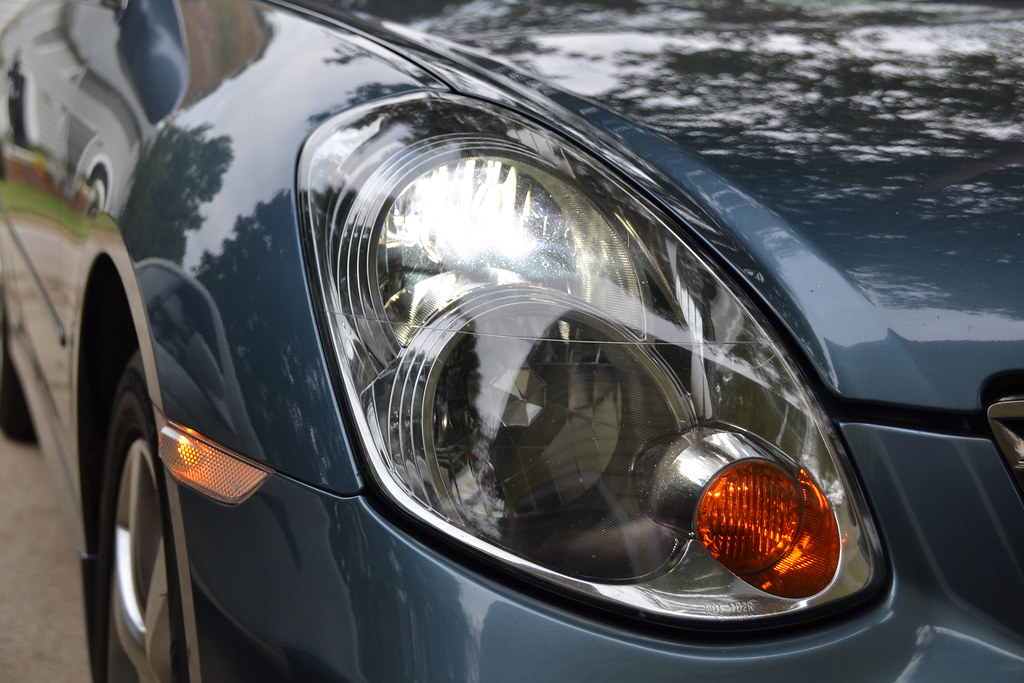
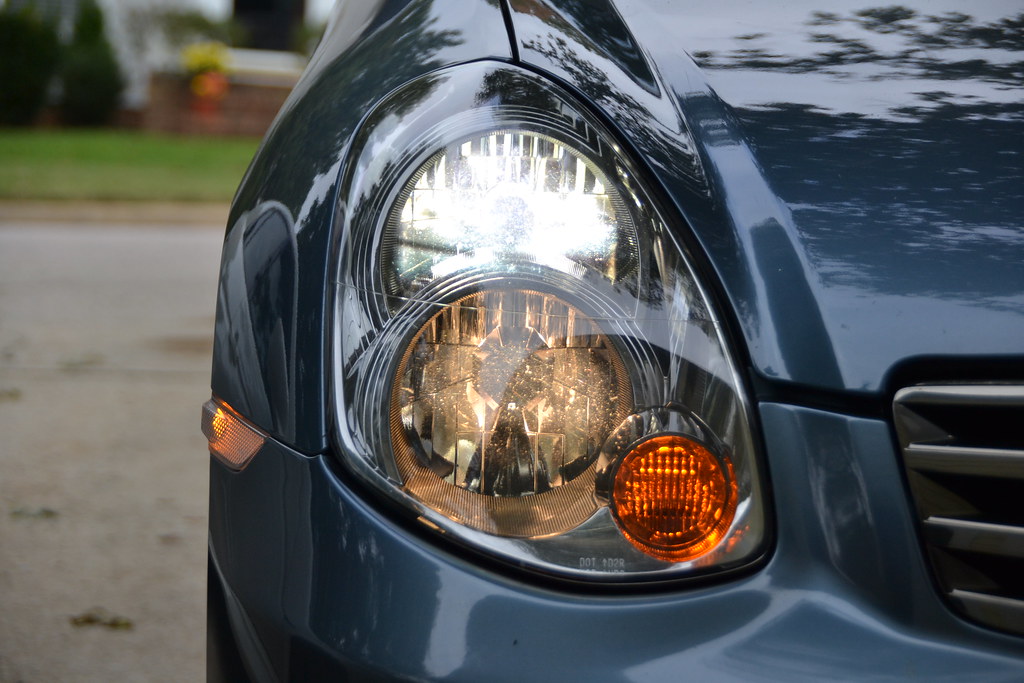
Drivers side done, passenger side untouched...
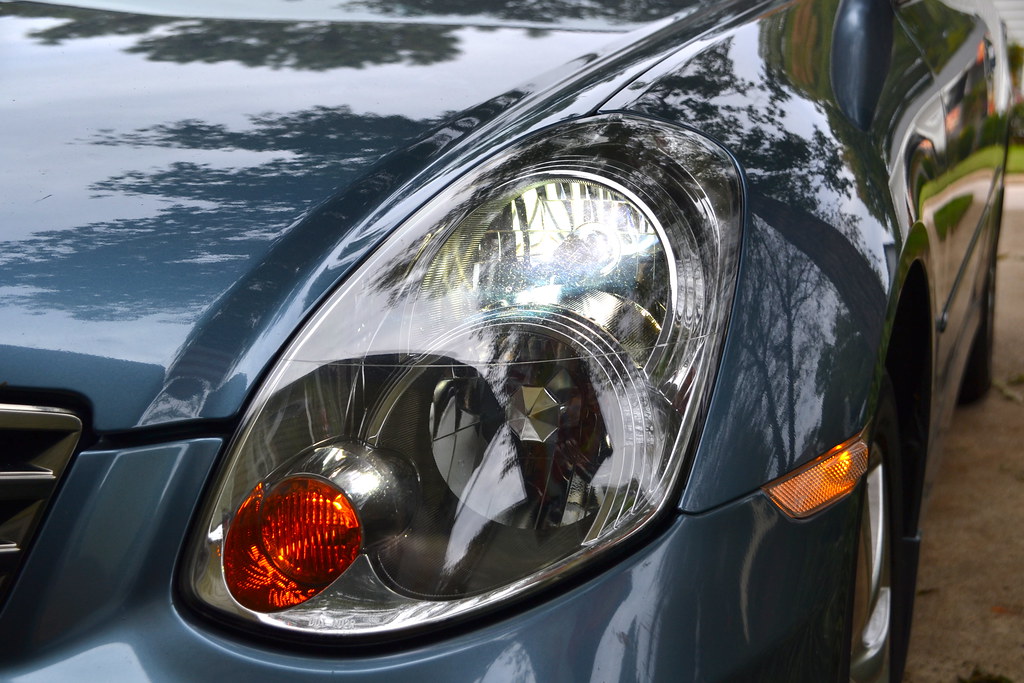
Not touched yet...
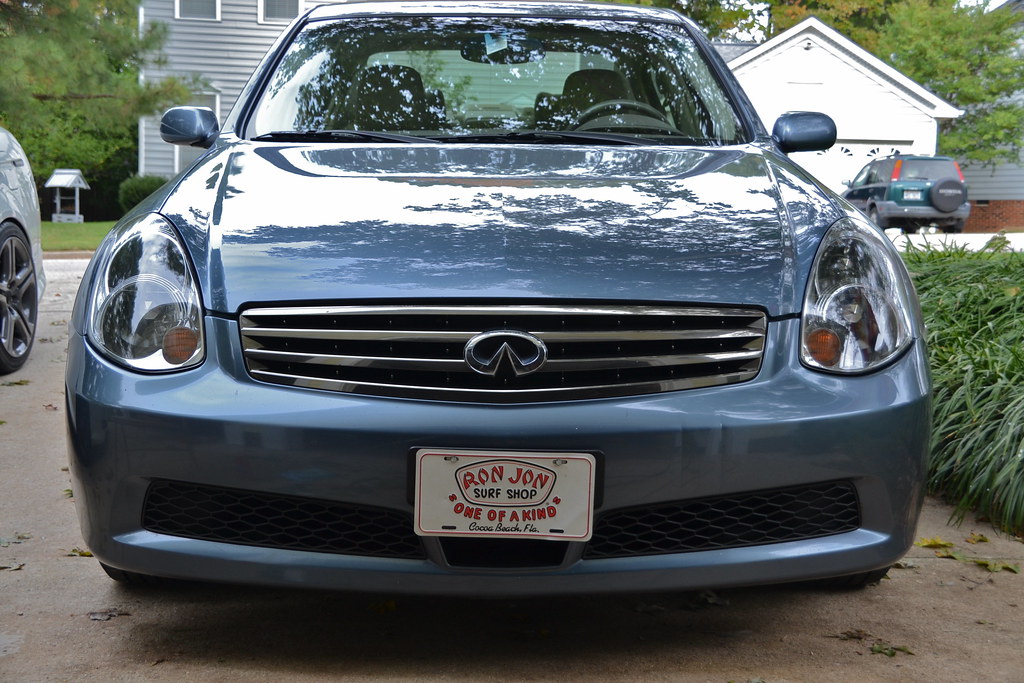
Both done...

Overall I love this product. It's cheap and you don't have to be a professional detailer to use it.
The only downside to this product is that there is no finishing compound to apply after cleaning, so the lights are prone to fogging up again just a few months after.
Good luck everyone


The following 4 users liked this post by CLtotheTL32:
 10-15-2012, 09:50 PM
#6
Drifting
Join Date: Jun 2012
Location: City of Champs, MA
Age: 32
Posts: 2,969
Received 657 Likes
on
478 Posts
If you wouldn't have mentioned your lip fitment or the chip on your grille, I wouldn't have noticed either. Looks badass to me!
And this product works well. I might give it a try on my brothers CTS. His headlights are
And this product works well. I might give it a try on my brothers CTS. His headlights are
Trending Topics
10-16-2012, 02:01 PM
#8
wet sanding and polishing gets great results with headlights as well.
the thing about this stuff from my exp is once you do it, you have to keep doing it.
i guess it cuts through the sealing layer of the plastic or whatever and it gets cloudy again every few months so dont do this unless your headlights look pretty bad.
the thing about this stuff from my exp is once you do it, you have to keep doing it.
i guess it cuts through the sealing layer of the plastic or whatever and it gets cloudy again every few months so dont do this unless your headlights look pretty bad.
10-16-2012, 02:06 PM
#9
Moderator
Thread Starter
iTrader: (3)
No problem
I'll have to look into that. Thanks 

She LOVES that damn car. Bought it brand new in late 1996 and it just hit 100k miles. It's reliable, comfy, and even better it's paid for
She will be getting a new car next year if my dad can convince her.
 thanks!
For $20 you really can't go wrong. Just read the instructions and take your time.

I don't have enough time, patience, or skill to wet sand
I used the 3M Headlight kit with sandpaper and all of that much it took way too long and I didn't get great results. This product has one step instead of 4 or 5.
And you are correct about the sealing layer, this product eats right through it, but it's worth it to me. I don't mind using this product every few months
She LOVES that damn car. Bought it brand new in late 1996 and it just hit 100k miles. It's reliable, comfy, and even better it's paid for
She will be getting a new car next year if my dad can convince her.
thanks!For $20 you really can't go wrong. Just read the instructions and take your time.
wet sanding and polishing gets great results with headlights as well.
the thing about this stuff from my exp is once you do it, you have to keep doing it.
i guess it cuts through the sealing layer of the plastic or whatever and it gets cloudy again every few months so dont do this unless your headlights look pretty bad.
the thing about this stuff from my exp is once you do it, you have to keep doing it.
i guess it cuts through the sealing layer of the plastic or whatever and it gets cloudy again every few months so dont do this unless your headlights look pretty bad.
I used the 3M Headlight kit with sandpaper and all of that much it took way too long and I didn't get great results. This product has one step instead of 4 or 5.
And you are correct about the sealing layer, this product eats right through it, but it's worth it to me. I don't mind using this product every few months
10-16-2012, 05:46 PM
#11
Moderator
Thread Starter
iTrader: (3)
Like I mentioned before, this takes less time and is less labor intensive.
10-17-2012, 03:36 AM
#12
The Old Grey Whistle Test
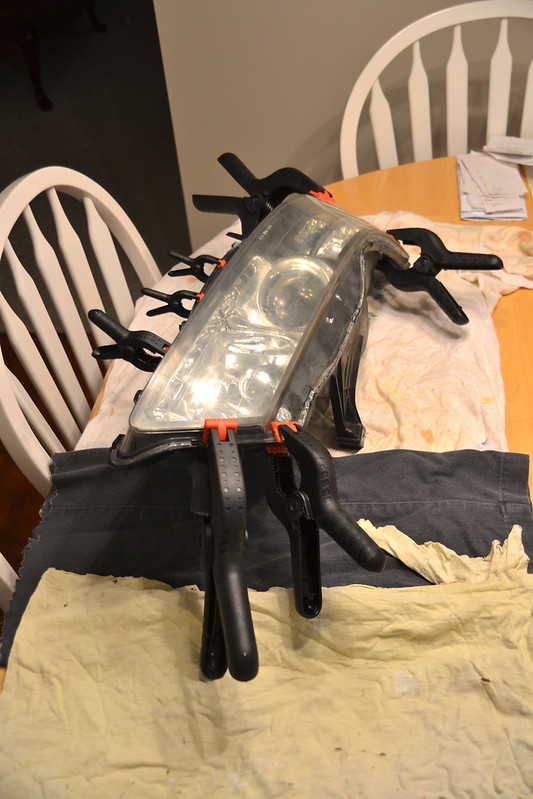
UV protective Coating Replacement
Polishing or wet-sanding headlights without renewing their UV protection is a false economy, unless this protection is replaced, the end result is that you'll have to do them again in a few months (repeat this polishing process enough and there will be no material left to work with)
In order to restore the lens back to its OEM standards a new UV resistant coating must be re-applied. Once both lenses have been polished to restore clarity, they should be sanded with 1500 grit finishing paper, this ensures the clear coat has a �key� to enable adhesion. When you spray clear coat on the sanded lenses it fills in those light scratches and makes them clear and glossy making them look brand new.
SprayMax� (aerosol spray) is a 2K clear paint: two-component acrylic resins plus isocyanates hardener that contains UV protection
The following users liked this post:
iLLeGaLy (05-29-2013)
10-17-2012, 09:30 AM
#13
Moderator
Thread Starter
iTrader: (3)
Whoa, very cool. I'll have to look into that product.
Thank you
Thank you
10-17-2012, 10:09 AM
#14
takin care of Business in
iTrader: (5)
Join Date: Jan 2008
Location: Kansas City, MO
Age: 40
Posts: 30,994
Received 4,732 Likes
on
4,064 Posts
Great work Tyler....
I recently did this and used the Meguiars Heavy Duty Restoration kit....and I was amazed with the outcome....
I recently did this and used the Meguiars Heavy Duty Restoration kit....and I was amazed with the outcome....
10-17-2012, 10:43 AM
#15
Race Director
iTrader: (3)
Join Date: Feb 2012
Location: South Florida
Age: 30
Posts: 18,278
Received 3,824 Likes
on
2,847 Posts
Thanks Tyler! My driver side is hazing again too. I'll make sure to pick this up!
10-17-2012, 03:28 PM
#16
Your Friendly Canadian
Join Date: Dec 2007
Location: Toronto, Ontario
Age: 31
Posts: 17,428
Received 1,484 Likes
on
1,048 Posts
Awesome.
I think this is a something you have to see in person to really appreciate. I used the Meguiar's kit on my Jetta, and pics really didn't do it justice. Driving on the highway at night definitely did.
As far as it hazing again, from what I've read the consensus is as long as you have a good sealant on you'll be fine and it won't re-haze in a couple of months.
One thing I would suggest is using painter's tape to protect the edges of the paint from the buffer, just in case.
 10-18-2012, 10:03 PM
#19
Team Owner
iTrader: (2)
Join Date: Jan 2008
Location: Kansas City, MO (Overland Park, KS)
Posts: 36,545
Received 6,470 Likes
on
5,162 Posts
Well done, Tyler!
02-21-2013, 03:23 PM
#21
Moderator
Thread Starter
iTrader: (3)
I didn't even see most of the replies in this thread
Anyways, I never posted GeeteeDan's headlights when I cleaned them using the same product. Sadly I didn't take many before pictures but they were WAY worse than mine ever were.

After:
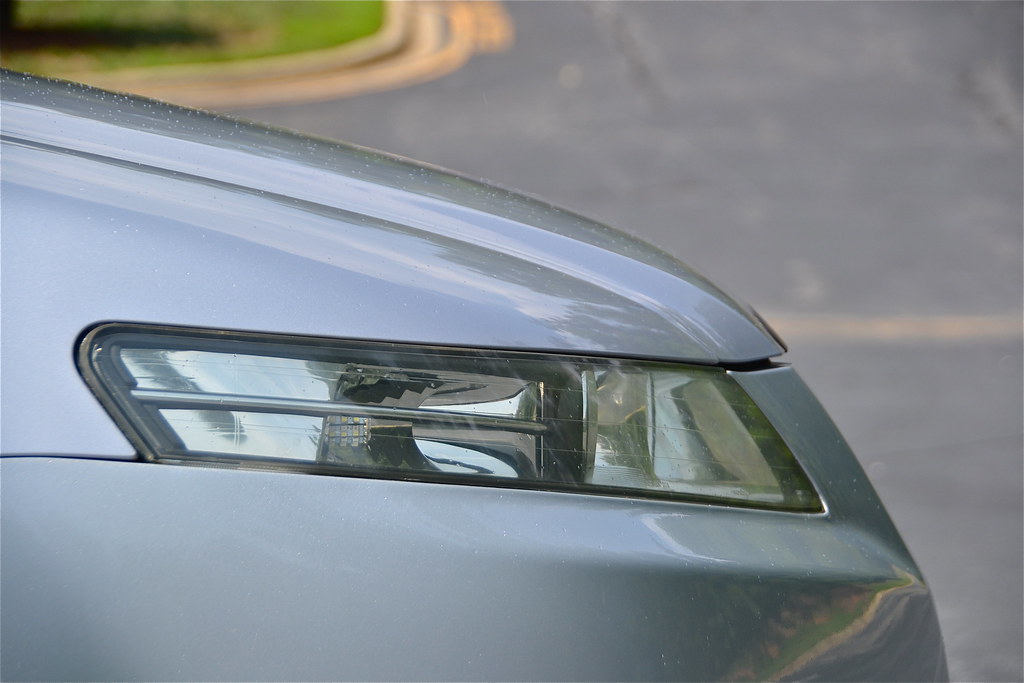
I never ended up getting any type of sealant to use after cleaning the headlights. I don't drive as often as I used to but I think my headlights are holding up rather well. I'll do some comparisons as well as take some pictures of all 3 cars (TL, G35, Intrepid) when I get home for Spring Break.
Anyways, I never posted GeeteeDan's headlights when I cleaned them using the same product. Sadly I didn't take many before pictures but they were WAY worse than mine ever were.
After:
I never ended up getting any type of sealant to use after cleaning the headlights. I don't drive as often as I used to but I think my headlights are holding up rather well. I'll do some comparisons as well as take some pictures of all 3 cars (TL, G35, Intrepid) when I get home for Spring Break.
02-21-2013, 06:08 PM
#22
Team Owner
iTrader: (2)
Join Date: Jan 2008
Location: Kansas City, MO (Overland Park, KS)
Posts: 36,545
Received 6,470 Likes
on
5,162 Posts
Super sparkly!
02-21-2013, 07:27 PM
#23
takin care of Business in
iTrader: (5)
Join Date: Jan 2008
Location: Kansas City, MO
Age: 40
Posts: 30,994
Received 4,732 Likes
on
4,064 Posts
damn that looks NICE....well done T...
03-25-2013, 12:04 PM
#25
Currently Post-Acura
I ended up picking this up last night, too. Any recommendations on a good sealant to use (sand and use that SprayMax)? My headlights have been cleaned up a while ago using the TurtleWax kit that comes with the small spray bottles and different sandpapers, but I think this will be a lot easier. But the one that had the bad oxidation before is getting worse, and the driver's side is following in its footsteps. Now if NJ will finally get some warm weather for me to wash my car and actually use this 

The following users liked this post:
CLtotheTL32 (04-07-2013)
04-07-2013, 09:09 PM
#27

Been a looooog time since I posted! Hello Acurazine! My 2003 TL-S is still running great. I just tried the 3M Lens Renewal Kit and i an extremely pleased with the results! I really regret not having done "before pics" but will post the "after" pic. It is a little more involved than the above kit. You sand with 500 grit, then 800, then there is another pad that you wet and sand and then you finish with a compound sand...my lens were horrible, trust me...here are the results! Will answer any questions that you have...took about 20 mins per lens...look for a new post with pics, can't seem to put them in this thread.
04-07-2013, 09:46 PM
#29
Moderator
Thread Starter
iTrader: (3)
I used that 3M kit before using the Mothers and had no problems with it. It was more time and labor intensive than the Mothers kit which is why I prefer this method more.
You'll have to upload your pictures to a hosting site like Photobucket and then copy the IMG codes here.
You'll have to upload your pictures to a hosting site like Photobucket and then copy the IMG codes here.
06-29-2014, 11:54 PM
#32
Advanced
Join Date: Mar 2007
Posts: 73
Likes: 0
Received 0 Likes
on
0 Posts
Sorry for the super late post. I did use the above mothers product and worked cherry. I will try and get some pics up. I lost the before pics tho; fortunately my car is in a "car port" so the yellowing/fading was not too bad.
06-30-2014, 07:22 AM
#33
Moderator
Thread Starter
iTrader: (3)
I did mine two weeks ago and while they aren't perfect, they are better than before!
 06-30-2014, 08:04 AM
#34
Once you remove the OEM UV layer of protection (or wait until the sun takes care of that for you)...there's no permanent solution. This is a great thread, not too bad to plan to do this every 6 months or so to keep her looking fresh.
On the S2000 I do white pad only every few months to lose the slight yellowish tinge...on the TL, since I swapped to my backup set of heads, I still have the UV coating on it. On both those AND the SRX, I do a coat of this and buff it off after every car wash. I apply it, then do tire shine while it's bonding, then buff off with a new paper towel. Gets that newish rainbow look to it once it bonds to the plastic.

On the S2000 I do white pad only every few months to lose the slight yellowish tinge...on the TL, since I swapped to my backup set of heads, I still have the UV coating on it. On both those AND the SRX, I do a coat of this and buff it off after every car wash. I apply it, then do tire shine while it's bonding, then buff off with a new paper towel. Gets that newish rainbow look to it once it bonds to the plastic.
The following users liked this post:
ebelp (07-31-2014)
06-30-2014, 08:18 AM
#35
Moderator
Thread Starter
iTrader: (3)
Good to know J! Thank you!
The following users liked this post:
CLtotheTL32 (06-30-2014)
06-30-2014, 09:12 AM
#37
Moderator
Thread Starter
iTrader: (3)
 06-30-2014, 10:15 AM
#38
takin care of Business in
iTrader: (5)
Join Date: Jan 2008
Location: Kansas City, MO
Age: 40
Posts: 30,994
Received 4,732 Likes
on
4,064 Posts
I have been still going strong with the Helmsman Spar Urethane and mineral spirits mix (1:1)...been almost a year and 3 months....
http://www.autogeekonline.net/forum/...lant-idea.html
I might try the sealant which Jeremy is mentioning though...
http://www.autogeekonline.net/forum/...lant-idea.html
I might try the sealant which Jeremy is mentioning though...
The following users liked this post:
swoosh (06-30-2014)
06-30-2014, 11:24 AM
#40
takin care of Business in
iTrader: (5)
Join Date: Jan 2008
Location: Kansas City, MO
Age: 40
Posts: 30,994
Received 4,732 Likes
on
4,064 Posts
aah ok....yeah my car doesnt see the sun much now a days...hence maybe the stuff is lasting longer....