08 Lexus RX350 detailed by TSC17!
 04-05-2009, 07:26 PM
#1
2012 SH-AWD / Advanced
Thread Starter
08 Lexus RX350 detailed by TSC17!
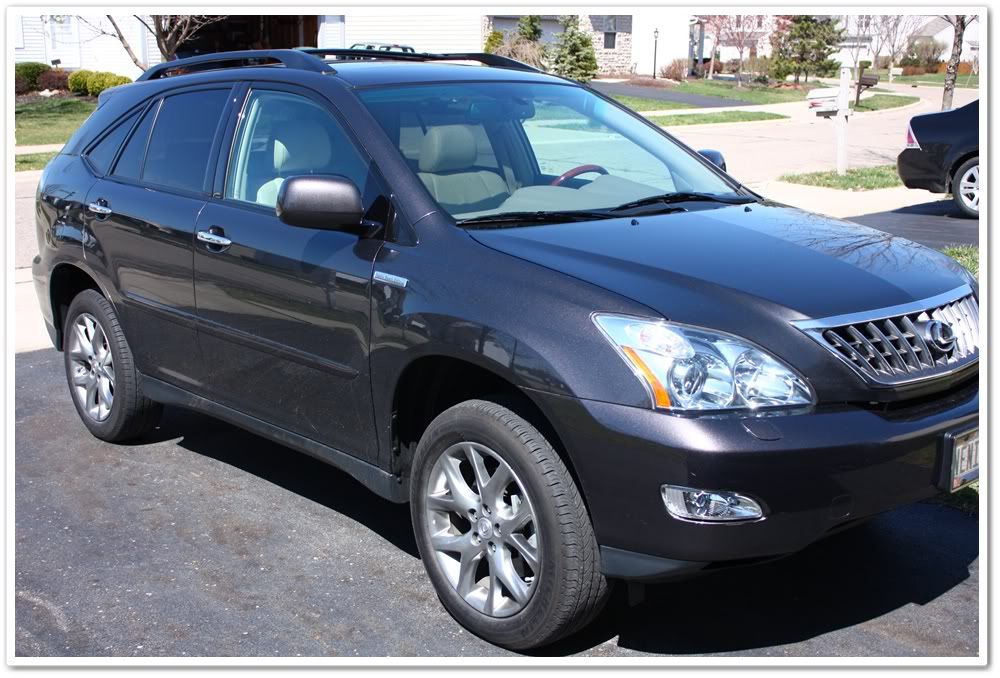
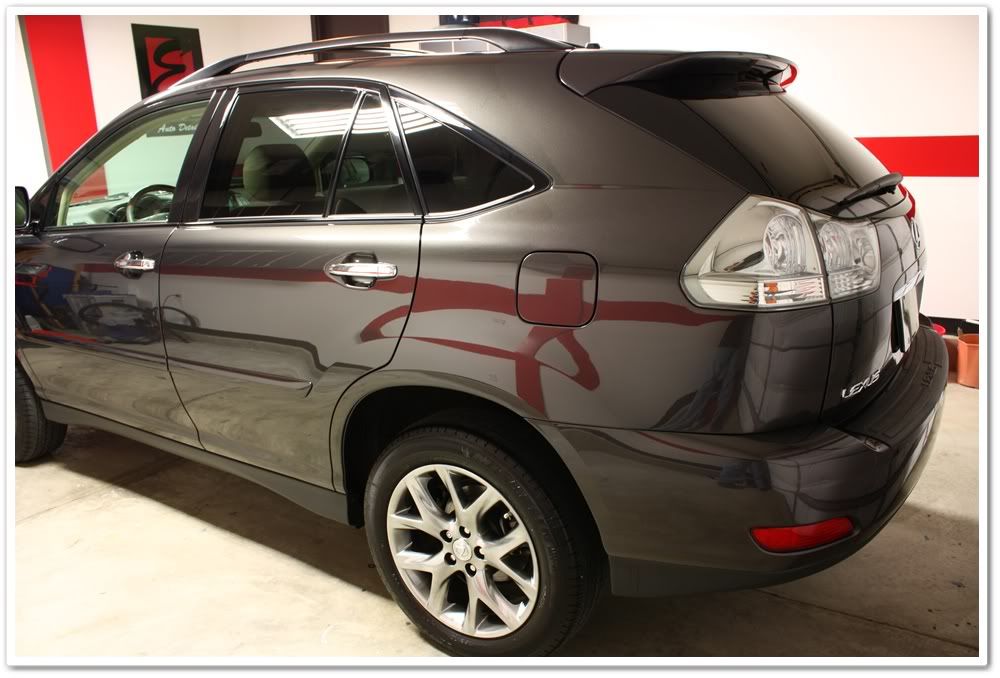
2008 Lexus RX350 Pebble Beach Edition in Truffle-Mica.
I’m not sure where the Lexus design/marketing team came up with the color name “Truffle-Mica”, but I’m glad they came up with the color! The Pebble Beach Edition is the only RX model that this color is available on. It has hues of grey, copper, blue, purple, and even a little bit of green too. The color varies slightly depending on the type and angle of the light, sometimes giving it a grey look, sometimes copper, and sometimes a slight look of purple.
The owner of this vehicle also has the 08 LS460L that I worked on a few weeks ago, and both of them are scheduled for every 4 months with me.
Other than being in need of a thorough cleaning, this one was in pretty good condition with the exception of some heavy scratches on the rear bumper, and some that went down the entire right side of the SUV. We agreed that the best approach would be a (modified) one-step polish, with a focus on reducing the severity of the scratches as good as I could. The interior would also need some work to clean up for the Ohio winter, but he said that a light cleaning would suffice. We were not going for a full-correction job.
Here’s the RX350 when it arrived:
First up was a wash of the exterior. My go-to wash when preparing for polishing is Chemical Guys Wash & Clear. I also used P21S Total Auto Wash to pre-treat the front end, and to clean the wheels, tires, and wheel wells.
After washing, I clayed all of the exterior surfaces with Riccardo clay using Optimum Instant Detailer and Gloss Enhancer as a lube. I find that the Optimum ID provides a super-slick surface for the clay, which reduces the risk of marring the finish (especially on soft Lexus paint). As is normal, I found the rear of the car as well as the areas right behind the wheels to have the most contaminants to be removed by clay. The horizontal surfaces were surprisingly in good shape.
After claying, I foamed the car once again with Chemical Guys to rinse off the Optimum ID, and then pulled it in the garage for polishing.
The water is sheeting nicely, which means no remaining waxes or sealants!
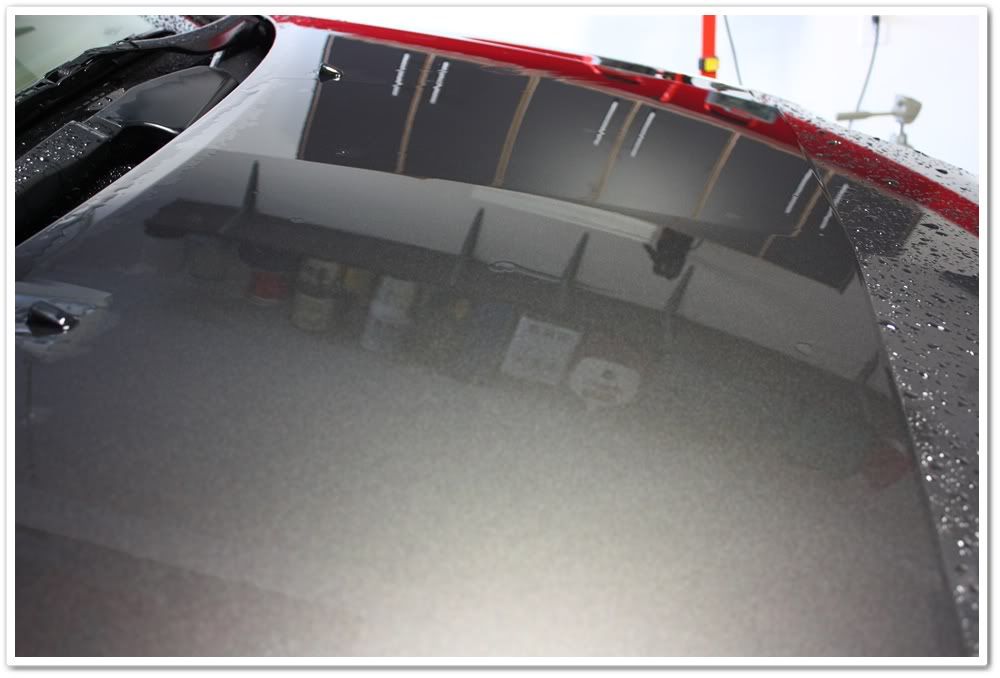
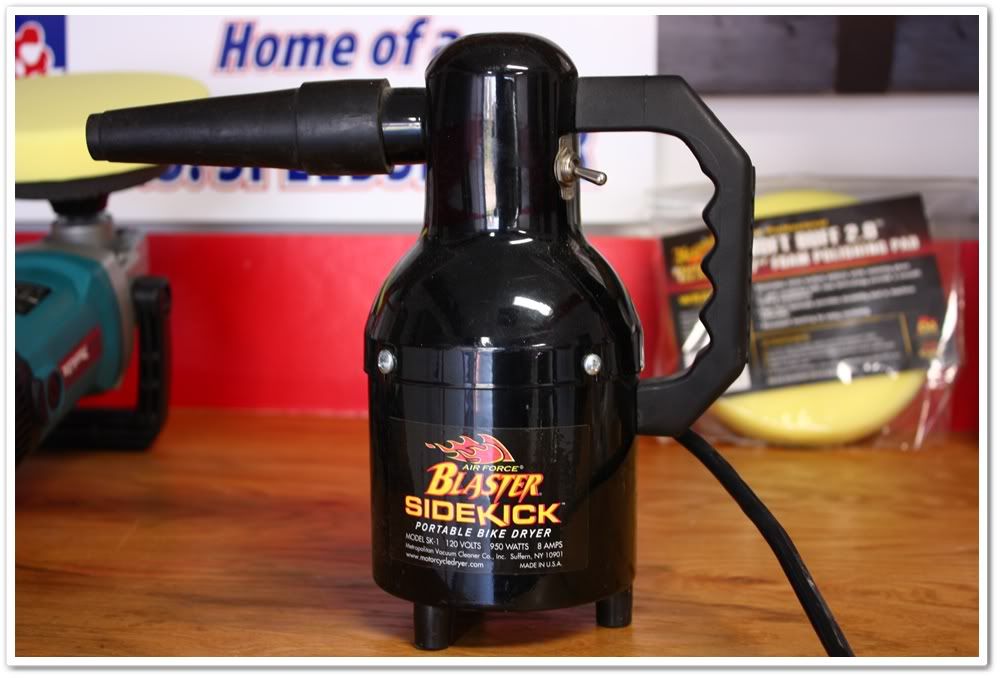
After washing, I always use my Blaster Sidekick blow dryer to dry the vehicles. This product is marketed to the motorcycle industry, but I find it’s perfect for cars. If you don’t blow dry, you’ll find a lot of water hiding in emblems and seals…water that either comes out when polishing to make a mess of things, or worse yet comes out when the customer drives away and then streaks all down the sides of their car! Whatever method you have access to (compressed air, leaf blower, whatever), I highly recommend using them!
Before my client arrived, I went ahead and got my tools ready in anticipation of a rotary/PO203S session since it worked so well on his LS460L.
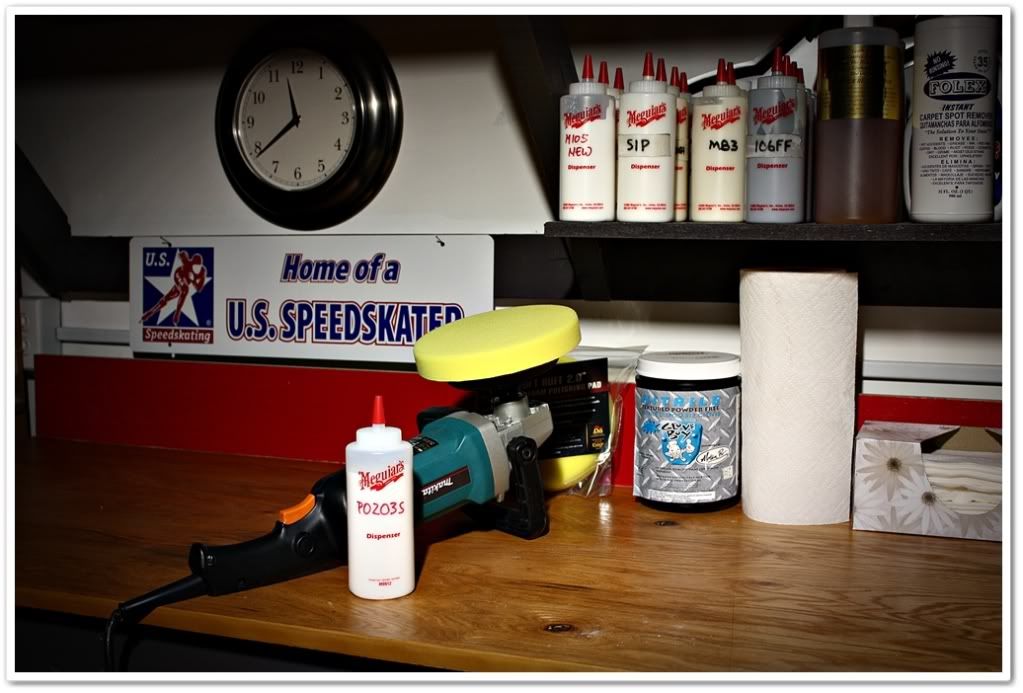
After inspection and a brief discussion however, I opted for the PC with an orange LC pad and Optimum Poli-Seal (OPS). I like using OPS because it provides light correction, and contains polymer sealants that provide months of protection (3 or 4 in my experience). It also leaves the slickest finish of any AIO products that I have used. And did I mention that it is incredibly easy to work with? It only requires a small amount of polish, and it doesn’t take a lot of time to work in and break down like traditional polishes do…allowing for a much quicker application. Once finished, there’s very little residue to remove which is a huge plus in my book. I also love the look of Poli-Seal on darker colors too!
Now onto polishing:
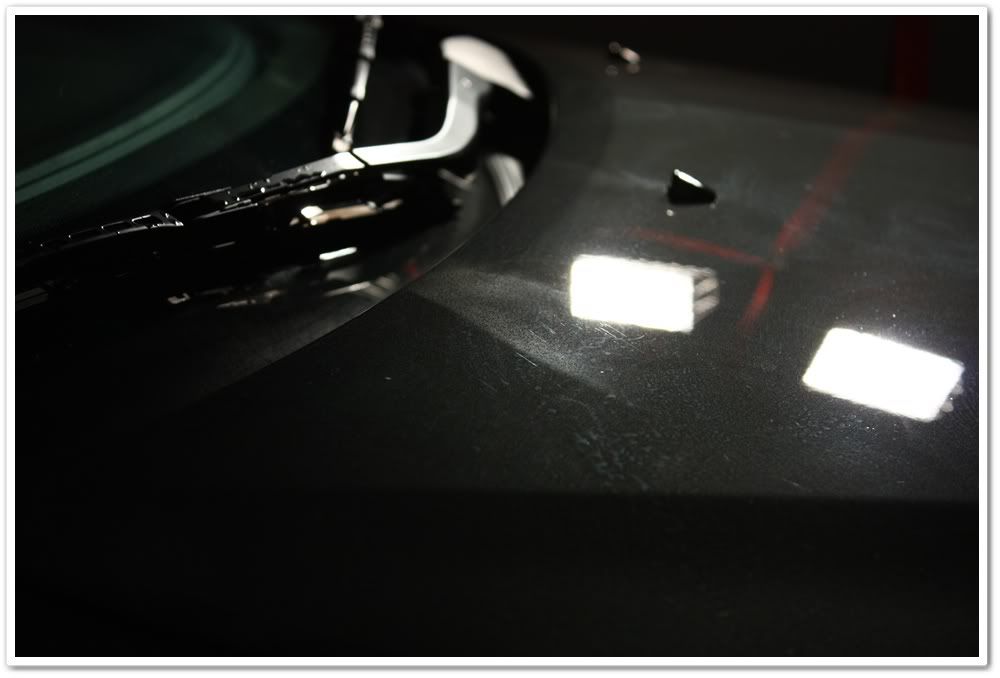
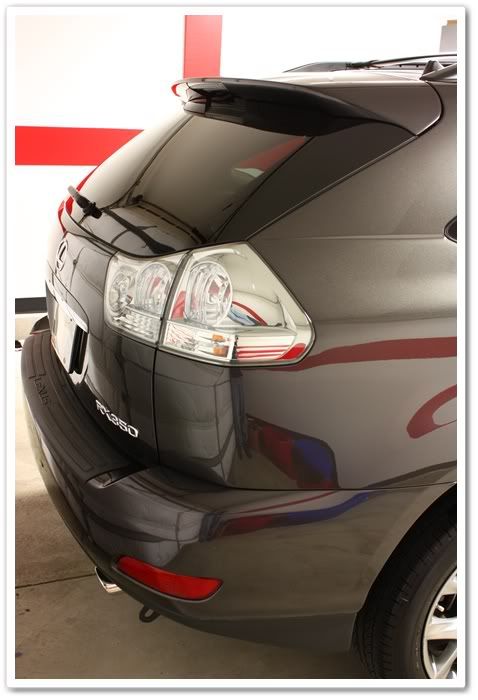
Hmmm, what have we here? Obviously our 10 month old Lexus has had some paint work done in the past because here’s overspray on the hood! I found out that the paint work had been done on the LR of the car, yet I find overspray on the hood…go figure. I also found a bit of overspray and poor sanding and blending work done on the rear quarter.
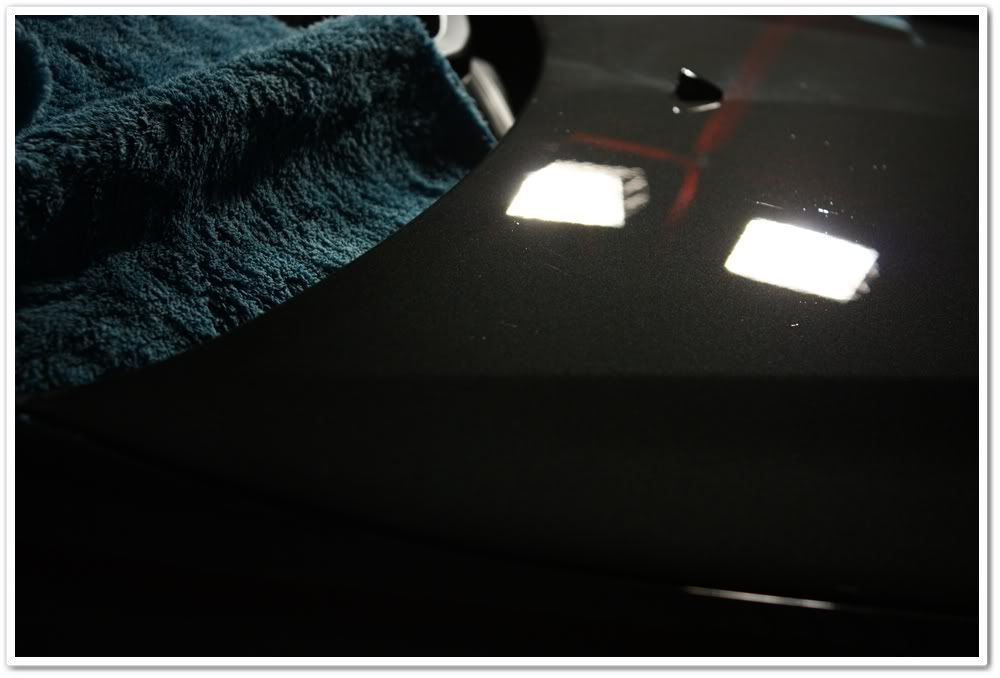
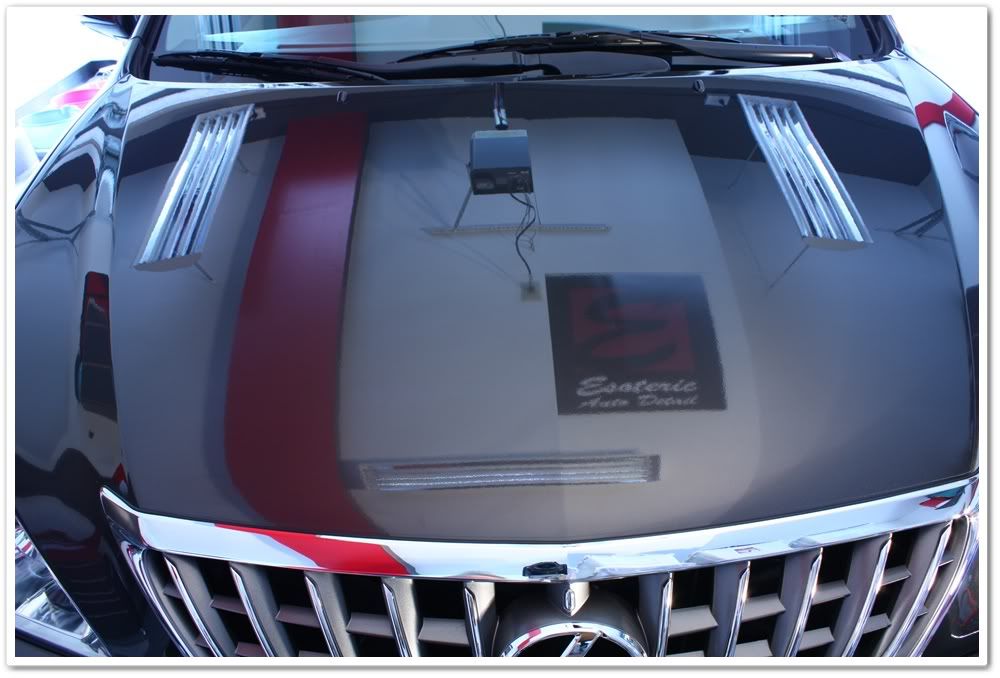
This is the one area that I did use the rotary…Meg’s yellow 2.0 polishing pad with Menzerna PO203S cleaned it up. There were a few deep defects on the hood that remained.
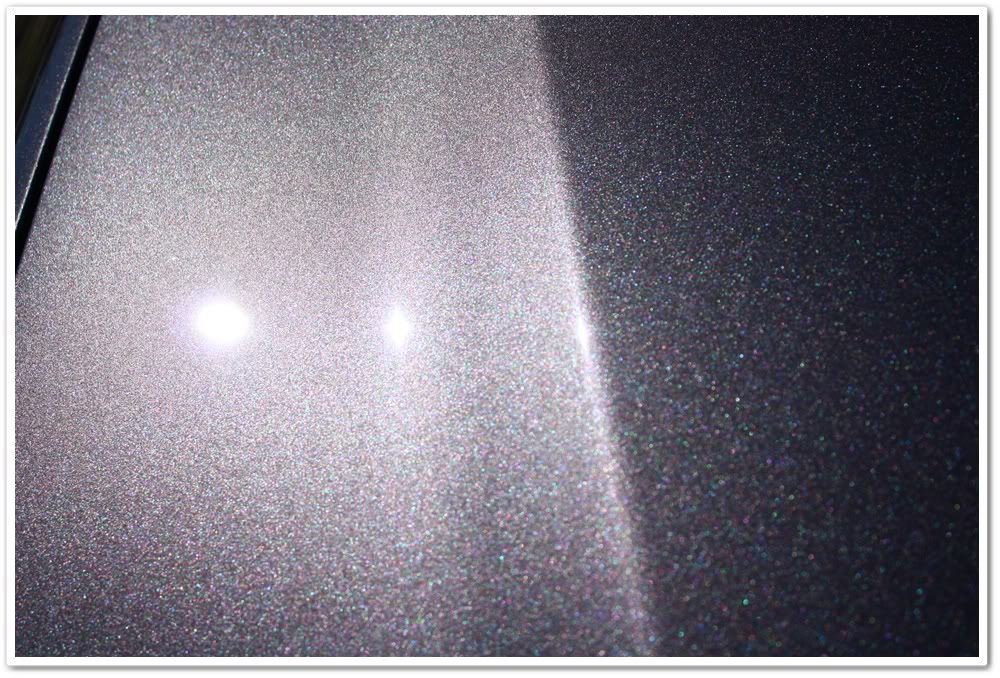
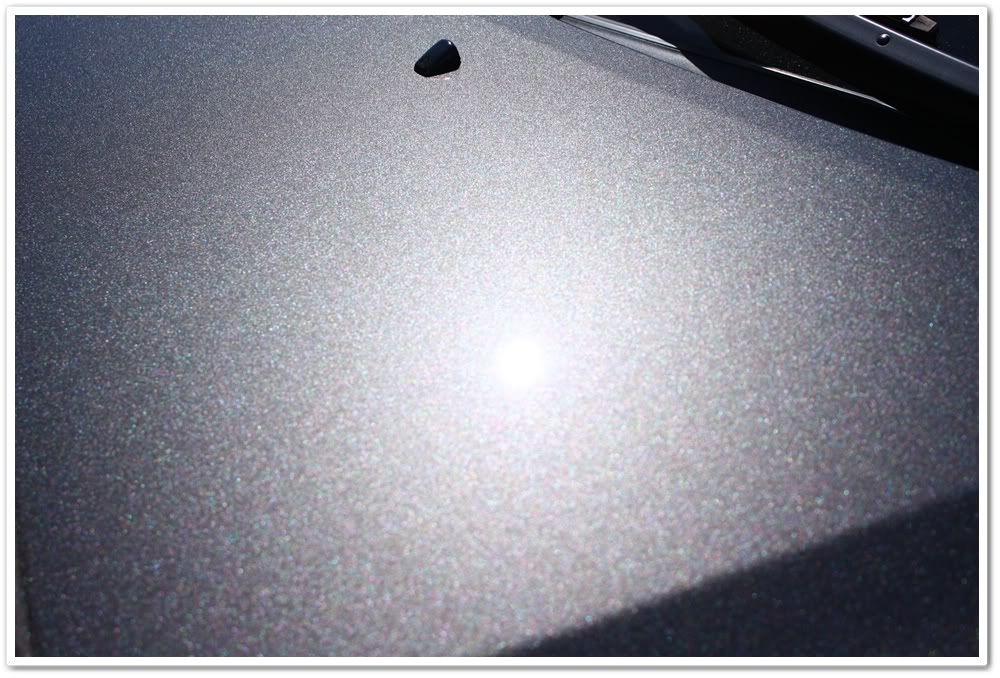
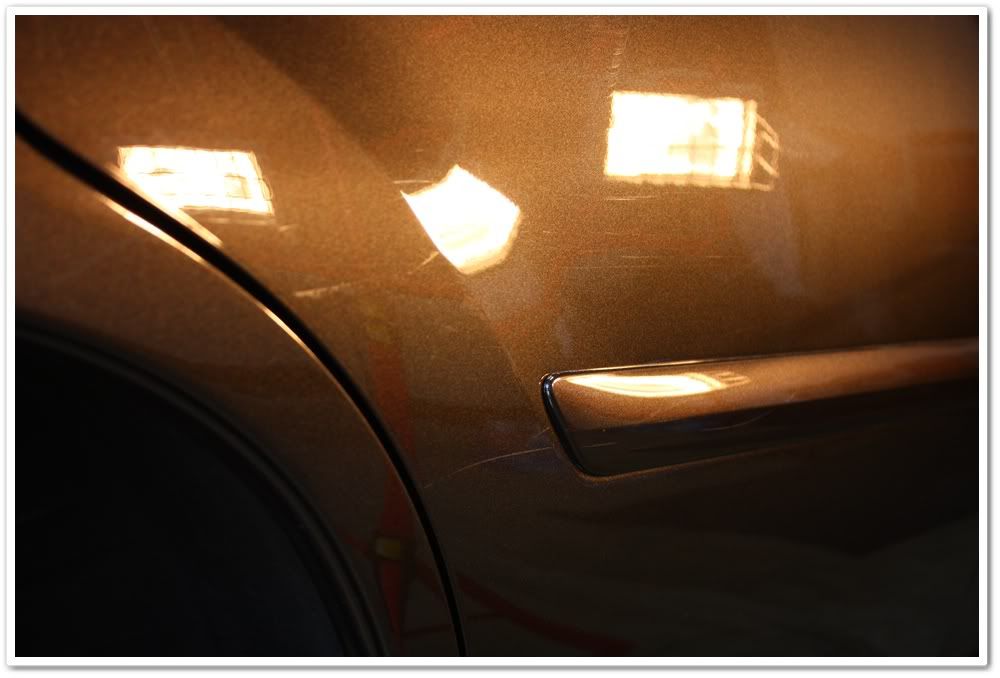
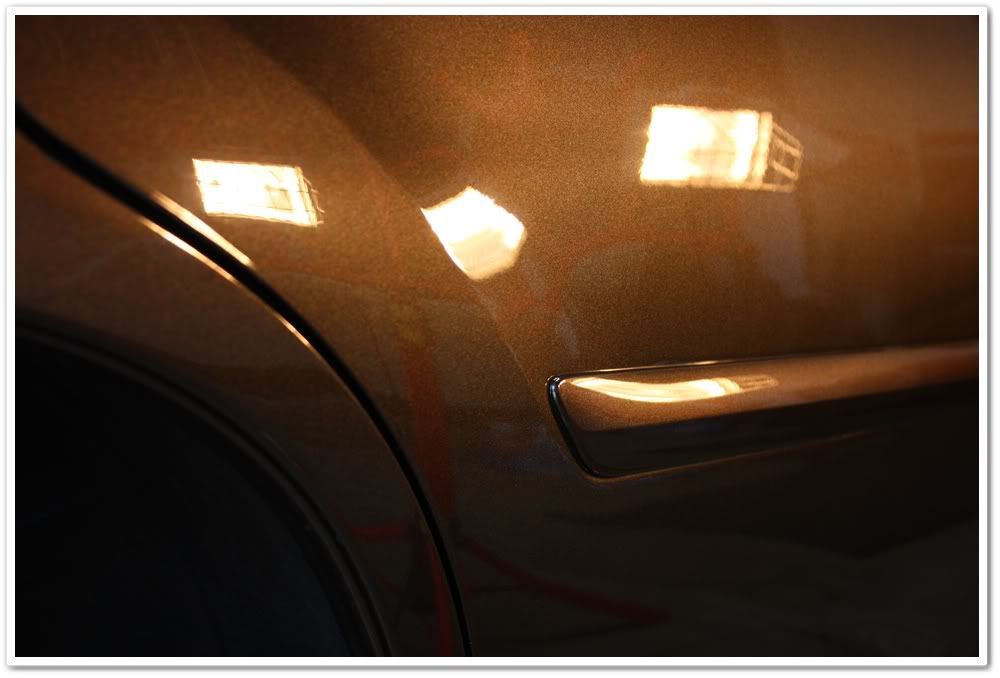
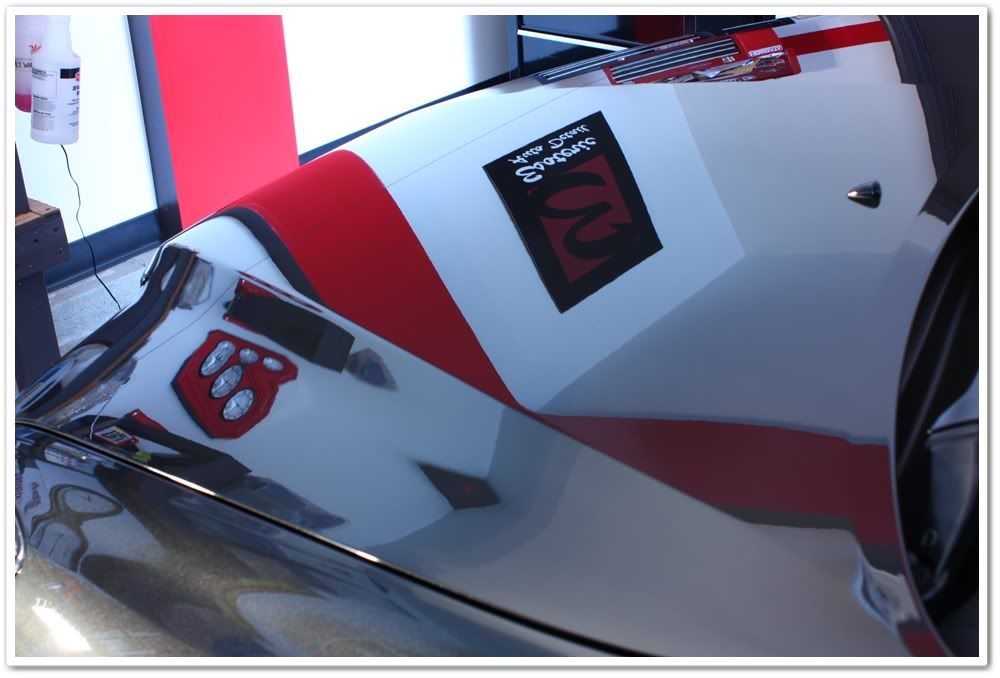
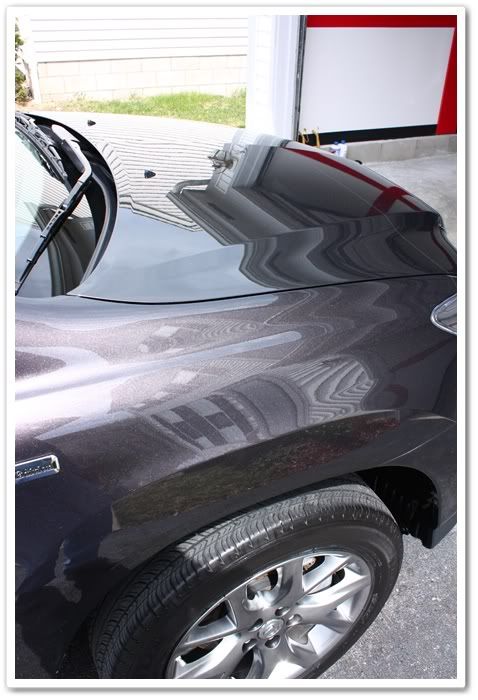
I pulled it outside for a quick inspection in the sunshine to see how it came out. Notice all of the colors in this paint.
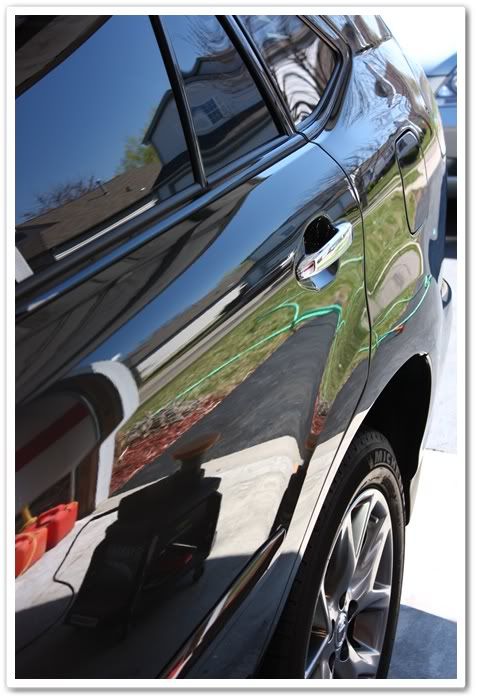
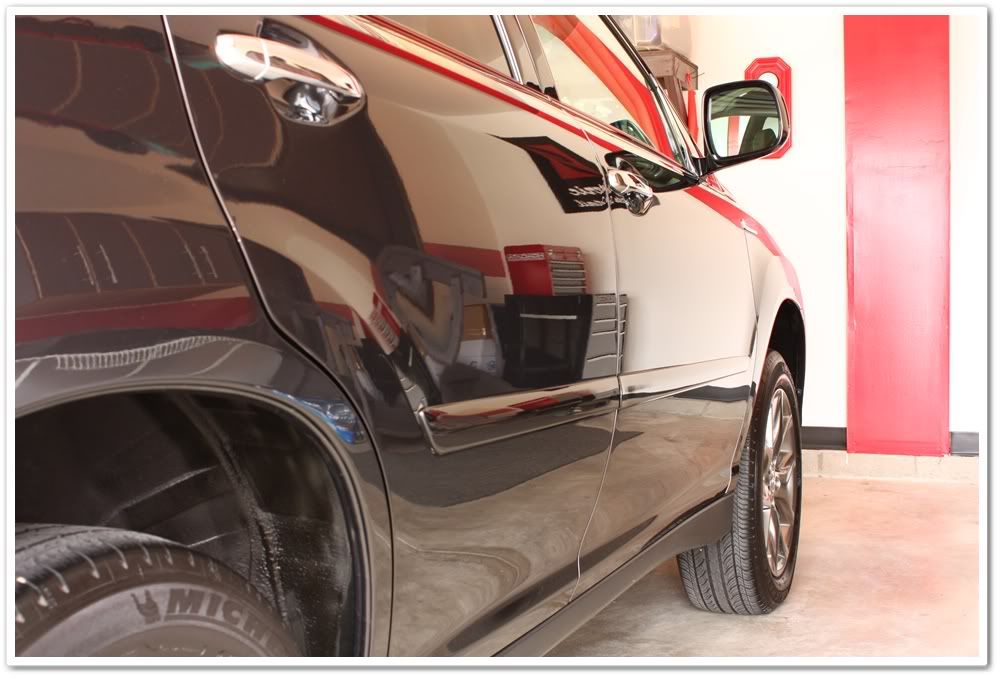
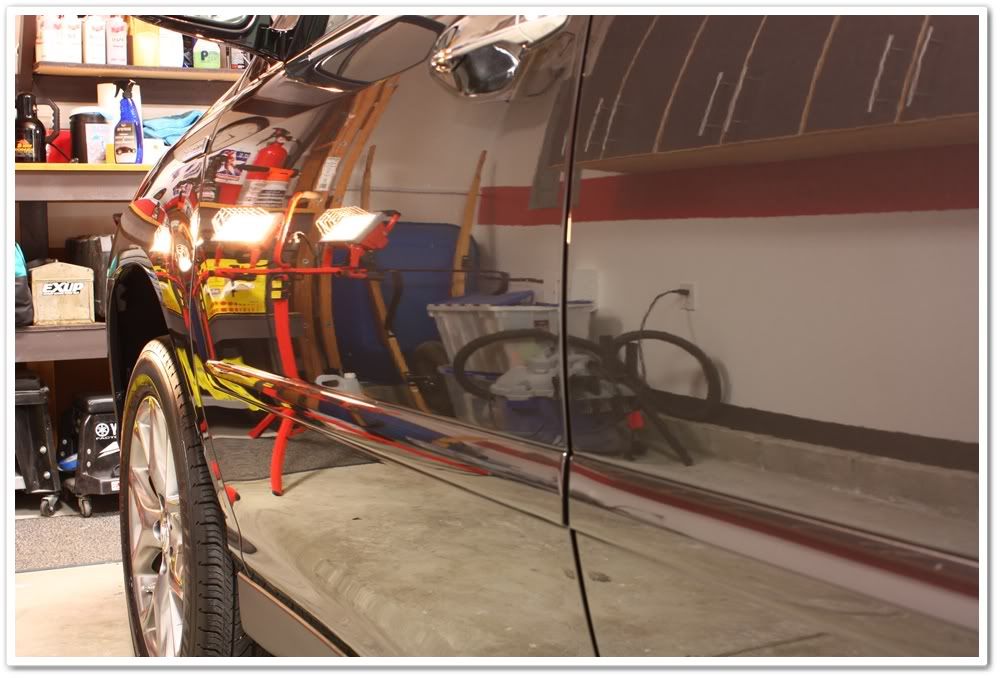
I’ve quickly moved down this side of the vehicle with Poli-Seal, PC, and an orange pad, and thought this made a good photo:
I’m not sure where the Lexus design/marketing team came up with the color name “Truffle-Mica”, but I’m glad they came up with the color! The Pebble Beach Edition is the only RX model that this color is available on. It has hues of grey, copper, blue, purple, and even a little bit of green too. The color varies slightly depending on the type and angle of the light, sometimes giving it a grey look, sometimes copper, and sometimes a slight look of purple.
The owner of this vehicle also has the 08 LS460L that I worked on a few weeks ago, and both of them are scheduled for every 4 months with me.
Other than being in need of a thorough cleaning, this one was in pretty good condition with the exception of some heavy scratches on the rear bumper, and some that went down the entire right side of the SUV. We agreed that the best approach would be a (modified) one-step polish, with a focus on reducing the severity of the scratches as good as I could. The interior would also need some work to clean up for the Ohio winter, but he said that a light cleaning would suffice. We were not going for a full-correction job.
Here’s the RX350 when it arrived:
First up was a wash of the exterior. My go-to wash when preparing for polishing is Chemical Guys Wash & Clear. I also used P21S Total Auto Wash to pre-treat the front end, and to clean the wheels, tires, and wheel wells.
After washing, I clayed all of the exterior surfaces with Riccardo clay using Optimum Instant Detailer and Gloss Enhancer as a lube. I find that the Optimum ID provides a super-slick surface for the clay, which reduces the risk of marring the finish (especially on soft Lexus paint). As is normal, I found the rear of the car as well as the areas right behind the wheels to have the most contaminants to be removed by clay. The horizontal surfaces were surprisingly in good shape.
After claying, I foamed the car once again with Chemical Guys to rinse off the Optimum ID, and then pulled it in the garage for polishing.
The water is sheeting nicely, which means no remaining waxes or sealants!
After washing, I always use my Blaster Sidekick blow dryer to dry the vehicles. This product is marketed to the motorcycle industry, but I find it’s perfect for cars. If you don’t blow dry, you’ll find a lot of water hiding in emblems and seals…water that either comes out when polishing to make a mess of things, or worse yet comes out when the customer drives away and then streaks all down the sides of their car! Whatever method you have access to (compressed air, leaf blower, whatever), I highly recommend using them!
Before my client arrived, I went ahead and got my tools ready in anticipation of a rotary/PO203S session since it worked so well on his LS460L.
After inspection and a brief discussion however, I opted for the PC with an orange LC pad and Optimum Poli-Seal (OPS). I like using OPS because it provides light correction, and contains polymer sealants that provide months of protection (3 or 4 in my experience). It also leaves the slickest finish of any AIO products that I have used. And did I mention that it is incredibly easy to work with? It only requires a small amount of polish, and it doesn’t take a lot of time to work in and break down like traditional polishes do…allowing for a much quicker application. Once finished, there’s very little residue to remove which is a huge plus in my book. I also love the look of Poli-Seal on darker colors too!
Now onto polishing:
Hmmm, what have we here? Obviously our 10 month old Lexus has had some paint work done in the past because here’s overspray on the hood! I found out that the paint work had been done on the LR of the car, yet I find overspray on the hood…go figure. I also found a bit of overspray and poor sanding and blending work done on the rear quarter.
This is the one area that I did use the rotary…Meg’s yellow 2.0 polishing pad with Menzerna PO203S cleaned it up. There were a few deep defects on the hood that remained.
I pulled it outside for a quick inspection in the sunshine to see how it came out. Notice all of the colors in this paint.
I’ve quickly moved down this side of the vehicle with Poli-Seal, PC, and an orange pad, and thought this made a good photo:
 04-05-2009, 07:26 PM
#2
2012 SH-AWD / Advanced
Thread Starter
Now on to the back of the car. As I’ve said before, the Menzerna bottles make great props for trunk lids so you can access the bottom part of it with the polisher.

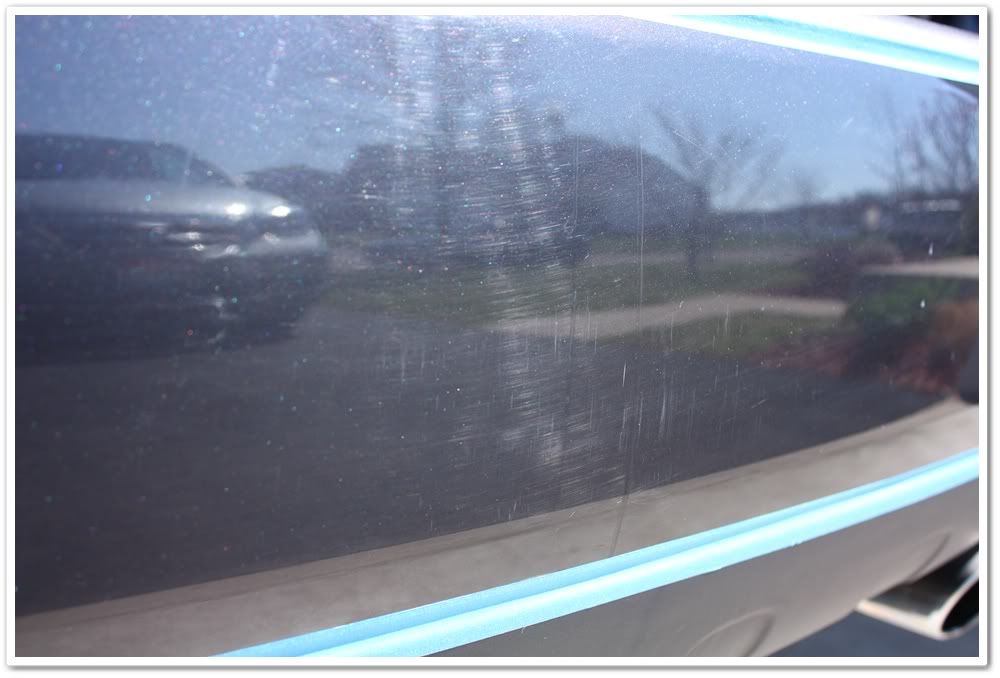
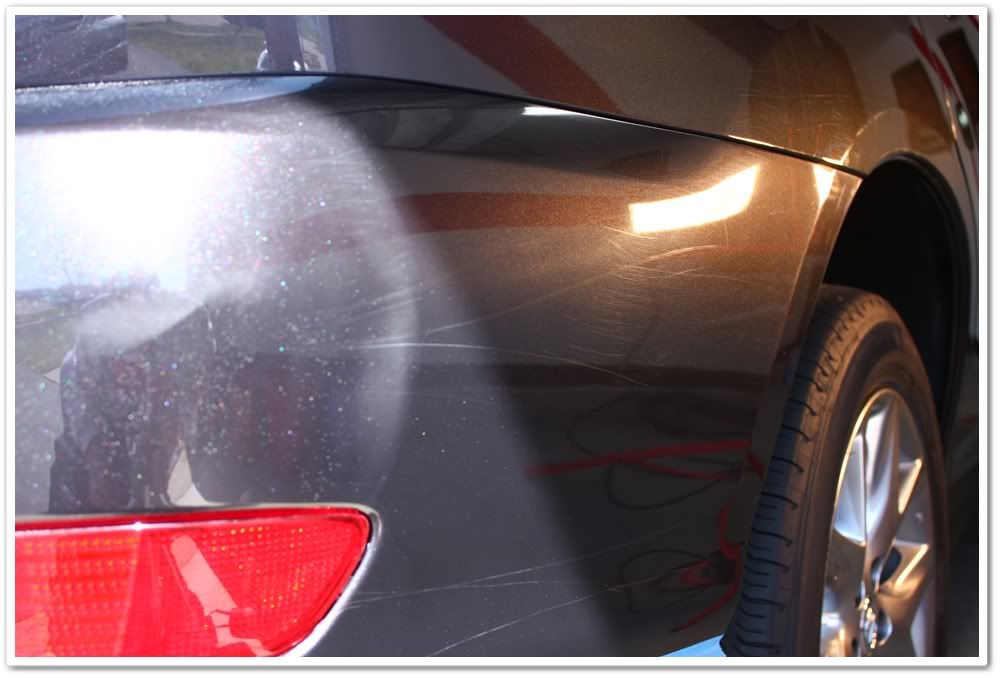
I knew that I had some heavier defects to deal with on the bumper and right side of the car, and here you can get a good picture of what I had to deal with. You can see a lot of vertical scratches on the bumper (hiding underneath the swirls). Since I had the PC in hand, I thought it would be a great opportunity to use the infamous Kevin Brown PC Method (KBPCM) with Meguiars M105 to correct them.
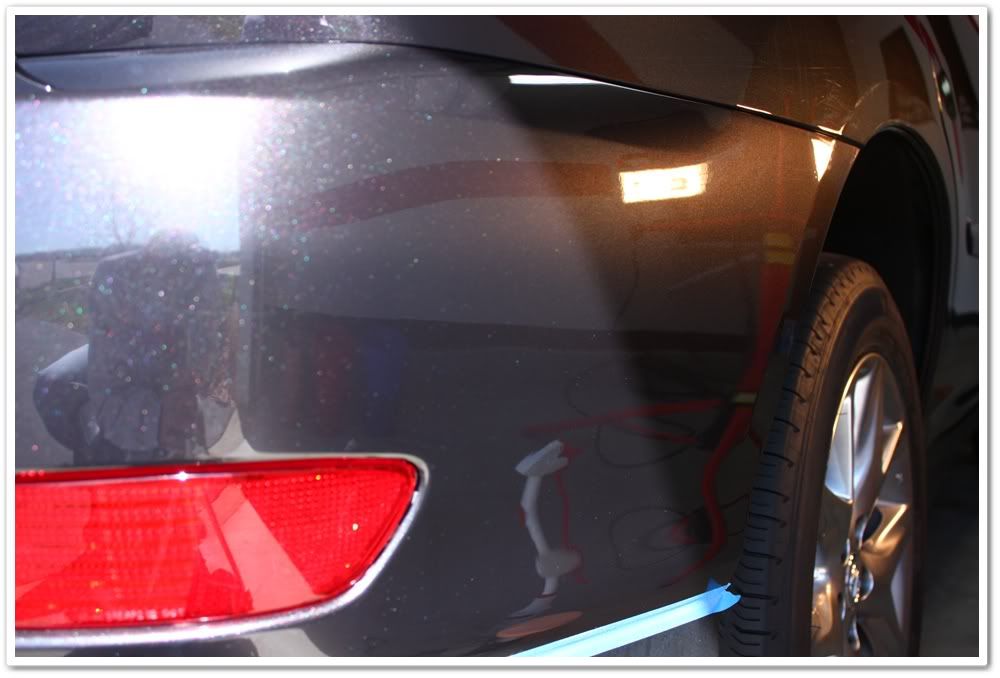
All of that corrected with one hit of M105 and the KBPCM! Afterwards I finished it with Poli-Seal. And yes, I went back and cleaned up the 105 residue that made it onto the plastic trim underneath…
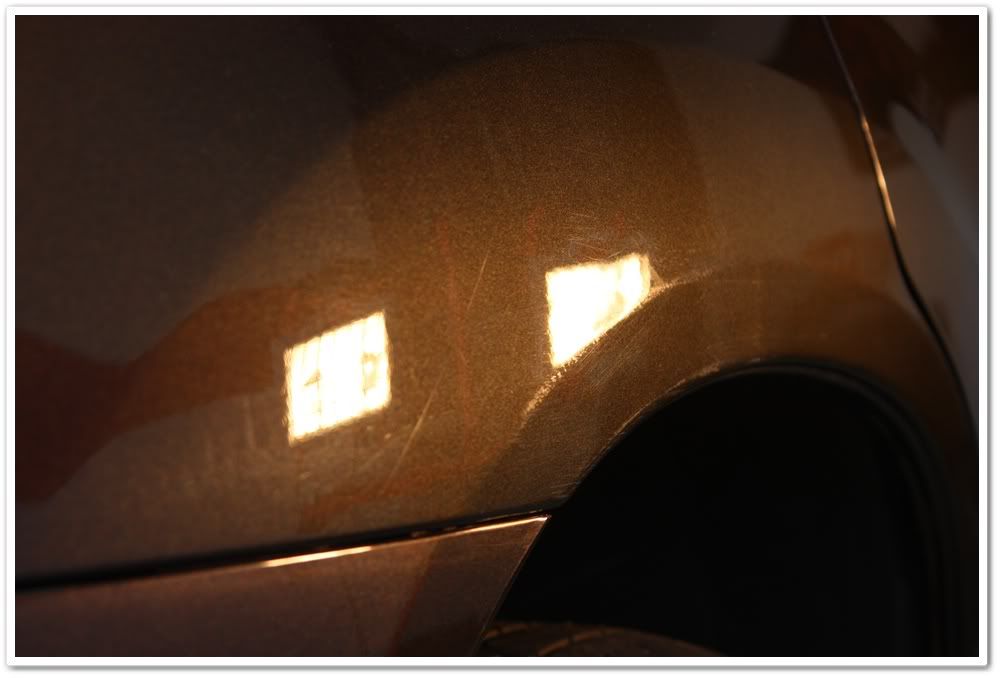
Moving back up the right side of the Lexus I had to deal with this…scratches that went all the way from the front bumper to the rear! Once again with PC/orange in one hand and a bottle of M105 in the other, I was prepared for battle!
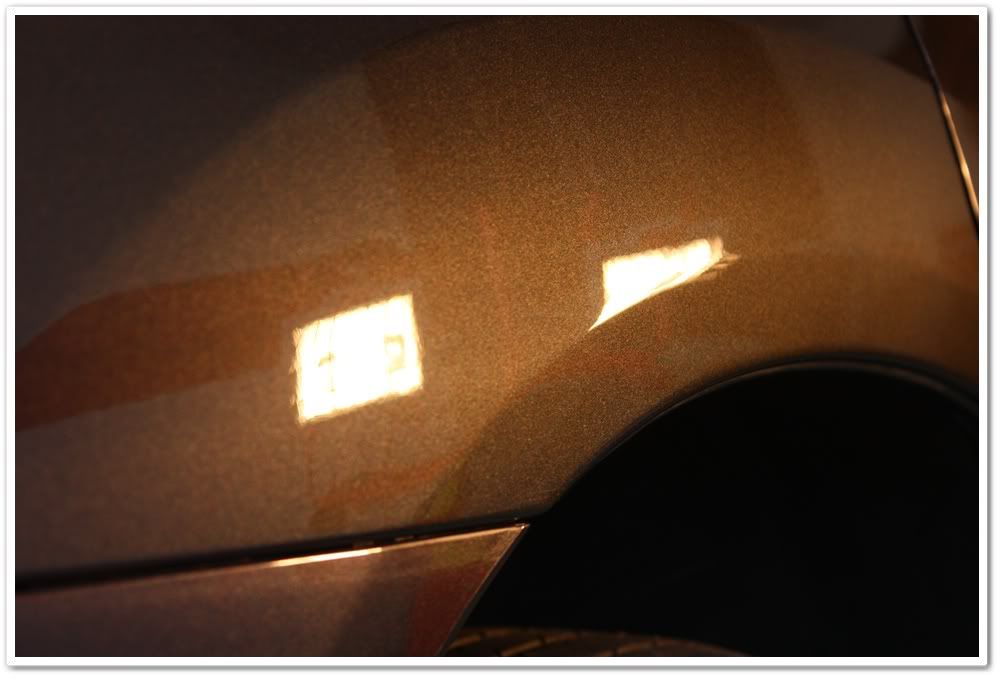
Guess who won that battle! These next few “after” photos are immediately after M105…no finishing polish (OPS) yet.
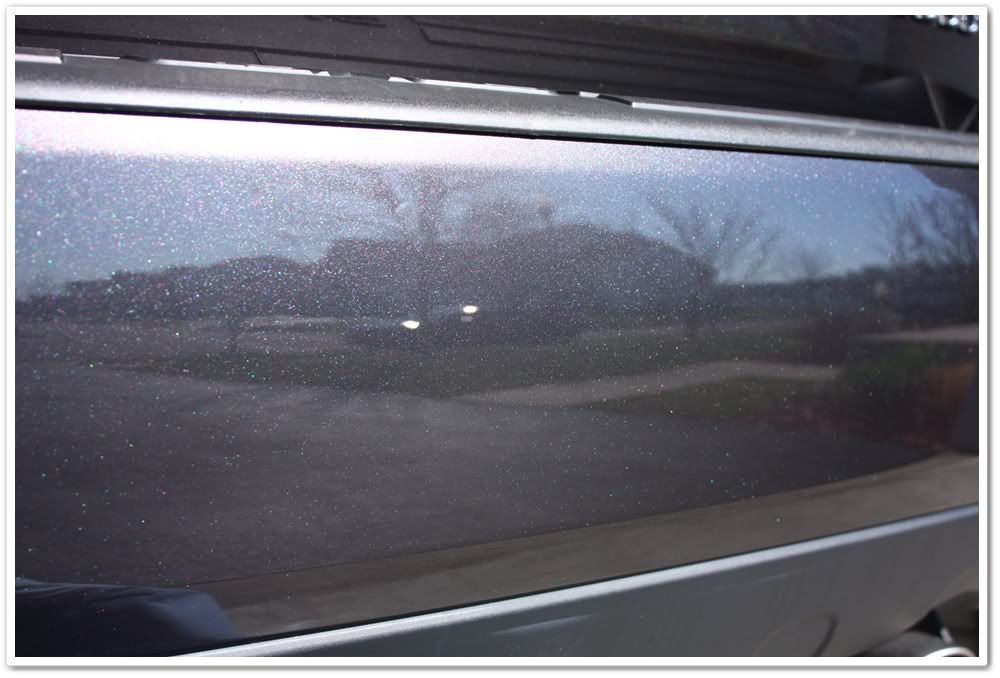
You can see that the scratches continue down the side, and there’s a nice scrape there too (I told you that the color on the car changes depending on the light!)
After:
Before:
After:
I knew that I had some heavier defects to deal with on the bumper and right side of the car, and here you can get a good picture of what I had to deal with. You can see a lot of vertical scratches on the bumper (hiding underneath the swirls). Since I had the PC in hand, I thought it would be a great opportunity to use the infamous Kevin Brown PC Method (KBPCM) with Meguiars M105 to correct them.
All of that corrected with one hit of M105 and the KBPCM! Afterwards I finished it with Poli-Seal. And yes, I went back and cleaned up the 105 residue that made it onto the plastic trim underneath…
Moving back up the right side of the Lexus I had to deal with this…scratches that went all the way from the front bumper to the rear! Once again with PC/orange in one hand and a bottle of M105 in the other, I was prepared for battle!
Guess who won that battle! These next few “after” photos are immediately after M105…no finishing polish (OPS) yet.
You can see that the scratches continue down the side, and there’s a nice scrape there too (I told you that the color on the car changes depending on the light!)
After:
Before:
After:
04-05-2009, 07:27 PM
#3
2012 SH-AWD / Advanced
Thread Starter
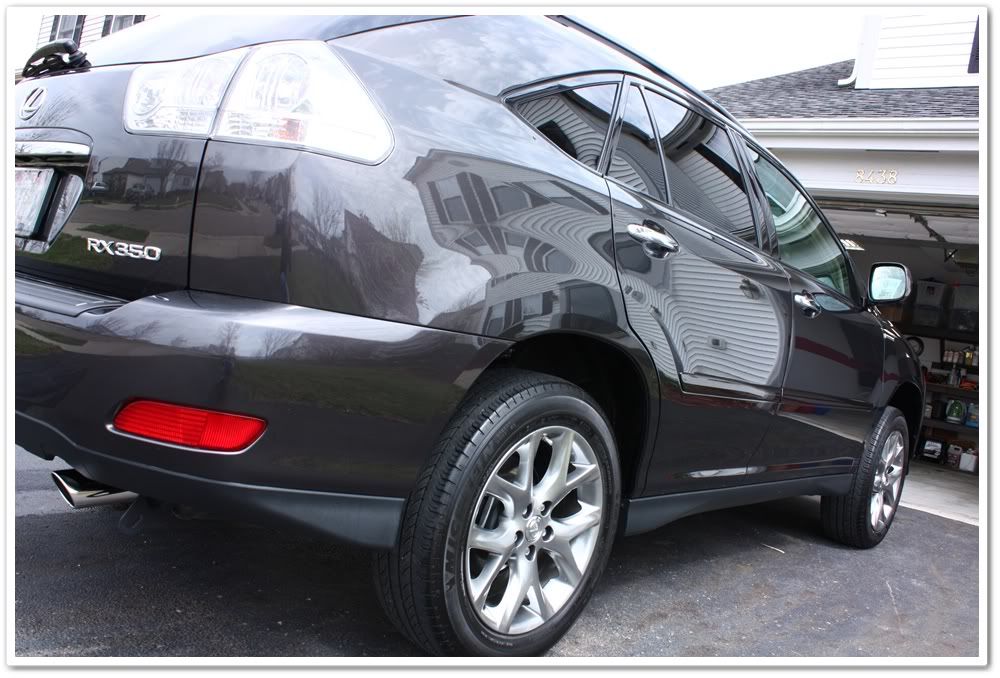
The M105 made quick work of the heavy defects, and then the Poli-Seal went smoothly on the rest of the car. There was sunshine outside, so I took the opportunity to pull the car out and get a few reflection shots since I didn’t know if I’d be able to the next day when I had the car all finished because the weather was supposed to change.
This is before finishing up the wheels/wheel wells, trim, glass, etc.
On this one you can see where I still had the tape protecting the Clear Bra.
Since I had the car all weekend, I closed up shop for the day so I could take my 8 year old son to Monster Jam for the evening. He had a blast!
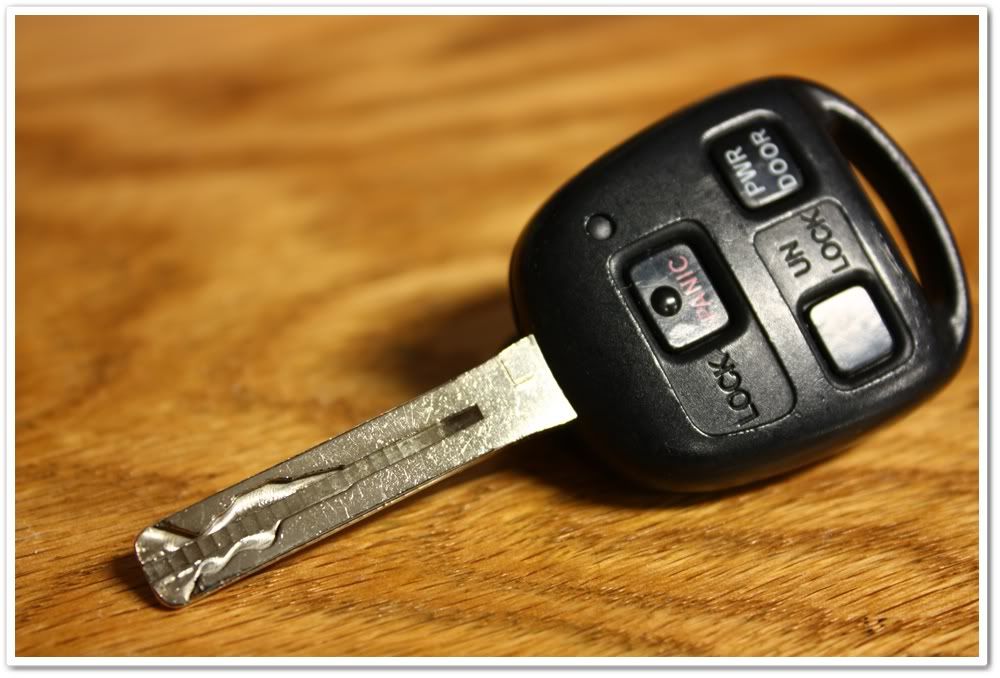
The next morning rolled around and now it’s time to finish up the Lexus. While having breakfast I had the car key sitting on the table in front of me, noticed that it was dirty, and thought hmmm, I bet I could clean that up. So my OCD got the better of me and I took some M105 to polish it up a bit.

This is why we call it detailing!
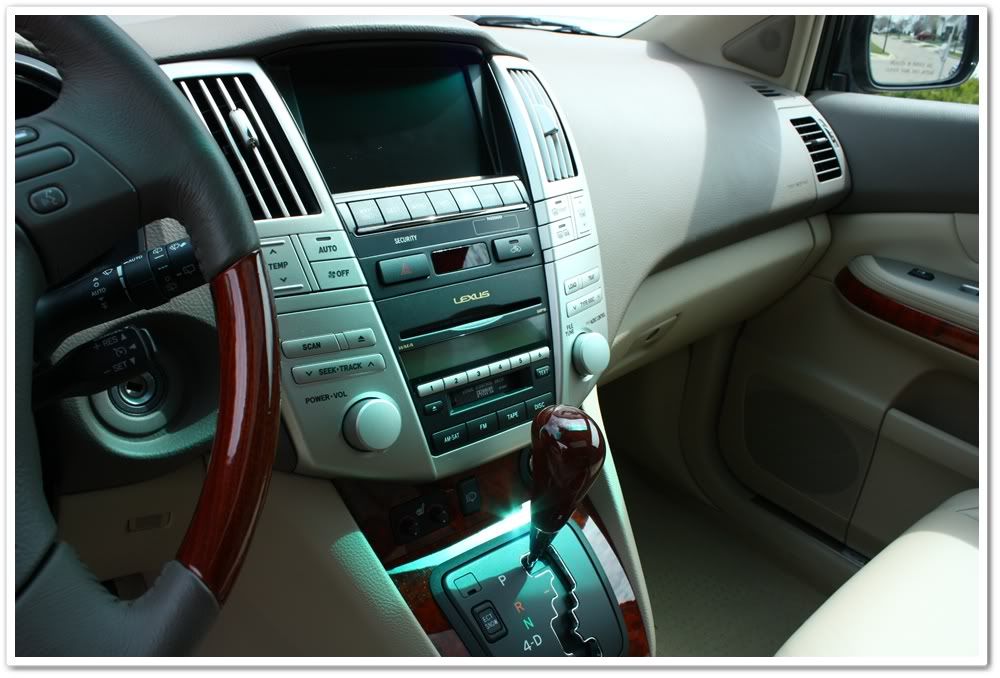
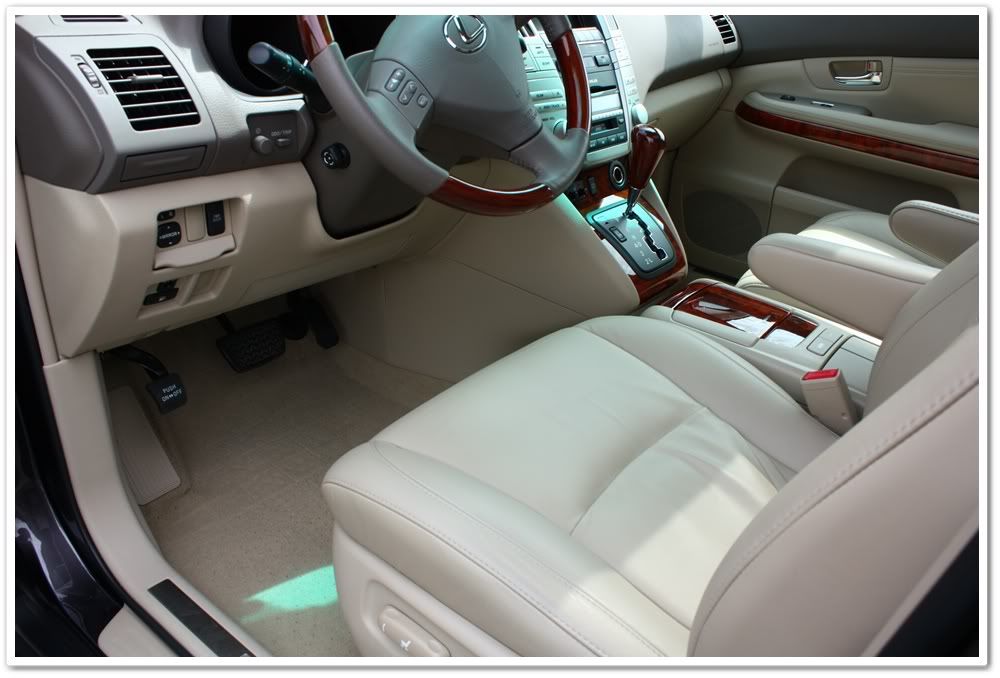
Now I’m moving on to the interior. Here’s what we’re dealing with:
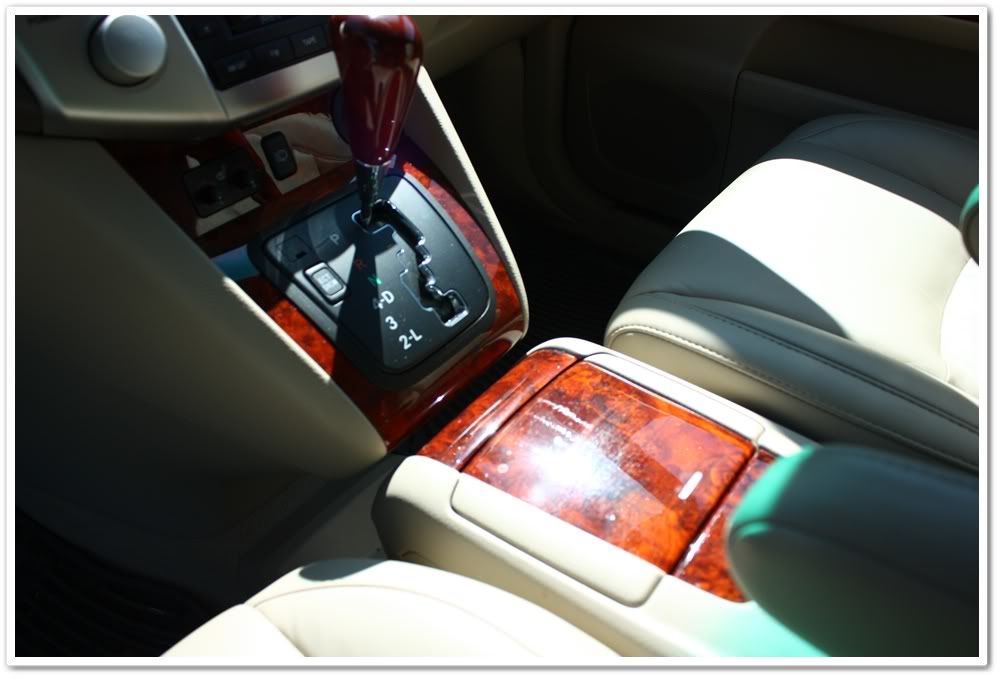
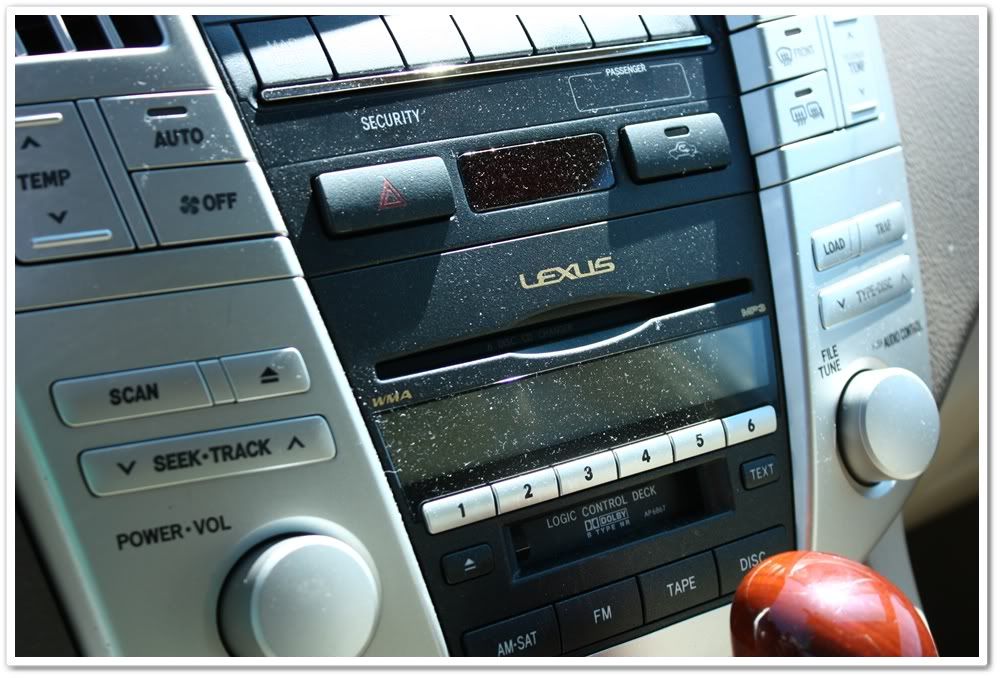
I did a very thorough vacuum job, then cleaned all surfaces with Woolite/water and a MF towel, and cleaned the gauges, controls, and console area with Meguiars Quick Interior Detailer.
This is before finishing up the wheels/wheel wells, trim, glass, etc.
On this one you can see where I still had the tape protecting the Clear Bra.
Since I had the car all weekend, I closed up shop for the day so I could take my 8 year old son to Monster Jam for the evening. He had a blast!
The next morning rolled around and now it’s time to finish up the Lexus. While having breakfast I had the car key sitting on the table in front of me, noticed that it was dirty, and thought hmmm, I bet I could clean that up. So my OCD got the better of me and I took some M105 to polish it up a bit.
This is why we call it detailing!
Now I’m moving on to the interior. Here’s what we’re dealing with:
I did a very thorough vacuum job, then cleaned all surfaces with Woolite/water and a MF towel, and cleaned the gauges, controls, and console area with Meguiars Quick Interior Detailer.
04-05-2009, 07:28 PM
#4
2012 SH-AWD / Advanced
Thread Starter
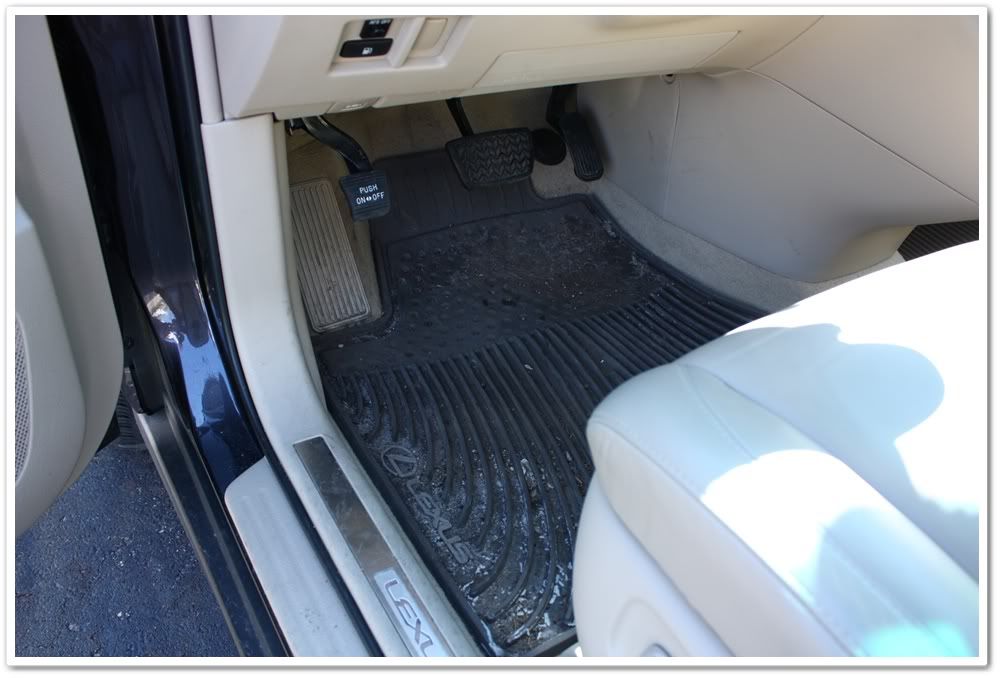
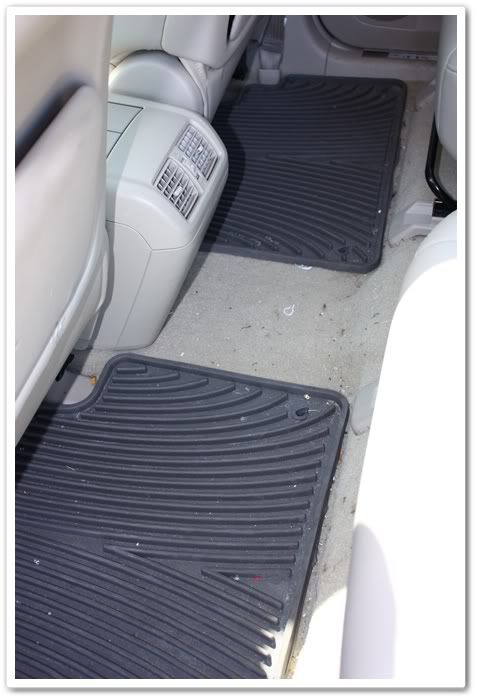
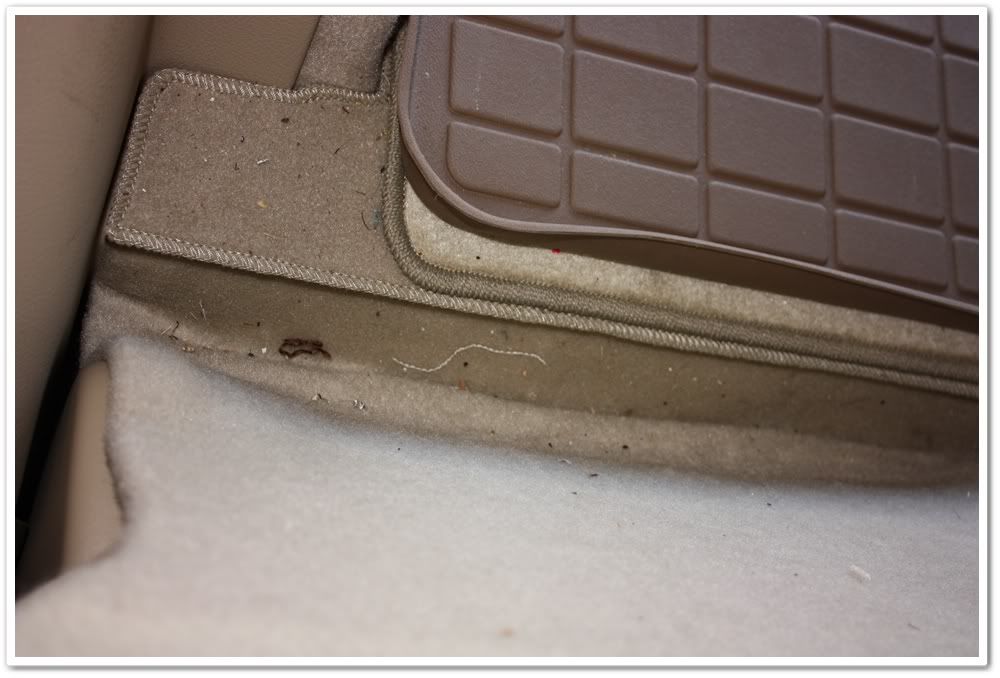
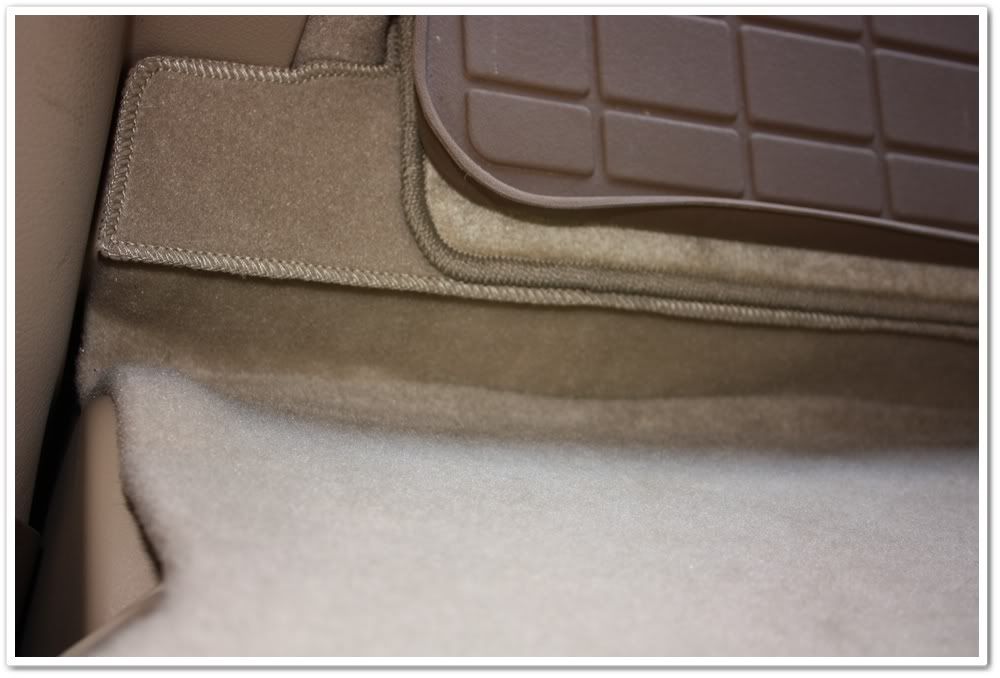
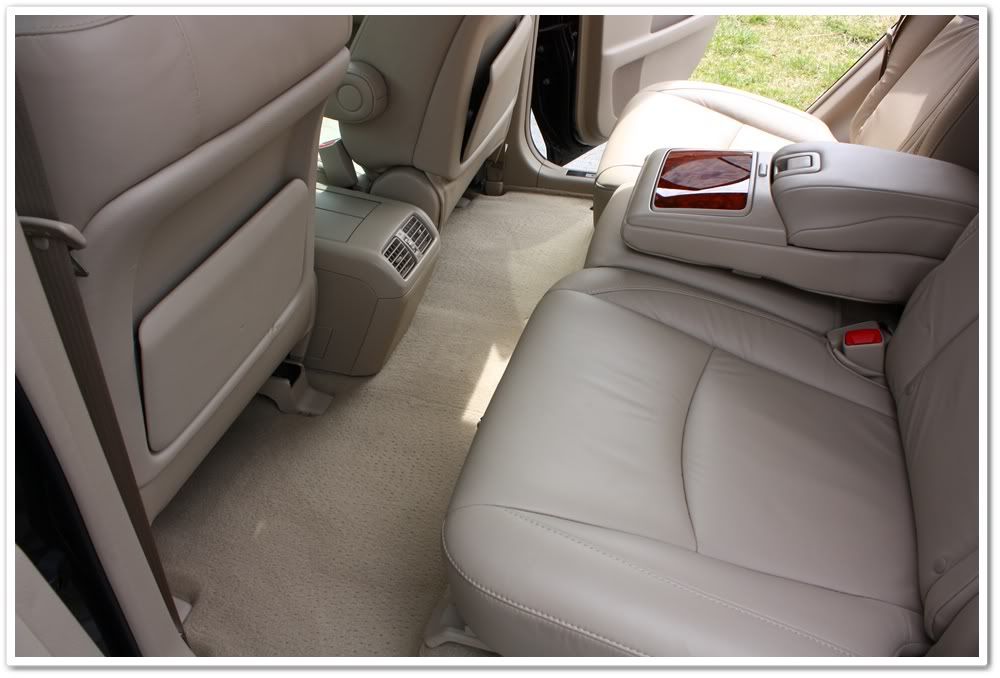
Here’s an area that can get missed. The only way to access this is to fold the rear seats forward. It’s like a catch-bin for “stuff”. This view is looking back into the hatch area.
After:
The driver’s seat was the dirtiest as per usual. It had a bit of grime built up, and some dye transfer issues as well. I first wiped it down with Woolite and water, and then sprayed Leatherique Prestine Clean on the seat and worked it in with a Swissvax leather brush. Afterwards I wiped it all down with a damp MF towel.
Before:
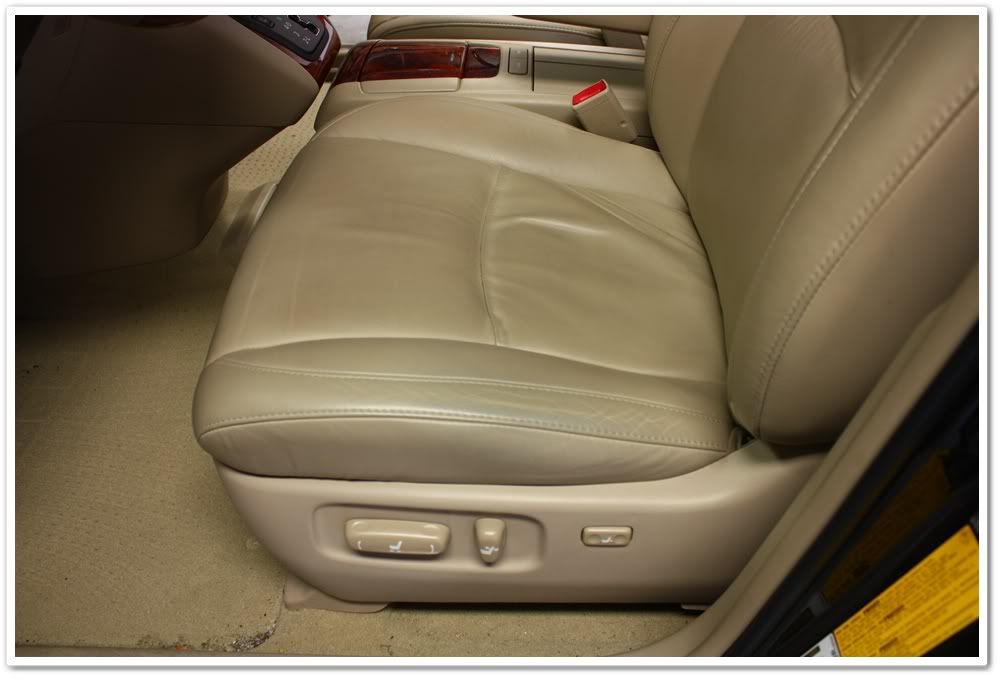
After:
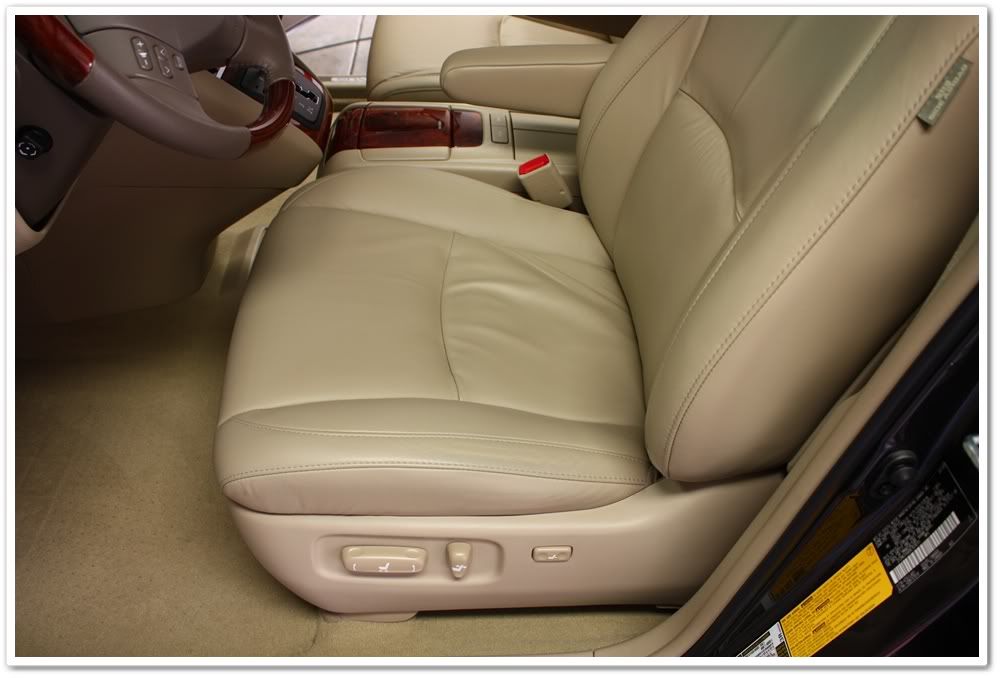
Some other interior after shots:
I cleaned the foot rest on the left (as well as the pedals and rubber floor mats) with Meguiars APC+.
Now that the interior is all finished up, it’s time for a few finishing touches.
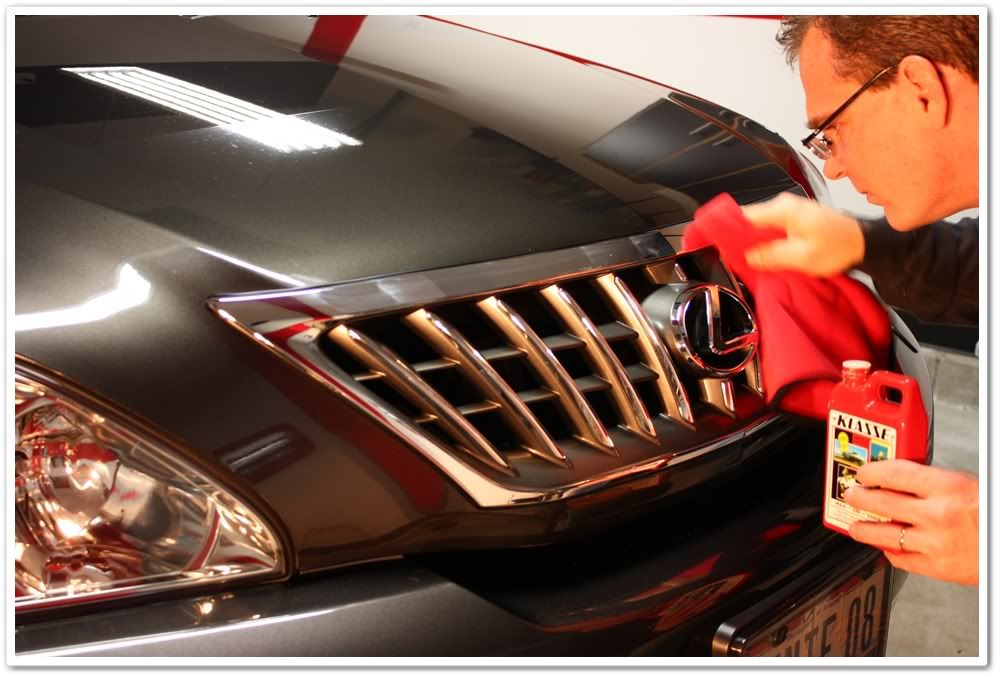
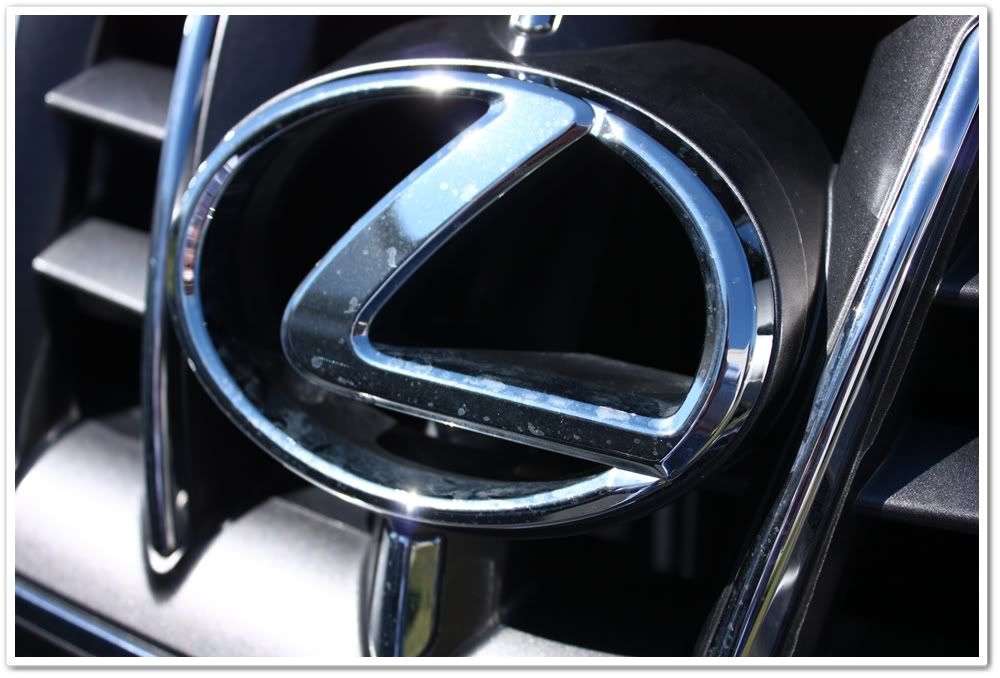
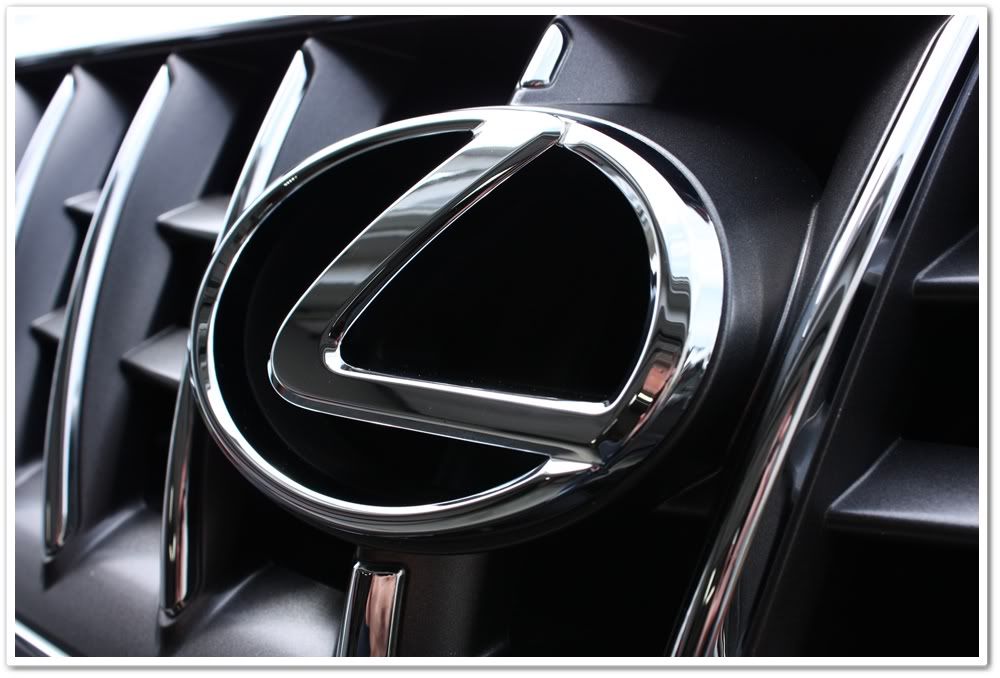
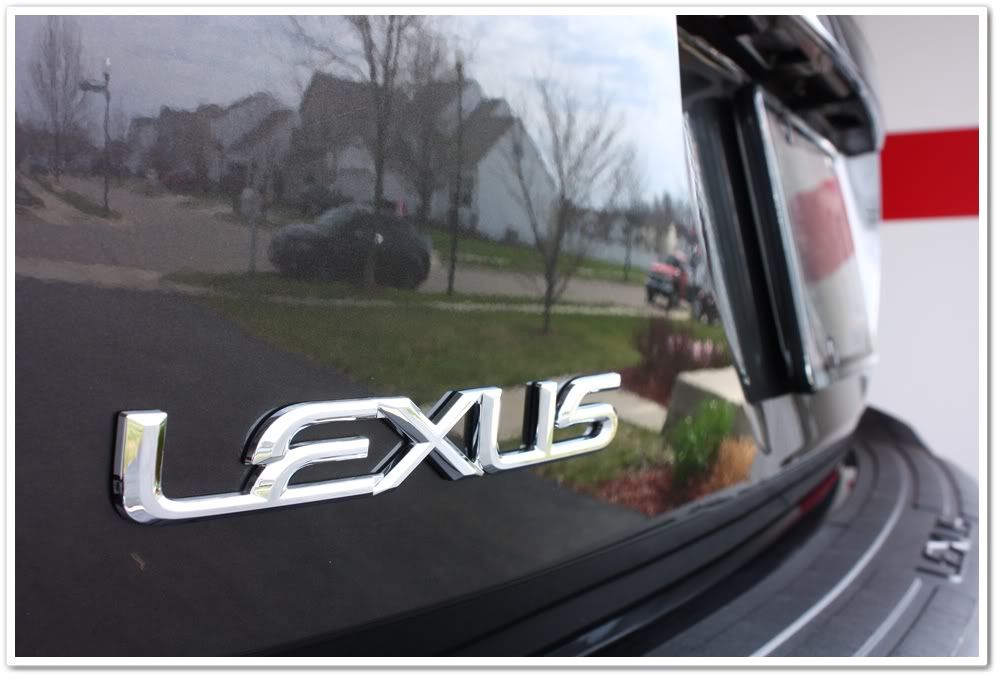
The chrome and emblems got cleaned and protected with Klasse All-In-One.
Before:
After:
After:
The driver’s seat was the dirtiest as per usual. It had a bit of grime built up, and some dye transfer issues as well. I first wiped it down with Woolite and water, and then sprayed Leatherique Prestine Clean on the seat and worked it in with a Swissvax leather brush. Afterwards I wiped it all down with a damp MF towel.
Before:
After:
Some other interior after shots:
I cleaned the foot rest on the left (as well as the pedals and rubber floor mats) with Meguiars APC+.
Now that the interior is all finished up, it’s time for a few finishing touches.
The chrome and emblems got cleaned and protected with Klasse All-In-One.
Before:
After:
04-05-2009, 07:29 PM
#5
2012 SH-AWD / Advanced
Thread Starter
Exhaust tip before:
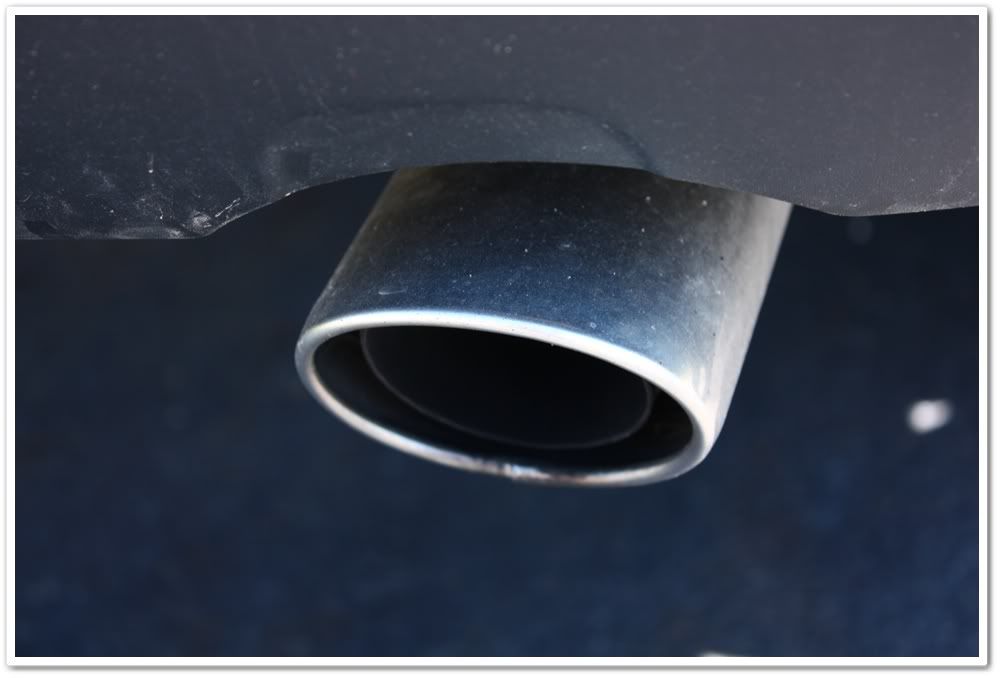
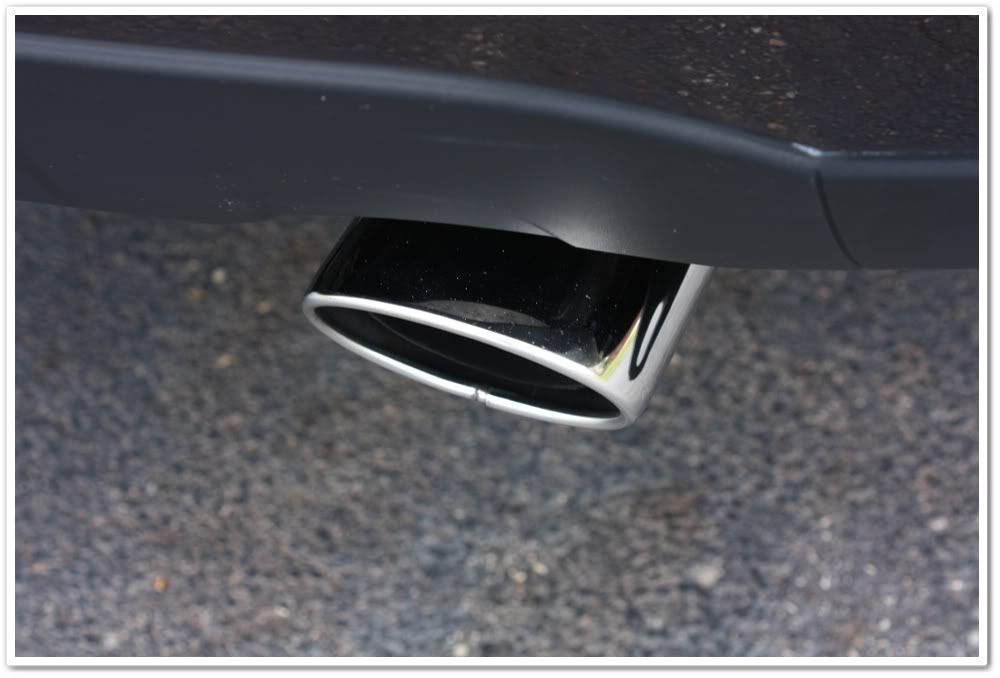
After polishing with M105: Note…that is not polish residue that you see where the plastic trim meets the bumper. It’s actually adhesive (I found it in several areas…perhaps leftover from the body work that had been done on it).
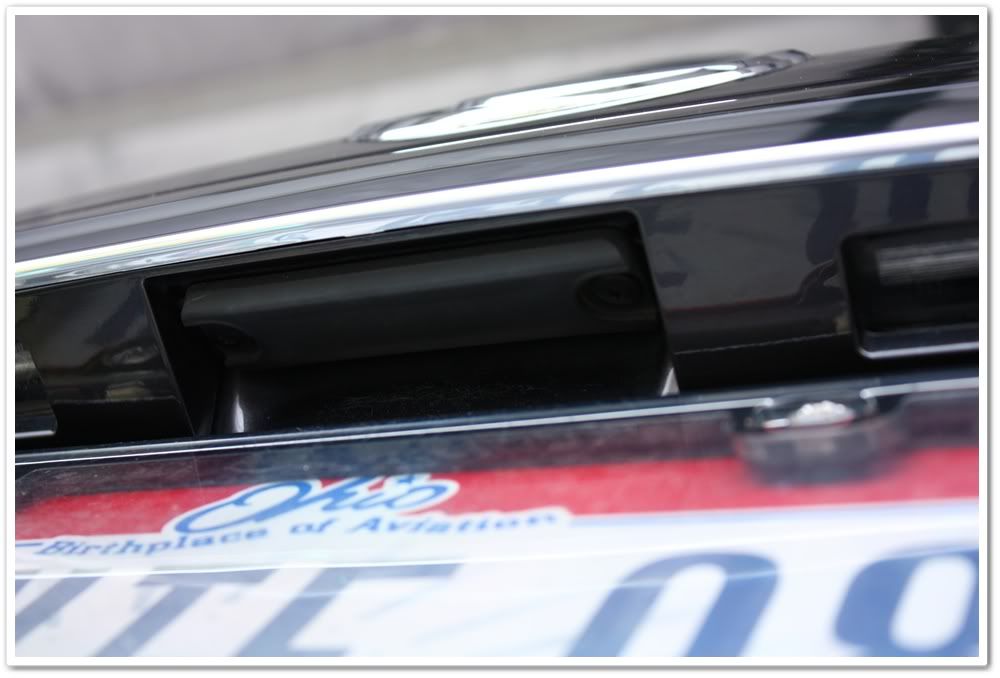
Don’t forget to clean the area on the trunk above the license plate:
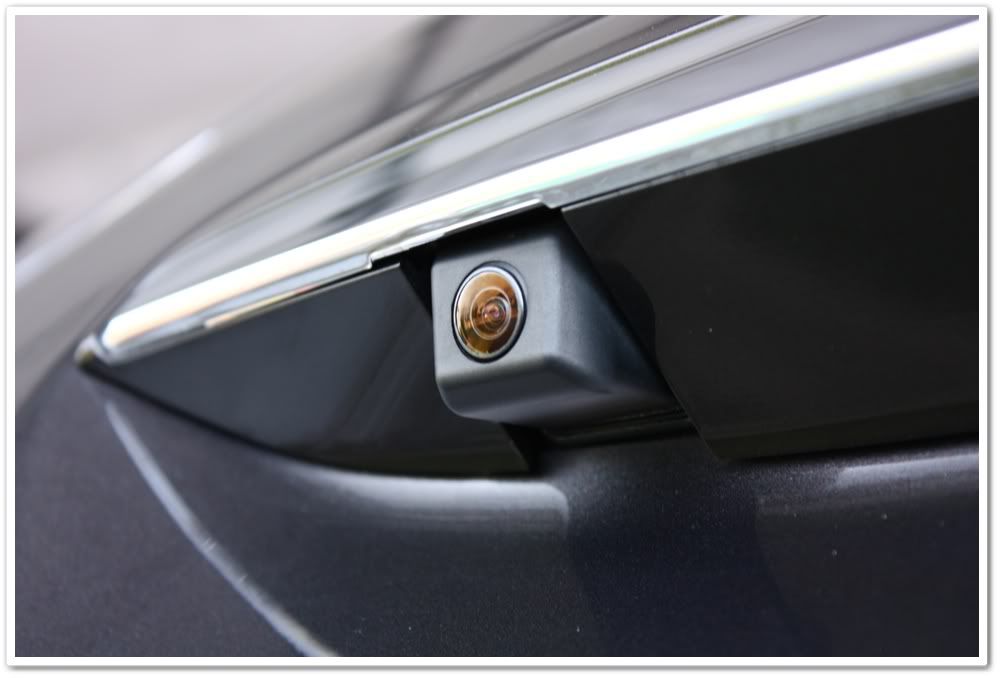
And clean up the backup camera lense:
Ready for some after shots?
I couldn’t decide between these next two photos, so I added both.
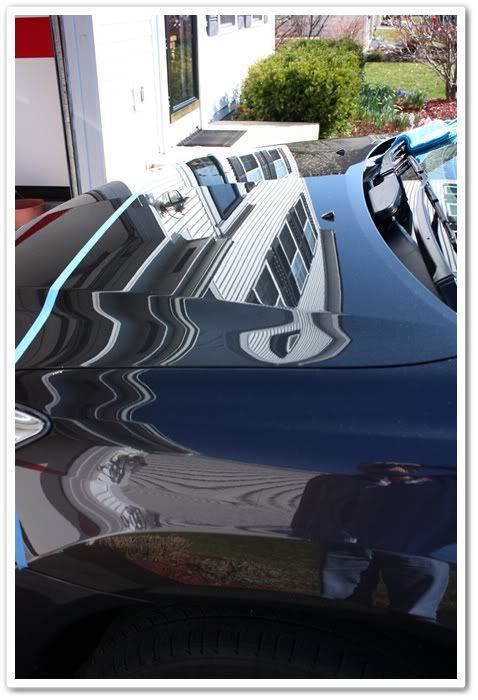
You can tell it’s spring! If you look closely, you will notice the magnolia tree blossoming in the reflection.
After polishing with M105: Note…that is not polish residue that you see where the plastic trim meets the bumper. It’s actually adhesive (I found it in several areas…perhaps leftover from the body work that had been done on it).
Don’t forget to clean the area on the trunk above the license plate:
And clean up the backup camera lense:
Ready for some after shots?
I couldn’t decide between these next two photos, so I added both.
You can tell it’s spring! If you look closely, you will notice the magnolia tree blossoming in the reflection.
04-05-2009, 07:30 PM
#6
2012 SH-AWD / Advanced
Thread Starter
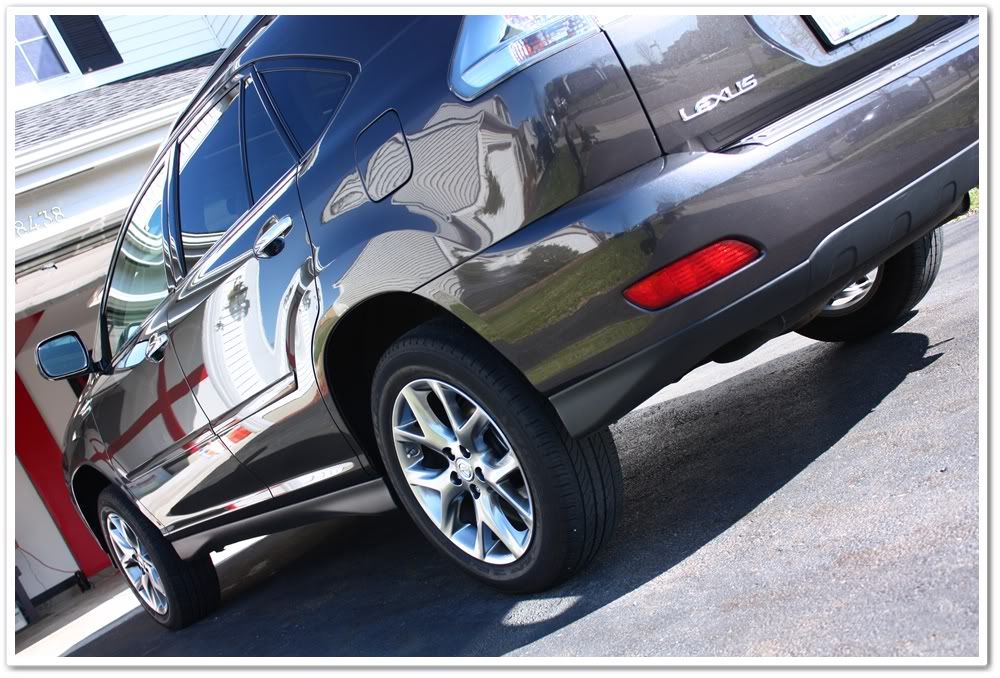
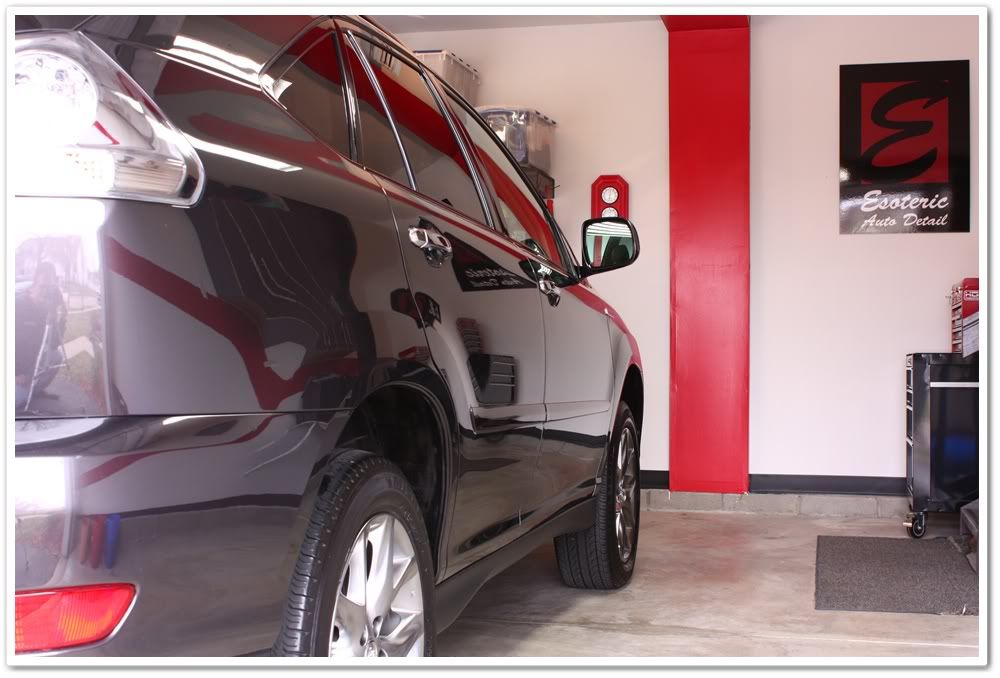
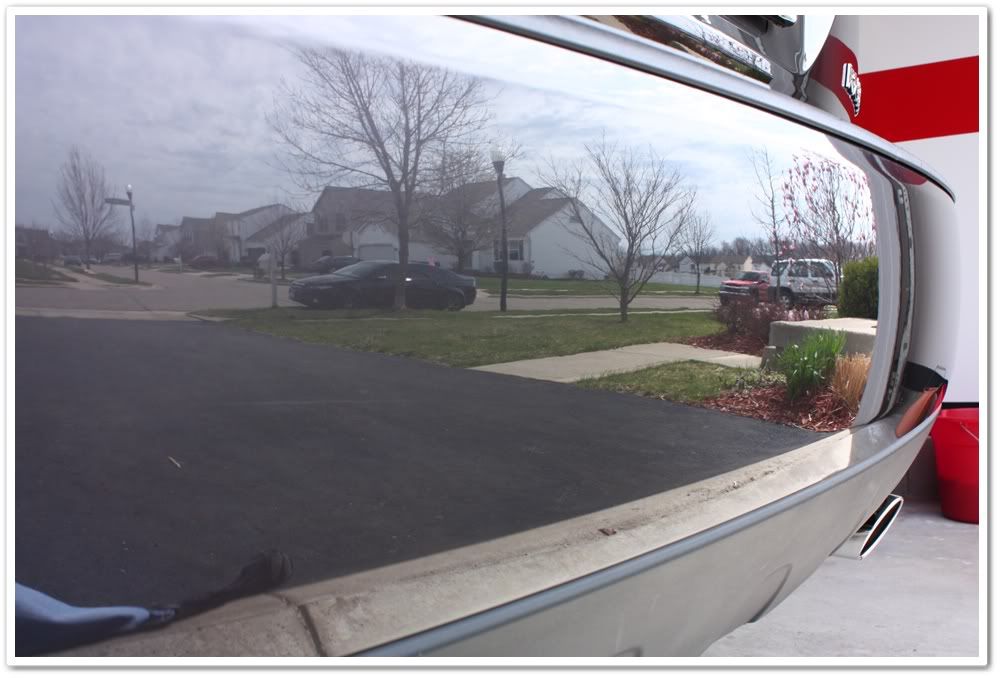
You can see how the color looks a bit different in this photo than it did in the sun shot I took the day before.
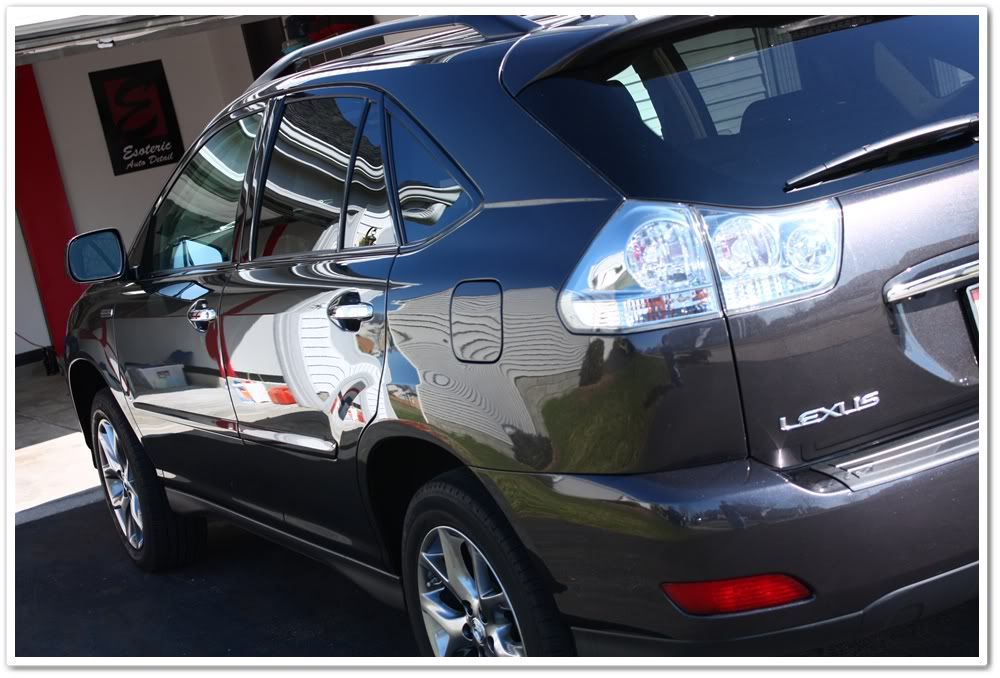
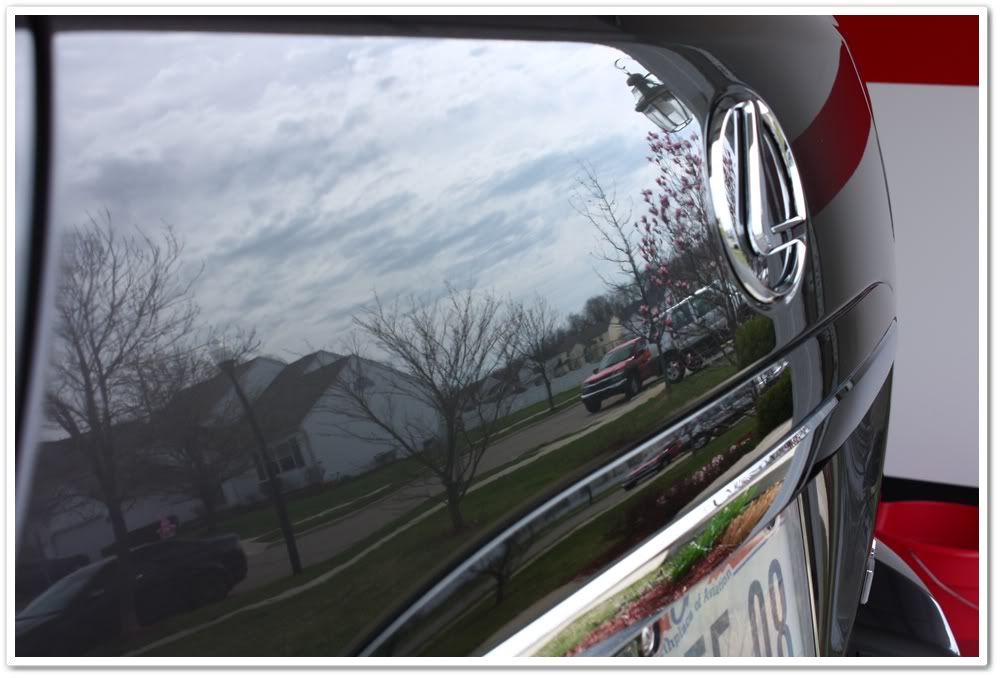
Final. You can see how the Clear Bra distorts the clarity a bit. Just compare the top of the red ceiling stripe to the bottom.
Total time: 7.5 hours (this one went quickly!!)
Thank you as always for checking out my work!
Final. You can see how the Clear Bra distorts the clarity a bit. Just compare the top of the red ceiling stripe to the bottom.
Total time: 7.5 hours (this one went quickly!!)
Thank you as always for checking out my work!
Trending Topics
04-05-2009, 08:09 PM
#8
amazing work as always!!
i noticed you're doing this "that's why we call it detailing" thing in your more recent posts....
i think you should have a "segment" of this, picking out nitty gritty details that no one would pick up
(you'll probably run out after some time...but should be interesting what comes up!)
i noticed you're doing this "that's why we call it detailing" thing in your more recent posts....
i think you should have a "segment" of this, picking out nitty gritty details that no one would pick up
(you'll probably run out after some time...but should be interesting what comes up!)
 Very nice, Todd. I like that color.
 04-05-2009, 08:57 PM
#12
2012 SH-AWD / Advanced
Thread Starter
Thank you, I thought it was cool too.
Short version...PC with an orange pad and Megs 105. Prime pad (completely cover surface of pad but don't saturate), apply strip of 105 to surface, start PC at speed 6 with HIGH pressure (more than you've probably done before). When 105 starts to flash, stop, spray surface with water, don't apply more 105 to either surface or pad, then start PC back at 6 until just before 105 flashes again. You'll need to clean pad after each panel. You'll be amazed on the amount of correction you get with a PC, and in a short period of time. The bonus is that it's much safer than correction with a rotary and leaves a hologram-free finish.
Kevin is currently writing a paper on this and it will be posted online soon.
04-05-2009, 09:07 PM
#14
Racer

I loved the key polish up you should add that in the description of the service.
clean windows
vacuum
wax
polish key
About to try the kevin brown method on a black TL coming this Tuesday.
clean windows
vacuum
wax
polish key
About to try the kevin brown method on a black TL coming this Tuesday.
04-05-2009, 10:00 PM
#15
2016 E350 Sport
As always Todd, Great Detail!!!
Just a couple of questions:
I know what you mean by this type of photo with a clear bra installed. I have the same issue but your pic still looks really good.
Just a couple of questions:
- What PC speed did you use the orange pad and Poliseal?
- How powerful is the Blaster air blower?
- Did you use the Poliseal and orange pad on the clear bra?
I know what you mean by this type of photo with a clear bra installed. I have the same issue but your pic still looks really good.
 04-05-2009, 11:54 PM
#17
I'm a thrill seeker in my
Another excellent post! How could you not get into detailing after seeing such amazing results every time.
I have friends with no knowledge of proper detailing and they were blown away by the difference you made on that accord (swirlzilla haha) a while back. Not only does it make me excited to do my own TL, but perhaps some friends cars on the side as well
I have friends with no knowledge of proper detailing and they were blown away by the difference you made on that accord (swirlzilla haha) a while back. Not only does it make me excited to do my own TL, but perhaps some friends cars on the side as well

 04-06-2009, 05:20 AM
#20
2012 SH-AWD / Advanced
Thread Starter
[QUOTE=SweetJazz;10738049]As always Todd, Great Detail!!!
Just a couple of questions:
I know what you mean by this type of photo with a clear bra installed. I have the same issue but your pic still looks really good.
QUOTE]
Thanks!
Speed 6
Amazingly powerful for such a small package!
Yes I did, but at about speed 4.5
I know, I know...I'll be out of it soon though. But I did show a lot of love to Optimum!
Thank you. Just be careful as it can become quite addictive!
Thank you. Yes those big vehicles are back breakers for sure. It really makes you appreciate the smaller cars.
Thanks! I enjoyed working with this color since it seemed to change all of the time. I'm all about the right tools for the job, and the dryer is perfect in my opinion.
Just a couple of questions:
- What PC speed did you use the orange pad and Poliseal?
- How powerful is the Blaster air blower?
- Did you use the Poliseal and orange pad on the clear bra?
I know what you mean by this type of photo with a clear bra installed. I have the same issue but your pic still looks really good.
QUOTE]
Thanks!
Speed 6
Amazingly powerful for such a small package!
Yes I did, but at about speed 4.5
I know, I know...I'll be out of it soon though. But I did show a lot of love to Optimum!
Another excellent post! How could you not get into detailing after seeing such amazing results every time.
I have friends with no knowledge of proper detailing and they were blown away by the difference you made on that accord (swirlzilla haha) a while back. Not only does it make me excited to do my own TL, but perhaps some friends cars on the side as well
I have friends with no knowledge of proper detailing and they were blown away by the difference you made on that accord (swirlzilla haha) a while back. Not only does it make me excited to do my own TL, but perhaps some friends cars on the side as well
Thanks! I enjoyed working with this color since it seemed to change all of the time. I'm all about the right tools for the job, and the dryer is perfect in my opinion.
04-06-2009, 10:52 AM
#21
Team Owner
iTrader: (2)
Join Date: Jan 2008
Location: Kansas City, MO (Overland Park, KS)
Posts: 36,545
Received 6,470 Likes
on
5,162 Posts
Todd, beautiful job. I amazes me how people don't take care of their cars, but it gives you a chance to show them what their car could look like!!
2009 Kansas City Acura Meet-May 17th
https://acurazine.com/forums/midwest-312/kansas-city-2009-spring-all-acura-meet-may-17th-12pm-%40-jay-wolfe-acura-714994/
2009 Kansas City Acura Meet-May 17th
https://acurazine.com/forums/midwest-312/kansas-city-2009-spring-all-acura-meet-may-17th-12pm-%40-jay-wolfe-acura-714994/
04-06-2009, 12:43 PM
#22
Senior Moderator
Regional Coordinator
(Mid-Atlantic)
Regional Coordinator
(Mid-Atlantic)
iTrader: (6)
 I need to come down to CBus and get some detailing lessons, incredible job as always, I see you used the M105 for polishing, but I missed what sealant you used?
04-06-2009, 03:16 PM
I need to come down to CBus and get some detailing lessons, incredible job as always, I see you used the M105 for polishing, but I missed what sealant you used?
04-06-2009, 03:16 PM
#23
2012 SH-AWD / Advanced
Thread Starter
Steven...thanks! I find that in many cases threads like this simply inspire people to want to keep a much nicer car. If that's what I accomplish, then I'm good with that!
97BlackAckCL...thanks again. I've had a lot of people lately tell me that they'd like to come over from several states away to see if they can learn a thing or two. By no means do I claim to know it all, but I'm always happy share helpful information.
I used the Optimum Poli-Seal, which is a cleaner/polish/sealant. In my experience it provides about 3 or 4 months of protection.
04-06-2009, 04:29 PM
#25
2012 SH-AWD / Advanced
Thread Starter
I already did!
"The driver’s seat was the dirtiest as per usual. It had a bit of grime built up, and some dye transfer issues as well. I first wiped it down with Woolite and water, and then sprayed Leatherique Prestine Clean on the seat and worked it in with a Swissvax leather brush. Afterwards I wiped it all down with a damp MF towel."
"The driver’s seat was the dirtiest as per usual. It had a bit of grime built up, and some dye transfer issues as well. I first wiped it down with Woolite and water, and then sprayed Leatherique Prestine Clean on the seat and worked it in with a Swissvax leather brush. Afterwards I wiped it all down with a damp MF towel."
04-06-2009, 05:32 PM
#26
The Detailer
iTrader: (1)
Join Date: Jul 2008
Location: Hollister / San Jose, CA
Age: 41
Posts: 1,090
Likes: 0
Received 0 Likes
on
0 Posts
I'm glad the KB method is working great for you Todd! I'm still trying to figure out what pads I'm going to try this method with because I don't think my 3M UK pads will fare all that well with this method... I need some flat pads, LoL.
Oh yeah, what wool pads do you have in your arsenal Todd? I think I'm solely sticking to the Micro-Surface Tuf-Buf wool pads but was looking to see what you are using. TIA!
Oh yeah, what wool pads do you have in your arsenal Todd? I think I'm solely sticking to the Micro-Surface Tuf-Buf wool pads but was looking to see what you are using. TIA!
 04-06-2009, 05:54 PM
#28
2012 SH-AWD / Advanced
Thread Starter
I'm glad the KB method is working great for you Todd! I'm still trying to figure out what pads I'm going to try this method with because I don't think my 3M UK pads will fare all that well with this method... I need some flat pads, LoL.
Oh yeah, what wool pads do you have in your arsenal Todd? I think I'm solely sticking to the Micro-Surface Tuf-Buf wool pads but was looking to see what you are using. TIA!
Oh yeah, what wool pads do you have in your arsenal Todd? I think I'm solely sticking to the Micro-Surface Tuf-Buf wool pads but was looking to see what you are using. TIA!
Yeah, you definitely want the flat pads for this method.
I have the Micro-Surface Tuf-Buf pads (great when combined with PO203S), as well as PFW pads. I don't have anything more aggressive than that, but I've been able to correct some seriously heavy damage with them.
Thank you! I was really happy with the amount of productivity I achieved in 7.5 hours myself. Sometimes they take a tremendous amount of time, and sometimes they go relatively quickly. After a couple of back-to-back 12 hour jobs, I was happy to be done in 7.5!
 04-13-2009, 01:08 AM
#30
05' AT SSM
Wow that car isn't aging well with the current owner, they brought it to the fountain of youth.
Great before and afters, im sure the car owner is more than satisfied with the results.
Great before and afters, im sure the car owner is more than satisfied with the results.
04-13-2009, 03:18 AM
#31
I think I need to invest in a camera after seeing your pictures. My crappy AA battery powered 5.1mp camera isn't cutting it anymore Lol
And you've given me some hope with my OPS, I was never impressed with it, but I also never tried it with an orange pad. I will give that a shot one of these days
good work as always!!
And you've given me some hope with my OPS, I was never impressed with it, but I also never tried it with an orange pad. I will give that a shot one of these days
good work as always!!

Thread
Thread Starter
Forum
Replies
Last Post
MrHeeltoe
1G TSX Tires, Wheels, & Suspension
20
02-23-2023 01:54 PM
detailersdomain
Wash & Wax
3
10-09-2015 10:13 PM
MrHeeltoe
2G TSX Tires, Wheels & Suspension
3
09-29-2015 10:43 PM
MrHeeltoe
3G TL Tires, Wheels & Suspension
0
09-28-2015 05:43 PM