
06 Subaru WRX by TSC17!
 04-20-2009, 08:49 AM
#1
2012 SH-AWD / Advanced
Thread Starter
06 Subaru WRX by TSC17!
2006 Subaru WRX
This post ended up with a lot more reading, and less eye candy than what I normally do, but given the nature of the detail, I saw it as a good learning opportunity for those who are newer to detailing.
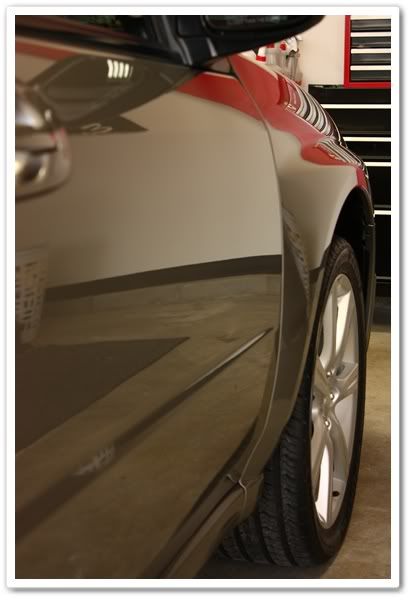
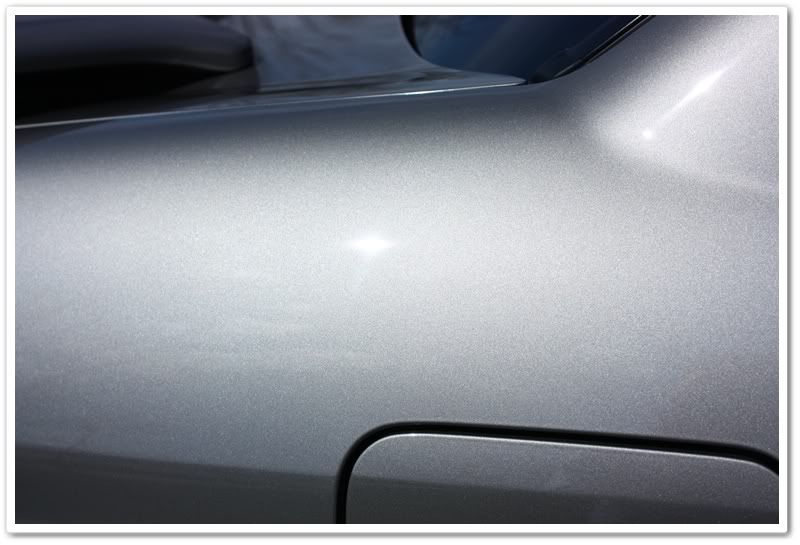
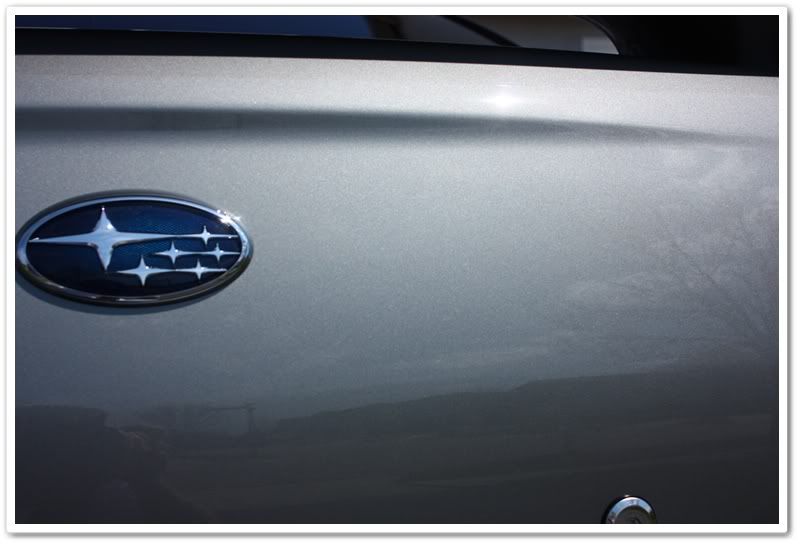
The owner recently purchased the car, and the exterior had been somewhat neglected. Silver typically does a great job of hiding swirls and defects, but not on this one! As you can see from the photos below, it was heavily swirled with plenty of holograms as well.
All of the horizontal surfaces were also covered in small dots, which looked to be paint overspray. I�ve experienced some that come off easily and others that will not, so I warned the owner accordingly and told him I�d touch base with him during the detail to see what we�re up against.
Silver is also challenging for photography and doesn�t provide the wow-factor during and after that darker colors do, so I held back on the detailed photos that I normally post.
Here�s what we were dealing with:
Got swirls?
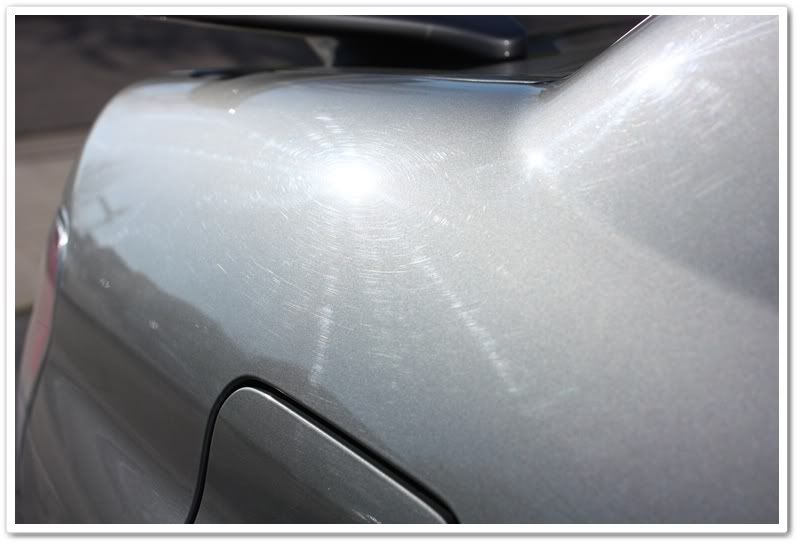
Here you can see hologram tracers indicating that somebody has made a poor attempt at rotary polishing sometime in the past.
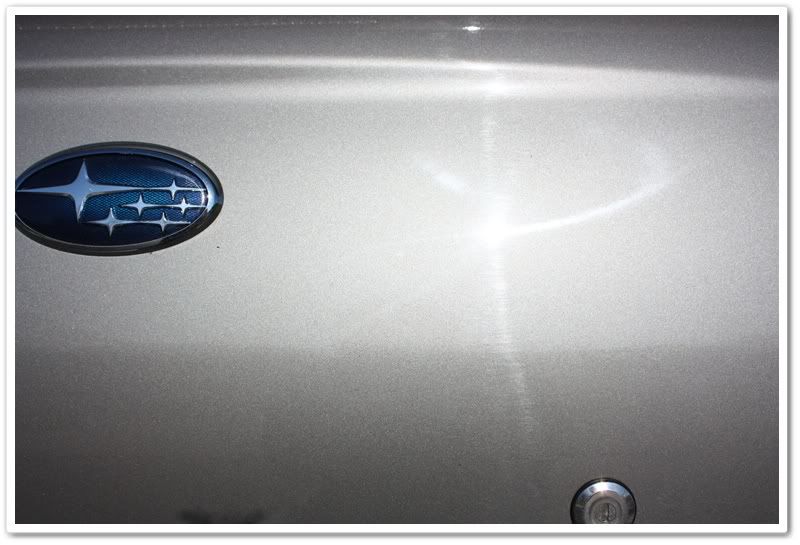
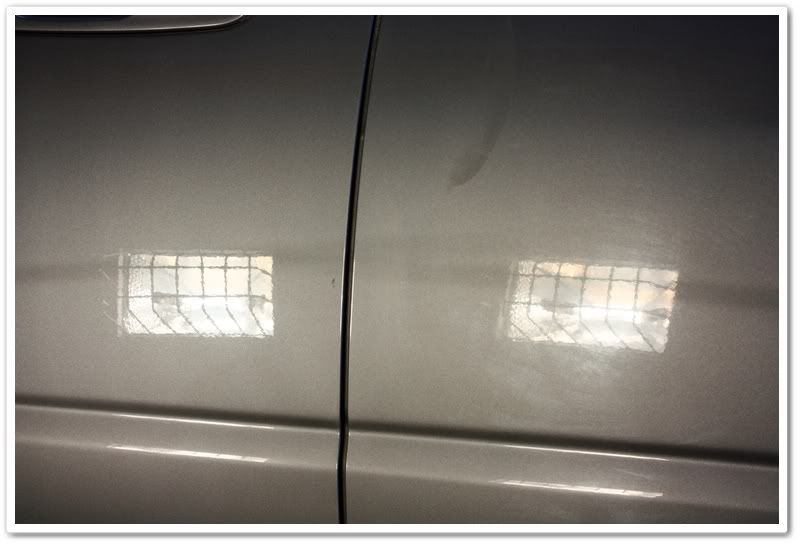
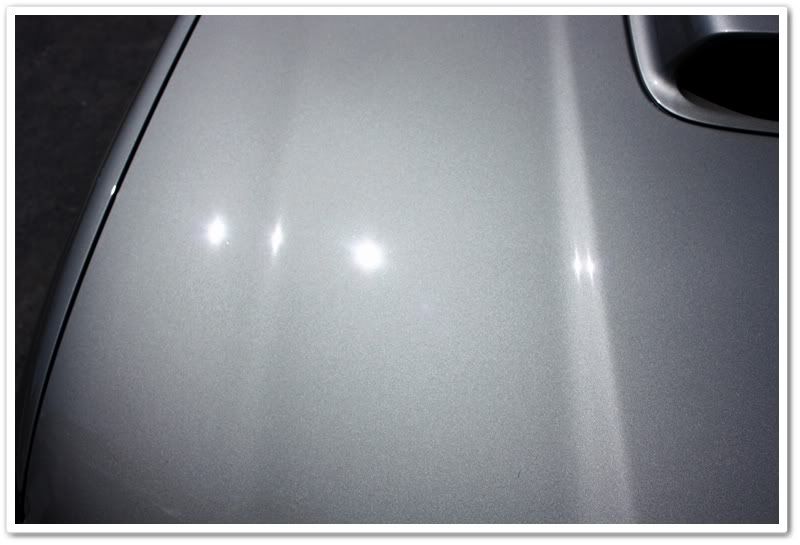
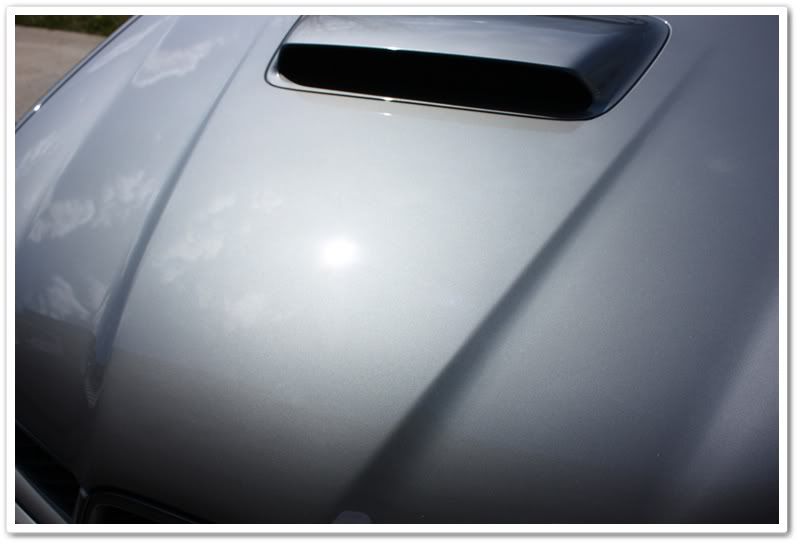
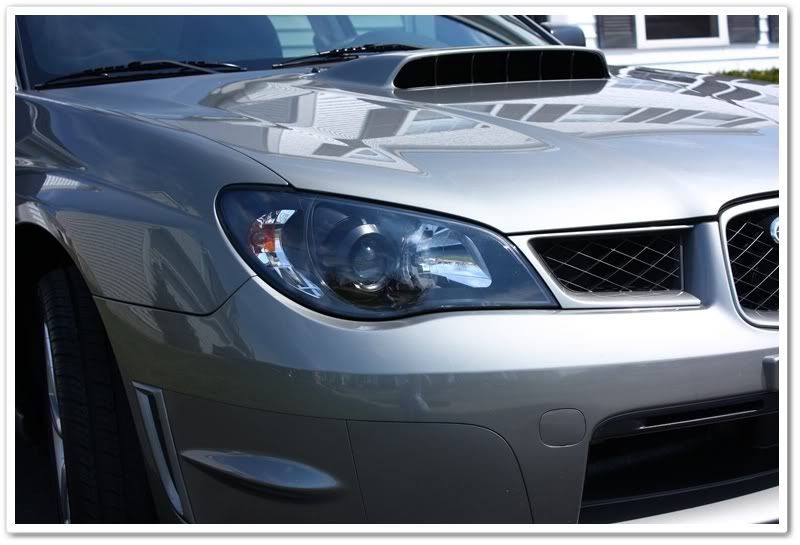
The hood looked especially bad. The camera couldn�t capture the true severity of the damage to the finish. If you look closely, you can actually see the small dots that I am referring to.
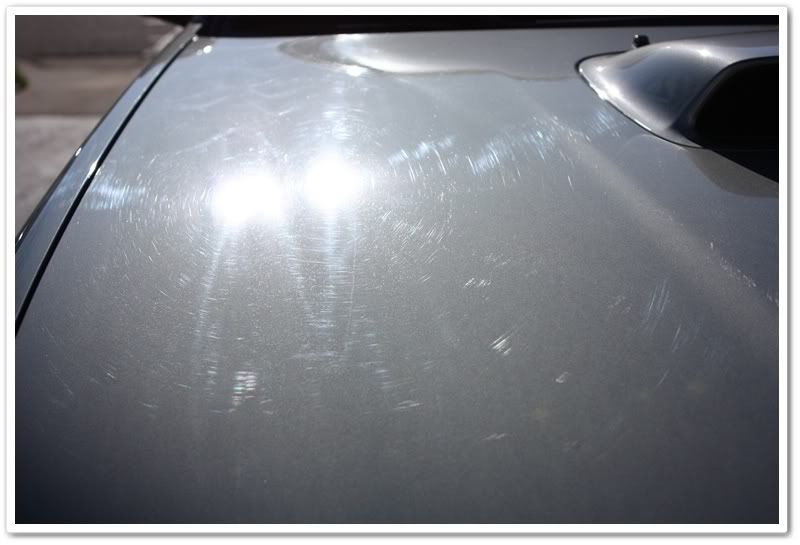
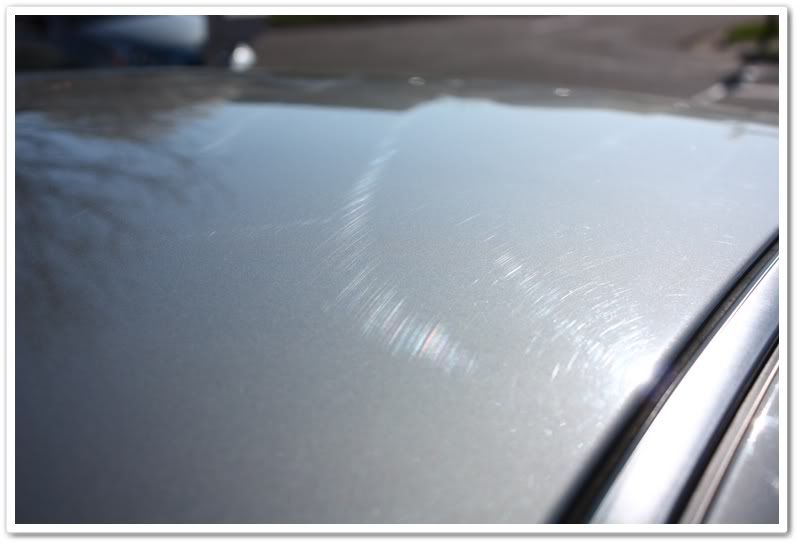
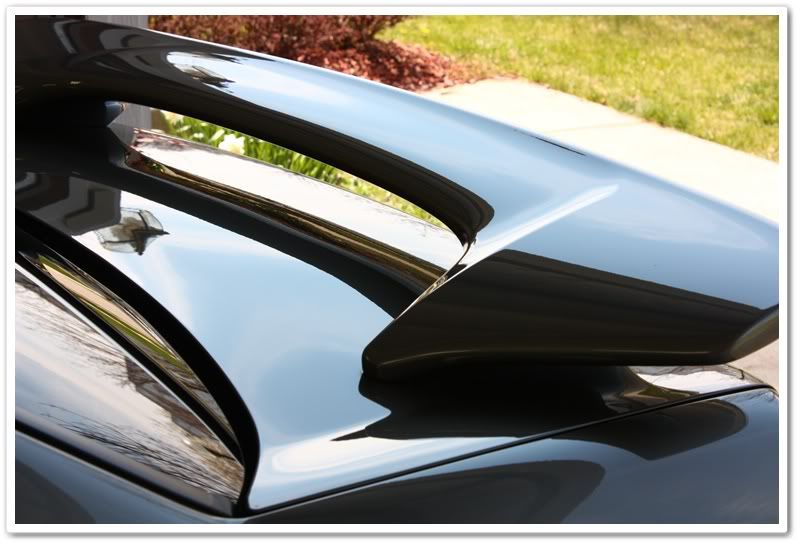
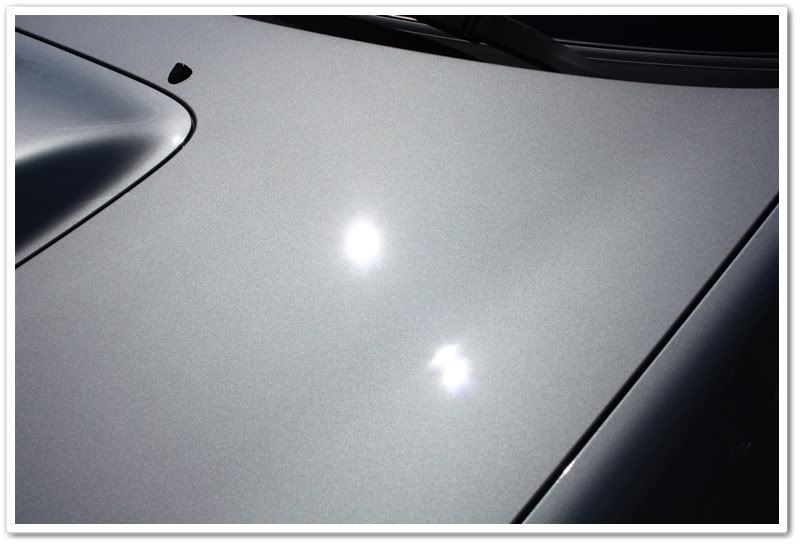
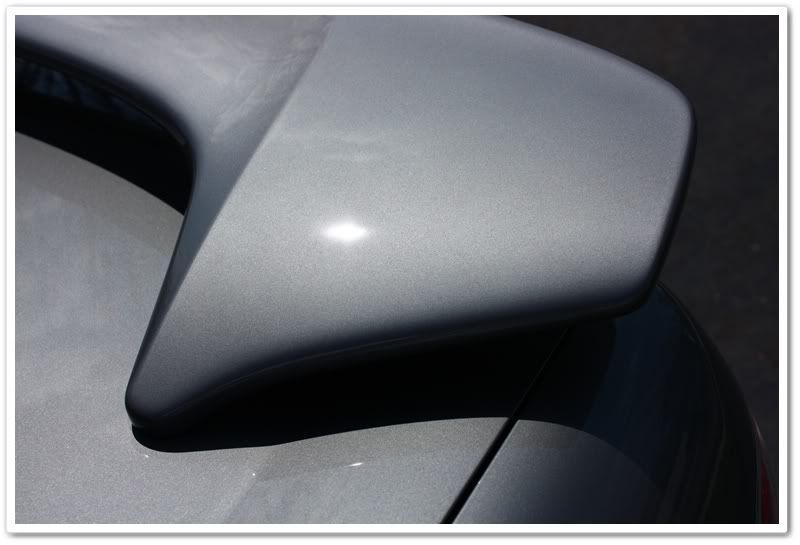
The roof�more swirls, scratches, water etching, and holograms.
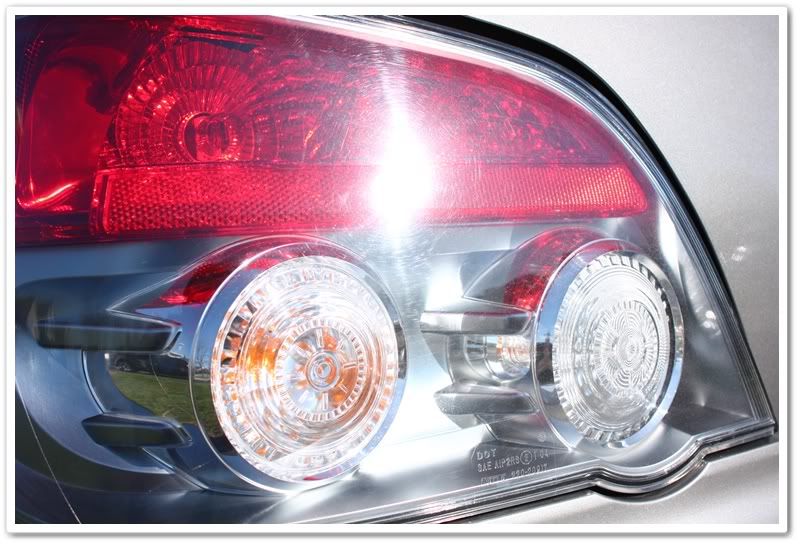
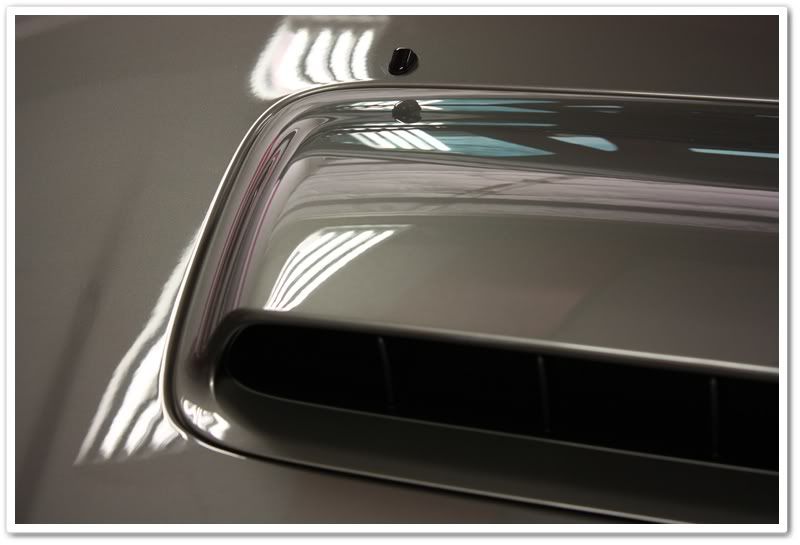
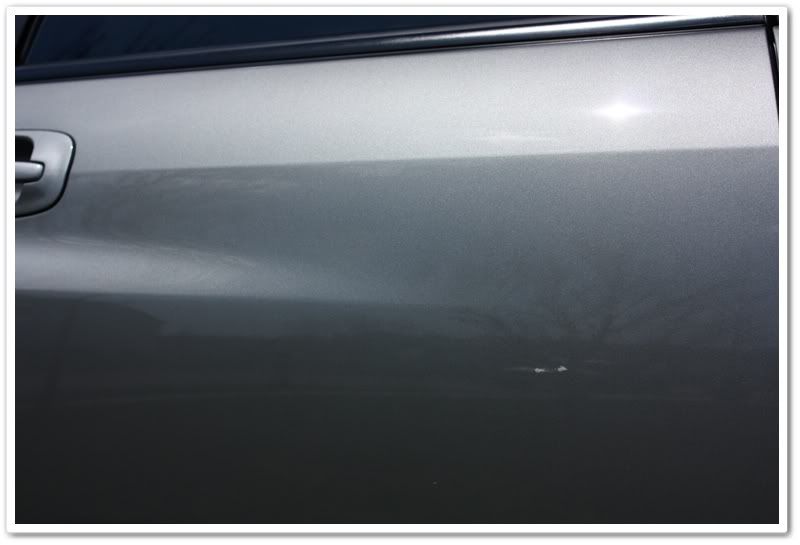
The tail lights were heavily swirled, and one of the headlights had some scrapes as well that required fixing (forgot to take photo of it).
To start the process, I washed the vehicle with Chemical Guys Wash & Clear at paint prep ratio to strip any possible wax or sealants that may still exist. The heavily soiled rims were treated with P21S Wheel Gel and allowed to dwell for a while to give it a chance to break down the baked on contaminants. While the P21S was working, I sprayed the tires and wheel wells with P21S Total Auto Wash. With a variety of brushes and about 40 minutes total time, I got the wheels cleaned up as best as they could without removing them (it had been a long time since these were cleaned!).
After washing, I started the claying process with Chemical Guys clay and used Optimum No Rinse as a lubricant. There was a lot of tar on the lower surfaces to remove, and I was also concentrating on the �dots� that covered the horizontal surfaces. I was able to make them better, and the way they were reacting to the clay I had a feeling that this was some sort of chemical and not paint overspray.
After claying I rinsed the car off again, and pulled it into the garage for drying and inspection under halogens and T-5 fluorescents (different lighting shows different kinds of defects). Upon further inspection I found the dots to be more severe than I could see outside. Since I thought it was chemical, I got out the Prep All solvent and treated all of the horizontal surfaces. Hmm, still not much better.
Curiosity was getting the better of me, as well as a touch of frustration so I decided to try some very fine wetsanding to see if it could be quickly remedied with Micro-Surface 8600 and 12000 pads. After a few passes it looked better, but after wiping it down with alcohol and re-inspecting, it hardly made a dent. After testing a small section with more abrasive MS pads, I determined that the only way to completely get rid of this would be with very aggressive wetsanding on all of the horizontal surfaces. I contacted the owner about it, and we agreed to just make it look as good as possible with regular polishing, and maybe we could go back at a later date for wetsanding since it would be such a sizable investment to do it properly.
I have a lot of people ask me how I know what the best combination of polishes/pads/techniques is for the job. Most of the time we can inspect a car, and have a good idea of what will be needed based on the type/color/condition of the paint, the experience we have with the manufacturer of the paint, as well as the experience with specific products. This car however proved that this is merely a guideline! First up was the Makita rotary with a Megs yellow 2.0 polishing pad and Menzerna PO203S polish (should be a great combination for soft Subaru paint). The paint was very �sticky�, which I suspected to be a result of the dots on the surface. The rotary had a mind of its own, was grabbing, jumping, and behaving badly! I switched it up and then tried a white pad with Menzerna Super Intensive Polish. It got even worse, the paint was quickly getting really hot, and the polish was clumping and spitting all over the place. I tried several other combinations, and it didn�t get any better. I decided to switch from the rotary to the Porter Cable D/A to see if that would help. I put on an orange 5.5� pad and used Megs 105 compound and proceeded to test a few different techniques. This seemed to do the trick. Since the paint was so finicky, it took a while to figure out an exact technique that would cut down all of the defects while finishing up nicely. I worked my way around the car, and had to adjust my techniques a bit as I went because the horizontal and vertical surfaces acted differently. Many times this can be caused by partial repaints, but I could not find evidence that this had been done.
Here are a few photos during the process:
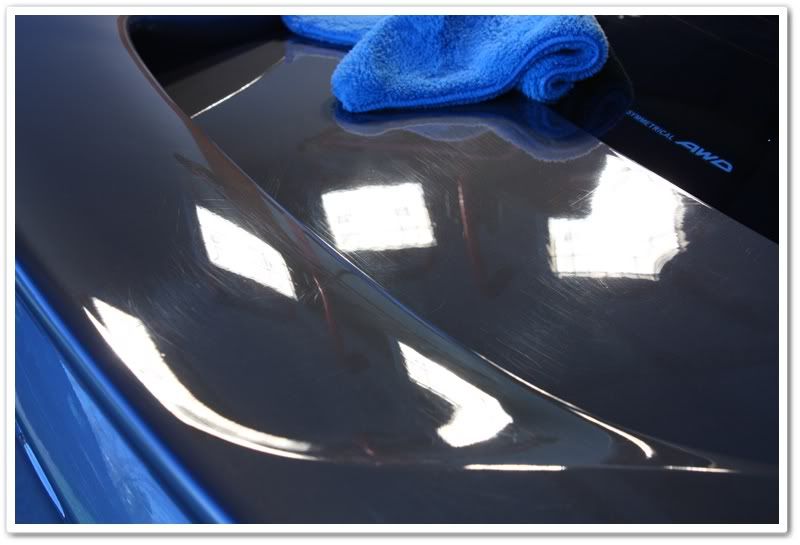
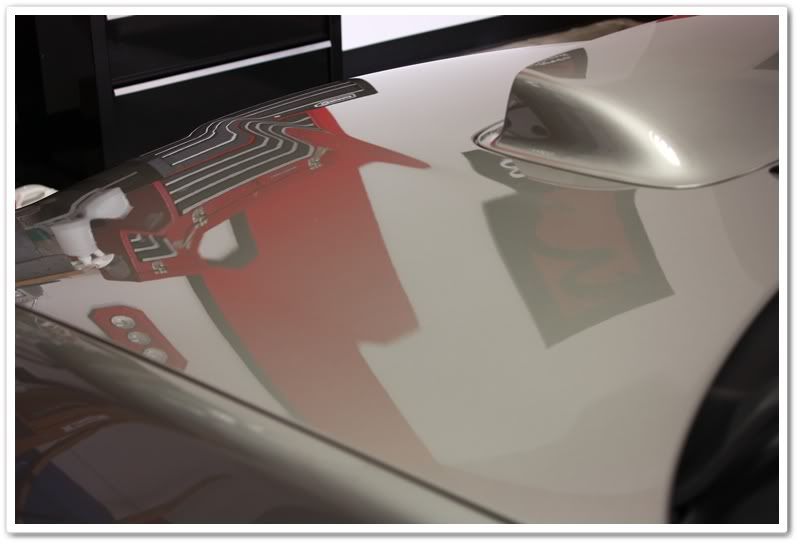
The left side is after compounding with M105 (before final polish), and the right side has not been polished yet. Notice the difference in clarity already!
Same thing on the rear deck�before and after M105:
Before
After

This post ended up with a lot more reading, and less eye candy than what I normally do, but given the nature of the detail, I saw it as a good learning opportunity for those who are newer to detailing.
The owner recently purchased the car, and the exterior had been somewhat neglected. Silver typically does a great job of hiding swirls and defects, but not on this one! As you can see from the photos below, it was heavily swirled with plenty of holograms as well.
All of the horizontal surfaces were also covered in small dots, which looked to be paint overspray. I�ve experienced some that come off easily and others that will not, so I warned the owner accordingly and told him I�d touch base with him during the detail to see what we�re up against.
Silver is also challenging for photography and doesn�t provide the wow-factor during and after that darker colors do, so I held back on the detailed photos that I normally post.
Here�s what we were dealing with:
Got swirls?
Here you can see hologram tracers indicating that somebody has made a poor attempt at rotary polishing sometime in the past.
The hood looked especially bad. The camera couldn�t capture the true severity of the damage to the finish. If you look closely, you can actually see the small dots that I am referring to.
The roof�more swirls, scratches, water etching, and holograms.
The tail lights were heavily swirled, and one of the headlights had some scrapes as well that required fixing (forgot to take photo of it).
To start the process, I washed the vehicle with Chemical Guys Wash & Clear at paint prep ratio to strip any possible wax or sealants that may still exist. The heavily soiled rims were treated with P21S Wheel Gel and allowed to dwell for a while to give it a chance to break down the baked on contaminants. While the P21S was working, I sprayed the tires and wheel wells with P21S Total Auto Wash. With a variety of brushes and about 40 minutes total time, I got the wheels cleaned up as best as they could without removing them (it had been a long time since these were cleaned!).
After washing, I started the claying process with Chemical Guys clay and used Optimum No Rinse as a lubricant. There was a lot of tar on the lower surfaces to remove, and I was also concentrating on the �dots� that covered the horizontal surfaces. I was able to make them better, and the way they were reacting to the clay I had a feeling that this was some sort of chemical and not paint overspray.
After claying I rinsed the car off again, and pulled it into the garage for drying and inspection under halogens and T-5 fluorescents (different lighting shows different kinds of defects). Upon further inspection I found the dots to be more severe than I could see outside. Since I thought it was chemical, I got out the Prep All solvent and treated all of the horizontal surfaces. Hmm, still not much better.
Curiosity was getting the better of me, as well as a touch of frustration so I decided to try some very fine wetsanding to see if it could be quickly remedied with Micro-Surface 8600 and 12000 pads. After a few passes it looked better, but after wiping it down with alcohol and re-inspecting, it hardly made a dent. After testing a small section with more abrasive MS pads, I determined that the only way to completely get rid of this would be with very aggressive wetsanding on all of the horizontal surfaces. I contacted the owner about it, and we agreed to just make it look as good as possible with regular polishing, and maybe we could go back at a later date for wetsanding since it would be such a sizable investment to do it properly.
I have a lot of people ask me how I know what the best combination of polishes/pads/techniques is for the job. Most of the time we can inspect a car, and have a good idea of what will be needed based on the type/color/condition of the paint, the experience we have with the manufacturer of the paint, as well as the experience with specific products. This car however proved that this is merely a guideline! First up was the Makita rotary with a Megs yellow 2.0 polishing pad and Menzerna PO203S polish (should be a great combination for soft Subaru paint). The paint was very �sticky�, which I suspected to be a result of the dots on the surface. The rotary had a mind of its own, was grabbing, jumping, and behaving badly! I switched it up and then tried a white pad with Menzerna Super Intensive Polish. It got even worse, the paint was quickly getting really hot, and the polish was clumping and spitting all over the place. I tried several other combinations, and it didn�t get any better. I decided to switch from the rotary to the Porter Cable D/A to see if that would help. I put on an orange 5.5� pad and used Megs 105 compound and proceeded to test a few different techniques. This seemed to do the trick. Since the paint was so finicky, it took a while to figure out an exact technique that would cut down all of the defects while finishing up nicely. I worked my way around the car, and had to adjust my techniques a bit as I went because the horizontal and vertical surfaces acted differently. Many times this can be caused by partial repaints, but I could not find evidence that this had been done.
Here are a few photos during the process:
The left side is after compounding with M105 (before final polish), and the right side has not been polished yet. Notice the difference in clarity already!
Same thing on the rear deck�before and after M105:
Before
After
 04-20-2009, 08:50 AM
#2
2012 SH-AWD / Advanced
Thread Starter
During the compounding process, I inspected in both the halogen and T-5 lights, and frequently pulled it outside to inspect in the sunshine. I would also wipe down each section a couple of times with 91% alcohol to make sure I had a surface that was clean of polishing oils to ensure I was getting an accurate reading of the surface condition.
After the entire car (including headlights and tail lights) was completed with M105, I pulled it back outside for yet another wash to remove compounding dust that gets everywhere! Once again I used Chemical Guys Wash & Clear at paint prep ratio.
Since the M105 with the proper (and evolving) technique left it with such a nice finish, I was then able to use Optimum Poli-seal with a PC and white pad as a finishing step. Poli-seal has light correcting capability, is very easy to work with, and leaves a nice layer of protection (not to mention a super-slick feel). Once again sun inspections were done during this process to make sure that it was finishing down properly. Had this been harder paint, I would have had to use a more aggressive method for the finish polish.
OK, we�re getting close to the �after� photos, and I appreciate you sticking with me for this long. Just a little more patience and we�ll be done!
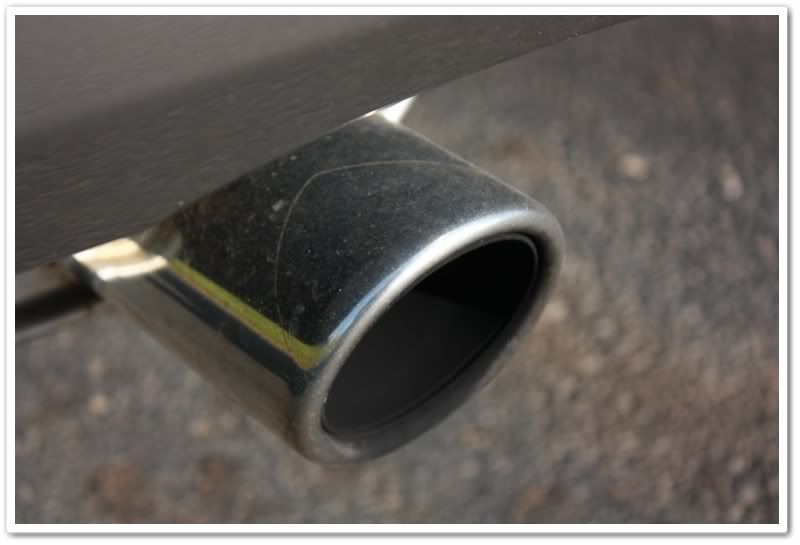
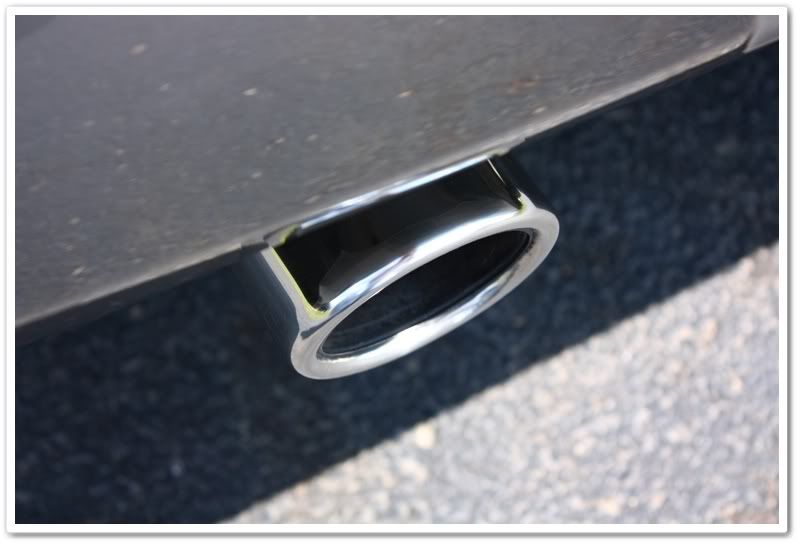
The door and trunk jambs were cleaned with Optimum No Rinse. The tires were treated with Optimum Opti-Bond tire gel. The exhaust tip was first cleaned with M105 and 0000 steel wool, and then refined with Optimum Metal Polish. The wheel wells were treated with Chemical Guys Fade 2 Black (awesome stuff).
For even more protection and a great look, I put a coat of Optimum Opti-seal sealant (my go-to sealant�easy to use, looks great, and very durable). I usually let it cure for about 20 minutes, and then I go back over it and buff it out with a quick sprits with Optimum Instant Detailer and Gloss Enhancer and a MF towel. I used the new Detailed Image reTHICKulous white MF towel, and I have to say it�s the absolute best towel I�ve ever had my hands on! Not cheap, but well worth it IMO.
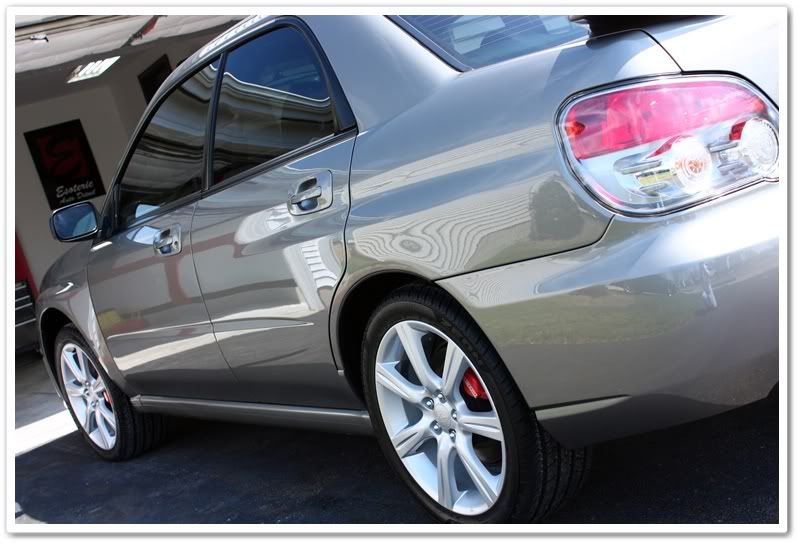
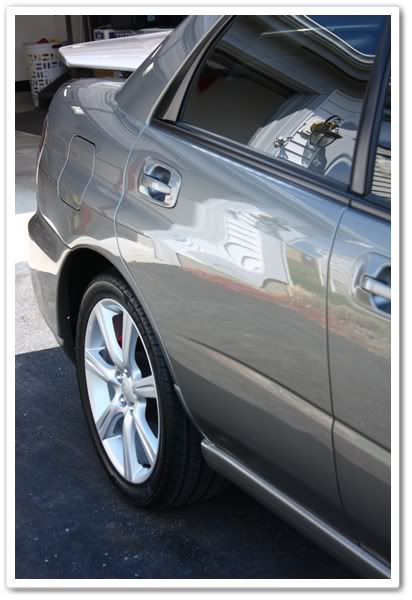
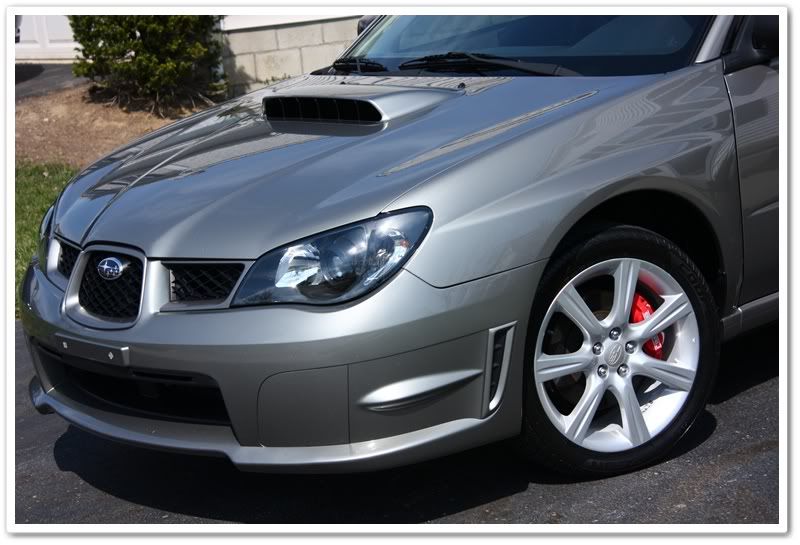
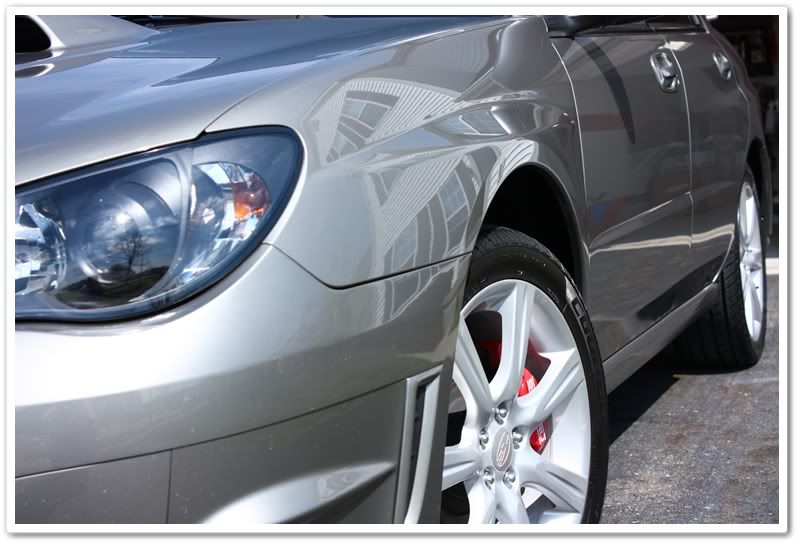
Even though the car gave me fits to start, and I had to continuously change up my technique on it, I think it came out looking tremendous. I was able to achieve 90+% correction rate in a short amount of time (8.5 hours), and the finish glowed in comparison when I was done. The owner was quite pleased with the outcome.
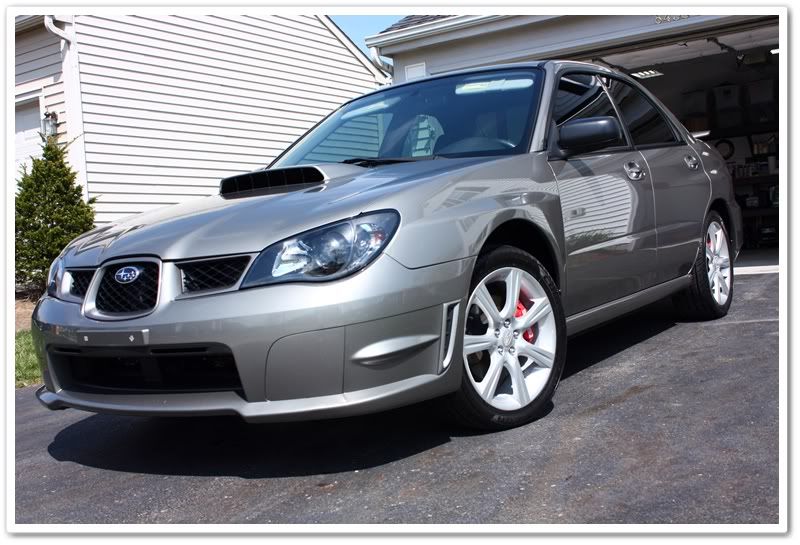
Now on to some after shots:

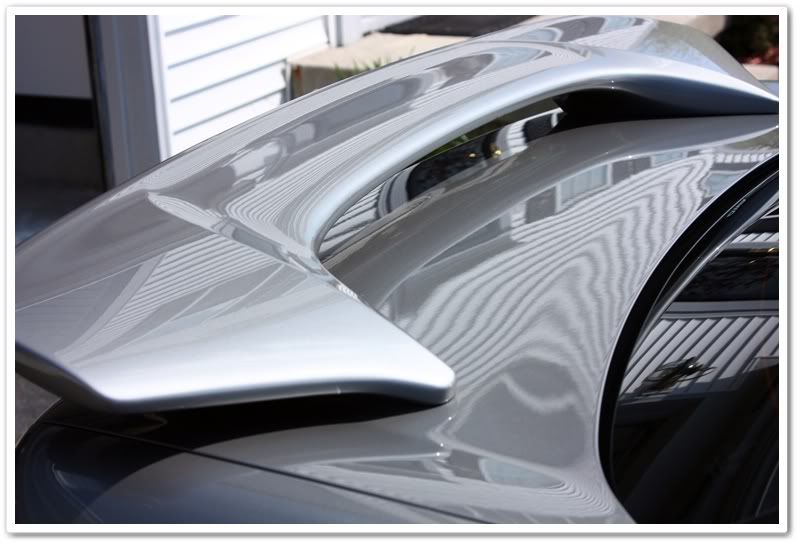
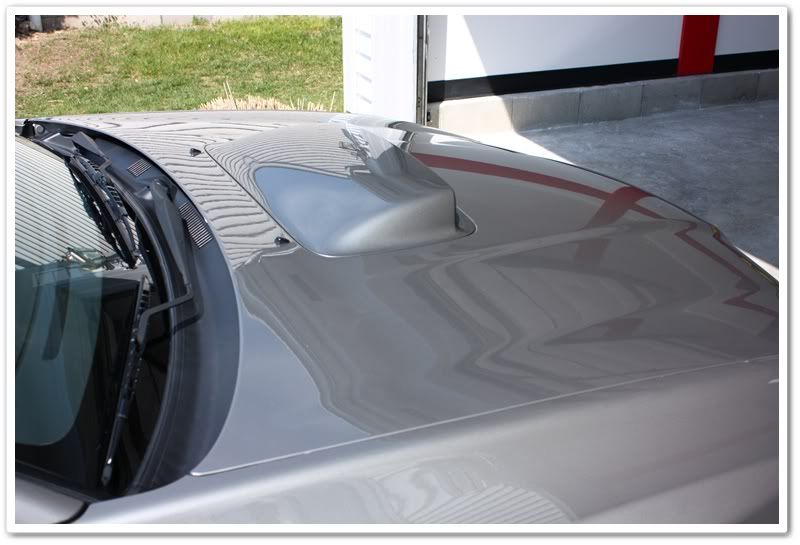
This shot can mess with your eyes a bit�can you tell where the roof line is?
Sorry, the white balance was off a bit on this shot so the color is a bit darker:
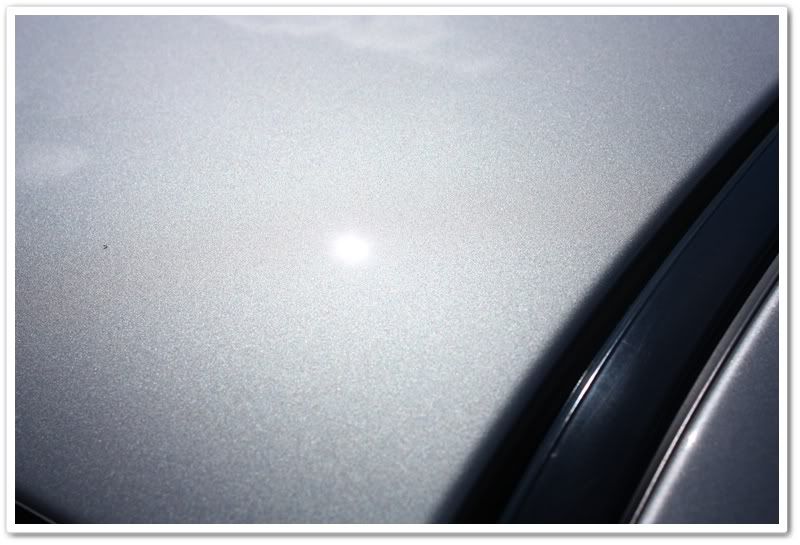
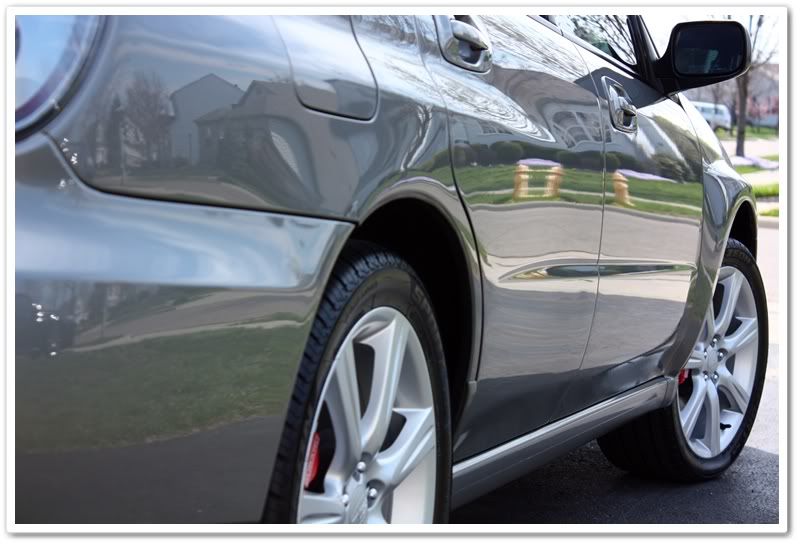
The sun doesn�t lie�no more swirls! If you look closely around the sun, you can see a few remnants of the infamous dots! Significantly improved though.
After the entire car (including headlights and tail lights) was completed with M105, I pulled it back outside for yet another wash to remove compounding dust that gets everywhere! Once again I used Chemical Guys Wash & Clear at paint prep ratio.
Since the M105 with the proper (and evolving) technique left it with such a nice finish, I was then able to use Optimum Poli-seal with a PC and white pad as a finishing step. Poli-seal has light correcting capability, is very easy to work with, and leaves a nice layer of protection (not to mention a super-slick feel). Once again sun inspections were done during this process to make sure that it was finishing down properly. Had this been harder paint, I would have had to use a more aggressive method for the finish polish.
OK, we�re getting close to the �after� photos, and I appreciate you sticking with me for this long. Just a little more patience and we�ll be done!
The door and trunk jambs were cleaned with Optimum No Rinse. The tires were treated with Optimum Opti-Bond tire gel. The exhaust tip was first cleaned with M105 and 0000 steel wool, and then refined with Optimum Metal Polish. The wheel wells were treated with Chemical Guys Fade 2 Black (awesome stuff).
For even more protection and a great look, I put a coat of Optimum Opti-seal sealant (my go-to sealant�easy to use, looks great, and very durable). I usually let it cure for about 20 minutes, and then I go back over it and buff it out with a quick sprits with Optimum Instant Detailer and Gloss Enhancer and a MF towel. I used the new Detailed Image reTHICKulous white MF towel, and I have to say it�s the absolute best towel I�ve ever had my hands on! Not cheap, but well worth it IMO.
Even though the car gave me fits to start, and I had to continuously change up my technique on it, I think it came out looking tremendous. I was able to achieve 90+% correction rate in a short amount of time (8.5 hours), and the finish glowed in comparison when I was done. The owner was quite pleased with the outcome.
Now on to some after shots:
This shot can mess with your eyes a bit�can you tell where the roof line is?
Sorry, the white balance was off a bit on this shot so the color is a bit darker:
The sun doesn�t lie�no more swirls! If you look closely around the sun, you can see a few remnants of the infamous dots! Significantly improved though.
04-20-2009, 08:52 AM
#3
2012 SH-AWD / Advanced
Thread Starter
There's a touch of Instant Detailer smear just under the sunshine...I wiped it down again before delivering the vehicle.
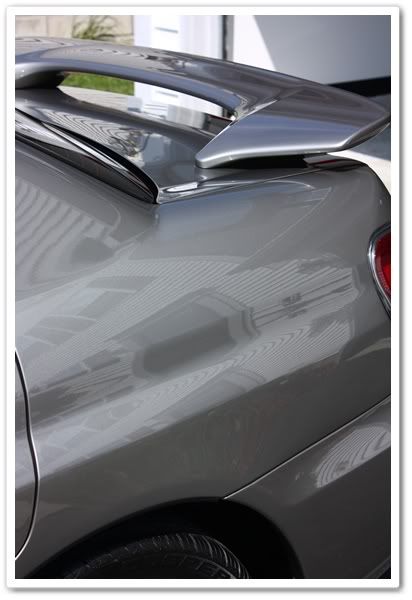
Now for the gloss shots�not easy to get on silver!

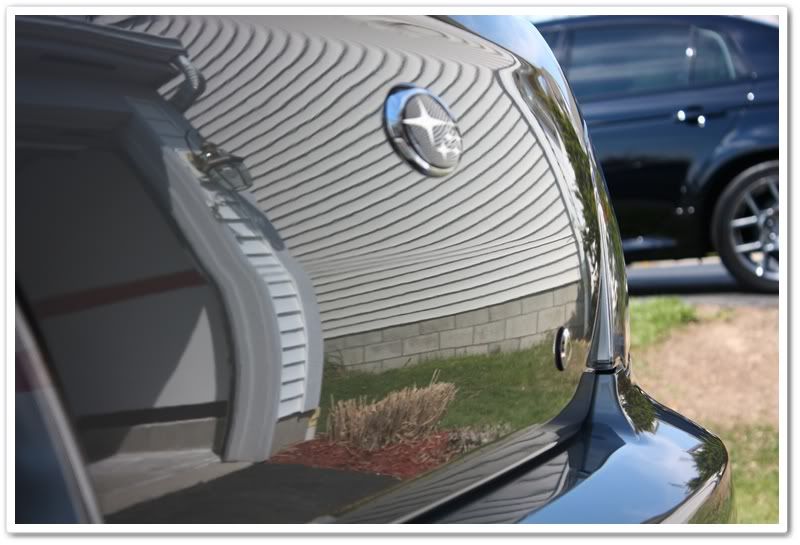
I thought this shot really showed a lot of gloss and wetness on the finish.
 04-20-2009, 08:53 AM
#4
2012 SH-AWD / Advanced
Thread Starter
The laundry basket that you see in the background is completely full with towels and pads from this car alone! It's amazing how many you go through on a job.
My TL-S lurks in the background. I love the reflection in this one:
Total time = 8.5 hours.
As always, thanks for taking the time to check out my work!
My TL-S lurks in the background. I love the reflection in this one:
Total time = 8.5 hours.
As always, thanks for taking the time to check out my work!

Trending Topics
04-20-2009, 11:36 AM
#8
Instructor
Join Date: Feb 2007
Age: 35
Posts: 116
Likes: 0
Received 0 Likes
on
0 Posts
As always AMAZING JOB Todd!!!!
I understand the frustration you must have went through with menzerna drying and cakeing up on you, i had this happen to me yesturday during a detail and i was about ready to pull all my hair out lol
I understand the frustration you must have went through with menzerna drying and cakeing up on you, i had this happen to me yesturday during a detail and i was about ready to pull all my hair out lol
04-20-2009, 11:56 AM
#9
2012 SH-AWD / Advanced
Thread Starter
Thanks guys, I certainly appreciate the kind words! 
It wasn't just the Menzerna...it was any combo of polish/pad on the rotary.
It wasn't just the Menzerna...it was any combo of polish/pad on the rotary.
04-20-2009, 01:12 PM
#11
2012 SH-AWD / Advanced
Thread Starter
I can be a variety of things. Temperatures and humidity can be a factor on some polishes. The presence of silicone on the surface (TOGWT can shed more light on this). And sometimes the paint is plain finicky...some newer Infinitis are bad this way. The key is to have backup products and plans available because not all details go smoothly. This one started poorly, but ended up pretty good once I got a system down.
04-20-2009, 03:14 PM
#12
Instructor
Join Date: Feb 2007
Age: 35
Posts: 116
Likes: 0
Received 0 Likes
on
0 Posts
yea i need to purchase some more compunds to have incase certain things dont work like you stated because most of my jobs get done on weekends and i have to order everything online cause there isnt a store that i kno of around where i live at that carries anything decent. and ive been caught in a bind a few times, dont wanna thread hijack tho, the subi cleaned up real nice! love that silver lol
 04-22-2009, 10:49 PM
#17
2016 E350 Sport
Todd......you are on FIRE!  It looks like the KBM is in full swing!
A few questions from a mere mortal: :surrender
It looks like the KBM is in full swing!A few questions from a mere mortal: :surrender
- Are you using 2 oz/gal of Citrus Wash Clear for the paint prep? I use the 1 oz/5 gal for my normal wash and this stuff is GREAT.
- When using the Poli-Seal, what speed are you using with the PC? Last time I used it on my TL-S I saw some marring using the Flex and a white LLC pad. The TL-S paint is so soft.
- How are you applying the Opti-Seal? Apply to a foam applicator first or to the panel? I may want to use this sealant as a base under the Fuzion.
04-23-2009, 05:48 AM
#18
2012 SH-AWD / Advanced
Thread Starter
Todd......you are on FIRE! It looks like the KBM is in full swing!
A few questions from a mere mortal: :surrender
It looks like the KBM is in full swing!A few questions from a mere mortal: :surrender
- Are you using 2 oz/gal of Citrus Wash Clear for the paint prep? I use the 1 oz/5 gal for my normal wash and this stuff is GREAT.
- When using the Poli-Seal, what speed are you using with the PC? Last time I used it on my TL-S I saw some marring using the Flex and a white LLC pad. The TL-S paint is so soft.
- How are you applying the Opti-Seal? Apply to a foam applicator first or to the panel? I may want to use this sealant as a base under the Fuzion.
Yes, 2oz/gal on the CGWC. I use this ratio before every polish job, or when I just want to strip off an existing LSP (always trying new stuff!)
If I'm working the PS to get any kind of correction I will use speed 6. It doesn't need much working time. If I'm simply using it as a quick polish and sealant, I'll put it on at about 4.5. On our PITA NBP's, I have found that even with the finest polishes and pads on a PC, you still see the slightest amount of D/A marring (only noticeable from about 3 inches away, and in the sunshine...barely there, and probably on a select few people could tell). It really takes a rotary and a product like PO85RD or 3M UF and a red or blue pad to jewel it down to the microscopic level and make it look like glass. If you have a Flex, I'd use grey or softer.
For Opti-seal, I prime the applicator pad by spraying it directly a time or two, and then put a light spritz on the panel. After a few panels I find that the applicator is plenty primed. I always let it cure for about 20 minutes, and then go back over it with OID (sprayed onto MF towel, not surface) to buff it out and remove any haze from over-application of OS.
Hope this helps!
04-23-2009, 06:33 AM
#19
Someday, an RS6 Avant+
That's great work. I can attest to the "soft paint" Subaru has. A lot of orange peel effect, and the clear coat scratches very easily.

Thread
Thread Starter
Forum
Replies
Last Post
Ponsey_Scheme
2G RDX (2013-2018)
32
10-23-2015 09:16 PM