
iJDMtoy Led DRL Harness Install w/Pics

Thread Starter


Joined: Dec 2011
Posts: 2,337
Likes: 802
From: South Jersey
iJDMtoy Led DRL Harness Install w/Pics
I recently bought the ijdmtoy LED DRL kit seen here: http://store.ijdmtoy.com/9005-LED-Da...d_sku45_r3.htm
It was a pretty straight forward install even though it didn't come with any instructions, so I figured I would do a little write up for anyone looking to buy the kit and install it.
I used this video as a reference even though it's the V-Leds kit, but the ijdmtoy kit is very similar.
Here is a picture of the ijdmtoy kit laid out:

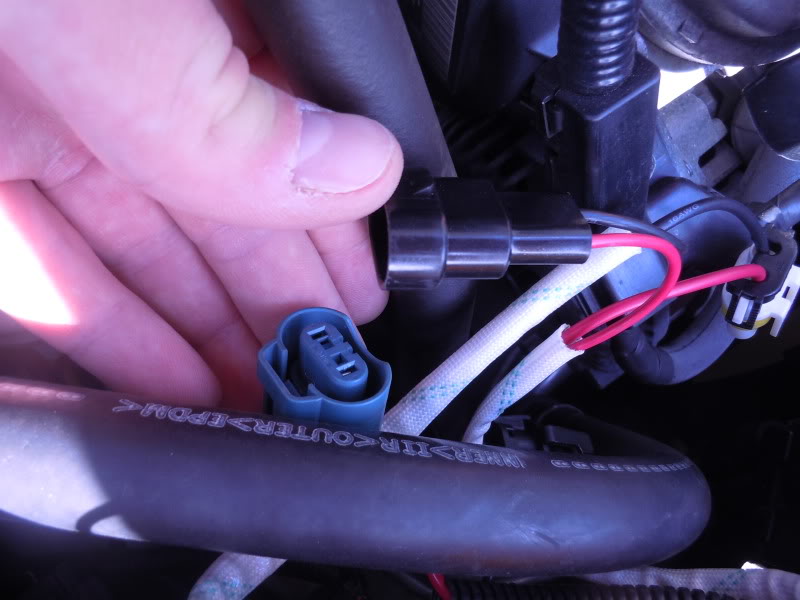
After taking off all the plastic engine trim, remove your factory halogen bulbs from the socket. The driver side is a pain compared to the passenger side, but you can do it with some patience as there is not much room for you to work. Connect the the inline resistor harness to the factory bulb socket.
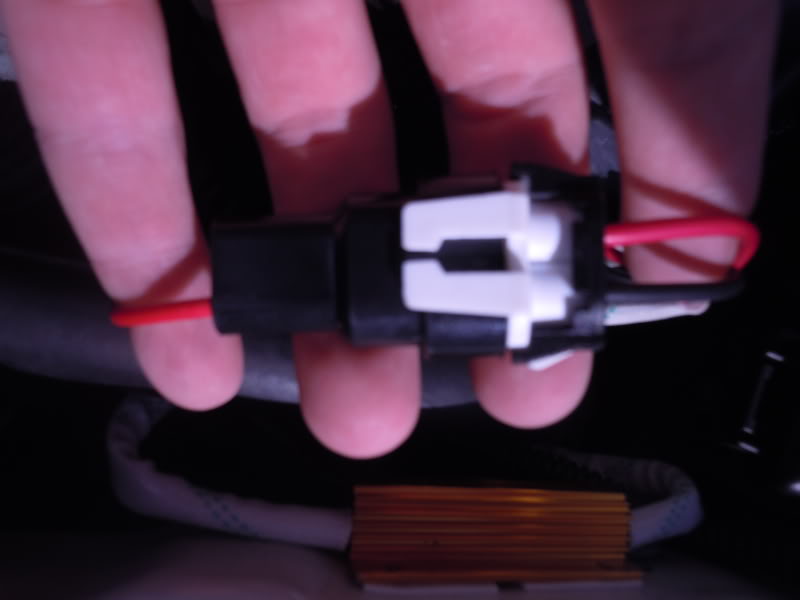
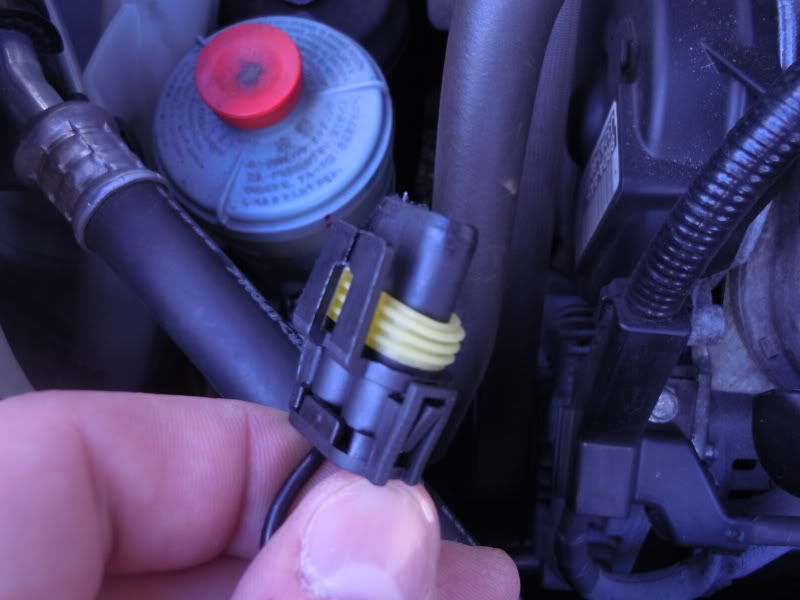
Now connect the white connector from the inline resistor harness to the black connector on the main harness. NOTE: YOU MUST HAVE THE RED WIRE IN LINE WITH THE BLACK WIRE! The connection looks like it should be made the other way because there is a tab on the black connector from the main harness that the two white pieces from the resistor harness hold on to when connected, however, the lights WILL NOT work if you connect them that way and the black wires from each harness are inline with each other.
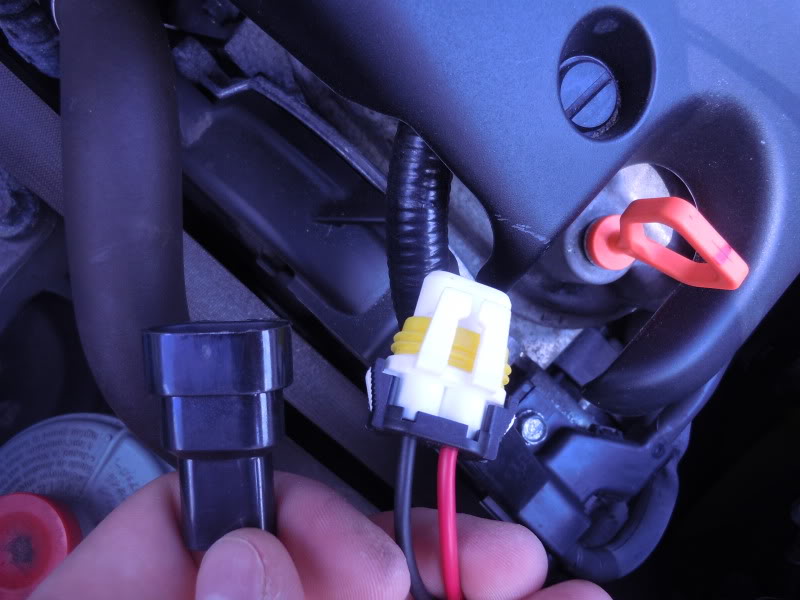
RED IN LINE WITH BLACK
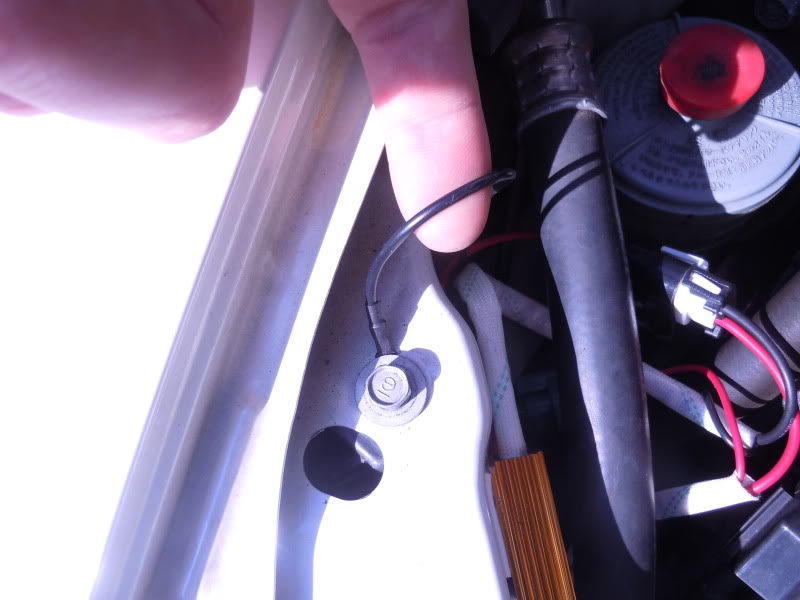
Now you can attach the ground wire from the main harness. It is a 10mm bolt.
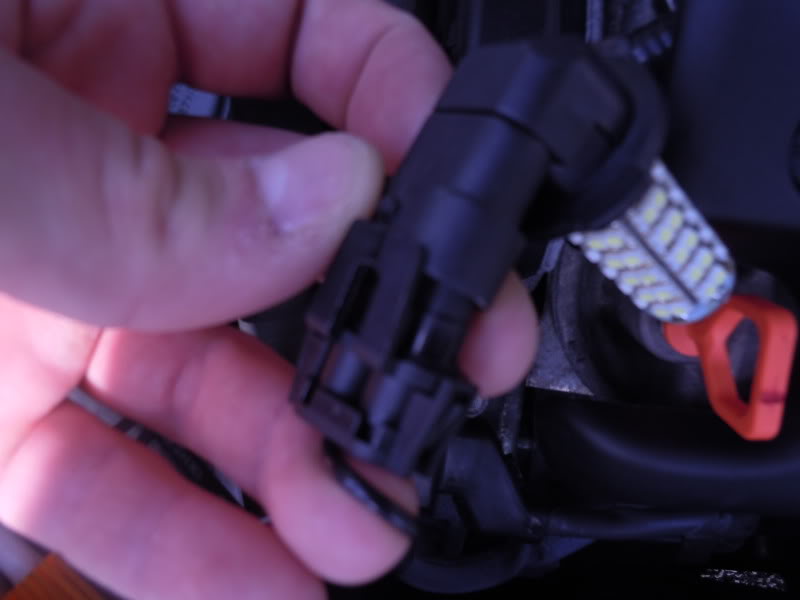
Next insert the LED bulb into the main harness connector. You may need to remove the lime green rubber piece otherwise it makes it very difficult for the connector and bulb to meet fully. (I took the green piece off.)
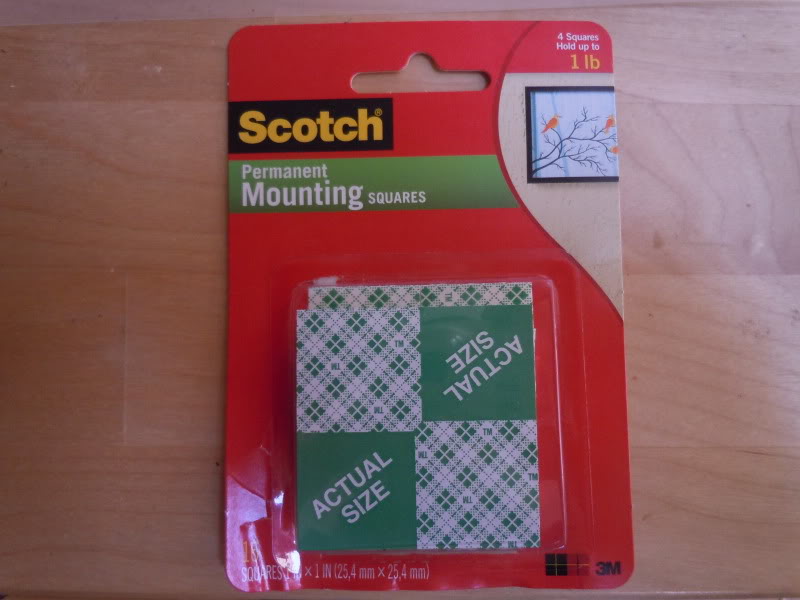
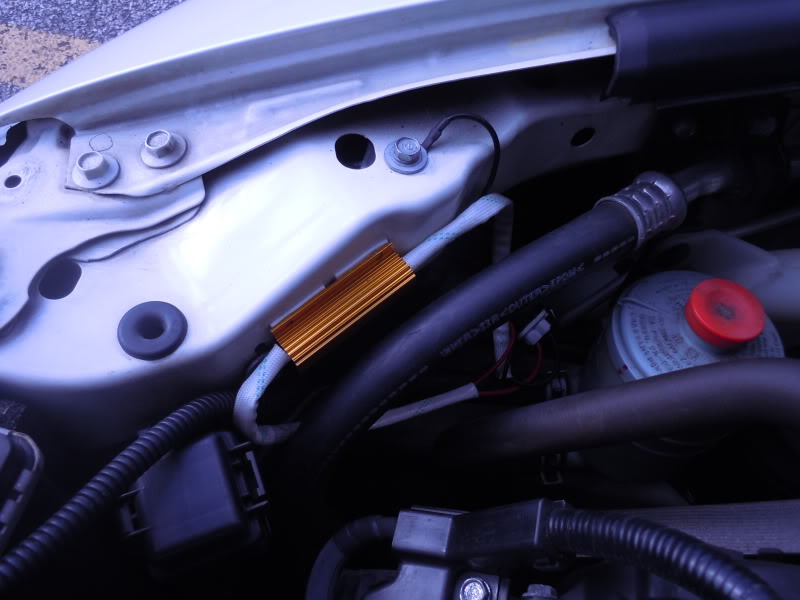
Next mount the gold inline resistor to the frame. I used double sided tape squares for this and cleaned the area well before attaching the resistor so it would stick properly. There are small holes on the resistor you can utilize if you prefer to use self tapping screws to attach the resistor to the frame, but that is up to you.
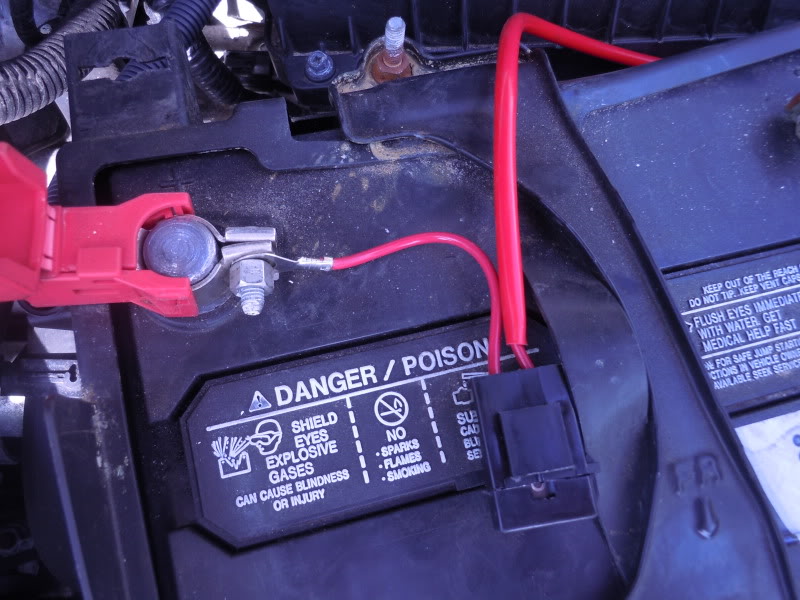
Repeat the same steps above for the drivers side. After making all the proper connections on the driver side, connect the red wire from the main harness to the positive battery terminal, which is also a 10mm bolt. Be careful not to remove the lead to the battery when removing the bolt as there is no need to remove the lead from the battery terminal.
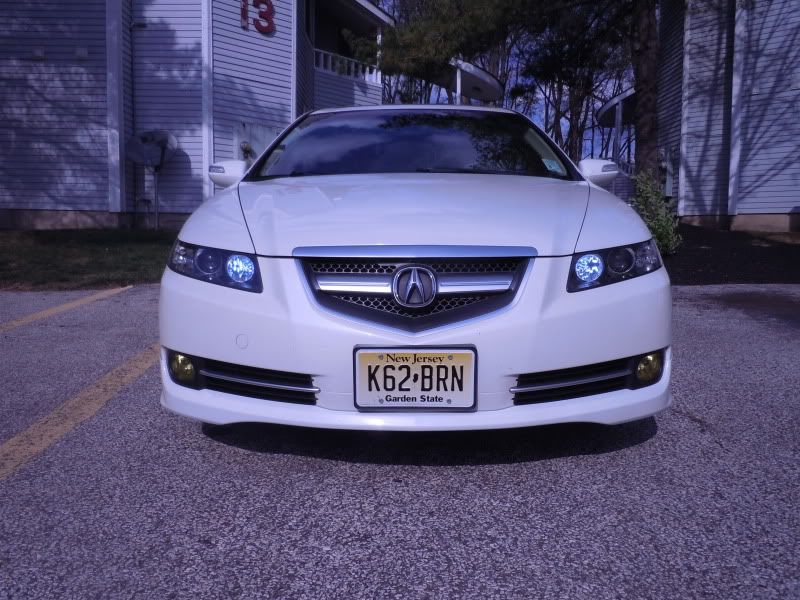
Button everything up and enjoy your new LED DRL's with NO DRL light on the dash!!


It was a pretty straight forward install even though it didn't come with any instructions, so I figured I would do a little write up for anyone looking to buy the kit and install it.
I used this video as a reference even though it's the V-Leds kit, but the ijdmtoy kit is very similar.
Here is a picture of the ijdmtoy kit laid out:
After taking off all the plastic engine trim, remove your factory halogen bulbs from the socket. The driver side is a pain compared to the passenger side, but you can do it with some patience as there is not much room for you to work. Connect the the inline resistor harness to the factory bulb socket.
Now connect the white connector from the inline resistor harness to the black connector on the main harness. NOTE: YOU MUST HAVE THE RED WIRE IN LINE WITH THE BLACK WIRE! The connection looks like it should be made the other way because there is a tab on the black connector from the main harness that the two white pieces from the resistor harness hold on to when connected, however, the lights WILL NOT work if you connect them that way and the black wires from each harness are inline with each other.
RED IN LINE WITH BLACK
Now you can attach the ground wire from the main harness. It is a 10mm bolt.
Next insert the LED bulb into the main harness connector. You may need to remove the lime green rubber piece otherwise it makes it very difficult for the connector and bulb to meet fully. (I took the green piece off.)
Next mount the gold inline resistor to the frame. I used double sided tape squares for this and cleaned the area well before attaching the resistor so it would stick properly. There are small holes on the resistor you can utilize if you prefer to use self tapping screws to attach the resistor to the frame, but that is up to you.
Repeat the same steps above for the drivers side. After making all the proper connections on the driver side, connect the red wire from the main harness to the positive battery terminal, which is also a 10mm bolt. Be careful not to remove the lead to the battery when removing the bolt as there is no need to remove the lead from the battery terminal.
Button everything up and enjoy your new LED DRL's with NO DRL light on the dash!!
Last edited by The Machine; Apr 9, 2012 at 07:29 PM.
Thread Starter
Joined: Dec 2011
Posts: 2,337
Likes: 802
From: South Jersey
It's easy man, the biggest pain is getting the driver side bulb in and out because there isn't a lot of room because of the battery. Best advice is try to remember how the bulb came out when you loosen it. That way when you go to put the bulb back in you'll know what way the tabs have to go when starting to twist it in.


Instructor
Joined: Apr 2011
Posts: 190
Likes: 18
From: Rochester, NY
I'm a pro at getting the bulbs out/putting them in. I've had them in and out so many times with all the kits I've tried lol. So on both sides it will be red to black? or just red to black on the side with the red only. Thanks for the write-up/clarification.
funny, i actually just installed mine today. Im waiting on a resposne from them because for some reason mine only come on if i tap or flick the relay on the harness. Once they are on they stay on but if i turn the car off and crank it back up they don't come on unless i tap or flick the relay 
Thread Starter
Joined: Dec 2011
Posts: 2,337
Likes: 802
From: South Jersey
funny, i actually just installed mine today. Im waiting on a resposne from them because for some reason mine only come on if i tap or flick the relay on the harness. Once they are on they stay on but if i turn the car off and crank it back up they don't come on unless i tap or flick the relay
Trending Topics

Last edited by Mondo375; Apr 9, 2012 at 08:33 PM. Reason: pic
Thread Starter
Joined: Dec 2011
Posts: 2,337
Likes: 802
From: South Jersey
I thought this as well and tried just putting LED bulbs in and only half the tree lit up and some people nothing lit up. So you need the harness to get the power the LED's need in order for them to light up properly or even light up at all. You can't put LED's in the DRL like you can with front and read turn signals LED's.
Thanks for the write-up! I've been waiting to hear some success stories with this, and now I think I'll finally pull the trigger. Anyone know if these kits ever go on sale? I probably won't get to this for a few weeks so I figured I could wait if there is a chance of a sale or promo code, otherwise I'll probably just order it up.
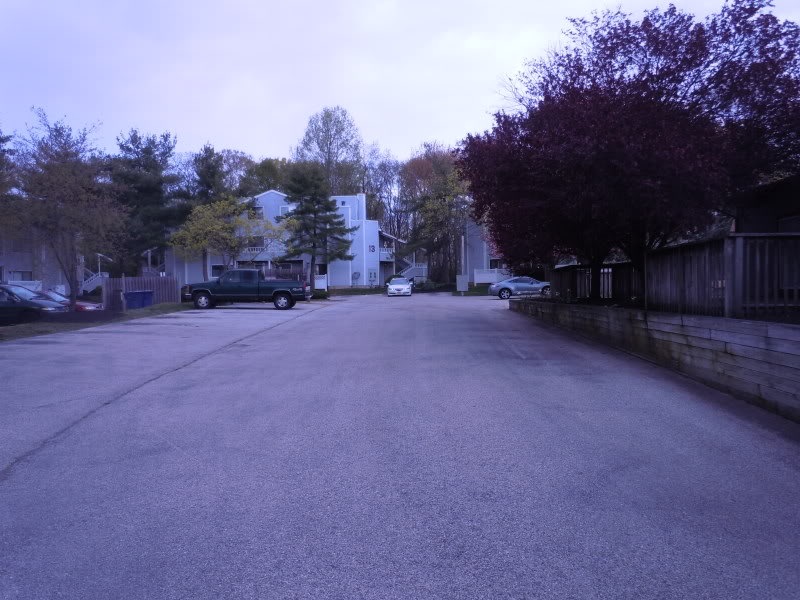
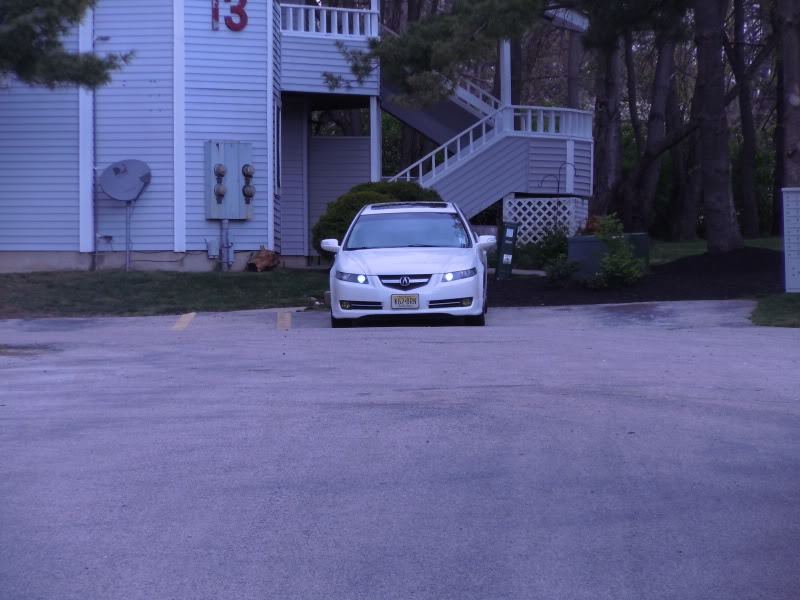
Also, anyone have any shots from farther away during the day? I've seen a few people with LED DRLs that are only visible from a few car lengths away. It looks like these are plenty bright, but some more pictures would be nice.
Also, anyone have any shots from farther away during the day? I've seen a few people with LED DRLs that are only visible from a few car lengths away. It looks like these are plenty bright, but some more pictures would be nice.


Thread Starter
Joined: Dec 2011
Posts: 2,337
Likes: 802
From: South Jersey
Thanks for the write-up! I've been waiting to hear some success stories with this, and now I think I'll finally pull the trigger. Anyone know if these kits ever go on sale? I probably won't get to this for a few weeks so I figured I could wait if there is a chance of a sale or promo code, otherwise I'll probably just order it up.
Also, anyone have any shots from farther away during the day? I've seen a few people with LED DRLs that are only visible from a few car lengths away. It looks like these are plenty bright, but some more pictures would be nice.
Also, anyone have any shots from farther away during the day? I've seen a few people with LED DRLs that are only visible from a few car lengths away. It looks like these are plenty bright, but some more pictures would be nice.

Thread Starter
Joined: Dec 2011
Posts: 2,337
Likes: 802
From: South Jersey
Hmm, that's a good question. I guess you could hook all of it up and see what happens. I can only assume it would work as long as the LED bulbs get the correct power that they need I guess it really wouldn't matter if you had the module or not. And since you don't you don't have DRL's to begin with I guess you really don't have to worry about the light on the dash, lol.

Advanced
Joined: May 2010
Posts: 73
Likes: 7
Funny, but I installed the IJDMtoy kit about 5 months ago and it worked for one day, then the DRL warning light came on and cut power to the lights so they did not work. I had to return it to them. But the kit i received had a black resistor and not a gold one. Anyone know if the gold one is updated? I would consider buying a new kit from them if it works.
I have an 07 base w/nav. Wonder if the year and/or equipment makes a difference.
I have an 07 base w/nav. Wonder if the year and/or equipment makes a difference.

Instructor
Joined: Apr 2011
Posts: 190
Likes: 18
From: Rochester, NY
Funny, but I installed the IJDMtoy kit about 5 months ago and it worked for one day, then the DRL warning light came on and cut power to the lights so they did not work. I had to return it to them. But the kit i received had a black resistor and not a gold one. Anyone know if the gold one is updated? I would consider buying a new kit from them if it works.
I have an 07 base w/nav. Wonder if the year and/or equipment makes a difference.
I have an 07 base w/nav. Wonder if the year and/or equipment makes a difference.
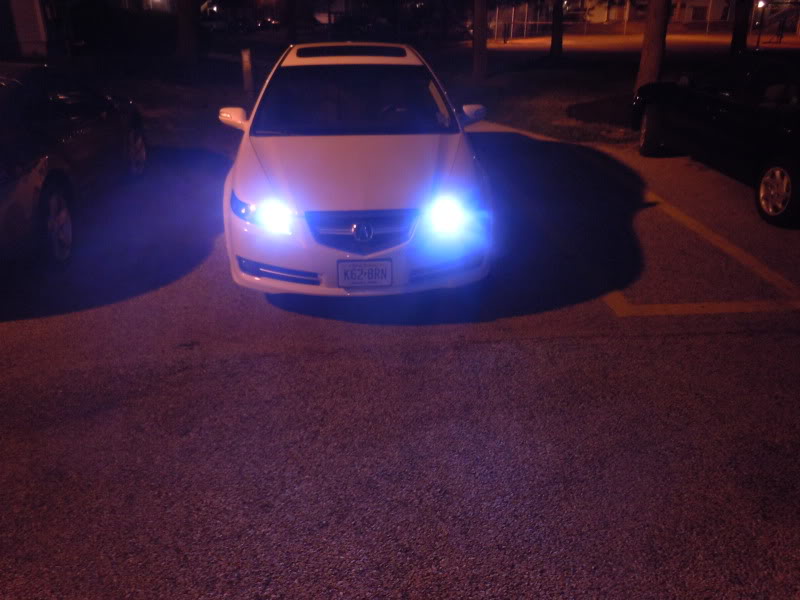
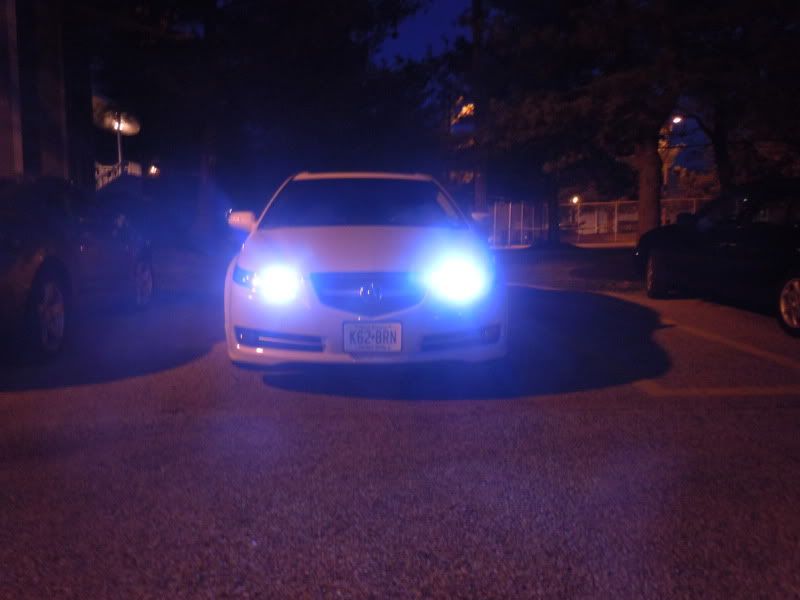
I'd say they are 6k. Next to my 5k switchbacks they are def more blue then white. It's pretty hard to mess up the install IMO. Just unplugging and plugging stuff in. Just watch the video in the original post a few times or while you ate doing it.
Thread Starter
Joined: Dec 2011
Posts: 2,337
Likes: 802
From: South Jersey
And yes, you can do this install being a 100% noob. It's really not that difficult to do as it is just plug and play. Just watch the video and read my write up as you do the install and everything will come together nicely. The hardest part of the whole install is getting the driver side bulb in and out because the battery is there and it makes it a tight squeeze. Other than that, it's a piece of cake.
Racer
Joined: Mar 2012
Posts: 445
Likes: 103
From: NYC
Yes, I believe they look to be 6k. I have a set of LED bulbs from ebay that are more white than these. I mixed up the bulbs when putting them in and I was pressed for time before work. The driver side had the blue bulb and since it's a little bit more difficult to get the bulb in an out of that side, I just changed the passenger side to the blue bulb. So now I have an extra set of white bulbs incase one of these goes out.
And yes, you can do this install being a 100% noob. It's really not that difficult to do as it is just plug and play. Just watch the video and read my write up as you do the install and everything will come together nicely. The hardest part of the whole install is getting the driver side bulb in and out because the battery is there and it makes it a tight squeeze. Other than that, it's a piece of cake.
And yes, you can do this install being a 100% noob. It's really not that difficult to do as it is just plug and play. Just watch the video and read my write up as you do the install and everything will come together nicely. The hardest part of the whole install is getting the driver side bulb in and out because the battery is there and it makes it a tight squeeze. Other than that, it's a piece of cake.
One other question, I do plan on getting new HID/fog kits to replace my 08 TL OEM HID/fogs. This way I can do that and get the DRL LED kit replaced at the same time. Is replacing HID/fog lights a easy DIY for a first time noob like myself? Or should I go to the shop and have it done?

All About Trance
Joined: May 2005
Posts: 4,561
Likes: 124
From: Atlanta
Nice write-up! However, your resistor won't be sticking to the car for much longer due to the resistor running really hot. I had used double sided tape for my LED turn signals and the resistors caused the adhesives to melt. That's when I had to mount it with some screws.
Thread Starter
Joined: Dec 2011
Posts: 2,337
Likes: 802
From: South Jersey
Thanks Mondo and Machine for clarifying! I am just worried because I don't want to f**** anything up since its my first car and all =P. But I got to try sometime =).
One other question, I do plan on getting new HID/fog kits to replace my 08 TL OEM HID/fogs. This way I can do that and get the DRL LED kit replaced at the same time. Is replacing HID/fog lights a easy DIY for a first time noob like myself? Or should I go to the shop and have it done?
One other question, I do plan on getting new HID/fog kits to replace my 08 TL OEM HID/fogs. This way I can do that and get the DRL LED kit replaced at the same time. Is replacing HID/fog lights a easy DIY for a first time noob like myself? Or should I go to the shop and have it done?
Nice write-up! However, your resistor won't be sticking to the car for much longer due to the resistor running really hot. I had used double sided tape for my LED turn signals and the resistors caused the adhesives to melt. That's when I had to mount it with some screws.
Thread Starter
Joined: Dec 2011
Posts: 2,337
Likes: 802
From: South Jersey
ok im gonna explain to you guys why the process isnt as simple as swapping out the bulbs. the DRL needs to detect a certain load from the bulb otherwise it will think the bulb is dead, the concept is very similar to turn signal hyperflashing. Except in this case, instead of hyperflashing, the DRL will shut off because you wouldn't want only one side DRL to come on. So that is why those gold resistors are needed. It produces the resistance a normal halogen bulb would give since now you have LEDs. Okay, so you ask, why is there a harness, why not just have the resistors and install the LED bulbs? The difference is that DRL stock voltage is 6v for half the power of a regular 12v bulb. If you plug in the LED like that, it's not going to be very bright at all. Ever seen LEDs on cars like the honda civic(06-11)? or the TSX(09+)? Those cars you can straight up just swap to LED bulbs, and it will only power it at 6v without needing any harness or resistor. It looks really dim. So in order for the DRL to be bright, it uses a relay harness. What that does is once it senses the 6v from the DRL, it will trigger the relay to give your new LED bulbs power straight from the battery, hence the battery connection on the harness. So that is why these harnesses allow our TLs to have such bright DRLs. I hope you guys understand now, I took awhile trying to reverse engineer the harness and I finally understand how and why it works. I actually got it free from ijdmtoy because I was there in person buying switchbacks and the owner saw my car and wanted to test fit the harness on my car so he gave it to me for free.
Racer
Joined: Mar 2012
Posts: 445
Likes: 103
From: NYC
Not too sure if they ever go on sale, but $55 plus shipping isn't too bad for all the wiring plus bulbs, so I would just order them. I will try to take some pictures from farther away tomorrow and post them up for you. Not sure how bright you're looking for them to be from a distance, but the bulbs have a bluish tint to them and will probably be hard to see super bright from a far distance when it's really sunny out. You would probably need a darker color bulb to see them better at a greater distance.
Right now it is showing $64.99.


Thread Starter
Joined: Dec 2011
Posts: 2,337
Likes: 802
From: South Jersey
Yeah, I think you may have the older version. They changed to this version not too long ago. It's only been a couple days, but everything still works great!
Chapter Leader (Midwest Region)
Joined: Apr 2011
Posts: 2,427
Likes: 784
From: Kansas City
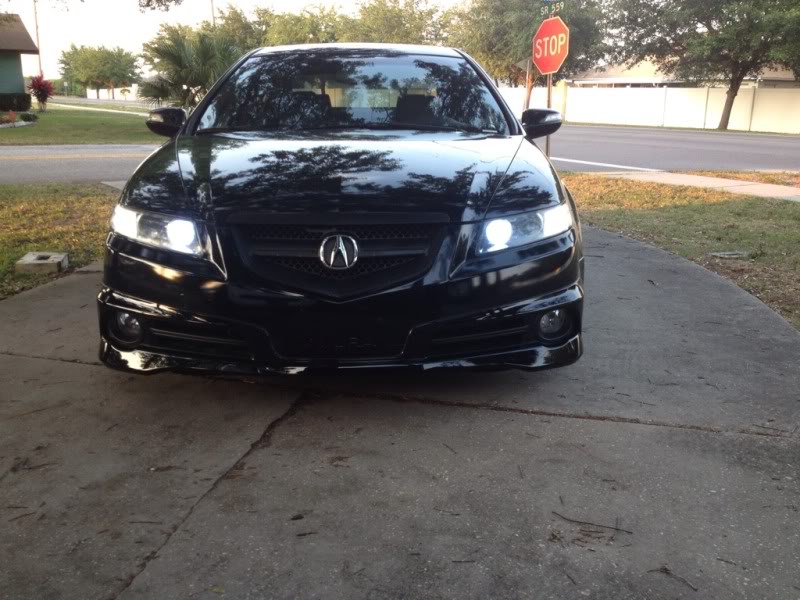
I was about to order these, and I noticed your light output varies from side to side. Is this common? It seems that one bulb is not getting enough power/ or too much. Is anybody else having this issue with these or is it just a camera issue that I'm seeing. I really want these, but not if they are not completely %100 perfect (I'm anal about these things).

Thread Starter
Joined: Dec 2011
Posts: 2,337
Likes: 802
From: South Jersey
I was about to order these, and I noticed your light output varies from side to side. Is this common? It seems that one bulb is not getting enough power/ or too much. Is anybody else having this issue with these or is it just a camera issue that I'm seeing. I really want these, but not if they are not completely %100 perfect (I'm anal about these things).