
2004-05 Acura Tl Illuminated Door Sills Group Buy


 05-05-2005 | 09:33 AM
#363
Make MyTL Great Again
Joined: Nov 2004
Posts: 1,686
Likes: 5
From: Dunellen, NJ
Originally Posted by Neogeek
hey i have a question about how the Acura things stay on? What if someone taps it with their heel as they are getting out, will it poke through?
05-05-2005 | 09:47 AM
#364
Make MyTL Great Again
Joined: Nov 2004
Posts: 1,686
Likes: 5
From: Dunellen, NJ
Originally Posted by AdamNJ
The rear sills do not have the bend in the correct spot, it is about a half inch too early, and I think the angle isn't correct either. So I have been using all the clamps I could find to try and eliminate any gaps between the OEM plastic and the lighted sills. My worry is that after everything is 'sticking correctly', I will go to put the rear sills in my car, and they won't fit right (because instead of making the metal bend to match the plastic, the plastic is bent to match the incorrect metal. We will see what happens.

Last night I took the clamps off and tried putting my rear passenger one on to see if it fit okay. The front (flat part) was fine, but the rear bend part was still wrong, and I couldn't even get the plastic to snap into the car because of the way it was now bent. So now I have to heat up the sills and pull them off the plastic, and then try bending the sills to the correct shape. That should be fun right? Yeah I spent >1 hour last night trying to bend the fucking thing correctly. I think I am giving up my hopes of making it look perfect on that sill. I will try the other one tonight.
I was trying to the lighted sills to bend exactly like the OEM ones, but that doesn't seem real possible to me, as I think the sills would need to be a tiny smidgen longer to accomplish that. So now where the bend is, there is a bit of space between the plastic and the lighted sill....so I will be using a lot of 'something' to fill it up with. I don't know if that is velcro, epoxy or a lot of double sided tape.
Dave, for the 2nd run, I would look into getting the bend perfect. The 2 fronts are great, no complaints there. If you get the bend perfect later, I might consider purchasing a new set of rears. I'm a perfectionist and I have a problem.
 05-05-2005 | 09:59 AM
#365
Make MyTL Great Again
Joined: Nov 2004
Posts: 1,686
Likes: 5
From: Dunellen, NJ
BTW, I checked my 1 bent one to see how it would fit in my car (its not stuck to the plastic yet, but I just laid them on top of each other)...it looks like it will be okay, because the plastic snapped into the car, and the sill still looked okay. I also knelt down to check for clearance...and it looks like there is plenty of space. At first thought there was a problem, because I was closing the door and at a certain point it got hard to do...then I realized I was a dumbass and left the weather stripping hanging...I put it back and it closes fine. The only spot where I think there could be a problem is right at the bend, and the door side (outside) edge of the sill, so I am going to make sure that part is stuck together real good. I say this because the door has a little 45 degree angle right where the "big part" meets the edge of the door. If you look, you will know what I'm talking about.
05-05-2005 | 10:08 AM
#366
Make MyTL Great Again
Joined: Nov 2004
Posts: 1,686
Likes: 5
From: Dunellen, NJ
Useful Information
FYI, Incase you break your OEM sills, or want another set, it's only $75 bucks.
http://www.acuraparts247.com/sunnysi...All&vinsrch=no
You would need to order 16, 18, 20, 22
http://www.acuraparts247.com/sunnysi...All&vinsrch=no
You would need to order 16, 18, 20, 22
05-05-2005 | 10:21 AM
#367
Previous Owner
Joined: May 2004
Posts: 848
Likes: 9
From: San Diego, CA
Hey adam, are there any clips of the plastic part that's attached to the frame? Can we can a scan or pics of how to remove the B pillar covers? I'm guessing that's on the service manual. And also how to remove the OEM sills? Thanks.
05-05-2005 | 11:34 AM
#368
Make MyTL Great Again
Joined: Nov 2004
Posts: 1,686
Likes: 5
From: Dunellen, NJ
Originally Posted by Thorin78
Hey adam, are there any clips of the plastic part that's attached to the frame? Can we can a scan or pics of how to remove the B pillar covers? I'm guessing that's on the service manual. And also how to remove the OEM sills? Thanks.
1) pull up the weather stripping in the area surounding the OEM sills.
2) pry one of the ends up (I just used my fingers, but you could use a screw driver or something.
3) once you have one end loose, just move your hand underneith the rest to pry the rest out.
They aren't held on with seperate clips, just with some clips that are part of the molded plastic. I don't know what you would call them, but is skinny at the top, fat in the middle and then it goes back to skinny...so its held to the car when the fat part is through the hole. I really don't think you could break the clips too easliy as long as you pull in an upwards direction.
05-06-2005 | 08:33 AM
#369

1st Gear
Joined: Oct 2004
Posts: 1
Likes: 0
From: Tampa, FL
Originally Posted by dlf2365
Supercomputers,
Just checking again about my refund. You reponse to my previous request was that you would refund by Monday the 3rd. Didn't happen.
This is request number three. Thanks.
Just checking again about my refund. You reponse to my previous request was that you would refund by Monday the 3rd. Didn't happen.
This is request number three. Thanks.
I still have not received the refund on my deposit.
THIS IS THE FOURTH REQUEST. I think a site moderator needs to get involved at this point. This is turning into a credibility issue.
05-06-2005 | 08:36 AM
#370

Suzuka Master
Joined: Mar 2004
Posts: 5,680
Likes: 2
Originally Posted by dlf2365
I still have not received the refund on my deposit.
THIS IS THE FOURTH REQUEST. I think a site moderator needs to get involved at this point. This is turning into a credibility issue.
THIS IS THE FOURTH REQUEST. I think a site moderator needs to get involved at this point. This is turning into a credibility issue.
Originally Posted by Supercomputers
DLF Deposite Refund Done
05-06-2005 | 10:16 AM
#373
DLF
As per I sent you in a PM , All credits have been issued in a very timley manner. I am sorry for the delay, I have a girl come in and do the books on the weekend she missed last week due to being sick, I promise you it will be proccessed this weekend, You are on our list to be taken care of.
Thanks
Dave
05-06-2005 | 03:38 PM
#374

Oakland Team Nighthawker
Joined: Dec 2004
Posts: 76
Likes: 0
From: Oakland, CA
NYC install?
ok folks, this installation seems damn complicated. I have an 05, so i guess the intstrux aren't exactly correct.
Supercomputers, and everyone else--who would do the install in the NY area well and for a fair price?
Supercomputers, and everyone else--who would do the install in the NY area well and for a fair price?
05-07-2005 | 01:14 AM
#375
Previous Owner
Joined: May 2004
Posts: 848
Likes: 9
From: San Diego, CA
Originally Posted by AdamNJ
Well I haven't done the install yet, so I don't have details/pics yet, but I plan to do so when I do my install. As for the OEM sills, they are easy to remove.
1) pull up the weather stripping in the area surounding the OEM sills.
2) pry one of the ends up (I just used my fingers, but you could use a screw driver or something.
3) once you have one end loose, just move your hand underneith the rest to pry the rest out.
They aren't held on with seperate clips, just with some clips that are part of the molded plastic. I don't know what you would call them, but is skinny at the top, fat in the middle and then it goes back to skinny...so its held to the car when the fat part is through the hole. I really don't think you could break the clips too easliy as long as you pull in an upwards direction.
Hey Adam,
I'm having problems finding the 12V wire from the fuse. The pictures on this thread doesn't give me a great idea of what color it is. Is it a yellow/blue striped wire? is it easy to find through the mound of wires near the b pillar? anyone can help? I'm trying to install these this weekend. Thanks.
05-07-2005 | 07:21 AM
#376
Instructor
Joined: Feb 2004
Posts: 127
Likes: 0
From: Niceville FL
Originally Posted by Thorin78
Hey Adam,
I'm having problems finding the 12V wire from the fuse. The pictures on this thread doesn't give me a great idea of what color it is. Is it a yellow/blue striped wire? is it easy to find through the mound of wires near the b pillar? anyone can help? I'm trying to install these this weekend. Thanks.
I'm having problems finding the 12V wire from the fuse. The pictures on this thread doesn't give me a great idea of what color it is. Is it a yellow/blue striped wire? is it easy to find through the mound of wires near the b pillar? anyone can help? I'm trying to install these this weekend. Thanks.
Have tried "Add-A-Circuit"? There's an open slot in the bottom row of the fuse panel that's constant 12 volts. I wired all four sills to that circuit. Just daisy chain front and rear sills together and route both the wires to the fuse panel. The right side is fairly simple to pass the wire through the center console.
05-07-2005 | 08:33 AM
#378
Not Really NFL, You just have to get them installed properly. The electrical should be done by a shop if your not sure, and all you need is some plastic based epoxy to make the rears fit a litte better. To help alivate the pressure put on them buy the stock curve in the sills.
05-07-2005 | 08:39 AM
#379
Spoke witht the Maker on the Back sill issue that has been brought up. The reason the stock bend could not be duplicated 100% is due to the stock sills are anchored into the plastic base, With our sills being a cover we did not have the luxuary to anchor them into something, So the Bend had to be less then the stock one. This will still give you a good fit but you have to work them onto the stock sills and apply pressure for the 3m to grab, No according to most the 3m is not grabbing as good as it should so we are going to ad more of it on the next run of sills. We are also going to suggest and maybe include in the next round a small miny tube of Plastic based Epoxy to help with the hold.
So if you are having problems here is what he suggested. You can use another line of the 3m and close pin it down over night.
Or use a few Lines of Epoxy where the bend hits your stock plates and pin it down overnight, Once it dries your problem will be gone.
I will get back to you with the name of the Plastic based Epoxy that once its dry will peel off and not damage any of your stock parts.
If you have any other questions let me know.
Dave
05-07-2005 | 10:24 AM
#380
Instructor
Joined: Oct 2004
Posts: 222
Likes: 0
From: Georgetown, DC
Originally Posted by SparkAF
Thorin78
Have tried "Add-A-Circuit"? There's an open slot in the bottom row of the fuse panel that's constant 12 volts. I wired all four sills to that circuit. Just daisy chain front and rear sills together and route both the wires to the fuse panel. The right side is fairly simple to pass the wire through the center console.
Have tried "Add-A-Circuit"? There's an open slot in the bottom row of the fuse panel that's constant 12 volts. I wired all four sills to that circuit. Just daisy chain front and rear sills together and route both the wires to the fuse panel. The right side is fairly simple to pass the wire through the center console.
Sorry SparkAF...i'm an electical
 amongst other things...
Could you post a couple pics of your set up? If not, how much are the "Add-A-Circuits" and what does "Daisy Chain" mean? Sounds like a ... :gheyfight: ... but I'm sure there's a more intellectual explanation.
Thanks for any insight...
05-07-2005 | 08:58 PM
#381
Previous Owner
Joined: May 2004
Posts: 848
Likes: 9
From: San Diego, CA
SparkAF: which fuse did you hook it up to? I really wanted to splice the wiring instead of going through a fuse because it would look more professional. The previous pictures provided with the '05 TL, though I have an '04, showed someone using a volt meter to measure the constant +12V came from. But the black prong of the volt meter was blocking the wire that I need (I think) and that was connected to the red prong. I would like to trace the wire if possible. I wonder if there is a constant 12v wire somewhere on the b pillar above the seat belt going to the courtesy lights.
Daisy Chain means to run the panels in series, one after another. I can splice 2 wires together and get the result.
Daisy Chain means to run the panels in series, one after another. I can splice 2 wires together and get the result.
05-08-2005 | 08:34 AM
#383
Instructor
Joined: Feb 2004
Posts: 127
Likes: 0
From: Niceville FL
Originally Posted by Bootlegged
Sorry SparkAF...i'm an electical amongst other things...
Could you post a couple pics of your set up? If not, how much are the "Add-A-Circuits" and what does "Daisy Chain" mean? Sounds like a ... :gheyfight: ... but I'm sure there's a more intellectual explanation.
Thanks for any insight...
amongst other things...Could you post a couple pics of your set up? If not, how much are the "Add-A-Circuits" and what does "Daisy Chain" mean? Sounds like a ... :gheyfight: ... but I'm sure there's a more intellectual explanation.
Thanks for any insight...
05-08-2005 | 11:46 AM
#384
Make MyTL Great Again
Joined: Nov 2004
Posts: 1,686
Likes: 5
From: Dunellen, NJ
I've completed the install on my passenger side. I've put together a guide with 37 pictures for a total of over 5 megs.
http://www.sbadesign.com/acurazine/sills/
Enjoy!
Dave, feel free to use these pics.
http://www.sbadesign.com/acurazine/sills/
Enjoy!
Dave, feel free to use these pics.
Last edited by AdamNJ; 05-08-2005 at 11:50 AM.
05-08-2005 | 11:49 AM
#385
Suzuka Master
Joined: Mar 2004
Posts: 5,680
Likes: 2
Originally Posted by AdamNJ
I've completed the install on my passenger side. I've put together a guide with 37 pictures for a total of over 5 megs.
http://www.sbadesign.com/acurazine/sills/
Enjoy!
http://www.sbadesign.com/acurazine/sills/
Enjoy!
Very nice. Looks great.
05-09-2005 | 06:06 AM
#388

Team Nighthawk President
Joined: Mar 2004
Posts: 482
Likes: 0
From: Northern, VA
Originally Posted by Supercomputers
DLF
As per I sent you in a PM , All credits have been issued in a very timley manner. I am sorry for the delay, I have a girl come in and do the books on the weekend she missed last week due to being sick, I promise you it will be proccessed this weekend, You are on our list to be taken care of.
Thanks
Dave
As per I sent you in a PM , All credits have been issued in a very timley manner. I am sorry for the delay, I have a girl come in and do the books on the weekend she missed last week due to being sick, I promise you it will be proccessed this weekend, You are on our list to be taken care of.
Thanks
Dave
I have also PM'd you several times regarding the refund I had requested and I have yet to receive my money either. This is not good. If you are doing business and you have a refund policy, it is not fair to ask your customers to wait well over a month to get their money back. I tried to give you the opportunity to handle this privately, but you have not complied so I am forced to put this out for the other forum members to see. Please issue my refund ASAP.

Thanks,
1HotTL
05-09-2005 | 07:38 AM
#389
Make MyTL Great Again
Joined: Nov 2004
Posts: 1,686
Likes: 5
From: Dunellen, NJ
Originally Posted by NFLblitze1
is it just me or do the pics not work?
05-09-2005 | 11:05 AM
#391
Instructor
Joined: Oct 2004
Posts: 222
Likes: 0
From: Georgetown, DC
Originally Posted by AdamNJ
I've completed the install on my passenger side. I've put together a guide with 37 pictures for a total of over 5 megs.
http://www.sbadesign.com/acurazine/sills/
Enjoy!
Dave, feel free to use these pics.
http://www.sbadesign.com/acurazine/sills/
Enjoy!
Dave, feel free to use these pics.
The pics and the captions were very easy to follow along with. I just hope that same set up is similar for the TSX
 05-09-2005 | 11:45 PM
#395
Make MyTL Great Again
Joined: Nov 2004
Posts: 1,686
Likes: 5
From: Dunellen, NJ
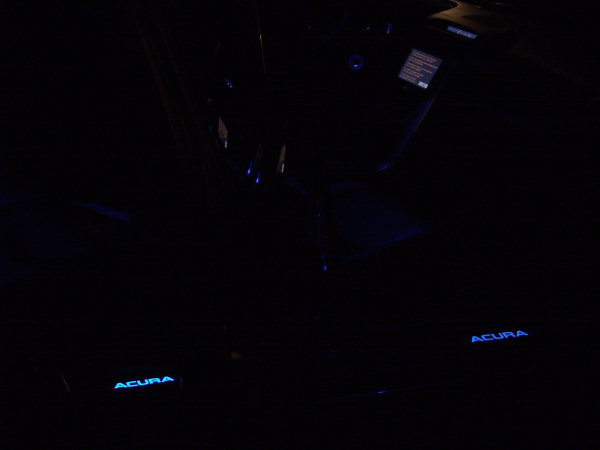
Originally Posted by NFLblitze1
why are the lights different colors? possible voltage disruption?
05-09-2005 | 11:49 PM
#396
Make MyTL Great Again
Joined: Nov 2004
Posts: 1,686
Likes: 5
From: Dunellen, NJ
Originally Posted by NFLblitze1
how pleased are people with their sills?
On a scale of 1-10, 10 being the best, I'm going to give them an 8. They are beautiful, but there are the problems of the rear bend issue and the need for more tape to make them stick well.
05-10-2005 | 09:31 AM
#398
Weapon X
Joined: Oct 2004
Posts: 182
Likes: 0
From: San Diego, CA
Originally Posted by NFLblitze1
how pleased are people with their sills?
Likes: Good color, great design, Good material
Dislikes: Unclear instructions, 3M tape not so good, rear plate curve
Last edited by GRich4u; 05-10-2005 at 09:34 AM.
05-10-2005 | 10:25 AM
#399
Make MyTL Great Again
Joined: Nov 2004
Posts: 1,686
Likes: 5
From: Dunellen, NJ
Originally Posted by Thorin78
Hey adam, nice job on the install. How long did it take you to do it?
- learning experience
- cleaning / waxing the area underneath the sills
- taking pictures
- tapping the wrong wires for 12v constant and wondering why (~15min)
- once I was sure I has power wondering why the sills weren't working (~20-30min)
In reference to the last issue, I knew my single red wire had power, but the sills still weren't lighting up. I didn't know if it was a bad crimp I had on one of the connectors i used, if the voltage regulators were bad...etc. So I turned my car on. I saw that it thought my passenger doors were closed (but they were open). I started to panic and think "oh shit, I fucked something up". Then I started thinking and knew it had to be something with the switch. I remembered that it was still hanging out of the car, and I screwed it back on and that fixed my problem (when it is screwed into the car, it is grounded...completing the circuit). The sills then lit up, and my car knew the door was open.
05-12-2005 | 08:42 AM
#400
Make MyTL Great Again
Joined: Nov 2004
Posts: 1,686
Likes: 5
From: Dunellen, NJ
Has anyone else installed these yet? Pics? Problems? Complaints? I'm slowly working on my driver side set. BTW, it looks like I will have to take my front passenger off and put more tape on it, because its coming off.