When you click on links to various merchants on this site and make a purchase, this can result in this site earning a commission. Affiliate programs and affiliations include, but are not limited to, the eBay Partner Network.
Since the Advance running board installation process has changed significantly for the 2017 models I thought I would add some photos and commentary to the steps provided by the official installation instructions. As someone who likes to perform routine maintenance at home, I thought I'd save $1000 and order the running boards to install them myself. It ended up being a larger job than expected, but it was a good challenge.
Install the new side sill/running board, praying everything lines up
The process took almost 4 hours but the latter half involved ducking inside frequently to watch football.
Recommended Tools
12mm socket and wrench - used on the 30 flippin' flange bolts used in this kit
10mm deep socket or open end wrench (This is NOT mentioned in the instructions but is needed to tighten the flange nut)
3-in-1 Painter's tool (Also not mentioned in the instructions but needed to score and scrape undercoating near the brackets)
2 short flat head screwdrivers to pop the round plastic trim clips, in the absence of having a real trim tool
Touch up paint - I picked this up from my Honda dealer for $15. Figured I'll want this anyway for touching up the inevitable rock chips.
Torque wrench - I only had a 1/2" wrench that went down to 25 ft lbs, so I ended up using the "snug + 1/4 turn" technique on the bolts
Gloves to protect your hands when removing the side sills
Right-angled Phillips screwdriver, used to unscrew the self-tapping screws at the front and rear of the side sill. I picked up this kit at Harbor Freight a while back:
Mega handy screwdriver for fender well screws Other Tips and Thoughts
Step 2 refers to a clip that is effectively buried inside the side sill. Interestingly enough this clip was missing on the left side of my 2-day-old vehicle. On the right side, I found it easier to push it out from the back.
Step 5 (Removing the existing side sill) just about made me throw in the towel. I am not the strongest guy out there so getting these off took multiple full exertion efforts. As tommypenguin mentioned in his post, remove the clip from step 6 before attempting step 5. Then adjust the front and rear of the side sill so that neither end catches when it slides forward. What worked for me better than pulling was to push it from the rear, where I could use the tire for leverage. If everything goes well, all 14 clips will come out cleanly.
Steps 6 and 7: In both cases the plastic "support" piece stayed on the vehicle instead of remaining in the factory side sill. Carefully slide it off the existing clips and affix it along its slots in the new one.
Step 9: Interestingly these clips come out when pushed down, as opposed to the '14-'16 instructions to turn them to remove them.
Step 10: I found it easiest to pop these back out with a flathead screwdriver. Tip: Make doubly sure the new clips are slid into their slots completely. Usually they will "click" and be nearly flush with the left edge of the plastic panel, but not all. Bonus advice: There are white block-ish clips that attach the new side sill to the running boards themselves. The instructions never mentioned anything about them needing to be attached so I used screwdrivers to make sure each one was pushed in.
Step 17 (Remove undercoating and apply touch up paint): In most cases I had very little undercoating in the areas where the brackets would go, but I went ahead and scraped off areas and painted them over.
Step 19 (Install Support Bracket A) required I cut off and paint the caulk line so the bracket could sit flush against the frame.
Step 23 (Install the new running board): This is also a huge pain especially if you are working alone. The doors are open, blocking a good view, and the weight of the new unit is much heavier than the original side sill. I worked from the back and used my foot to hold up the front end, making sure the fender well fit into the back slot, and carefully pushed in each pin from back to front.
Steps 24-26: You'd think the hard part was over but you'd be wrong. There is a very good chance that one or more bolts will not line up right on one or more of the 3 brackets. Using a flat head to make small adjustments on alignment may be needed here.
The last steps involve putting the Phillips screws back in the fender and pushing the 2 black clips in the front back into place. Make sure to put the "buried" clip on the inside first.
The final result:
I can see why the dealer charges so much. Hope someone finds this helpful!
Excellent, helpful post. After reading the instructions that Acura had for their dealers on installation, I decided to let them do it. It, as you illustrate, is not a simple 30 min. bolt on. Still, the results are fantastic. I also added the splashguards which really tie everything together nicely...I think.
Excellent, helpful post. After reading the instructions that Acura had for their dealers on installation, I decided to let them do it. It, as you illustrate, is not a simple 30 min. bolt on. Still, the results are fantastic. I also added the splashguards which really tie everything together nicely...I think.
Wow! That's a good looking vehicle. The dealer had the same one (black chrome wheels and all) in the showroom. It sold the next day.
Appreciate the kind words. Looks like I may get the splash guards as well.
OMG, I installed the wrong year running board to my 2017. I ordered the advanced runningboard from Amazon, and I guess it is for 2016, but the good news is that installation is the same as for 2016 and it actually fits. The only difference is that the existing side sill panel with the chrome remains intact. My wife, who loves bling bling actually loves I, lol. I'll post some pictures of it later if anyone is interested. It only took me about 45 minutes for the install.
OMG, I installed the wrong year running board to my 2017. I ordered the advanced runningboard from Amazon, and I guess it is for 2016, but the good news is that installation is the same as for 2016 and it actually fits. The only difference is that the existing side sill panel with the chrome remains intact. My wife, who loves bling bling actually loves I, lol. I'll post some pictures of it later if anyone is interested. It only took me about 45 minutes for the install.
I've read about others who did the same. I'd love to see pictures.
I feel like a fool because I thought they would be the same since it's the same car, only a couple minor facelift. But it doesn't matter. Happy wife, happy life, right?
Quick question, is it Advance or Chrome Advance running board? Can't figure out the differences on ACURA website.
I ordered the Chrome Advance running boards. These presumably have an extra chrome strip on the outer edge.
LOL - looking at Acura's website I see where the confusion is. The link to the non-chrome version says "Chrome trim with custom step plate provides added eye appeal" and clearly shows a chrome strip on the board in the detail image. The chrome version duplicates that description twice and has a broken image link. Acura's web team needs to get their act together. I'll see if there is a Site Feedback link anywhere...
Both Advance running boards have a chrome stripe on the side, but the "chrome" version has the chrome step surface, while the non-chrome version has a black step surface. $26 difference. The Sport ones are basically the same as the 14-16 sport boards, albeit with a slightly different rocker portion look and it is missing now the chrome stripe.
Both Advance running boards have a chrome stripe on the side, but the "chrome" version has the chrome step surface, while the non-chrome version has a black step surface. $26 difference. The Sport ones are basically the same as the 14-16 sport boards, albeit with a slightly different rocker portion look and it is missing now the chrome stripe.
Very good to know! With this difference in mind I can see the difference now on the Acura website but they really should have done a better job to show the running boards. Thanks for the information. Glad I got the Chrome version -- even though it's more of a silver with black diamond skid material.
Very good to know! With this difference in mind I can see the difference now on the Acura website but they really should have done a better job to show the running boards. Thanks for the information. Glad I got the Chrome version -- even though it's more of a silver with black diamond skid material.
Wait, so is the step surface actually more like a painted plastic surface than a metallic one? Acura has this weird aversion to real metallic trims, but I hope it didn't happen here...
Wait, so is the step surface actually more like a painted plastic surface than a metallic one? Acura has this weird aversion to real metallic trims, but I hope it didn't happen here...
Pretty much right on. Im ok as I wouldn't want the glare of chrome. Bottom line is it looks really good to my eye.
Hmm I'm just concerned about that surface lasting. Pebbles caught in soles would ruin that finish, wouldn't it?
I guess any material used for a step can/will wear. What is not so evident from the pictures is that the edge and the diamonds are raised significantly from the metal surface below meaning that unless you plan on jogging on the running boards, your sole will not touch the finished surface below. From how I get in and out of mine so far, I'm mostly stepping on the rubber edge.
Will the 2017 Chrome Advance boards fit on 2016 MDX ? It's not available for 2016...
I don't see why not. The Sport boards for the 2016 also require removing the side sills, where there appear to be the same cutouts and holes in the body.
If I were you I would check underneath the vehicle to confirm the bolt holes are present. There should be 6 total: a pair near each wheel and one pair in the middle.
Those 6 you mention are indeed present on the 2014-2016. They are the only attachment points for the Advance boards and the 2014-2016 Sport boards attach to them as well. There is a 2017 around here that has 2014-2016 Advance boards on it.
Will the 2017 Chrome Advance boards fit on 2016 MDX ? It's not available for 2016...
Originally Posted by TLXinTX
I don't see why not. The Sport boards for the 2016 also require removing the side sills, where there appear to be the same cutouts and holes in the body.
If I were you I would check underneath the vehicle to confirm the bolt holes are present. There should be 6 total: a pair near each wheel and one pair in the middle.
Originally Posted by neoshi
Those 6 you mention are indeed present on the 2014-2016. They are the only attachment points for the Advance boards and the 2014-2016 Sport boards attach to them as well. There is a 2017 around here that has 2014-2016 Advance boards on it.
Ditto on this. From what I look at the installation guides between the 2014-2016 Sport Board and 2017 Advance Boards, the mounting are the same. I'm hoping someone can confirm this with their 2014-2016. I have a 2016 and don't like the 2014-2016 Advance Boards. The 2017 seem more integrated than an add-on.
Ditto on this. From what I look at the installation guides between the 2014-2016 Sport Board and 2017 Advance Boards, the mounting are the same. I'm hoping someone can confirm this with their 2014-2016. I have a 2016 and don't like the 2014-2016 Advance Boards. The 2017 seem more integrated than an add-on.
Would these Advance Running Boards fit a 2013 rdx? Oem acura parts website lists that these are compatible for models 2016 and up, but aren't the bodies of the 2016 models pretty much the same as the 2013 one?
Erm.. you might be in the wrong forum if you're asking about the RDX using MDX boards. MDX boards seem to be cross compatible from 2014 up to current, or at least the rockers from a 17 fit a 16 fine, so the boards should work too but hasn't been verified yet.
Hi,
I'm in the middle of doing this install, working on the left side of the vehicle, and have a question:
Step 19: install Left Bracket A and Left Bracket C, loosely, onto the car frame.
Step 20: install Support Bracket A to Left Bracket A
Step 21: install Support Bracket B to Left Bracket C.
so far so good
Step 22: torque down the Support Bracket A and Support Bracket B
Step 23: this is where I got confused.
Instructions say to REMOVE the Left Bracket A and Left Bracket C. These were installed (loosely) in Step 19 above. Why installed at Step 19 and remove now?
Step 24: install the running board.
Step 25: install Left Bracket A, Left Bracket B, Left Bracket C. So these 3 brackets get put on AFTER the running board?
OMG, I installed the wrong year running board to my 2017. I ordered the advanced runningboard from Amazon, and I guess it is for 2016, but the good news is that installation is the same as for 2016 and it actually fits. The only difference is that the existing side sill panel with the chrome remains intact. My wife, who loves bling bling actually loves I, lol. I'll post some pictures of it later if anyone is interested. It only took me about 45 minutes for the install.
Hi,
I'm in the middle of doing this install, working on the left side of the vehicle, and have a question:
Step 19: install Left Bracket A and Left Bracket C, loosely, onto the car frame.
Step 20: install Support Bracket A to Left Bracket A
Step 21: install Support Bracket B to Left Bracket C.
so far so good
Step 22: torque down the Support Bracket A and Support Bracket B
Step 23: this is where I got confused.
Instructions say to REMOVE the Left Bracket A and Left Bracket C. These were installed (loosely) in Step 19 above. Why installed at Step 19 and remove now?
Step 24: install the running board.
Step 25: install Left Bracket A, Left Bracket B, Left Bracket C. So these 3 brackets get put on AFTER the running board?
Is this correct directions?
Thanks!
Annona,
The directions are correct. IIRC, you put the brackets on first to get the support brackets lined up correctly, then remove the brackets to make room for attaching the running boards. Once the boards are on, put the support brackets on underneath the boards and tighten the bolts through both brackets.
TLXinTX,
Thanks for the confirmation! After much more body aches and pain, I was able to finish everything: roof rails, cross bars, and the advance chrome running boards. The posts on this board have been super helpful. There was 1 spot on each running board that I had to use zip ties: at the front, on the inside, the black flabby plastic part did not line up with anything else.
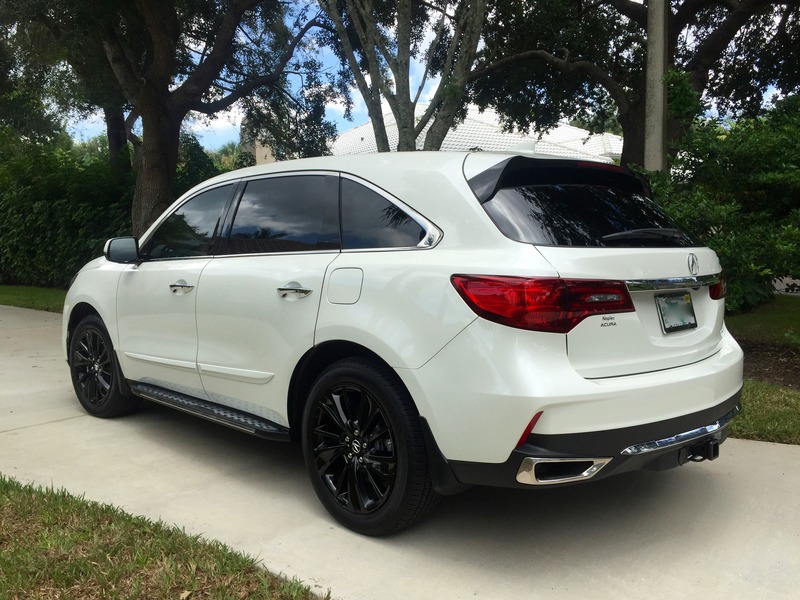
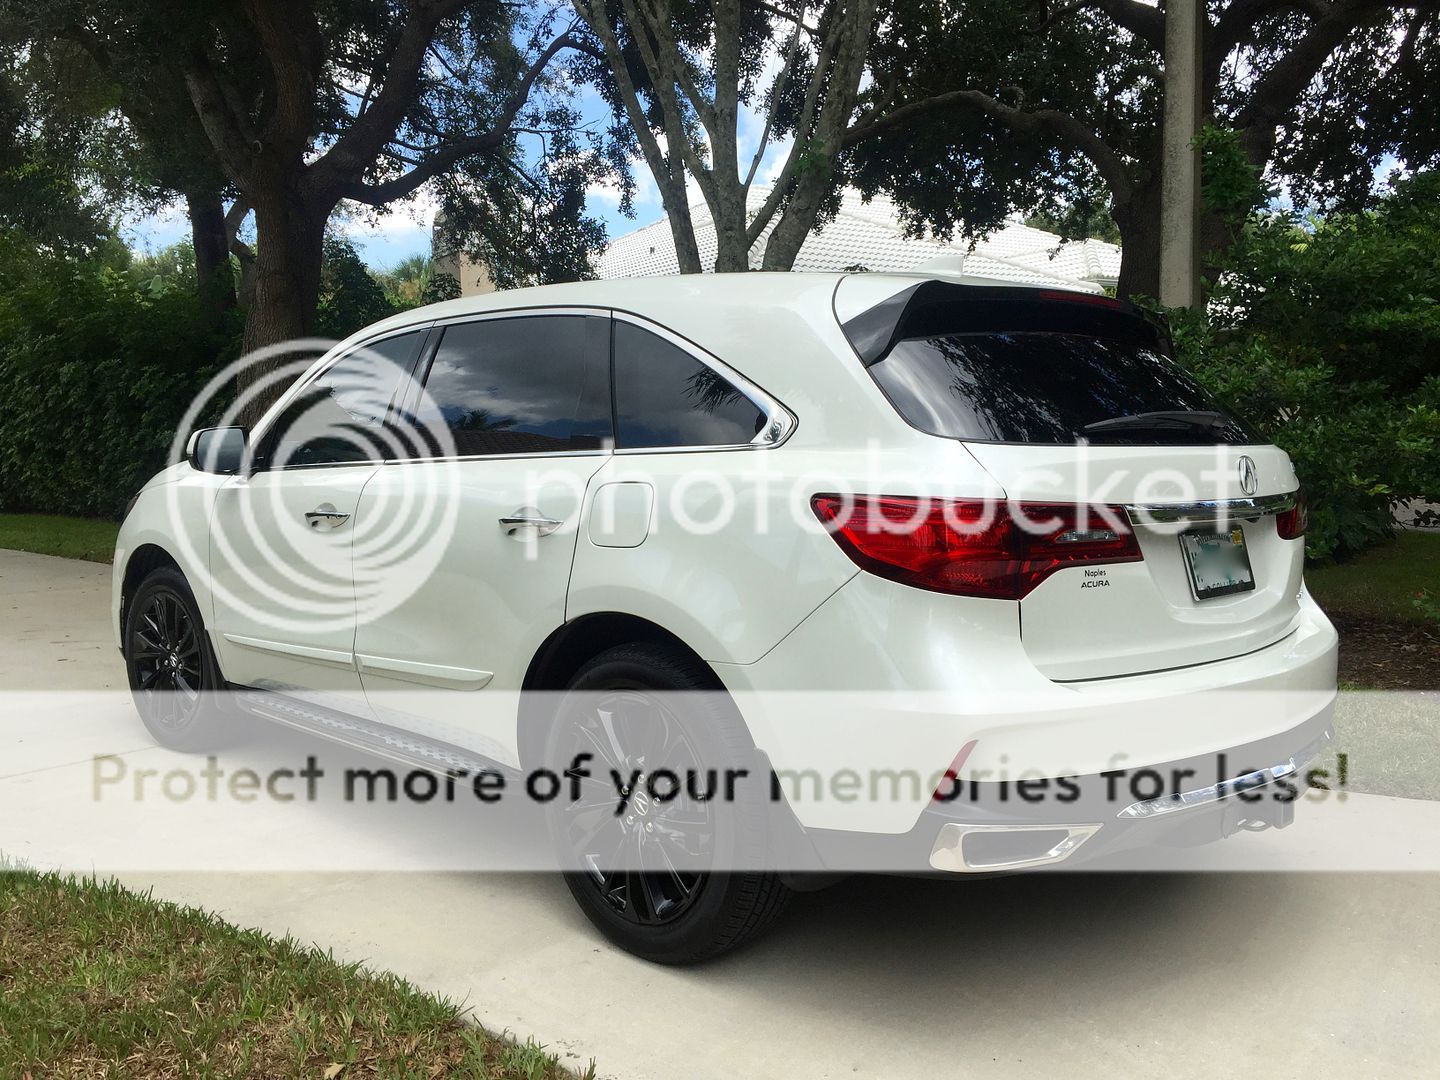
Here is a picture of my 2017 with the 2016 runningboard.
Hello I have the 2017. Same color. And I like the look. Can you show me more picture and I guess you don't have take out the side sill too. I'mean glad to show this. It's very nice. And you have intrusion to install.
So recently installed aftermarket RBs on our MDX and they fit great. Company is called Vangaurd and got them on EBay for $200.
Was very to install just bolt down on the brackets provided. No removal of the chromed side strip required and def. not as complicated as some posts here have mentioned
Driver side installed
Can you post some pictures with the running board installed? Thanks.
I guess any material used for a step can/will wear. What is not so evident from the pictures is that the edge and the diamonds are raised significantly from the metal surface below meaning that unless you plan on jogging on the running boards, your sole will not touch the finished surface below. From how I get in and out of mine so far, I'm mostly stepping on the rubber edge.
Close up photo of the running board. The rubber diamond are more raised about a quarter of an inch than the metal surface.
We decided to stay away from these R. boards as it was too much metal shiny material for our Silver MDX. We wanted a board with a uniform black surface for this reason.
These boards suit a White MDX however. I see that you had to remove the side chrome strip. Our boards just bolted on without the chrome strip removal, we just had to remove out the three cutouts in each side where the supports go.
Another advantage of having running boards installed is that you can stand on them and reach the roof. Great help and realized this when I washed and waxed my X today. Used the board to stand and reach the middle roof areas.
So glad to have done this.

 09-04-2016 | 10:01 AM


 Hello I have the 2017. Same color. And I like the look. Can you show me more picture and I guess you don't have take out the side sill too. I'mean glad to show this. It's very nice. And you have intrusion to install.


 .
.


