When you click on links to various merchants on this site and make a purchase, this can result in this site earning a commission. Affiliate programs and affiliations include, but are not limited to, the eBay Partner Network.
I removed the upper intake manifold (2000 TL) to check out the knock/detonation sensor. You can just barely see it through the runners on the lower intake manifold. I fished out the wire and it was completely severed. Trust me, no RAT was in there gnawing on it. I can post a photo of the wire, definitely no little rat teeth marks on it. The wiring problem is a design flaw, the dealerships are just feeding us a line of BS to keep from having to warranty it.
Anyway, anybody have a writeup with photos on how to remove the lower intake manifold? Or is anybody out there *really* talented and can tell me a technique for how to replace the knock sensor without removing the lower IM?
There is more than enough room for a small mouse to get in there and chew them up. Its happened to many members here. Its not hard to believe.
I know what you mean, and I tried to keep an open mind. But trust me, 95% of us are being lied to or at least misled on this subject.
1) My wife's car doesn't sit still long enough for a rat to scurry around and gnaw anything.
2) The car is always garaged, along with a vette and 3 other cars. None of the others have ever been bothered, and there's no sign of mice in the house or garage.
3) As you can see in the photos, no sign of teeth marks.
4) None of the other wires were bothered. Funny how the rat decided to gnaw this one wire, and did it right on top of the sensor where there would be the most motion, the most stress, the most fatigue cycles.
Well your case may very well be different. I have seen photos from other members where the mouse had had a small nest under there as well.
[quote=bradg;8806016]I know what you mean, and I tried to keep an open mind. But trust me, 95% of us are being lied to or at least misled on this subject.
I got the Knock Sensor light (P0325) too and Acura told me it was probably mice/rats. They sold me a wire and knock sensor replacements (~$70). The job (with labor at $120/hr) was quoted at about $600. I just pulled off the the intake manifold and looking under the lower manifold part I see lots of fir. At least I fried the beast(s).
It's a very common problem. Honda has a tsb on it, as well as rodent repellent electrical tape. I own a small repair shop, and we see one every couple months or so. It's usually just that one wire on hondas. Usually multiples on other makes. Supposedly there's been a change from petroleum based vinyl insulation to soy based insulation, which is preferred by 7 out 10 rodents. It's probably healthier as well.
Same problem rat poop below the lower intake. Everything apart to get to the sensor but the front (towards the radiator) runner out. All bolt/nuts removed but still can't get the thing off. Ran through the threads to find nothing. Can anyone tell me the secret to getting this part off to get to the knock sensor? Everything visible, including the power steering pump is removed. Thanks in advance.
If you remove all the bolts the only thing holding it in place should be the gasket? silly question but have you tried wiggling it off?
Thanks Skirmich. Yeah this thing is a pain. Wiggling, if you take a,wrench on the lower corner you can lift it a little but it's like something is still hanging it up. One pic of a guy's head shows what looks like dowels in the upper corners so tried prying with a screw driver in the corners. Even light mallet blows on the driver...no go. Pretty wild the engineers would make you go so far just for a sensor. There's no bolts underneath is there?
Thats what I thought. Two bolts two nuts. Wonder what's holding this thing on there. Guess I'll have to play with it again tomorrow. Thanks for the help. It's definitely an out of the box thinking project at this point. Lol
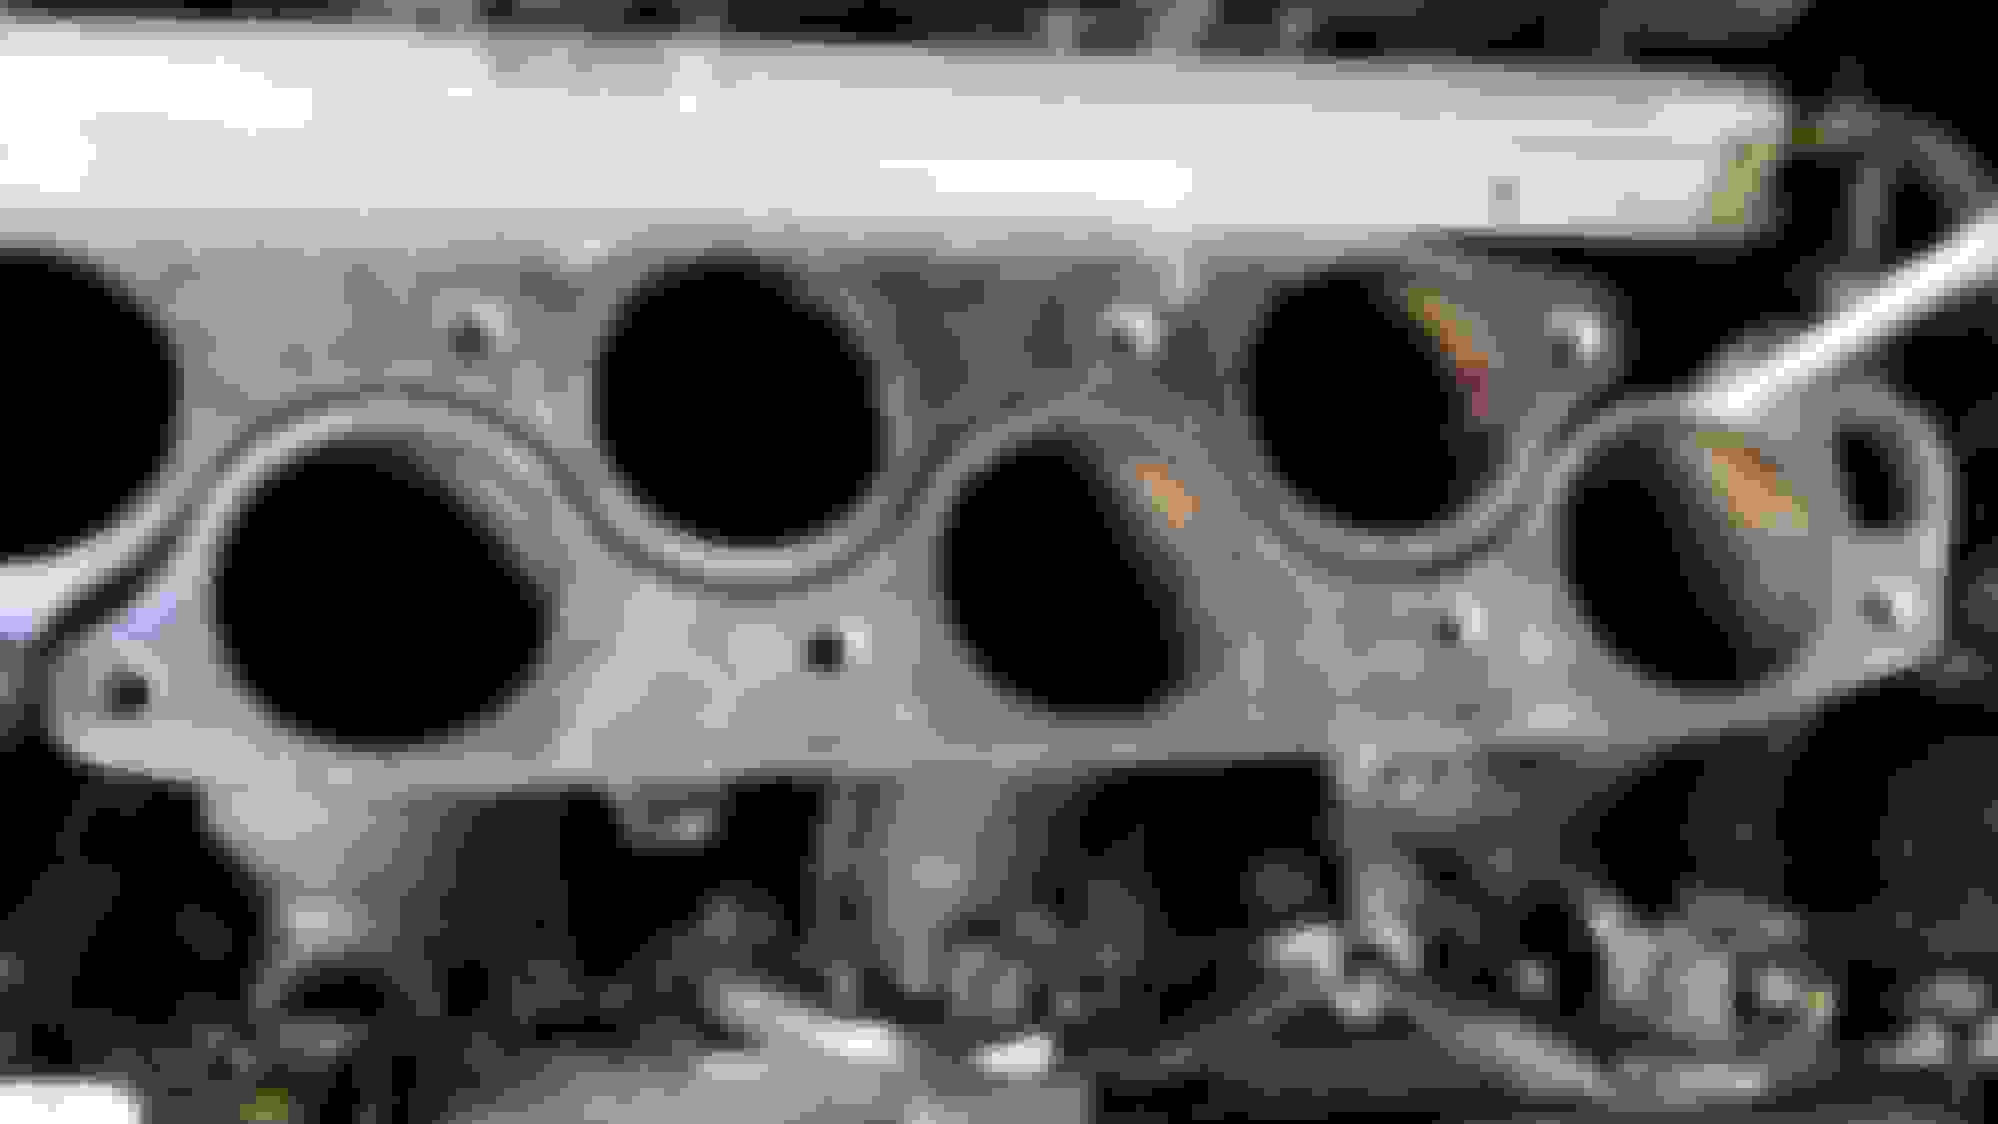
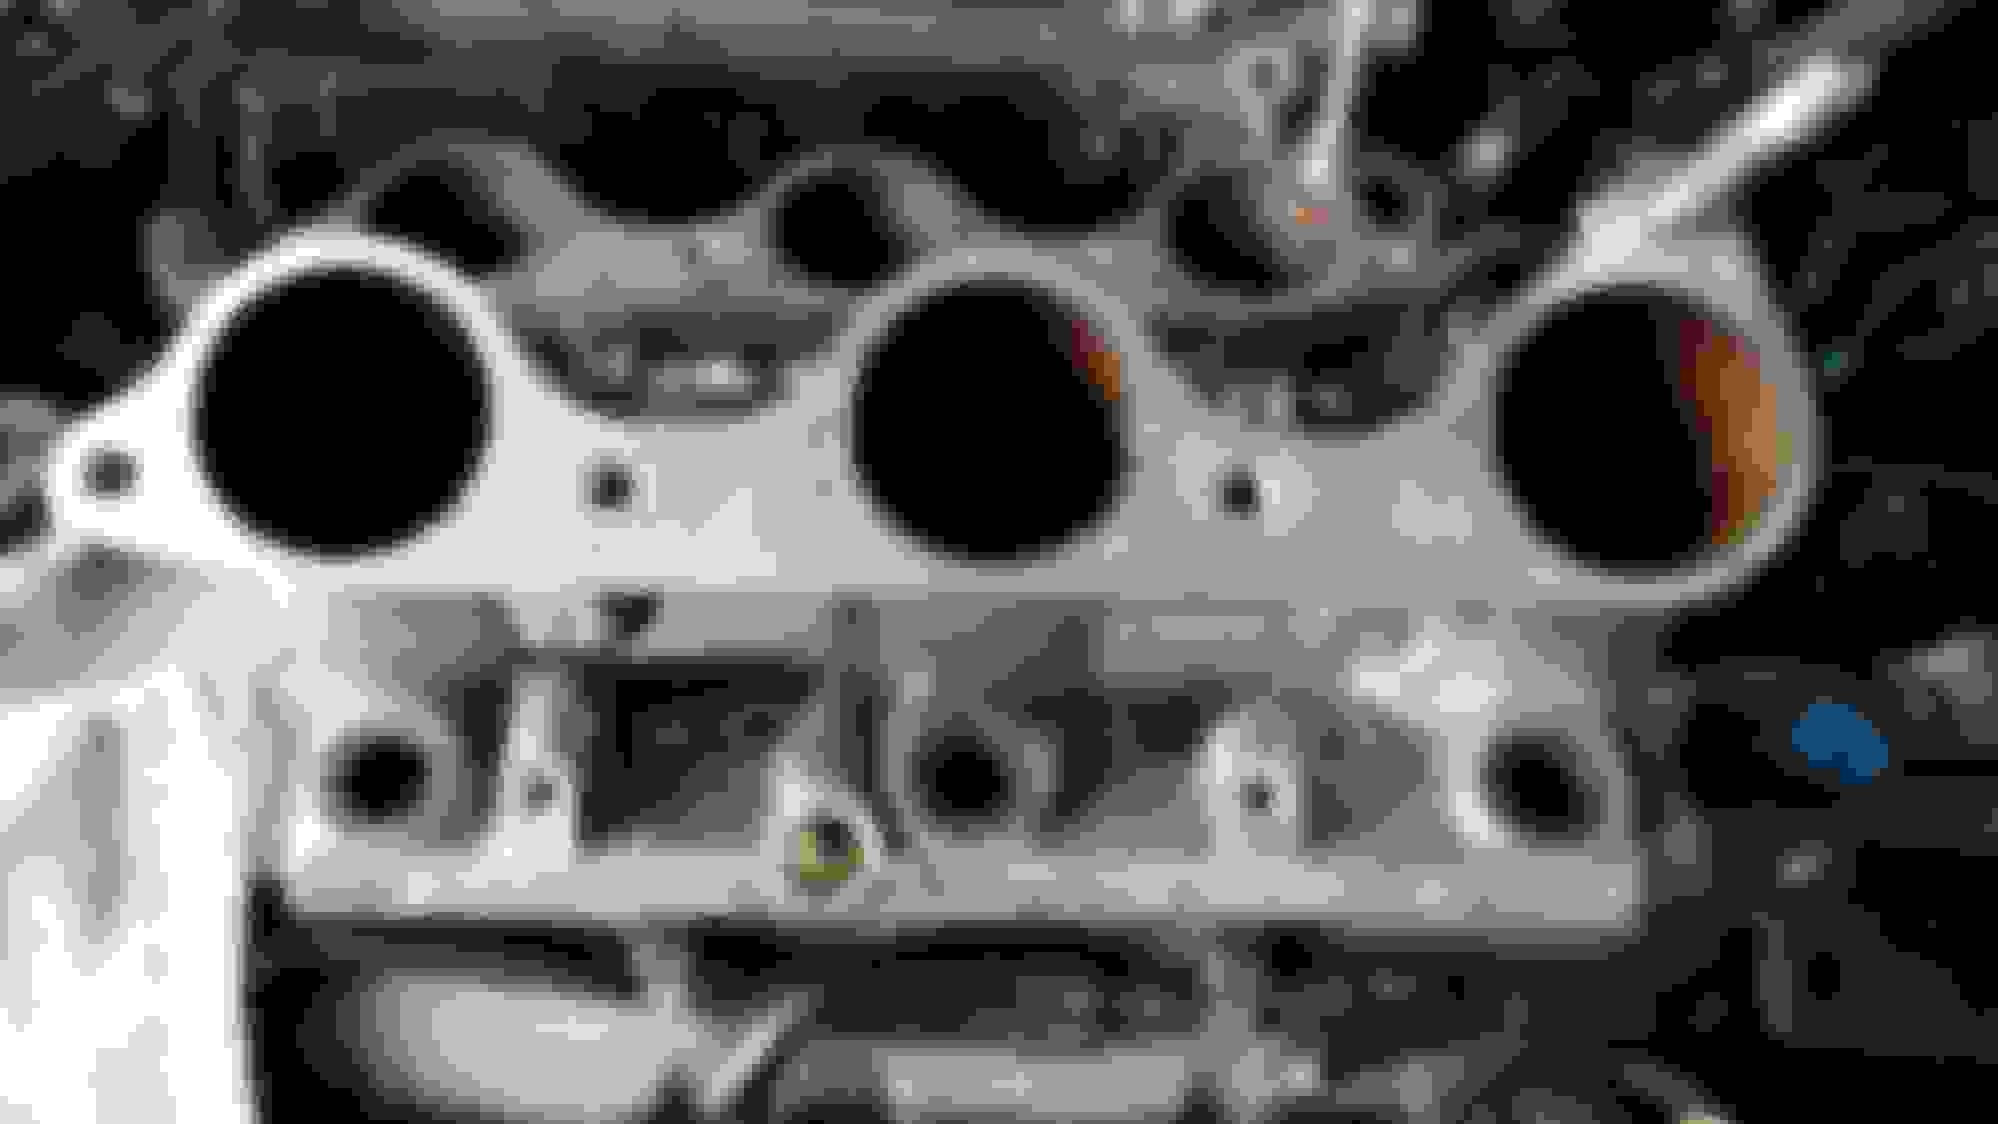
Finally found a DIY for the CLS. J32A2...guy hit it on the nose. You have to remove the rear runner first; easy. This exposes the fifth, hidden bolt on the runner near the radiator. Thought I'd post these in case someone else needs the info.
Firewall runner, removed.
Hidden bolt on the front runner, side the battery is on.
There is one bolt on the drivers side of the front manifold. It's on the underside. I missed it when i was doinmg my disassembly, but i wasd removing the heads so i just yanked the mabifold off with the head. Thatsd when i saw it.
Hello,
Just joined to try and get some assistance with my Acura. It's a 2002 TL with 104K miles and the car has really been fantastic up until now. For the first time ever, I got the Check Engine Light (CEL) and my code reader says "P0325 Knock Sensor 1 Circuit (Bank 1)". So here are my questions;
1) How many knock sensors are there on this motor? (I think 1)
2) Can it be replaced by only removing the upper intake?
3) The gaskets on the upper manifold appear to be bi-metal. If so, do you need to replace them while doing this job?
I consider myself quite handy around engines so this does not seem like that big of a project. I'm just trying to get some info before I start.
No, you need to remove the upper and lower intake manifold.
As long as you dont damage the gasket removing the manifold, you can reuse it.
Thanks for the response. I got lucky and found that a F*^*^&*^ pack rat ate the single wire going to the sensor. I was able to get the new pigtail in with no problem and was surprised that the Honda one only cost $7.00. Your correct, there is only one sensor. I only removed the upper plenum (manifold) and the front fuel rail to gain access to the plug. In my opinion, I believe I could have removed the sensor without removing the lower intake tubes. With an extension, a universal joint, and the proper socket I think it can be done as there is pretty much a straight shot down to it once the fuel rail is out of the way. I cleaned the original MLS gaskets and sprayed them with a gasket spray before re-using them.
Here is a trick I learned. As you probably know, the upper plenum is bolted down with bolts and studs, and the throttle body (TB) attaches to the manifold with bolts and studs. So, how do you pull the manifold straight up without taking apart most of the TB? I backed out (removed) the two studs holding the TB and was easily able to pull the manifold straight up without having to remove anything from the TB. I only lifted the air filter cover from it's housing to allow it to move towards the fender slightly. Worked like a charm and saved a bunch of work.!
She purrs like a kitten once again.
Finally found a DIY for the CLS. J32A2...guy hit it on the nose. You have to remove the rear runner first; easy. This exposes the fifth, hidden bolt on the runner near the radiator. Thought I'd post these in case someone else needs the info.
Firewall runner, removed.
Hidden bolt on the front runner, side the battery is on.
Thanks CTCost. I am at this point in the process but can't seem to remove the firewall runner. I've removed three of the bolts/screws. Is there one hidden near the power steering pump somewhere? Thanks.
take a look at my thread i started. in order to remove the lower intake, the bolt closest to the belts are "hidden" by part of the wiring harness. you have to push it (wiring harness) to the side with your socket while you are trying to get the socket on. you should have enough room while facing the engine bay to work, IIRC. no pictures for you, but it is there. the other three should be very easy to see.