G-009: DIY - RL Fog Light Glass Replacement
 03-27-2010, 03:20 PM
#1
Instructor
Thread Starter
G-009: DIY - RL Fog Light Glass Replacement
DIY - RL Fog Light Glass Replacement
I noticed the fog light on my driver’s side had cracked a couple weeks ago. Instead of just being able to buy glass to replace the broken glass from Acura, I was told the whole assembly (which cost around $130) would need to be replaced. It sounds like this is a rather common problem on our RLs, so rather that footing the $130, I thought I’d see how difficult it would be to replace the glass myself and provide what I did in hopes it might benefit others on this forum. Replacing the lens itself isn’t too difficult and costs less than $20. The most lengthy /difficult part of the process is removing the bumper to remove the fog light assembly. I used the instructions found <here> to remove and install the bumper and by following steps 1-3.
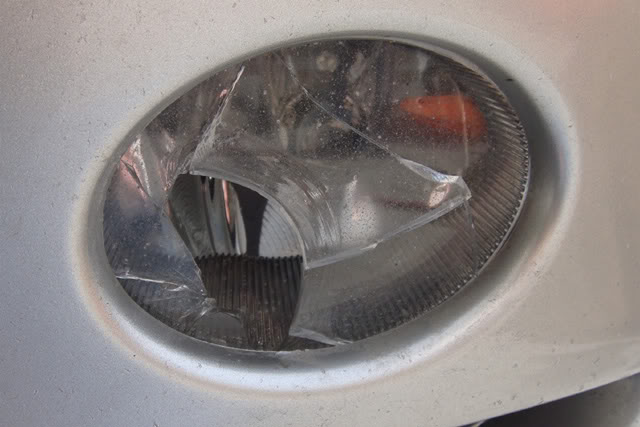
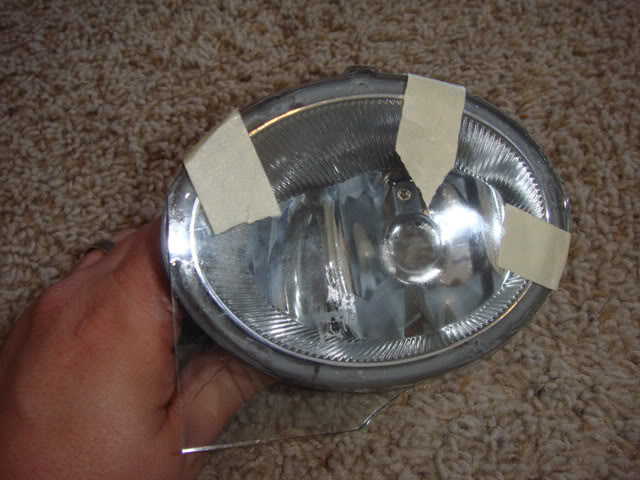
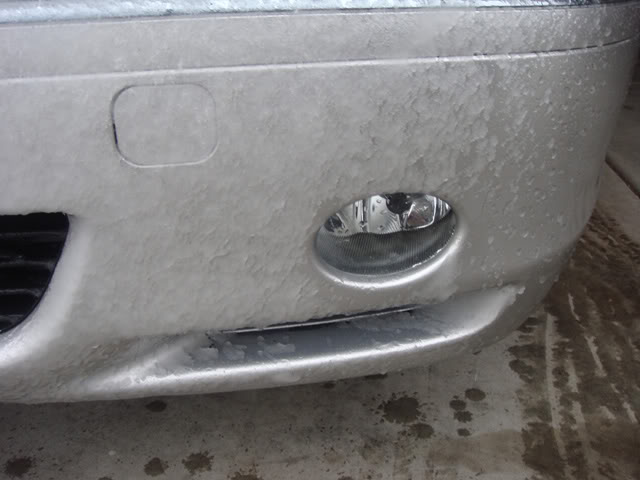
Here what my cracked lens looked like.
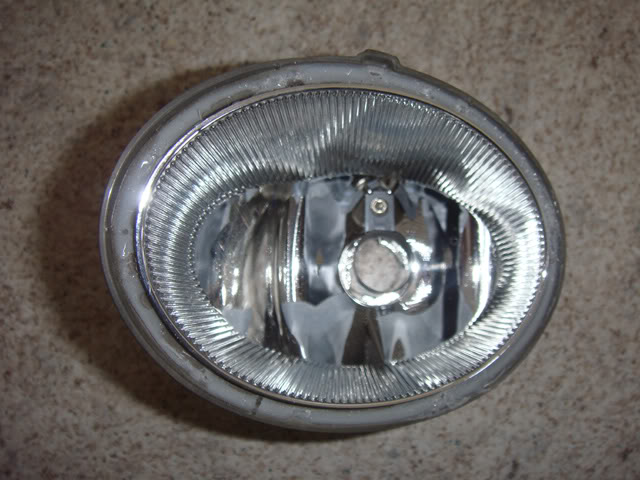
The fog light assembly removed from the bumper.

The fog light assembly with all the broken glass removed.
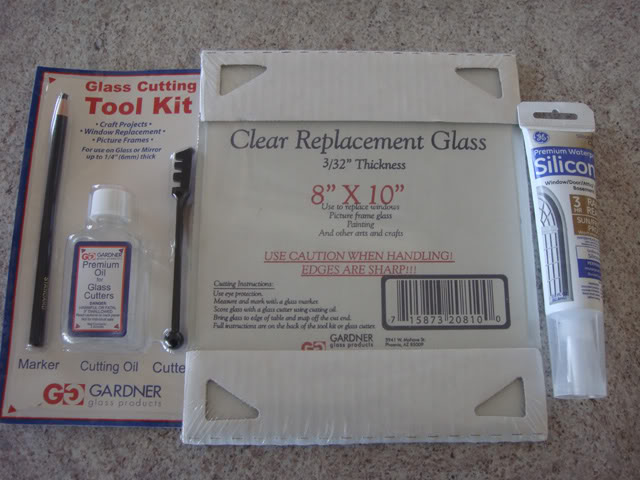
I went to The Home Depot and found an 8”x10” piece of glass, a glass cutting kit, and some silicone sealant, all for under $20!
I had never cut glass before, but it really wasn’t too difficult. Basically you just score the glass with the glass cutter and break the glass off. The 8”x10” piece has enough glass for 3 replacement lenses. In my case, it let me mess up a couple times before I had the final piece I wanted to use.
What ended up working best for me is I cut a rectangular piece that was slightly larger than the fog light and taped this to the assembly.
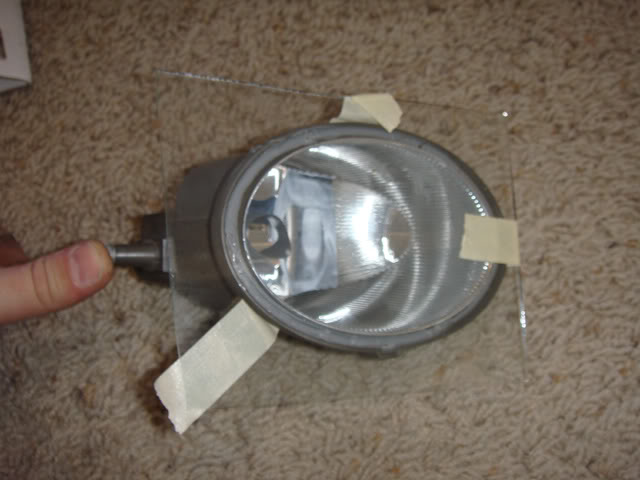
I then used the glass cutter to trace the shape of the lens. After doing a small section, I would break this piece off and then re-tape the glass so that it was a little more secure. After scoring the oval shape of the glass, I found running scores perpendicular to this helped me take off the small sections more easily.
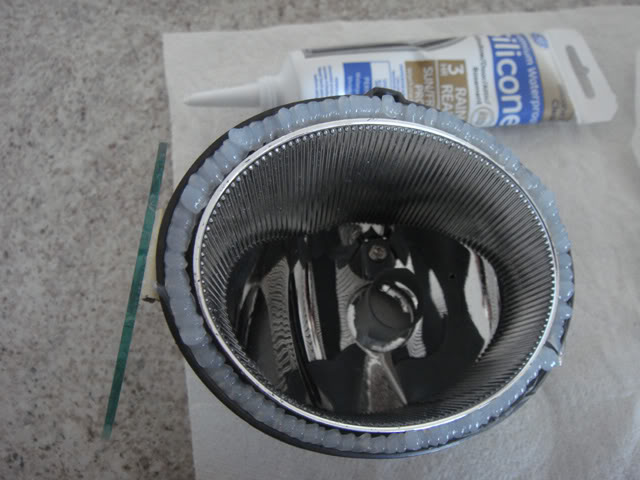
After having the glass completely cut, then applied the sealant to the groove in the light assembly where the broken glass was previously attached.
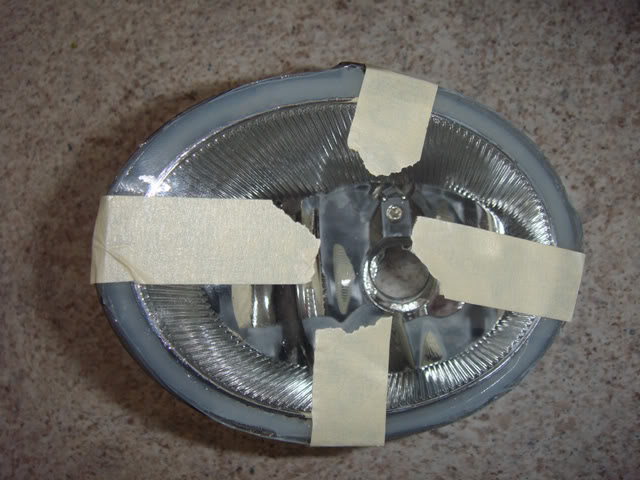
I then placed the glass on the assembly and secured it with tape while it dried.
I then reattached the fog light assembly to the bumper and then reattached the bumper to the car.
Hopefully, this is helpful to some of you DIYers out there!
I noticed the fog light on my driver’s side had cracked a couple weeks ago. Instead of just being able to buy glass to replace the broken glass from Acura, I was told the whole assembly (which cost around $130) would need to be replaced. It sounds like this is a rather common problem on our RLs, so rather that footing the $130, I thought I’d see how difficult it would be to replace the glass myself and provide what I did in hopes it might benefit others on this forum. Replacing the lens itself isn’t too difficult and costs less than $20.
The most lengthy /difficult part of the process is removing the bumper to remove the fog light assembly. I used the instructions found <here> to remove and install the bumper and by following steps 1-3.Here what my cracked lens looked like.
The fog light assembly removed from the bumper.
The fog light assembly with all the broken glass removed.
I went to The Home Depot and found an 8”x10” piece of glass, a glass cutting kit, and some silicone sealant, all for under $20!
I had never cut glass before, but it really wasn’t too difficult. Basically you just score the glass with the glass cutter and break the glass off. The 8”x10” piece has enough glass for 3 replacement lenses. In my case, it let me mess up a couple times before I had the final piece I wanted to use.
What ended up working best for me is I cut a rectangular piece that was slightly larger than the fog light and taped this to the assembly.
I then used the glass cutter to trace the shape of the lens. After doing a small section, I would break this piece off and then re-tape the glass so that it was a little more secure. After scoring the oval shape of the glass, I found running scores perpendicular to this helped me take off the small sections more easily.
After having the glass completely cut, then applied the sealant to the groove in the light assembly where the broken glass was previously attached.
I then placed the glass on the assembly and secured it with tape while it dried.
I then reattached the fog light assembly to the bumper and then reattached the bumper to the car.
Hopefully, this is helpful to some of you DIYers out there!

The following 4 users liked this post by jhal:
03-27-2010, 03:57 PM
#2
Nice job and good information. **this thread should go in the garage sticky for future reference**
My driver's side fog has a perfects horizontal crack in the center. Not ready to replace it yet but will probably follow your method when I do.
My driver's side fog has a perfects horizontal crack in the center. Not ready to replace it yet but will probably follow your method when I do.
03-27-2010, 04:28 PM
#3
Instructor
Join Date: Aug 2003
Location: Northern California
Posts: 245
Likes: 0
Received 0 Likes
on
0 Posts
Thank you very much for taking the time to post this fix. This is one thing I need to do to my car and I've been procrastinating it. I might try to find a glass shop to cut the glass for me since I don't think I would be as successful as you in cutting my own.
This is one thing I need to do to my car and I've been procrastinating it. I might try to find a glass shop to cut the glass for me since I don't think I would be as successful as you in cutting my own.
 03-28-2010, 07:34 AM
#6
Senior Moderator
Awesome job. Garaged.
03-28-2010, 09:43 AM
#7
Safety Car

You may wish to put an Xpel foglight cover on it. No cracks on mine (knock on wood) yet, though one of them has a pretty big gouge in the vinyl which I presume was a rock hit.
http://www.xpel.com/products/headlight.asp
http://www.xpel.com/products/headlight.asp
Trending Topics
03-28-2010, 09:28 PM
#8
Instructor
Thread Starter
03-31-2010, 06:39 PM
#10
Instructor
Thread Starter
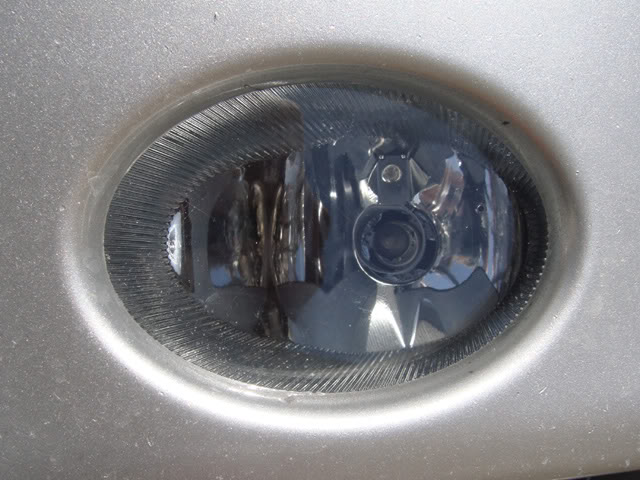
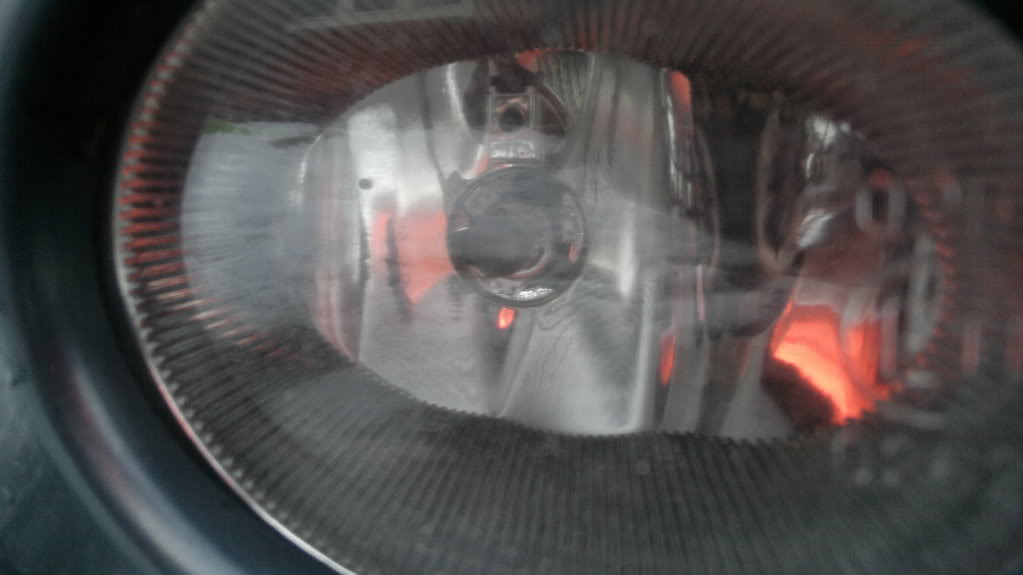
It's been snowing and raining all day here and after driving an hour to work, being parked outside for 8 hours, and driving home for another hour, it seems to have a good seal on it.  I don't see any moisture inside the foglight. Here are some pics:
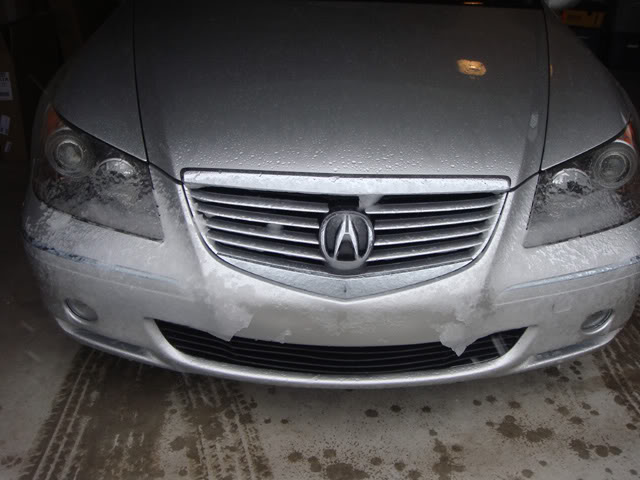

I don't see any moisture inside the foglight. Here are some pics:
09-04-2011, 01:07 PM
#13

Bumper Removal DIY Info?
I found this thread to be excellent. Both of my fogs are cracked. I went to HD this morning and bought everything you did for the replacements. Unfortunately the link didn't work for the bumper removal and after searching through this forum, I can't find any DIY instructions for it. Does anyone have a link or instructions on how to remove the front bumper? Sorry if this has been asked to death.
09-04-2011, 02:57 PM
#14
Senior Moderator
There is a thread that has been posted in recently that shows it, but I can't find it on my phone right now. Go to the garage and look for accessory installation instructions. The Aspec lip kit instructions tell you how. Oemacuraparts.com may have the instructions as well. I would love to see a DIY with pics if you do it and have the time/camera to post one.
The following users liked this post:
911Joe (09-05-2011)
09-05-2011, 10:29 AM
#15
Bumper Removal DIY Info?
After some searching, I found them. Many thanks. As soon as I can dedicate some time to this, I'll definitely take some photos as I begin the process. Looks like a lot of screws and clips!
09-06-2011, 03:42 PM
#16

hey can you post the link for bumper removal here. also i herd if you dont have them cracked, which i dont yet cause i recently got my rl but they sale a cover for them you just place it over the fog light. do you guys think that will work?
http://cgi.ebay.com/ebaymotors/Lamin...item41581d4533
http://cgi.ebay.com/ebaymotors/Lamin...item41581d4533
09-06-2011, 09:51 PM
#17
Crap, I don't have it saved. I downloaded them into a PDF file but cannot figure out how to paste pages 2 & 3 (which are the two you need). I finished replacing both of mine yesterday. I took my time and it was about 2.5 hours total. Take your time with the glass cutting. I kept the glass rectangular since it was easiest to cut it that way and there was plenty of space inside the bumper. I took a bunch of pics but need to download them to post DIY for the bumper removal. Simple to do. A film protector is highly recommended unless you want to do this often!
 04-03-2012, 02:03 AM
#21

Just did this today, the bumper does not need to be removed for the pass side, I am not sure about the drivers since there is an air box and may be less space to work with. In order to avoid removal of the bumper you must remove the tire and a few of the clips holding the plastic fender trim and bend it out of the way, I used lexan instead of glass since you can cut it with metal shears and is more shatter resistant, I am yet to find out if it will withstand the heat from the bulb but I will keep you guys updated
The following 2 users liked this post by 2005WhiteRL:
Maintenanceman (04-04-2012),
XXBogey (04-05-2012)
04-04-2012, 09:58 PM
#22
Racer
04-05-2012, 07:28 PM
#23
I have no driven the vehicle for a few hours with the fogs on and no issues for me yet! , lexan is awesome , they also claim it will never yellow , and i have a feeling it will be easier to restore then the glass ones once it becomes all beat up
04-06-2012, 04:47 AM
#25
Racer
Also on thing with replacing the glass is that sometimes when making that yearly inspection for the car here, they might look for e-markings of the lights. If you dont have them - fail. I think that i will play lottery with that, it will happen also if you have put aftermarket xenons (hids) in your lights.
04-06-2012, 09:52 AM
#26
Senior Moderator
One of the first things I noticed about the stock RL is the difference in color temperature between the HID low beams and the fog lights. On the wall in the garage, in the reflection of tailgates in traffic, on people's bumpers at stop lights- everywhere I looked I noticed white headlights and dull yellow fog lights. I'm in a situation right now of buying a house, so I don't want to spend a lot of money on mods. I didn't want to chance spending over $30 on halogens that may not be white enough for my desire, and I definitely didn't want to drop the $$$ on an HID upgrade. So I came across these:
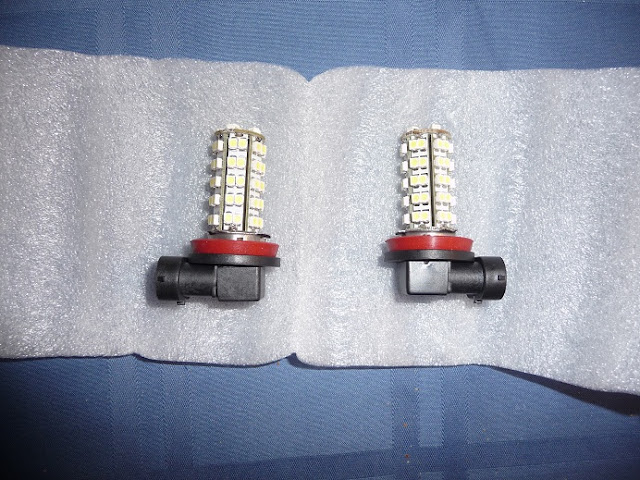
68 SMD LED H11s. $8 a pair on ebay with shipping. Now these are in no way a performance mod as they output about 20% of the lumens 55W halogens do, and would be put to shame next to an HID. If you regularly use your fog lights to help you see in fog, PLEASE DO NOT SWAP YOUR LIGHTS FOR THESE. They aren't going to illuminate the road 5 feet in front of you . Being in central Texas where I might drive in fog once a year, I don't feel like I lost much usability. Also, the HIDs are low enough that I feel comfortable if fog were to roll in.
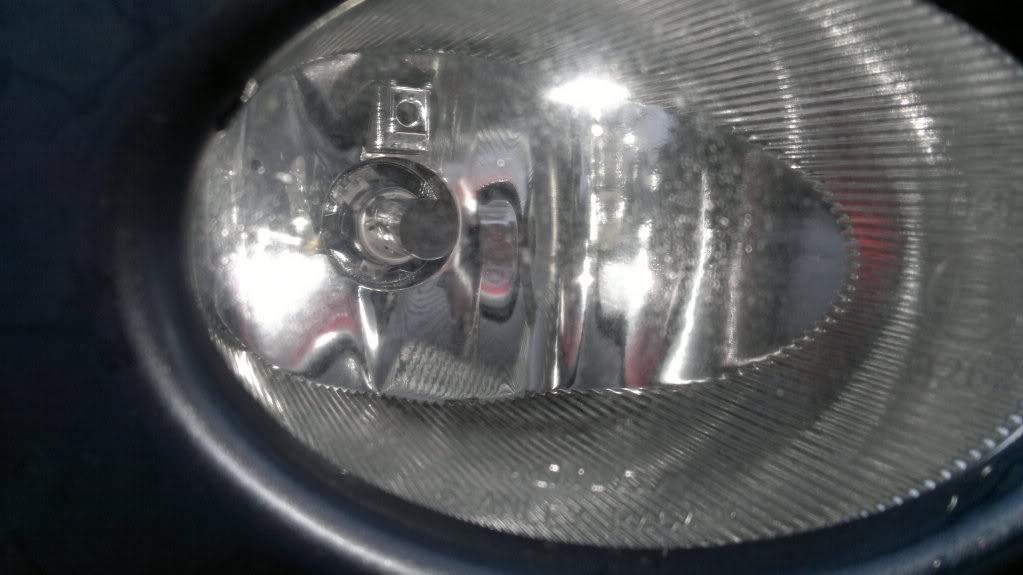
They do however, complete the look I was going for. Here is a side by side comparison with the left light being a stock halogen and the right being the white LEDs. (Sorry for the blurry pic.)

The advertisement said they were a 6000k color temperature. They are slightly whiter than the HIDs, and almost appear to be blueish. Here is a daylight pic with both in.

I purposely noticed every chance I got on the way to work this morning, and I can certainly tell a difference in the look. Overall I am pleased with the look for now. Someday I will probably do an HID upgrade, but I can't justify spending the money right now. My next step for the fogs is to find a way to have them come on with the parking lights, so I can have them on with or without the low beams.
68 SMD LED H11s. $8 a pair on ebay with shipping. Now these are in no way a performance mod as they output about 20% of the lumens 55W halogens do, and would be put to shame next to an HID. If you regularly use your fog lights to help you see in fog, PLEASE DO NOT SWAP YOUR LIGHTS FOR THESE. They aren't going to illuminate the road 5 feet in front of you
. Being in central Texas where I might drive in fog once a year, I don't feel like I lost much usability. Also, the HIDs are low enough that I feel comfortable if fog were to roll in.They do however, complete the look I was going for. Here is a side by side comparison with the left light being a stock halogen and the right being the white LEDs. (Sorry for the blurry pic.)
The advertisement said they were a 6000k color temperature. They are slightly whiter than the HIDs, and almost appear to be blueish. Here is a daylight pic with both in.
I purposely noticed every chance I got on the way to work this morning, and I can certainly tell a difference in the look. Overall I am pleased with the look for now. Someday I will probably do an HID upgrade, but I can't justify spending the money right now. My next step for the fogs is to find a way to have them come on with the parking lights, so I can have them on with or without the low beams.
I took mine out when I got the HIDs and installed my DRL/Fog switch.
Last edited by oo7spy; 04-06-2012 at 09:54 AM.
04-06-2012, 09:11 PM
#27
Thanks to this great thread, I replaced the glass on my right fog light it was cracked. It came out great and I also installed hids. I also seen the lexan at home depot but since I installed hids I wasn't sure how it would hold up to the heat. I might end up doing both in lexan in the future if good feedback comes from it. The bumper was very easy to remove takes about 10-15minutes tops!


The following users liked this post:
Maintenanceman (04-09-2012)
04-12-2012, 03:48 PM
#30
Racer
Strange thing btw, my fog lights dont have those metal parts inside them, place for the screws are there thou, maybe some "european" thing?
Bulb is H11 like yours have.
Bulb is H11 like yours have.
04-14-2012, 12:12 AM
#31
Racer
Photos added.
When i have repaired that broken glass, i will change bulbs, i dont want to put xenons yet in fogs because i have to do yearly inspection in few months, Legend will fail if i put them in before that.
When i have repaired that broken glass, i will change bulbs, i dont want to put xenons yet in fogs because i have to do yearly inspection in few months, Legend will fail if i put them in before that.
The following 2 users liked this post by rkiazim:
HEAVY_RL (04-19-2012),
Maintenanceman (04-18-2012)
 10-13-2012, 03:51 AM
#34
Racer
Here is some more info about using plastic.
https://acurazine.com/forums/showthr...maintenaNCEMAN
Last edited by Maintenanceman; 10-13-2012 at 03:58 AM.
 07-12-2014, 04:48 AM
#36

Going to have to try this. Have one cracked lens and didn't want to get a new one cause it wouldn't match the condition of the other fog. Also 007spy mentioned fog/drl switch. Have to look into that...
07-12-2014, 09:21 PM
#37
Senior Moderator
Good luck. I have a redesign (v2.0) that fixes observed flaws in the prototype. However, it's in beta mode since I don't have an RL to test it on. 
You can have it if you want. (The new design.)
You can have it if you want. (The new design.)
 09-28-2015, 01:12 PM
#39

I followed this process 6 months ago, I thought...to the tee, but the lense is now gone. Not sure exactly how long its been missing but for sure a few hundred miles. Anyone else have this happen after replacing the lense? What couldve caused it to fall off? The bulbs are stock.
Last edited by GASKICKER; 09-28-2015 at 01:18 PM.
09-28-2015, 01:17 PM
#40