
[3rd Gen TL] 3rd + 4th Pressure switch Help? DMV
 12-26-2011, 09:39 PM
#1

[3rd Gen TL] 3rd + 4th Pressure switch Help? DMV
Hey guys, just hit 70k few days ago and planning on changing out the pressure switches, was wondering if anyone on here has ever done the 3rd and 4th pressure switch replacement and willing to give me a hand. I looked at the DIY and still confused. Thanks
Last edited by TWiSDiT; 12-26-2011 at 09:41 PM.
 12-26-2011, 09:44 PM
#2
I've done it twice.(on two separate cars)
very easy!!!!!
this is the DIY i followed.
the one posted on the first page of the 3rd and 4th gear DIY is hard to follow
very easy!!!!!
this is the DIY i followed.
the one posted on the first page of the 3rd and 4th gear DIY is hard to follow
I just replaced my 3rd and 4th gear switches and it was super easy. The hardest part for me was 1) locating the shroud covering the 3rd gear (I was expecting some large plastic covering, like in the wheel well or something) and 2)unplugging the one cable
I decided to take a few pictures for everyone. I know I had a little bit of trouble following some of the other pictures.
06 TL.
I jacked my car up and removed the wheel just because I could, and I thought I'd make it easy on myself. I thought I'd take a wide shot so everyone could see where these switches are in relation to the wheel well. I know it took me some time to locate it because I'm a noob and had NO IDEA what I was looking for. Also when I read about needing to remove a "shroud" i was picturing something bigger like in the wheel well, or perhaps like the plastic covering you have to remove to drain the ATF. I also removed part of the plastic in the wheel well for some extra room. It's not necessary but only required 1 clip.
Here you can see the plastic piece I moved out of the way, and the general location of the 3rd and 4th switch. The 4th switch is just out in the open. The 3rd is covered in a hard plastic covering (the "shroud").

Here is a closer view, from within the wheel well. Again you can see the 4th switch and the 3rd, with the 3rd being covered in the shroud. I've also noted the 2 bolts and the cable you will need to unplug in order to swing the shroud out of the way.

Closer view of the 3rd switch and the shroud. You can see the 2 bolts I removed, and the cable that needs to be unplugged. This was the hardest/most annoying part for me. There is a button to hit to pull the top half up and off. I used a small flathead to help me pry it up as I pushed the button. Then there is a slot in the bottom of the plug that I stuck the flathead in and pushed in (towards the back of the car), in order to pull the bottom part of the plug off of the metal clip. Once the cable is unplugged, and the 2 bolts removed, the shroud will swing away revealing the 3rd switch.

There is a plug going into each switch that you have to remove. Here you can see the shroud swung away revealing the 3rd switch. The plug is still attached to the 3rd switch. You can also see the 4th switch where I have already removed the plug.

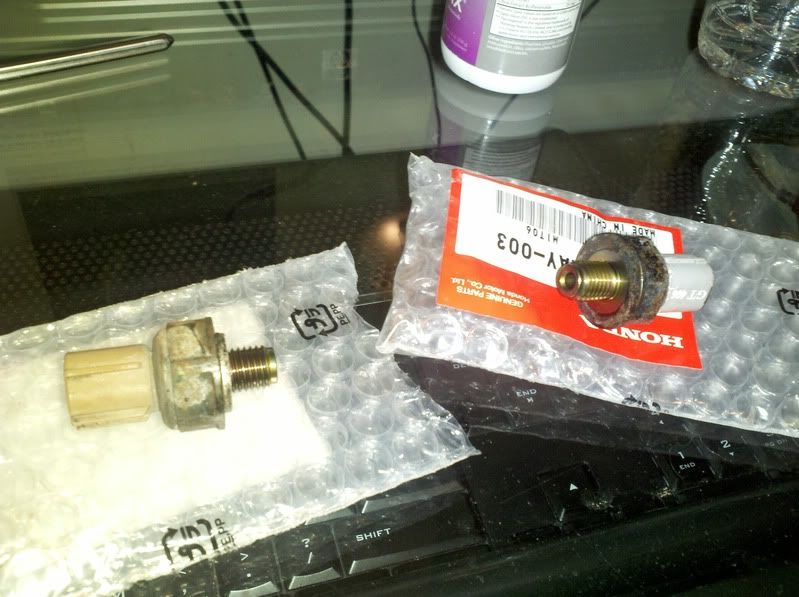
At this point it's a piece of cake. Remove plugs. Loosen switches with a wrench. Remove by hand. Have the new switches ready to minimize ATF leakage. Tighten by hand, and then a bit more with the wrench.
I decided to take a few pictures for everyone. I know I had a little bit of trouble following some of the other pictures.
06 TL.
I jacked my car up and removed the wheel just because I could, and I thought I'd make it easy on myself. I thought I'd take a wide shot so everyone could see where these switches are in relation to the wheel well. I know it took me some time to locate it because I'm a noob and had NO IDEA what I was looking for. Also when I read about needing to remove a "shroud" i was picturing something bigger like in the wheel well, or perhaps like the plastic covering you have to remove to drain the ATF. I also removed part of the plastic in the wheel well for some extra room. It's not necessary but only required 1 clip.
Here you can see the plastic piece I moved out of the way, and the general location of the 3rd and 4th switch. The 4th switch is just out in the open. The 3rd is covered in a hard plastic covering (the "shroud").
Here is a closer view, from within the wheel well. Again you can see the 4th switch and the 3rd, with the 3rd being covered in the shroud. I've also noted the 2 bolts and the cable you will need to unplug in order to swing the shroud out of the way.
Closer view of the 3rd switch and the shroud. You can see the 2 bolts I removed, and the cable that needs to be unplugged. This was the hardest/most annoying part for me. There is a button to hit to pull the top half up and off. I used a small flathead to help me pry it up as I pushed the button. Then there is a slot in the bottom of the plug that I stuck the flathead in and pushed in (towards the back of the car), in order to pull the bottom part of the plug off of the metal clip. Once the cable is unplugged, and the 2 bolts removed, the shroud will swing away revealing the 3rd switch.
There is a plug going into each switch that you have to remove. Here you can see the shroud swung away revealing the 3rd switch. The plug is still attached to the 3rd switch. You can also see the 4th switch where I have already removed the plug.
At this point it's a piece of cake. Remove plugs. Loosen switches with a wrench. Remove by hand. Have the new switches ready to minimize ATF leakage. Tighten by hand, and then a bit more with the wrench.
Last edited by justnspace; 12-26-2011 at 09:47 PM.
The following users liked this post:
TWiSDiT (12-26-2011)
12-26-2011, 09:55 PM
#4
it saved my buddies life too!
the first time, we were trying to figure it out based on the 1st page!!!
FUCK that!!!! LOL
when writing a DIY, make sure its clear and concise and to the point with great pictures!!
Once you get in there, you'll see what you need to remove in order to get to the 3rd gear switch.
the top clip hanging down is the hardest to unclip
12-26-2011, 10:00 PM
#5
I believe it was on page 5 or 6.
it saved my buddies life too!
the first time, we were trying to figure it out based on the 1st page!!!
FUCK that!!!! LOL
when writing a DIY, make sure its clear and concise and to the point with great pictures!!
Once you get in there, you'll see what you need to remove in order to get to the 3rd gear switch.
the top clip hanging down is the hardest to unclip

Trending Topics
12-27-2011, 10:16 AM
#12
 ) shift was always smooth. Got even more smooth after i switch out the old oem ATF with Redline D4 @ 60k. Wonder if it can get even more smoother
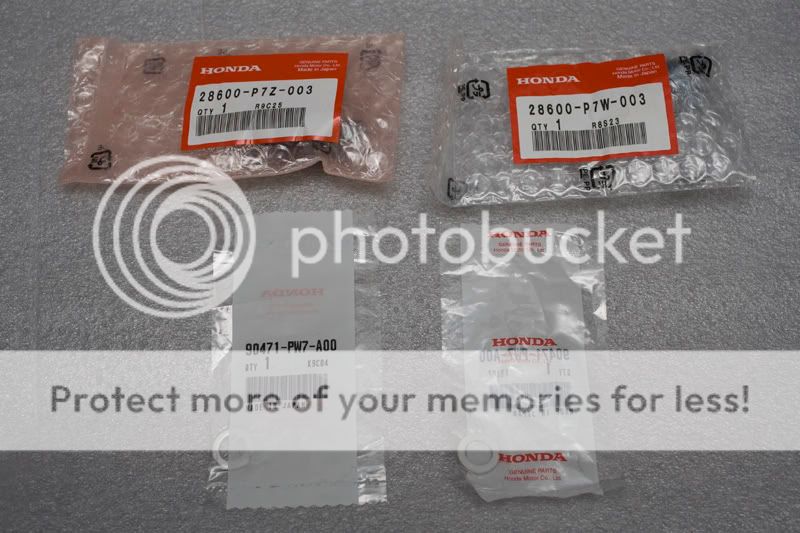
I just called my local Acura Dealership and they are selling it at $47.18 each. Ill probably pick them up this weekend and try installing it
12-28-2011, 04:45 AM
#14
I never had a problem with my transmission ( knock on wood ) shift was always smooth. Got even more smooth after i switch out the old oem ATF with Redline D4 @ 60k. Wonder if it can get even more smoother
I just called my local Acura Dealership and they are selling it at $47.18 each. Ill probably pick them up this weekend and try installing it
) shift was always smooth. Got even more smooth after i switch out the old oem ATF with Redline D4 @ 60k. Wonder if it can get even more smoother I just called my local Acura Dealership and they are selling it at $47.18 each. Ill probably pick them up this weekend and try installing it
Now if you want to come Quantico VA just let me know.
The following users liked this post:
TWiSDiT (12-28-2011)
 12-28-2011, 01:28 PM
#22
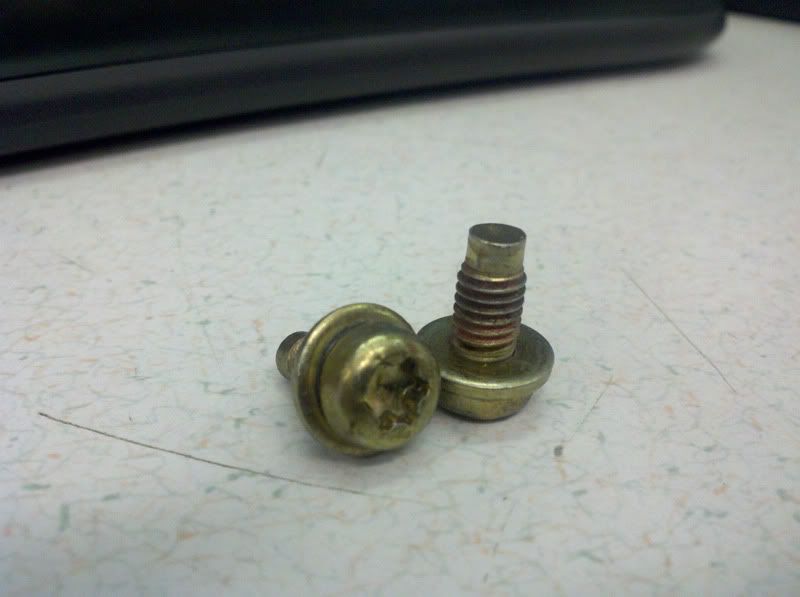
^those look funny.
never seen them while doing this certain(3rd and 4th gear switches) job before.
I'm gonna go ahead and say that they gave you some extra bullish screws....that you dont need.
the switches have a plug/clip going into them..pull these clips/plugs out. then use a 22mm wrench to loosen the switches.
never seen them while doing this certain(3rd and 4th gear switches) job before.
I'm gonna go ahead and say that they gave you some extra bullish screws....that you dont need.
the switches have a plug/clip going into them..pull these clips/plugs out. then use a 22mm wrench to loosen the switches.
12-28-2011, 01:30 PM
#23
^those look funny.
never seen them while doing this certain(3rd and 4th gear switches) job before.
I'm gonna go ahead and say that they gave you some extra bullish screws....that you dont need.
the switches have a plug/clip going into them..pull these clips/plugs out. then use a 22mm wrench to loosen the switches.
never seen them while doing this certain(3rd and 4th gear switches) job before.
I'm gonna go ahead and say that they gave you some extra bullish screws....that you dont need.
the switches have a plug/clip going into them..pull these clips/plugs out. then use a 22mm wrench to loosen the switches.


 12-28-2011, 01:42 PM
#26
takin care of Business in
iTrader: (5)
Join Date: Jan 2008
Location: Kansas City, MO
Age: 40
Posts: 30,994
Received 4,732 Likes
on
4,064 Posts
TWISTID....your in serious luck....am in Aldie, VA for the next 2 days....PM me here if you need help....this is basically a 15 minute job....
The following 2 users liked this post by swoosh:
justnspace (12-28-2011),
TWiSDiT (12-28-2011)
The following users liked this post:
swoosh (12-28-2011)
12-28-2011, 02:52 PM
#28
just came back dealer n got the right washers lol
Thanks for chiming in swoosh, too bad youre only gonna be here for 2 days :p anyways, i appreciate the offer, but i wanna try this myself to get experience before i seek further help
Thanks for chiming in swoosh, too bad youre only gonna be here for 2 days :p anyways, i appreciate the offer, but i wanna try this myself to get experience before i seek further help
 12-28-2011, 03:13 PM
#30
takin care of Business in
iTrader: (5)
Join Date: Jan 2008
Location: Kansas City, MO
Age: 40
Posts: 30,994
Received 4,732 Likes
on
4,064 Posts
^^^ justn ur making me blush again 
12-30-2011, 03:16 PM
#31
Alright fellas, early release today at work so I decided to tackle the pressure switches. Very easy and straight forward for the most part, 4th gear switch was a breeze, 3rd gave me a problem because the clips and bolts were corroded and i had a tough time getting them loose. Anyways, out with the old and in with the new. I felt a big difference! I thought doing the ATF flush was a big difference. With the new pressure switches and d4 ATF, the gears are so much more snappy and smooth. Feels like a new car once again!
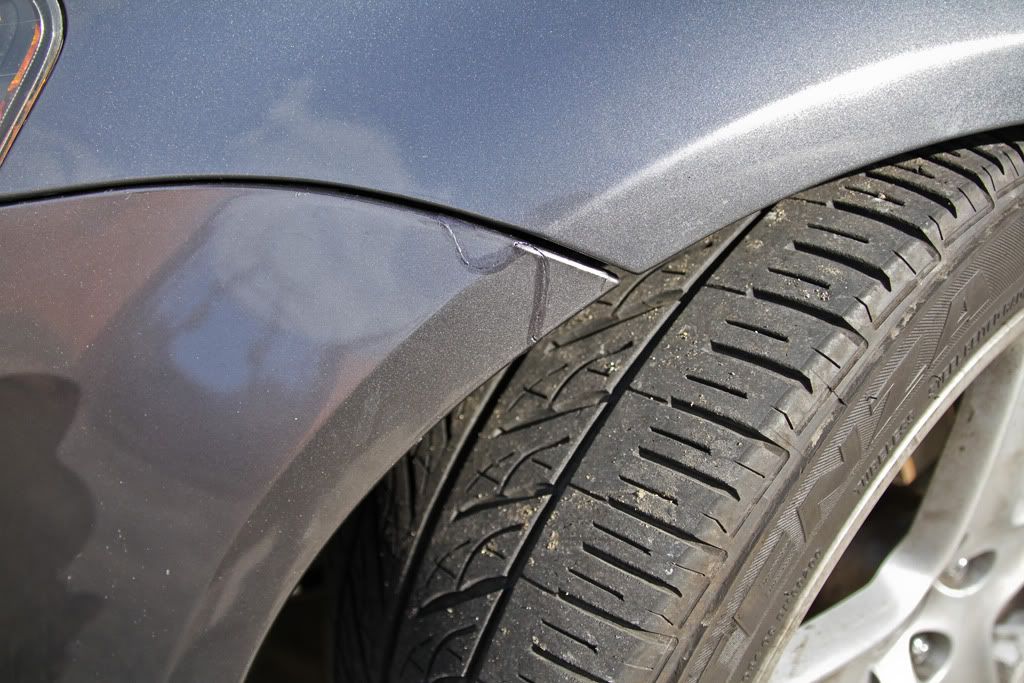
Also, i attempted to fix the crack on my bumper.. long story short, yesterday : pothole+ being low =
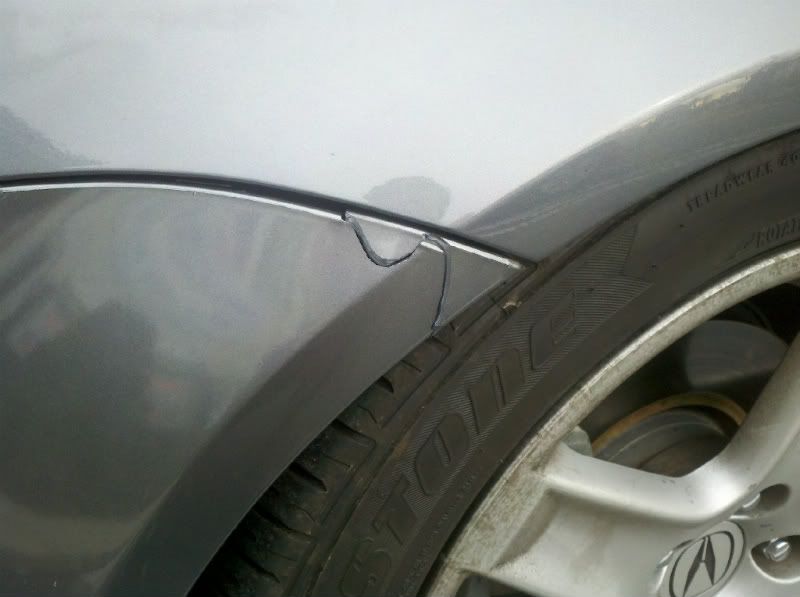
And now with some JB Weld:
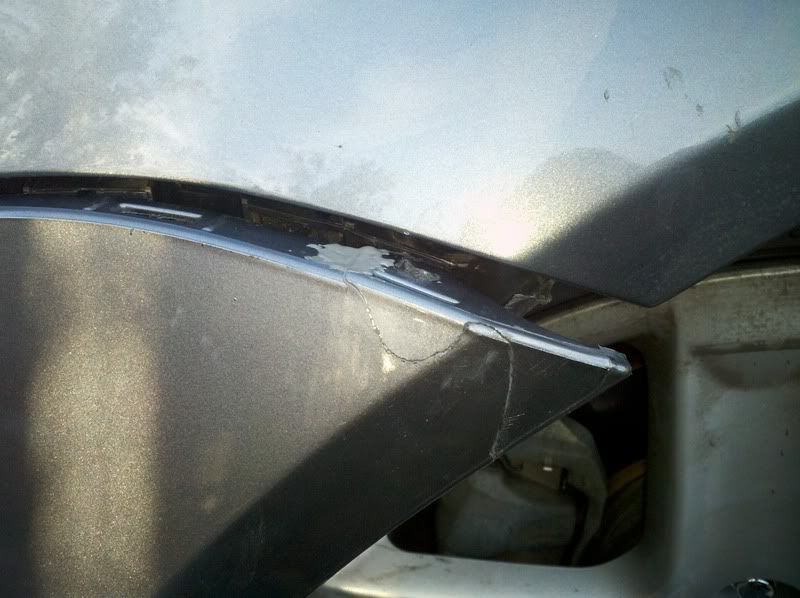
Im letting my car sit for 24hrs for it to fully cure. I hope it doesnt snap apart again when i mount it back up
Once again, id like to thanks every single one of u who posted in this thread with some guides and helps
Also, i attempted to fix the crack on my bumper.. long story short, yesterday : pothole+ being low =
And now with some JB Weld:
Im letting my car sit for 24hrs for it to fully cure. I hope it doesnt snap apart again when i mount it back up
Once again, id like to thanks every single one of u who posted in this thread with some guides and helps
Last edited by TWiSDiT; 12-30-2011 at 03:19 PM.
12-30-2011, 03:34 PM
#35
yessir! if the clips cooperated with me, it would have took me about 15mins just like Swoosh said. 4th gear switch i was able to do seconds after i removed the wheel. That clip above the 4th gear that is being held by a metal piece was a biattch in my case.
The following users liked this post:
TWiSDiT (12-31-2011)
12-31-2011, 11:48 AM
#37
takin care of Business in
iTrader: (5)
Join Date: Jan 2008
Location: Kansas City, MO
Age: 40
Posts: 30,994
Received 4,732 Likes
on
4,064 Posts
NICE FIX on both counts
The following users liked this post:
TWiSDiT (12-31-2011)
12-31-2011, 12:03 PM
#38
what a beautiful day it is here in the east coast. 60degrees on NYE!
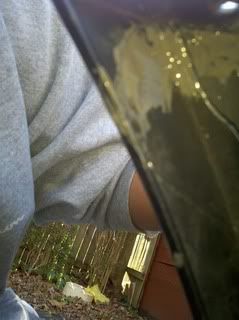
So i just came back from placing the bumper back on, so far the jb weld is doing a pretty good job holding up. Felt pretty solid. I hope it wont crack again in the future :/
lol @ touchup paint fail
So i just came back from placing the bumper back on, so far the jb weld is doing a pretty good job holding up. Felt pretty solid. I hope it wont crack again in the future :/
lol @ touchup paint fail
Last edited by TWiSDiT; 12-31-2011 at 12:07 PM.
12-31-2011, 12:24 PM
#39
12-31-2011, 12:27 PM
#40
takin care of Business in
iTrader: (5)
Join Date: Jan 2008
Location: Kansas City, MO
Age: 40
Posts: 30,994
Received 4,732 Likes
on
4,064 Posts
Let me know how it holds up bro....i used gorilla glue for a similar fix, holding up pretty good....