Some before and almost after pics of our place


Thread Starter
Suzuka Master


Joined: Oct 2001
Posts: 6,523
Likes: 54
From: Trumbull, CT
Some before and almost after pics of our place
Well, technically it is my girlfriend's place, but the plans are for us to live there. We have been doing the work ourselves for the past 8 months on the weekends. It's been a lot of work but it is almost finished. I don't have a lot of after pics as nothing is 100% done yet, but we are getting closer. The house is a nice Cape, only about 1600 sq ft, with an unfinished basement and 1 car garage with an attic over the garage. It's on a corner lot with a park behind it separated by a little stream. Pretty nice setting. The house was owned by an old couple that were the original owners from when it was built in the 50's. VERY outdated. Anyway, here are a few pics:
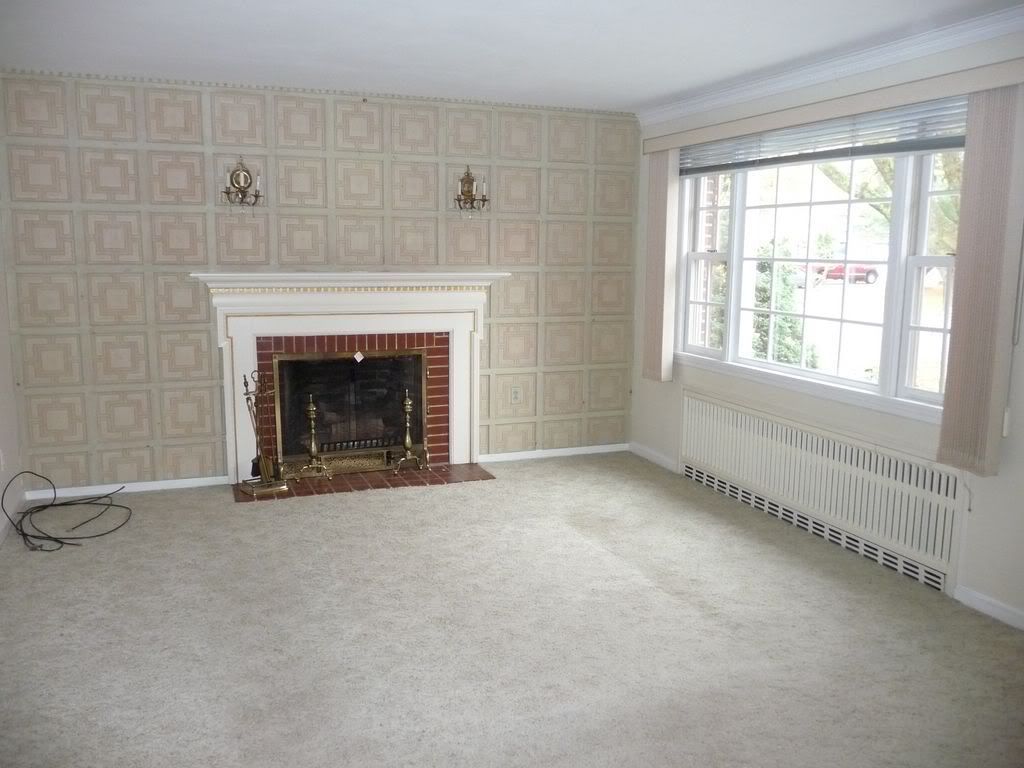
before:
this is green wooden paneling. Was quite unpleasant to look at.
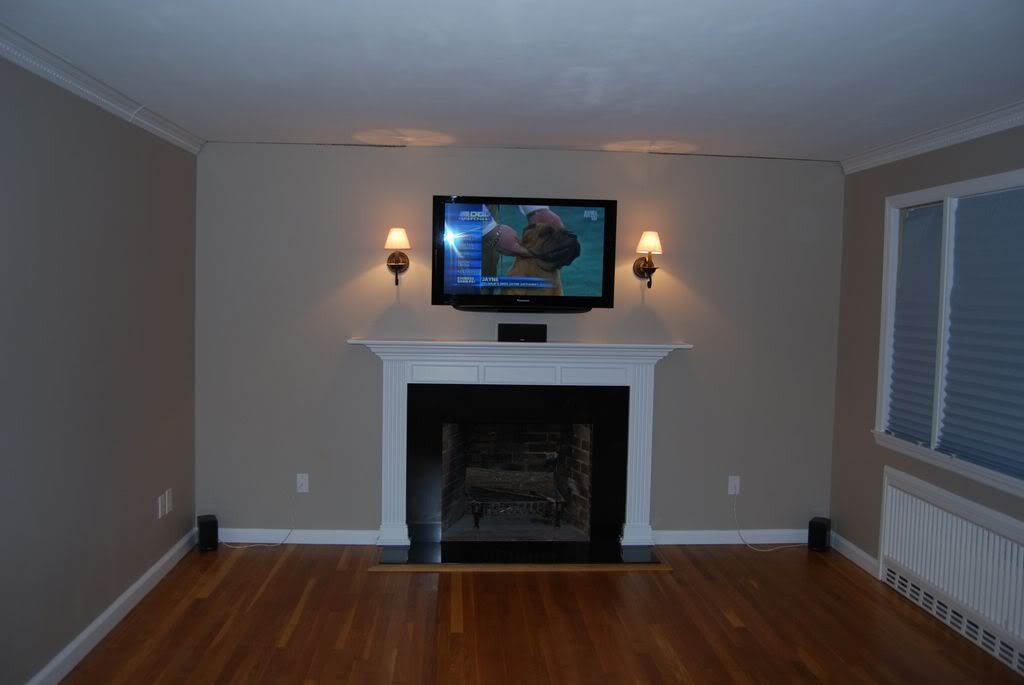
after:
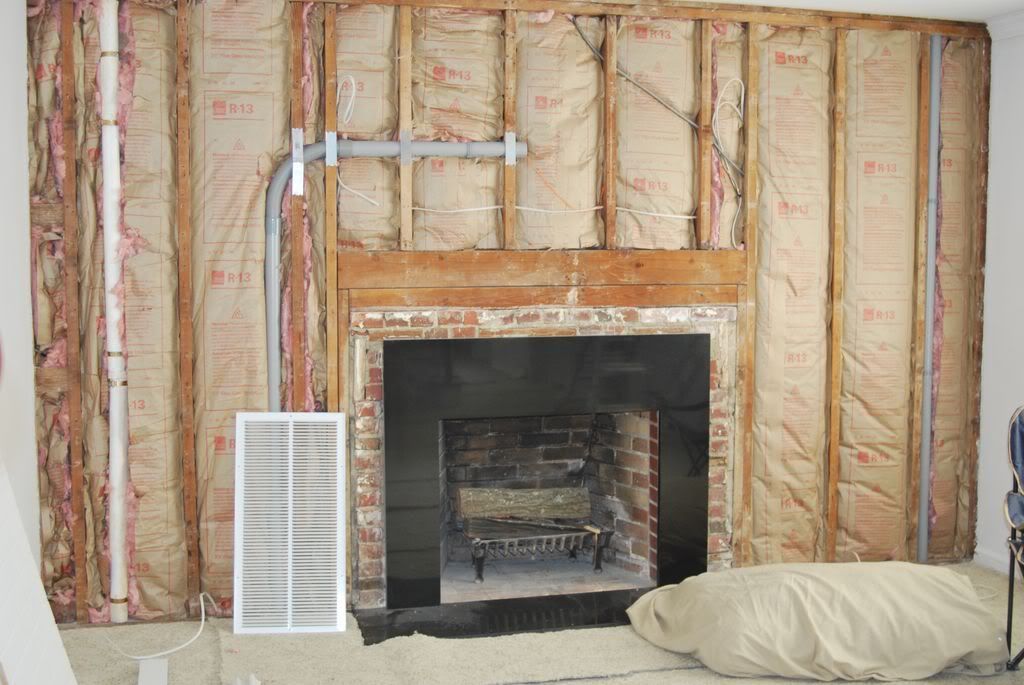
removed the paneling, and the plaster underneat was fubar. They channeled up from the mantel where there was a outlet installed to run wire to their sconces. We removed the plaster (what a mess) and started fresh. I ran 2 two inch pvc pipes up to the dormer from the basement with pull strings, as well as conduit up to above the fireplace. Ran new wires for sconces, outlets, and reinsulated. Then sheetrocked the wall. New granite, and a new mantle too. Still have to put up crown on that wall.
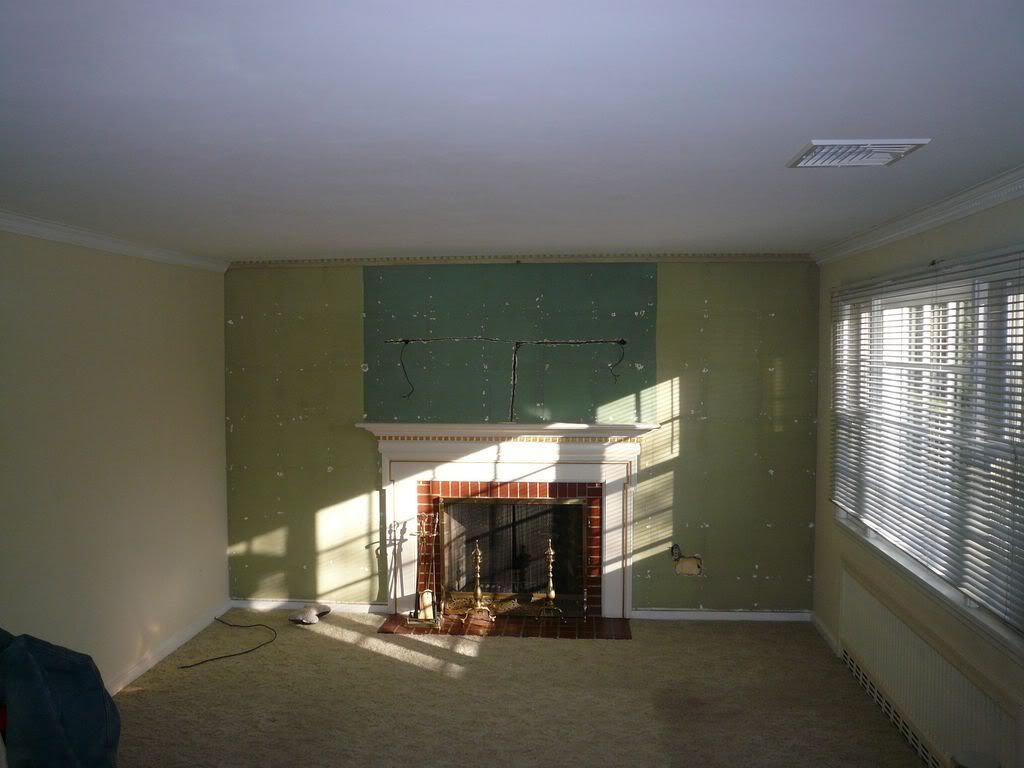
This is how the wall looked after we removed the panelling:
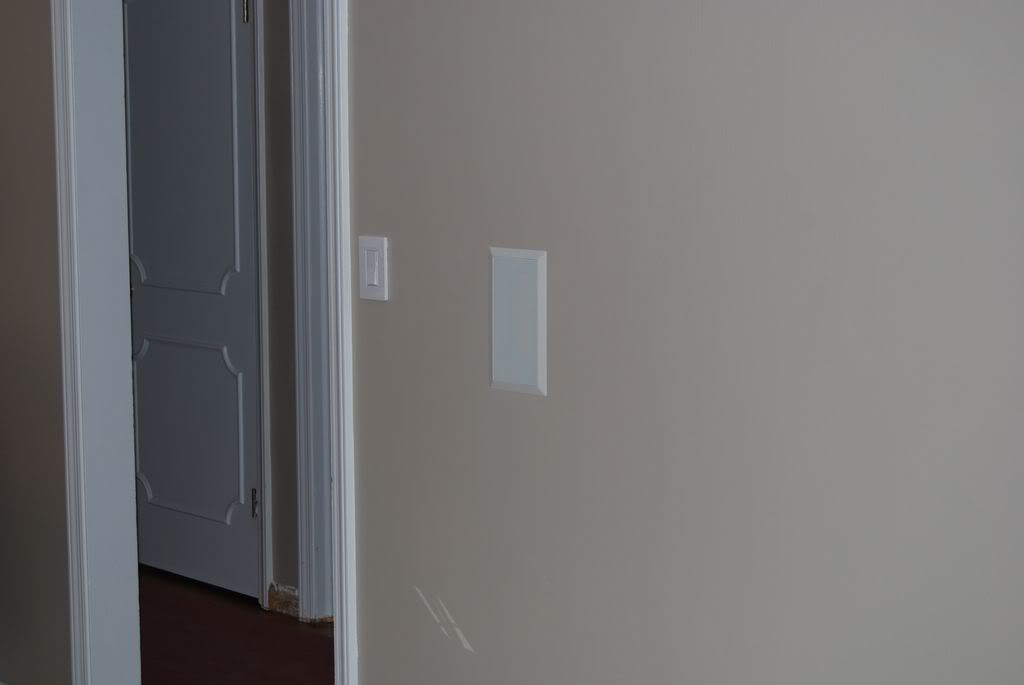
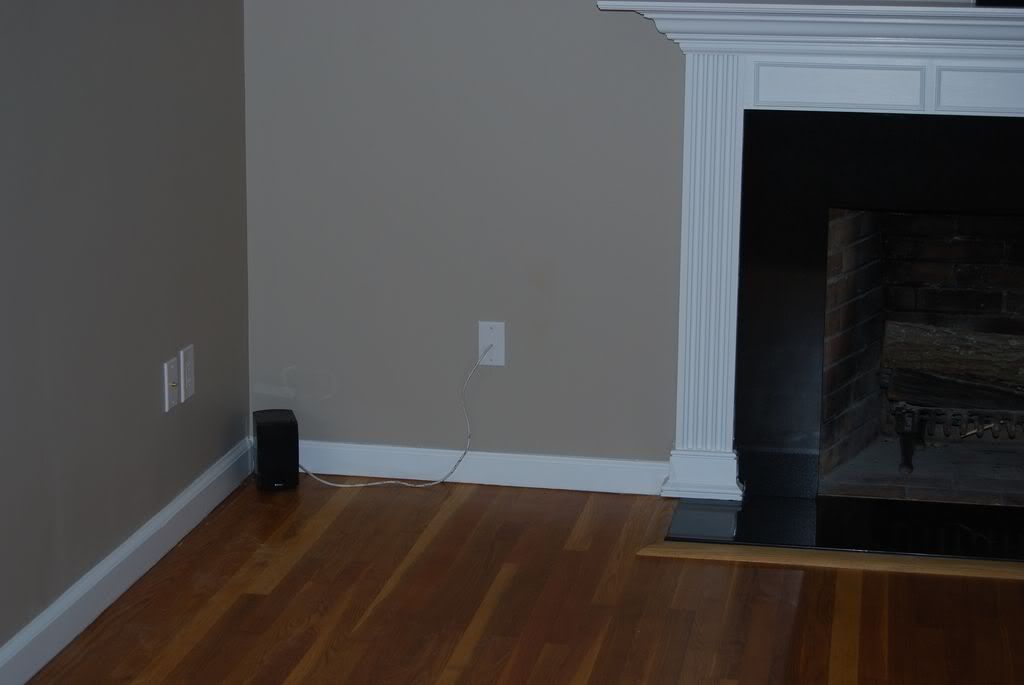
I installed the entire home theater last night. I wasn't sure where we were going to put speakers at first. Once we ordered furniture and was able to figure out the layout, I was able to install the rear speakers. Since I couldn't get into the ceiling without more patchwork, we decided on a nice set of Speakercraft LCR3 One's, which are very small for wall speakers. Great quality though. The fronts are still up in the air since we will probably be putting some cabinets in. So I just ran wires out of plates for the time being. If I decide to move them its ok, cause I have some romex run right behind those plates for outlets which will eventually go in, so they can use that cutout.
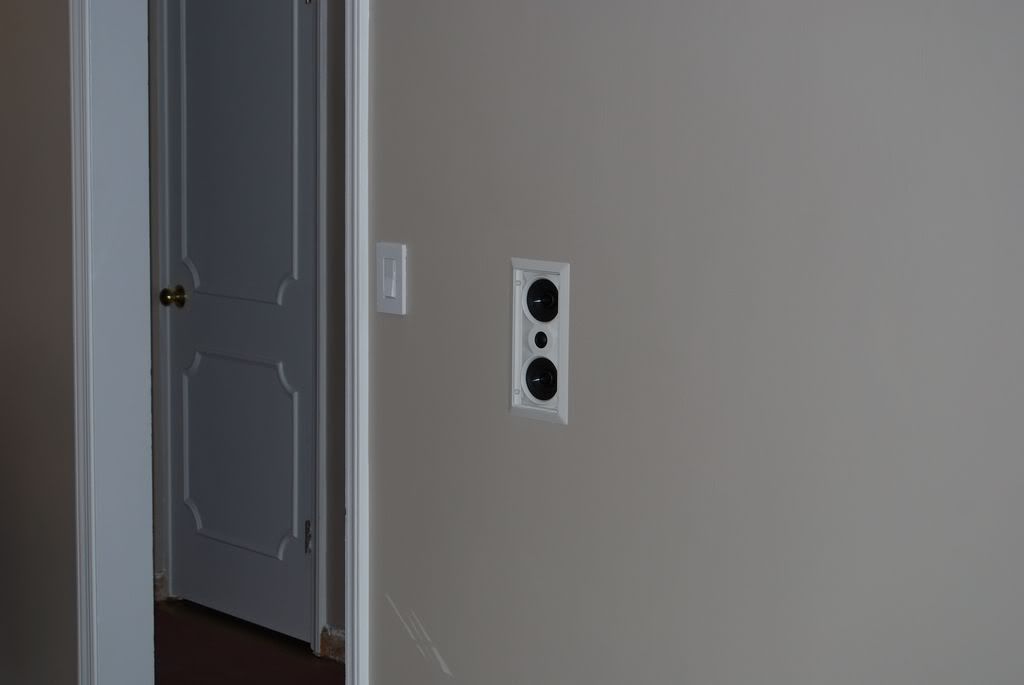
Subwoofer will be somewhere between the couch which will sit on that wall, and the future cabinets, so I have the plate next to the outlet:
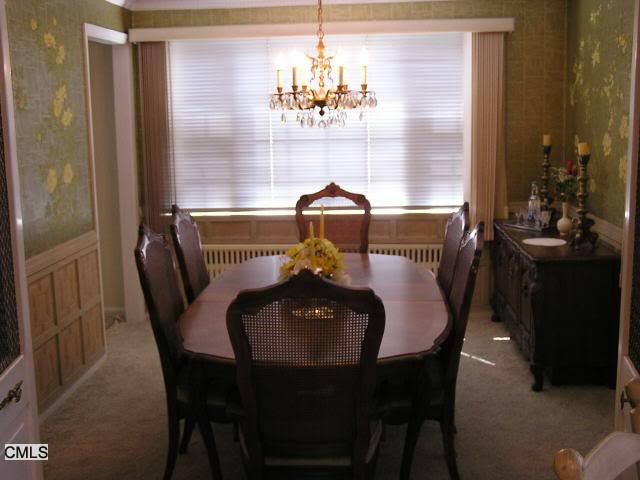
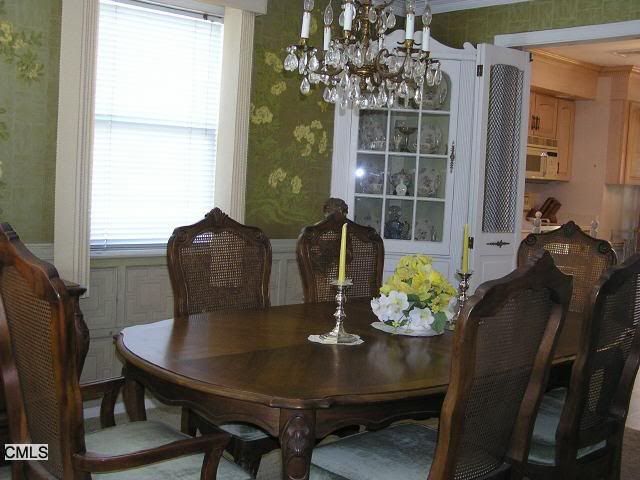
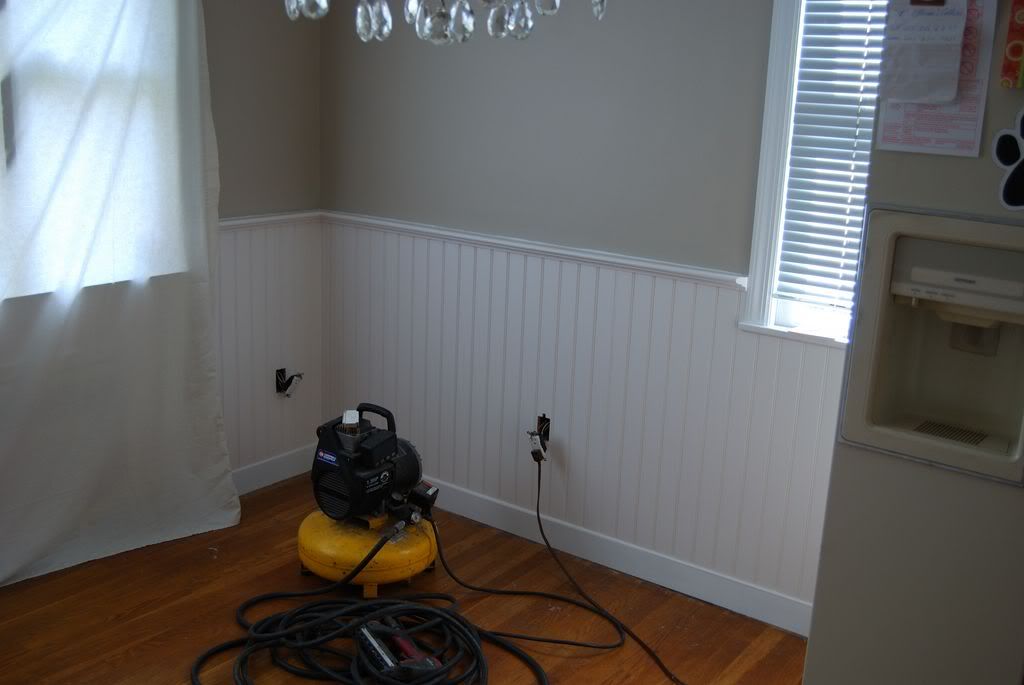
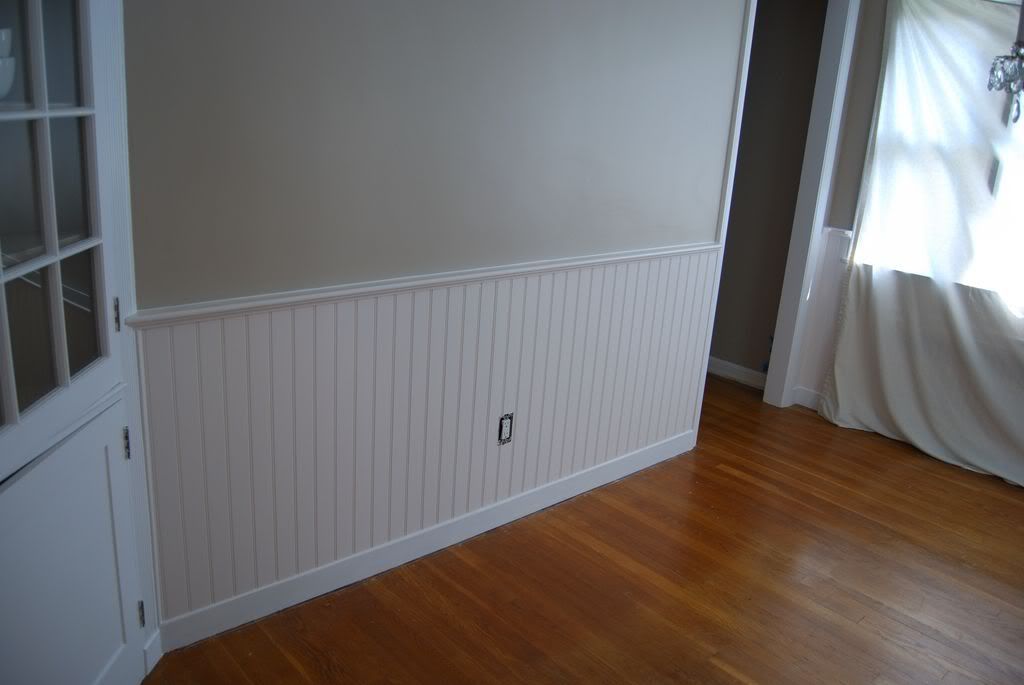
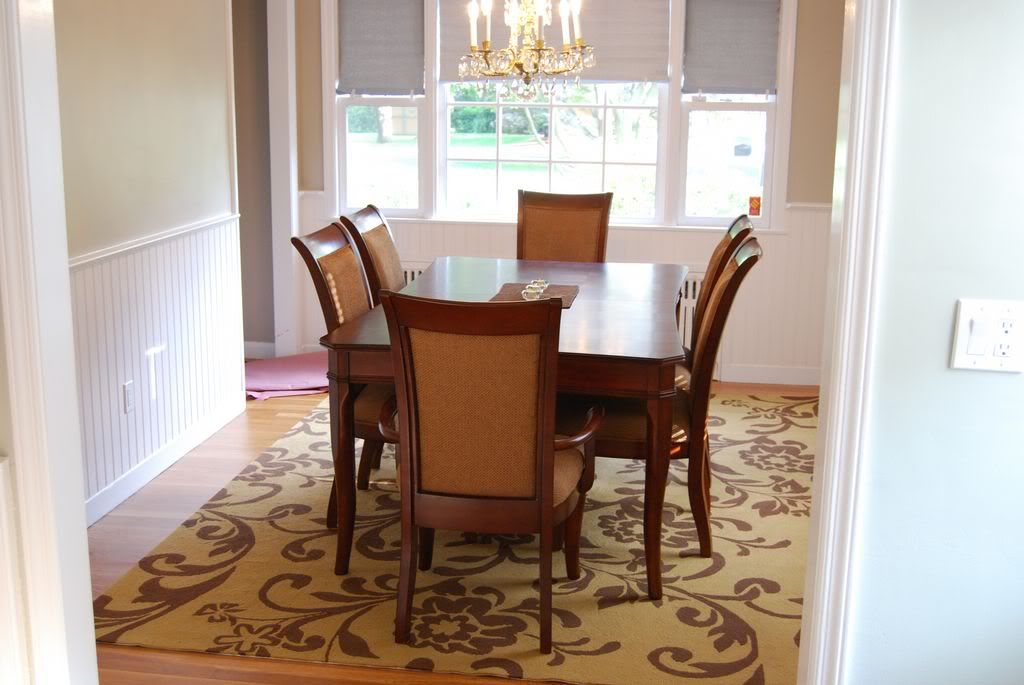
The dining room was also a big project. There was 3 layers of very stubborn wallpaper to get off. It also had the same paneling under the chair rail that was on the wall in the living room. The plaster behind that was it even rougher shape. So we decided to do a nice beadboard in there:
before:
after:
We've done plenty more but it's getting late. I'll post some more pics in the next day or two. Just wanted to post up whats been taking up a big chunk of my "Free time" the last 3/4's of a year.
before:
this is green wooden paneling. Was quite unpleasant to look at.
after:
removed the paneling, and the plaster underneat was fubar. They channeled up from the mantel where there was a outlet installed to run wire to their sconces. We removed the plaster (what a mess) and started fresh. I ran 2 two inch pvc pipes up to the dormer from the basement with pull strings, as well as conduit up to above the fireplace. Ran new wires for sconces, outlets, and reinsulated. Then sheetrocked the wall. New granite, and a new mantle too. Still have to put up crown on that wall.
This is how the wall looked after we removed the panelling:
I installed the entire home theater last night. I wasn't sure where we were going to put speakers at first. Once we ordered furniture and was able to figure out the layout, I was able to install the rear speakers. Since I couldn't get into the ceiling without more patchwork, we decided on a nice set of Speakercraft LCR3 One's, which are very small for wall speakers. Great quality though. The fronts are still up in the air since we will probably be putting some cabinets in. So I just ran wires out of plates for the time being. If I decide to move them its ok, cause I have some romex run right behind those plates for outlets which will eventually go in, so they can use that cutout.
Subwoofer will be somewhere between the couch which will sit on that wall, and the future cabinets, so I have the plate next to the outlet:
The dining room was also a big project. There was 3 layers of very stubborn wallpaper to get off. It also had the same paneling under the chair rail that was on the wall in the living room. The plaster behind that was it even rougher shape. So we decided to do a nice beadboard in there:
before:
after:
We've done plenty more but it's getting late. I'll post some more pics in the next day or two. Just wanted to post up whats been taking up a big chunk of my "Free time" the last 3/4's of a year.
Thread Starter
Suzuka Master
Joined: Oct 2001
Posts: 6,523
Likes: 54
From: Trumbull, CT
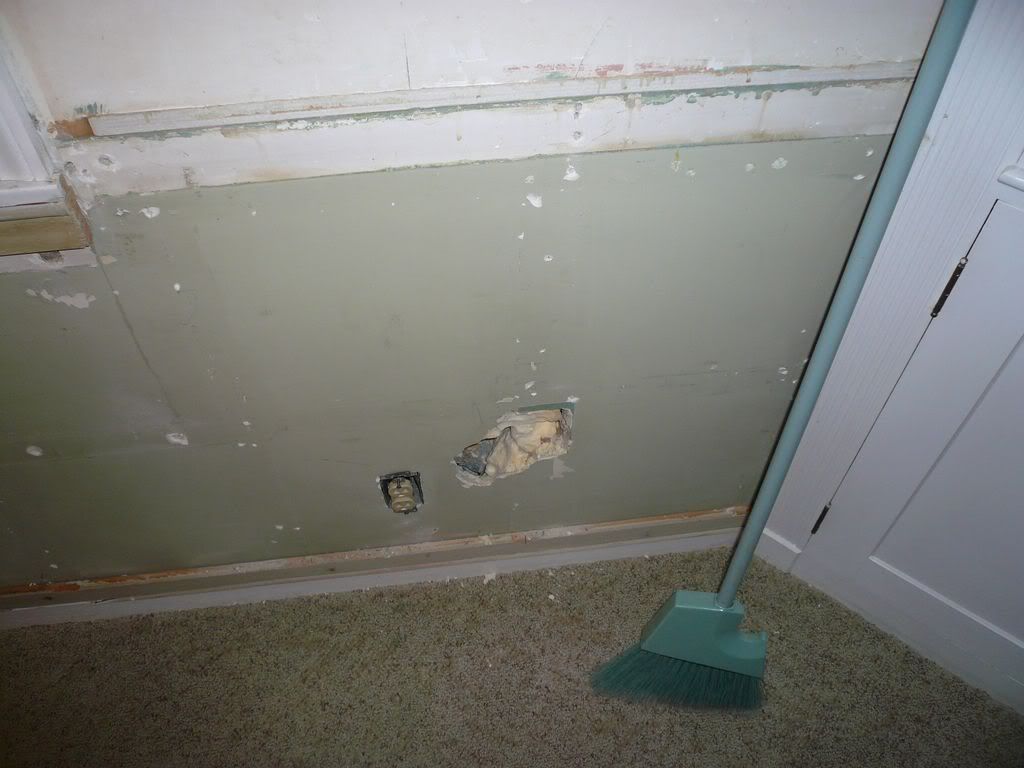
Forgot to add this picture before heading to bed. When we took off the paneling in the dining room, we found these large holes by each outlet. They just knocked the plaster out with a hammer. It was far easier to install beadboard then to try and fix or replace the plaster. Plus we both liked the look of the beadboard:







Drifting
Joined: Mar 2009
Posts: 2,367
Likes: 1
From: Franklin, Indiana
I really like your and your GFs style. The best part about this is it's something you both are working on and creating together which can't do anything except make your bond stronger. Good luck with the project and the relationship.
Trending Topics


Thread Starter
Suzuka Master
Joined: Oct 2001
Posts: 6,523
Likes: 54
From: Trumbull, CT
This is a first. My expertise lay within the home theater/audio realm. I have to get creative at work sometimes, but this is new to me.

Yeehaw
Joined: Aug 2003
Posts: 20,972
Likes: 26
From: Chandler, Arizona
Looks fantastic. Assuming those wood floors were under the carpet, did you know that when you (or your GF) bought the house? Did they take much work to clean up?
I've been trying to figure out where to put my rear surround speakers...I might copy what you did. That looks great, and very convenient to have the speakers out of the way.
I've been trying to figure out where to put my rear surround speakers...I might copy what you did. That looks great, and very convenient to have the speakers out of the way.
Thread Starter
Suzuka Master
Joined: Oct 2001
Posts: 6,523
Likes: 54
From: Trumbull, CT
Looks fantastic. Assuming those wood floors were under the carpet, did you know that when you (or your GF) bought the house? Did they take much work to clean up?
I've been trying to figure out where to put my rear surround speakers...I might copy what you did. That looks great, and very convenient to have the speakers out of the way.
I've been trying to figure out where to put my rear surround speakers...I might copy what you did. That looks great, and very convenient to have the speakers out of the way.
If you want, I can take a normal sized in wall speaker to the house and take a pic to give you a general idea on the size of these. There are different ranges in size obviously, but most or close in size, where these are rather small. If you were local I'd give you a hand. I'd love to check out the old barns and silos at your new place.
Thread Starter
Suzuka Master
Joined: Oct 2001
Posts: 6,523
Likes: 54
From: Trumbull, CT
Forgot to mention, you cannot tell from the pictures but these speakers are part of Speakercraft AIM series. The whole speaker aims inwards. There are three screws each on the top and bottom that allows you to tilt it either way. So the speakers are actually tilting in towards the front of the room a little. Once the grill is on, it all looks flush.
Thread Starter
Suzuka Master
Joined: Oct 2001
Posts: 6,523
Likes: 54
From: Trumbull, CT
Ideally, I would have liked to bring the speakers back farther, but getting them to match on either side was proving to me an issue. There is a doorway into the hall to the left of the picture I posted. To the right of the speaker on the other side is the entry to the front foyer/door, and they measure differently off the front wall. Add the fact that the studs are not the same on either side, and there are some short bays, the one pictures is in a bay that is only about 2 or 3 inches wider then the speaker itself. So the speakers are a little more forward then I would like, but I had no real choice here.
Yeehaw
Joined: Aug 2003
Posts: 20,972
Likes: 26
From: Chandler, Arizona
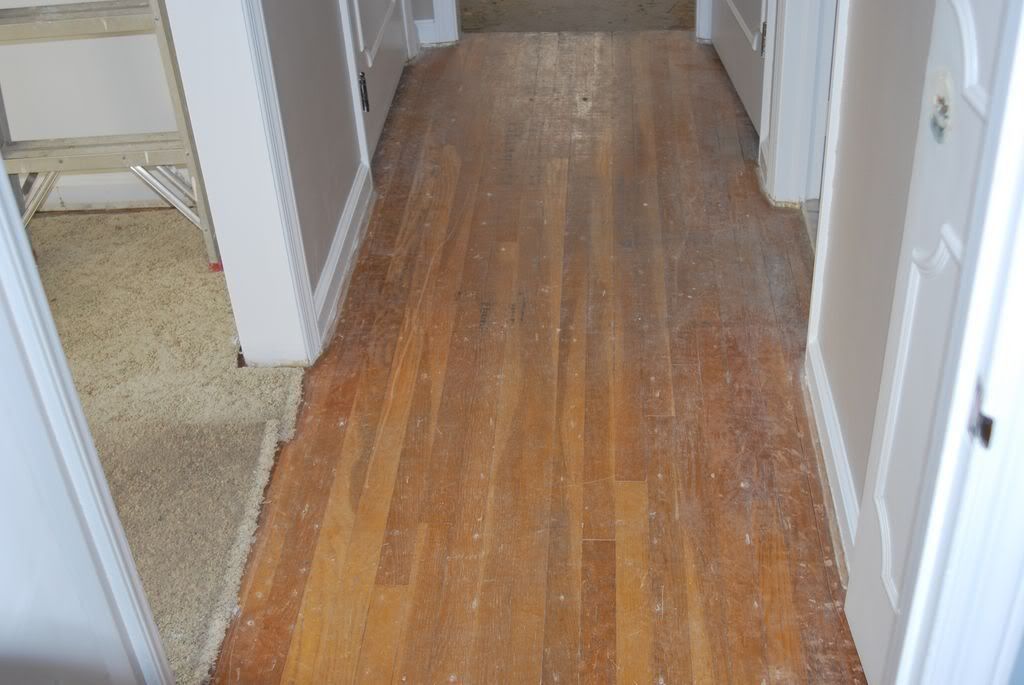
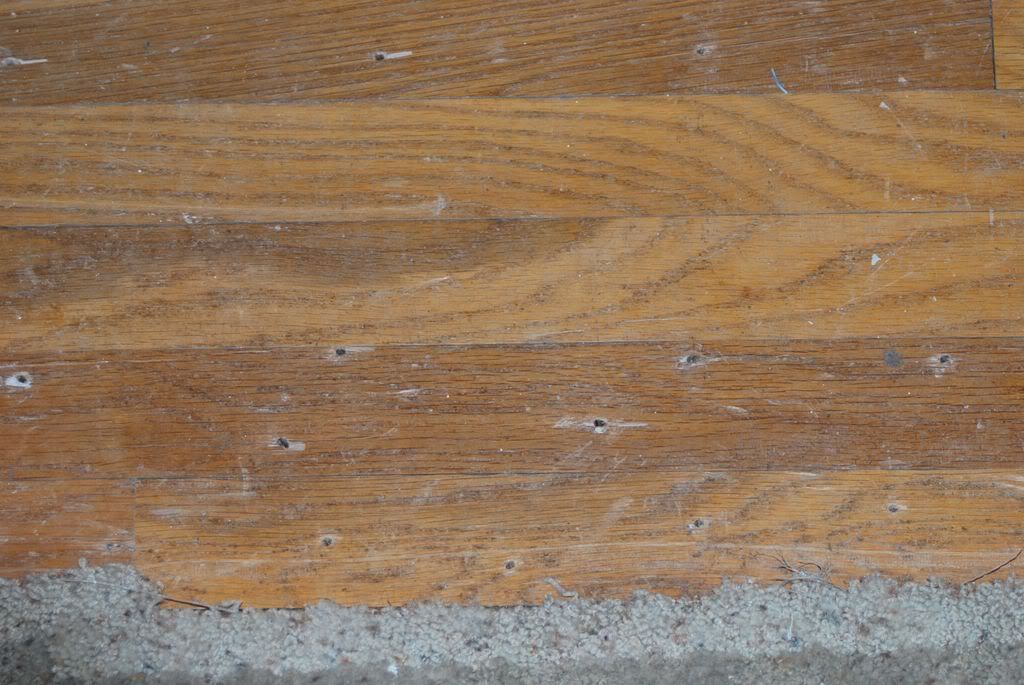
Thanks. The wood floors were there. I pried up the corner of the carpet around the old hearth when we went to go look at the house to see what was under it. I knew there was hardwood in certain spots, but wasn't sure until I checked in a couple rooms before buying. They were in pretty good shape. The original owners had no kids or pets, and lived there since the early 50's when the house was built. We had them refinished, and had to have the boards in the hallway replaced due to a billion holes caused by the screws that held down the linoleum that was in there.
If you want, I can take a normal sized in wall speaker to the house and take a pic to give you a general idea on the size of these. There are different ranges in size obviously, but most or close in size, where these are rather small. If you were local I'd give you a hand. I'd love to check out the old barns and silos at your new place.
I forgot you are in Fairfield. Probably my favorite town in CT. My grandmother lives on Aran Hill Road, if you know where that is.
Yeehaw
Joined: Aug 2003
Posts: 20,972
Likes: 26
From: Chandler, Arizona
I have the same problem with doors in the way of the ideal rear speaker location. Did you consider ceiling speakers instead of in the wall?
Thread Starter
Suzuka Master
Joined: Oct 2001
Posts: 6,523
Likes: 54
From: Trumbull, CT
So cool to find such nice wood hidden under there. Amazes me how many people covered it up with carpet.
I'm down with small... my TV room is pretty small, and I have floor standing speakers up front. For the rears I really just need the fill. No need for a pic of the normal speaker, it might be a while before I get around to getting those done. The walls in my TV room are some kind of crumbly 1930's plaster, and I'm hesitant to start cutting it apart. Already did that for the shower install and it was a pain in the ass.
I forgot you are in Fairfield. Probably my favorite town in CT. My grandmother lives on Aran Hill Road, if you know where that is.
I'm down with small... my TV room is pretty small, and I have floor standing speakers up front. For the rears I really just need the fill. No need for a pic of the normal speaker, it might be a while before I get around to getting those done. The walls in my TV room are some kind of crumbly 1930's plaster, and I'm hesitant to start cutting it apart. Already did that for the shower install and it was a pain in the ass.
I forgot you are in Fairfield. Probably my favorite town in CT. My grandmother lives on Aran Hill Road, if you know where that is.
Actually yeah, its not too far from here. The house is in Trumbull though.
Thread Starter
Suzuka Master
Joined: Oct 2001
Posts: 6,523
Likes: 54
From: Trumbull, CT
Yeah, I was thinking about going from the dormer upstairs across. The dormer is in the front side of the house, over the right side of that room. The issue is that there is blocking where the dormer ends in the ceiling, and I do not know if there is any blocking farther down. There is old wood flooring in the dormer, and I had to stick a fiberglass glow rod underneath to see if there was a clear shot. So it would be VERY hard to get a drill in there to drill through the blocking to see if I have a clear shot across the entire room. I could have cut a speaker hole and then tired to drill, but if I hit another block, I would have to cut and patch. I didn't want to have to patch a plaster ceiling cause it NEVER looks right.
Thread Starter
Suzuka Master
Joined: Oct 2001
Posts: 6,523
Likes: 54
From: Trumbull, CT
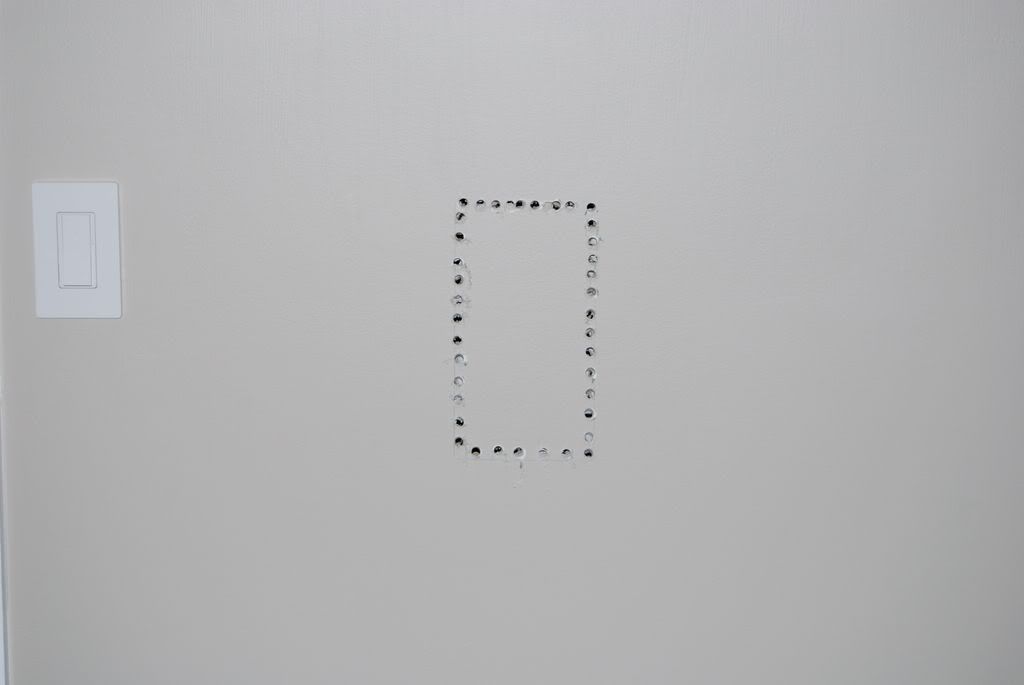
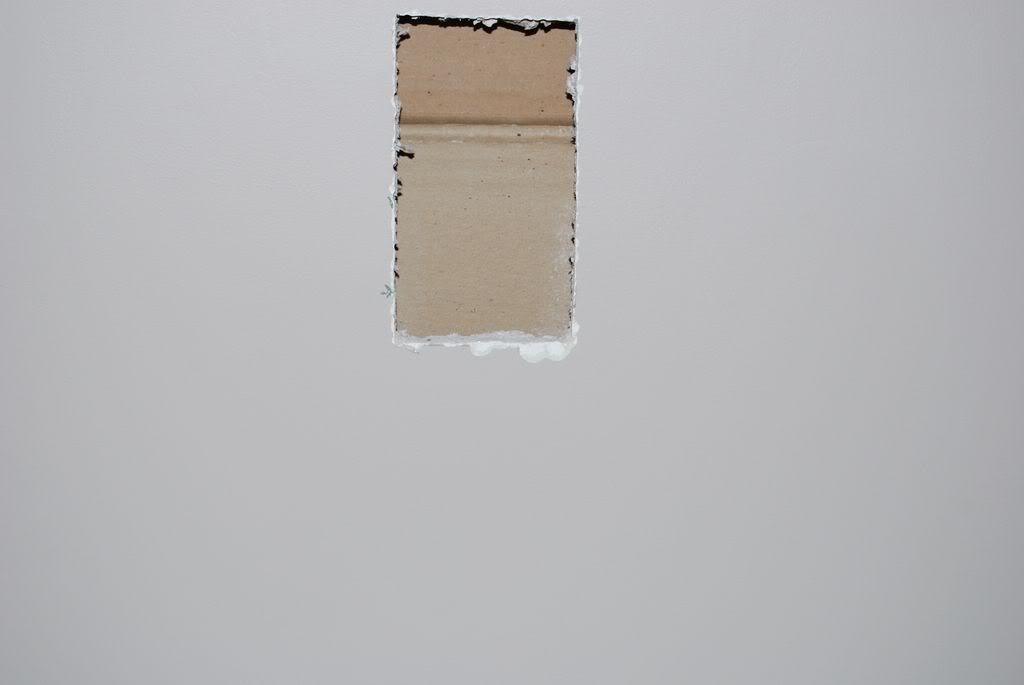
Luckily, I was able to keep the chipping of the paint within a half inch of the whole, which is covered by the half inch lip of the speaker. On each side of the speaker, take your bit and once in the hole, just drill with the drill at and angle to connect two of the holes. It will allow you to get a sheetrock saw in. Then cut down. You can cut down on the chipping if you hold your saw at about a 45 degree angle to the wall while cutting. As you can see here, I have a sheetrock base behind the plaster, which is tough to cut, but much easier then mesh.
Last edited by 2001AudiS4; Jul 27, 2009 at 07:37 PM.
Thread Starter
Suzuka Master
Joined: Oct 2001
Posts: 6,523
Likes: 54
From: Trumbull, CT
Here are some more random pictures.
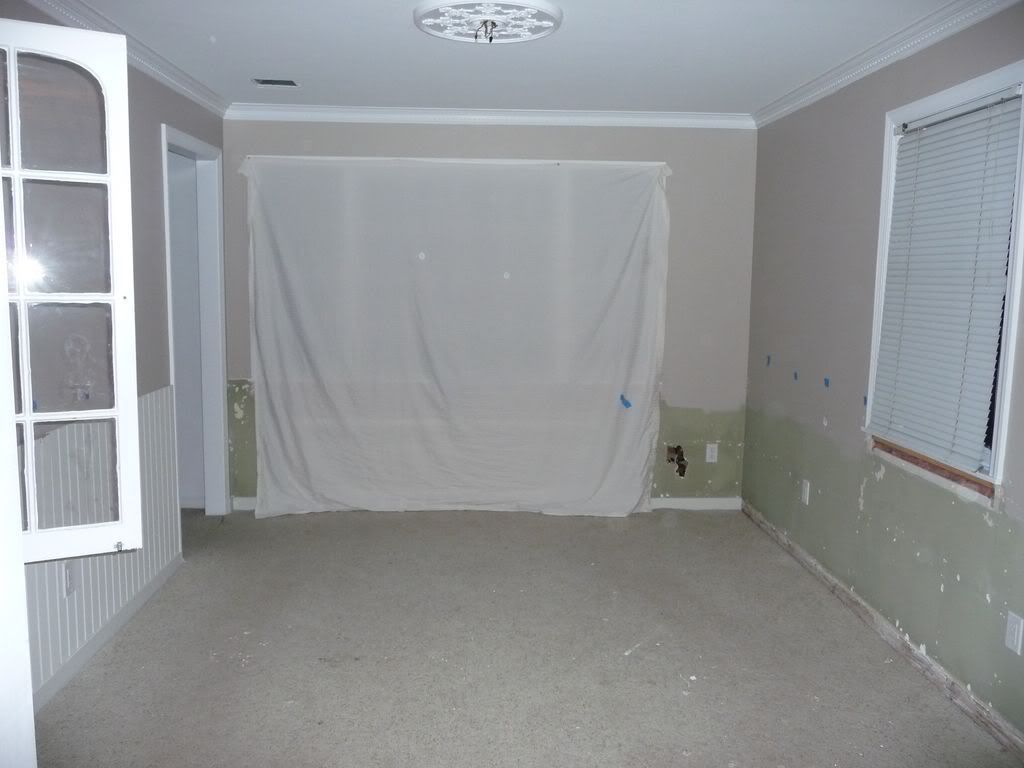
The dining room after the wallpaper and panel was removed. The wall was painted and the carpet was not yet removed. We left the carpet in until paint was done:
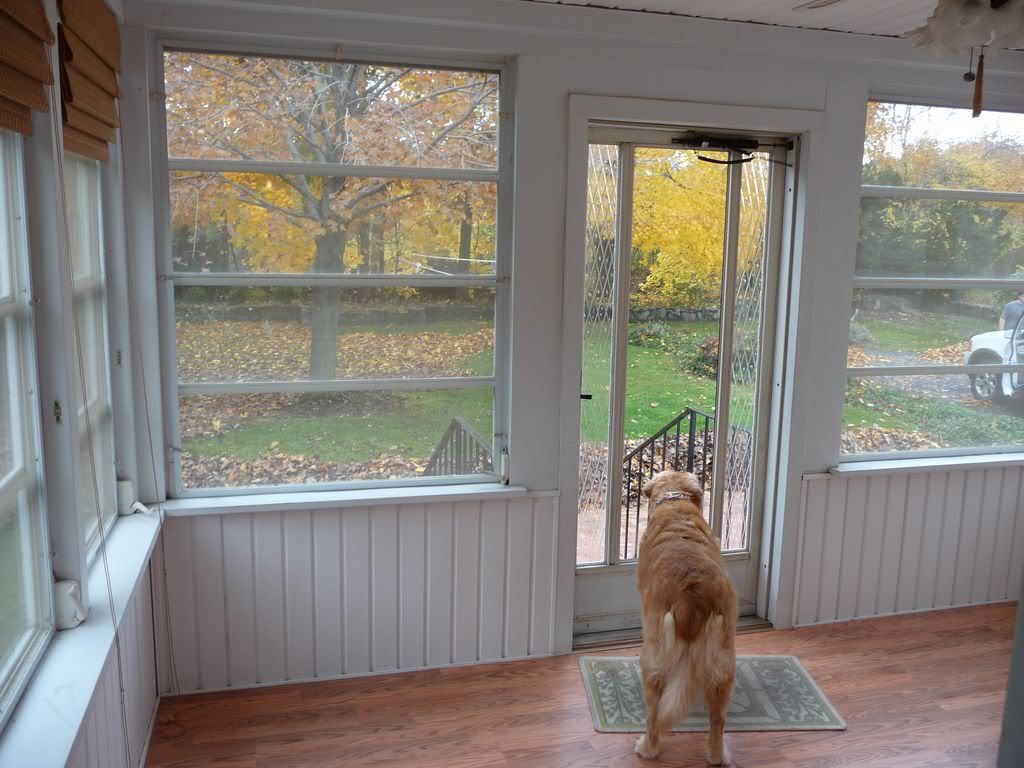
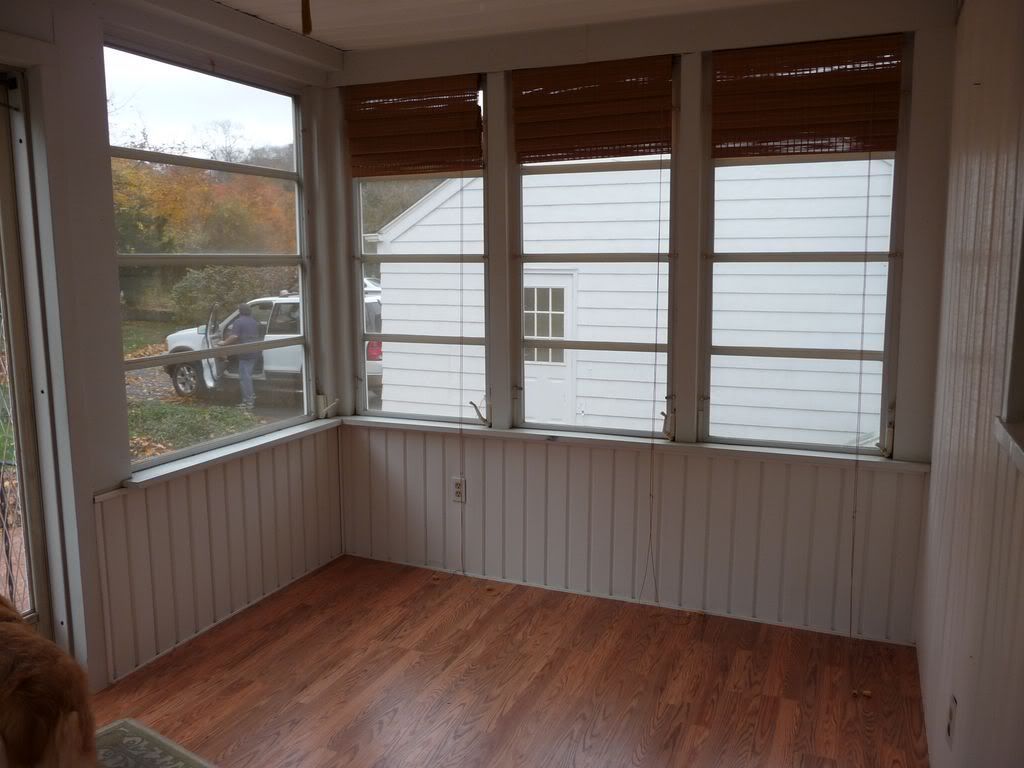
The porch looking into the backyard:
The floor boards that had to be replaced in the hallway:
Living room wall with new granite, insulation, pipe up to the dormer (other one is behind the insulation) and pipe up to the tv:
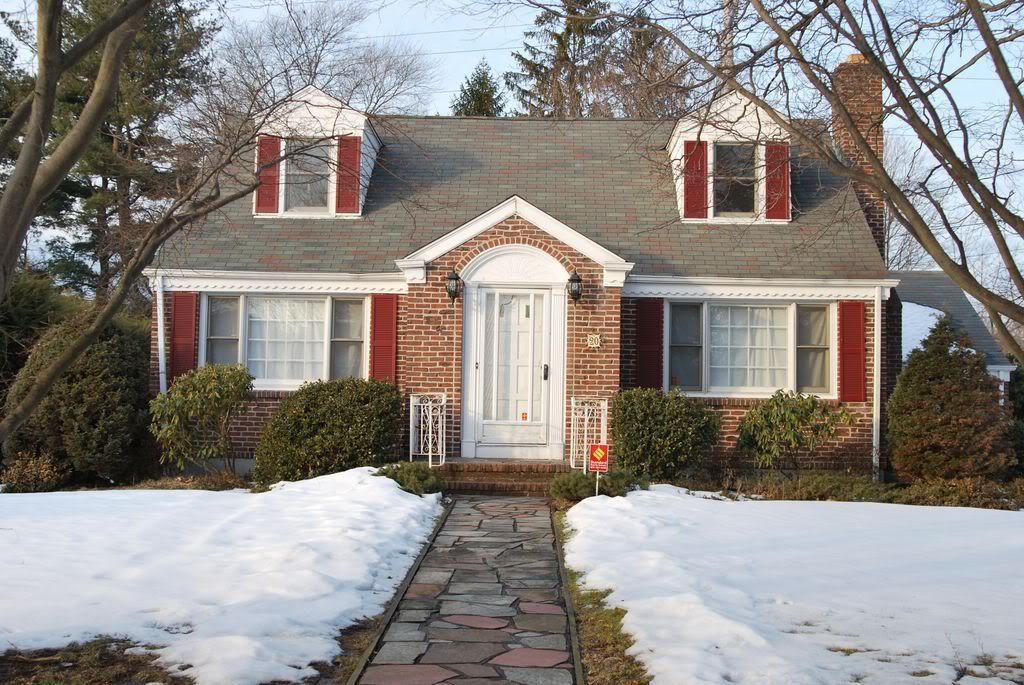
Front View:
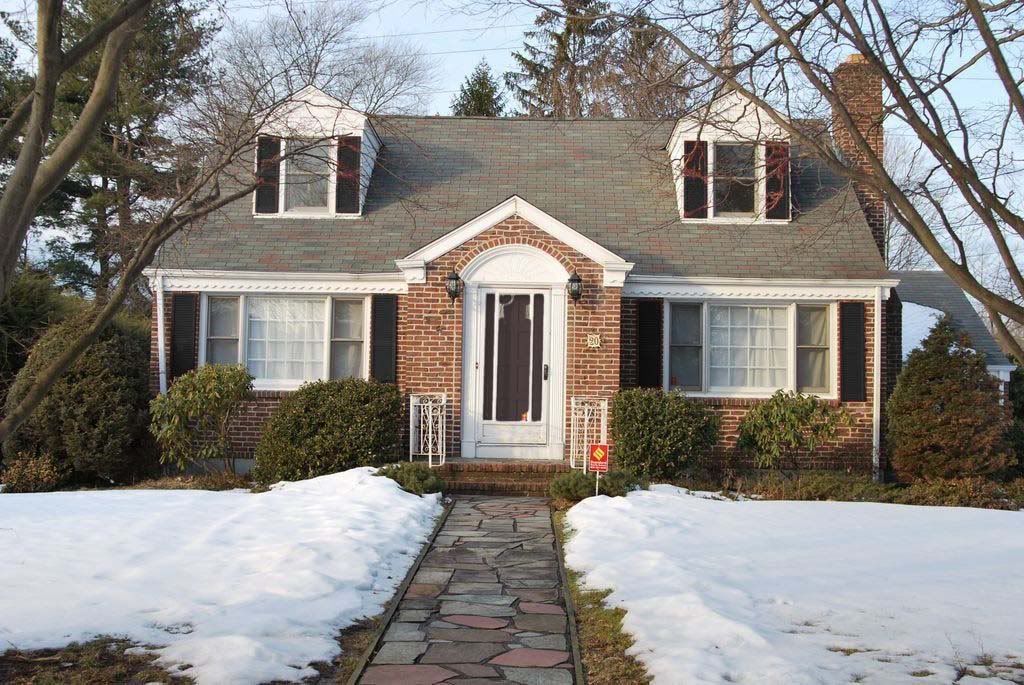
Photoshopped front view (opinions on the black welcomed):
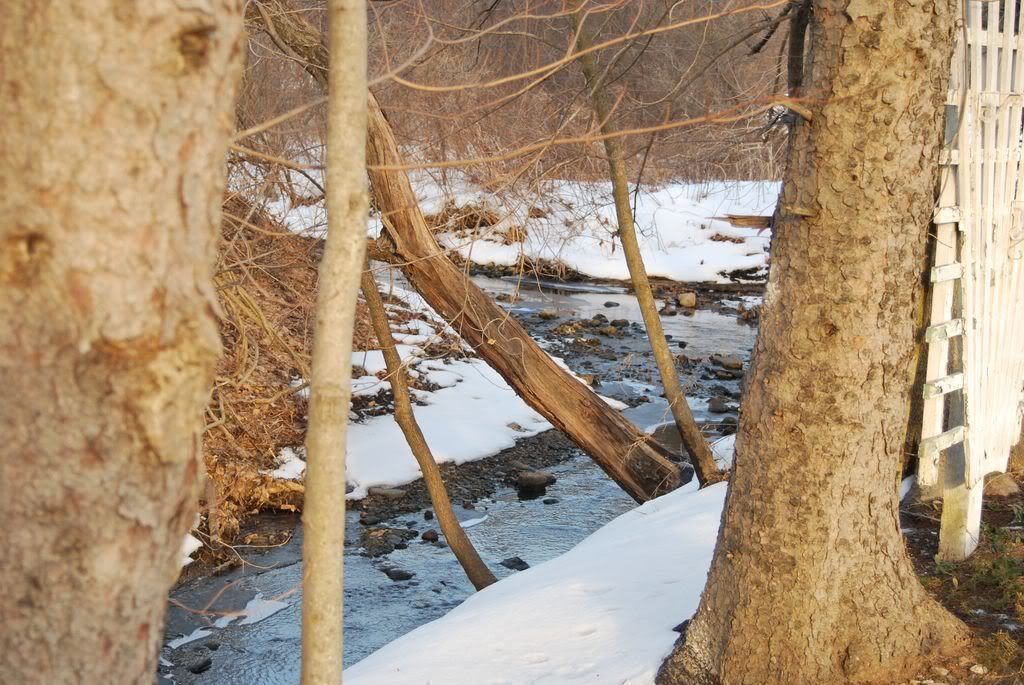
Little stream that separates the yard with the park behind the house:
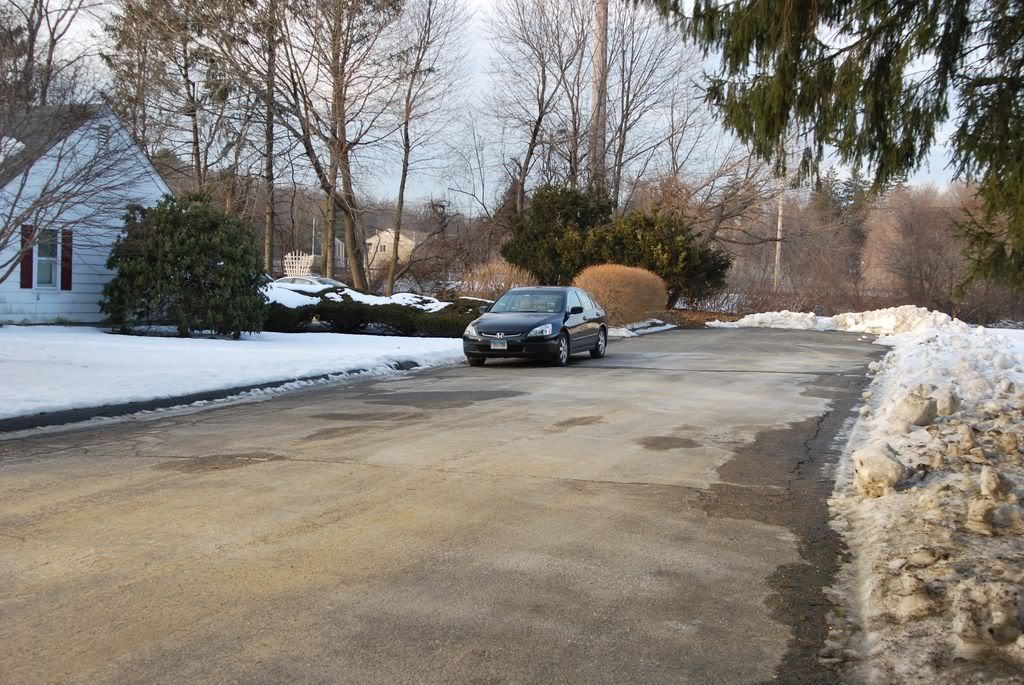
The driveway is on this extension of a cross street. You turn onto her street, and get to the first stop sign. Take a right, and this is what you see. Driveway is right behind her car, and the only thing on this extension of the street:
Garage with the cabinet and pegboard I installed:
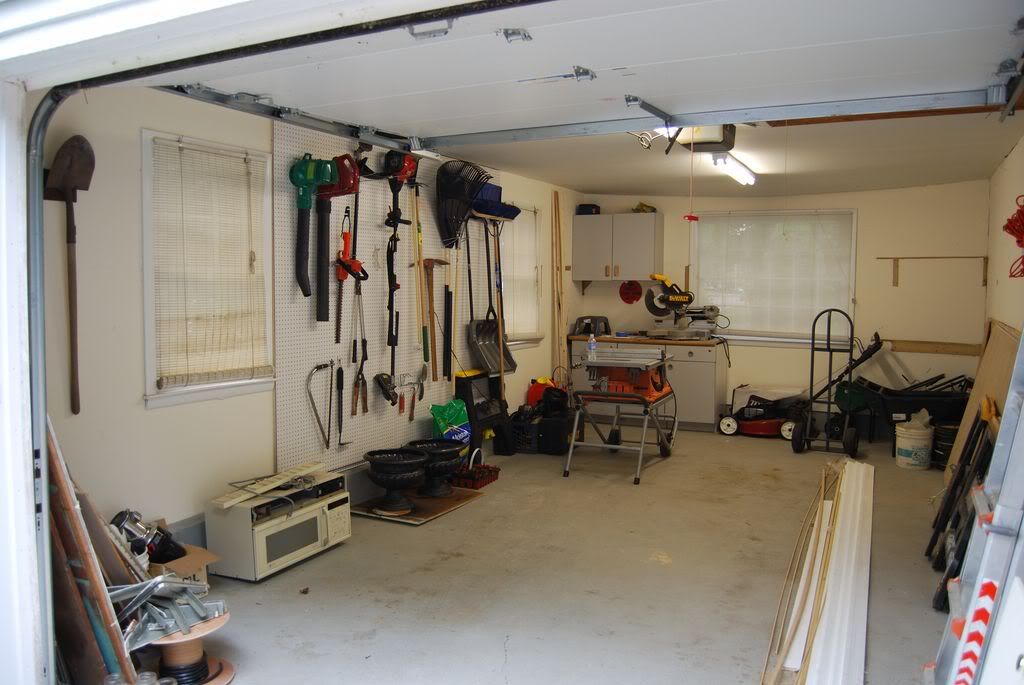
And of course what is going in that garage:

 its a car forum afterall
The dining room after the wallpaper and panel was removed. The wall was painted and the carpet was not yet removed. We left the carpet in until paint was done:
The porch looking into the backyard:
The floor boards that had to be replaced in the hallway:
Living room wall with new granite, insulation, pipe up to the dormer (other one is behind the insulation) and pipe up to the tv:
Front View:
Photoshopped front view (opinions on the black welcomed):
Little stream that separates the yard with the park behind the house:
The driveway is on this extension of a cross street. You turn onto her street, and get to the first stop sign. Take a right, and this is what you see. Driveway is right behind her car, and the only thing on this extension of the street:
Garage with the cabinet and pegboard I installed:
And of course what is going in that garage:
its a car forum afterall
Thread Starter
Suzuka Master
Joined: Oct 2001
Posts: 6,523
Likes: 54
From: Trumbull, CT
I kinda do too, but she likes the look of a house with black shudders and a black door. She actually would like a black door with gold kickplate, but she doesn't wants to keep a screen door, so it isn't worth putting the kickplate in.








Thread Starter
Suzuka Master
Joined: Oct 2001
Posts: 6,523
Likes: 54
From: Trumbull, CT
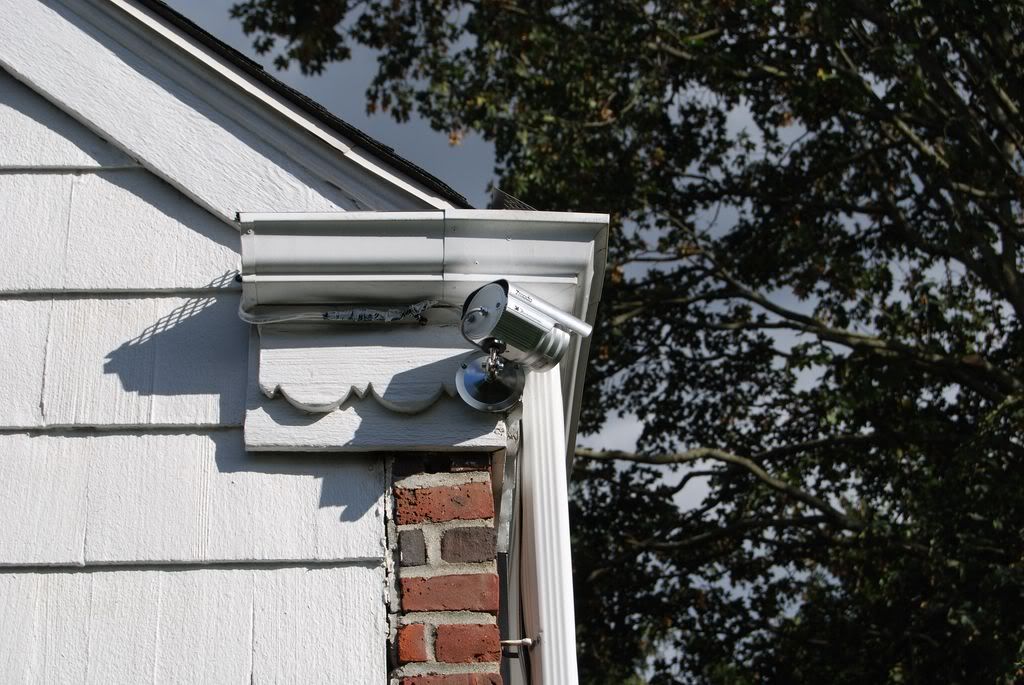
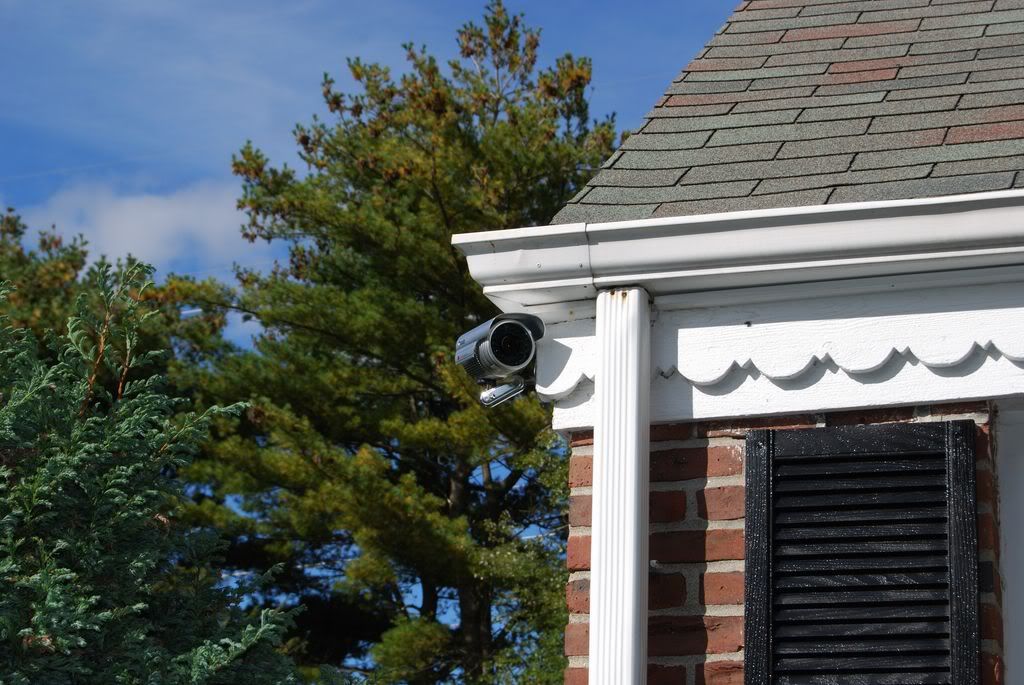
Sorry, I haven't added any pics lately. Been working on starting a new business with my new partner and time has been tough to come by. I did some minor work. I added a couple of security cameras, and will be adding 4 more. In the year we have been here, we have had a break in in the house (I talked about it on the site here before, my rims were stolen), and a break in in my gf's car. I just need time to get over to the supply house for some BNC connectors and a power block for the system and then I can install the rest of the cameras. Right now the system is tied into the tv over the fireplace, or can view via the web. Will eventually run a wire up to the upstairs tv when I install the plasma up there, to view on that tv too.
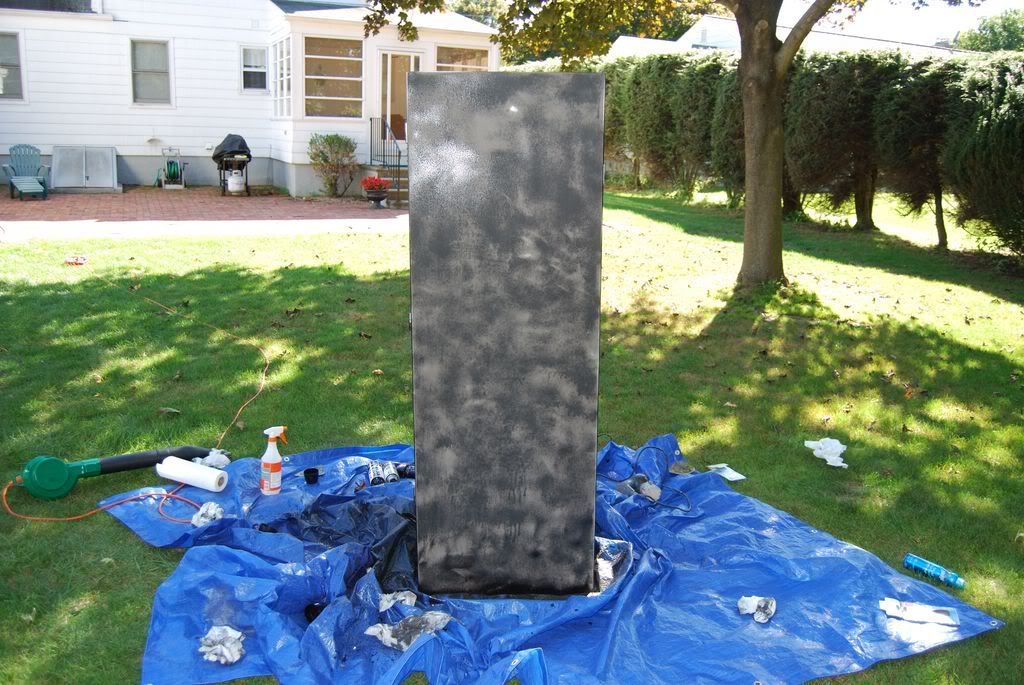
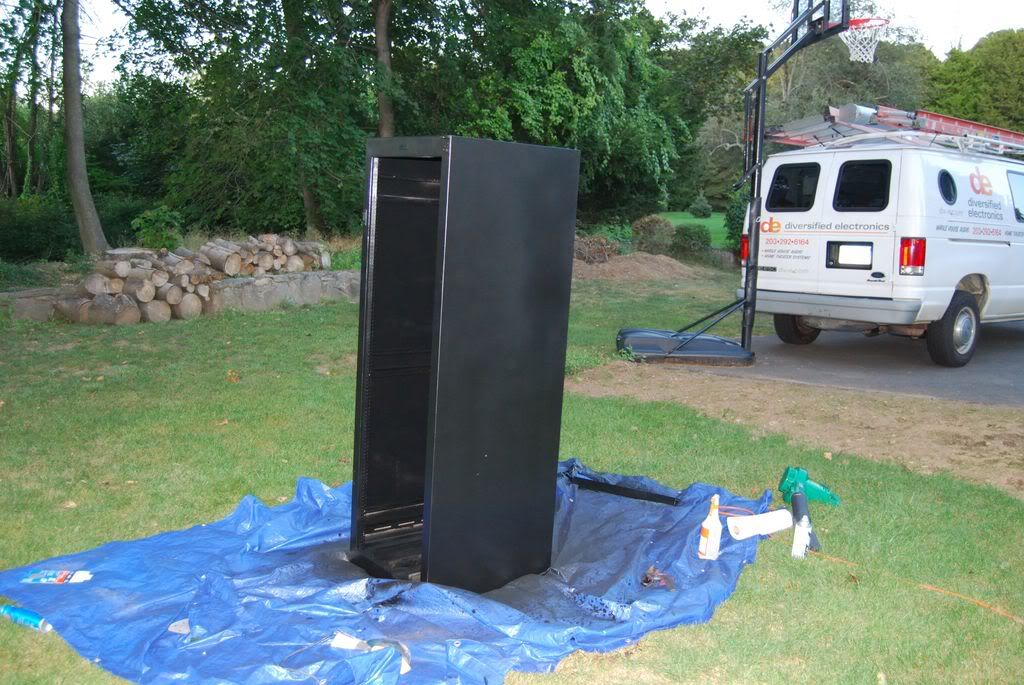
I also am working on refinishing an equipment rack I got for free on craigslist. It was a networking rack so needed some modifications. For one, it was brown to begin with. So I painted it black. I started off with a cheap paint from Walmart (don't ask me why I used that, I have no idea myself) and it was awful. The paint came out in gobs instead of a spray. So I sanded down the whole thing to a smooth finish, although not all the way down to bare metal, and started from scratch with Rustoleum that I picked up the the depot. Worked out much better. I just have to paint the door still, ran out of paint so have to go pick some up. I am now working on making some shelving out of 1 inch MDF board, that I have to paint before installing in the rack. I have some pictures now, and hopefully will have some when I finish. I can't find the pics I have before I started. If I can dig them up I will post them. The quality of the pics aren't that great, I was loosing light as it was getting late and I was more concerned with finishing and getting that beast back into the basement, then with taking pictures.
This is the back of the rack, the door opens for access to the equipment
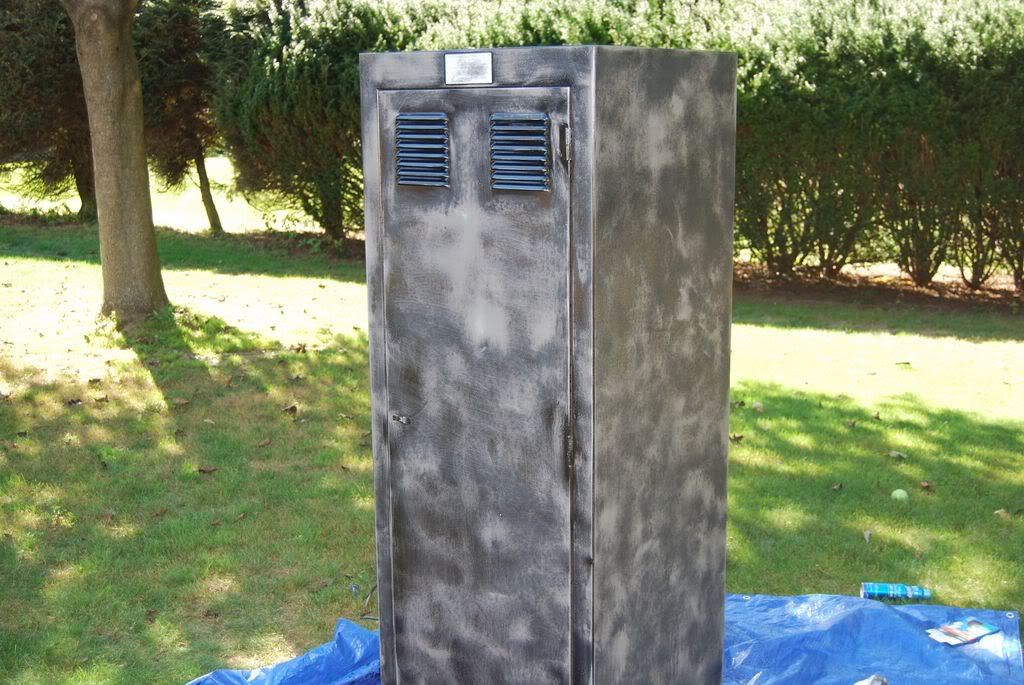
Side view
Front and part of the inside view. There is a smoked glass door that goes on the front
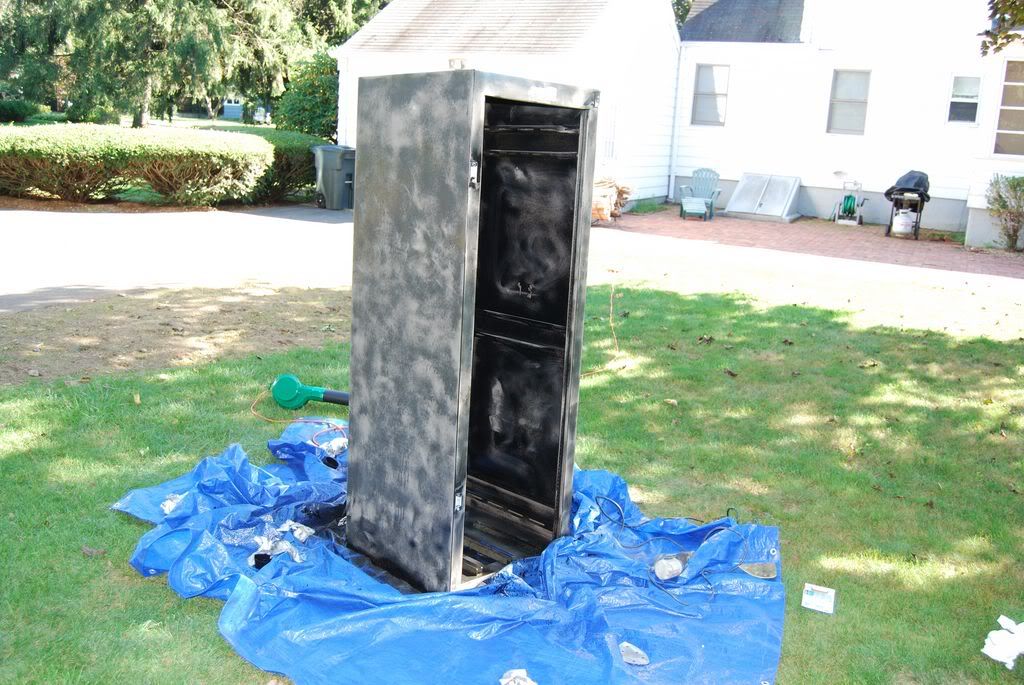
With some paint on the rack
Inside
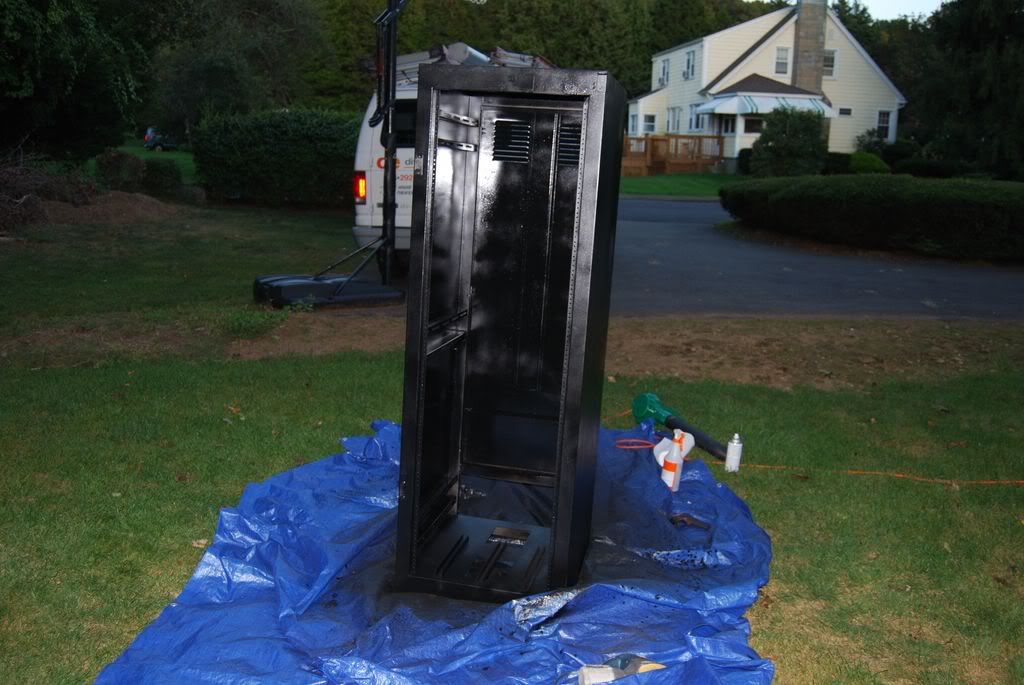
Rear and side with paint
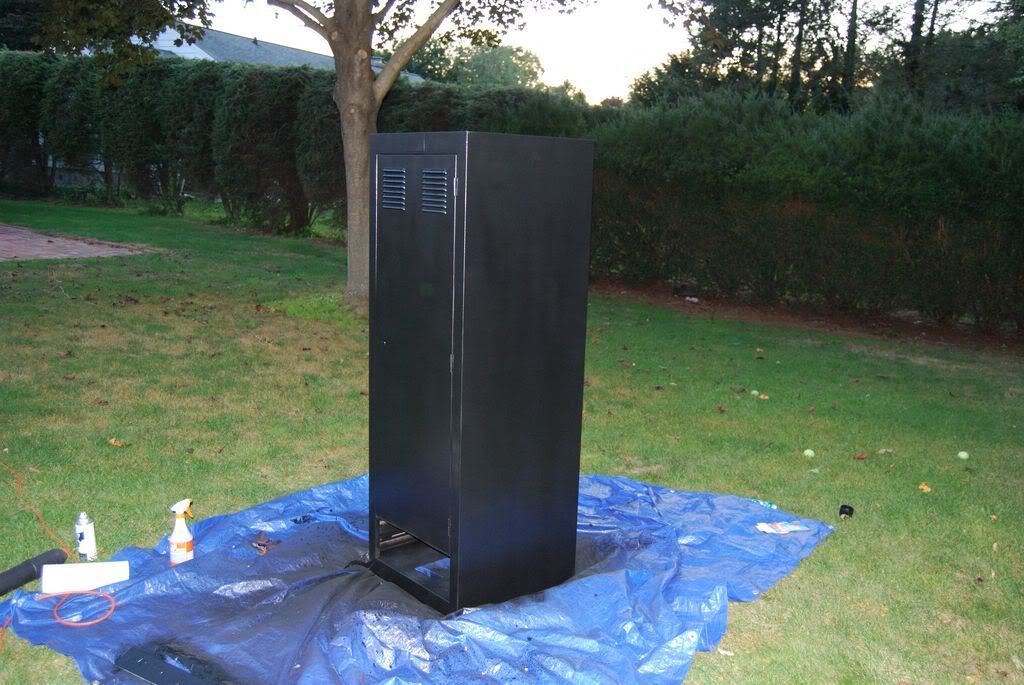
I also am working on refinishing an equipment rack I got for free on craigslist. It was a networking rack so needed some modifications. For one, it was brown to begin with. So I painted it black. I started off with a cheap paint from Walmart (don't ask me why I used that, I have no idea myself) and it was awful. The paint came out in gobs instead of a spray. So I sanded down the whole thing to a smooth finish, although not all the way down to bare metal, and started from scratch with Rustoleum that I picked up the the depot. Worked out much better. I just have to paint the door still, ran out of paint so have to go pick some up. I am now working on making some shelving out of 1 inch MDF board, that I have to paint before installing in the rack. I have some pictures now, and hopefully will have some when I finish. I can't find the pics I have before I started. If I can dig them up I will post them. The quality of the pics aren't that great, I was loosing light as it was getting late and I was more concerned with finishing and getting that beast back into the basement, then with taking pictures.
This is the back of the rack, the door opens for access to the equipment
Side view
Front and part of the inside view. There is a smoked glass door that goes on the front
With some paint on the rack
Inside
Rear and side with paint
Thread Starter
Suzuka Master
Joined: Oct 2001
Posts: 6,523
Likes: 54
From: Trumbull, CT
The rack is inside now, and I just cut the shelving about a half hour ago. I want to add one more shelf but ran out of MDF so I will go pick some up in a bit, along with some paint and anything else I need to finish.
As you can see, I have wires dropping everywhere. I just connected everything to get it going until I figured out what I was going to do long term. Now that the rack is almost finished I can finally clean all that up.
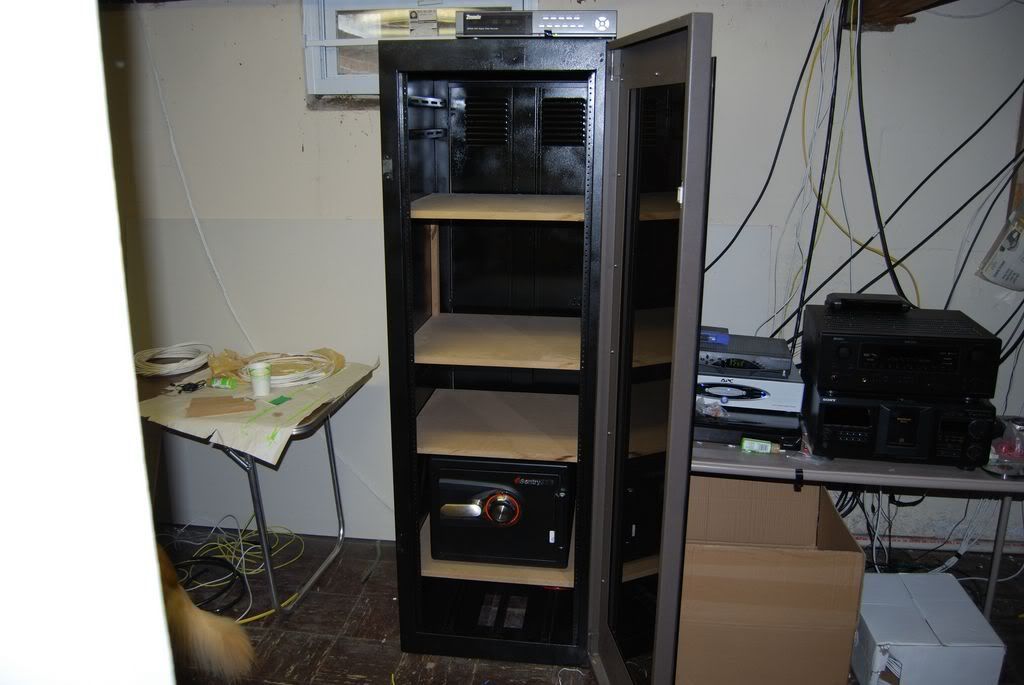
With the glass door on. The door frame is still brown here, will hopefully finish getting that painted tonight or tomorrow.
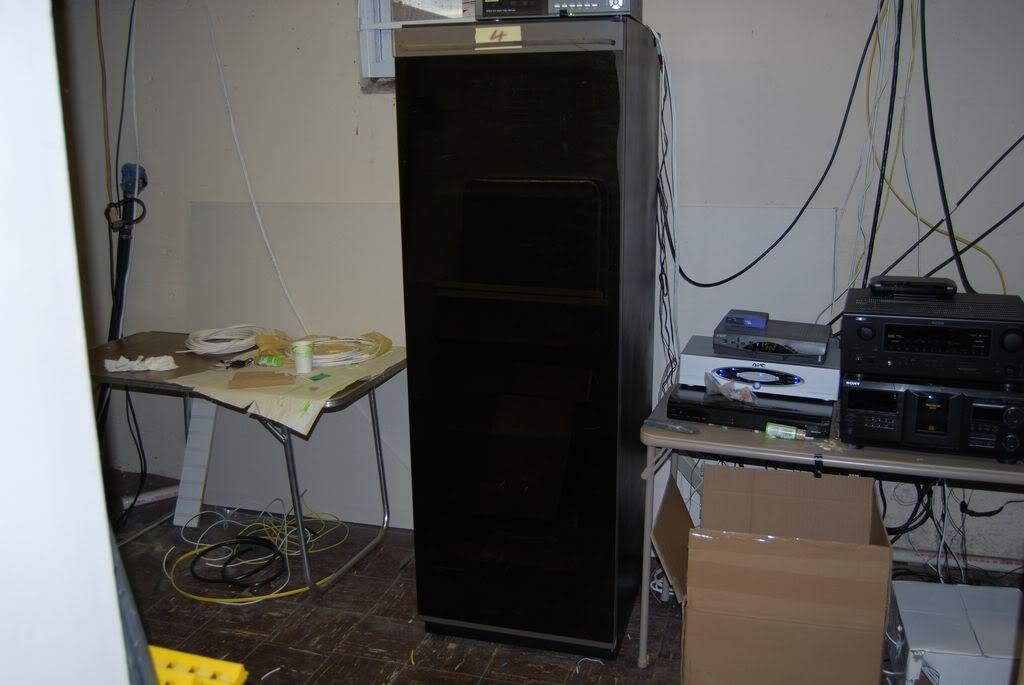
I basically spaced out the shelving for my equipment, plus some extra space. Also decided to add the safe down there. Don't really have a great place to bolt it down anywhere else. It's hard to bolt into a newly refnished hardwood floor, I just can't bring myself to do it. The only other place that is possible would be in the dormer that you have to crawl over ductwork to get to. Although a great hiding spot, not very practical, so once the shelf is securely mounted, I will bolt the safe down with 4 lags. The rack is insanely heavy as it is, with the equipment, shelving, and safe, it's going nowhere. Plus I will have a camera focused on it for safe measure.
As you can see, I have wires dropping everywhere. I just connected everything to get it going until I figured out what I was going to do long term. Now that the rack is almost finished I can finally clean all that up.
With the glass door on. The door frame is still brown here, will hopefully finish getting that painted tonight or tomorrow.
I basically spaced out the shelving for my equipment, plus some extra space. Also decided to add the safe down there. Don't really have a great place to bolt it down anywhere else. It's hard to bolt into a newly refnished hardwood floor, I just can't bring myself to do it. The only other place that is possible would be in the dormer that you have to crawl over ductwork to get to. Although a great hiding spot, not very practical, so once the shelf is securely mounted, I will bolt the safe down with 4 lags. The rack is insanely heavy as it is, with the equipment, shelving, and safe, it's going nowhere. Plus I will have a camera focused on it for safe measure.
Thread Starter
Suzuka Master
Joined: Oct 2001
Posts: 6,523
Likes: 54
From: Trumbull, CT
Camera focused on driveway
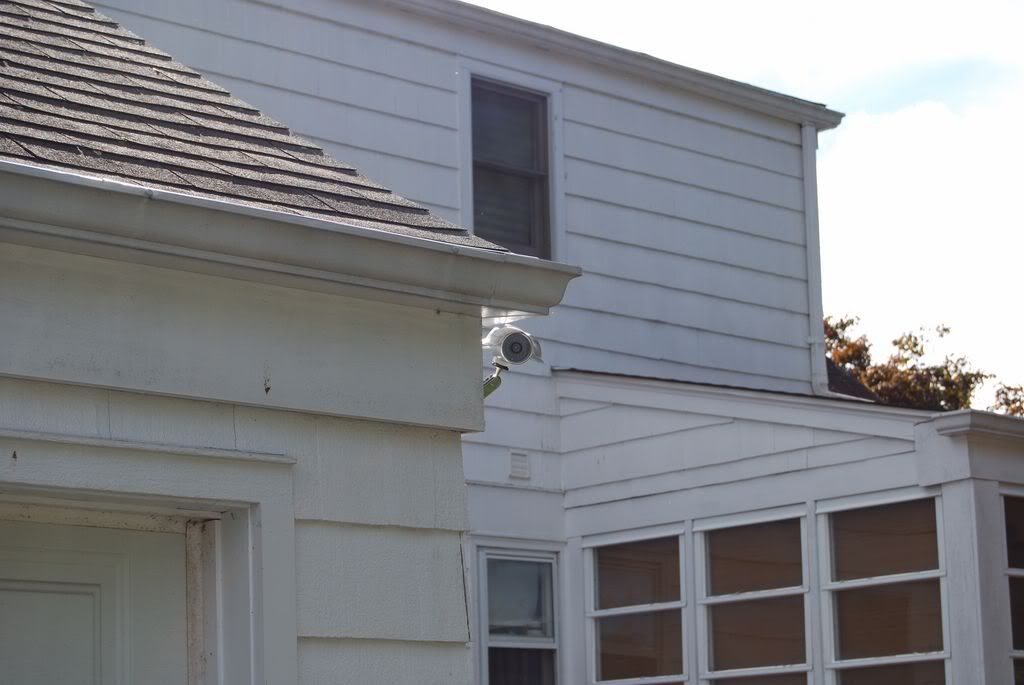
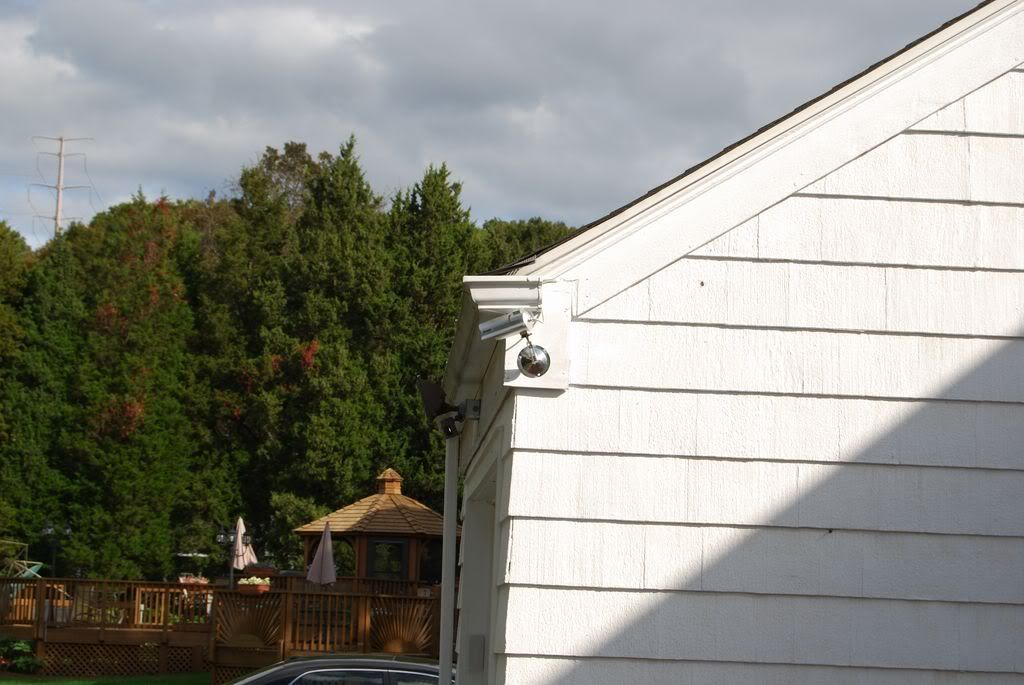
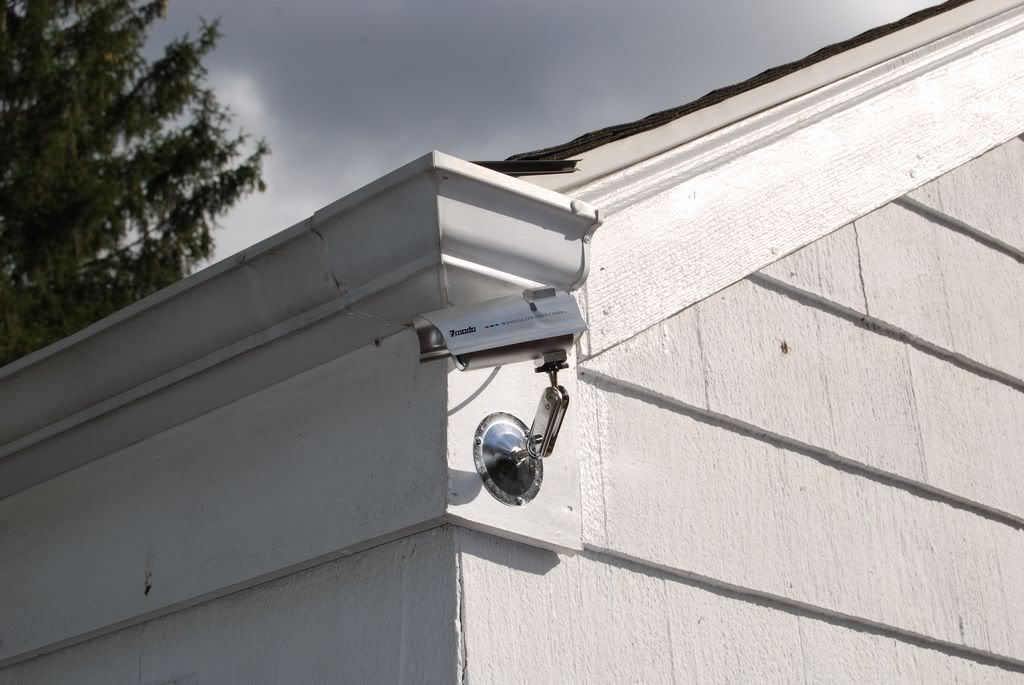
Camera focused on the front yard. I am really unhappy with how I had to run this wire. I had no choice, I could not get a hole farther up and get into the dormer. I might box something out with some moulding to cover it so it is not noticeable.
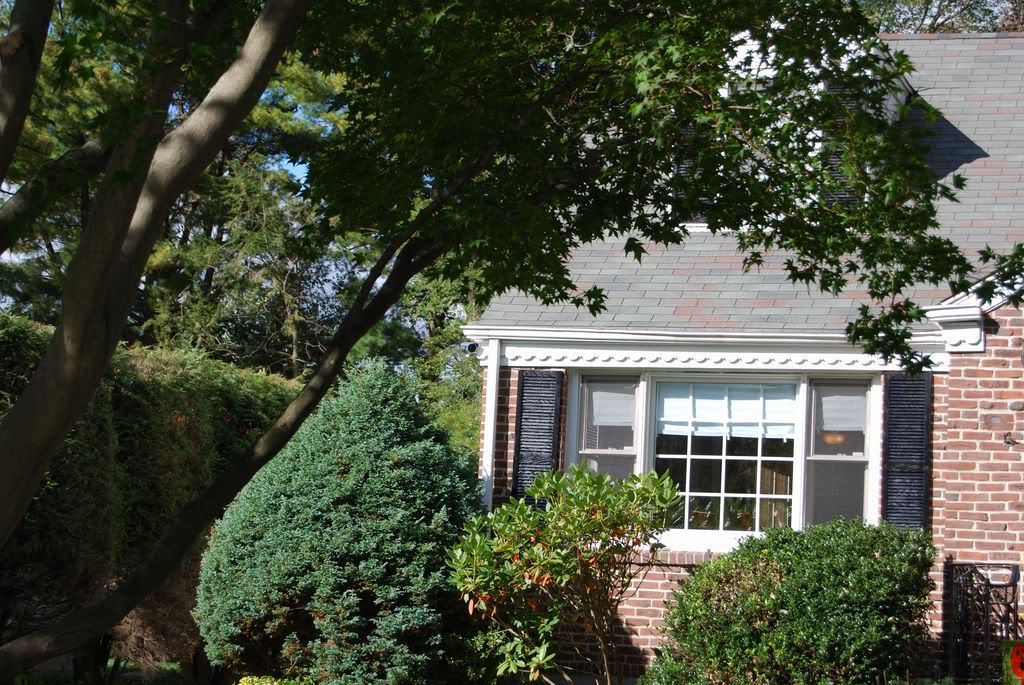
And yes, the shutters are now painted black. My gf painted them and did a great job. They look as though they came black from the get go.
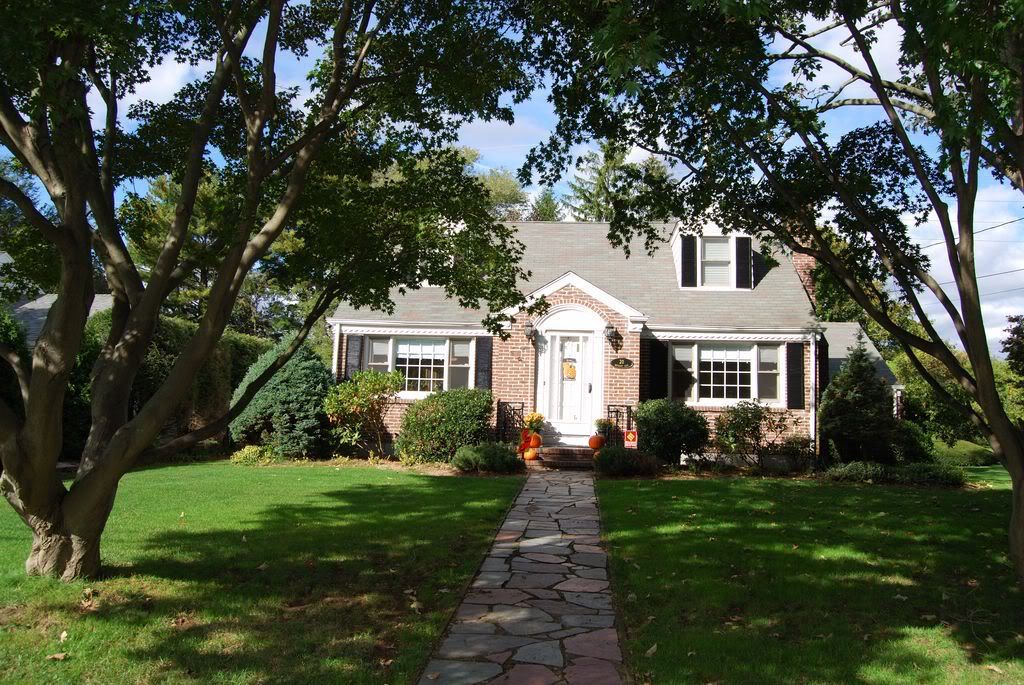
Camera focused on the front yard. I am really unhappy with how I had to run this wire. I had no choice, I could not get a hole farther up and get into the dormer. I might box something out with some moulding to cover it so it is not noticeable.
And yes, the shutters are now painted black. My gf painted them and did a great job. They look as though they came black from the get go.
Thread Starter
Suzuka Master
Joined: Oct 2001
Posts: 6,523
Likes: 54
From: Trumbull, CT
Got the shelves mostly painted. Just have to get the reverse side done tomorrow morning.
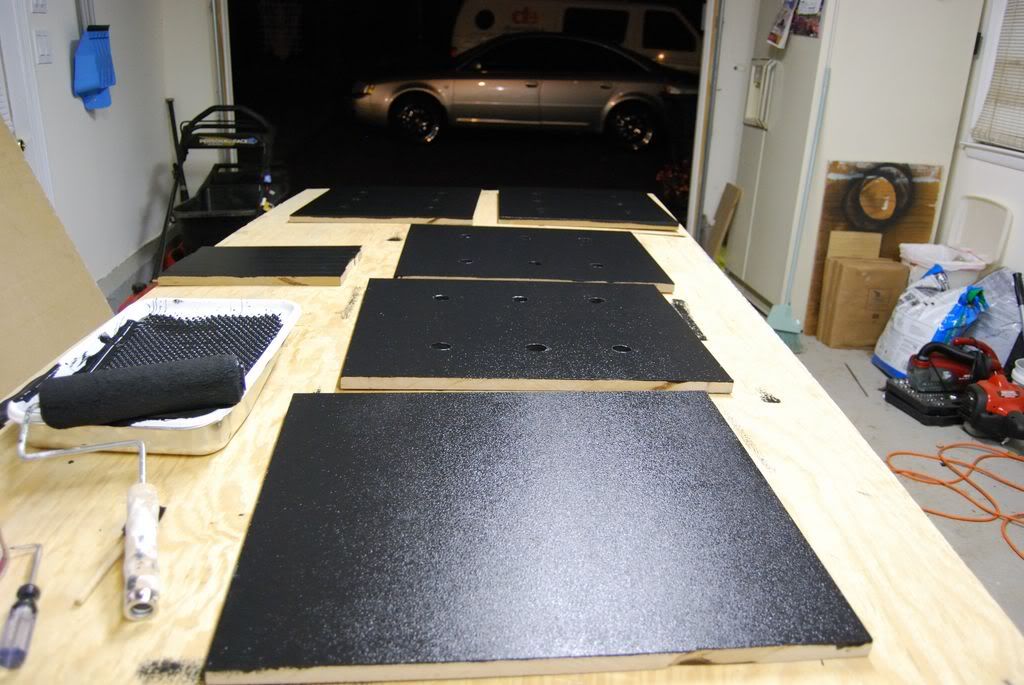
I put air holes in all the shelves except the bottom one. The rack will have two fans mounted to the top forcing hot air out.
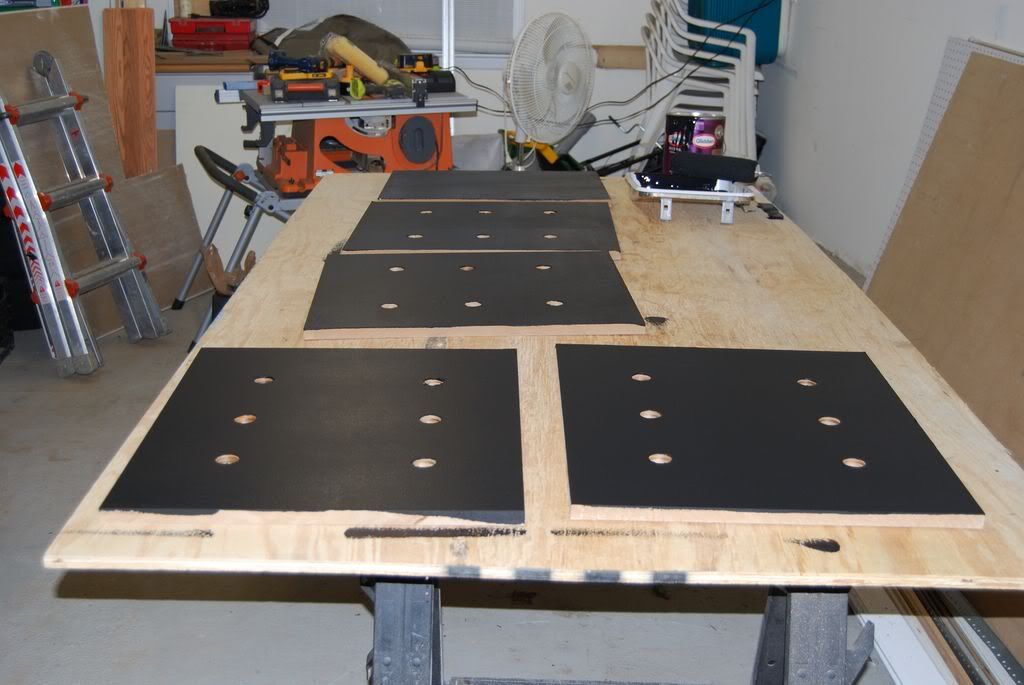
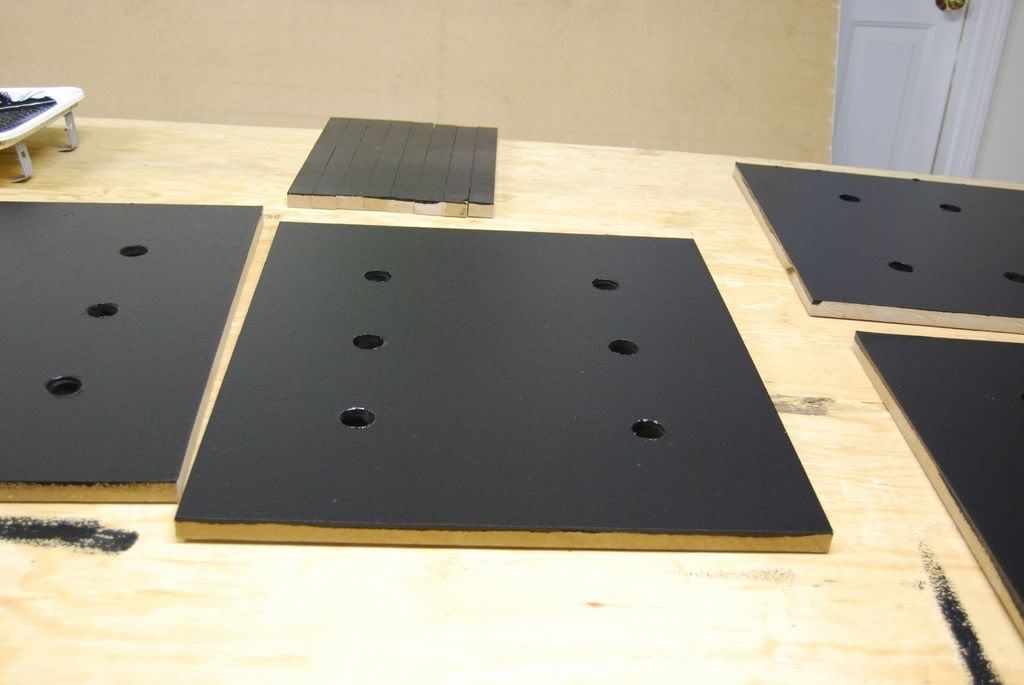
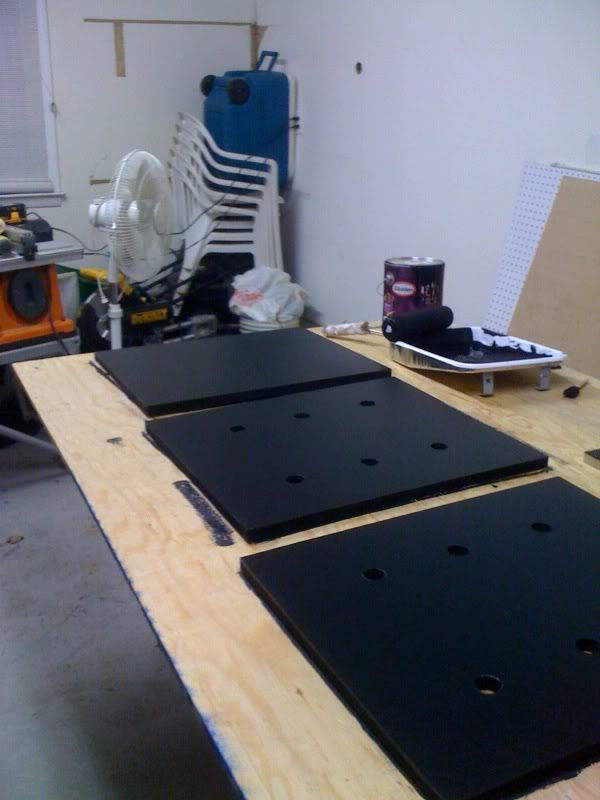
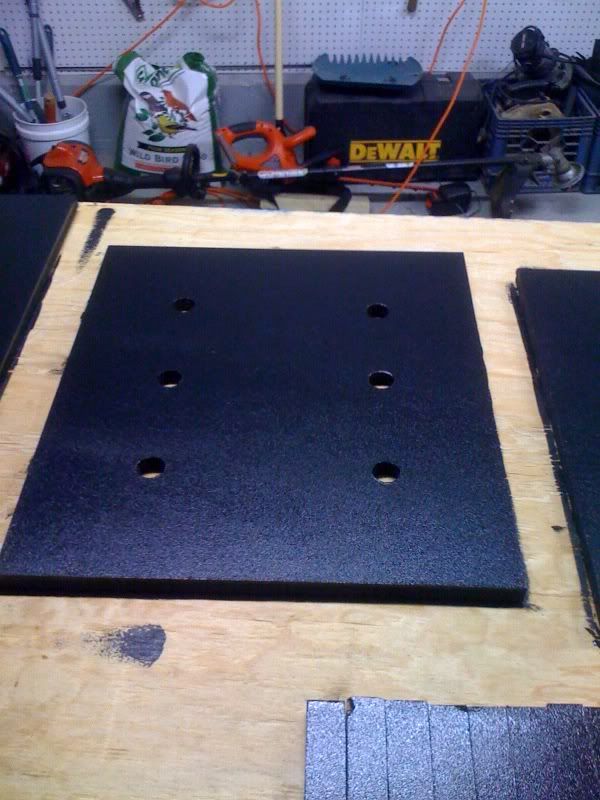
I put air holes in all the shelves except the bottom one. The rack will have two fans mounted to the top forcing hot air out.