Official speaker box build thread
 05-05-2009, 11:28 AM
#41
Drifting
Is that 1" MDF? That looks a lot thicker than normal... I have a 1/2 built box chilling in my garage... No updates till it's finished, which will hopefully be tomorrow or Thursday

 05-05-2009, 12:35 PM
#43
Drifting
Looks good dude... I need to get working on my box. It's 2.25 cubes tuned at 36hz with 47.25 square inches of port... I'm working on the corner of the port right now. It's not smooth enough for me, so I have some work to do... Hopefully I'll be able to work on it a little tonight, but most likely the next time I'll be able to work on it will be on Wednesday or Thursday.
On1wheel, what are your plans for covering the box?
On1wheel, what are your plans for covering the box?
05-05-2009, 02:45 PM
#44
Three Wheelin'
Join Date: Feb 2009
Location: Mooresville NC
Age: 39
Posts: 1,942
Likes: 0
Received 11 Likes
on
10 Posts
Hmmm I look forward to checkin out some pics of that box. Well the guy might paint it not sure yet. Just finished her up sanded the rough fits and rounded the edges came out great, pics up soon.
05-05-2009, 11:49 PM
#45
Drifting
Seeing these pictures makes me want to build a ported box again  . Too bad I want to go sealed, but ported boxes are more fun to make. I need to make a couple small boxes pretty soon. Too bad all I have is a jigsaw, so they won't be very nice, but they're going under my seats, so it doesn't have to be all that pretty.
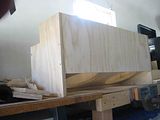
Just to contribute to this thread, this is the last box I made w/ birch plywood. This was a long time ago.
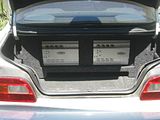
This is how it was set up in my old car.
This was a quick box I peiced together, cause I wanted to try out some RE8's. And I got a one w/ a smashed up dust cap for cheap. I like downfiring boxes for some reason
. Too bad I want to go sealed, but ported boxes are more fun to make. I need to make a couple small boxes pretty soon. Too bad all I have is a jigsaw, so they won't be very nice, but they're going under my seats, so it doesn't have to be all that pretty. Just to contribute to this thread, this is the last box I made w/ birch plywood. This was a long time ago.

This is how it was set up in my old car.

This was a quick box I peiced together, cause I wanted to try out some RE8's. And I got a one w/ a smashed up dust cap for cheap. I like downfiring boxes for some reason
 05-06-2009, 09:51 PM
#46
Drifting
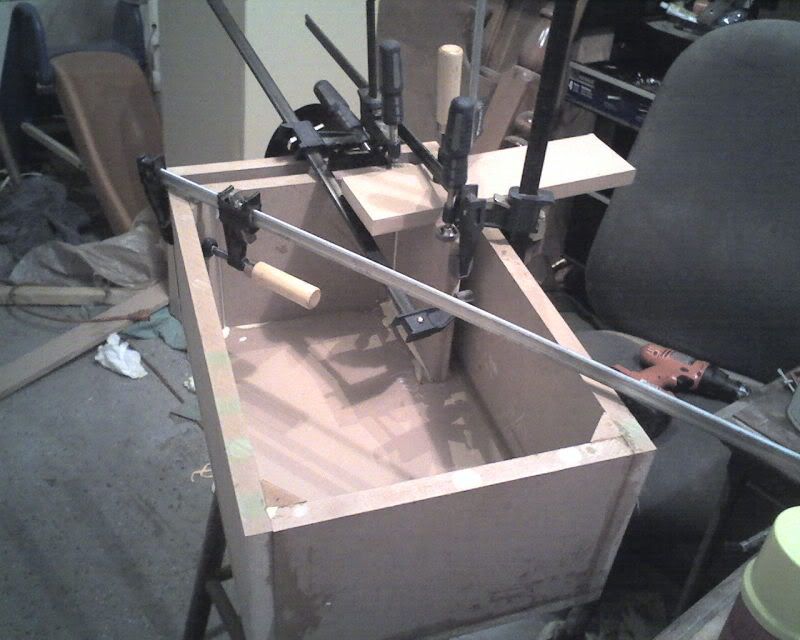
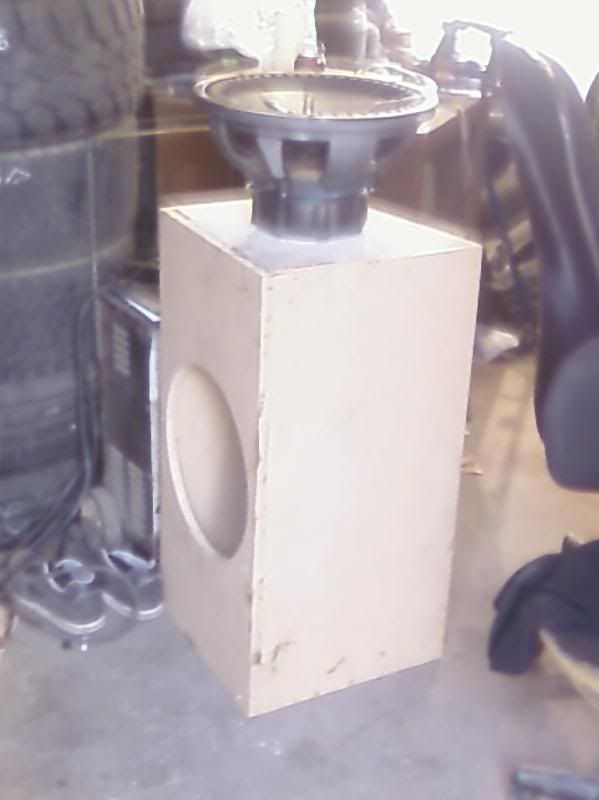
Here's a little glimpse of what I've been working on... This is as it currently sits. I'll have full build pics when I get done with it hopefully tomorrow.

05-06-2009, 10:32 PM
#47
Three Wheelin'
Join Date: Feb 2009
Location: Mooresville NC
Age: 39
Posts: 1,942
Likes: 0
Received 11 Likes
on
10 Posts
do you ever just use glue on em? My last 3 boxes thats all i've used and no probs yet even with the 12's beating like bananas. and oh is that a split i see in the port wall? lol i always get those pisses me off so bad this stuff is so weak
05-06-2009, 10:43 PM
#48
Drifting
Yes it is a split, and no I haven't done a box with only glue yet... I talk about it all the time, but always use my screws. This one's getting a double baffle, so that split should basically just go away...
 05-09-2009, 09:09 PM
#51
2000 WDP
05-09-2009, 09:09 PM
#52
Drifting
False there on1wheel... Caps can actually clean up the signal... That's about their only use...
Greenwood, nice work... Can't wait to see some more pics of that vette build
Greenwood, nice work... Can't wait to see some more pics of that vette build
05-09-2009, 09:11 PM
#53
2000 WDP
 You win the award for the worst pictures ever..


 05-17-2009, 10:03 PM
#60
Advanced
Join Date: Jun 2008
Location: columbia, South Carolina
Age: 39
Posts: 98
Likes: 0
Received 0 Likes
on
0 Posts
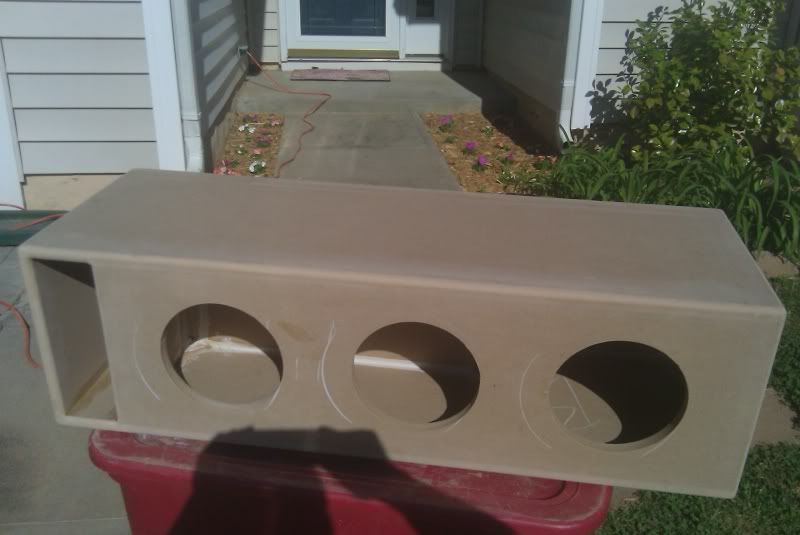
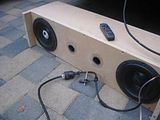
this is my box ive been workin on for a couple days now. it was previously a carpeted box that i built but i decided to glass the front of it. Its right at 1. cu ft. It will be housing one rockford p3d4 12, with a rockford p1000 pushing it. The box is made out of 3/4 mdf and the whole inside of the box is sealed with fiberglass resin. there are 5 layers of matt on the outside and about another six on the inside of the box. I want the box to hold up to a stronger speaker when the RF goes out.
05-17-2009, 10:08 PM
#61
Drifting
s10, that's going to be one solid ass box. The only thing I see is the size for if/when you upgrade the sub. There aren't a whole lot of subs that will work in 1 cube sealed... Other than that, MOAR PICS!!!! Looks sexy as hell...
05-17-2009, 10:40 PM
#62
Advanced
Join Date: Jun 2008
Location: columbia, South Carolina
Age: 39
Posts: 98
Likes: 0
Received 0 Likes
on
0 Posts
just to clarify in the picture it is sitting on its side. the side beside the drink is the top. should be nice to have it all in the car. All i gotta do to finish the amp rack is route my plexi , frost and mount leds .. Im just throwin an idea around about the sub box. I dont really wanna re carpet the sides and back and im not gonna smooth all that completly out so it can be painted but would it look bad to use a light texture bed liner in black to coat the back and sides.. The front of the box Will be painted to match the car.
05-18-2009, 12:54 AM
#64
Good thread that just came up in another sub-forum...but I feel it's worthy to be here. 
https://acurazine.com/forums/3g-tl-audio-bluetooth-electronics-navigation-94/goal-competition-ready-sound-system-726990/
https://acurazine.com/forums/3g-tl-audio-bluetooth-electronics-navigation-94/goal-competition-ready-sound-system-726990/
Just had my system redone by my friend Bing of Simplicity in Sound. I’ve had it for a couple of weeks and it is crystal clear and should do well in the Iasca competitions. For those going to the All Cali Meet in July, you’ll get a chance t audition it in person. Enjoy Bings build log
Well, just spent the last three weeks redoing my friend Mike, a.k.a ChicoOG's acura TL. some of you may remember this car, as it is hte third system that has gone through the vehicle and the second time i have worked on it:
http://www.diymobileaudio.com/forum/...-complete.html
Well, good ole Mike's caught the SQ bug, and when the california IASCA shows were announced, we decided to redo the system for even higher level of SQ and the occassional IASCA comp.
so here are the goals:
1. raise the level of SQ a few notches higher htan before, something competitive in the rookie class of IASCA.
2. retain zapco DC power/processing and adding to it.
3. fit much more gear in the trunk but still somehow retain a bit of stealthiness and daily usability.
so...lets get started:
as before, the stock headunit was used as a signal source. the TL is one of those rare stock HUs, when tapped before hte factory amp, is reasonably clean and flat. and not to mention the stock nav and info screen makes it difficult to do an aftermarket source.
as mentioned before, zapco processing, so here is the laptop plugged in and ready to tune:

the front stage we went from zapco to Seas.
the Lotus Reference midbass was installed in the same manner as before, and the sound proofing was also from the previous install:

quick shot of hte termination of wiring on the driver side midbass:

and the same goes for the passenger side of course:


the one thing i added this time, was to fully sound proof the door card. as the TL tend to hvae quite a bit of door buzzing, we also decided to secure the movable pocket door shut, as it was a major source of rattles. so here they are:


moving onto the midrange. we have a pair of Seas Excel Magnesium 4" mids. this time, i had the time to mold hte kicks into the stock piece. and here is the result. the kicks are aimed at the opposite listener, and have an internal volume of approx. .25 cub ft.


here is the shot of both from the back seat:

then, i made a pair of grilles for the speakres. if you are wondering why the grille is black and not tan, for one, the interior is two tone black and tan, but more importantly, tan grille cloth gets dirty so quickly and is impossible to make clean.


Well, just spent the last three weeks redoing my friend Mike, a.k.a ChicoOG's acura TL. some of you may remember this car, as it is hte third system that has gone through the vehicle and the second time i have worked on it:
http://www.diymobileaudio.com/forum/...-complete.html
Well, good ole Mike's caught the SQ bug, and when the california IASCA shows were announced, we decided to redo the system for even higher level of SQ and the occassional IASCA comp.
so here are the goals:
1. raise the level of SQ a few notches higher htan before, something competitive in the rookie class of IASCA.
2. retain zapco DC power/processing and adding to it.
3. fit much more gear in the trunk but still somehow retain a bit of stealthiness and daily usability.
so...lets get started:
as before, the stock headunit was used as a signal source. the TL is one of those rare stock HUs, when tapped before hte factory amp, is reasonably clean and flat. and not to mention the stock nav and info screen makes it difficult to do an aftermarket source.
as mentioned before, zapco processing, so here is the laptop plugged in and ready to tune:
the front stage we went from zapco to Seas.
the Lotus Reference midbass was installed in the same manner as before, and the sound proofing was also from the previous install:
quick shot of hte termination of wiring on the driver side midbass:
and the same goes for the passenger side of course:
the one thing i added this time, was to fully sound proof the door card. as the TL tend to hvae quite a bit of door buzzing, we also decided to secure the movable pocket door shut, as it was a major source of rattles. so here they are:
moving onto the midrange. we have a pair of Seas Excel Magnesium 4" mids. this time, i had the time to mold hte kicks into the stock piece. and here is the result. the kicks are aimed at the opposite listener, and have an internal volume of approx. .25 cub ft.
here is the shot of both from the back seat:
then, i made a pair of grilles for the speakres. if you are wondering why the grille is black and not tan, for one, the interior is two tone black and tan, but more importantly, tan grille cloth gets dirty so quickly and is impossible to make clean.
the Seas lotus reference tweeters were installed inthe facotry location, with its early reflection, it sound quite nice, similar to on axis A pillars but IMO affords a deeper stage.


if you are wondering what happend to the hood release, it was relocated to right next to the kick, still relatively easy to reach

here are some build pics of hte kicks.
first the back mold was mated to the stock panels and then trimmed:

then, they recieved a layer of sound proofing:

ring baffles were then aimed and attached:

and mold cloth secured, resined, and then reinforced from the inside:

after that, they were sanded smooth:

then as usual, each kick recieved a layer of modeling clay, and then another lay of sound proofing to hold the clay in place and to aid in resonance killing. here you see one of hte kicks with clay and the other one is already done with the sound proofing over the clay:

and then, they were wrapped in factory matching vinyl. they turned out to be one of hte more difficult wrap jobs i have had to do, due to the complex concave and then convex shapes. but after a lot of pulling and swearing, they were done

here are the shots of hte midranges with their wiring terminations:


and finally ,installed into the kick panels:

a quick shot of hte tweeter wiring termination:

so thats it for the front stage.
now a few quick shots of the wiring. here you see all the wires running in the door sills, wired tired and secured every 6 inches or less:


so thats it for the interior. as some of hte work was already done from the previous install.
moving to the trunk.
if you are wondering what happend to the hood release, it was relocated to right next to the kick, still relatively easy to reach
here are some build pics of hte kicks.
first the back mold was mated to the stock panels and then trimmed:
then, they recieved a layer of sound proofing:
ring baffles were then aimed and attached:
and mold cloth secured, resined, and then reinforced from the inside:
after that, they were sanded smooth:
then as usual, each kick recieved a layer of modeling clay, and then another lay of sound proofing to hold the clay in place and to aid in resonance killing. here you see one of hte kicks with clay and the other one is already done with the sound proofing over the clay:
and then, they were wrapped in factory matching vinyl. they turned out to be one of hte more difficult wrap jobs i have had to do, due to the complex concave and then convex shapes. but after a lot of pulling and swearing, they were done
here are the shots of hte midranges with their wiring terminations:
and finally ,installed into the kick panels:
a quick shot of hte tweeter wiring termination:
so thats it for the front stage.
now a few quick shots of the wiring. here you see all the wires running in the door sills, wired tired and secured every 6 inches or less:
so thats it for the interior. as some of hte work was already done from the previous install.
moving to the trunk.
here is hte normal view with all the grilles on. the entire trunk was done with grey carpet so its durable. you will notice that the main floor is a two tier wtih a curved step in the middle:


pop off all the grilles, and here is what you see.
two DIYMA 12s reside in side fiberglass enclsoures that are molded INTO the stock side carpeting (thanks to Josh at JML audio for giving me the idea and insipiration). each enclsoure is 1.5 cubfeet or so.
three zapco DC reference amps are in the two level fake floor. a DC1100.1 powers the diyma12s wtih 1100 watts, a dc650.6, sends 100 watts to each tweeter and 180 watts to the midrange, while a DC1000.4 sends a bridged 500 watts RMS to each midbass.
everyhting is trimmed in exterior matching vinyl, and my logo is on the front wall. so basicaly a fully boxed trunk install, the only piece of stock carpet you see is the one under the rear deck.


so here are some build pics of the trunk.
by FAR the most difficult part of the instlal was the side boxes. found out quickly that the stock "carpet" really doesnt take resin at all, and you cant just lay glass on it as it wont stick. so after some trial and error, i coated the stock carpet with a combination of resin and duraglass, let that stick, and then layed 10 layers of mat/cloth on the places where i wnated to have the back of hte subbox.
so here are the sides with all the backs done:


then the baffle was attached. the shape was used to it can accomodate the fake floor to come later, as i knew before hand that all three amps cannot fit on the same plane and still fit the diyma12 on the sides.

then, the mold was resined, and the box strengthend with 10 more layers of mat/cloth from inside of hte box. I cut the backs of these boxes and laid up the glass, and then joined the two pieces back together with glass. you can see in this picture where i put a line of sound proofing on the seams, even though they were already sealed up with cloth/mat from both sides.
then, i sanded and molded the edges to flow into the stock carpted shape:

and finally, the boxes were carpeted, whcih was a bit difficult as well due to the shape hehe, and the front red vinyl trim panel attached:


two quick shots of the wiring going into the DIYMA 12s:


so here is the floor piece that was curved. you can see here its been glassed and sanded smooth for the curved effect to match the shape of the side baffles:


and here is hte piece after vinyl and carpet application:


here the trusswork belowt he floor. the stock navigation unit, whcih was located ont he passenger side trunk floor, was extended and relocated to accomodate the subbox:

here are some quick shots of hte grilles being made, all have a rabet around the cutout, and HD mesh grille attached:


and all of them carpted, whcih is a breathable carpet.

and a shot of the wiring and layout of hte amps below the floor, all wires secured, and heatshrink terminated.

so thats it...with some quick tuning by Leon, the car definetly have potential to do well at the upcoming iasca comps.
the stage and imaging is excellent i have to say, with VERY good center focus, and the stage is nice and high and wide.
tonality is also good, very smooth overall but with good detail, but it hink will get even better with more tuning time.
pop off all the grilles, and here is what you see.
two DIYMA 12s reside in side fiberglass enclsoures that are molded INTO the stock side carpeting (thanks to Josh at JML audio for giving me the idea and insipiration). each enclsoure is 1.5 cubfeet or so.
three zapco DC reference amps are in the two level fake floor. a DC1100.1 powers the diyma12s wtih 1100 watts, a dc650.6, sends 100 watts to each tweeter and 180 watts to the midrange, while a DC1000.4 sends a bridged 500 watts RMS to each midbass.
everyhting is trimmed in exterior matching vinyl, and my logo is on the front wall. so basicaly a fully boxed trunk install, the only piece of stock carpet you see is the one under the rear deck.
so here are some build pics of the trunk.
by FAR the most difficult part of the instlal was the side boxes. found out quickly that the stock "carpet" really doesnt take resin at all, and you cant just lay glass on it as it wont stick. so after some trial and error, i coated the stock carpet with a combination of resin and duraglass, let that stick, and then layed 10 layers of mat/cloth on the places where i wnated to have the back of hte subbox.
so here are the sides with all the backs done:
then the baffle was attached. the shape was used to it can accomodate the fake floor to come later, as i knew before hand that all three amps cannot fit on the same plane and still fit the diyma12 on the sides.
then, the mold was resined, and the box strengthend with 10 more layers of mat/cloth from inside of hte box. I cut the backs of these boxes and laid up the glass, and then joined the two pieces back together with glass. you can see in this picture where i put a line of sound proofing on the seams, even though they were already sealed up with cloth/mat from both sides.
then, i sanded and molded the edges to flow into the stock carpted shape:
and finally, the boxes were carpeted, whcih was a bit difficult as well due to the shape hehe, and the front red vinyl trim panel attached:
two quick shots of the wiring going into the DIYMA 12s:
so here is the floor piece that was curved. you can see here its been glassed and sanded smooth for the curved effect to match the shape of the side baffles:
and here is hte piece after vinyl and carpet application:
here the trusswork belowt he floor. the stock navigation unit, whcih was located ont he passenger side trunk floor, was extended and relocated to accomodate the subbox:
here are some quick shots of hte grilles being made, all have a rabet around the cutout, and HD mesh grille attached:
and all of them carpted, whcih is a breathable carpet.
and a shot of the wiring and layout of hte amps below the floor, all wires secured, and heatshrink terminated.
so thats it...with some quick tuning by Leon, the car definetly have potential to do well at the upcoming iasca comps.
the stage and imaging is excellent i have to say, with VERY good center focus, and the stage is nice and high and wide.
tonality is also good, very smooth overall but with good detail, but it hink will get even better with more tuning time.
Last edited by nf3d0149ab; 05-18-2009 at 12:57 AM.
05-18-2009, 10:57 AM
#66
Advanced
Join Date: Jun 2008
Location: columbia, South Carolina
Age: 39
Posts: 98
Likes: 0
Received 0 Likes
on
0 Posts
hell yea thats clean as hell. I defiently like all the covers in the trunk. To hide / protect all that equipment. The Kickpanels turned out really nice. Only question i have is were all the wires ( power,rcas and speaker) ran together in that bundle. Ive always heard its best to run signal wires away from power cables and such to reduce the chance of interferance.. just wonderin tho..I know i would hate it if that car came into my body shop and needed work done on the doors.. clean install
Last edited by s10httnswtchs; 05-18-2009 at 11:00 AM.
05-18-2009, 03:09 PM
#67
hell yea thats clean as hell. I defiently like all the covers in the trunk. To hide / protect all that equipment. The Kickpanels turned out really nice. Only question i have is were all the wires ( power,rcas and speaker) ran together in that bundle. Ive always heard its best to run signal wires away from power cables and such to reduce the chance of interferance.. just wonderin tho..I know i would hate it if that car came into my body shop and needed work done on the doors.. clean install
You can just follow that and post in his thread...

 05-27-2009, 08:27 PM
#73
Three Wheelin'
Join Date: Feb 2009
Location: Mooresville NC
Age: 39
Posts: 1,942
Likes: 0
Received 11 Likes
on
10 Posts
well damn thats pretty cool then. I cant get mine out unless i take the box out but I carry a screw driver to detach the bracket and just pull the box right out takes like 2 mins
05-27-2009, 09:05 PM
#74
2000 WDP
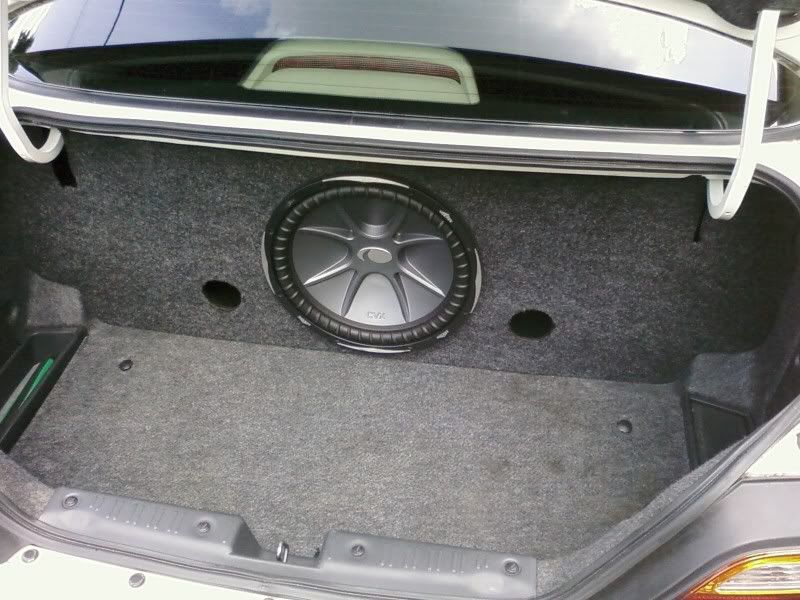
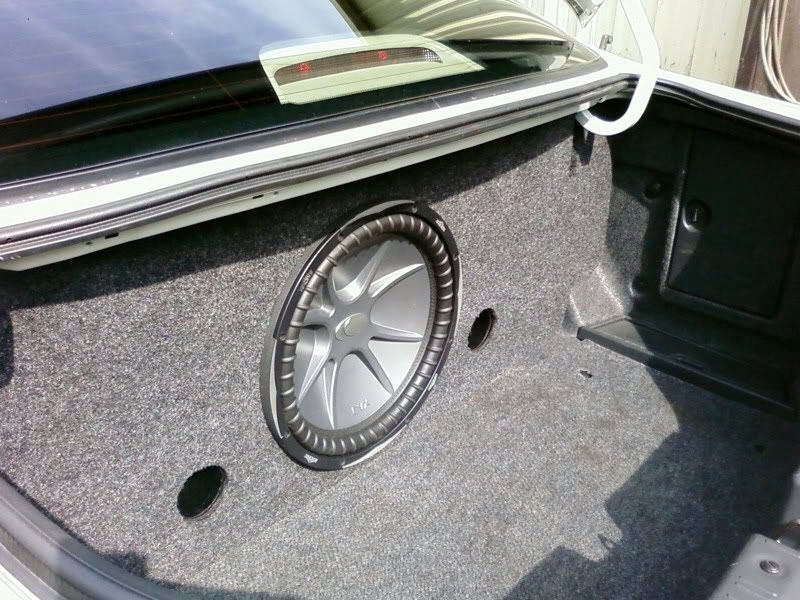
Yea i got tired of doin that with mine so just got bored and decided to trim it out and fix the floor so i can get it out with it all in and still have about 3 1/3 cu.ft. too for the sub.
04-28-2010, 04:34 PM
#78
Three Wheelin'
Join Date: Feb 2009
Location: Mooresville NC
Age: 39
Posts: 1,942
Likes: 0
Received 11 Likes
on
10 Posts
Ok well im working on a box for a guy that works with my wife. It's goin in a 99 jeek cherokee getting 3 sundown audio e8's with a audiopipe ap10001d box is 40" w 14"h 14"d 2.2 cubes tuned to 32. Should beat pretty hard. Gonna be painted coal mine charcoal.