Official speaker box build thread
 04-21-2009, 12:04 PM
#1
Senior Moderator
Regional Coordinator
(Mid-Atlantic)
Regional Coordinator
(Mid-Atlantic)
Thread Starter
iTrader: (6)
Official speaker box build thread
Since we have added the new audio/electronic forum, post your speaker boxes, plans, what you're working on here to share.
 04-21-2009, 12:22 PM
#2
Drifting
Good idea Chris. Right now, I'm working on a design for an SPL box for my RD. I'm going to be roughly doubling the port area, and raising the tuning a little (to ~36hz). I'm also going to be doing some SPL secrets to the box to try and get the absolute most out of it... I'll post the current design when I get home. I'm trying to get up into the 141-142 db range, and catch the dude that beat me (142.9).
04-21-2009, 12:27 PM
#3
Three Wheelin'
Join Date: Feb 2009
Location: Mooresville NC
Age: 39
Posts: 1,942
Likes: 0
Received 11 Likes
on
10 Posts
yea good idea. Well I am in the process of cutting out the mounting holes for the subs. Soon it's off to the hardware store to get some nuts and bolts to make terminals.
04-21-2009, 12:31 PM
#4
Drifting
Any specs on the box you're building?
04-21-2009, 12:36 PM
#5
Three Wheelin'
Join Date: Feb 2009
Location: Mooresville NC
Age: 39
Posts: 1,942
Likes: 0
Received 11 Likes
on
10 Posts
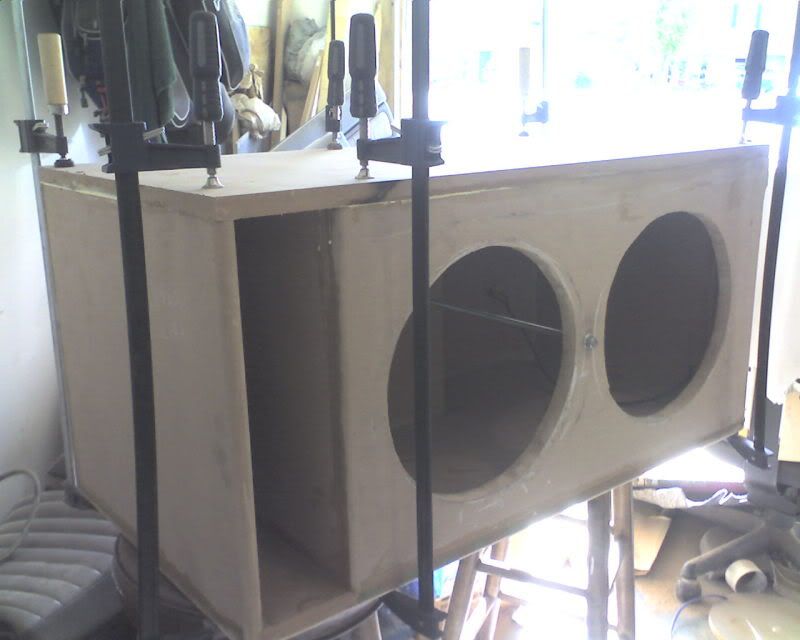
yea using the re 33 wide 16.5 high 18 deep, 4" wide port and a 15" long l2 port wall. 60" of port 3.285 cubes tuned at 34.4. Hopefully should slap pretty hard. I used 45's in the corners, rounding the edges. So far no bracing I am thinking of using all thread. But have not decided yet as the top is not yet on. Watcha think? I dont wanna put a bunch of 2x2's in there taking up cubes. And yea I did the speaker wire through port thing last time, didn't like the way it looked.
04-21-2009, 12:51 PM
#6
Drifting
It sounds like you already have it built, but I'd suggest making the box shorter. I know it sucks, but when I was testing this weekend, I found out that most of our sound travels through the rear deck, rather than the rear seats like would seem. To back this statement up, when I put my rear speakers/baffles in, I lost 1.5db in score...
My new box is going to be 34"w x 15"h x ?? (probably 16-17")d, with 3-3.5" wide port.
Another thing I just learned is that you should keep your subs as close to the port exit as possible (if you don't mind the astetics). So maybe try that. I'd also do a double baffle, and any other sides you can double up, rather than doing the internal bracing. All thread is probably the best option when you do have to go inside the box, though. Another thought is to resin the inside of the box. I'm going to, and it should help with the flow inside the box... Just some little tricks I've picked up from CACO. I have more I can pm you over there, if you're interested...
04-21-2009, 01:15 PM
#7
Three Wheelin'
Join Date: Feb 2009
Location: Mooresville NC
Age: 39
Posts: 1,942
Likes: 0
Received 11 Likes
on
10 Posts
34 how are you fitting that in there 33 was a squeeze, well to late. It should be fine. Mostly using it as a daily pounder. And maybe a comp here and there. I'll most likely sell it soon as I always do. Sure hit me up over there always willing to hear more stuff. I put dynamat on the deck lid to help keep rattle down.
Trending Topics
04-21-2009, 01:17 PM
#8
Drifting
I thought that 34" was the max width? Well, maybe I should go re-measure. I know my current box is 32", and there's a bit of clearance with it. Maybe 34" is too big... I'll check today, but I was really trying to keep my depth down as much as possible. Either way, should turn out fun.
I see you in here Chris, and now I understand why this sub-forum was added...
I see you in here Chris, and now I understand why this sub-forum was added...
04-21-2009, 01:40 PM
#9
Three Wheelin'
Join Date: Feb 2009
Location: Mooresville NC
Age: 39
Posts: 1,942
Likes: 0
Received 11 Likes
on
10 Posts
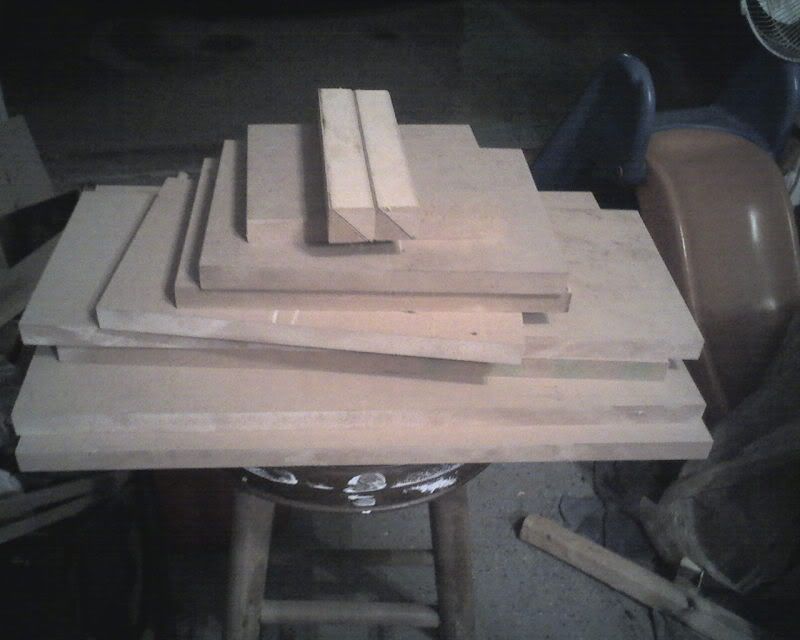
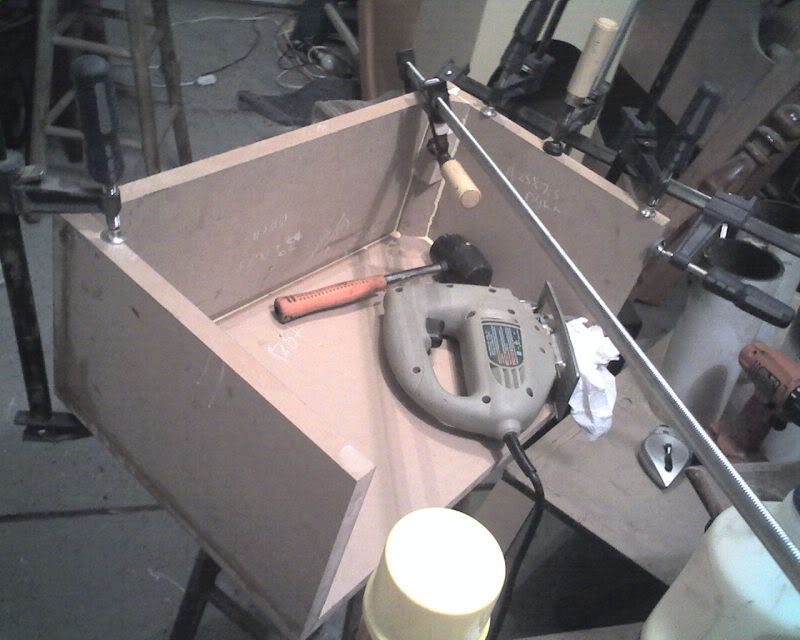
Well 33.5 may work. But if 34 will I'll be doing that next time around. Maybe even 33.5. But I didnt want a pure hassle getting the box out. It comes out very easy as is. Well I am also just about finished up dynamating everything. I put some on roof, door panels. trunk lid, deck lid, and all in trunk walls and some on the floor of trunk. SHould help out some. I could tell a diff with the old 15 and just having the trunk lid done. Well here it is so far, all 45's done. Btw where the clamp is thats just another piece of wood so I can get pressure on the bottom.
Last edited by on1wheel01; 04-21-2009 at 01:43 PM.
04-21-2009, 01:49 PM
#10
Drifting
Something to keep in mind when doing the 45 in the port, is the reason it's there. It's there to keep the port the same width all the way across. So another thing you can/should do is to cut a 45 on the back of the port wall itself. It looks like your port width is pretty consistant, but just an fyi for the future... I'll check my photobucket when I get home to see if I have any pics of it when I did my build. Keep up the good work, and I can't wait to see some vids of these babies shaking up the CL...
04-21-2009, 04:10 PM
#12
Three Wheelin'
Join Date: Feb 2009
Location: Mooresville NC
Age: 39
Posts: 1,942
Likes: 0
Received 11 Likes
on
10 Posts
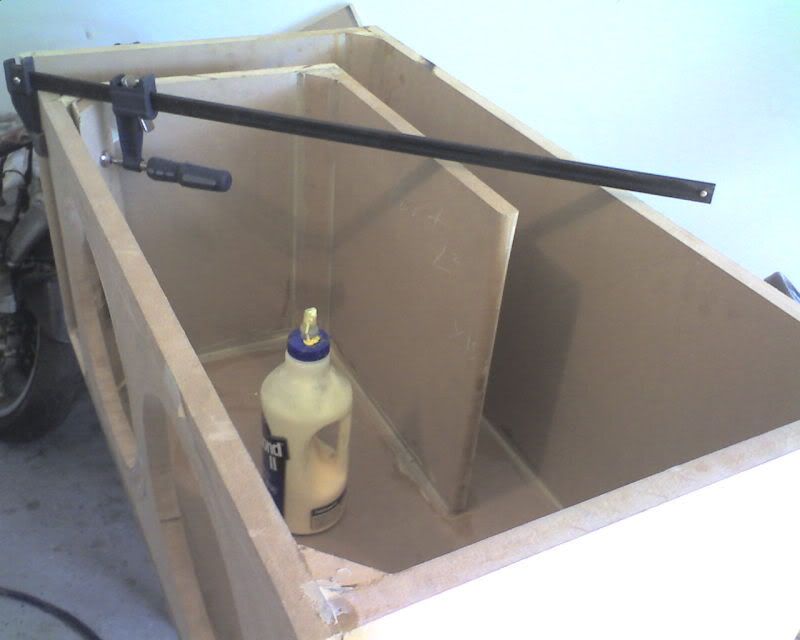
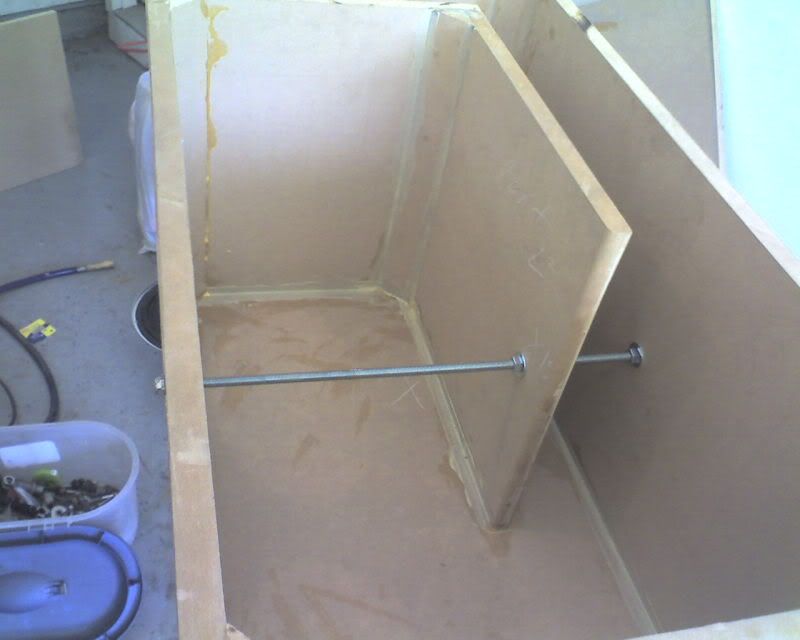
Well just went and picked up some all thread, I wanted to flush the front bolt but I decided to leave it be to not weaken the wood, from what I have read this really makes the box stronger using this stuff.. Next is to put in the nut and bolt terminals just have to decide to put them on the back or side of box. I'm thinking back because of room
04-21-2009, 05:15 PM
#14
Three Wheelin'
Join Date: Feb 2009
Location: Mooresville NC
Age: 39
Posts: 1,942
Likes: 0
Received 11 Likes
on
10 Posts
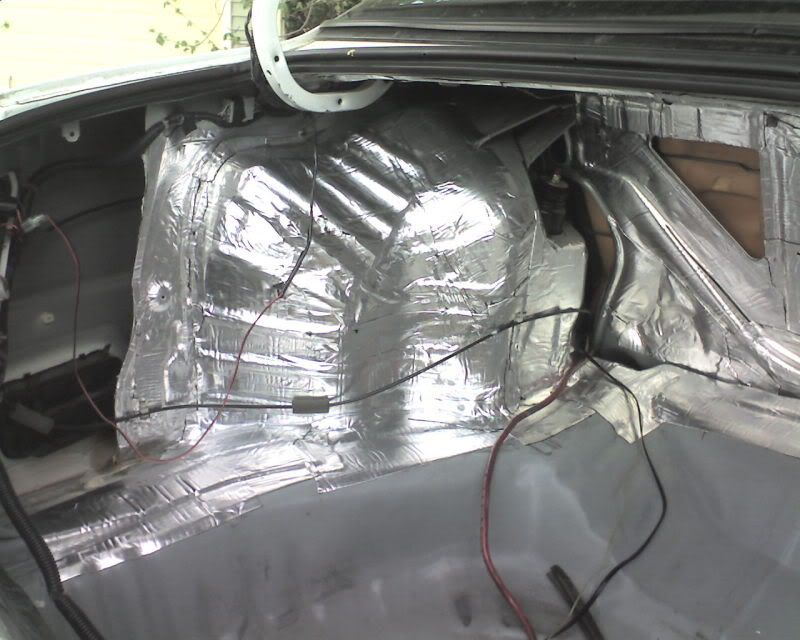
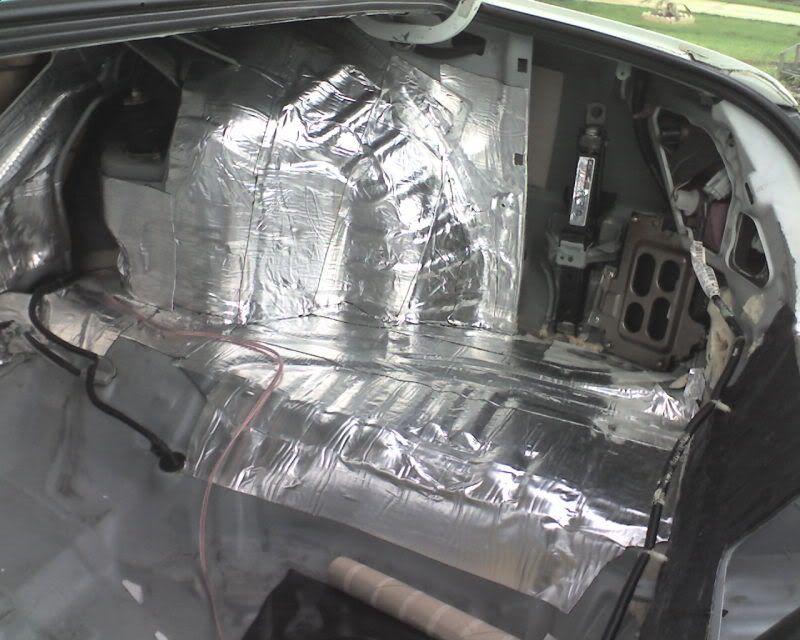
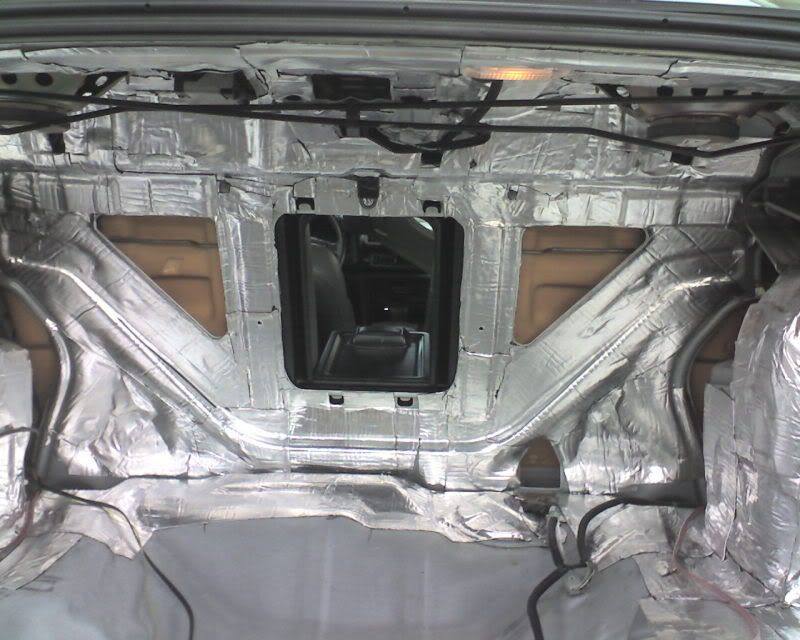
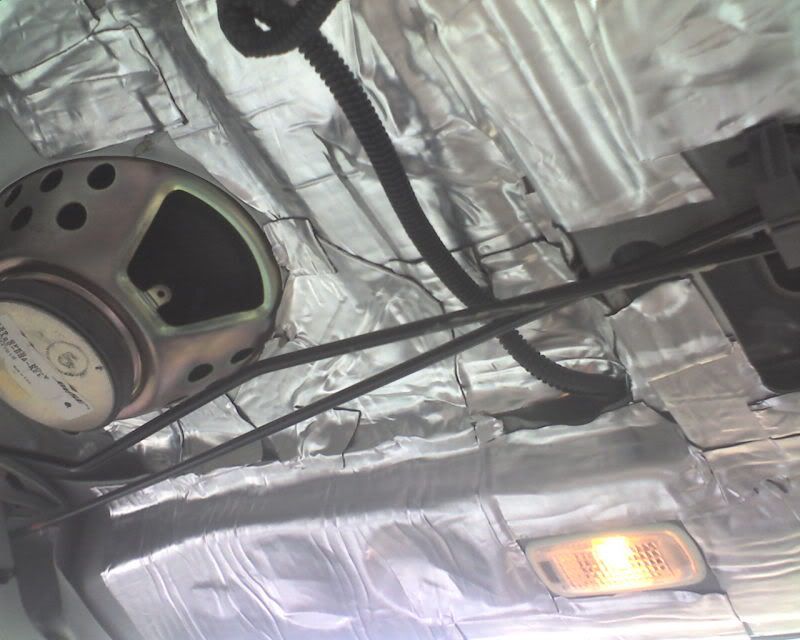
From a request here is a few shots of the sound mat. Keep in mind it's not yet complete.
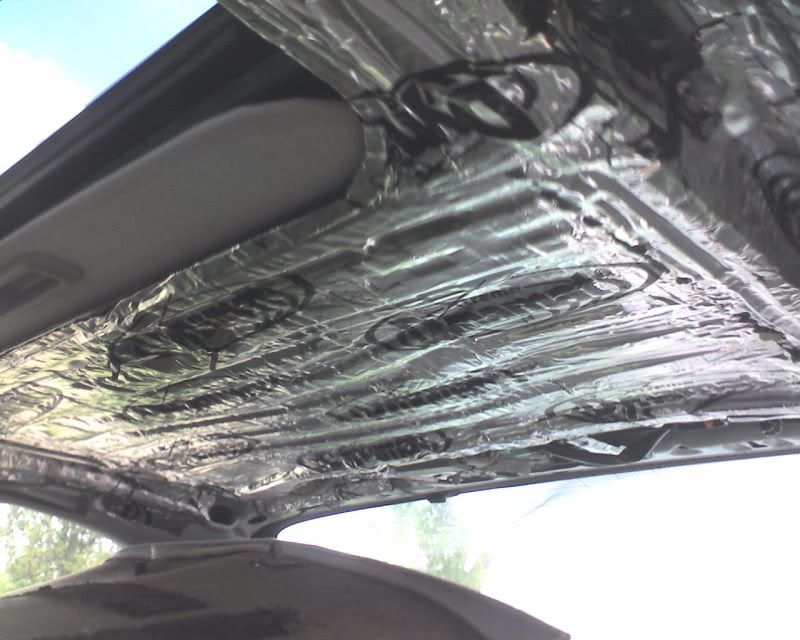
And here is one of the box so far, all that is left is to finish rounding edges sanding and paint. Subs will be here tomorrow. Ahh I'm excited.
Yea I don't mind the trunk deing useless. I never us it anyways
And here is one of the box so far, all that is left is to finish rounding edges sanding and paint. Subs will be here tomorrow. Ahh I'm excited.
Yea I don't mind the trunk deing useless. I never us it anyways
04-21-2009, 05:53 PM
#16
Three Wheelin'
Join Date: Feb 2009
Location: Mooresville NC
Age: 39
Posts: 1,942
Likes: 0
Received 11 Likes
on
10 Posts
Well for the trunk lid and rt door I used cascade v max which i picked up from ca.com for 50 shipped for 5 sheets 13x30. For the roof, and lt door I found 3 sheets of dynamat extreme 18x33 off craigs list for 40. And I got 2 rolls of peel and seal from lowes 6"x25' for 15 a roll. It did all of my trunk. Also I used 4 cans of expanding foam on the pid and trunk area. I still have half a sheet of dynamat and cascade and a tiny bit of peel/ seal.

 04-21-2009, 10:07 PM
#22
Paint job looks nice on the enclosure, on1wheel. What kind of primer did you use?
I'm going to be doing a full build log (from the building of the woofer, enclosure, deadening, amp rack, etc...) soon. It usually takes me a while to get everything done to my liking, and of course it seems like I NEVER have a full day to get the work started.
I'm going to be running a '05 RE SeXXX off of 1000-1200w in a 2-2.25^ft enclosure tuned around 30-32hz. I can't wait to finally get some bass in my Type-S...I caught the performance bug for the first time in a WHILE
04-21-2009, 11:42 PM
#24
Three Wheelin'
Join Date: Feb 2009
Location: Mooresville NC
Age: 39
Posts: 1,942
Likes: 0
Received 11 Likes
on
10 Posts
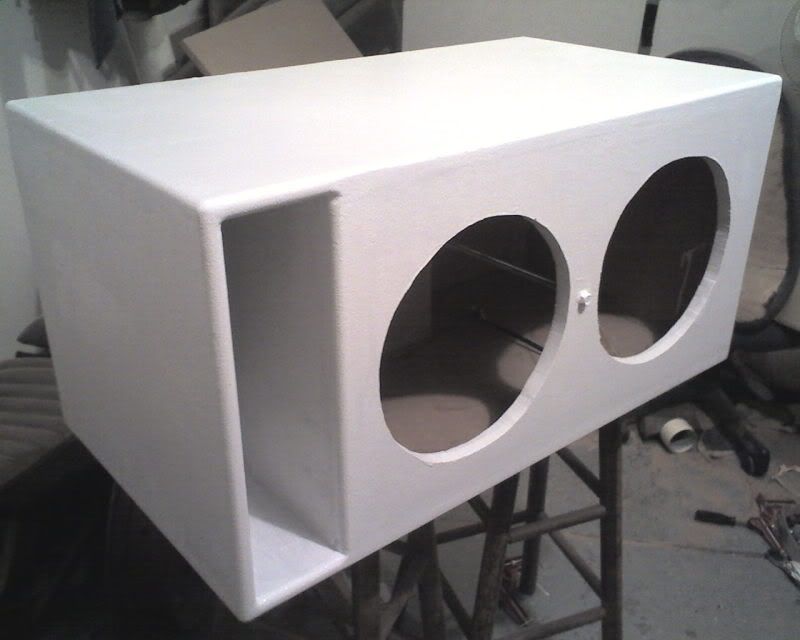
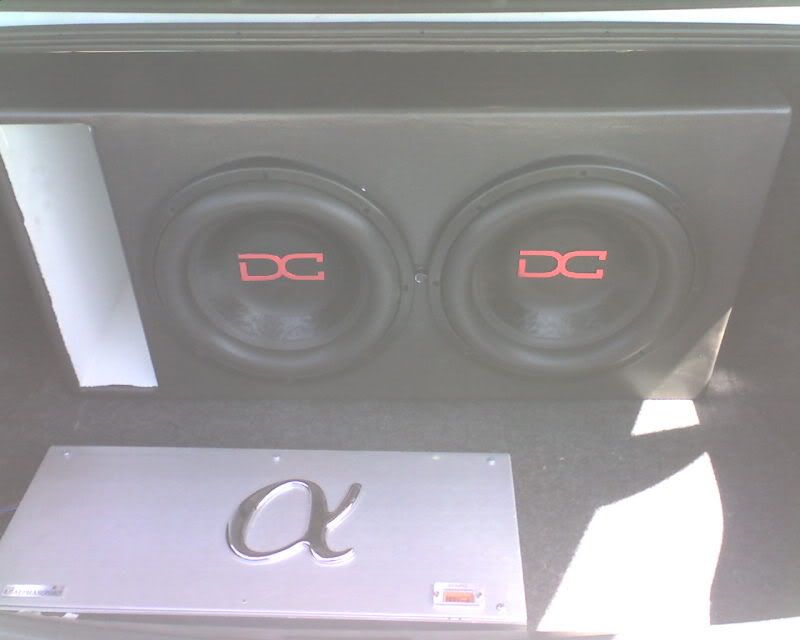
Here is a sneak peak of the (near)finished product. I'm running out of paint(but hey one little can from wal mart has done 2 boxes not to shabby for $7). I also have decided to leave the port primer white, kinda going with the int/ext match kinda thing. I like it. Still needs a few more coats of gray but is goin strong should be dry for tomorrow for the install.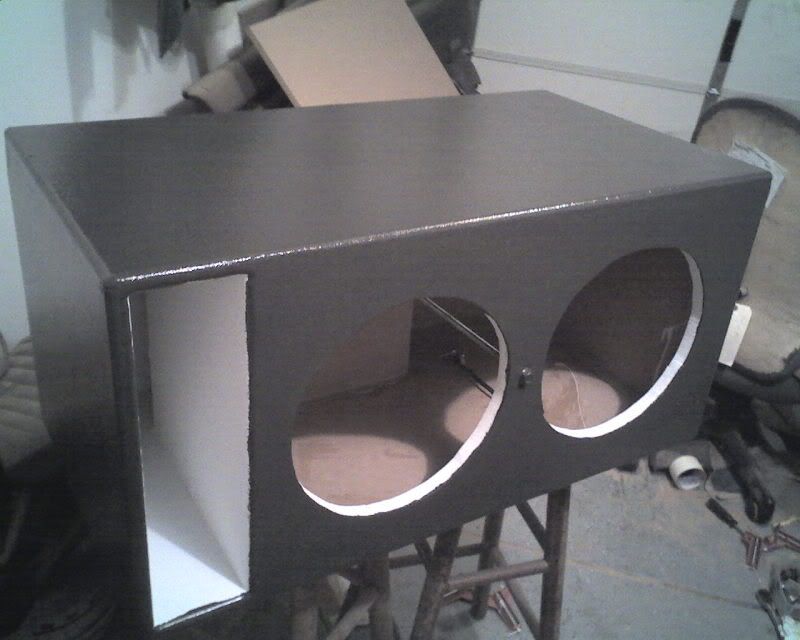
Last edited by on1wheel01; 04-21-2009 at 11:46 PM.

 04-22-2009, 07:50 PM
#30
Three Wheelin'
Join Date: Feb 2009
Location: Mooresville NC
Age: 39
Posts: 1,942
Likes: 0
Received 11 Likes
on
10 Posts
yea I'll make some tomorrow. Gotta go job hunting I lost my position on the team I was on at work because a pallet slipped off my forks on the lift when I was pickin it up. Still gotta job just not the gravy I had. I had to go buy a different fuse set up as my cheapo ebay $11 circuit breaker kept popping. So went and got one of those huge fuse holders with a 250 fuse for $25 local(not to bad a price). Now I can beat all day with no probs. Also I have located a kinetok 1800 for 100 locally it's resting at 12.5 and is a year old. so should be good. I can tell im still dropping voltage as the volume drops slightly when beating for awhile, so hopefully the batt will help out..
04-22-2009, 08:17 PM
#31
Drifting
You planning on adding the battery in the front or back? If you're thinking the front, you're going to have to get creative in mounting/wiring... The terminals are backwards from what we need for the 1st gen CL... The biggest bat I've found that has the correct terminal placement is the Exstatic Batcap 2000...

 04-23-2009, 08:44 AM
#39
Senior Moderator
05-05-2009, 02:28 AM
#40
Three Wheelin'
Join Date: Feb 2009
Location: Mooresville NC
Age: 39
Posts: 1,942
Likes: 0
Received 11 Likes
on
10 Posts
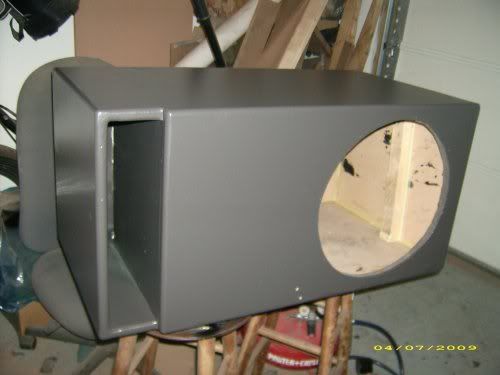
Well here is one I'm building for a friend It's goin in a 96 tacoma extended cab behind the passenger front seat. It's .8 of a cube tuned at 34hz. It's for a kicker c10. I tried to get him to let me do some custom shyt but it wasnt happening. He currently has a bass tube so it should be a huge upgrade. Will have rounded edges and has 45's in the corners. Here is the the progress so far.