MISC: 03 Toyota 4Runner Full Audio Makeover
 03-15-2010, 07:18 PM
#1
Senior Moderator
Regional Coordinator
(Mid-Atlantic)
Regional Coordinator
(Mid-Atlantic)
Thread Starter
iTrader: (6)
03 Toyota 4Runner Full Audio Makeover
Well I've taken on the not so easy task of replacing all 10 speakers in my Daily Driver. The 4Runner has a 10 speaker JBL Synthesis sound system, and just about every paper cone speaker is blown. When I bought the car it had a few blown speakers, but these speakers are such junk that they basically all have blown and pop and sound like ass. The scope of this project is to replace the following.
4 - Tweeters (2 in front doors, 2 in trunk/rear pillars either .75" or 1")
1 - Center Channel Speakers (Belived to be a 3.5" but not confirmed)
2 - 6x9 Front Door Speakers (Replaced with Alpine Type S 6x9's Coaxials)
2 - 6.5" Rear Door Speakers (Replaced with Alpine Type S 6.5" Coaxials)
1 - Rear Amped Subwoofer (Believed to be 8" replaced with a JL 8w3)
1 - New amp for JL Subwoofer.
This project will not be done all at once, but in stages. This is a learning process as there is hardly any documentation on this speaker system and I am too cheap to buy a service manual just for audio work. But I will update this thread as I go. I do a lot of audio work on my 1G CL, but this is the first attempt at any audio work on my truck. Hope you guys enjoy, and I look for opinions and input as I go.
 03-15-2010, 07:32 PM
#2
Senior Moderator
Regional Coordinator
(Mid-Atlantic)
Regional Coordinator
(Mid-Atlantic)
Thread Starter
iTrader: (6)
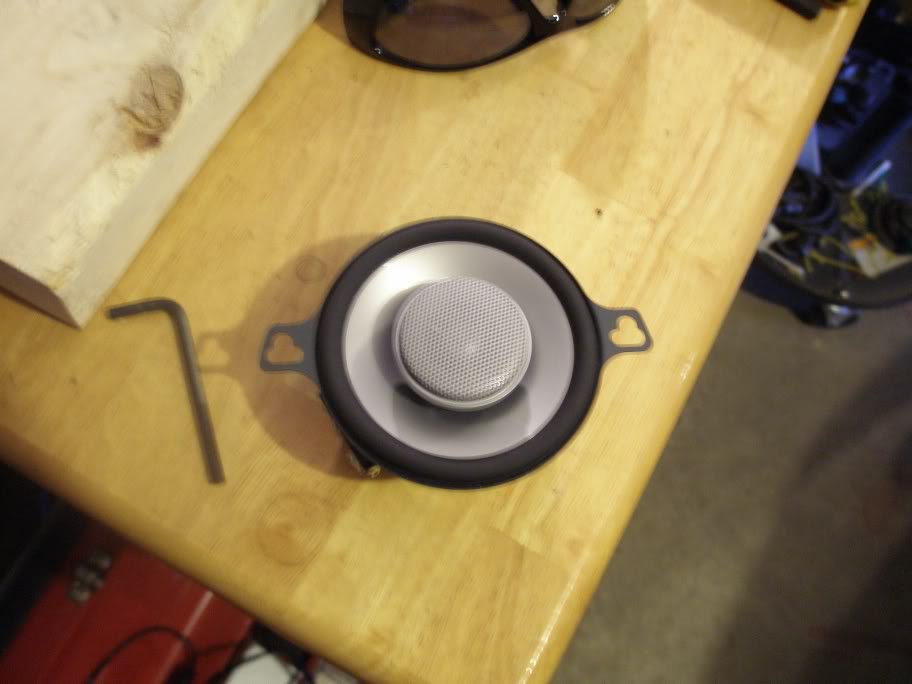
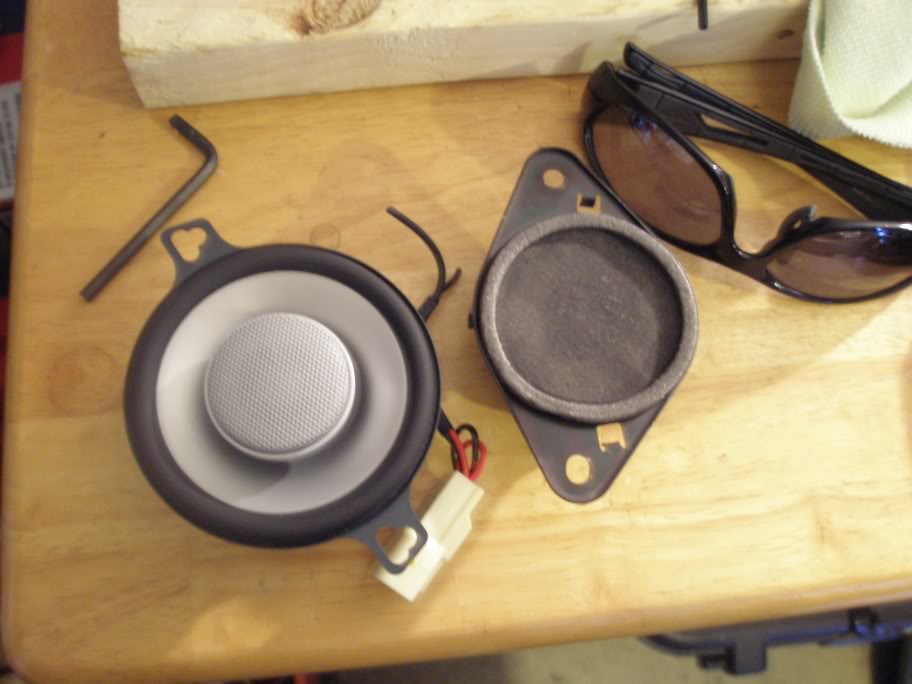
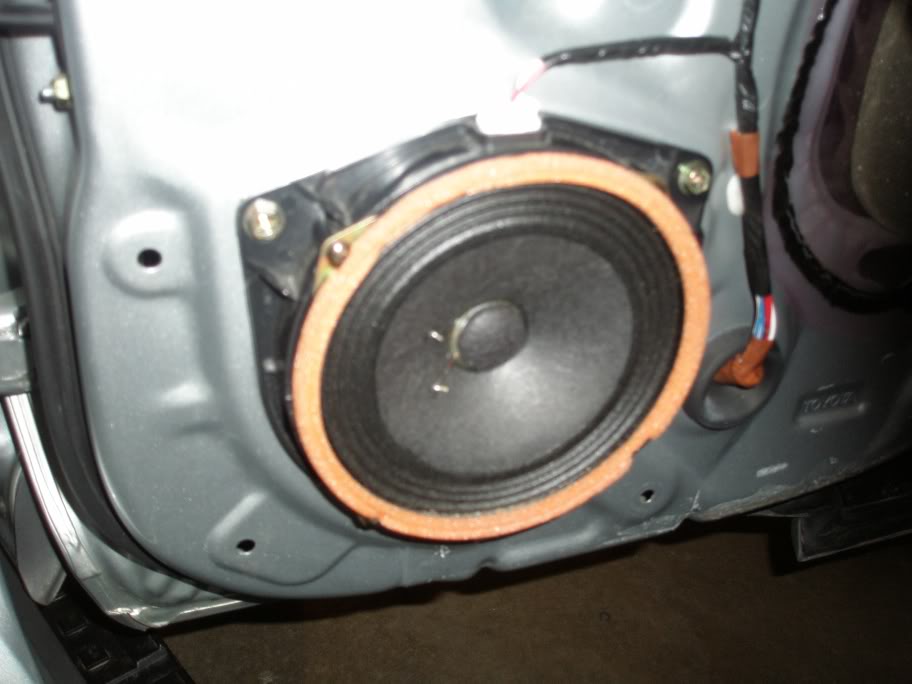
I initially started with the rear doors that have only 1 speaker figuring this would be easier. However out of the 2 sets of speaker adapters that I got from an ebay seller, neither set of adapters worked for the rear doors, and I will have to either create my own adapter or modify the stock speaker housings, which will be a challenge as the speakers are glued into the speaker housings, and the speaker housings don't show up on a parts list, you have to buy the whole speaker assembly.
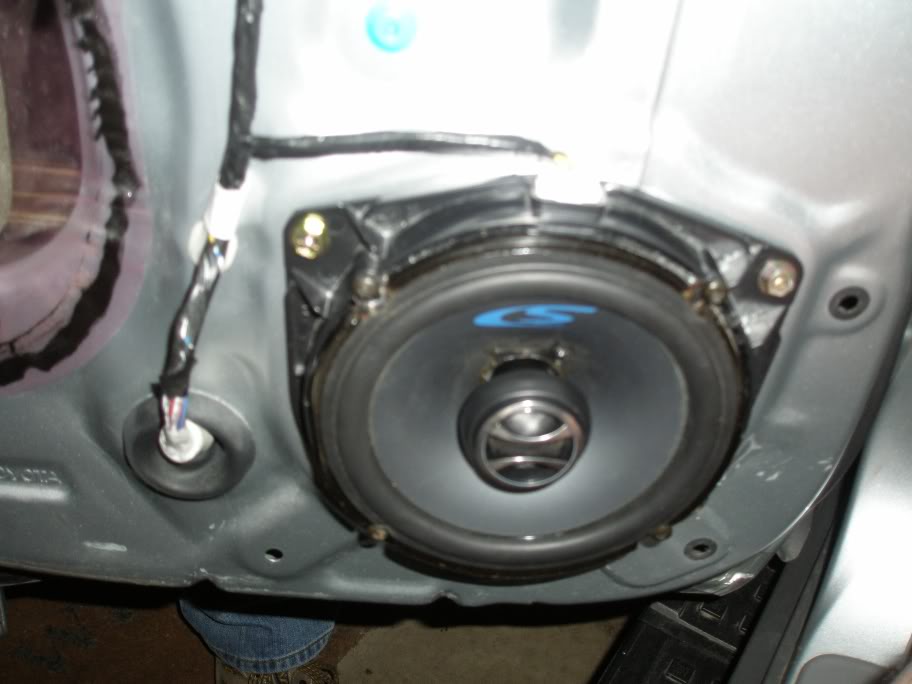
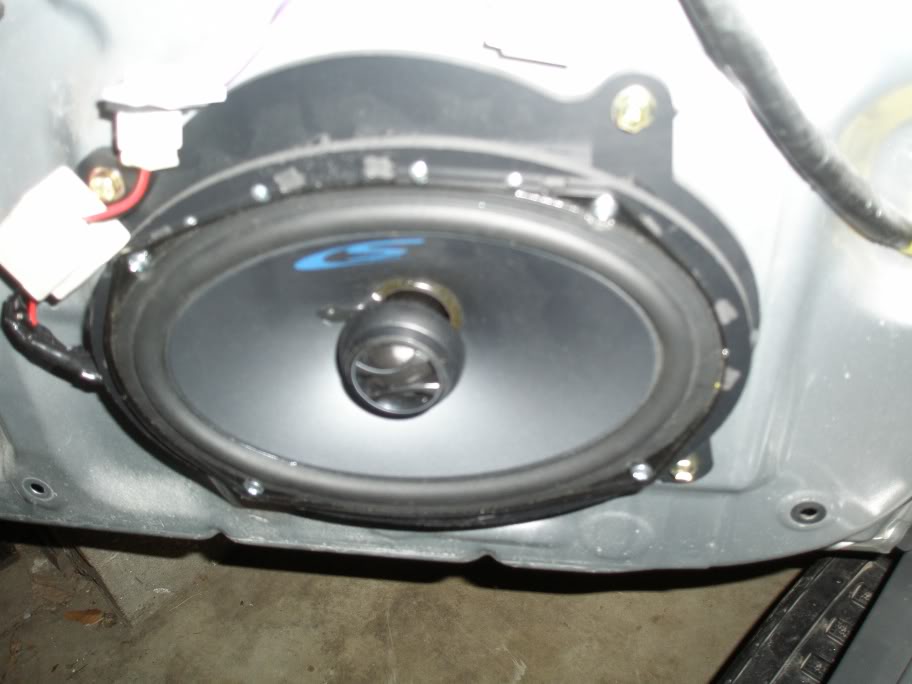
So I moved on to the front, I picked up a set of Alpine Type S 6x9's and 6.5's from gnate, another member on this forum. I didn't order tweeters for the front and rear because I wanted to get in under the door panel and see what I was dealing with first, but they're next on the list. So to start off, I removed the stock speakers, and wiring, and using 2 adapters that I got off of ebay, I installed new 6x9's and transfered the stock wiring over to the new 6x9. All doors will be dampened at some point with some dynamat, but I have zero vibrations and zero road noise anyway.
Driver Door
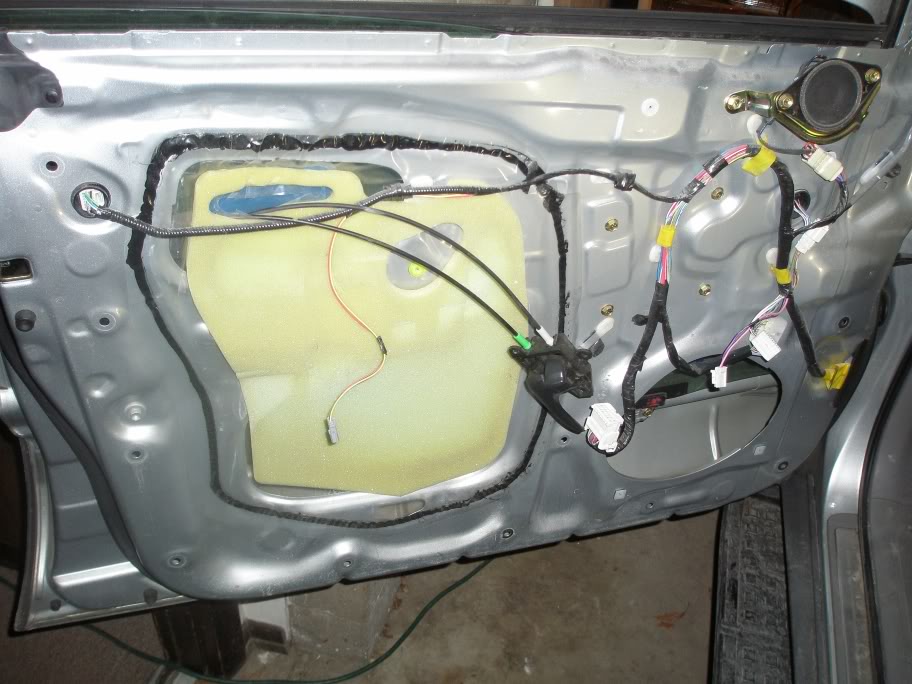
Passenger Door
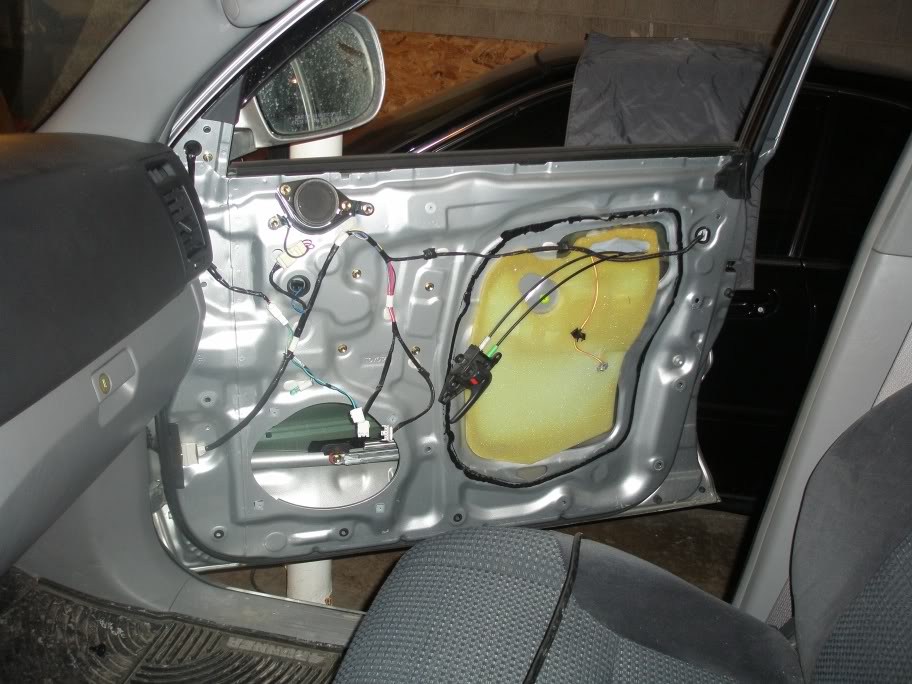
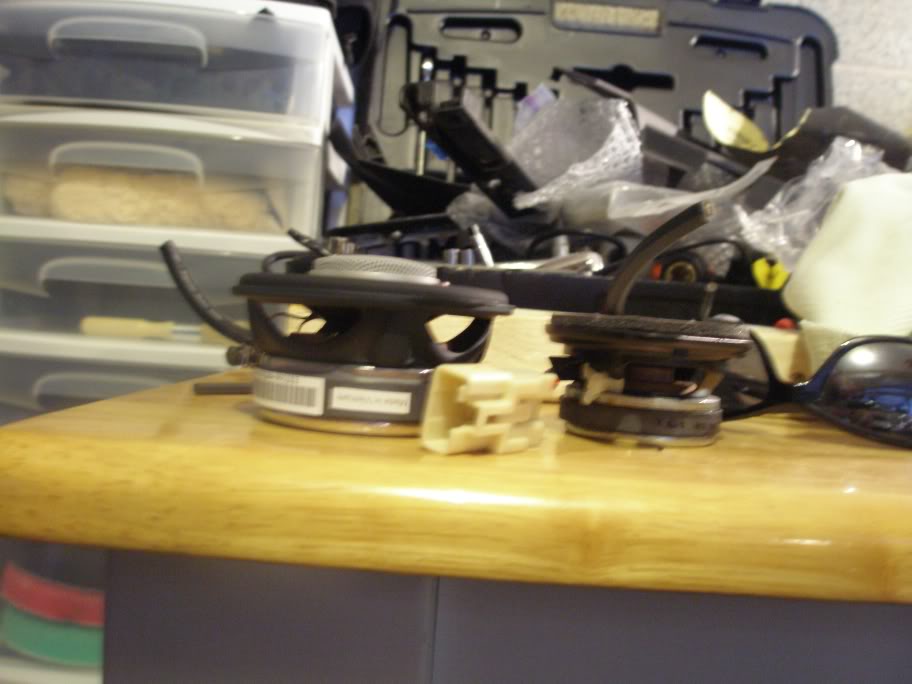
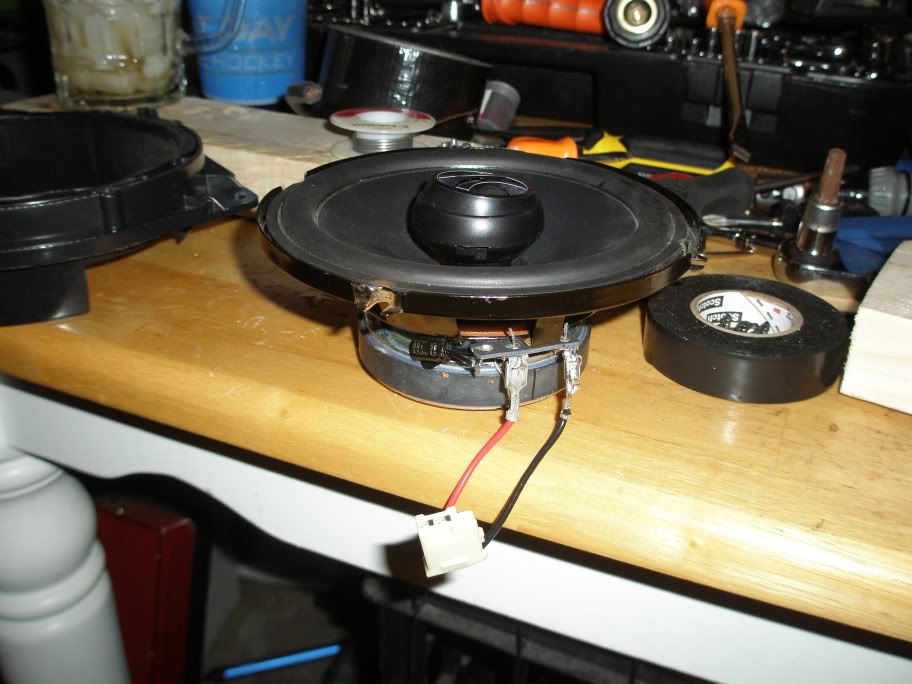
Old vs. New, you can see the soldering that had to be done to the stock plugs
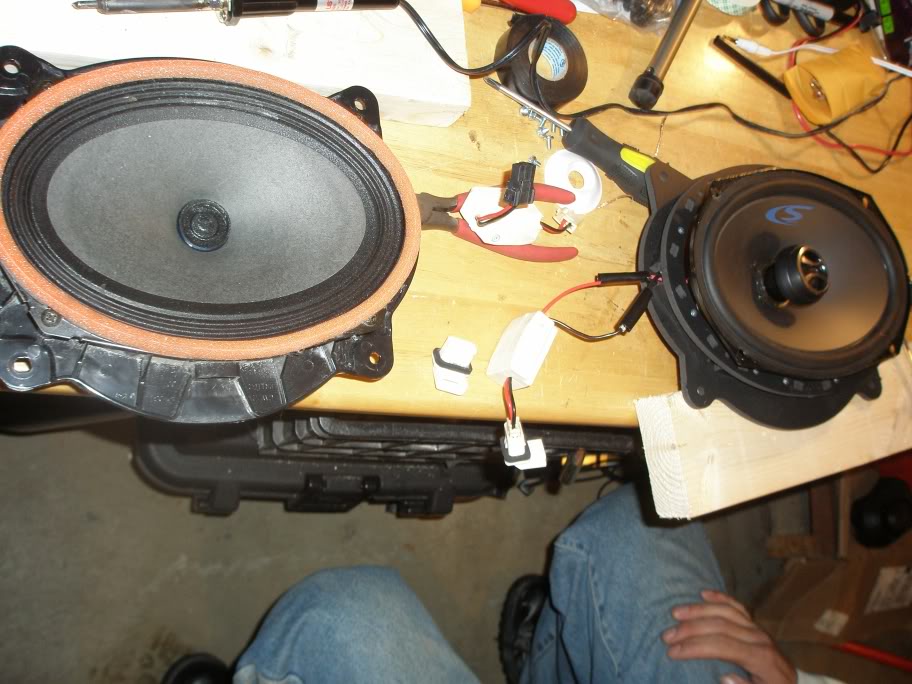
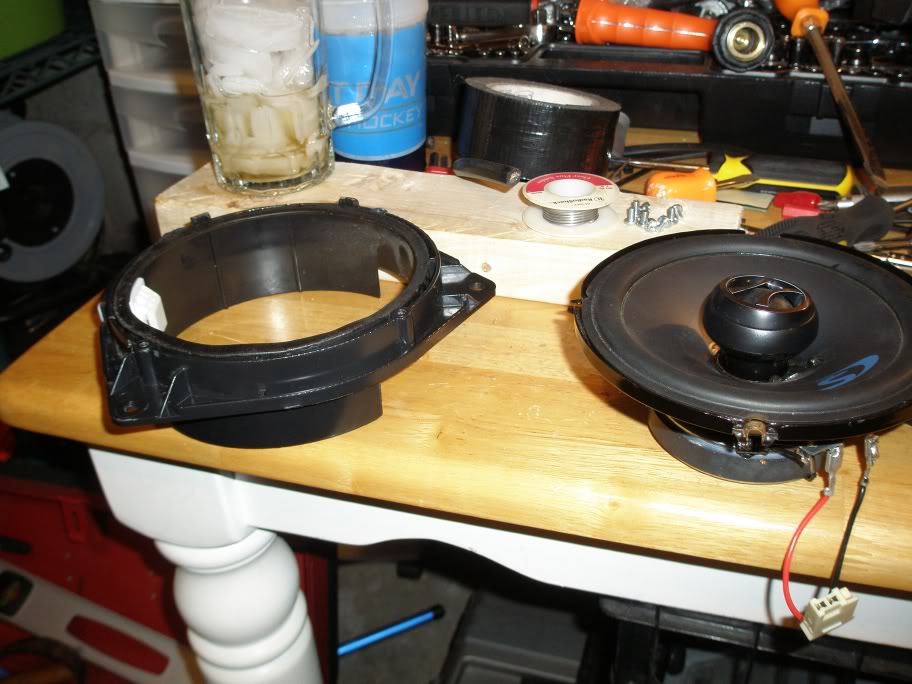
New 6x9's getting ready to go in

Both stock 6x9's had blown surrounds and made annoying vibrating sounds when they hit, these new Type S's are nowhere near their max wattage and should be in no danger of blowing. Once installed in the car, everyone that's heard the stereo playing outside the truck swears that I have a set of 10's in the trunk because the bass is crisp and very clean. This is just the new 6x9's and the mini sub in the trunk. Overall, I'm happy with the improved sound, however the blown tweeters up front and in the center channel annoy me that much more now because the 6x9's sound so clean now, so they will be next on the list while I figure out what to do with the back door speakers. Thanks for looking, I will post another update probably this weekend.
So I moved on to the front, I picked up a set of Alpine Type S 6x9's and 6.5's from gnate, another member on this forum. I didn't order tweeters for the front and rear because I wanted to get in under the door panel and see what I was dealing with first, but they're next on the list. So to start off, I removed the stock speakers, and wiring, and using 2 adapters that I got off of ebay, I installed new 6x9's and transfered the stock wiring over to the new 6x9. All doors will be dampened at some point with some dynamat, but I have zero vibrations and zero road noise anyway.
Driver Door
Passenger Door
Old vs. New, you can see the soldering that had to be done to the stock plugs
New 6x9's getting ready to go in
Both stock 6x9's had blown surrounds and made annoying vibrating sounds when they hit, these new Type S's are nowhere near their max wattage and should be in no danger of blowing. Once installed in the car, everyone that's heard the stereo playing outside the truck swears that I have a set of 10's in the trunk because the bass is crisp and very clean. This is just the new 6x9's and the mini sub in the trunk. Overall, I'm happy with the improved sound, however the blown tweeters up front and in the center channel annoy me that much more now because the 6x9's sound so clean now, so they will be next on the list while I figure out what to do with the back door speakers. Thanks for looking, I will post another update probably this weekend.
03-23-2010, 11:43 AM
#3
Senior Moderator
Regional Coordinator
(Mid-Atlantic)
Regional Coordinator
(Mid-Atlantic)
Thread Starter
iTrader: (6)
Got another set of adapters for the 6.5's, hoping these ones will work, if not I will have to fab something
03-23-2010, 12:17 PM
#4
Drifting
You gonna do any deadening or anything to seal the doors Chris? Looking at the size of the hole in the doors is scary... I thought our CLs were bad about that, but man, that hole is massive... Not so good for the SQ of the final product.
03-31-2010, 11:42 AM
#5
Senior Moderator
Regional Coordinator
(Mid-Atlantic)
Regional Coordinator
(Mid-Atlantic)
Thread Starter
iTrader: (6)
Yeah, deadening is on the list after I replace all 10 speakers. Finally found some custom mounts for the 4 tweeters, and also ordered a center channel speaker that's going to need a custom made mount, probably just going to hack up the original center channel since it's blown and reuse that mount. The 4 other ones I did order mounts for however
This job has turned into far more than I bargained for but it will be so worth it in the end, I will have some update pics hopefully this weekend.
This job has turned into far more than I bargained for but it will be so worth it in the end, I will have some update pics hopefully this weekend.
Last edited by 97BlackAckCL; 03-31-2010 at 11:45 AM.
04-03-2010, 11:22 PM
#6
Senior Moderator
Regional Coordinator
(Mid-Atlantic)
Regional Coordinator
(Mid-Atlantic)
Thread Starter
iTrader: (6)
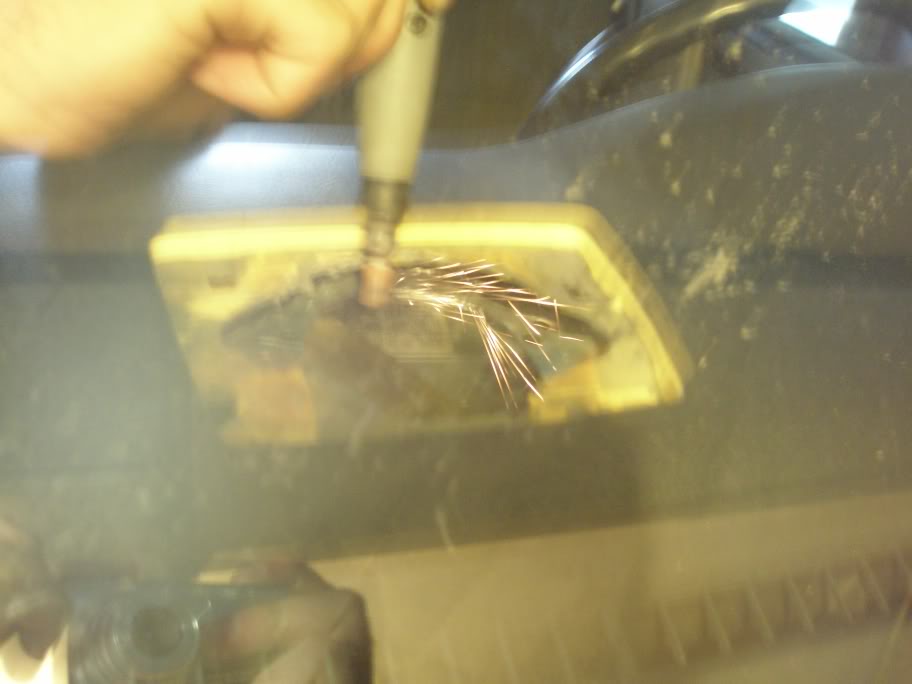
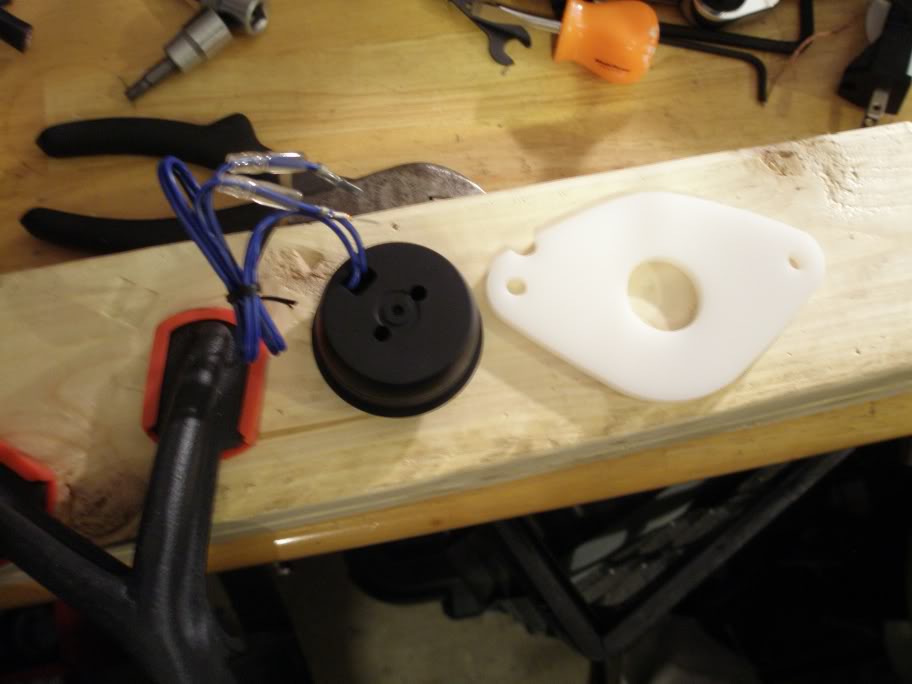
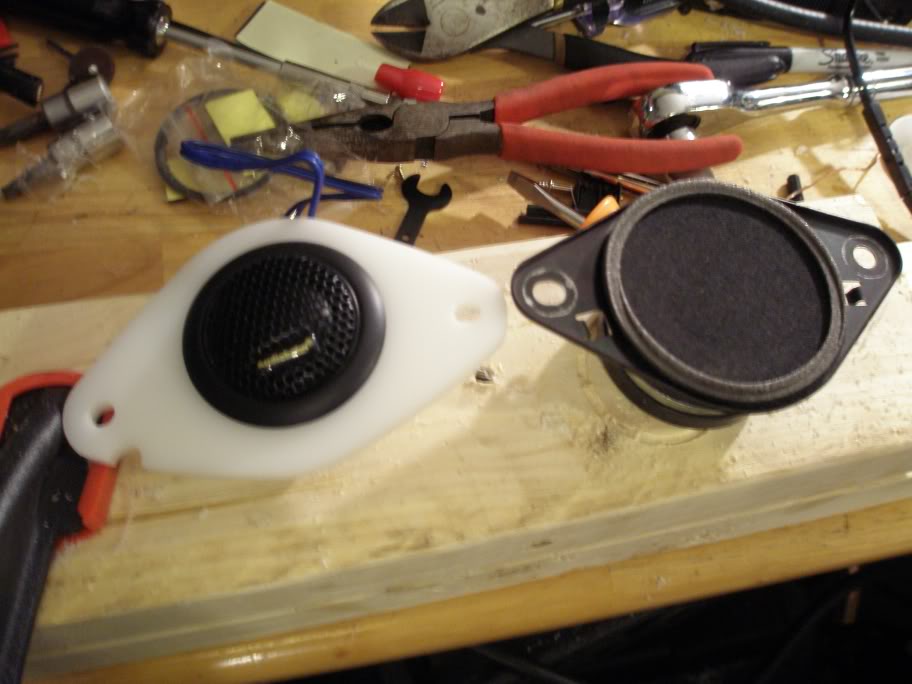
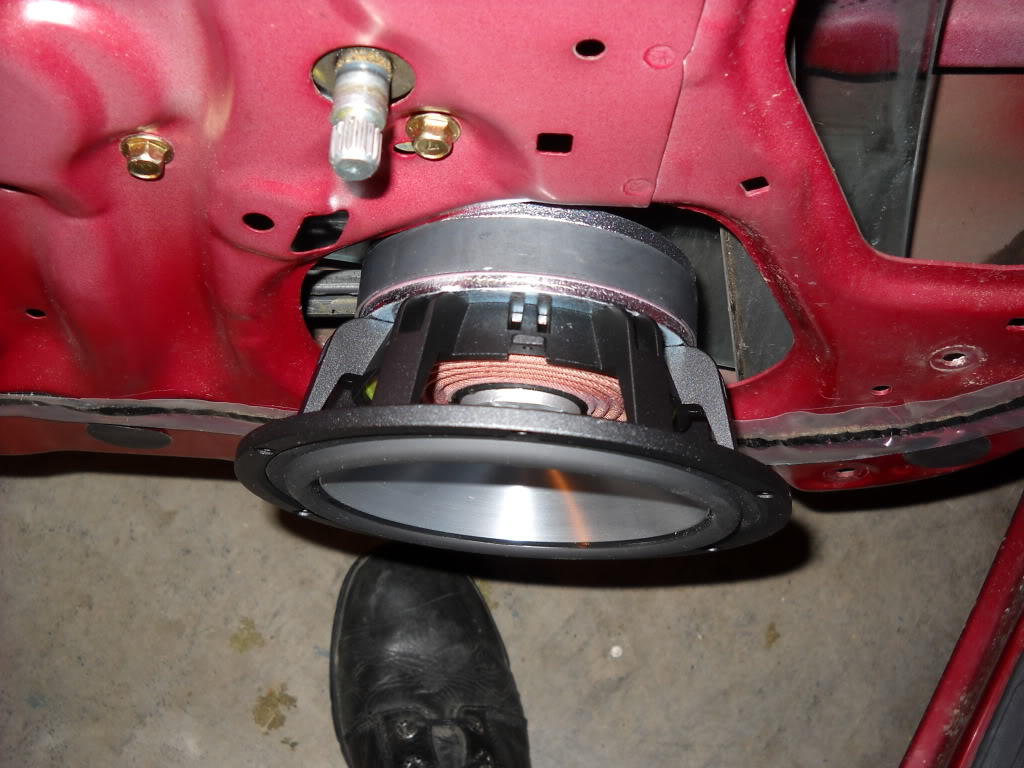
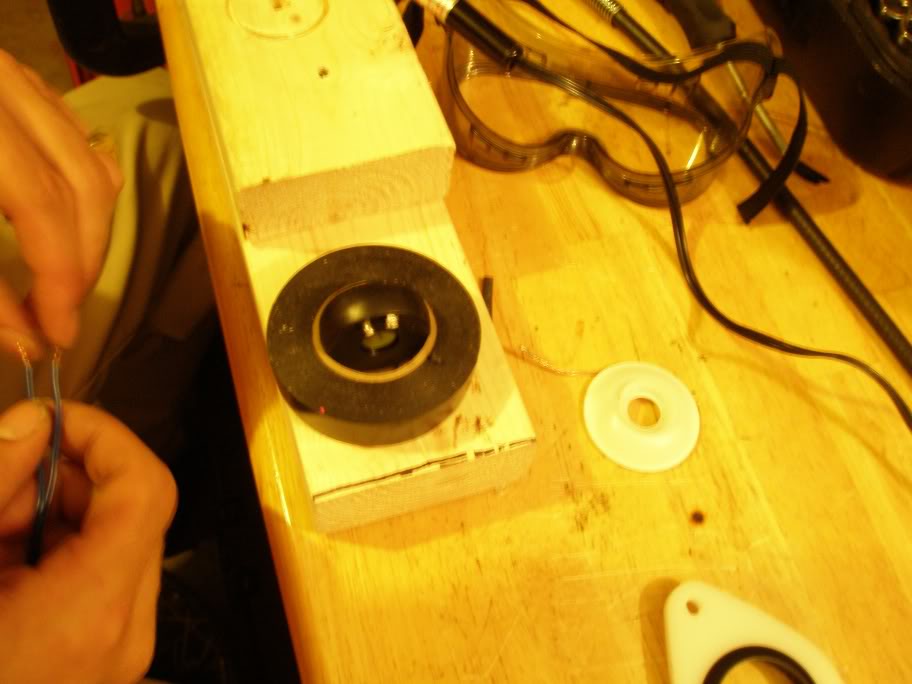
Well, I definitely didn't reuse the factory mount for the center channel but holy hell did it take a lot of modification to get the 3.5" speaker into the dash location that started off with a tweeter.
Stock tweeter (blown)
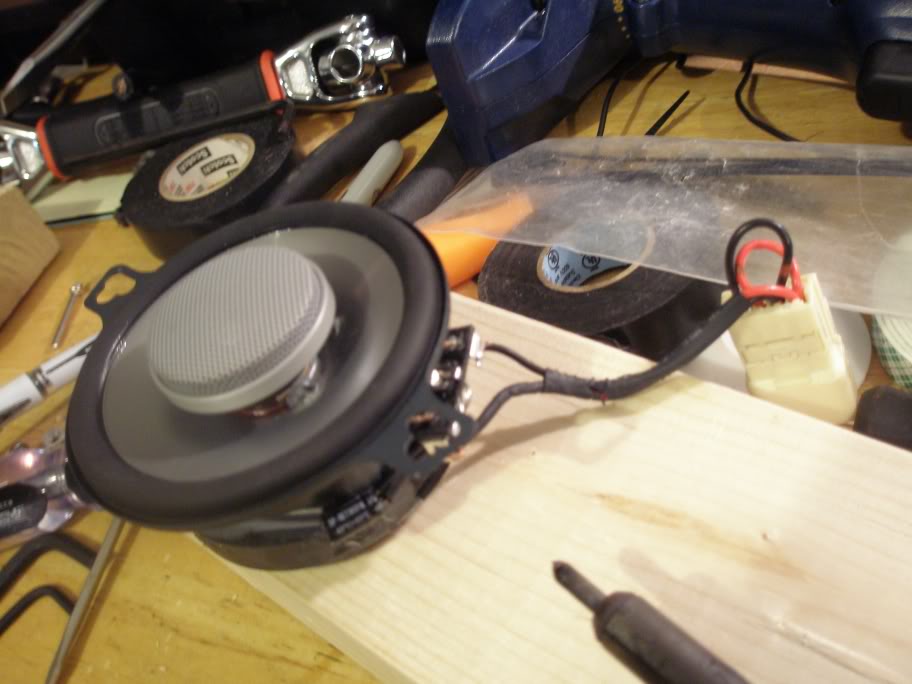
New 3.5" Infinity Reference Center Channel Speaker
Um, yeah a little difference in size here...
That is an understatement... Wouldn't fit at all
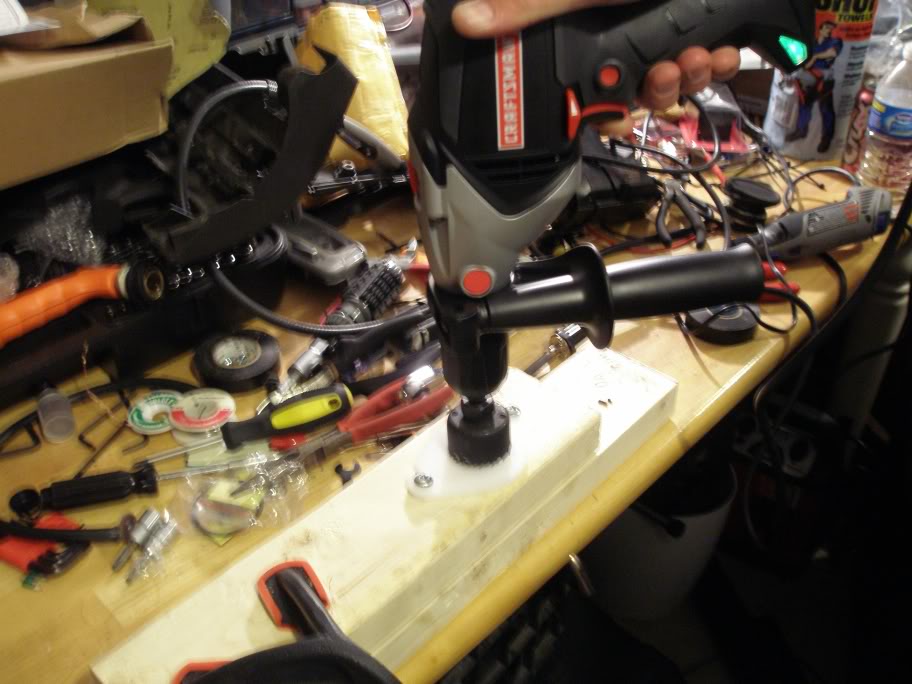
We all took turns cutting, and grinding for about 3 hrs, my buddy cutting the brackets to make more room so the magnet could drop through
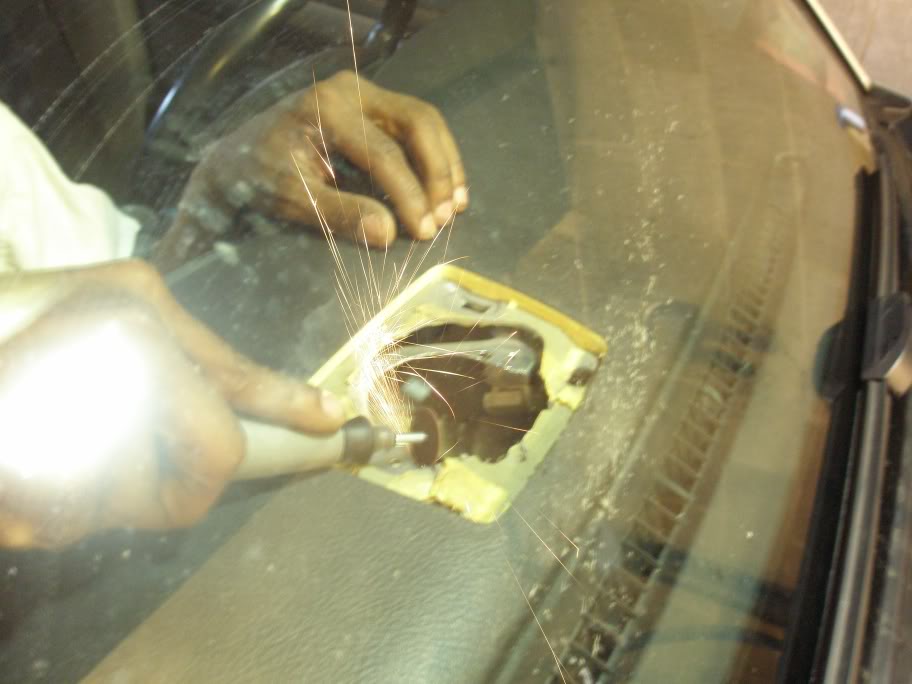
Lots of cutting, lots of grinding
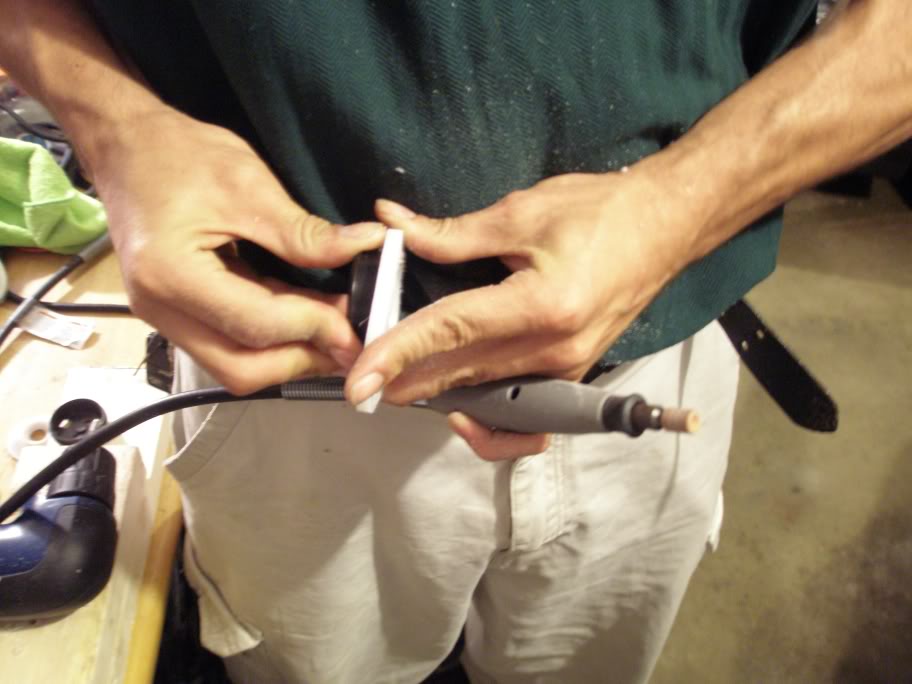
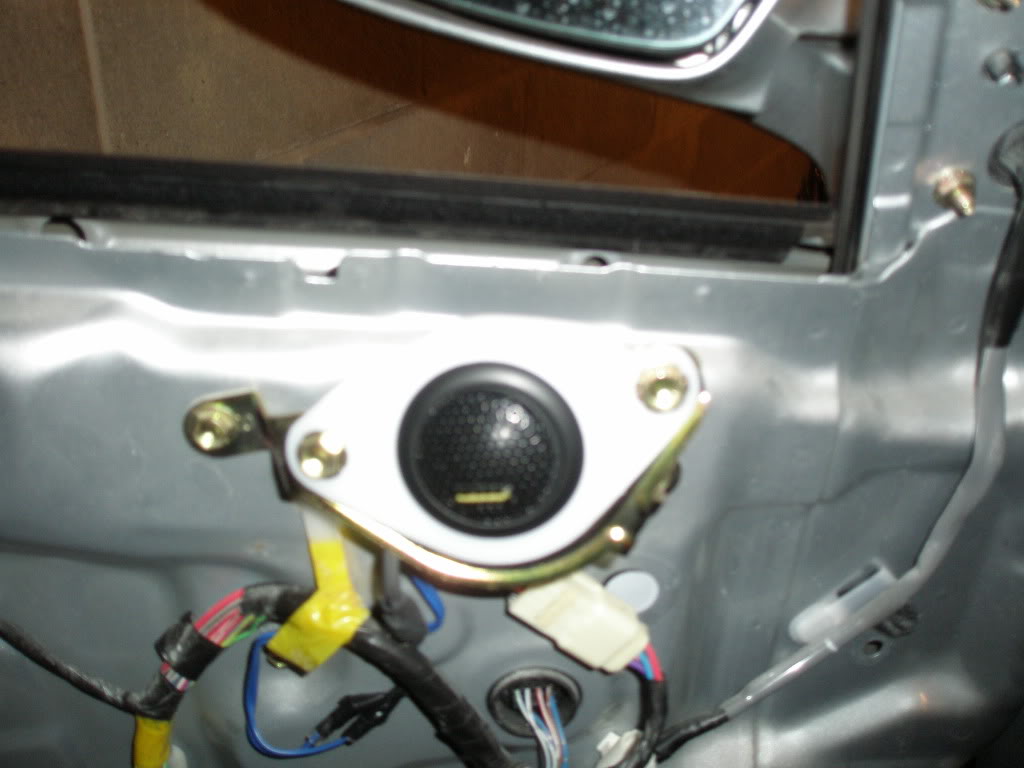
Reused stock wires, soldered the wires to the Infinity, used about 3 times the amount of solder as the stock tweeter had.
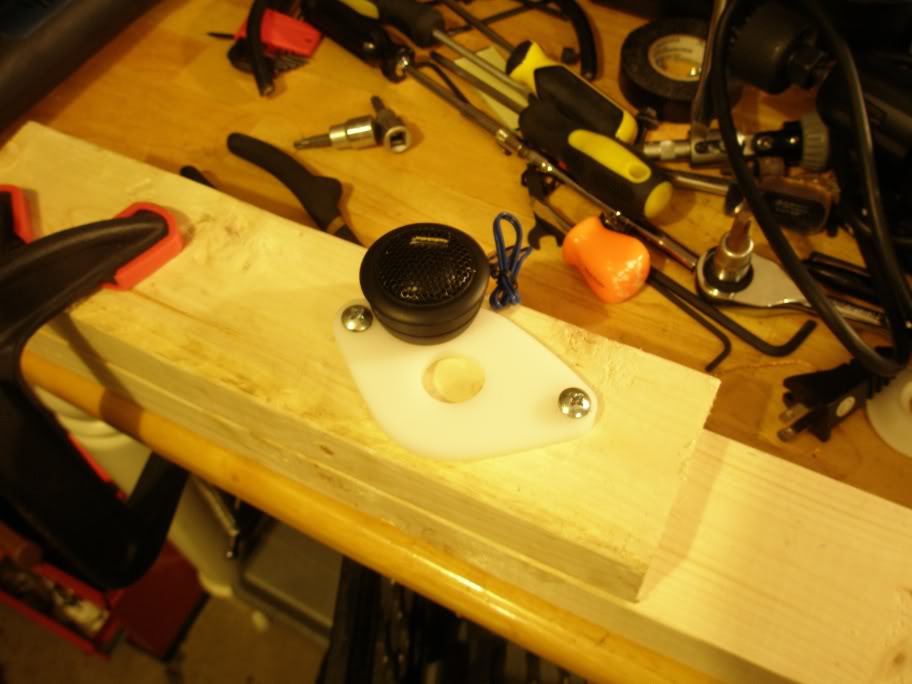
Foam had to be cut back 1/2-3/4 of an inch all the way around in addition to the brackets being cut back, and new holes having to be drilled for the wider round speaker. Final product 4 hrs later, here I thought that I would just snip the wires and drop this bad boy in, wishful thinking, but well worth the effort
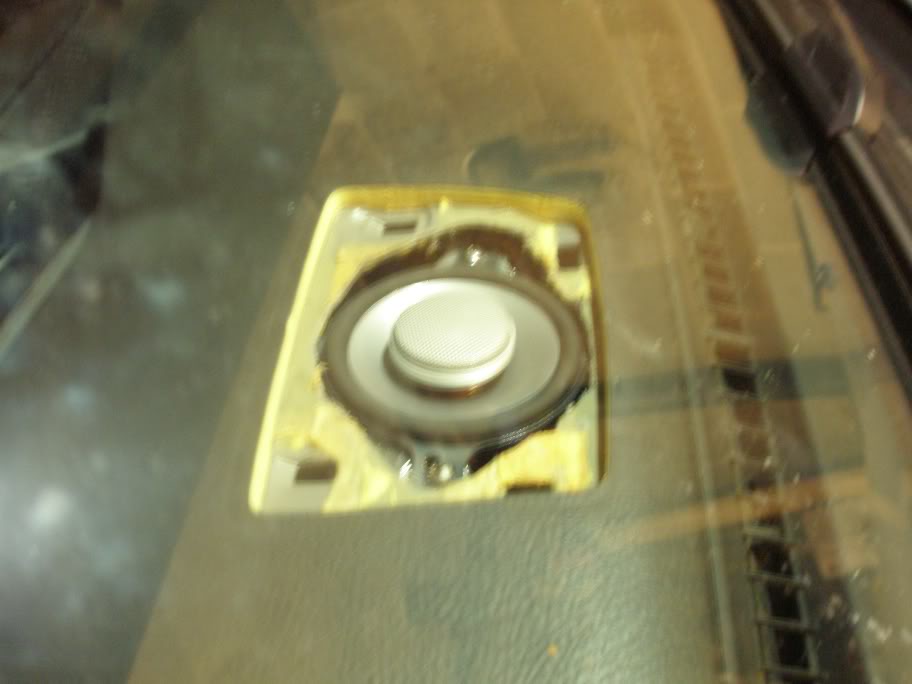
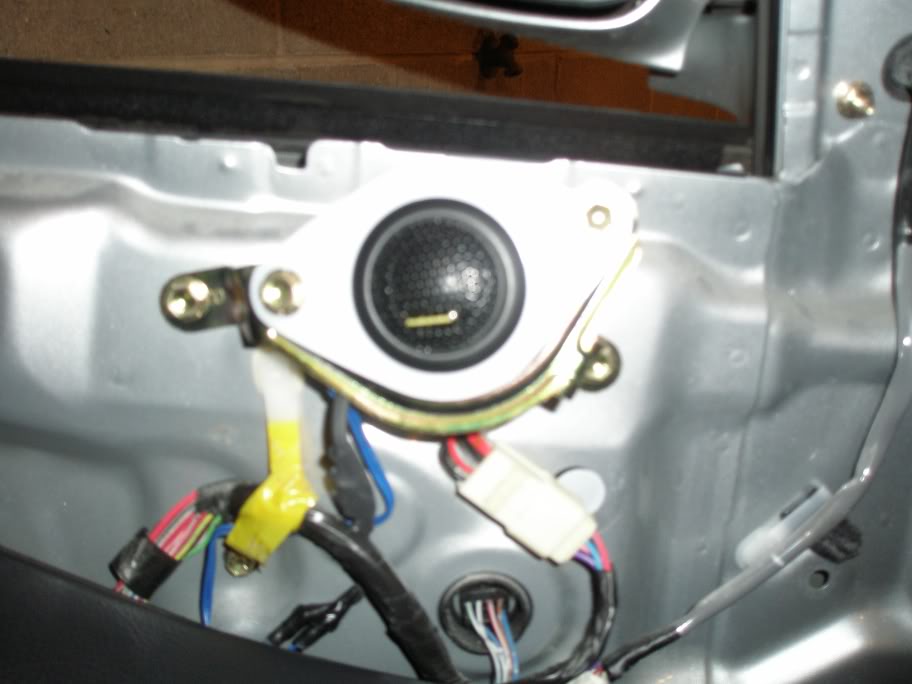
Final product, sitting flush
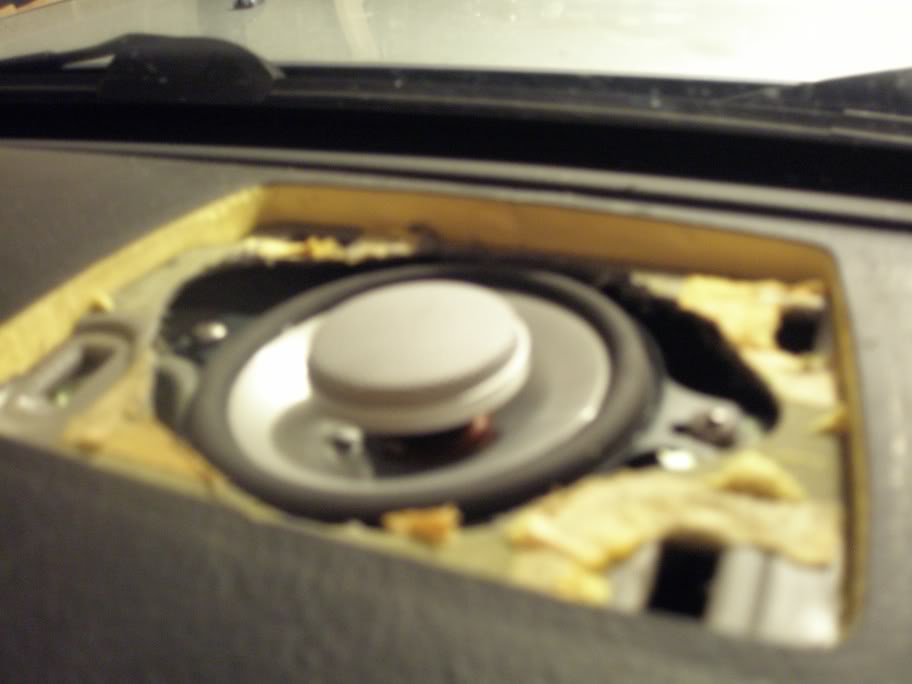
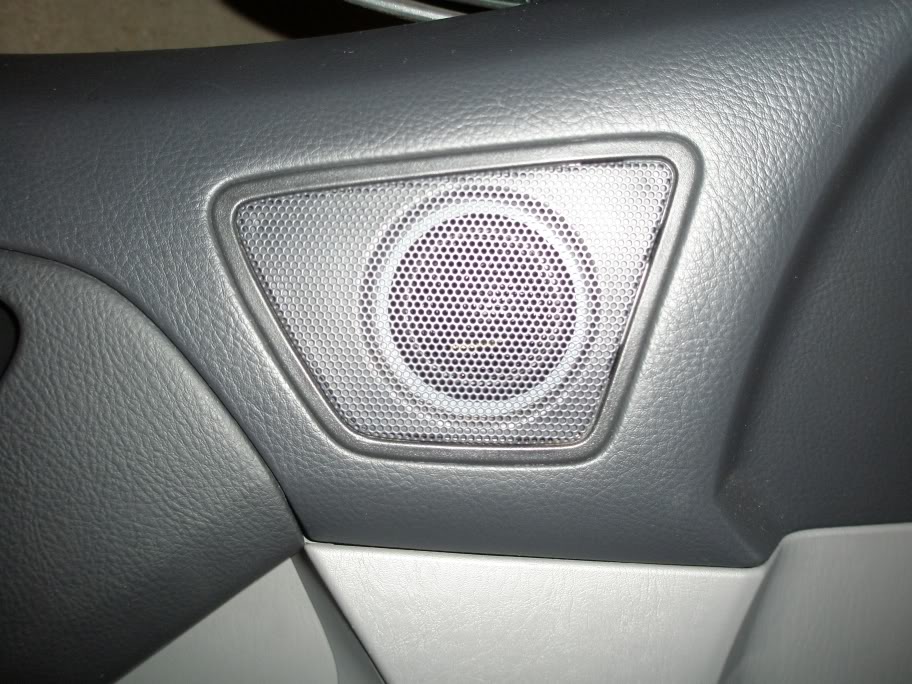
Now you see it, now you don't! Sounds incredibly crisp and clear, can't wait to replace the rest of the blown tweeters (4 left)

Stock tweeter (blown)
New 3.5" Infinity Reference Center Channel Speaker
Um, yeah a little difference in size here...
That is an understatement... Wouldn't fit at all
We all took turns cutting, and grinding for about 3 hrs, my buddy cutting the brackets to make more room so the magnet could drop through
Lots of cutting, lots of grinding
Reused stock wires, soldered the wires to the Infinity, used about 3 times the amount of solder as the stock tweeter had.
Foam had to be cut back 1/2-3/4 of an inch all the way around in addition to the brackets being cut back, and new holes having to be drilled for the wider round speaker. Final product 4 hrs later, here I thought that I would just snip the wires and drop this bad boy in, wishful thinking, but well worth the effort
Final product, sitting flush
Now you see it, now you don't!
Sounds incredibly crisp and clear, can't wait to replace the rest of the blown tweeters (4 left)
04-03-2010, 11:25 PM
#7
Drifting
Wow, very nice Chris. Although, I have to say, any less quality work from you would've been a disappointment. When you do good quality work all the time, it becomes the expectation...
Again, looking sick, and definitely will be worth the time and effort when it's all done.
Again, looking sick, and definitely will be worth the time and effort when it's all done.
Trending Topics
04-03-2010, 11:30 PM
#8
Senior Moderator
Regional Coordinator
(Mid-Atlantic)
Regional Coordinator
(Mid-Atlantic)
Thread Starter
iTrader: (6)
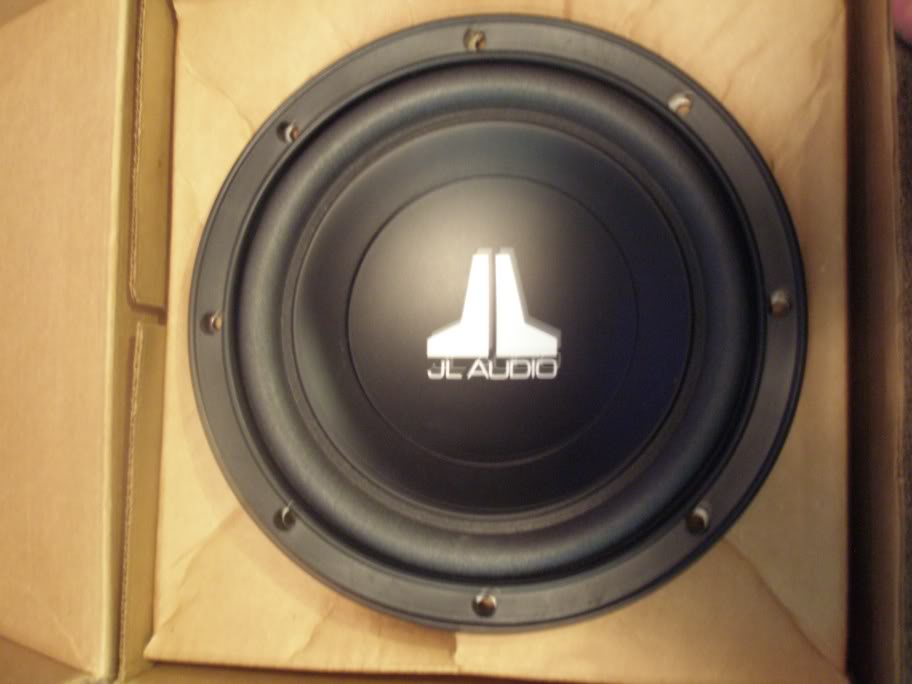
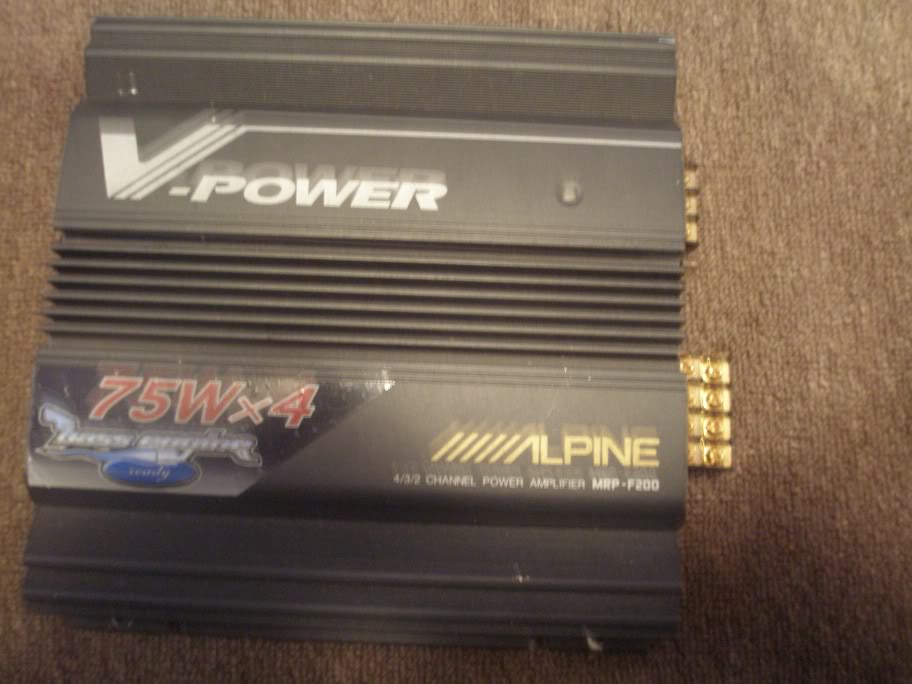
3 speakers down, 7 speakers to go, I have been working my way front to back. Still have the rear door speakers to go in, but trying to find replacement brackets so I don't have to cut up the stock ones. I have a pair of Alpine Type S 6.5's to go in the rear doors. I will be ordering 4 x 1" tweeters sometime this week for the front doors and rear trunk pillars, I already got replacement brackets for those. I also finally pulled this bad boy out of storage after 3 years of waiting, after I do the rear doors I'm going to rip out the stock JBL DVC 8" sub and replace it with this guy.
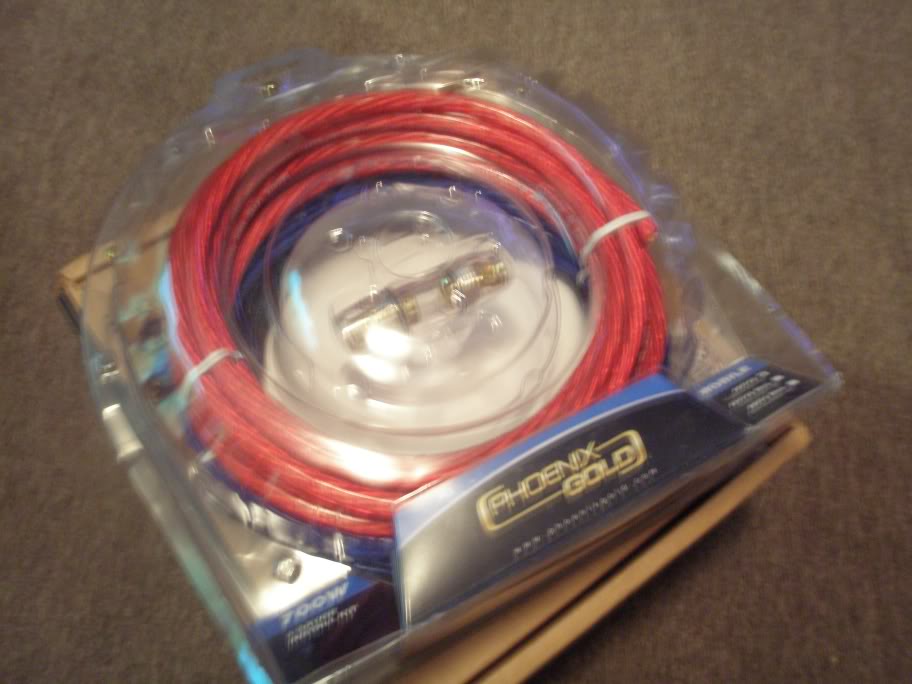
Got all the supplies I need for this to work, 2 LOC's, an amp kit, and a 4 channel amp that I'm going to bridge into 2 channels for each output from the stock amp into each voice coil on the JL 8"
Alpine amp picked up from a member on here, wanted a small profile amp that wasn't too powerful.
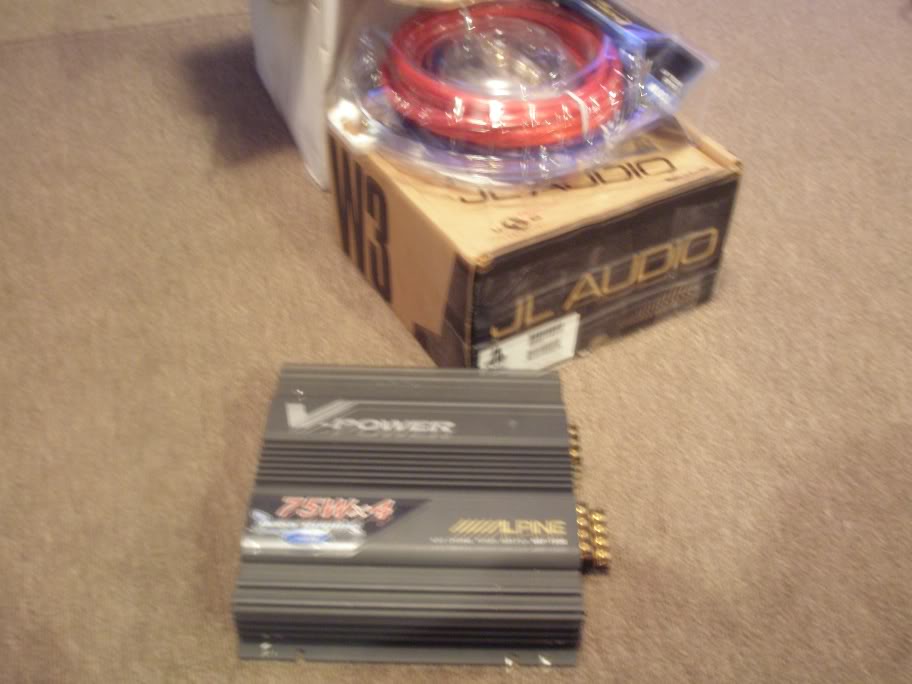
JL goodness
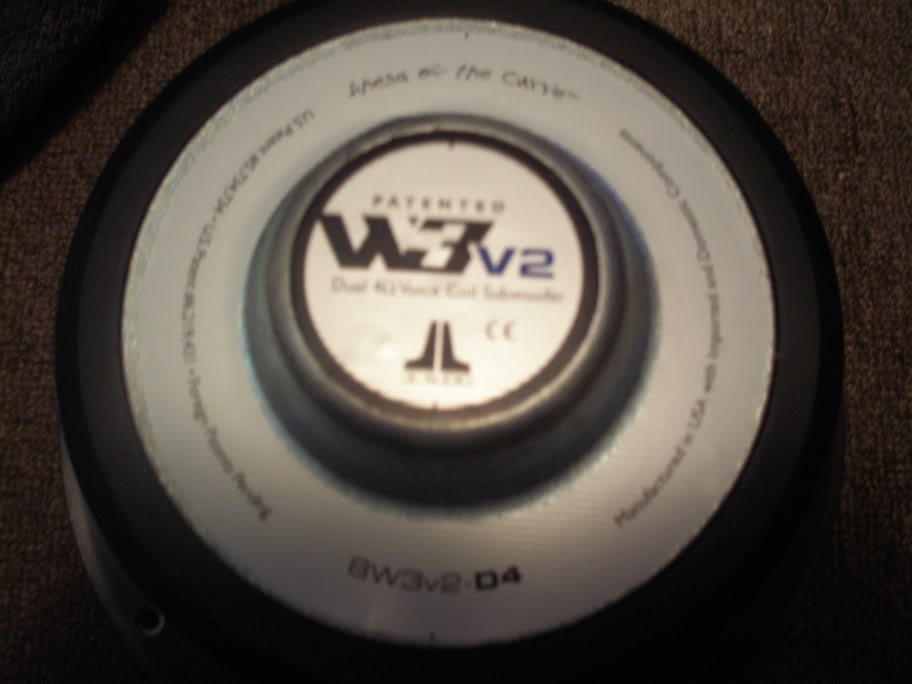
Stay tuned
Got all the supplies I need for this to work, 2 LOC's, an amp kit, and a 4 channel amp that I'm going to bridge into 2 channels for each output from the stock amp into each voice coil on the JL 8"
Alpine amp picked up from a member on here, wanted a small profile amp that wasn't too powerful.
JL goodness
Stay tuned
Last edited by 97BlackAckCL; 04-03-2010 at 11:34 PM.
04-03-2010, 11:48 PM
#9
Drifting
Nice amp pickup... Those older Alpines are impressive in terms of power output. Watch out buddy, you may be surprised just how much output you get out of that sub...
04-04-2010, 01:34 PM
#10
Senior Moderator
Regional Coordinator
(Mid-Atlantic)
Regional Coordinator
(Mid-Atlantic)
Thread Starter
iTrader: (6)
I've had this sub waiting for 3 years because I know what kind of output I can get out of it. Just had to wait for the motivation and the right amp for the right price. It should be a fun project though, looking forward to ripping out the stock 8, even though it still puts out a deccent thump, I want more...
04-07-2010, 11:41 AM
#11
Senior Moderator
Regional Coordinator
(Mid-Atlantic)
Regional Coordinator
(Mid-Atlantic)
Thread Starter
iTrader: (6)
Purchased 2 sets of 1" Silk Dome Tweeters, the last speakers I will need to complete this build. Now I just need time to do some more work, stay tuned. 
 04-10-2010, 02:41 PM
#14
Senior Moderator
Regional Coordinator
(Mid-Atlantic)
Regional Coordinator
(Mid-Atlantic)
Thread Starter
iTrader: (6)
And on and on and on
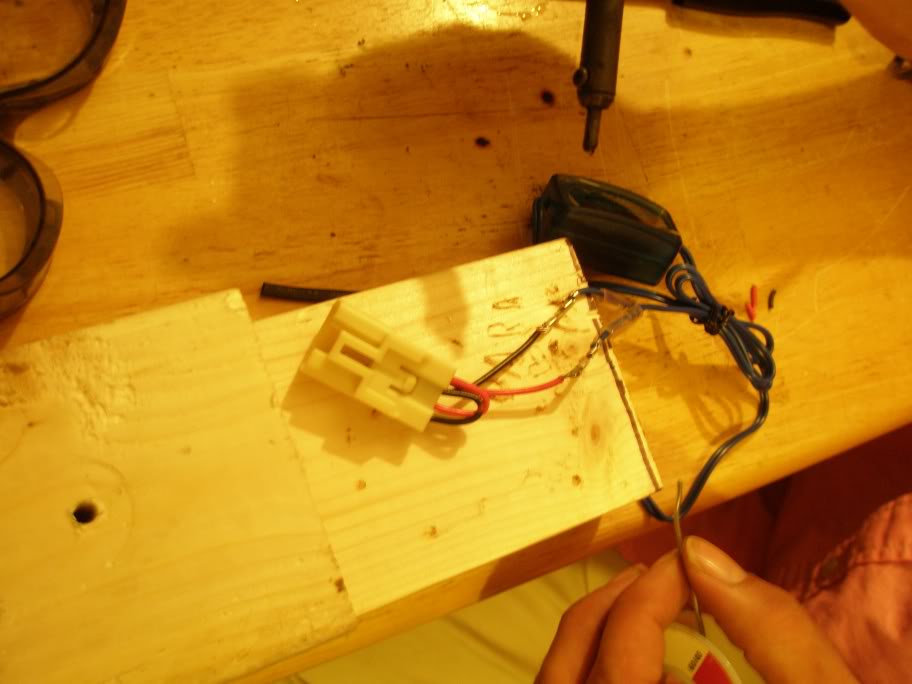
Got 2 more speakers done last night, had to help my buddy rip his dash apart first, but then we decided to keep being productive and work on my truck because i wanted to see if the brackets I bought would work, and ended up just doing the rear door 6.5's while we were at it.
Here's the paper JBL bs
Bought some universal toyota brackets for a celica in hopes that I could use these because we thought that the stock speakers were glued to the baskets but it turned out that they weren't and we ended up using the stock bezels, here's a comparison.
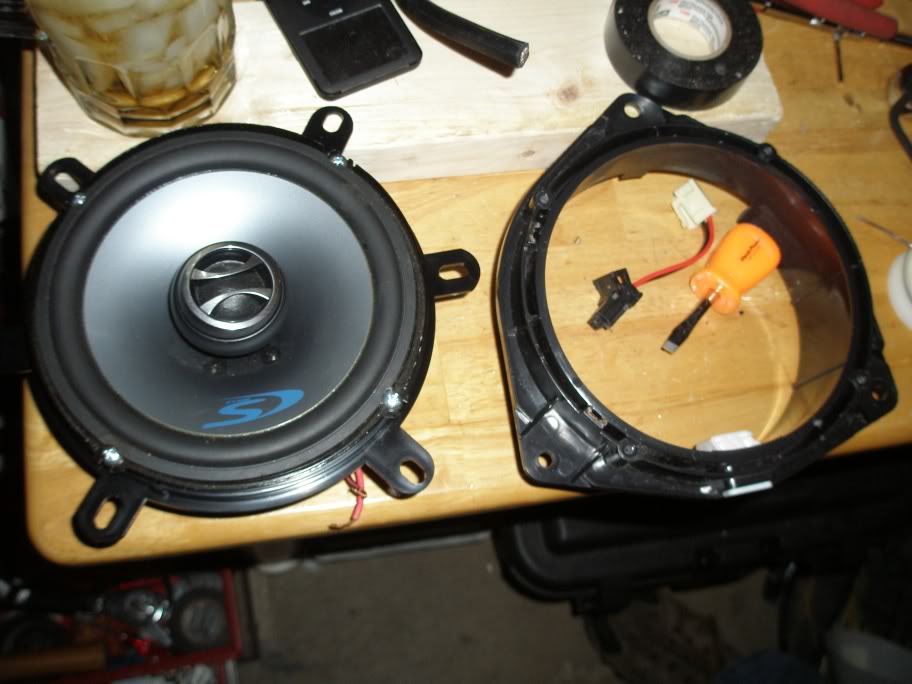
Magnets on the Type S's were a little bit bigger but not by much, however they are coaxial and have the built in tweeters which adds lots of depth to the rear channel.
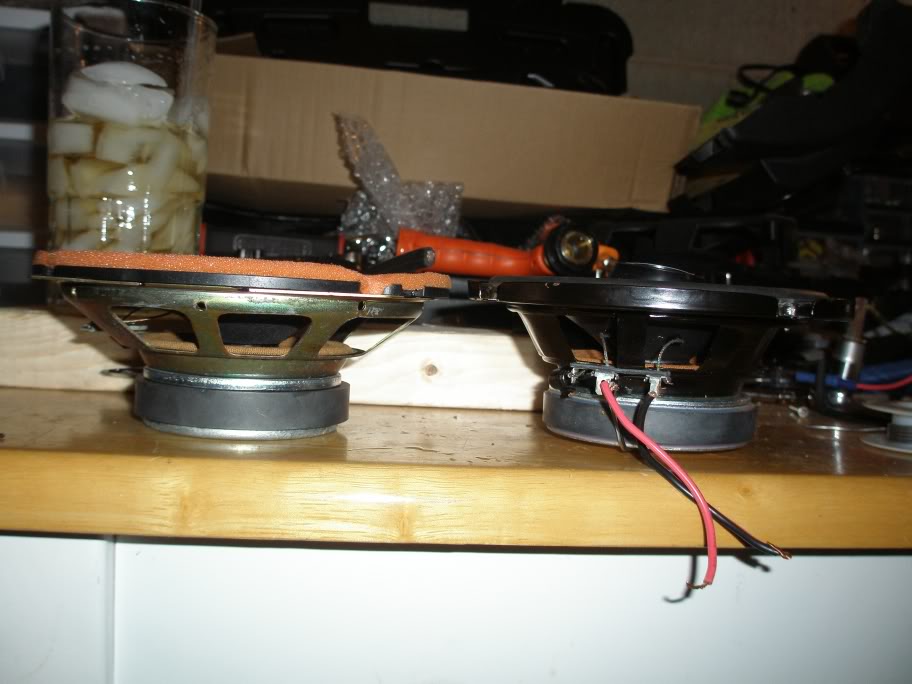
Reused stock wiring as always, plus lots of solder
So we couldn't get the stock wire clips out of the stock bezels because the speaker was in the way so we decided to try and pop the speaker out, low and behold it came right out so we used the stock bezels because they were far more beefy and gave a seal to the speaker and the door where the brackets would not
Tada
All hooked up and playing away
With the addition of the coaxials with the tweeters, you can now hear the highs way clearer in the back seats and the front seats, and since these are better speakers, there's also far more bass with these in the back doors. So, 5 speakers down, 5 to go. Half way there
Thanks for looking
Here's the paper JBL bs
Bought some universal toyota brackets for a celica in hopes that I could use these because we thought that the stock speakers were glued to the baskets but it turned out that they weren't and we ended up using the stock bezels, here's a comparison.
Magnets on the Type S's were a little bit bigger but not by much, however they are coaxial and have the built in tweeters which adds lots of depth to the rear channel.
Reused stock wiring as always, plus lots of solder
So we couldn't get the stock wire clips out of the stock bezels because the speaker was in the way so we decided to try and pop the speaker out, low and behold it came right out so we used the stock bezels because they were far more beefy and gave a seal to the speaker and the door where the brackets would not
Tada
All hooked up and playing away
With the addition of the coaxials with the tweeters, you can now hear the highs way clearer in the back seats and the front seats, and since these are better speakers, there's also far more bass with these in the back doors. So, 5 speakers down, 5 to go. Half way there
Thanks for looking
Last edited by 97BlackAckCL; 04-10-2010 at 02:43 PM.
04-10-2010, 03:10 PM
#15
Drifting
Hey Chris, what year celica's were those spacers for? I'm about to start on my 91, and I found out that the mids I bought are actually kinda deep. If you didn't hack those up too bad, you wanna send them my way?
Oh, and the work done looks good, as always...
Oh, and the work done looks good, as always...
04-10-2010, 09:06 PM
#16
Senior Moderator
Regional Coordinator
(Mid-Atlantic)
Regional Coordinator
(Mid-Atlantic)
Thread Starter
iTrader: (6)
I can check the years but it's def for a celica and I didn't hack them up at all, took them off and put them back in the original bag, I'll get the part number for you shortly. And thanks for looking again, nice to be half way done
04-11-2010, 11:29 AM
#17
Senior Moderator
Just curious why so much solder? Why not just use the right and tight connector and some electrical tape or dap of solder? With that much solder you can end up with a cold solder joint and have the outcome be the opposite of your desired goal. Just a thought.
04-11-2010, 09:38 PM
#18
Senior Moderator
Regional Coordinator
(Mid-Atlantic)
Regional Coordinator
(Mid-Atlantic)
Thread Starter
iTrader: (6)
Didn't really use a ton of solder, just enough to hold things together, my buddy and I solder everything we do electronically, never had an issue with cold solders
04-12-2010, 08:17 PM
#20
Senior Moderator
Regional Coordinator
(Mid-Atlantic)
Regional Coordinator
(Mid-Atlantic)
Thread Starter
iTrader: (6)
where you from?
04-14-2010, 11:39 AM
#21
Senior Moderator
Regional Coordinator
(Mid-Atlantic)
Regional Coordinator
(Mid-Atlantic)
Thread Starter
iTrader: (6)
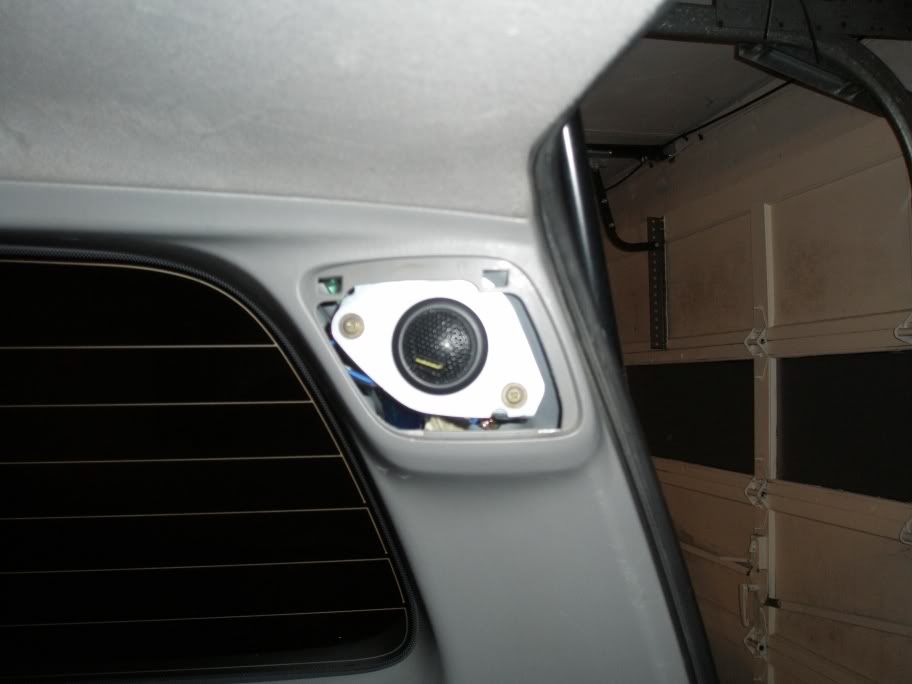
Box of 4 tweeters came in yesterday 
 04-15-2010, 12:24 PM
#23
Senior Moderator
Regional Coordinator
(Mid-Atlantic)
Regional Coordinator
(Mid-Atlantic)
Thread Starter
iTrader: (6)
Total time was between 4-5 hrs to do the center channel speaker, completely not what we expected, of course I did buy my friend's pizza and stop to eat, as well as a few sanity breaks. Sounds so incredibly clear though, thanks again
Last edited by 97BlackAckCL; 04-16-2010 at 08:35 AM.
04-16-2010, 08:37 AM
#24
Senior Moderator
Regional Coordinator
(Mid-Atlantic)
Regional Coordinator
(Mid-Atlantic)
Thread Starter
iTrader: (6)
Going to attempt the front door tweeters tonight, the adapters I bought won't fit the tweeters (big surprise with the luck I've had) I'm trying to preserve all the stock brackets so these were the best option, even though I asked for 1" tweeter holes and the guy made holes like half the size, but nothing a little dremel won't fix. Should have pics tonight, after the pens game
04-16-2010, 08:52 AM
#25
Drifting
Looking forward to some more pics, Chris. I (finally) got my 3 ways in earlier this week, but don't have an amp for them currently. I have to pick a HT plate amp up hopefully tomorrow so I can trade it to a guy for my amp for the celica. I hope to have a build log up in the next couple weeks, but I guess time will tell...
04-17-2010, 11:26 AM
#26
Senior Moderator
Regional Coordinator
(Mid-Atlantic)
Regional Coordinator
(Mid-Atlantic)
Thread Starter
iTrader: (6)
Nice Matt!
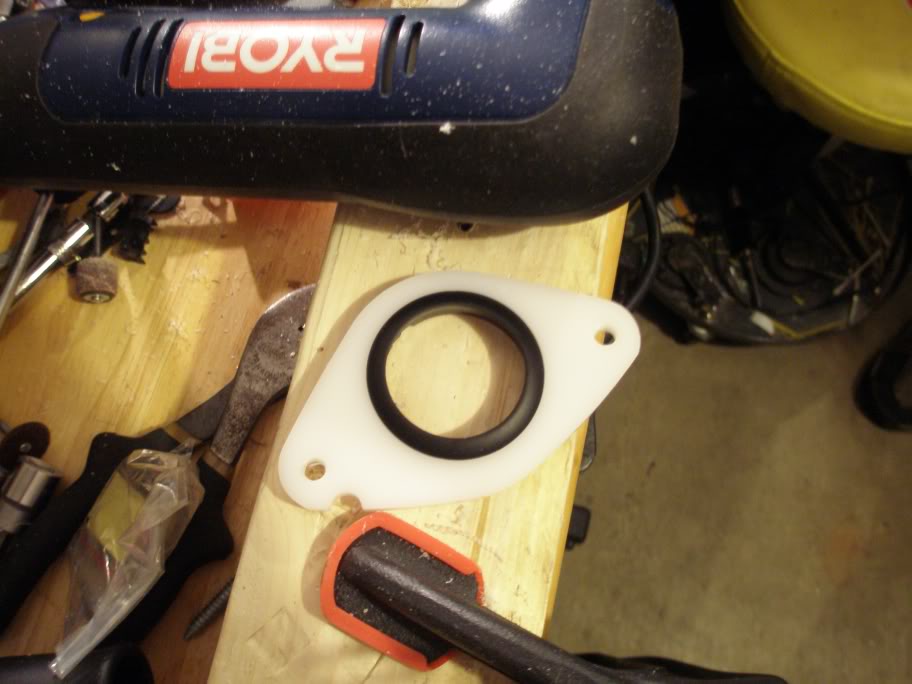
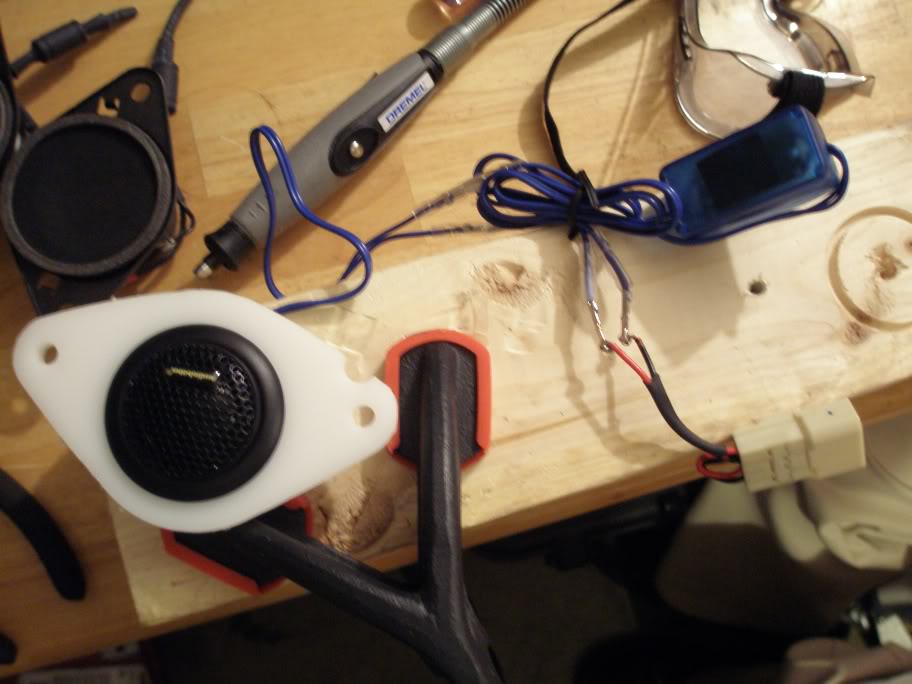
Well, after the pens game, I got the front door tweeters done. I picked up 4 x 100w rms Audiobahn AT68 1" Silk Dome Tweeters. Again, there's next to no documentation on adapters or spacers so I went with a company that makes adapters for Tacomas, however as expected, I had to do some modification. I asked him to make me holes for 1" tweeters, not sure what tweeters he was thinking of, but the holes he made were so tiny I don't even think the hole was an inch in diameter, I had to modify the adapters (go figure). Here is a comparison of the adapters that I purchased vs the tweeters that were supposed to house 1" tweeters.
Like every project I ever undertake, it's never cut and dry, so my buddy and I got to work modifying the adapters because I'm too impatient to send these adapters back. And it gave me an excuse to try out my brand new hammer drill that I bought several months ago.
Using a hole saw, we cut a larger hole, but the hole saw bits that I had wouldn't give us the exact size that we wanted, so we went to the next size down, and it wouldn't fit right.
Then we dremeled out the extra room that we needed to get them to fit snug.
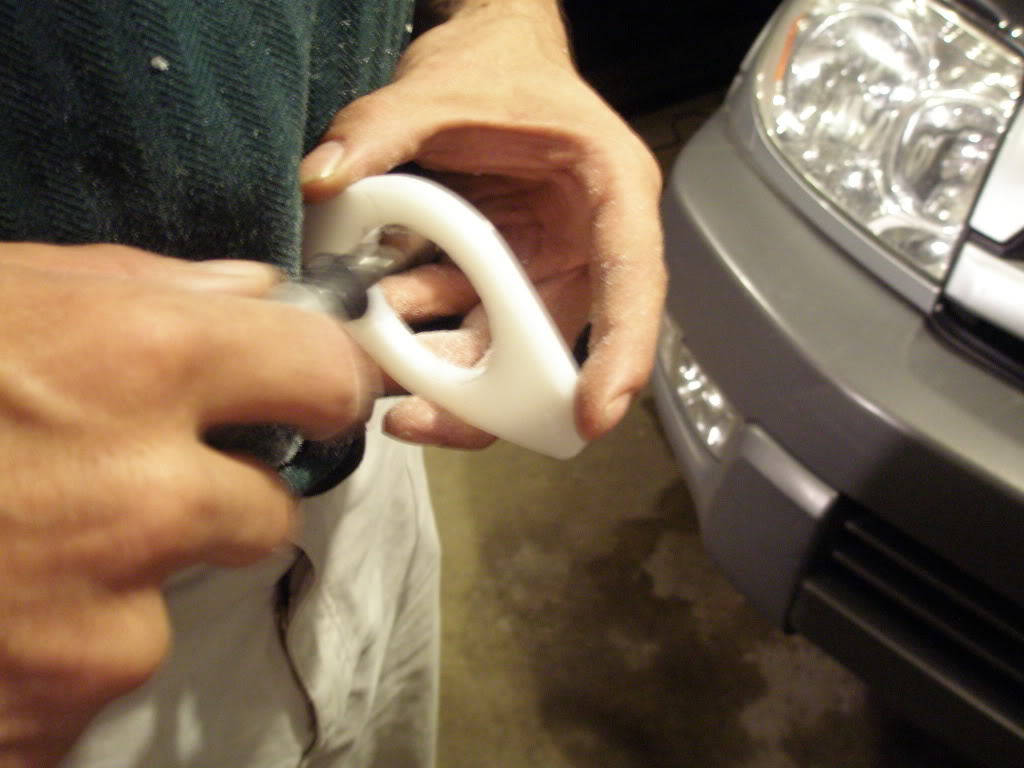
And voila, got it to slide right in
Here's me mounting the tweeter into the modified adapter
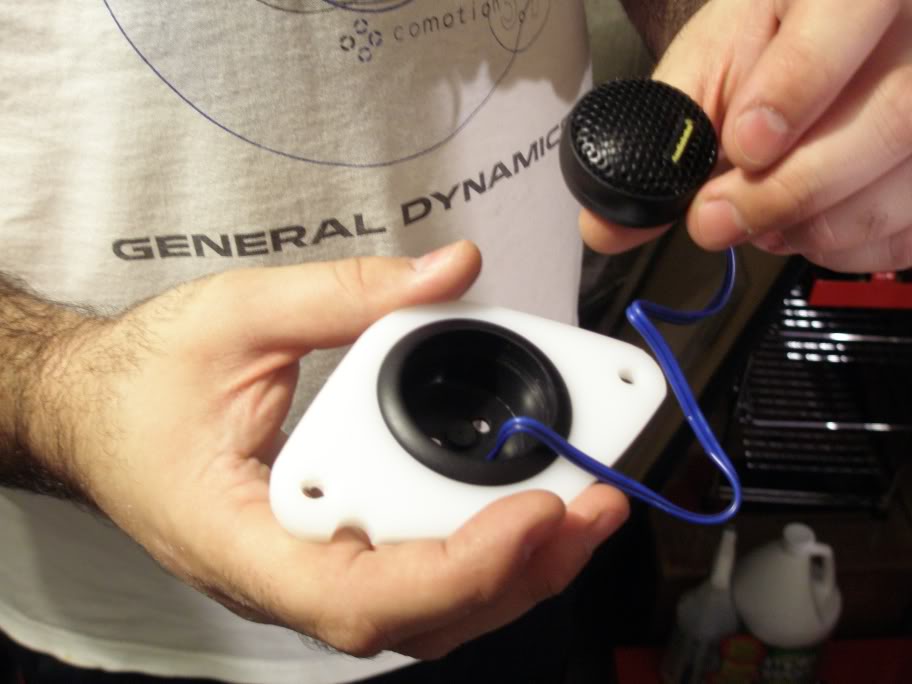
Fully assembled
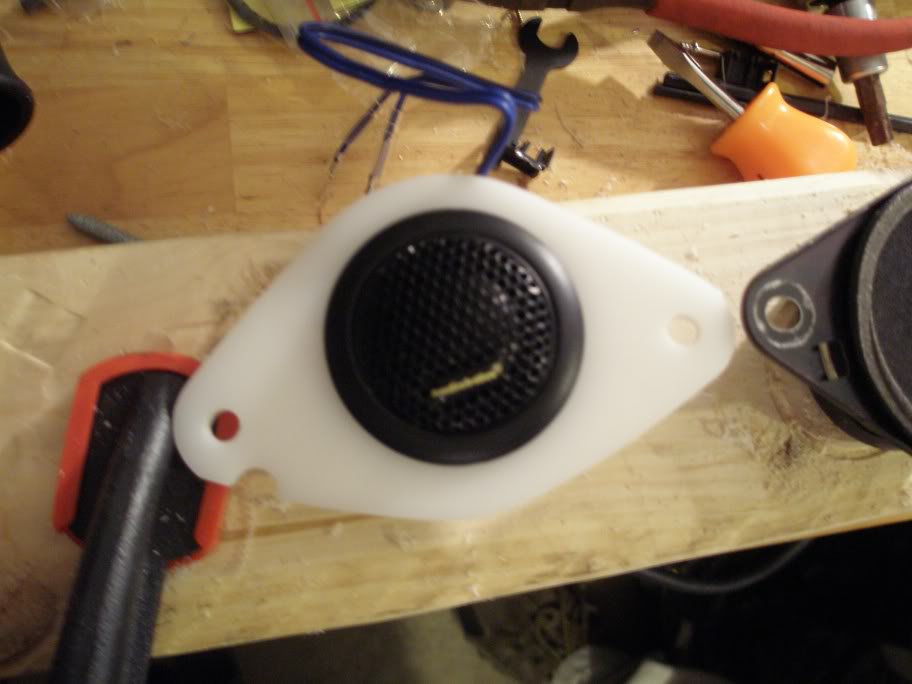
Side by side comparison, had to flip the tweeter around after this pic
Here it is all mounted up, didn't bother taking pics of the soldering since Jonesi thinks it's a waste of time
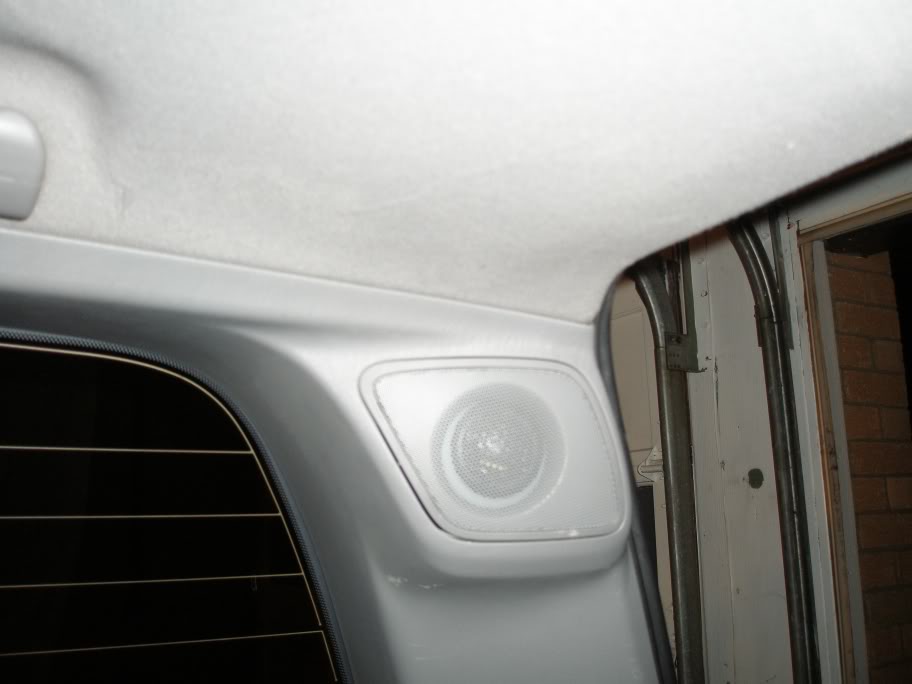
Door panel all put back in place, you can see the audiobahn tweeter smiling back at you
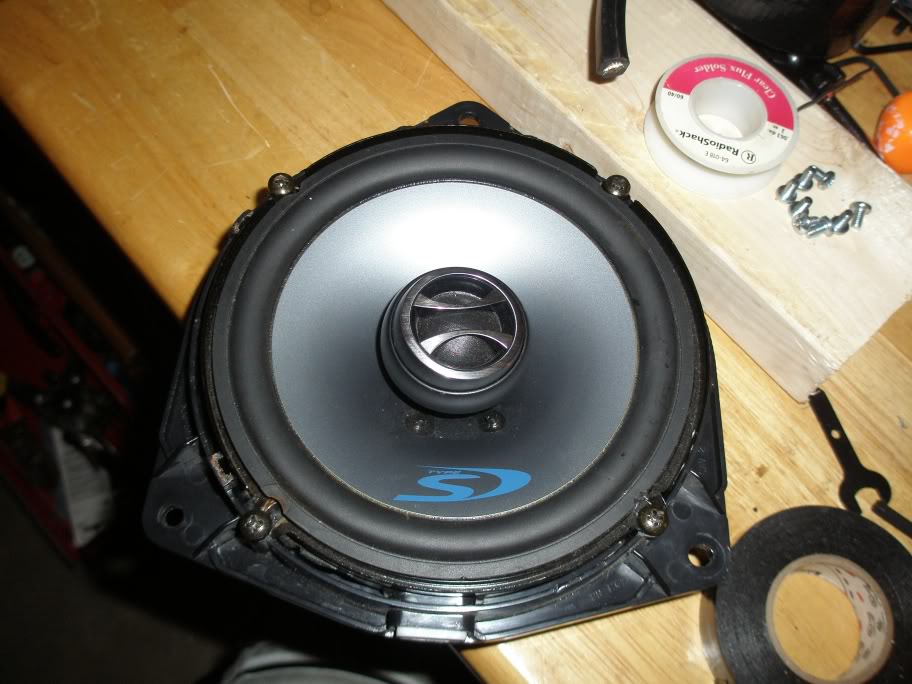
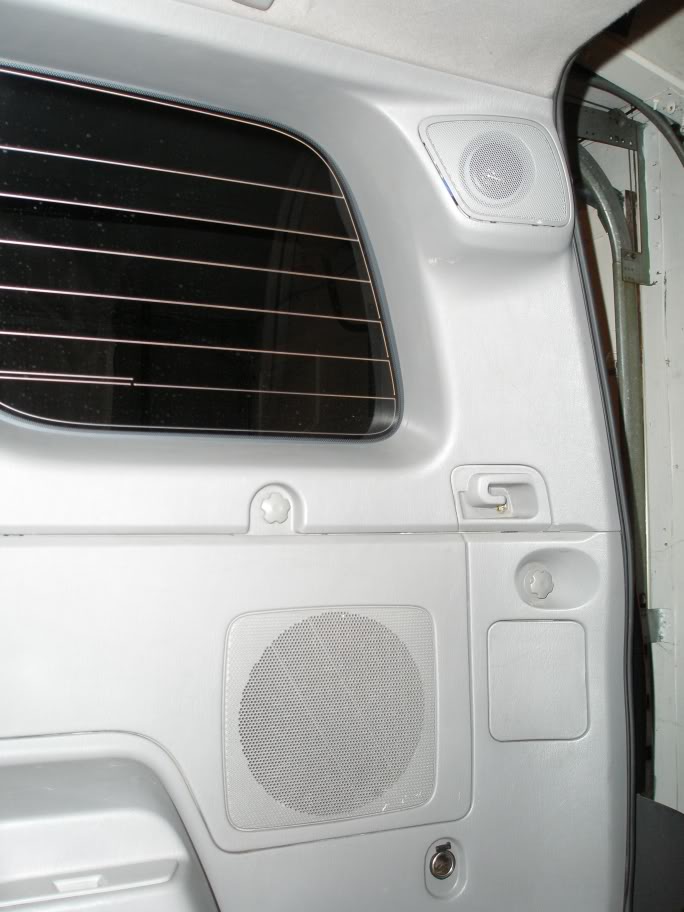
Oh and since I never took a final pic of the 6x9's before putting the door panel back on, here's one of the driver door 6x9
7 speakers down, 3 more to go, thanks for looking
Well, after the pens game, I got the front door tweeters done. I picked up 4 x 100w rms Audiobahn AT68 1" Silk Dome Tweeters. Again, there's next to no documentation on adapters or spacers so I went with a company that makes adapters for Tacomas, however as expected, I had to do some modification. I asked him to make me holes for 1" tweeters, not sure what tweeters he was thinking of, but the holes he made were so tiny I don't even think the hole was an inch in diameter, I had to modify the adapters (go figure). Here is a comparison of the adapters that I purchased vs the tweeters that were supposed to house 1" tweeters.
Like every project I ever undertake, it's never cut and dry, so my buddy and I got to work modifying the adapters because I'm too impatient to send these adapters back. And it gave me an excuse to try out my brand new hammer drill that I bought several months ago.
Using a hole saw, we cut a larger hole, but the hole saw bits that I had wouldn't give us the exact size that we wanted, so we went to the next size down, and it wouldn't fit right.
Then we dremeled out the extra room that we needed to get them to fit snug.
And voila, got it to slide right in
Here's me mounting the tweeter into the modified adapter
Fully assembled
Side by side comparison, had to flip the tweeter around after this pic
Here it is all mounted up, didn't bother taking pics of the soldering since Jonesi thinks it's a waste of time
Door panel all put back in place, you can see the audiobahn tweeter smiling back at you
Oh and since I never took a final pic of the 6x9's before putting the door panel back on, here's one of the driver door 6x9
7 speakers down, 3 more to go, thanks for looking
04-18-2010, 08:44 PM
#28
Senior Moderator
Regional Coordinator
(Mid-Atlantic)
Regional Coordinator
(Mid-Atlantic)
Thread Starter
iTrader: (6)
Thanks man, it really wasn't that hard once we got the dremel speed kicked up, the hole saw really helps as well. I only wanna do this stuff once, 2 more adapters to cut for the very rear of the truck and then on to the sub
04-29-2010, 12:16 PM
#29
Senior Moderator
Regional Coordinator
(Mid-Atlantic)
Regional Coordinator
(Mid-Atlantic)
Thread Starter
iTrader: (6)
Gonna drill out the other 2 tweeter adapters tonight, should get the rear tweeters in tomorrow night after the pens game 
04-29-2010, 12:23 PM
#30
Drifting

 04-29-2010, 08:22 PM
#31
Senior Moderator
Regional Coordinator
(Mid-Atlantic)
Regional Coordinator
(Mid-Atlantic)
Thread Starter
iTrader: (6)
Adapters were modified tonight, will be in tomorrow
Matt, holy hell! Reminds me of my Acura speaker work
Matt, holy hell! Reminds me of my Acura speaker work
Last edited by 97BlackAckCL; 04-29-2010 at 11:04 PM.
05-01-2010, 02:27 PM
#32
Senior Moderator
Regional Coordinator
(Mid-Atlantic)
Regional Coordinator
(Mid-Atlantic)
Thread Starter
iTrader: (6)
2 more speakers down, 9 total replaced 
I used the audiobahn crossovers that came with these tweeters since I have full range speakers in the rear doors. Reused the stock wiring again of course, plus a little extra.
After I got everything soldered and ready to go, one of the wires popped loose from the tweeter, so I had to take everything apart and resolder the leads.
After that, hooked everything up and using some screws from an extra acura door panel that I had, I screwed these tweeters in to the stock locations in the rear trunk area.
After a little maneuvering, got the new tweeters all lined up, and got the stock covers to go back on over the new tweeters
It actually sits more flush than in this pic
New tweeters installed, plus a look at what comes next
05-09-2010, 03:18 PM
#33
Senior Moderator
Regional Coordinator
(Mid-Atlantic)
Regional Coordinator
(Mid-Atlantic)
Thread Starter
iTrader: (6)
Just ordered a full set of Cool White wide angle LED bulbs for the truck interior, sub project is going to have to wait a couple weeks till I can fix my rear hatch locking mechanism 
05-13-2010, 08:43 AM
#34
Senior Moderator
Regional Coordinator
(Mid-Atlantic)
Regional Coordinator
(Mid-Atlantic)
Thread Starter
iTrader: (6)
swapped the interior out to cool white LED's from superbrightleds.com, I'll have some pics up tonight, still putting off doing the sub...
05-13-2010, 11:43 AM
#36
Senior Moderator
Regional Coordinator
(Mid-Atlantic)
Regional Coordinator
(Mid-Atlantic)
Thread Starter
iTrader: (6)
haha, lots of patience indeed, way more of a project than I expected to be taking on. Thanks for the comment 
05-13-2010, 12:07 PM
#38
Drifting
Chris, the build's looking good. Can't wait to see it finished.
05-13-2010, 02:20 PM
#39
Senior Moderator
Regional Coordinator
(Mid-Atlantic)
Regional Coordinator
(Mid-Atlantic)
Thread Starter
iTrader: (6)
I'll throw up some LED pics tonight though.
05-13-2010, 04:33 PM
#40
5th Gear

Awesome thread!
I was googling and surfed over here and this is exactly what I want to do. Very informative posting by the OP.
Just bought a 2003 4runner with the JBL system and could tell the speaker drivers were the weakest link. There is no mistaking the suck sound of cone tweeters IMO.
97BlackAckCL, I would love to pick your brain about this system if thats OK. PM sent.