
Polished Metal 09 TL with Aerokit self-installed!! 1st one on Acurazine??
 12-10-2008, 08:58 PM
#1
Intermediate
Thread Starter
Join Date: May 2006
Posts: 30
Likes: 0
Received 0 Likes
on
0 Posts
Polished Metal 09 TL with Aerokit self-installed!! 1st one on Acurazine??
Hi folks!
I own a 3G TL and now a 4G TL. Last weekend I installed the factory aerokit myself with the help of my wife.
The install took me about 5-6 hrs, and I spent a total of $20 for tools. I took lots of breaks in between!
Here are some pictures. Sorry I took them during the evening.


I bought the kit for $958 +tax in CA for those of you who are wondering.
I will take some daytime pictures so you can get a better look. I did not document the install, because I was too excited about getting it done. The only picture I have are of the car with the front bumper off, and even that is on my dad's camera, so I don't have access to it right now. I will give a few quick pointers regarding the process once I post up some new pictures, hopefully by the weekend. Thanks.
I own a 3G TL and now a 4G TL. Last weekend I installed the factory aerokit myself with the help of my wife.
The install took me about 5-6 hrs, and I spent a total of $20 for tools. I took lots of breaks in between!
Here are some pictures. Sorry I took them during the evening.
I bought the kit for $958 +tax in CA for those of you who are wondering.
I will take some daytime pictures so you can get a better look. I did not document the install, because I was too excited about getting it done. The only picture I have are of the car with the front bumper off, and even that is on my dad's camera, so I don't have access to it right now. I will give a few quick pointers regarding the process once I post up some new pictures, hopefully by the weekend. Thanks.
 12-10-2008, 09:08 PM
#2
show so pictures from not so up close
isn't there a rocker panel kit 2?
I do think your the 1st
isn't there a rocker panel kit 2?
I do think your the 1st
 12-10-2008, 09:16 PM
#4
Honda Fanboy
Very nice! Congrats on the purchase.
I actually saw my first 2009 TL on the road Monday night in Laguna Niguel and it was the same color as yours. One thing that caught my attention was the headlights. The bottom part of the headlight that meets with the bumper looked like it had some sort of LED strip going across it in the area that is indented in front of the high-beams. I know there are no LED's in the headlight but I was wondering if Acura designed some sort of reflector thing that lights up from the light of the HID projectors. Maybe I was just seeing things but it definitely caught my eye.
I actually saw my first 2009 TL on the road Monday night in Laguna Niguel and it was the same color as yours. One thing that caught my attention was the headlights. The bottom part of the headlight that meets with the bumper looked like it had some sort of LED strip going across it in the area that is indented in front of the high-beams. I know there are no LED's in the headlight but I was wondering if Acura designed some sort of reflector thing that lights up from the light of the HID projectors. Maybe I was just seeing things but it definitely caught my eye.

 another Tustin Acura customer
12-11-2008, 03:59 PM
another Tustin Acura customer
12-11-2008, 03:59 PM
#7
Three Wheelin'
Nice!...how much do the dealers charge for the install? I looked into something like this earlier but don't like the idea of adding more weight to an already heavy car. Besides, those chin spoilers will come right off after a few encounters with some steep on/off ramps.
Trending Topics
12-11-2008, 08:13 PM
#8
Team Owner
iTrader: (2)
Join Date: Jan 2008
Location: Kansas City, MO (Overland Park, KS)
Posts: 36,545
Received 6,470 Likes
on
5,162 Posts
TLC...wow, that looks good man! Great job...I really like the rear vents next to the exhaust. I sure wish they had done more with the front end though. They should have made a lip that runs all the way across the front of the car.
12-13-2008, 12:25 PM
#11
Racer
Join Date: Nov 2008
Location: Toronto
Age: 47
Posts: 353
Likes: 0
Received 0 Likes
on
0 Posts
12-13-2008, 05:11 PM
#12
5th Gear

Join Date: Dec 2008
Posts: 5
Likes: 0
Received 0 Likes
on
0 Posts
Looks great. I see that your in SoCal ? Would you be interested in having some really great pictures of you 4g TL? I'm a photographer looking to find certain cars for my portfolio. Photos will be free of charge. You can check out some of my work here: www.mshapphotography.com
Let me know,
Marc
Dpmshap@gmail.com
Let me know,
Marc
Dpmshap@gmail.com
12-13-2008, 10:56 PM
#15
Team Owner
iTrader: (2)
Join Date: Jan 2008
Location: Kansas City, MO (Overland Park, KS)
Posts: 36,545
Received 6,470 Likes
on
5,162 Posts
I agree with you guys. They could have made the nose piece more aggressive. It looks like it just accentuates the sides of the front nose-not the actual front part of the car.
12-14-2008, 08:02 PM
#16
Intermediate
Thread Starter
Join Date: May 2006
Posts: 30
Likes: 0
Received 0 Likes
on
0 Posts
Hi everyone,
sorry for the delays, been a bit busy. Here are some more pictures...not so close up this time.


The dealer was gonna charge an additional $2080 minus a 20% discount...whatever that turns out to be. That price includes parts and labor.
The kit is fairly lightweight. All the parts are made of plastic.
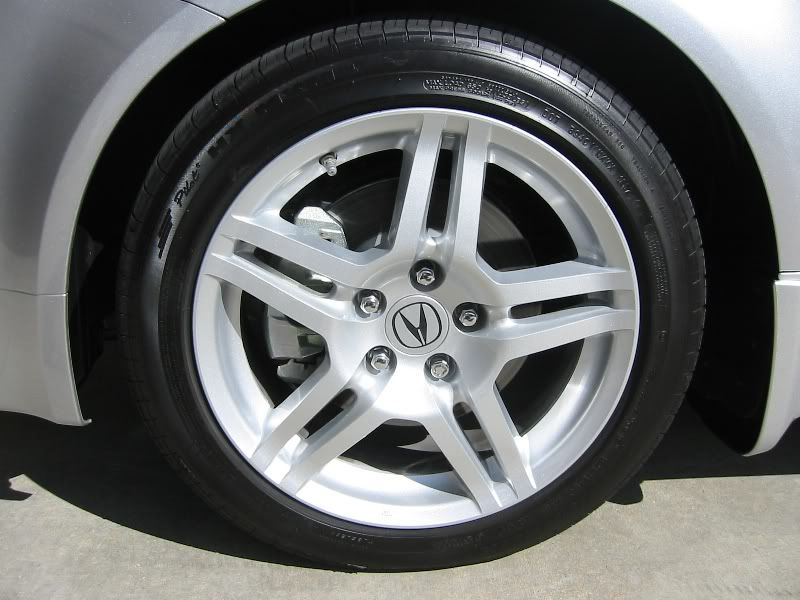
I think we will look into rims, 18's or 19's, and getting it lowered. I've always been cautious about letting others work on my car, especially in the aftermarket department. I've seen a TL with 20's at one of the dealers down in San Diego. Good size, just needed to be lowered. At the moment I don't know of any aftermarket adjustable springs. The wheel gap is pretty big. I would've loved having the AWD rims!!! I believe them to be 18's.
One thing to mention. I switched out the bulbs to clear ones when I did the install. I didn't like the corner looking orangey with the factory bulbs in there.
Let me know if you need pictures at different angles. Enjoy.
sorry for the delays, been a bit busy. Here are some more pictures...not so close up this time.
The dealer was gonna charge an additional $2080 minus a 20% discount...whatever that turns out to be. That price includes parts and labor.
The kit is fairly lightweight. All the parts are made of plastic.
I think we will look into rims, 18's or 19's, and getting it lowered. I've always been cautious about letting others work on my car, especially in the aftermarket department. I've seen a TL with 20's at one of the dealers down in San Diego. Good size, just needed to be lowered. At the moment I don't know of any aftermarket adjustable springs. The wheel gap is pretty big. I would've loved having the AWD rims!!! I believe them to be 18's.
One thing to mention. I switched out the bulbs to clear ones when I did the install. I didn't like the corner looking orangey with the factory bulbs in there.
Let me know if you need pictures at different angles. Enjoy.
12-14-2008, 08:52 PM
#17
Intermediate
Thread Starter
Join Date: May 2006
Posts: 30
Likes: 0
Received 0 Likes
on
0 Posts
Here are few quick pointers regarding the install.
Have the following tools handy: 90 degree phillips, flat head screwdrivers, needle nose pliers, exacto knife, power drill with different sizes drill bits, power saw ( I used a hand saw - $6 at Home Depot), heavy duty double sided tape ( bought at Home Depot as well), big blanket, rubbing alcohol, shop towels.
The side panel install is the easiest of the three. Removing it is straight forward as directed in the installation instructions. You may need a second person to help you pull off the old panels. They are single pieces. The extra assistance makes the removal smoother by applying force at different points. Installing the new panel is even easier. You will reuse the mounting clips and its a cinch to snap back on. There is, however, a round clip, plunge type. You need a clip remover, as instructed, to pull it off. I used a pair of scissors and yanked out the plunger and a needle nose plier to pull out the rest of the clip. Follow the instructions and there should be no problems.
The front lip install is a bit more challenging. Remove all the clips/screws that hold the bumper. Starting at one of the edges of the front bumper, slowly pull the bumper away from the body. Do not use jerkin motions to get it off! Well, I wouldn't recommend it. The center of the bumper is a bit tougher to pull off because it is retained by bigger hooks. Apply force slowly, but with increasing amount and it will come off. Once the bumper is completely detached from the car, have someone hold it, while you unplug the wires from the fog light, bumper lights and temp sensor. I washed the front bumper, dried it, and cleaned it with rubbing alcohol. This preps the surface so the tape will stick. Drilling the holes requires the usage of different size bits. Inside of the bumper there are marks that define exactly where to drill. Make sure you have someone double check your marks before you drill. The rest is straight forward. The lip actually fits very snug without gaps. I was very surprised becuase when I installed the A-kit on my 06 there were gaps on the sides of the front.
FYI, from what I can recall, if you want to remove the front grill you have to remove the front bumper. The front grill is held by "star" screws. I could be wrong, but I'm working off of memory.
The rear is the hardest and most cumbersome install. Again follow the directions to unistall it. Once it's off the frame, have someone hold it, so you can unplug the license plate lights. Drilling the holes uses the same process as the front bumper. Mark and drill, but be sure to double check. The instructions recommend usage of a power saw. I went shopping for one at Home Depot and they cost close to $100. I bought a hand saw, with an additional blade to cut plastic for less than $10. There are lines inside the rear bumper that show you exactly where to cut. Stay within those lines. However, if you do deviate a bit don't worry. As you look at the pictures I posted earlier, those cuts are completely covered by the kit.
The portion of the kit closes to the license plate may require additional double sided tape. I had to do the rear install over, because when all was done, there were major gaps in between. Factory tape was just not enough. To save yourself some time, use a strip of double sided tape that is 6-7 inches long on each rear piece, from the inner edge of the bumper reflector. Double up on it to make it thicker, one strip alone is not thick enough. The rest of the install is straight forward.
Make sure you use the blanket to lay the pieces on while you work. I used an exacto knife to debur and clean the some of the edges. If you want to replace the bumper light with clear ones, this is a good time to do it while you have easy access to them.
Ta-dah! I think I summarized the main points. I will be glad to answer questions. If I had to do this again, I think I could do it in about 2-3 hours. Ready...set....GOOO !!!!!!!!
12-15-2008, 12:31 AM
#18
Advanced
the kit looks good man!! but the wheels are not dpin it for me, they look oddly small. if i get my hands on one of these bad boys im definitely going to need the bigger rims.
12-15-2008, 01:41 AM
#19
TLC, it's a beautiful car regardless, and the new rims will send it over the top! Nice job on the kit. Keep us posted regarding the rims. I've been looking at Luxe, Axis, Arelli, KMC and Foose, most of them don't have the correct bolt patterns, so I've been told. RonJon's are nice too, but a little too busy for me. Good luck wit it!
12-21-2008, 09:11 AM
#22
12-21-2008, 02:58 PM
#23
Intermediate
Thread Starter
Join Date: May 2006
Posts: 30
Likes: 0
Received 0 Likes
on
0 Posts
This thread was originally created for 4G enthusiasts that are interested in modifying their TL by adding the aerokit.
I think it is funny how so many people are resistant to change. History never fails to repeat itself.
Teknoking, you are entitled to your opinion and I am glad I was able to make your TL-s even better.
In either case, 3G or 4G, they are all in the same family. Have you ever hated your sibling because of his/her looks?
Cheers!
12-21-2008, 03:21 PM
#24
This thread was originally created for 4G enthusiasts that are interested in modifying their TL by adding the aerokit.
I think it is funny how so many people are resistant to change. History never fails to repeat itself.
Teknoking, you are entitled to your opinion and I am glad I was able to make your TL-s even better.
In either case, 3G or 4G, they are all in the same family. Have you ever hated your sibling because of his/her looks?
Cheers!
I think it is funny how so many people are resistant to change. History never fails to repeat itself.
Teknoking, you are entitled to your opinion and I am glad I was able to make your TL-s even better.
In either case, 3G or 4G, they are all in the same family. Have you ever hated your sibling because of his/her looks?
Cheers!
Grow up guys.......this is getting so old already
 12-21-2008, 03:31 PM
#25
Three Wheelin'
100% agree. There is always a ton of 3g owners in here bashing the car. If you dont like it....move the fuck on and buy something else when u get rid of your 3g. Otherwise.....leave this forum for 4g owners and 3g owners that will get the 4g like myself.
Grow up guys.......this is getting so old already
Grow up guys.......this is getting so old already


 04-03-2009, 10:42 AM
#29
I'm Craig
iTrader: (2)

The design is awful, the size is tiny, and the finish is utter s***. They need to make the stock SH-AWD wheels standard on the base TL, and then the upgraded SH-AWD wheels standard on the AWD TL.
04-03-2009, 11:08 AM
#30
Burning Brakes
Wow I just saw this. very nicely done! 958 for the kit sounds pretty decent. Did you buy the kit through your dealer? My dealer quoted $1500 for the kit + install, so I wanted to do it myself and this is a great guide!

 04-04-2009, 08:40 PM
#33
Burning Brakes

 04-05-2009, 11:47 AM
#34
Pro

Join Date: Jan 2009
Age: 42
Posts: 745
Likes: 0
Received 0 Likes
on
0 Posts
Aside from the undersized wheels, the TL looks great in black with the painted chrome strip in the back. The body side moldings also look good on the TL's rather large doors.


 04-05-2009, 07:03 PM
#37
IMO the kit ruins the contours for me. The color doesn't blend well, and the front and back are atrocious. I do like the side door molding, too! It's still a beautiful car despite the kit, and thank god for the 18" stock alloys, those should be stock on every model.
04-05-2009, 07:23 PM
#38
the color blends perfectly...i think you are seeing the reflection of the road in that picture that makes it seem lighter...sorry that you don't like it...I love it and yes the wheels look so much better than the FWD...