Started my lowering process
 02-18-2011, 12:31 AM
#1
Intermediate
Thread Starter

Join Date: Nov 2007
Location: Maryland
Age: 46
Posts: 28
Likes: 0
Received 0 Likes
on
0 Posts
Started my lowering process
Well i started the lowering process on my TL today. I started at 10am and stopped at 2pm managing to get the front two done. That included the front ball joints too. I installed HR race coils and the ingalls front ball joint camber kit. I adjust my camber, but my toe is a little off. my steering wheel is slightly off center towards the right. I got the manual and know what i have to do to adjust. Tomorrow ill be installing the rear coils and ingalls camber kit. Then off to check how close i got my specs with an alignment. Ill take pics soon as im done. I guess all i need now is a set of rims. 
 02-18-2011, 02:26 AM
#2

In for pics! Congratz on the fronts. I lowered my car 2 days ago and it took me 5 hours for the front cause I went into some trouble with rusted bolts + nuts. Have fun with the rear seats, taking them out is easy...but it's hard to put them back in cause you can't see where the hole is to screw the bolts back on. GOod Luck!
02-18-2011, 04:30 AM
#4
Intermediate
Thread Starter
Join Date: Nov 2007
Location: Maryland
Age: 46
Posts: 28
Likes: 0
Received 0 Likes
on
0 Posts
Well so far the ride isnt too bad. It seems to be dampening at the same rates as it did before without alot of extra bounce. But thank goodness for good roads here About the back seats, yeah im dreading it. Thats why i didnt push on yesterday, i wanted to start early and tackle it with all day to spare. Pics will come.
About the back seats, yeah im dreading it. Thats why i didnt push on yesterday, i wanted to start early and tackle it with all day to spare. Pics will come.
02-18-2011, 04:45 AM
#5
Well so far the ride isnt too bad. It seems to be dampening at the same rates as it did before without alot of extra bounce. But thank goodness for good roads here About the back seats, yeah im dreading it. Thats why i didnt push on yesterday, i wanted to start early and tackle it with all day to spare. Pics will come.
About the back seats, yeah im dreading it. Thats why i didnt push on yesterday, i wanted to start early and tackle it with all day to spare. Pics will come. I also left tons of scratches on the panel behind the rear seats.
By the way, how low are you planning to go? xD
02-18-2011, 07:48 AM
#6
-------Tim-------
^The bolts behind the headrest do not have to removed all the way. If you loosen them enough, without removing them, and then slide the back of the rear seat up and out(towards the front of car), almost like taking a picture off the wall. Much easier to put back in and then tighten them down. Hope this helps. Good luck!
02-18-2011, 11:16 AM
#7
^ +1 what he said is true
u dont have to remove them, but in my case i didnt understand how the procedure worked and kept on turning, before i knew it the bolts were all the way out lol. it definitely will be a wise choice to not remove them. Like he said, u can loosen it a bit and lift it straight up and forward to get the bolts to slide through the lil hole on the back. However, in my case, i misunderstood what.they meant and thought the seats were able to come out by simply pushing up.
Anyways, just to clarify, up isnt the way to go, its just to get the bolts resting at the back to be off their "resting spot" and am amble to slide through the opening. After that, its forward and down....hope this helps
Trending Topics
 02-19-2011, 03:35 PM
#10
Search is your best friend. =) Anyways, here's the link:
https://acurazine.com/forums/3g-tl-tires-wheels-suspension-97/how-remove-back-seats-put-suspension-3g-garage-f-070-a-567460/
Good luck, hope all goes well for you.
https://acurazine.com/forums/3g-tl-tires-wheels-suspension-97/how-remove-back-seats-put-suspension-3g-garage-f-070-a-567460/
Good luck, hope all goes well for you.
02-20-2011, 04:31 PM
#11
Intermediate
Thread Starter
Join Date: Nov 2007
Location: Maryland
Age: 46
Posts: 28
Likes: 0
Received 0 Likes
on
0 Posts
You were right the backs took alot less time. I got the rears done in about 1.5 hours. Too easy. All i did was loosen the bolts and pulled the seat off. It wasnt bad. The hardest part for me was installing the rear camber kit. I got the bottom set off easy. But the upper one the bolts were seized up. If it wasnt for my husband i wouldnt have been able to get them out. He had to heat them up with a torch damn near till they melted to get them out. Even still he had to cut them. Well he got them out i did the rest and got them installed. We did the alignment together. Took it to a shop and got the alignment checked. I wasnt too far off. I know where i went wrong i think. Well here are the pics.

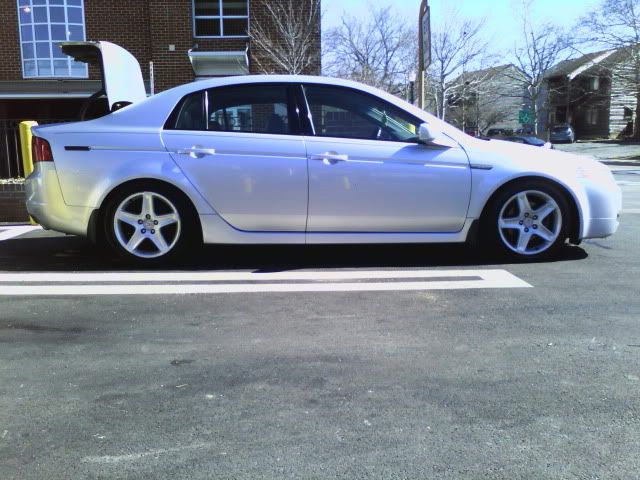
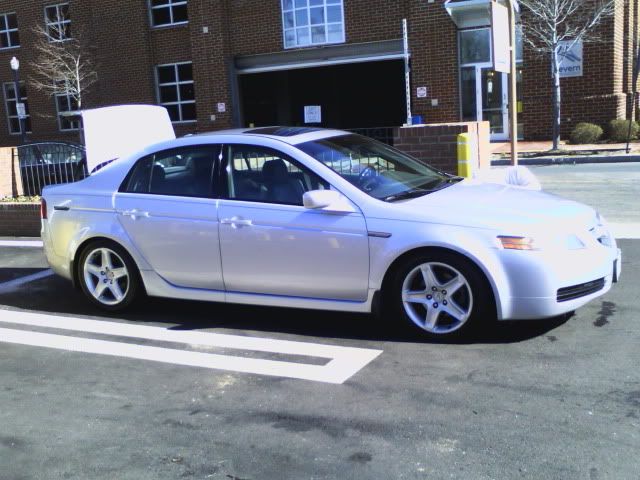
Sorry about the camera phone pics my hubby broke the damn digicam. Anyway, i need some rims now. And my man is pissed i spent all the money he had for his rims for his truck.
Sorry about the camera phone pics my hubby broke the damn digicam. Anyway, i need some rims now. And my man is pissed i spent all the money he had for his rims for his truck.
02-21-2011, 05:09 AM
#14
Intermediate
Thread Starter
Join Date: Nov 2007
Location: Maryland
Age: 46
Posts: 28
Likes: 0
Received 0 Likes
on
0 Posts
Yeah i did H&R race springs with KYB struts and shocks. Not the coilovers. Its a 2 in front and 1.75 in the rear. I like it so far. Havent bottomed yet. And its really not too bouncy.

Thread
Thread Starter
Forum
Replies
Last Post
marcelft
2G TL (1999-2003)
30
07-10-2018 06:17 PM
Oakes
Wash & Wax
10
10-12-2015 11:17 AM