
DIY: Upper Adjustable Balljoint bolt Clearance Opening

Thread Starter


Joined: Sep 2008
Posts: 78,246
Likes: 20,200
Ok, this warranting a DIY is a little questionable but figured I'd share my experience since I went ahead and did this.
On the 3G side, we've been discussing why when you lower past a certain point (maxed on teins and just normal lowering on all the other F&F, HTs, N1 etc) and have an SPC or other adjustable upper balljoint installed, your car feels and sounds ridiculous when hitting even the most modest bump in the road. Decafe and a few others mentioned that a lot of people cut out an access hole to allow the nut to up into rather than slamming into the metal where the shock top (delicious!) mounts.
Here was my solution. And do yourselves a favor, don't be a cheapskate, get yourself a metal hole saw bit from harborfreight or home depot.
Using a dremel is kind of an option, but you really have very limited space and the angles to make the cuts are difficult...ESPECIALLY on passenger side which is RIGHT next to the AC hi/low pressure lines. BE CAREFUL and do NOT cut that or hammer it.
As discussed, a circular cut retains more of it's rigidity and to be honest, after trying to cut out a rectangle, is a lot easier. Another big one, below or above, there are no wires in the way to create the clearance. Go for it...also, I was lucky enough that my camber mount bolts had slammed into the metal hard enough for me to see where I needed the space from above...so technically, remove your covers, and inspect, you can likely just do this from above without even jacking the car up (although, for safety of knowing you won't drill into your upper control arm, I'd suggest you do jack it up.)
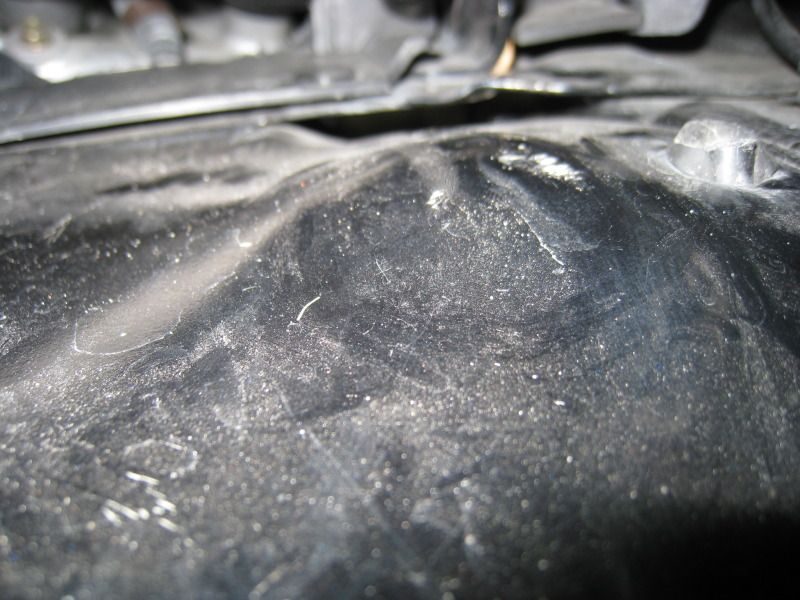
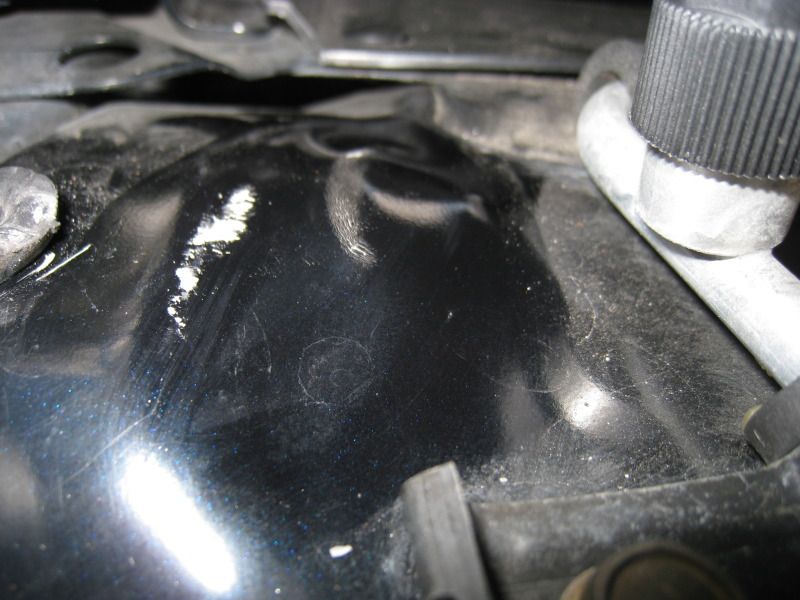
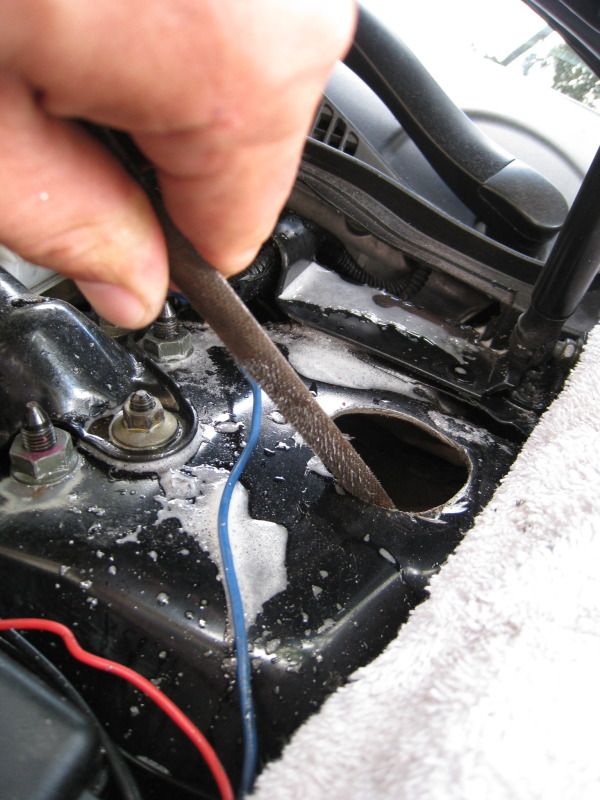
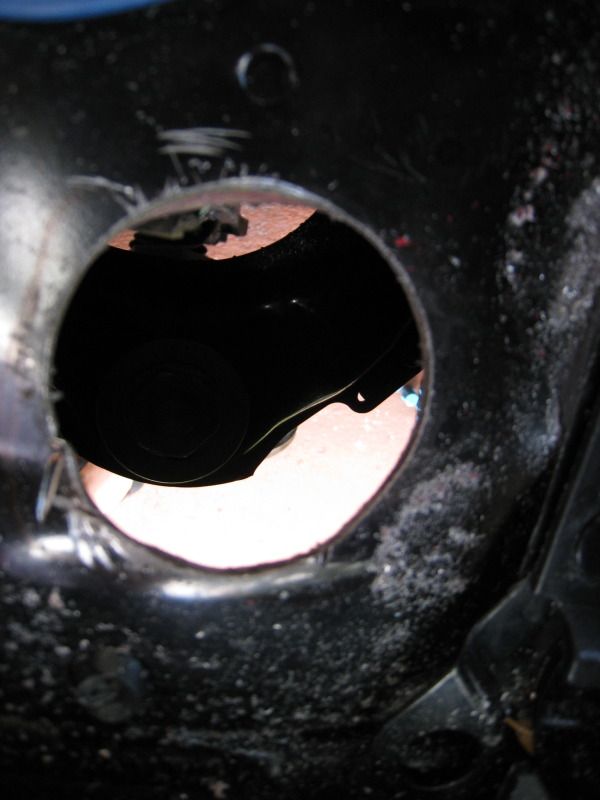
Here, you can see where it was hitting...
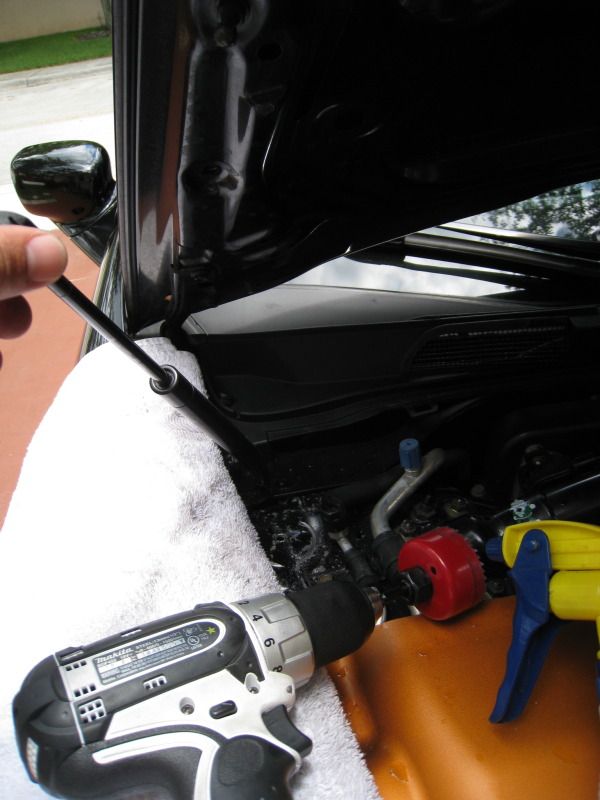
and here is where I started tackling it...and also why I suggested you guys go buy a metal saw...I used a blade that came in one of those cheap kits. Use a center punch to make an indentation to avoid the bit walking, and also, start with a small bit and work your way up to the huge 1/2" bit that goes with a hole saw bit. It's meant for wood, needless to say that I kinda made it through the first hole ok...but 2nd one it got a few mm down and wouldn't go anymore, even with me spraying water to keep the bit cool while drilling.
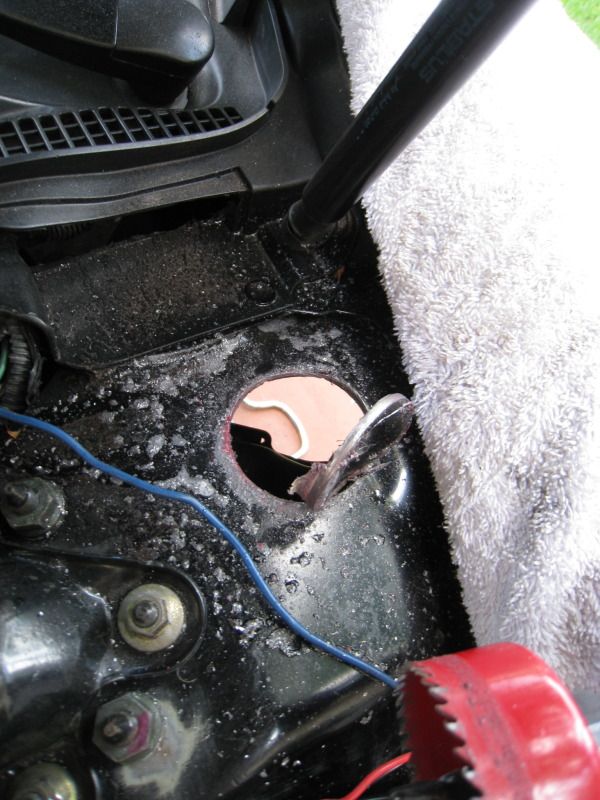
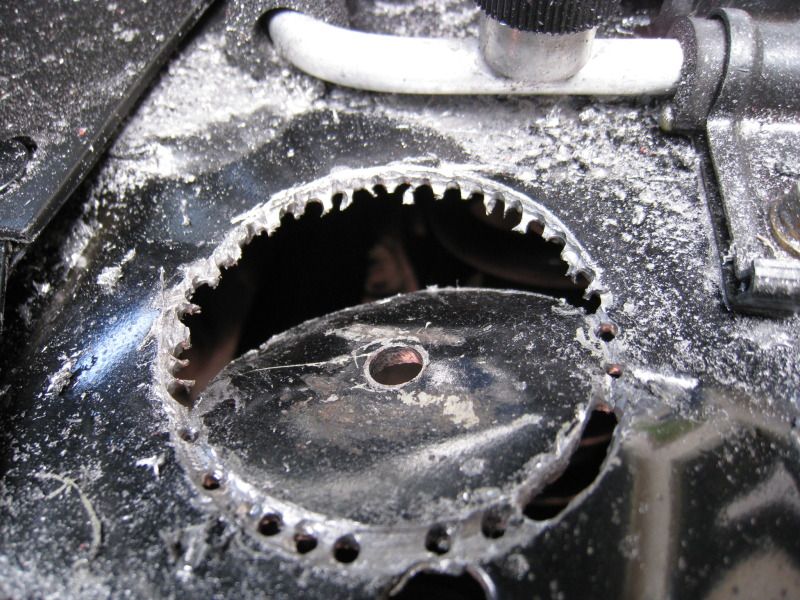
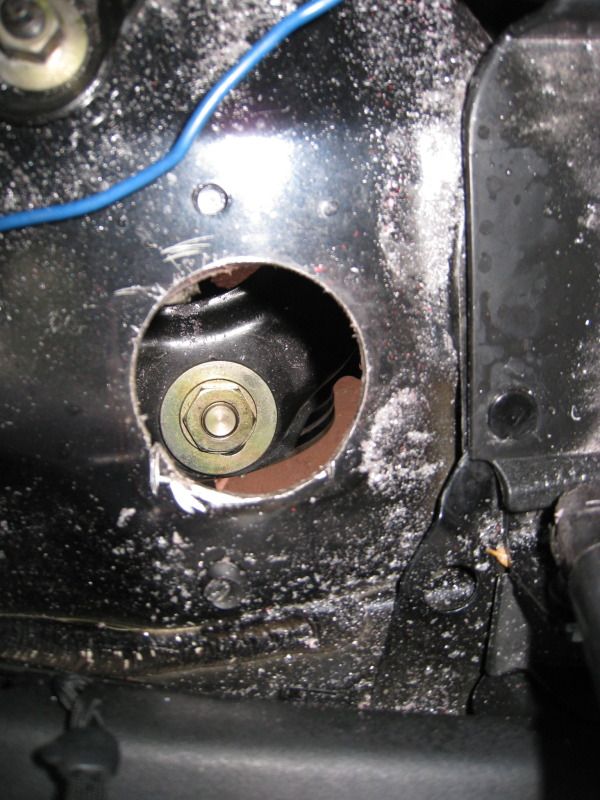
and here, filed it down a little.
Now, passenger side was a PITA...since my bit died and it was hard to access this area, for this side I had to drill a little further out from center...so avoid the AC lines. I also detached the hood damper and moved it off to the side. The driver one was strong enough to hold it up alone (I've replaced them before).
and here, on passenger side, bit got dull, ended up using some ghetto ingenuity and just used a small bit and drilled all the way around, then used a hammer and carefully knocked it through, cut the last piece with the dremel and then used the grinder to get rid of the ridges.
And that is it...very easy, and maxed the front teins...
Drove around last night and no problems, it's perfect, even on a highway with repairs going on, nothing. Didn't bottom out once with fiancee in car too.
Added a dab of touchup paint on all exposed metal surfaces and a piece of rubber weatherstrip I had from another project just for looks.
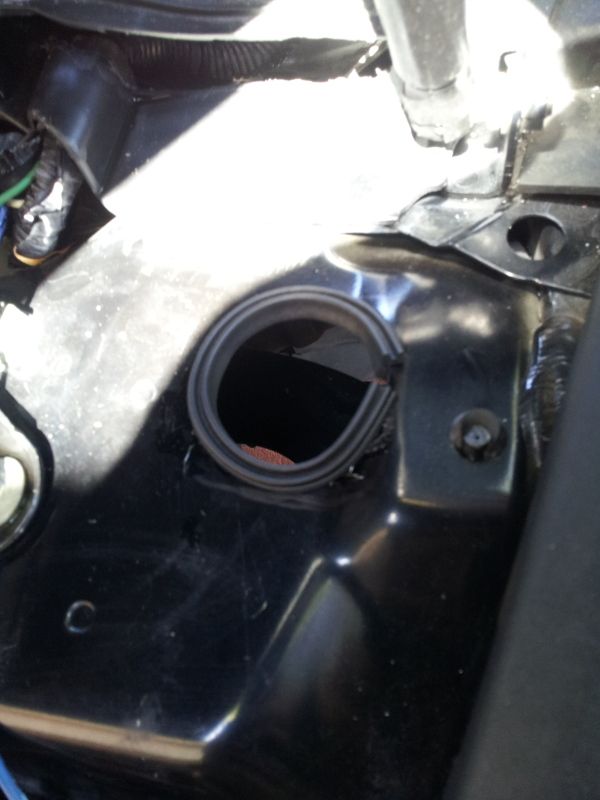
and best part...you can now use a traditional extension and socket on this nut to make adjustments (it's a pain to adjust with a crescent wrench).
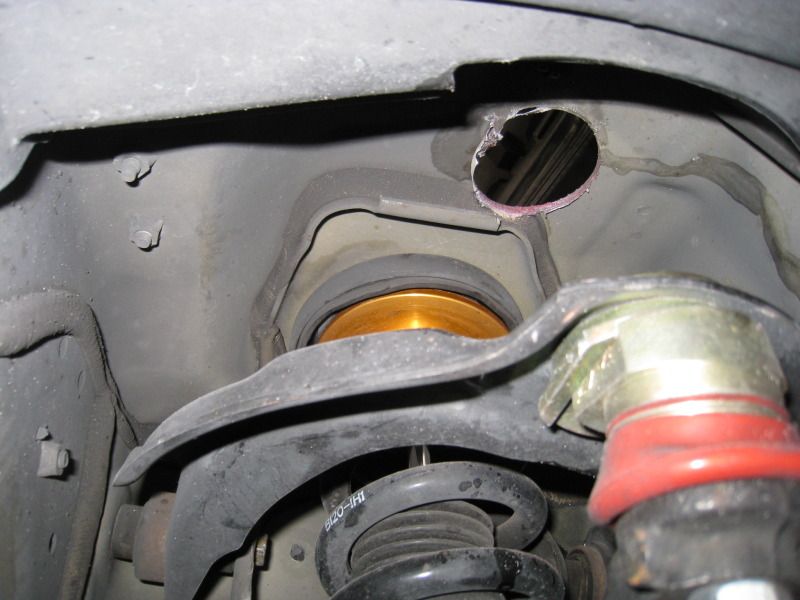
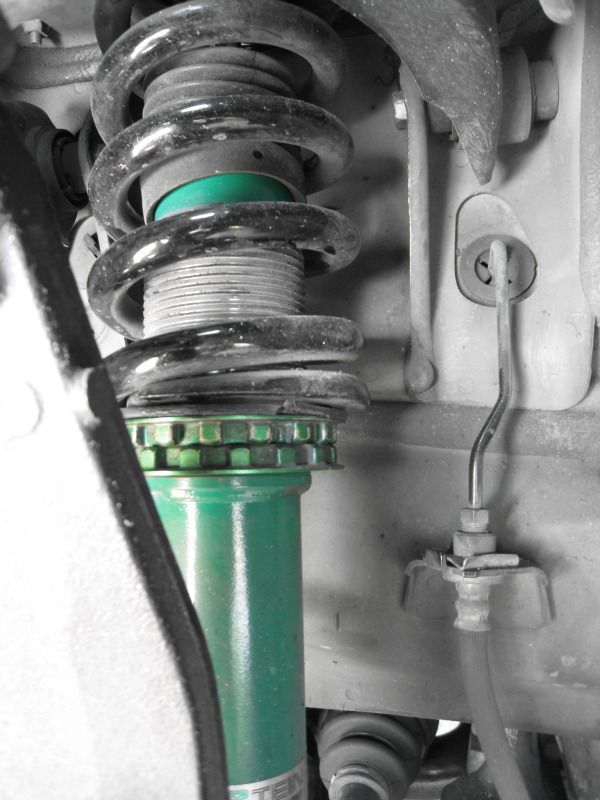
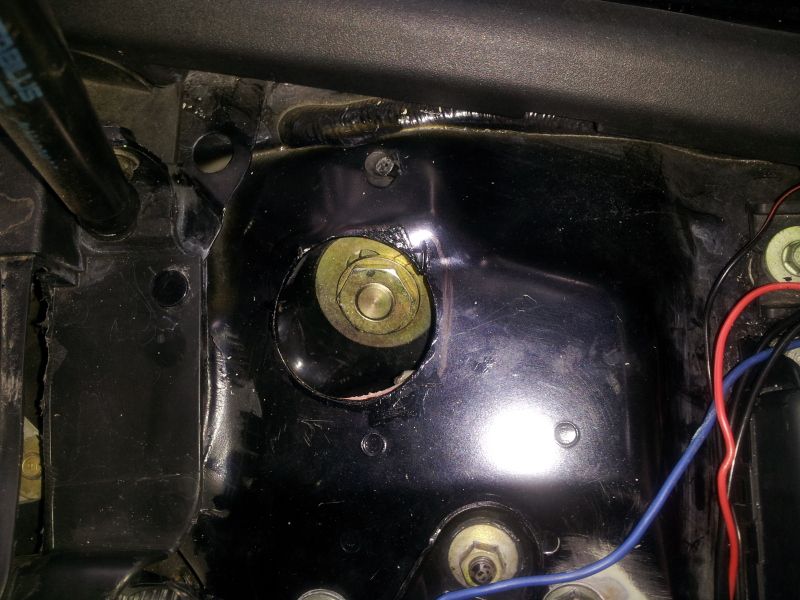
and here, when lowered, it's right there!
On the 3G side, we've been discussing why when you lower past a certain point (maxed on teins and just normal lowering on all the other F&F, HTs, N1 etc) and have an SPC or other adjustable upper balljoint installed, your car feels and sounds ridiculous when hitting even the most modest bump in the road. Decafe and a few others mentioned that a lot of people cut out an access hole to allow the nut to up into rather than slamming into the metal where the shock top (delicious!) mounts.
Here was my solution. And do yourselves a favor, don't be a cheapskate, get yourself a metal hole saw bit from harborfreight or home depot.
Using a dremel is kind of an option, but you really have very limited space and the angles to make the cuts are difficult...ESPECIALLY on passenger side which is RIGHT next to the AC hi/low pressure lines. BE CAREFUL and do NOT cut that or hammer it.
As discussed, a circular cut retains more of it's rigidity and to be honest, after trying to cut out a rectangle, is a lot easier. Another big one, below or above, there are no wires in the way to create the clearance. Go for it...also, I was lucky enough that my camber mount bolts had slammed into the metal hard enough for me to see where I needed the space from above...so technically, remove your covers, and inspect, you can likely just do this from above without even jacking the car up (although, for safety of knowing you won't drill into your upper control arm, I'd suggest you do jack it up.)
Here, you can see where it was hitting...
and here is where I started tackling it...and also why I suggested you guys go buy a metal saw...I used a blade that came in one of those cheap kits. Use a center punch to make an indentation to avoid the bit walking, and also, start with a small bit and work your way up to the huge 1/2" bit that goes with a hole saw bit. It's meant for wood, needless to say that I kinda made it through the first hole ok...but 2nd one it got a few mm down and wouldn't go anymore, even with me spraying water to keep the bit cool while drilling.
and here, filed it down a little.
Now, passenger side was a PITA...since my bit died and it was hard to access this area, for this side I had to drill a little further out from center...so avoid the AC lines. I also detached the hood damper and moved it off to the side. The driver one was strong enough to hold it up alone (I've replaced them before).
and here, on passenger side, bit got dull, ended up using some ghetto ingenuity and just used a small bit and drilled all the way around, then used a hammer and carefully knocked it through, cut the last piece with the dremel and then used the grinder to get rid of the ridges.
And that is it...very easy, and maxed the front teins...
Drove around last night and no problems, it's perfect, even on a highway with repairs going on, nothing. Didn't bottom out once with fiancee in car too.
Added a dab of touchup paint on all exposed metal surfaces and a piece of rubber weatherstrip I had from another project just for looks.
and best part...you can now use a traditional extension and socket on this nut to make adjustments (it's a pain to adjust with a crescent wrench).
and here, when lowered, it's right there!
Last edited by rockstar143; May 27, 2012 at 09:10 PM.

Thread Starter
Joined: Sep 2008
Posts: 78,246
Likes: 20,200
Hey Fellas, TTk, no, when I mentioned it, I hadn't made it yet! 
Plus, to be honest, it was decafe and someone else that mentioned doing this, can't take credit for the idea. I was just told that it wasn't documented very well for us 3G people.
Vill, thanks man...can't believe I have someone done you don't have done to your beast!! Impression, day 2...perfect...maxed on fronts, car is still SUPER driveable.
J.
nice job bro! It actually made me realize this was the noise i was getting... I couldnt figure out for the longest time what it could be so i just lived with it. I had a maxima before this and it didnt have the upper control arm so this is all new to me somewhat lol
Trending Topics

Sorry to revive an old thread. I think you should have used this stuff instead of that other molding it would have looked a lot better. http://www.brandsport.com/ptrm-1150-...l?cmp=fwgs2011 It looks like you did a good job I am on the edge of doing it myself... talk me into it! Are you happy you did it, how much better is it? are you getting any bottoming out still? I am worried if I do this it is just going to travel farther and then cause the hole to open up more or cause more damage. I am just pretty hesitant to cut a hole that large in my car.

^i did the same thing as jeremy and haven't had any issues. no more SLAM BAM BOOM noises from the upper ball joint hitting the shock tower. the ball joint itself, only travels about an inch past the new hole opening on large bumps/dips. it's not like it's going to smash through your hood or anything.
since this is revived... J, have you had any issues with water, dirt, road shit coming up through the holes? i am going to do this at some point because its sounds terrible when it hits the top of the tower, but im trying to figure out if i need to come up with something custom to keep stuff out. Thanks man
^i did the same thing as jeremy and haven't had any issues. no more SLAM BAM BOOM noises from the upper ball joint hitting the shock tower. the ball joint itself, only travels about an inch past the new hole opening on large bumps/dips. it's not like it's going to smash through your hood or anything.
how big of a hole saw did you use? and did you have any issues with clearance on the passenger side. I just went to take a look at mine. You can see where they hit so it should be obvious where to cut the hole. but on the passenger side it looks like it has hit a few times right below the smaller AC line. Do you have all your plastic in your engine bay? if it traveled an inch past the whole it seems like it would definitely damage the plastics. Huge thanks for your help btw.
no issues to report, except a more pleasurable driving experience.

Thread Starter
Joined: Sep 2008
Posts: 78,246
Likes: 20,200
All my holes are dirty, man...so I really didn't notice much of a difference.
the rubber stuff I used to line the hole is long gone, it fell out. No extra rust or further opening of the hole to speak of either...I went from the drive being REALLY not very tolerable to not having any more bottoming out noise. That's it...to me, it's a no brainer.
With the TEINS maxed I'm taking a guess but I think there's still a good 4" of suspension travel when you hit a big bump in the road.
well i just got done doing this I did circles just like rockstar. What really made me decide to do it was when I saw rockstar's pics and realized no more getting pissed off trying to get a crescent wrench up their to adjust camber. The only thing I noticed that no one mentioned is that there is a piece of subframe or something that is up there that still prevents my suspension from traveling much farther, so I grinded that down a litte as well for more clearance, however it still feels like my suspension especially on the passenger side is bottoming out on something over bad bumps I just can't find what. It is definitely not as bad now though. I don't really think much debris will get into the bay. If you look into your wheel well very little debris makes it up that high since its blocked by the wishbone.
Thread Starter
Joined: Sep 2008
Posts: 78,246
Likes: 20,200
The edge of the wishbone has a tab that I remember might stick out a little further...might be what's hitting...worst case, spray some paint up in there and look to see where it's making contact on those big bumps in a week.
I will say that if I hit like a huge pothole or something, I can still make it bottom out, but the day to day driving is fixed...no more clanking!
I will say that if I hit like a huge pothole or something, I can still make it bottom out, but the day to day driving is fixed...no more clanking!
 to make sure that is the culprit and possibly open my hole up a bit or shave the wishbone down some to give it clearance. I am too far along to settle for any banging!
Last edited by joelmatt89; Oct 1, 2012 at 07:34 PM.
Originally it was 2" but then this morning i got motivated and tried to make sure I had gotten rid of any points it would make contact. I took the tires off and unbolted the upper ball joint along with the anti lock brake wire so i could move the wish bone up and down freely (there is some resistance from the bushings so you have to use a little umph). I ended up with more of a half circle type hole that fits the wish bone perfectly. Also If you look at the wish bone by the ball joint there are two rough edges sticking out that were hitting. I ground these down about an 1/8" and shaped it a little so it fit into the hole I made nicely (see picture). I also ground down the rest of the lip that stuck down from the strut reinforcement from below with an angle grinder (see picture). If you take the wishbone off this would be very easy to do. I opted to use a ratchet strap to crank it down out of the way (the bushings resist this). The shape I have below is the exact shape you need for clearance there is no more than 1/8" of space in any direction when the wishbone travels. If you make a 2" circular hole and the widen the farthest edge to 3" that is exactly what I did as you can see in my drawing. At the point I am at now the bolts for adjusting camber now hit on the inner edge of the holes, but I can't cut any further because of the reinforcement and I don't want to remove any more because I think any more pivoting may cause damage to the ball joint, plus it is a good spot for it to make contact since it is reinforced pretty heavily. If you do this its all pretty self explanatory when you start moving the wish bone up and down you can see exactly what I am talking about. I will say if you have two people it would be nice cause that wish bone can be a bitch to move from the bottom while trying to locate where it is contacting from the top. I can still make it bottom out but it is much harder to get it to now and not nearly as bad sounding when it does.
Last edited by joelmatt89; Oct 2, 2012 at 02:41 PM.
Thread Starter
Joined: Sep 2008
Posts: 78,246
Likes: 20,200
dang...you just made my DIY look like a 3rd grader did it in comparison...
thanks for sharing though...you did a bangup job. I must say mine is probably ok because maxed on Teins does NOT equal maxed on most other coils.
thanks for sharing though...you did a bangup job. I must say mine is probably ok because maxed on Teins does NOT equal maxed on most other coils.

I just did mine similarly as well, I only did 1.5" hole on the passenger side and 2" on the driver's side.
I also noticed the wishbone hit on my way home on the driver's side... and was thinking about opening it up more.
I was concerned though really about the adjustable ball-joint hitting more though since if it hit hard enough I thought it could cause the metal to slip and throw the alignment out.
So better if the bolt on the top of the ball-joint smacks the coil-over support in the fender or the wishbone hits the hole :/
Or I could just be careful and not go too fast when I hit dips, roads in Hawaii suck though.
Last edited by mzilvar; Oct 5, 2012 at 02:53 AM. Reason: Spell-check ;)

Thread
Thread Starter
Forum
Replies
Last Post
SidhuSaaB
3G TL Problems & Fixes
18
May 30, 2020 12:40 AM
ExcelerateRep
Sponsored Sales & Group Buys
0
Sep 22, 2015 10:39 AM