Painted Engine Covers, Installed Puddle Lights and Footwell Lighting
 02-25-2012, 03:17 PM
#1
Painted Engine Covers, Installed Puddle Lights and Footwell Lighting
Well, this install pretty much kicked my ass.
I worked on it for about 8 hours, taking my time and making a couple trips to home depot and such. Worked all evening up until 1am actually.
I painted the engine covers the day before though and threw them on after 24 hours of drying. That DIY was simple, just time consuming. 2 coats primer, 2-3 color, and 5 of clear. lots of sanding in between for that smooth finish. They came out ok; but I might re-do it. Also going to paint the IM cover black and polish the letters soon enough.
BTW: For anyone that needs parts definitely try Home depot before the parts store. You'll save a lot of money. Ex: Advanced auto sells wire loom for like 6.99, I got the same quantity from home depot for 1.99. Stupid, right? lol. I got the puddle light kit from LEDMOD.com. definitely a good deal for 39.99 I think with free shipping.
I wired the puddle lights up to the Dome supervisor the way guitarplayer16 describes in his DIY:
https://acurazine.com/forums/3g-tl-2004-2008-93/%5Bdiy%5D-lets-add-some-class-footwell-led-lighting-847702/#post13558344
One of the toughest parts was trying to re-install the sideskirts by myself. Definitely done best with two people. It was really hard to try to slide all the clips in properly. After a lot of time, a lot of yelling, and a lot of cussing, I realized I could just pop out the clips and slide them all into the sideskirts; then just pop the side skirts on. How stupidly simple and easy
I found a way for the wires to come into the cabin in behind the wheel well liner. Cut a small hole in one of the rubber grommets for them to enter the cabin (on both the pass. side and driver's side.)
Then I simply spliced the footwell LEDs into the puddle light wiring. So essentially I did an Add-a-fuse (3a fuse) to the Power Seat Slide fuse and then spliced the negative wire into the dome supervisor wiring. Everything is running off of that now. Any idea if that's safe? Should I put a 5a fuse to be safe? I have 4 12" LED strips running off of that and 10 puddle lights with 4 LEDs in each.
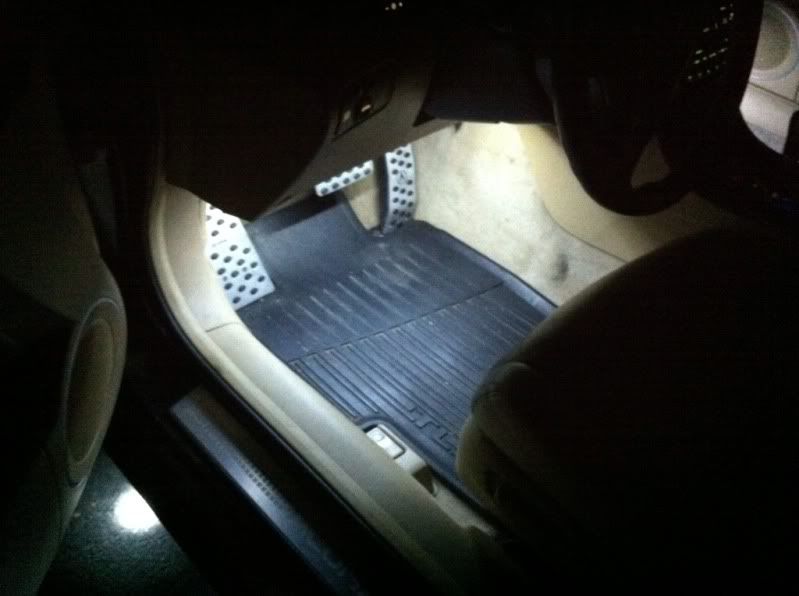
The only problem I had with the Footwell LED's is I don't know where to mount them really. They wouldn't stick to the backseat's vinyl, even with 3m Tape..and they're obviously not going to stick to the carpet/felt underneath the seat. Any Ideas?
Overall I'm very happy with the result. They look amazing and they fade off when I lock the car just like the dome lights do. They also fade off when I close the door and come on when I open it.
Sorry for the bad pics. Iphone status!
Painting/Sanding/Drying


Finished Product

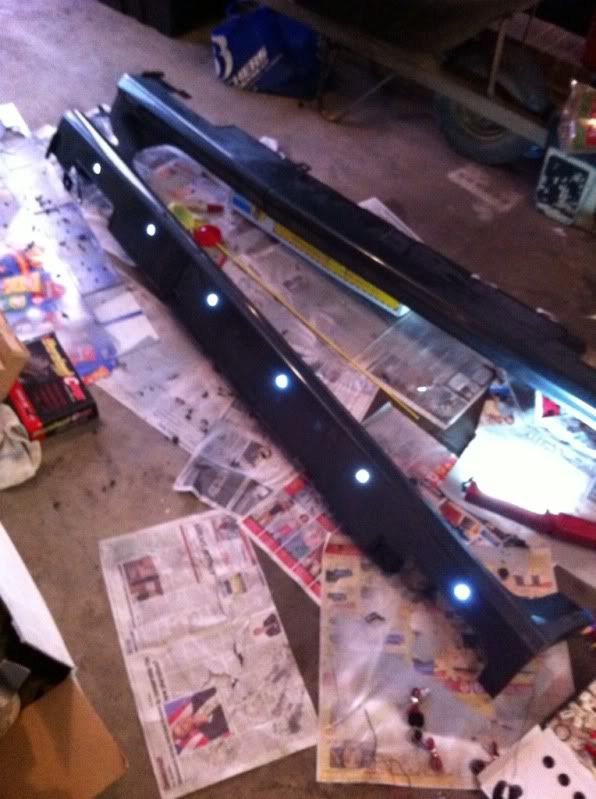
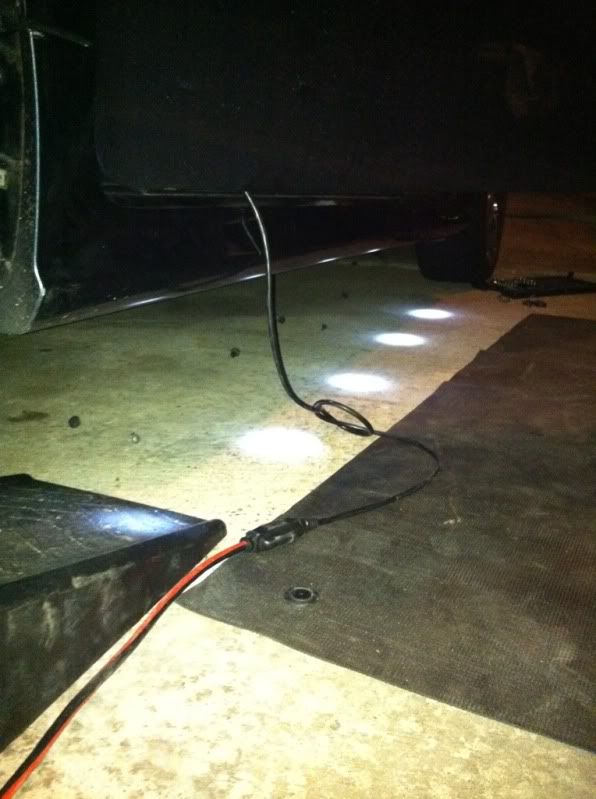
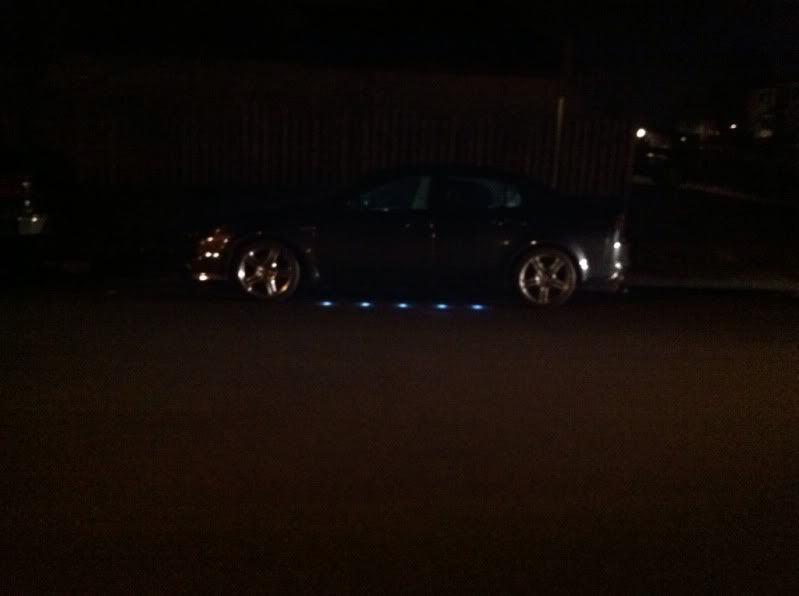
Testing the lights. I'm stupid and accidentally put 6 in one side. I called LEDMOD.com and they said I could purchase 2 extra LED units (1 for each side) so I'd have 6 but I didn't want to wait for shipping and just stuck with 5 per side. So now I have an extra hole in one of my sideskirts. But Home depot has metal plugs for $2.59 so that solved my problem.
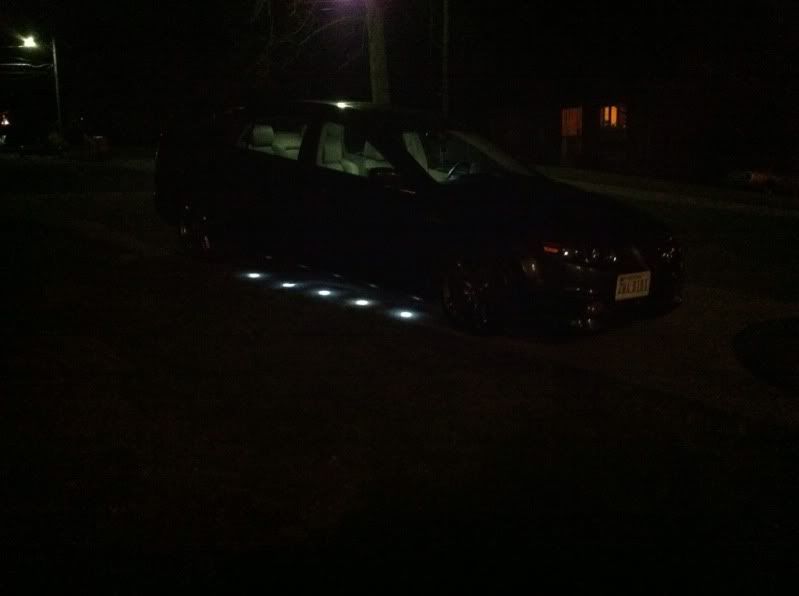
Finished Product!!

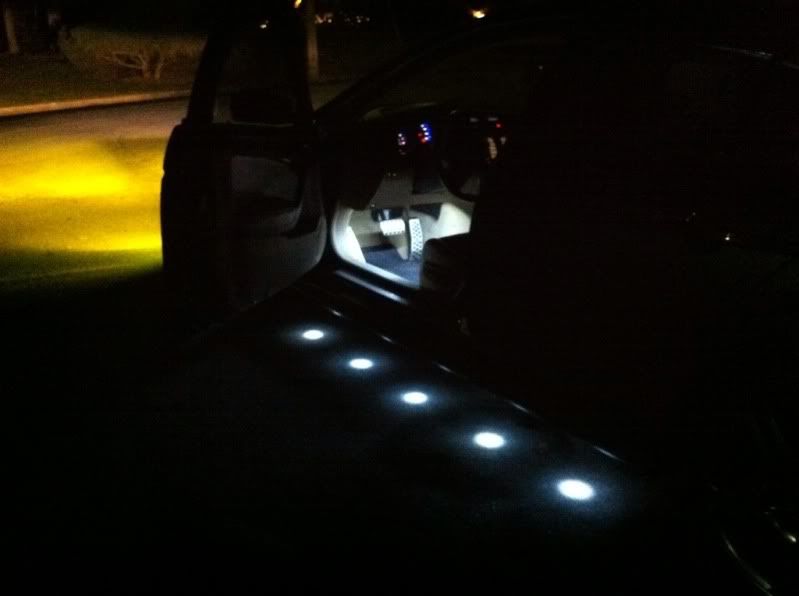
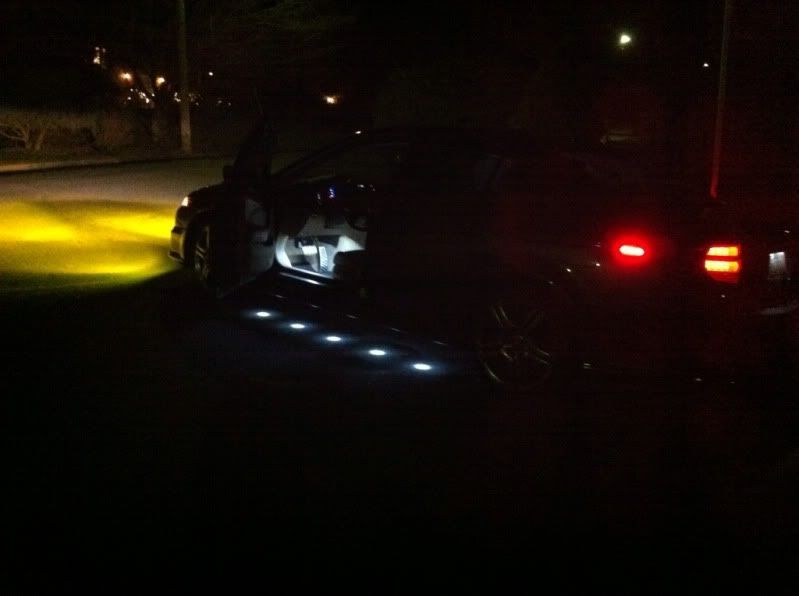
The Dome lights were off in this pic so I could get the full effect of the footwell LEDs. They're SUPER BRIGHT.
I worked on it for about 8 hours, taking my time and making a couple trips to home depot and such. Worked all evening up until 1am actually.
I painted the engine covers the day before though and threw them on after 24 hours of drying. That DIY was simple, just time consuming. 2 coats primer, 2-3 color, and 5 of clear. lots of sanding in between for that smooth finish. They came out ok; but I might re-do it. Also going to paint the IM cover black and polish the letters soon enough.
BTW: For anyone that needs parts definitely try Home depot before the parts store. You'll save a lot of money. Ex: Advanced auto sells wire loom for like 6.99, I got the same quantity from home depot for 1.99. Stupid, right? lol. I got the puddle light kit from LEDMOD.com. definitely a good deal for 39.99 I think with free shipping.
I wired the puddle lights up to the Dome supervisor the way guitarplayer16 describes in his DIY:
https://acurazine.com/forums/3g-tl-2004-2008-93/%5Bdiy%5D-lets-add-some-class-footwell-led-lighting-847702/#post13558344
One of the toughest parts was trying to re-install the sideskirts by myself. Definitely done best with two people. It was really hard to try to slide all the clips in properly. After a lot of time, a lot of yelling, and a lot of cussing, I realized I could just pop out the clips and slide them all into the sideskirts; then just pop the side skirts on. How stupidly simple and easy
I found a way for the wires to come into the cabin in behind the wheel well liner. Cut a small hole in one of the rubber grommets for them to enter the cabin (on both the pass. side and driver's side.)
Then I simply spliced the footwell LEDs into the puddle light wiring. So essentially I did an Add-a-fuse (3a fuse) to the Power Seat Slide fuse and then spliced the negative wire into the dome supervisor wiring. Everything is running off of that now. Any idea if that's safe? Should I put a 5a fuse to be safe? I have 4 12" LED strips running off of that and 10 puddle lights with 4 LEDs in each.
The only problem I had with the Footwell LED's is I don't know where to mount them really. They wouldn't stick to the backseat's vinyl, even with 3m Tape..and they're obviously not going to stick to the carpet/felt underneath the seat. Any Ideas?
Overall I'm very happy with the result. They look amazing and they fade off when I lock the car just like the dome lights do. They also fade off when I close the door and come on when I open it.
Sorry for the bad pics. Iphone status!
Painting/Sanding/Drying
Finished Product
Testing the lights. I'm stupid and accidentally put 6 in one side. I called LEDMOD.com and they said I could purchase 2 extra LED units (1 for each side) so I'd have 6 but I didn't want to wait for shipping and just stuck with 5 per side. So now I have an extra hole in one of my sideskirts.
But Home depot has metal plugs for $2.59 so that solved my problem.Finished Product!!
The Dome lights were off in this pic so I could get the full effect of the footwell LEDs. They're SUPER BRIGHT.
Last edited by quanaman; 02-25-2012 at 03:31 PM.
 02-25-2012, 03:48 PM
#4
Looks good! Covers look nice. Did you apply any high temp clear coat to give them a good glossy shine? Puddles look good. I like the white footwell lighting. I did red in mine. For the rears I zip tied the led modules underneath the the driver and pass seats.
Brings back memories of mods I've done. Trips back and fourth to home depot, radio shack, auto zone. I've gotta get back to some of my own mods. Just been so damn busy CF'ing parts for other people.
Brings back memories of mods I've done. Trips back and fourth to home depot, radio shack, auto zone. I've gotta get back to some of my own mods. Just been so damn busy CF'ing parts for other people.
02-25-2012, 04:34 PM
#5
BANNED
iTrader: (33)

glad I'm not the only TL with puddle lights around here...
great job man, thanks for taking the time to measure the distance between each light...makes all the difference in the finished result.
footwell lighting looks good. that's on my list to do. got a link for them? maybe I overlooked it.
great job man, thanks for taking the time to measure the distance between each light...makes all the difference in the finished result.
footwell lighting looks good. that's on my list to do. got a link for them? maybe I overlooked it.
02-26-2012, 05:38 PM
#6
Looks good! Covers look nice. Did you apply any high temp clear coat to give them a good glossy shine? Puddles look good. I like the white footwell lighting. I did red in mine. For the rears I zip tied the led modules underneath the the driver and pass seats.
Brings back memories of mods I've done. Trips back and fourth to home depot, radio shack, auto zone. I've gotta get back to some of my own mods. Just been so damn busy CF'ing parts for other people.
Brings back memories of mods I've done. Trips back and fourth to home depot, radio shack, auto zone. I've gotta get back to some of my own mods. Just been so damn busy CF'ing parts for other people.
I'll try the zip ties for the rear. The problem is they're LED strips not bars so they're flexible and somewhat annoying. Love your CF and engine bay work...I've been meaning to buy some CF materials and give it a try myself. Where do you get your materials from usually? Ebay just seemed overpriced to me last time I checked...and low quality!
glad I'm not the only TL with puddle lights around here...
great job man, thanks for taking the time to measure the distance between each light...makes all the difference in the finished result.
footwell lighting looks good. that's on my list to do. got a link for them? maybe I overlooked it.
great job man, thanks for taking the time to measure the distance between each light...makes all the difference in the finished result.
footwell lighting looks good. that's on my list to do. got a link for them? maybe I overlooked it.
As for the footwell lighting I got it off ebay for about $6.99 for two 12" strips if I'm remembering correctly. I chose 12" because you can cut them every 3 LEDs so I figured if they were too much I could shorten them easily. Unfortunately one is flickering so I contacted the seller and hopefully he will send me another set.
http://www.ebay.com/itm/260919052869...ht_4827wt_1139
Here's some more pics and a Video of me unlocking the car:
[URL=http://s2.photobucket.com/albums/y34/Afghandragon45/?action=view¤t=751fcb1c.mp4]

Last edited by quanaman; 02-26-2012 at 05:46 PM.
02-26-2012, 05:45 PM
#7
Race Director
iTrader: (8)
Awesome install weekend!
Glad you found my DIY useful (thanks to vlad for location of the dome wire!).
Was the 5 pin connector a pain to remove?
I think I'm gonna pull the trigger on puddle lights now...
Glad you found my DIY useful (thanks to vlad for location of the dome wire!).
Was the 5 pin connector a pain to remove?
I think I'm gonna pull the trigger on puddle lights now...
Trending Topics
02-26-2012, 05:51 PM
#8
Actually it was pretty easy to remove! I just double and triple checked it was the right connector lol. I was scared I'd tap into the wrong one. Then when I went to test the puddle lights I prayed before reconnecting the battery...and they didnt light up. I realized I forgot to reconnect that 5 pin connector
Do it! LEDMOD.com sells them on ebay for I think 49.99 but if you go to their website its 39.99 and FAST shipping. They have black rings around them, (vs chrome) which stops you from getting that Halo affect which I'm glad I looked into before purchasing. If you call the customer service number they're good guys and they'll probably ship to Canada.
Sidenote: I'm heading up to Toronto in May. We should have a meet
Last edited by quanaman; 02-26-2012 at 05:56 PM.
02-26-2012, 06:29 PM
#9
Race Director
iTrader: (8)
Actually it was pretty easy to remove! I just double and triple checked it was the right connector lol. I was scared I'd tap into the wrong one. Then when I went to test the puddle lights I prayed before reconnecting the battery...and they didnt light up. I realized I forgot to reconnect that 5 pin connector
Do it! LEDMOD.com sells them on ebay for I think 49.99 but if you go to their website its 39.99 and FAST shipping. They have black rings around them, (vs chrome) which stops you from getting that Halo affect which I'm glad I looked into before purchasing. If you call the customer service number they're good guys and they'll probably ship to Canada.
Sidenote: I'm heading up to Toronto in May. We should have a meet
I'll need to prepare myself mentally if I can cut holes in my A-Spec sideskirts
 02-26-2012, 07:29 PM
#10
Moderator
iTrader: (3)
Congrats on the new goodies! You did a great job on the engine shrouding.
As for the puddle lights I can't help you with your questions but they look great!
As for the puddle lights I can't help you with your questions but they look great!
02-26-2012, 11:47 PM
#11
I didn't use High Temp paint. Which is another reason I may redo them. I just used regular rustoleum from home depot and for the clear coat I used Duplicolar automotive clear coat. It was just what I had lying around, and I kind of knew I would want to re-do them anyway (figured the first try would suck lol) so I wasn't that worried. Right now I kind of like them so I may leave them as is.
I'll try the zip ties for the rear. The problem is they're LED strips not bars so they're flexible and somewhat annoying. Love your CF and engine bay work...I've been meaning to buy some CF materials and give it a try myself. Where do you get your materials from usually? Ebay just seemed overpriced to me last time I checked...and low quality!
I'll try the zip ties for the rear. The problem is they're LED strips not bars so they're flexible and somewhat annoying. Love your CF and engine bay work...I've been meaning to buy some CF materials and give it a try myself. Where do you get your materials from usually? Ebay just seemed overpriced to me last time I checked...and low quality!
honestly ive purchased CF cloth from several different sites including ebay. and the quality is pretty much the same. no real difference. the main ebay seller of CF material has a legit site they just use ebay to drum up more sales. for resin i use West Systems epoxy. solarcomposites.com they also have CF material or anything else you might need. i'll tell you this, its a learning process and not as easy as it seems. but when done right the results look awesome
as for the painted engine panels, i'll give you some advice. i learned when ever you wanna mod something do you research well. and try to practice doing things the right way one time. this will save you time, money, and headaches. but if the paint holds up and youre happy with them thats cool.
02-27-2012, 09:10 PM
#12
Team Owner
iTrader: (2)
Join Date: Jan 2008
Location: Kansas City, MO (Overland Park, KS)
Posts: 36,545
Received 6,470 Likes
on
5,162 Posts
Wow Quana, I'm impressed. Well done, young squire.
02-27-2012, 09:25 PM
#13
Looks good.. Hopefully i get to do it someday lol.. My driveway is very narrow. I always have to squeeze myself out of the car. Any sort of mod/cleaning/maintenance, i do.. My whole body is in pain for about a week.
02-28-2012, 10:42 AM
#14
Thanks everyone.
I went and picked up some more wire loom yesterday so I could cover the wires leading into the car (I had run out and couldnt leave my car in pieces over the weekend)
I took some extra pics in case anyone else wants to do this mod or needs an entry point into the car for wiring. I just removed the whee well liner and cut small slits in these grommets.
Passenger's side:


Driver's side:


I went and picked up some more wire loom yesterday so I could cover the wires leading into the car (I had run out and couldnt leave my car in pieces over the weekend)
I took some extra pics in case anyone else wants to do this mod or needs an entry point into the car for wiring. I just removed the whee well liner and cut small slits in these grommets.
Passenger's side:
Driver's side:
02-28-2012, 02:03 PM
#17
takin care of Business in
iTrader: (5)
Join Date: Jan 2008
Location: Kansas City, MO
Age: 40
Posts: 30,994
Received 4,732 Likes
on
4,064 Posts
Well done bro....outcome was great for both the mods...!!!

Thread
Thread Starter
Forum
Replies
Last Post
mada51589
3G TL Problems & Fixes
79
05-03-2022 08:54 PM
Marmbo
4G TL Problems & Fixes
6
09-21-2015 09:39 AM