New headlight LED's (Buda is THE MAN!!!)
 10-26-2009, 09:47 PM
#1
Team Owner
Thread Starter
iTrader: (2)
Join Date: Jan 2008
Location: Kansas City, MO (Overland Park, KS)
Posts: 36,545
Received 6,470 Likes
on
5,162 Posts
New headlight LED's (Buda is THE MAN!!!)
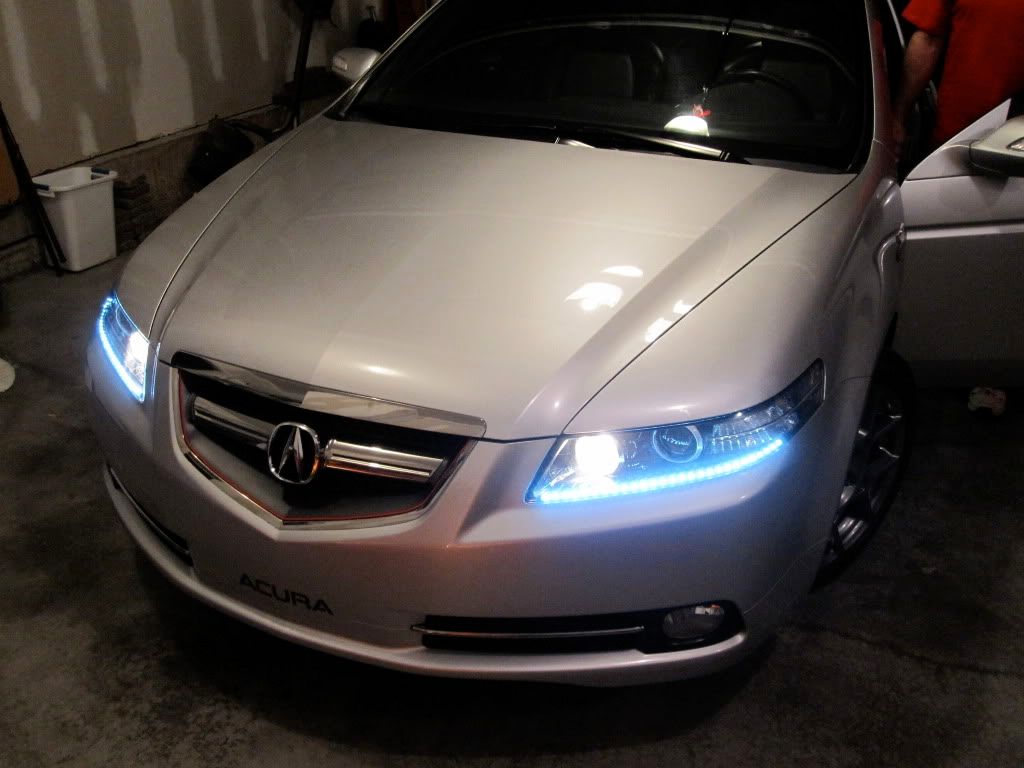
OK guys, I've been patiently waiting for this for a while. Yesterday, Buda and I tackled putting LED's in my headlights (a la bforbrian). These turned out MUCH better than I ever expected.

First, we took off the nose of the car.

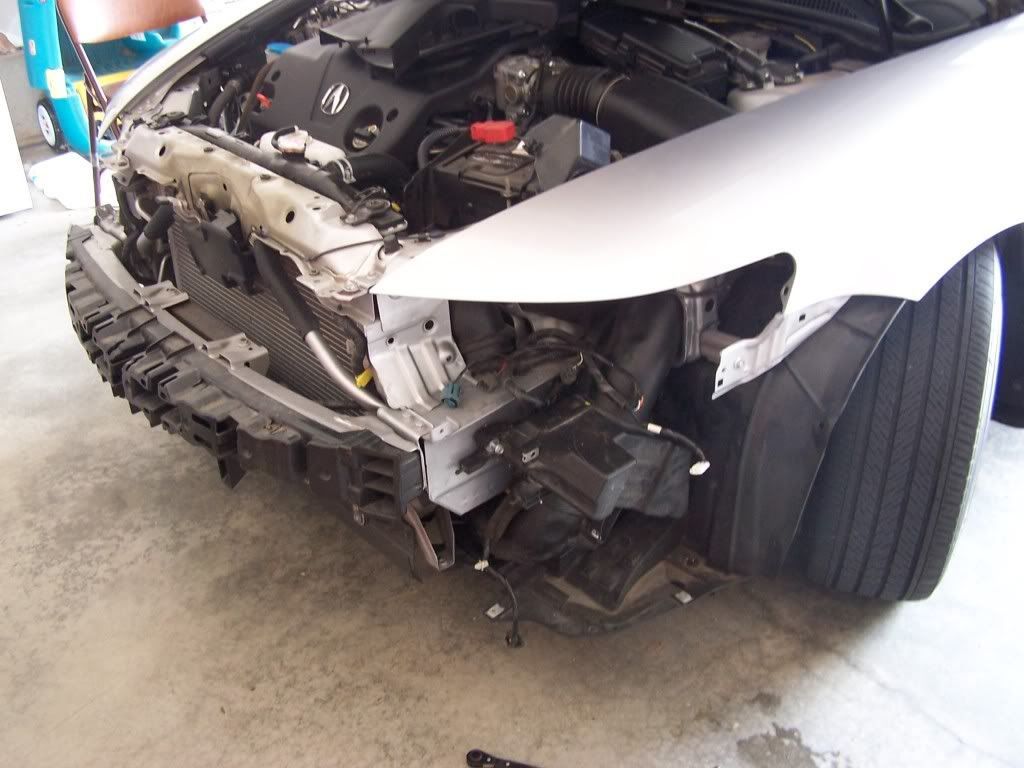
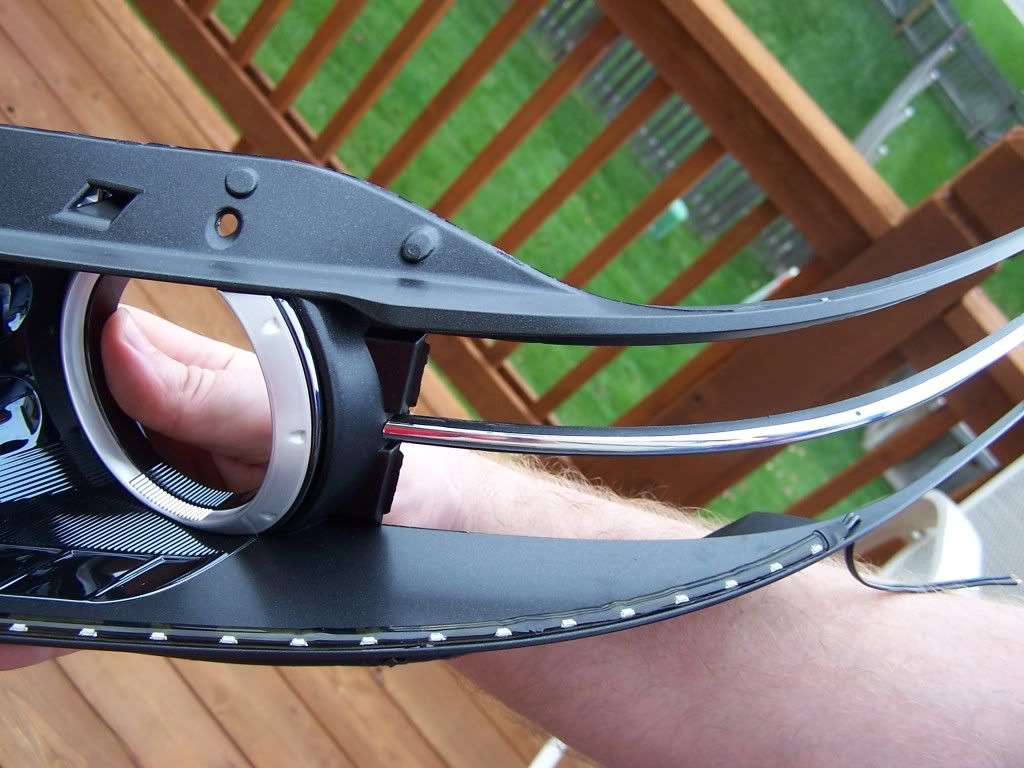
Then removed the headlights. I never told Buda this, but all this made me very nervous, but I trust him totally, so we kept going. The goal was to clear the headlights, insert carbon fiber vinyl in the sides and insert the LED's.
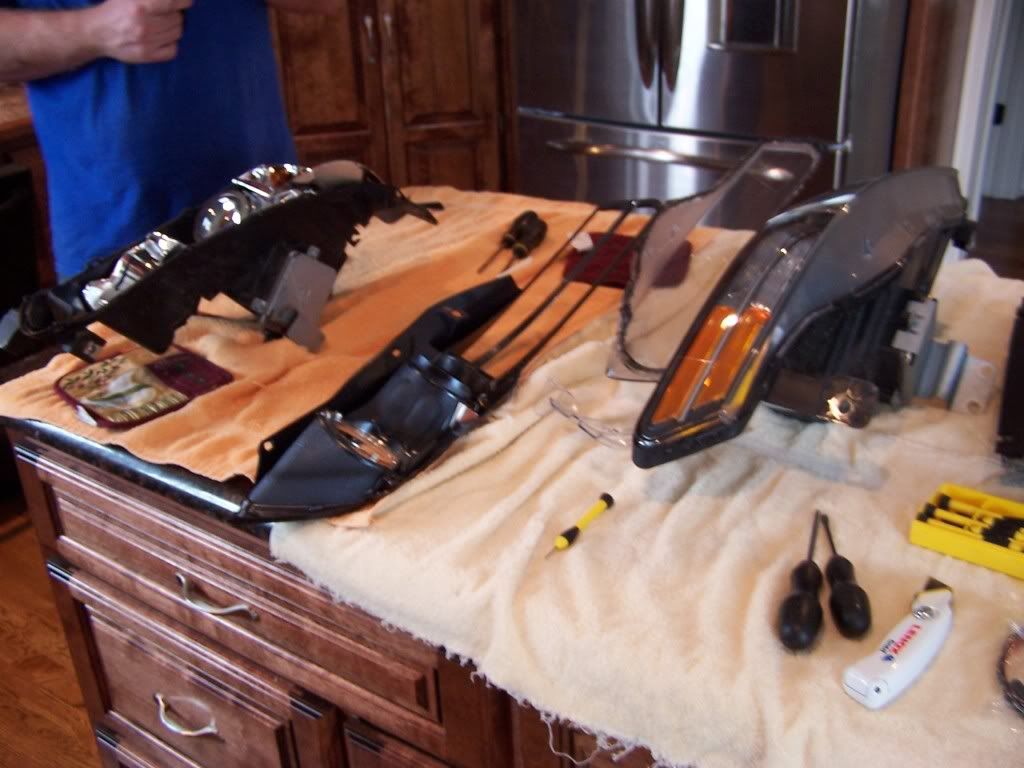
We make a good mess!
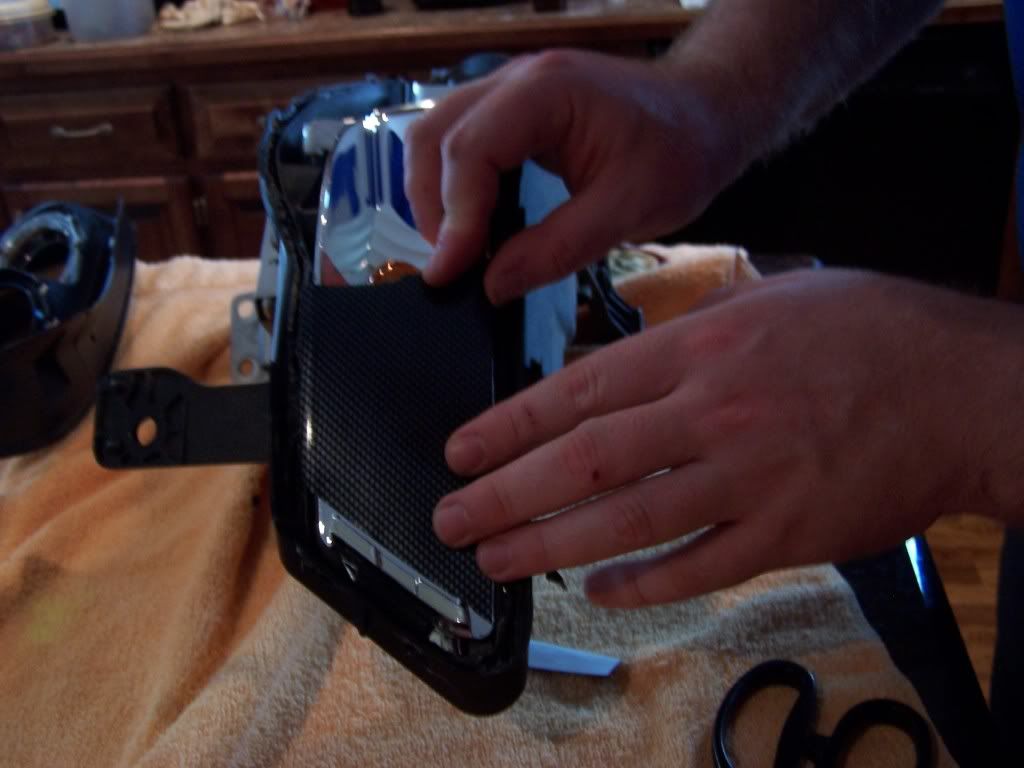
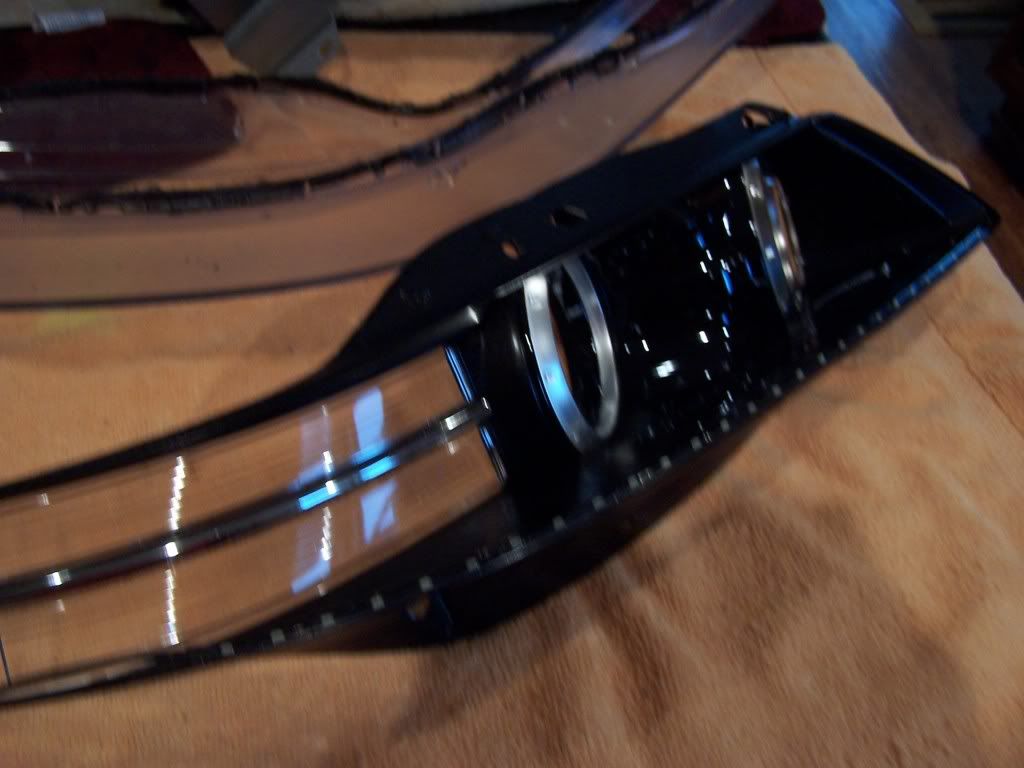
Inserting the carbon fiber.
We placed the brand new side emitting LED's onto the headlight tray. These LED's are brand new from Oznium.com. I bought a 2-two foot lengths for the headlights. Then drilled small holes in the bottom of the try to run the wiring.
We decided to use the diffuser again-a better look for the Type S.
We then rebaked the headlights after applying adhesive-just to make sure the adhesive worked and stuck together. After baking them, we applied more adhesive-just to make sure we had a perfect waterproof seal.
Then it was time to re-insert the headlights into the car. Wiring was next. Buda is a perfectionist, so he shrink wrapped all the wiring, inserted a fuse as a precaution-just in case. We wired the LED's into the winshield wipers. The green wire is hot all the time, so it's a perfect place to tap in to the system. I wanted the LED's on with the DRL's and the headlights. So the green winshield wiper wire facilitated this perfectly.

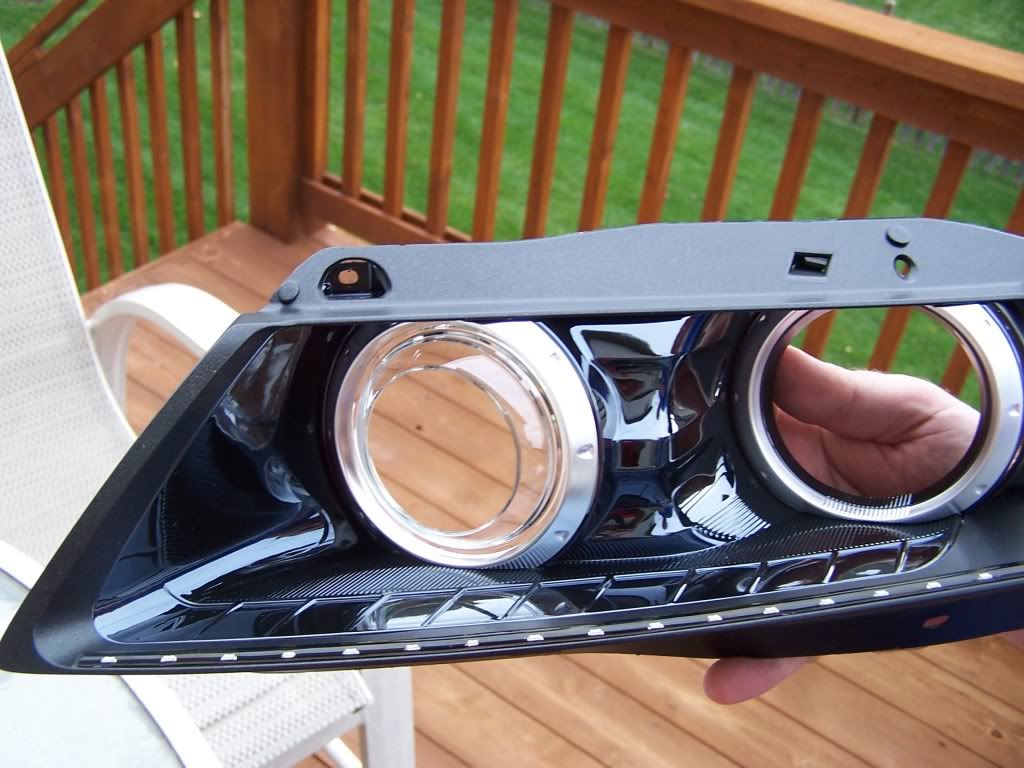
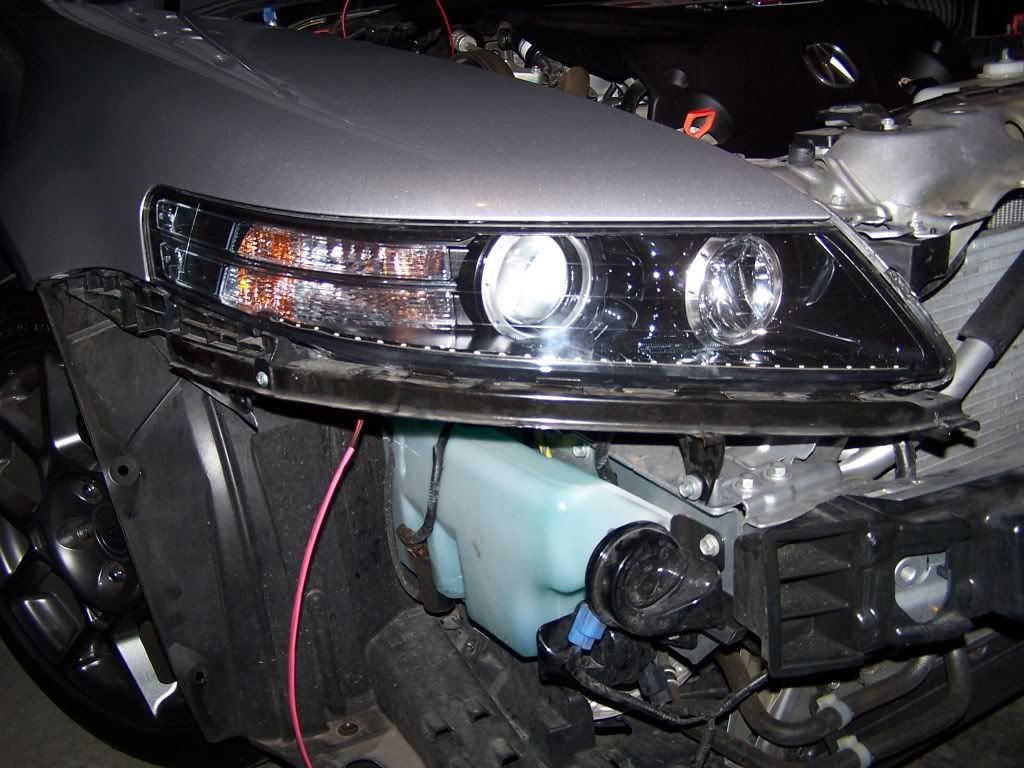
Here's a headlight after we're completely done with the handywork. This is our test before we start re-assembling the Type S.
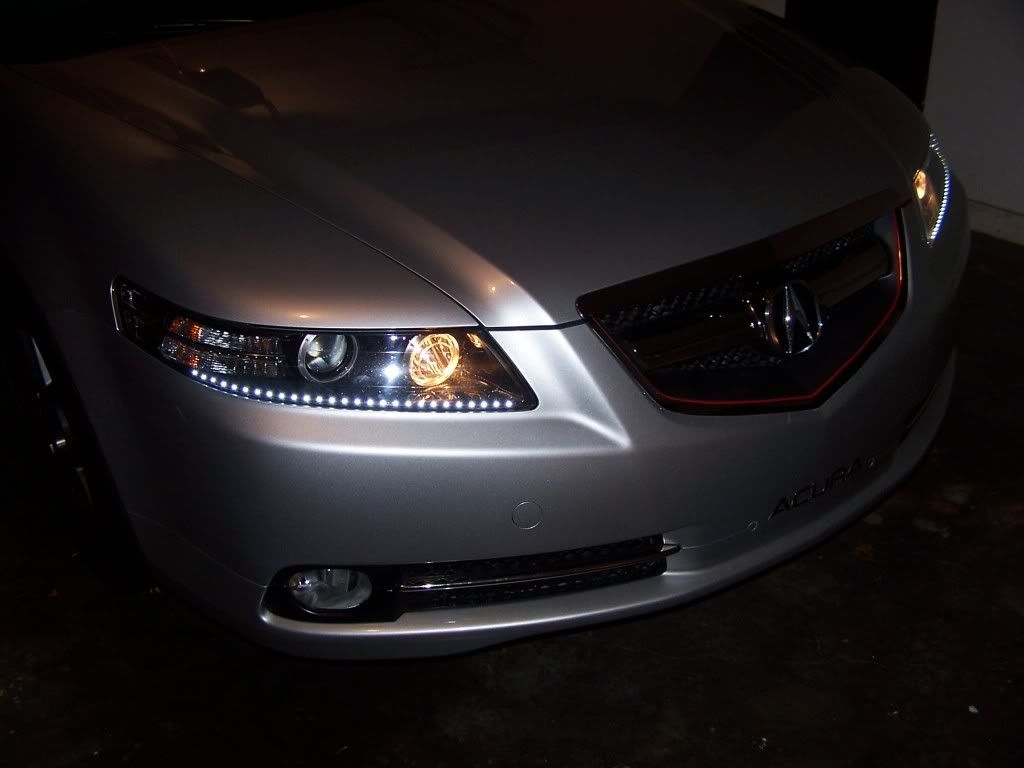
After a lot of hard work, we have the finished product!
....with the DRL's on.
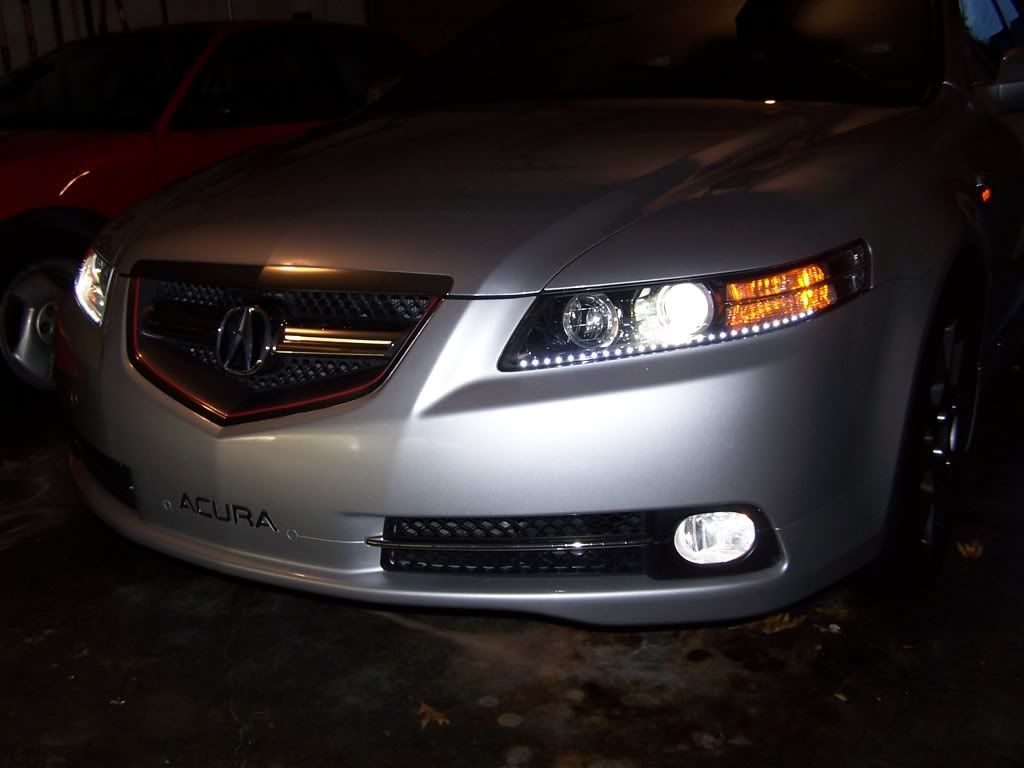
...with the headlights on!

Here's a picture with just the LED's on. We got the headlights to do this by applying the emergency brake---nice effect!
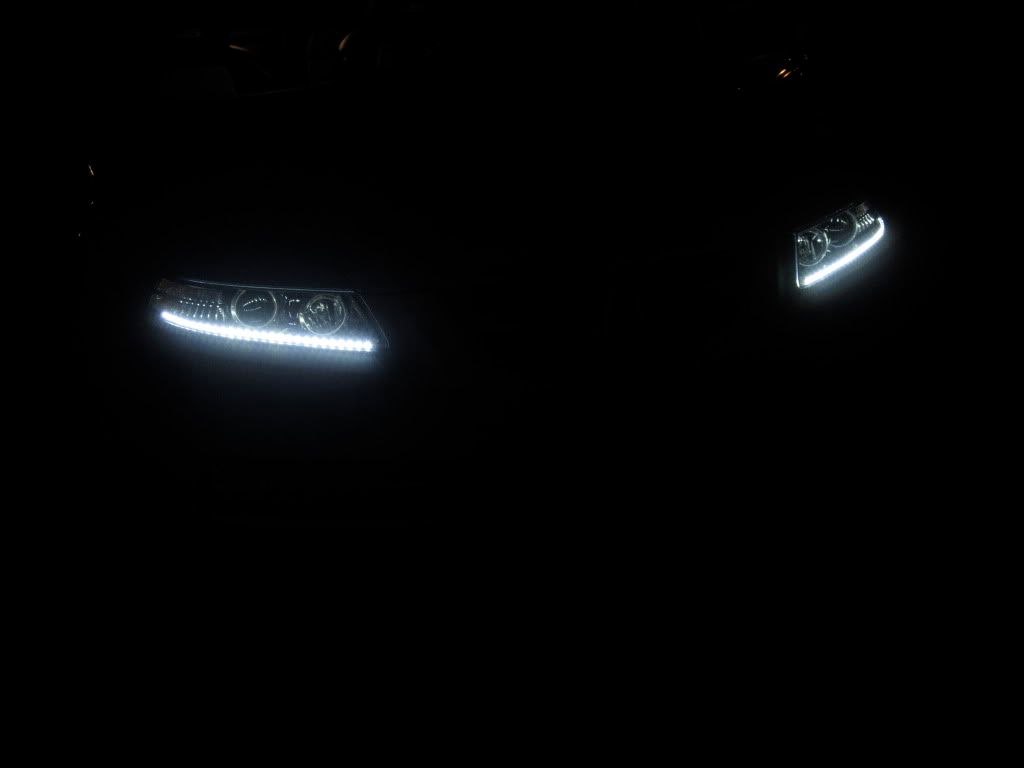
Both of them-in the dark-with the emergency brake on.

Here's everything back together.
The one thing I didn't know is that the diffuser bulb is amber too. I wanted to get the lights cleared, which we did, but I still have amber in the lights because of the bulb. So today I ordered a switchback light that will burn white, but when I turn on the turn signal, it will blink amber. Once they are delivered and installed, I'll update these pictures.
I hope you guys like these pics. Buda, as always did an OUTSTANDING JOB. He is truly a master at all this stuff. Honestly, I could have never done it without him. Me and electricity have never formally met. So I owe this to all to The Master! Thanks Sean !!!!
First, we took off the nose of the car.
Then removed the headlights. I never told Buda this, but all this made me very nervous, but I trust him totally, so we kept going. The goal was to clear the headlights, insert carbon fiber vinyl in the sides and insert the LED's.
We make a good mess!
Inserting the carbon fiber.
We placed the brand new side emitting LED's onto the headlight tray. These LED's are brand new from Oznium.com. I bought a 2-two foot lengths for the headlights. Then drilled small holes in the bottom of the try to run the wiring.
We decided to use the diffuser again-a better look for the Type S.
We then rebaked the headlights after applying adhesive-just to make sure the adhesive worked and stuck together. After baking them, we applied more adhesive-just to make sure we had a perfect waterproof seal.
Then it was time to re-insert the headlights into the car. Wiring was next. Buda is a perfectionist, so he shrink wrapped all the wiring, inserted a fuse as a precaution-just in case. We wired the LED's into the winshield wipers. The green wire is hot all the time, so it's a perfect place to tap in to the system. I wanted the LED's on with the DRL's and the headlights. So the green winshield wiper wire facilitated this perfectly.
Here's a headlight after we're completely done with the handywork. This is our test before we start re-assembling the Type S.
After a lot of hard work, we have the finished product!
....with the DRL's on.
...with the headlights on!
Here's a picture with just the LED's on. We got the headlights to do this by applying the emergency brake---nice effect!
Both of them-in the dark-with the emergency brake on.
Here's everything back together.
The one thing I didn't know is that the diffuser bulb is amber too. I wanted to get the lights cleared, which we did, but I still have amber in the lights because of the bulb. So today I ordered a switchback light that will burn white, but when I turn on the turn signal, it will blink amber. Once they are delivered and installed, I'll update these pictures.
I hope you guys like these pics. Buda, as always did an OUTSTANDING JOB. He is truly a master at all this stuff. Honestly, I could have never done it without him. Me and electricity have never formally met. So I owe this to all to The Master! Thanks Sean !!!!


 10-26-2009, 10:23 PM
#4
Team Owner
Thread Starter
iTrader: (2)
Join Date: Jan 2008
Location: Kansas City, MO (Overland Park, KS)
Posts: 36,545
Received 6,470 Likes
on
5,162 Posts
He mentioned that yesterday! Reach out to him Link. He said you guys used to talk all the time!
10-26-2009, 10:35 PM
#6
Team Owner
Thread Starter
iTrader: (2)
Join Date: Jan 2008
Location: Kansas City, MO (Overland Park, KS)
Posts: 36,545
Received 6,470 Likes
on
5,162 Posts
Draztic, please send me the link from V-LED's. I've been looking for brighter DRL's all day and couldn't find anything that was right!
10-26-2009, 10:43 PM
#7
Here you go, kinda expensive. Jptl04 has them...
http://www.v-leds.com/Shop/Control/P...2745/SFV/32481
his thread on them:
https://acurazine.com/forums/3g-tl-2004-2008-93/drl-upgrade-kit-v-leds-696284/
http://www.v-leds.com/Shop/Control/P...2745/SFV/32481
his thread on them:
https://acurazine.com/forums/3g-tl-2004-2008-93/drl-upgrade-kit-v-leds-696284/
Trending Topics
10-26-2009, 10:58 PM
#9
Team Owner
Thread Starter
iTrader: (2)
Join Date: Jan 2008
Location: Kansas City, MO (Overland Park, KS)
Posts: 36,545
Received 6,470 Likes
on
5,162 Posts
Yes! They are brand new-these are the side emitting LED's. They have 2 sided tape on the bottom, so they're easy to adhere to the light brackets. I waited 3 weeks for these to come back in stock at Oznium.
10-26-2009, 11:01 PM
#10
AZ Community Team

Join Date: May 2007
Location: N35�03'16.75", W 080�51'0.9"
Posts: 32,488
Received 7,770 Likes
on
4,341 Posts
Pretty Cool Steven_Bell.

More pics of the CF in the headlight please.
More pics of the CF in the headlight please.
 10-26-2009, 11:16 PM
#12
94 DC4 RS LSV/Turbo
iTrader: (1)
Join Date: Jul 2007
Location: New York City | Stuck in Traffic
Age: 38
Posts: 11,734
Likes: 0
Received 11 Likes
on
11 Posts
thats clean... I woulda thought going all the way to the side would've been better but that looks great
fyi. you may not want to have these running all the time... led's dont live for ever
fyi. you may not want to have these running all the time... led's dont live for ever
10-26-2009, 11:20 PM
#14
AZ Community Team
Join Date: May 2007
Location: N35�03'16.75", W 080�51'0.9"
Posts: 32,488
Received 7,770 Likes
on
4,341 Posts
I think you need the Accord Fog Light Conversion thread.
10-26-2009, 11:38 PM
#17
Steve-
Congrats on finally tackling this... they turned out really clean.
Although I still would have covered every other one...
Did you hook them up to a separate switch? You can save a LOT of led life and hassle if you did, these don't last forever
Congrats on finally tackling this... they turned out really clean.
Although I still would have covered every other one...
Did you hook them up to a separate switch? You can save a LOT of led life and hassle if you did, these don't last forever
10-26-2009, 11:58 PM
#18
Steven, glad you are happy with the lights!
Infamouslink, I've not been on the forums most of the year. Owning a house has really hit my pocket book and being on the forum is not a good way to save money due to the very contagious modding bug. But I do try to respond to PMs although I think I missed a couple in there from some other members.
draztic1011, the strips from oznium is the only thing you need from them. The LEDs are wired to connect directly to a 12v circuit, no additional resistors needed. When I wired them up I did connect them to a low amp inline fuse but that really isn't needed. There are other supplies needed for opening the headlights and running wiring but nothing from Oznium if all you want is the strips.
stillhere153, going all the way to the side was not possible as he left in the diffuser. If the diffuser would have been removed then we could have gone all the way over to the carbon fiber.
Thait, He got the 2 foot length ones (Link to LED strips) and we cut them down to size. You can cut the strip after every 3 LEDs. Steven was nervous about that too. The 2 foot strip has 36 LEDs and we cut it down to 27 as the diffuser was in the way.
bforbrian, Did not install a separate switch but that can still be done with the way I wired them. Also another reason I put the inline fuse in was so if he wanted them off he could always remove the fuse. Not as convenient as a switch but still an option.
10-26-2009, 11:59 PM
#19
Team Owner
Thread Starter
iTrader: (2)
Join Date: Jan 2008
Location: Kansas City, MO (Overland Park, KS)
Posts: 36,545
Received 6,470 Likes
on
5,162 Posts
Thanks Brian. As I said at the beginning of this thread-you were the motivation! They guy at Oznium said I should not have any trouble with the lifespan of these LED's. I guess we'll see if he's right.

 Looks great, hopefully they'll last longer than the ones I used from Oznium
  10-27-2009, 06:02 AM
#26
04TL4L
Wow that came out clean! I want to do this mod so bad.
(if anyone lives in jersey and is good at taking the headlights apart and installing these, pm me to talk about a price!)
(if anyone lives in jersey and is good at taking the headlights apart and installing these, pm me to talk about a price!)
 10-27-2009, 12:11 PM
#32
10-27-2009, 06:24 PM
#37
Team Owner
Thread Starter
iTrader: (2)
Join Date: Jan 2008
Location: Kansas City, MO (Overland Park, KS)
Posts: 36,545
Received 6,470 Likes
on
5,162 Posts
I didn't shoot any wiring pictures, but we tapped into the windshield wipers-the green wiring. There is a group of wires close to the firewall on the driver's side. Just cut into the sheathing that protects all the wires-fish out the green wire and tap into that.