
MY Blue Batmobile overlays (teaser for now...)
 10-22-2008, 03:04 PM
#41
practicing nihilist
OK, thanks for the WDP pics. I'm set on the darker, especially with the cutouts.
Only part I'm stuck on is the reverse light overlays. I like the idea, but I'm wondering if the lighter tint will match the light grey of the license plate area.
Thought's? Bat, guidance?
Only part I'm stuck on is the reverse light overlays. I like the idea, but I'm wondering if the lighter tint will match the light grey of the license plate area.
Thought's? Bat, guidance?
 10-22-2008, 03:50 PM
#42
10th Gear
Join Date: Aug 2008
Location: CT
Posts: 13
Likes: 0
Received 0 Likes
on
0 Posts
Dooon't! Just my thoughts... If you notice the little blue bulbs in my reverse lights - i had to switch out for brighter bulbs. I couldn't see anything as I was backing up- the brighter lights help a bit but I would think with the stock bulbs if you tint they will be useless.
10-24-2008, 02:26 AM
#43

 10-24-2008, 06:20 AM
#44
practicing nihilist
Dooon't! Just my thoughts... If you notice the little blue bulbs in my reverse lights - i had to switch out for brighter bulbs. I couldn't see anything as I was backing up- the brighter lights help a bit but I would think with the stock bulbs if you tint they will be useless.
Placed order. Now I wait.
11-10-2008, 08:22 AM
#46
11-10-2008, 08:32 AM
#47
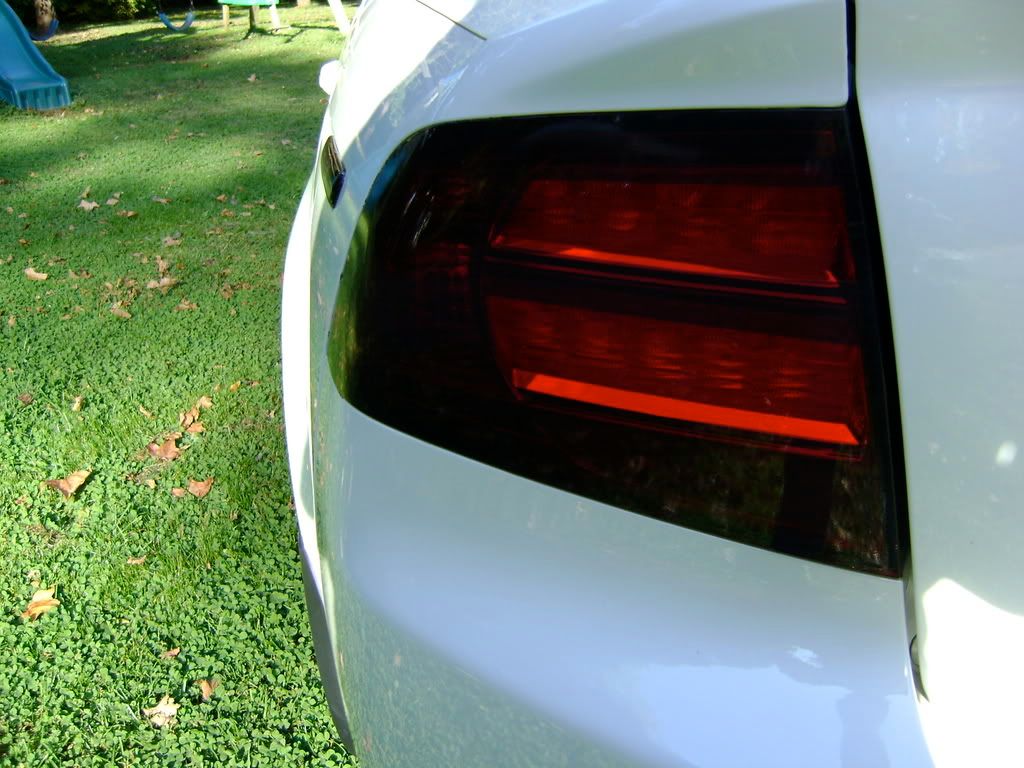
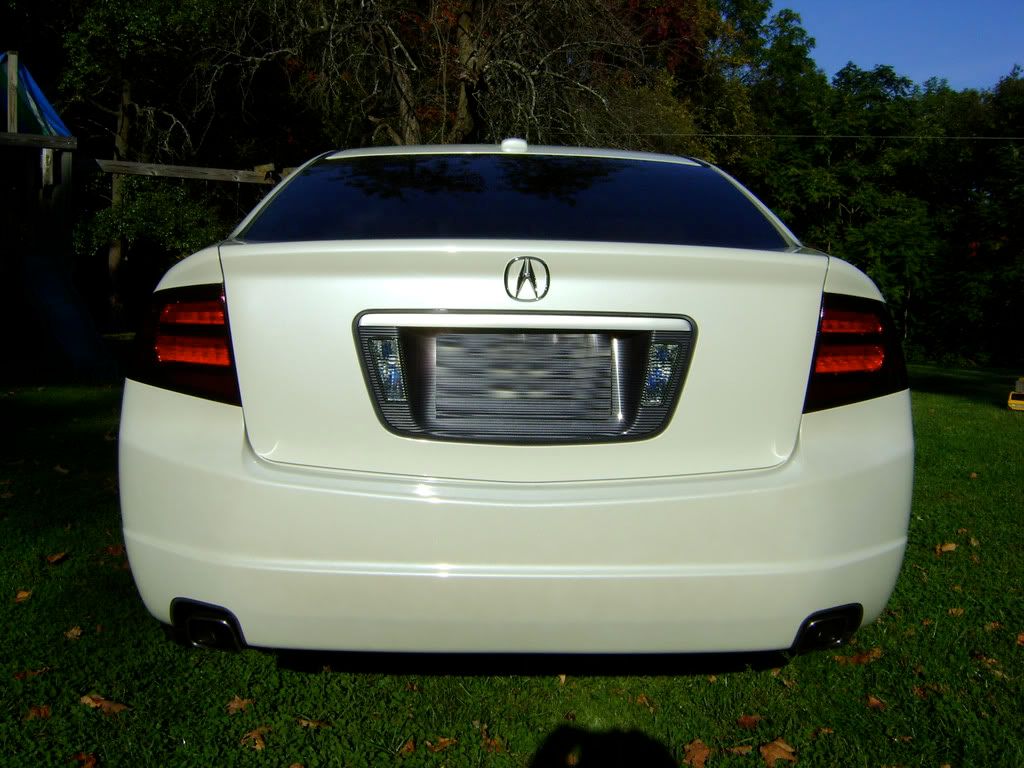
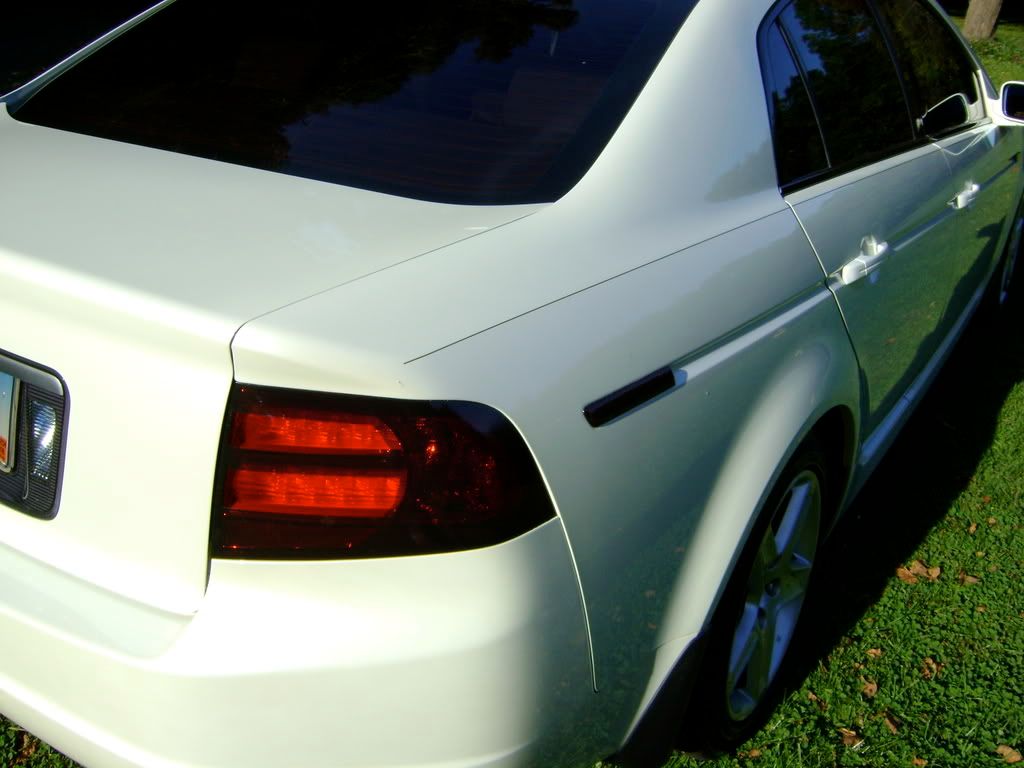
btw, I'll be adding more pics to my gallery soon  . I have full smoke tails, smoke tails with cutouts, full smoke headlights, headlight sidemarker, front and rear sidemarkers, turn signal, fogs, reverse light, and roof overlays
  . Shoot me an email if you're interested .
Bat™
. I have full smoke tails, smoke tails with cutouts, full smoke headlights, headlight sidemarker, front and rear sidemarkers, turn signal, fogs, reverse light, and roof overlays . Shoot me an email if you're interested .Bat™
Last edited by Blue Batmobile; 11-10-2008 at 08:34 AM.
11-17-2008, 08:47 PM
#48
practicing nihilist
Installed my Blue Bat's with cutouts. Did fronts, rear side markers and rears. The rears look horrible up close - lot's of tiny bubbles, creases and a milky residue left underneath from the soap/water application mix. Not so bad to the passing eye.
Fronts turned out pretty good but still have the residue underneath and it's really visible in the front marker lights at night when they're on. Bat, am I totally screwed or will the residue dissipate?
My DIY recommendations:
-Start with the fronts first. They're pretty easy and give you a feel for how to work the material and are pretty forgiving
-Use your fingers with heat to initially work out the larger bubbles and shape the overlay. After that, lot's of heat, pressure and one of those air duct tape squeegies work well.
-Good luck with the rears...they just plain suck at the bend from rear to side.
Really like the cutout design, Bat, and might be ordering some new rears if these really bug me.
 11-18-2008, 07:52 PM
#50
Ned, shoot me an email. I can give you a super discount so you can perfect your installation .
Bat™
.Bat™

Thread
Thread Starter
Forum
Replies
Last Post
rp_guy
Member Cars for Sale
9
07-16-2017 07:33 AM
CLOSED: 3G Acura TL Model Car(Blue)
bluetl04
Non-Automotive & Motorcycle Sales
12
08-16-2016 02:49 PM
detailersdomain
Wash & Wax
3
10-09-2015 10:13 PM