Headlight restored

Thread Tools
 
Search this Thread
 
Old 04-06-2017, 11:47 AM
  #1  
Suzuka Master
Thread Starter
 
truonghthe's Avatar
 
Join Date: Jun 2008
Age: 36
Posts: 7,952
Received 1,687 Likes on 1,303 Posts
Smile Headlight restored

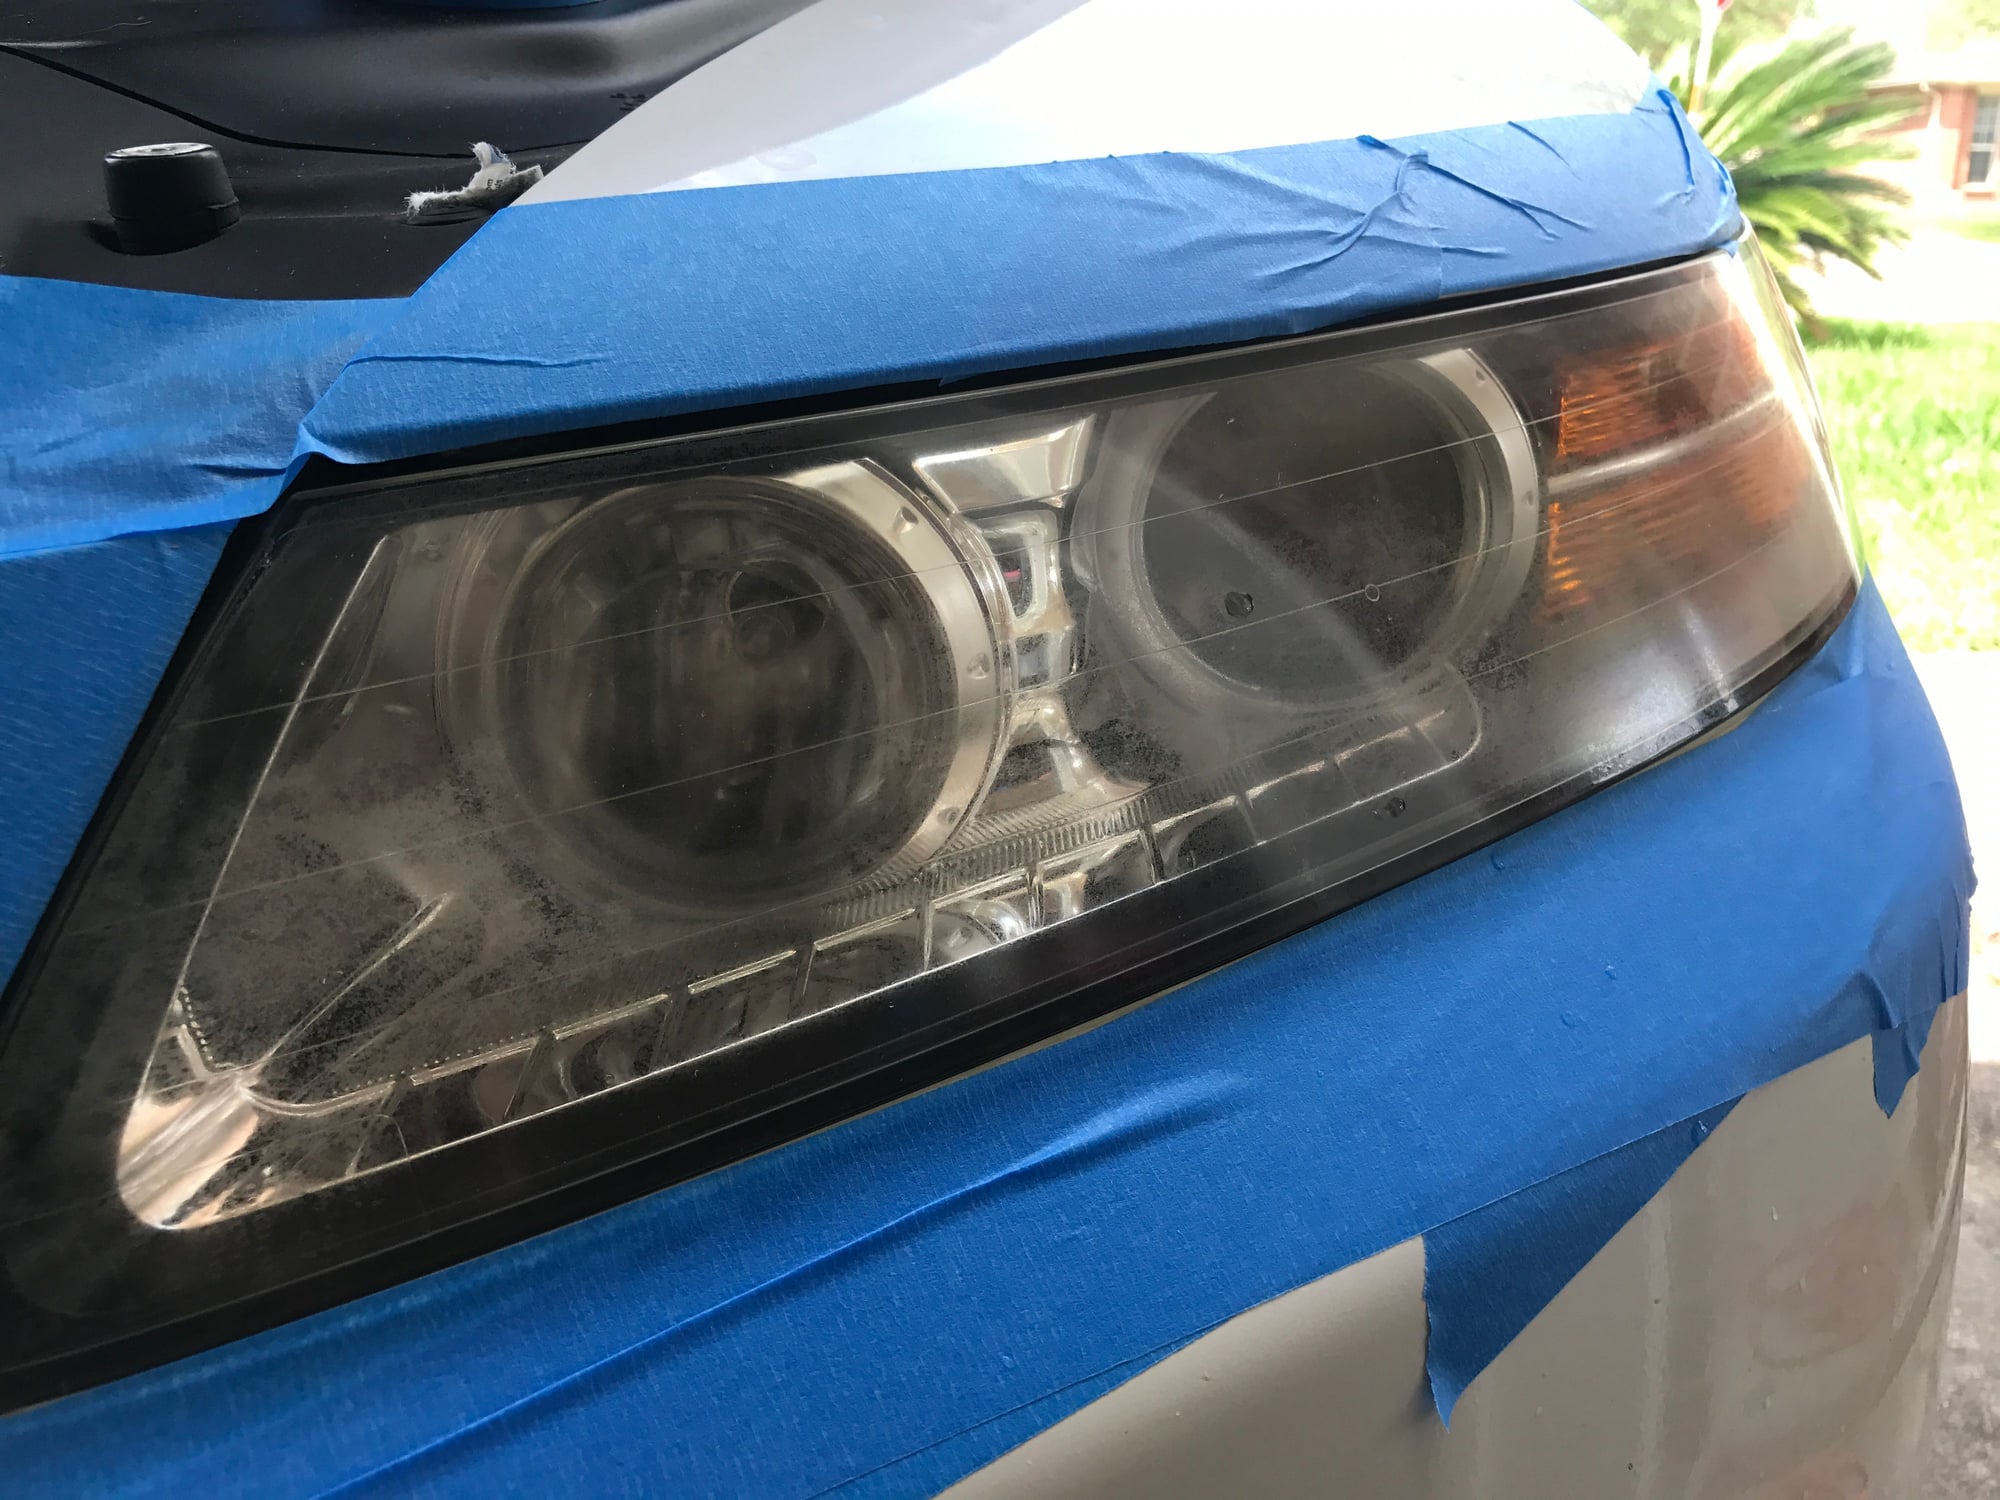
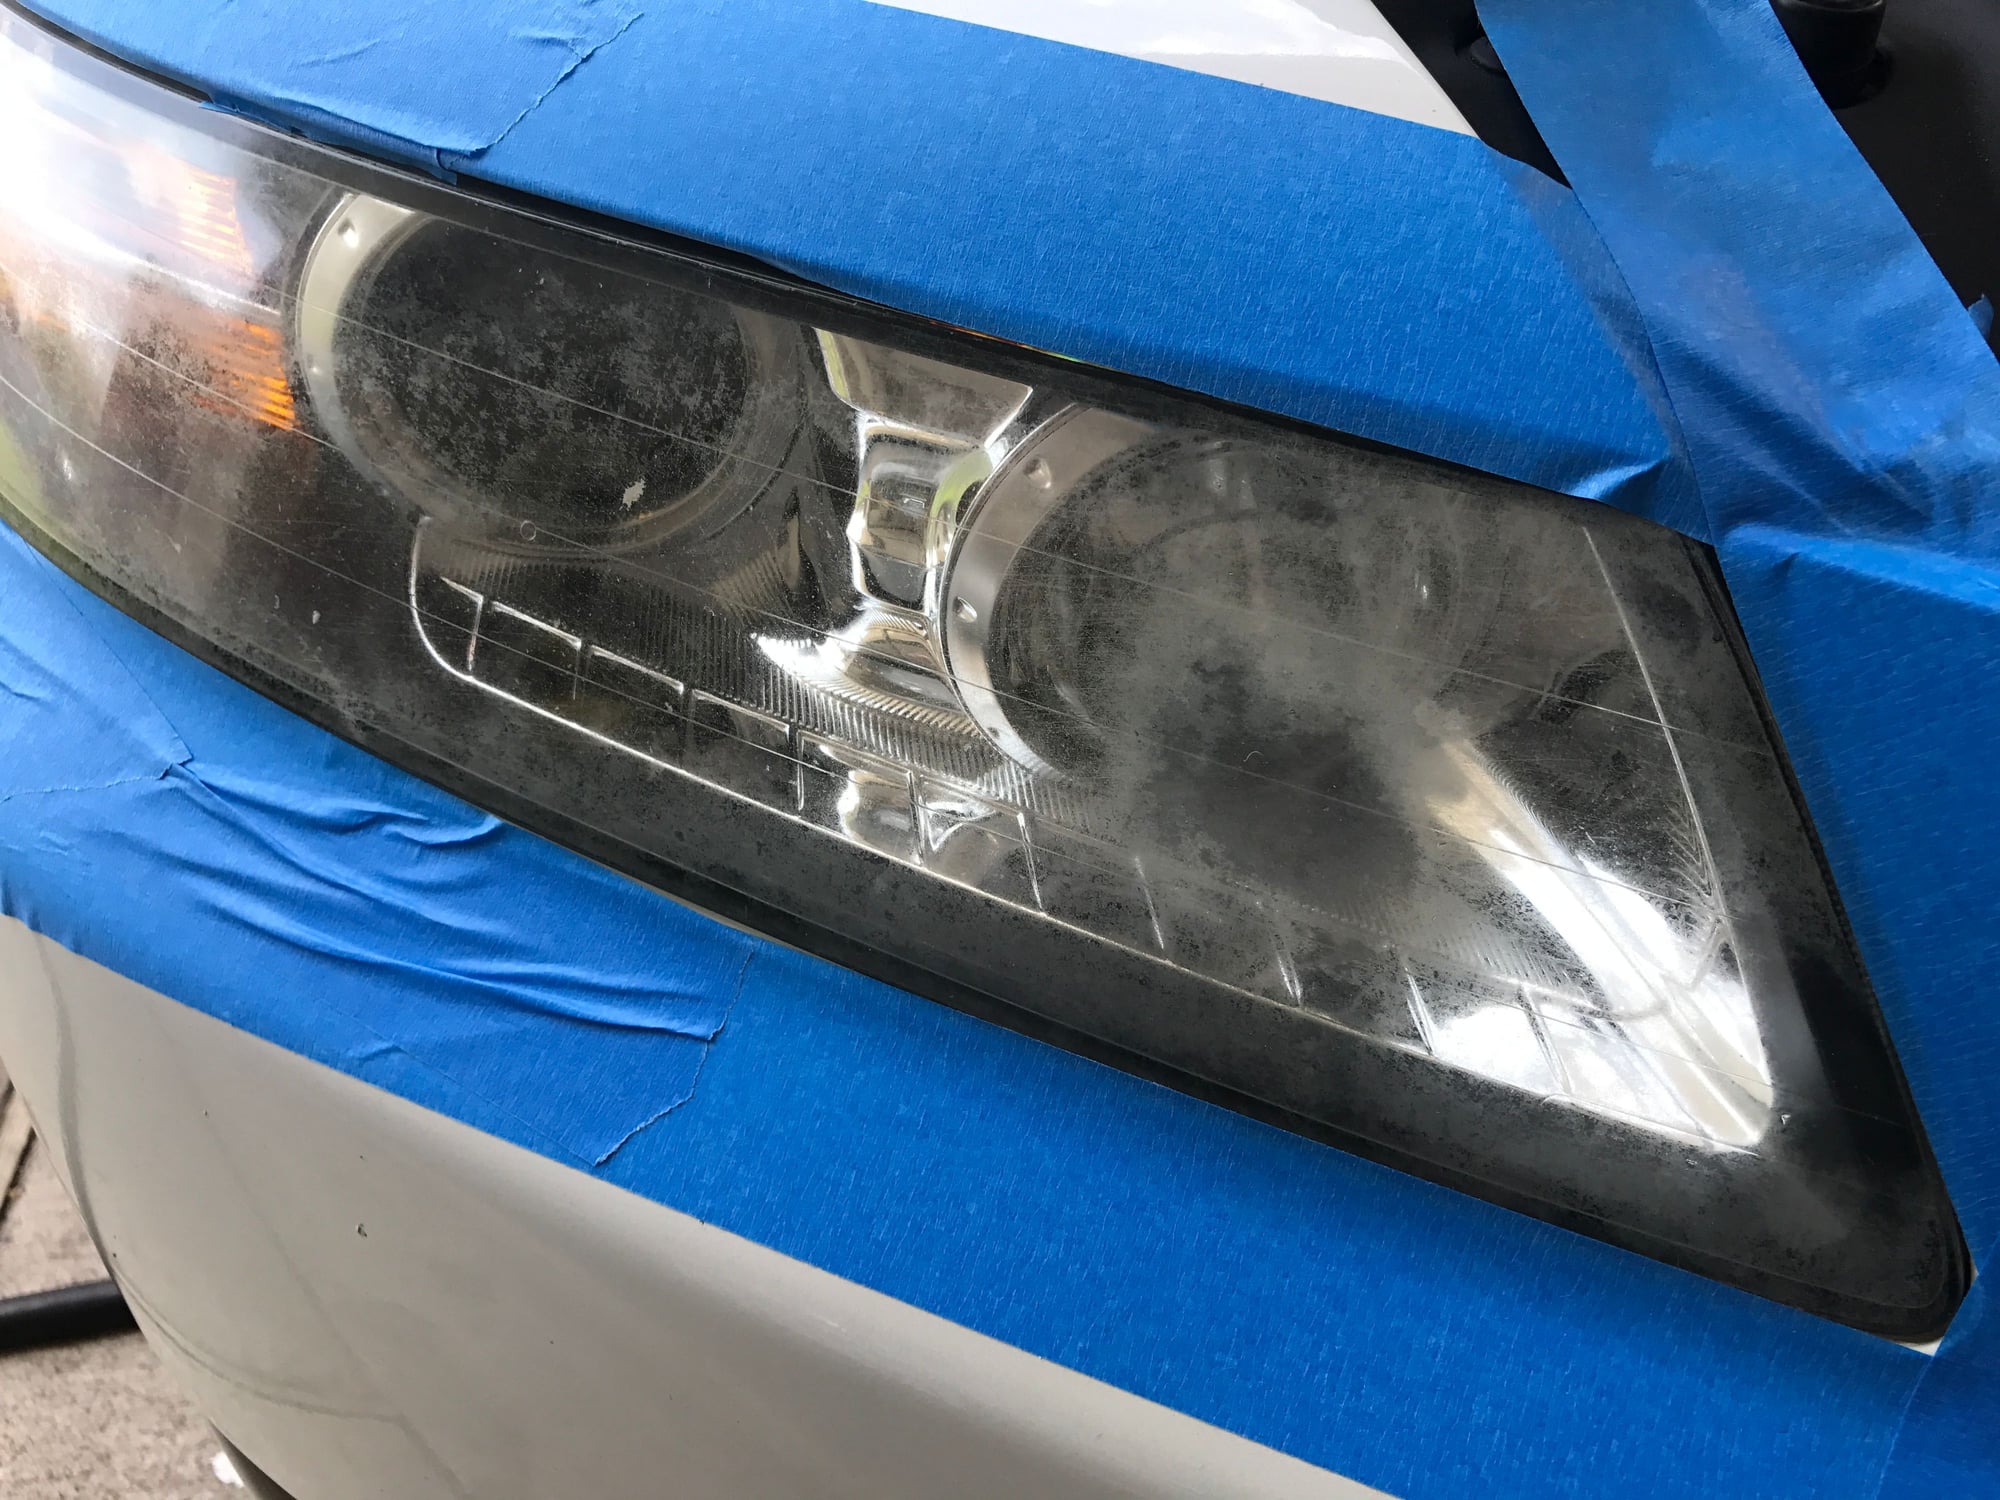
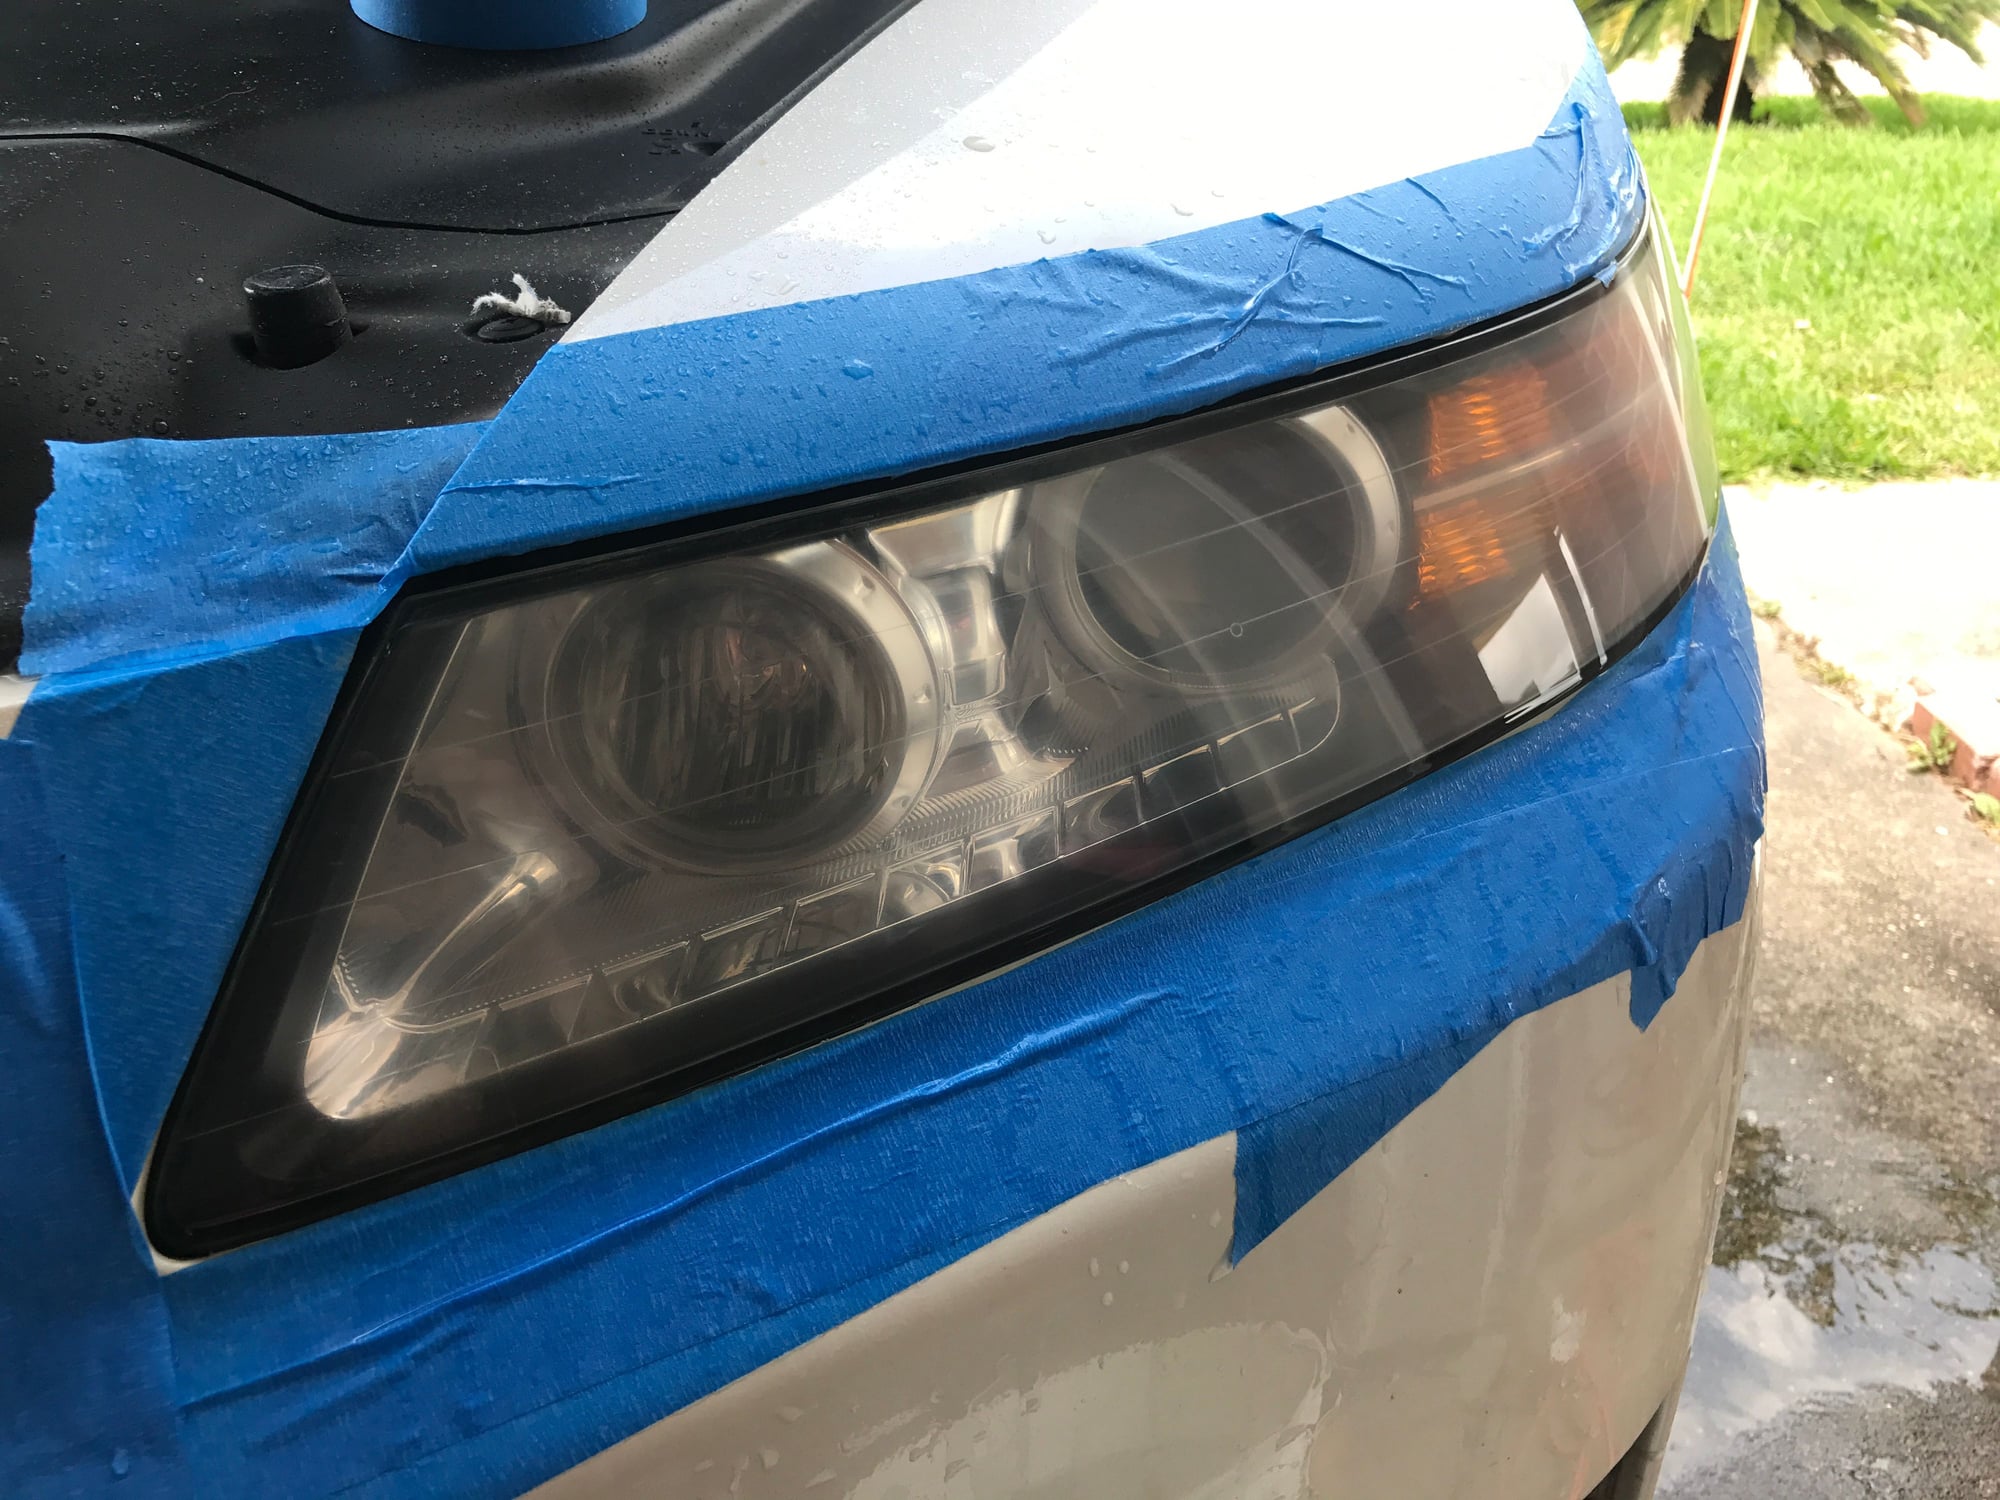
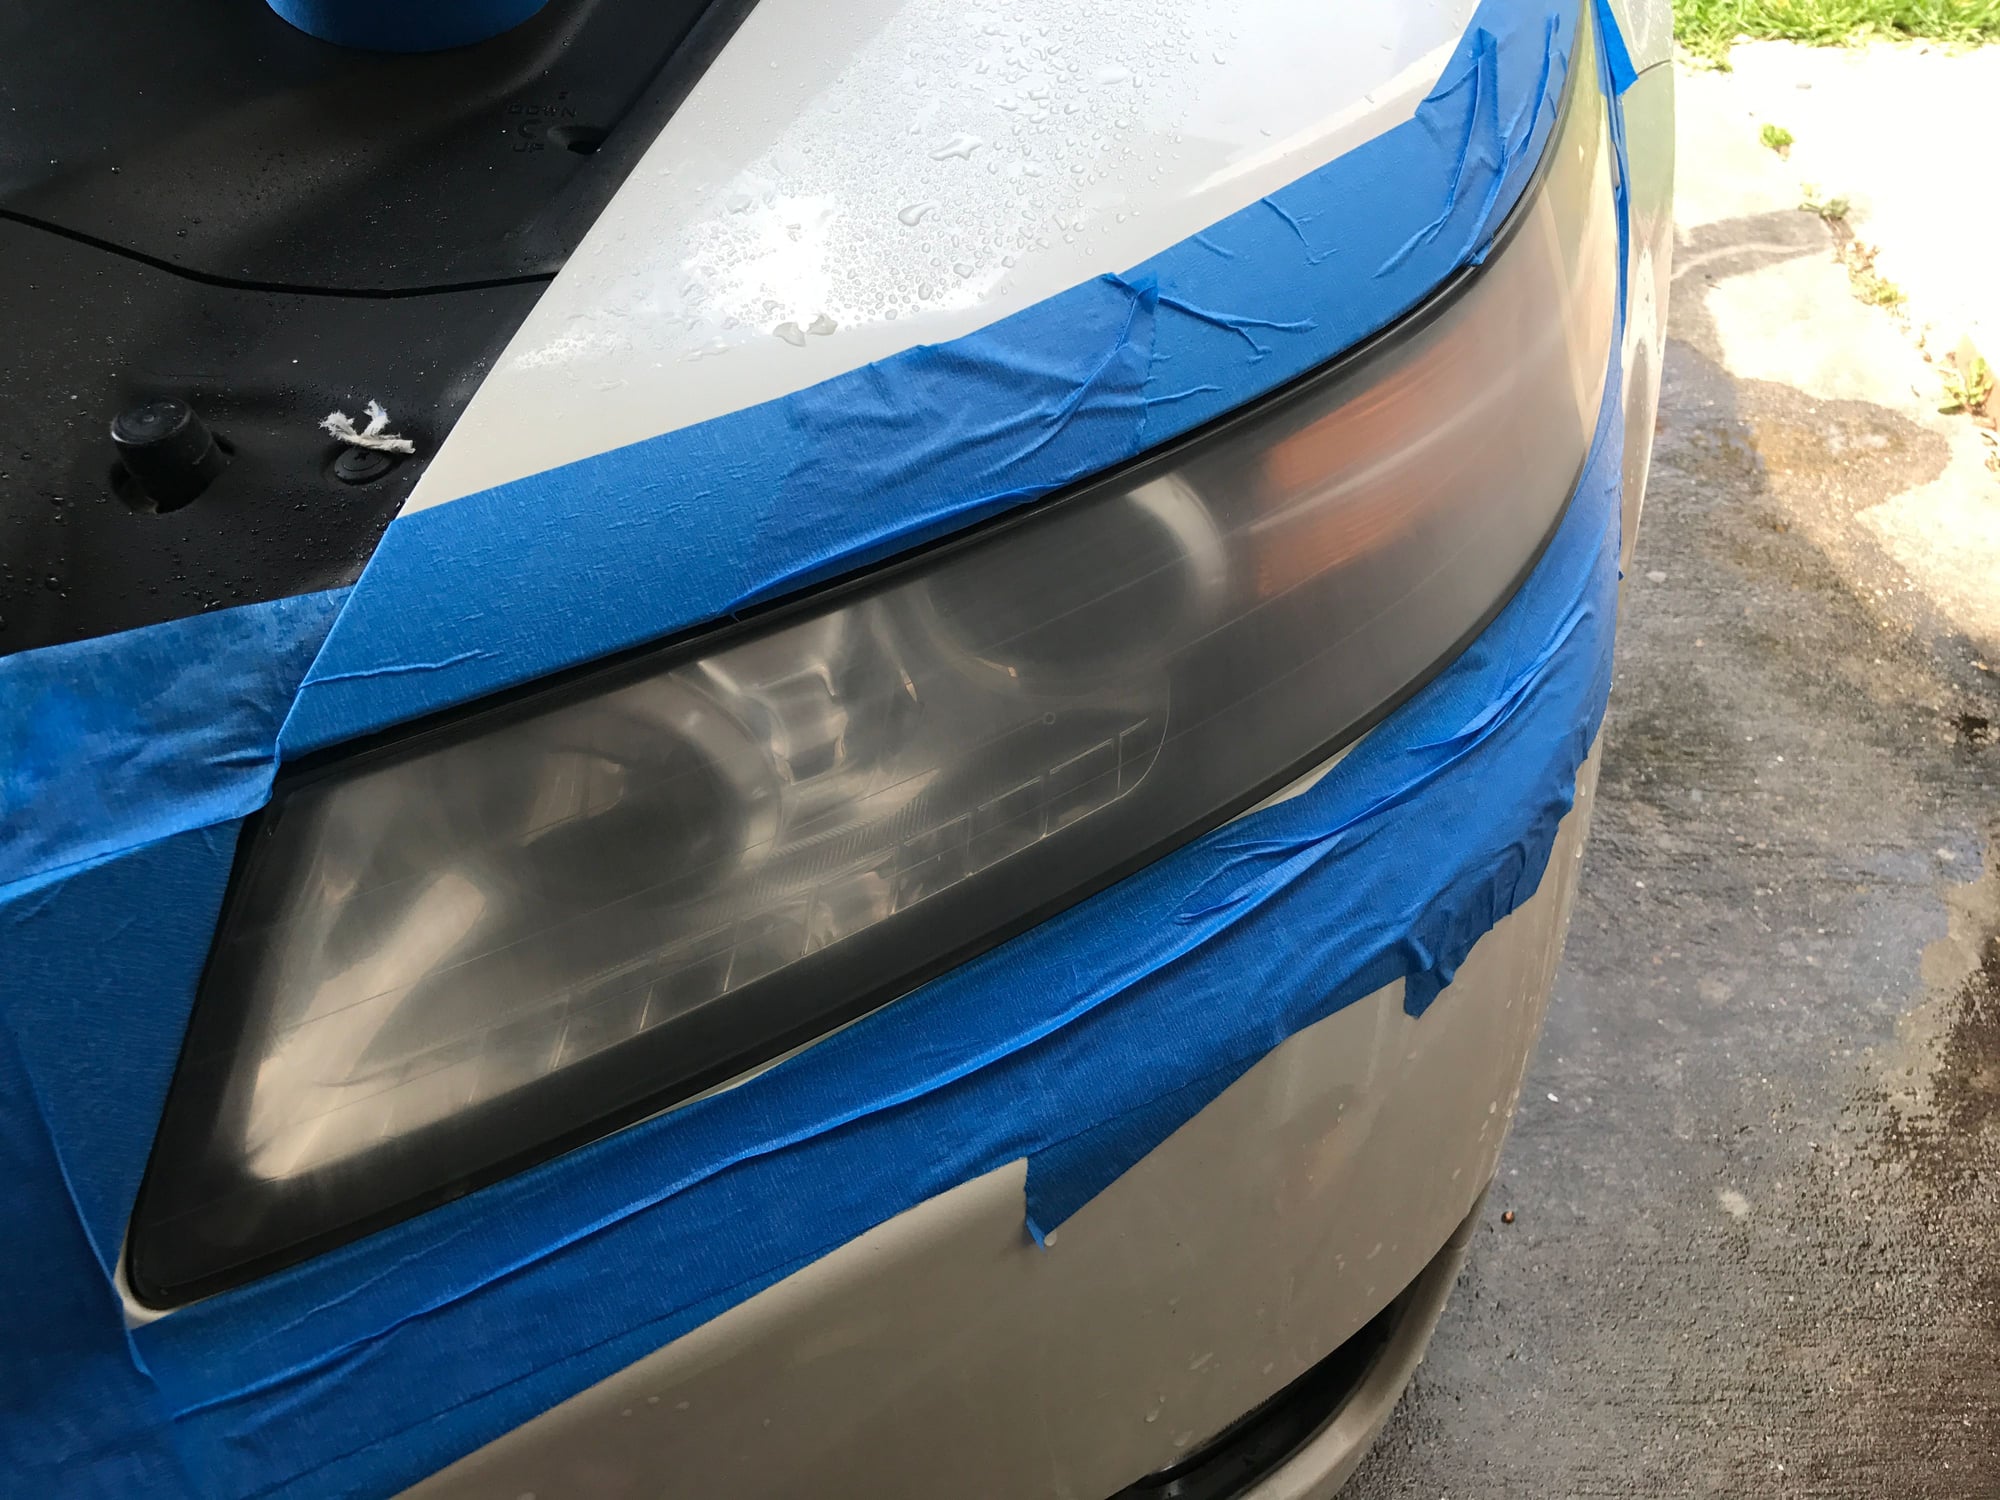
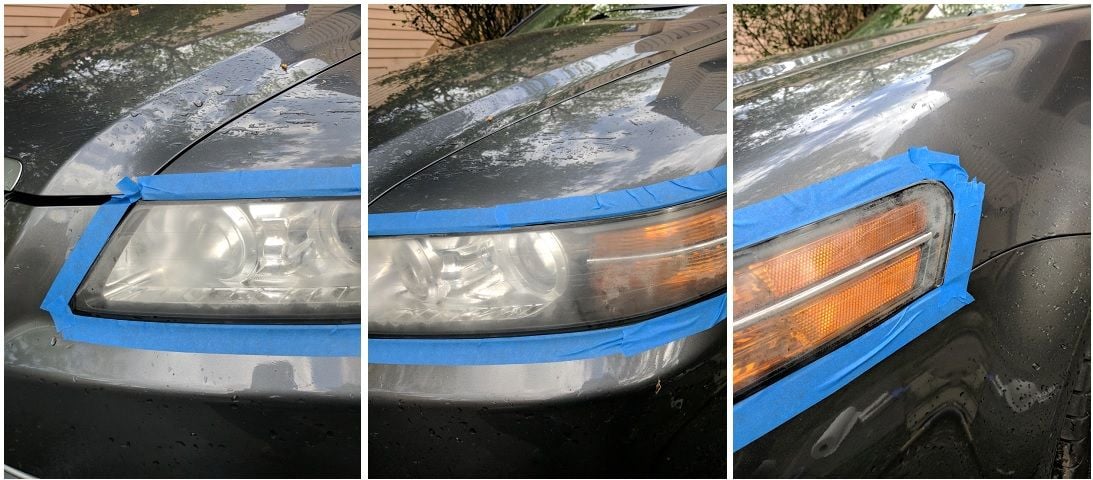
Before
Before
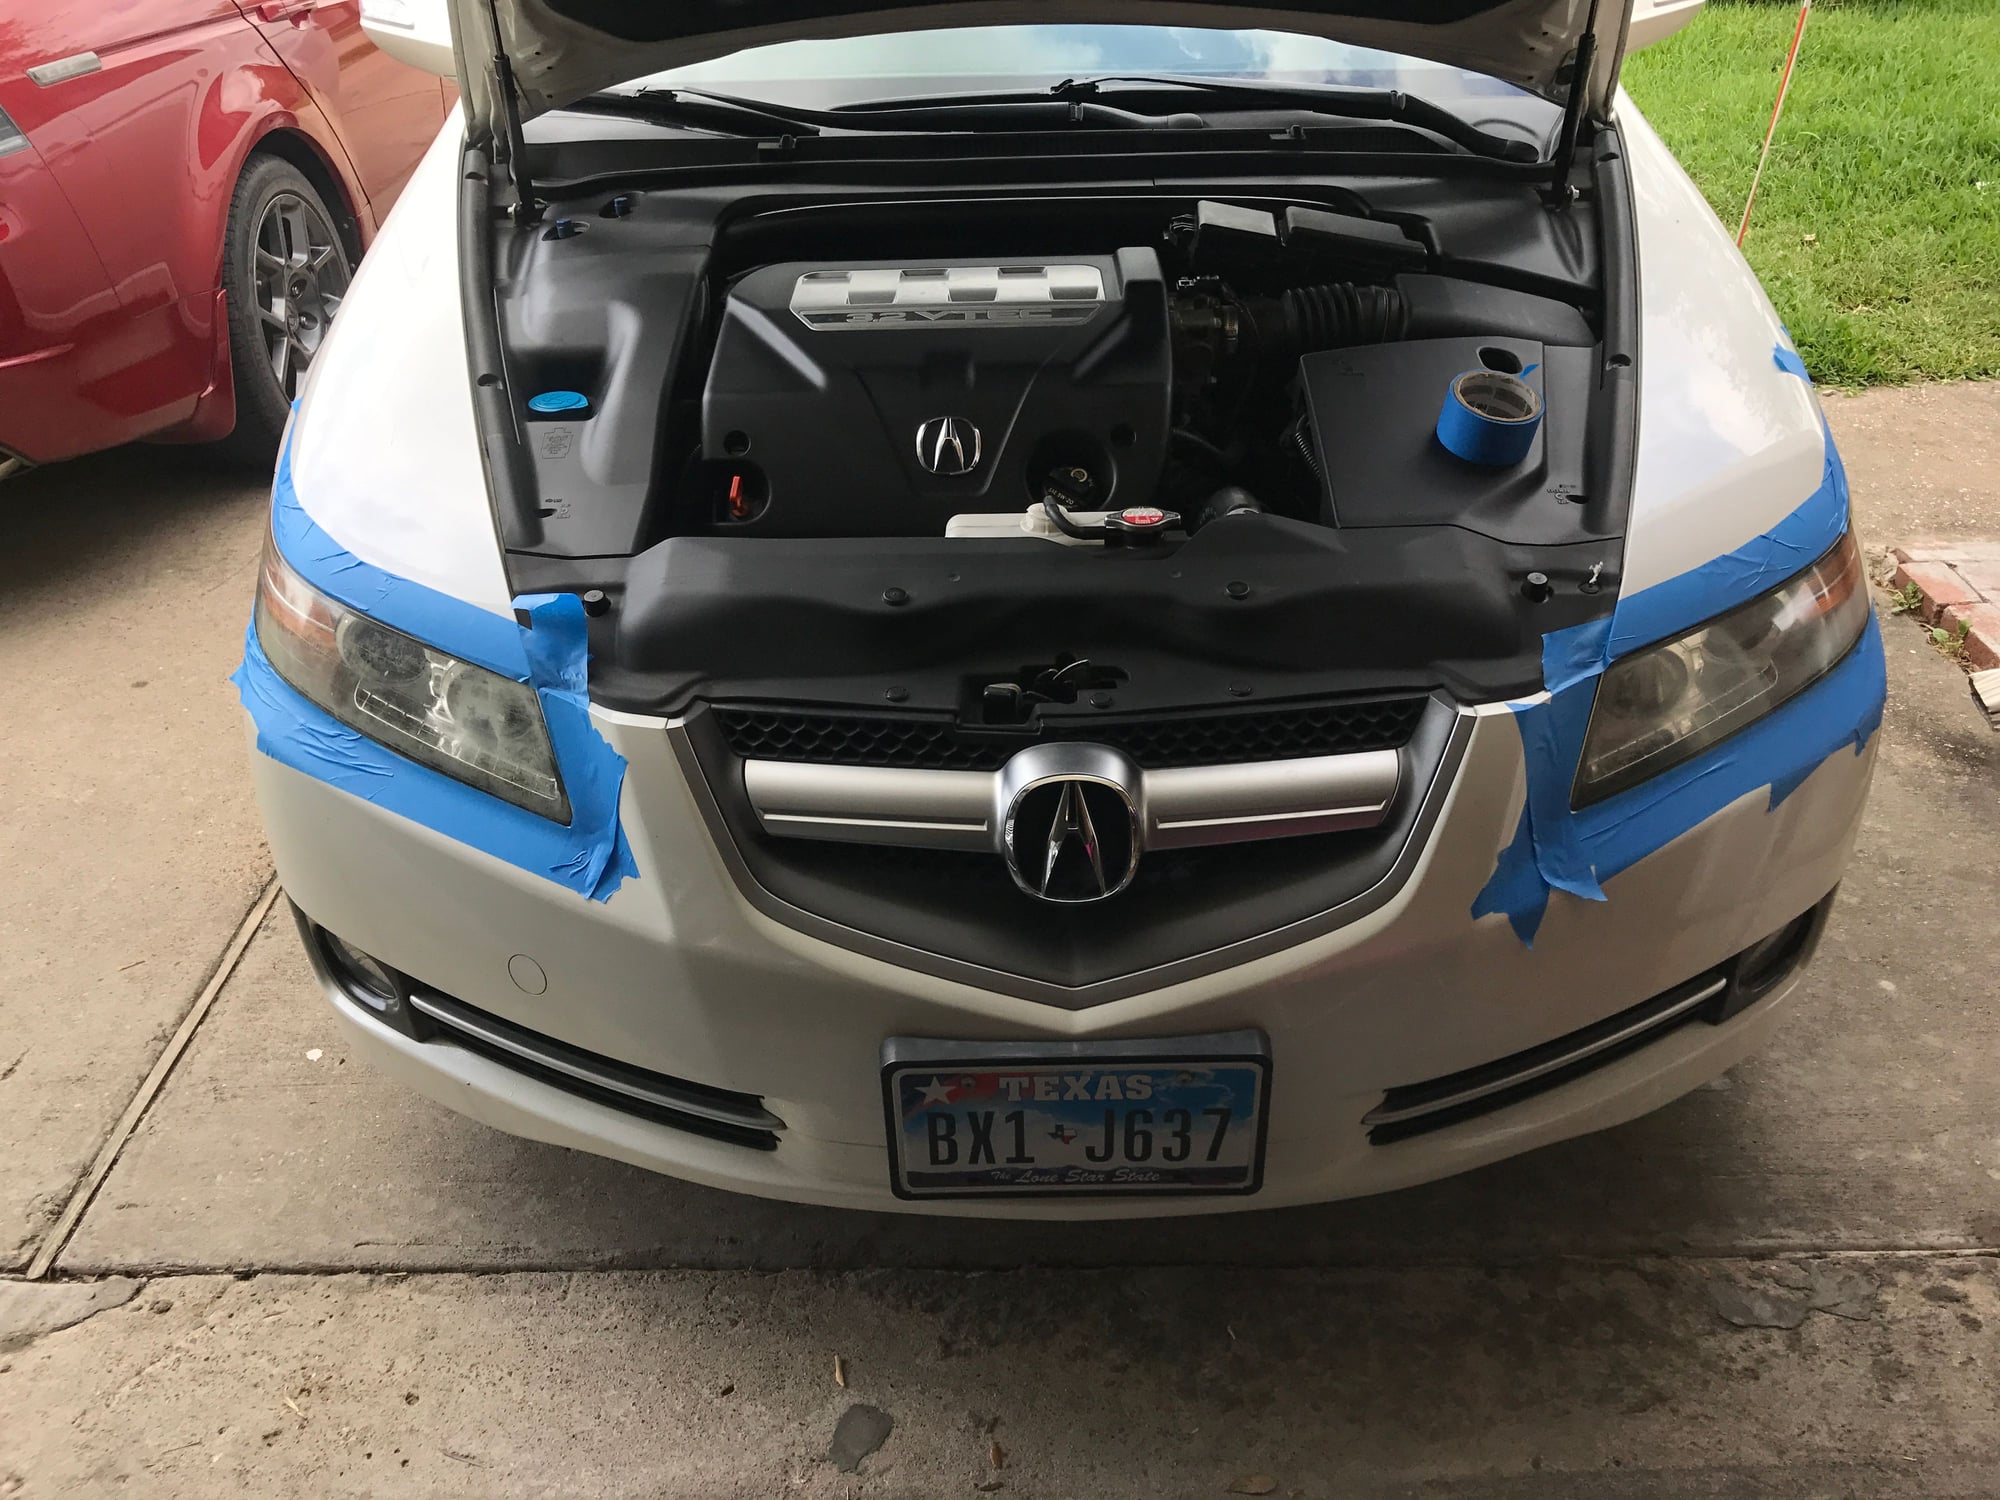
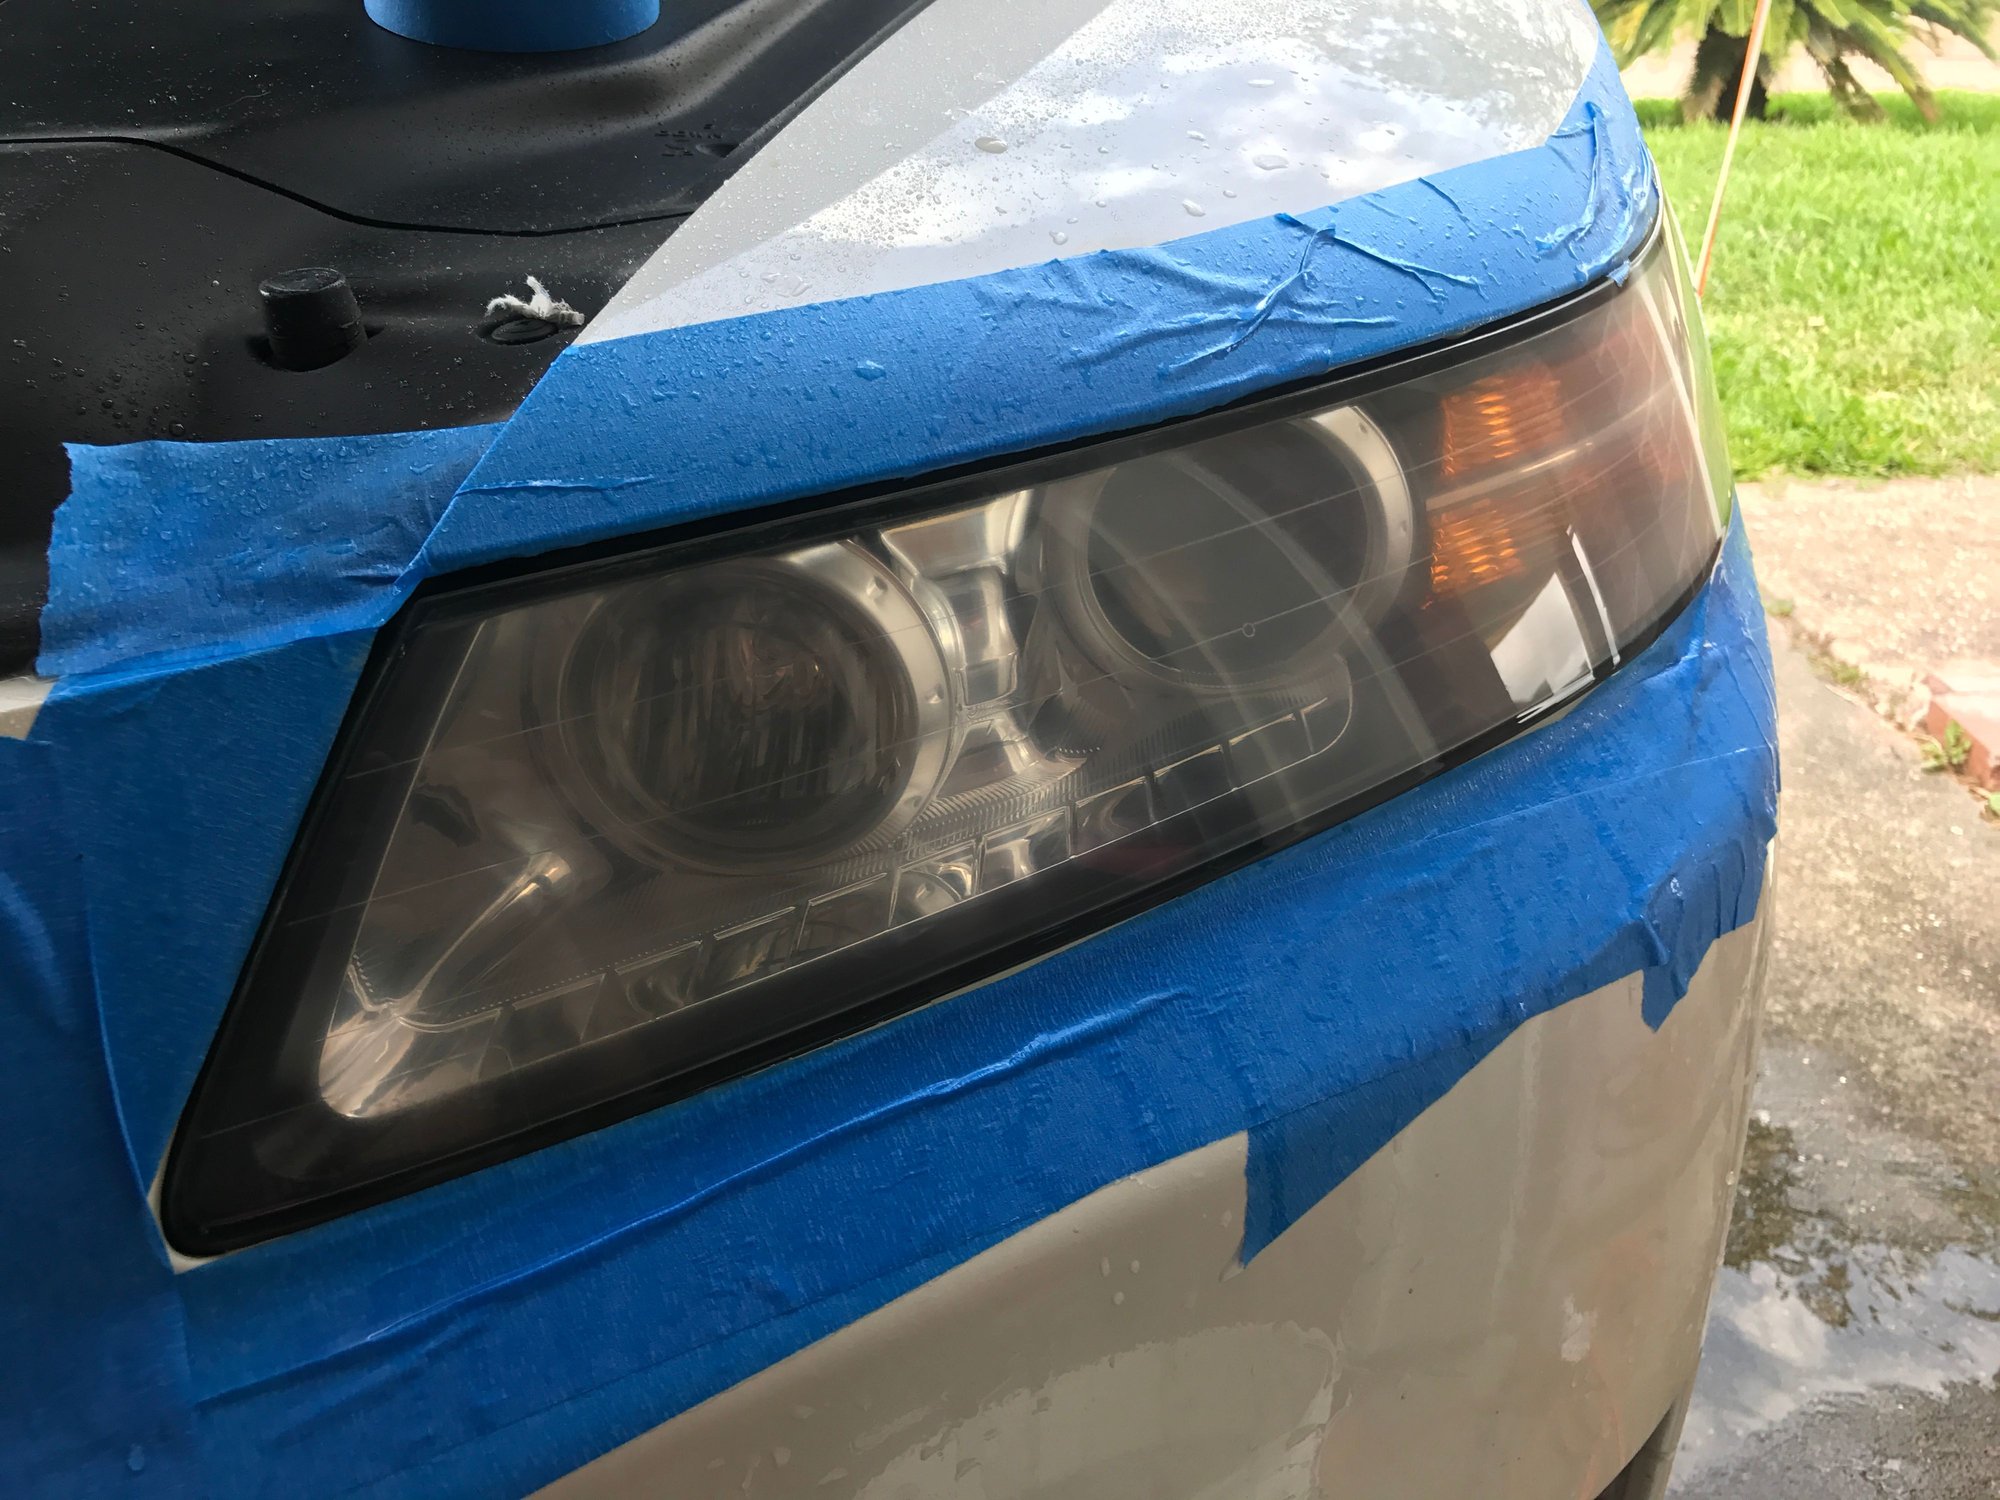
Prep up and ready to go
Before
Before

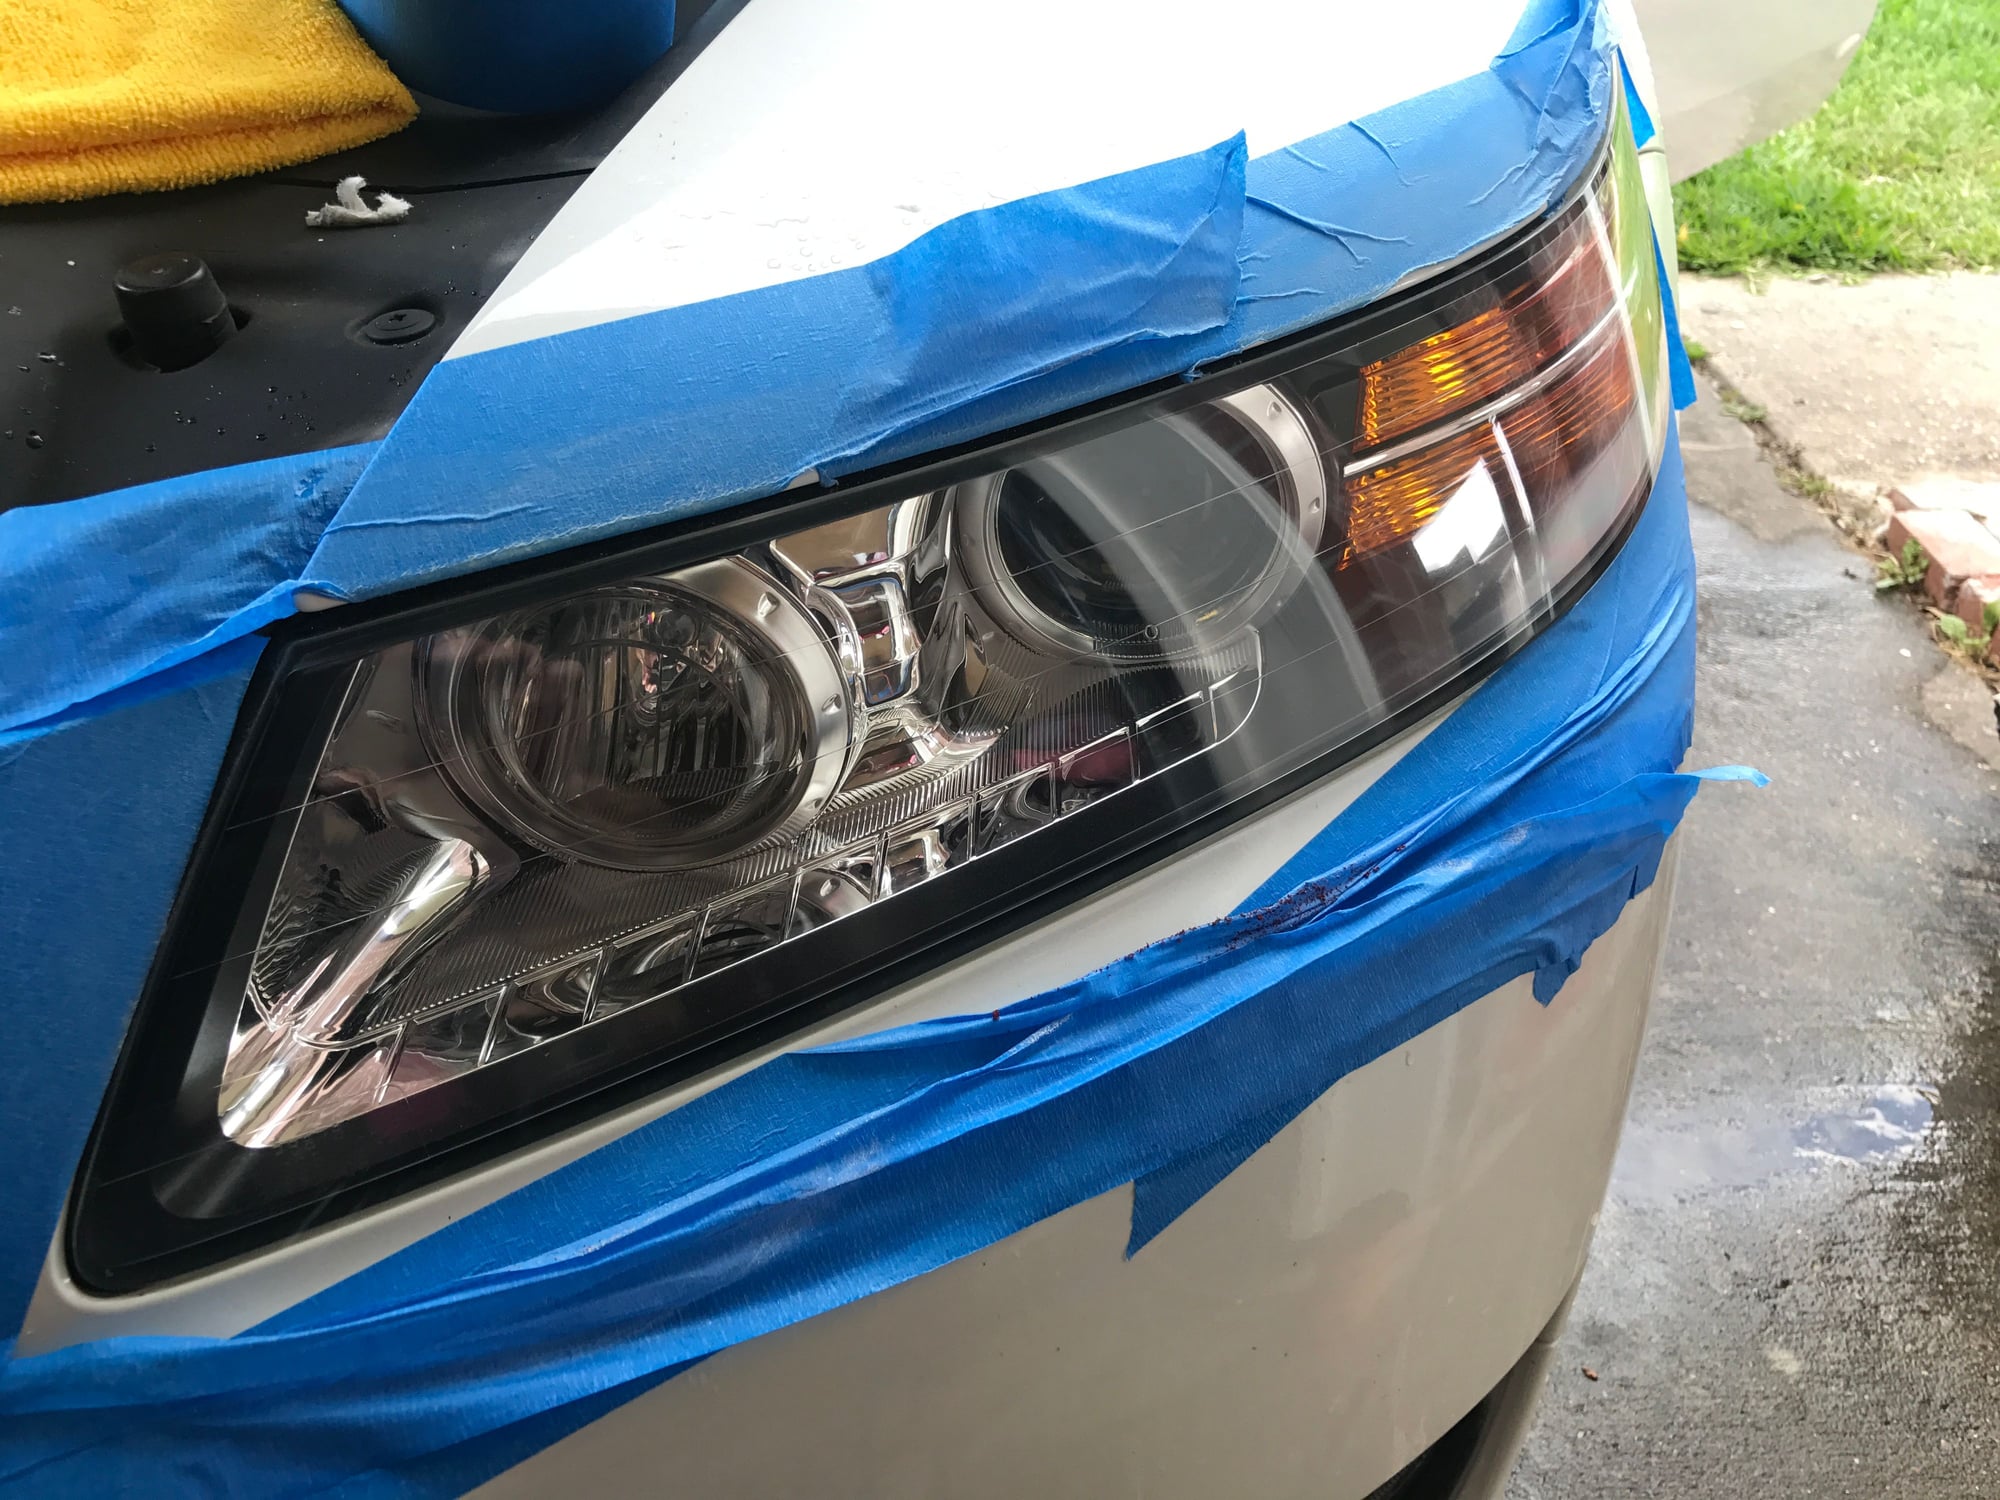
After 1500 grid sand down.
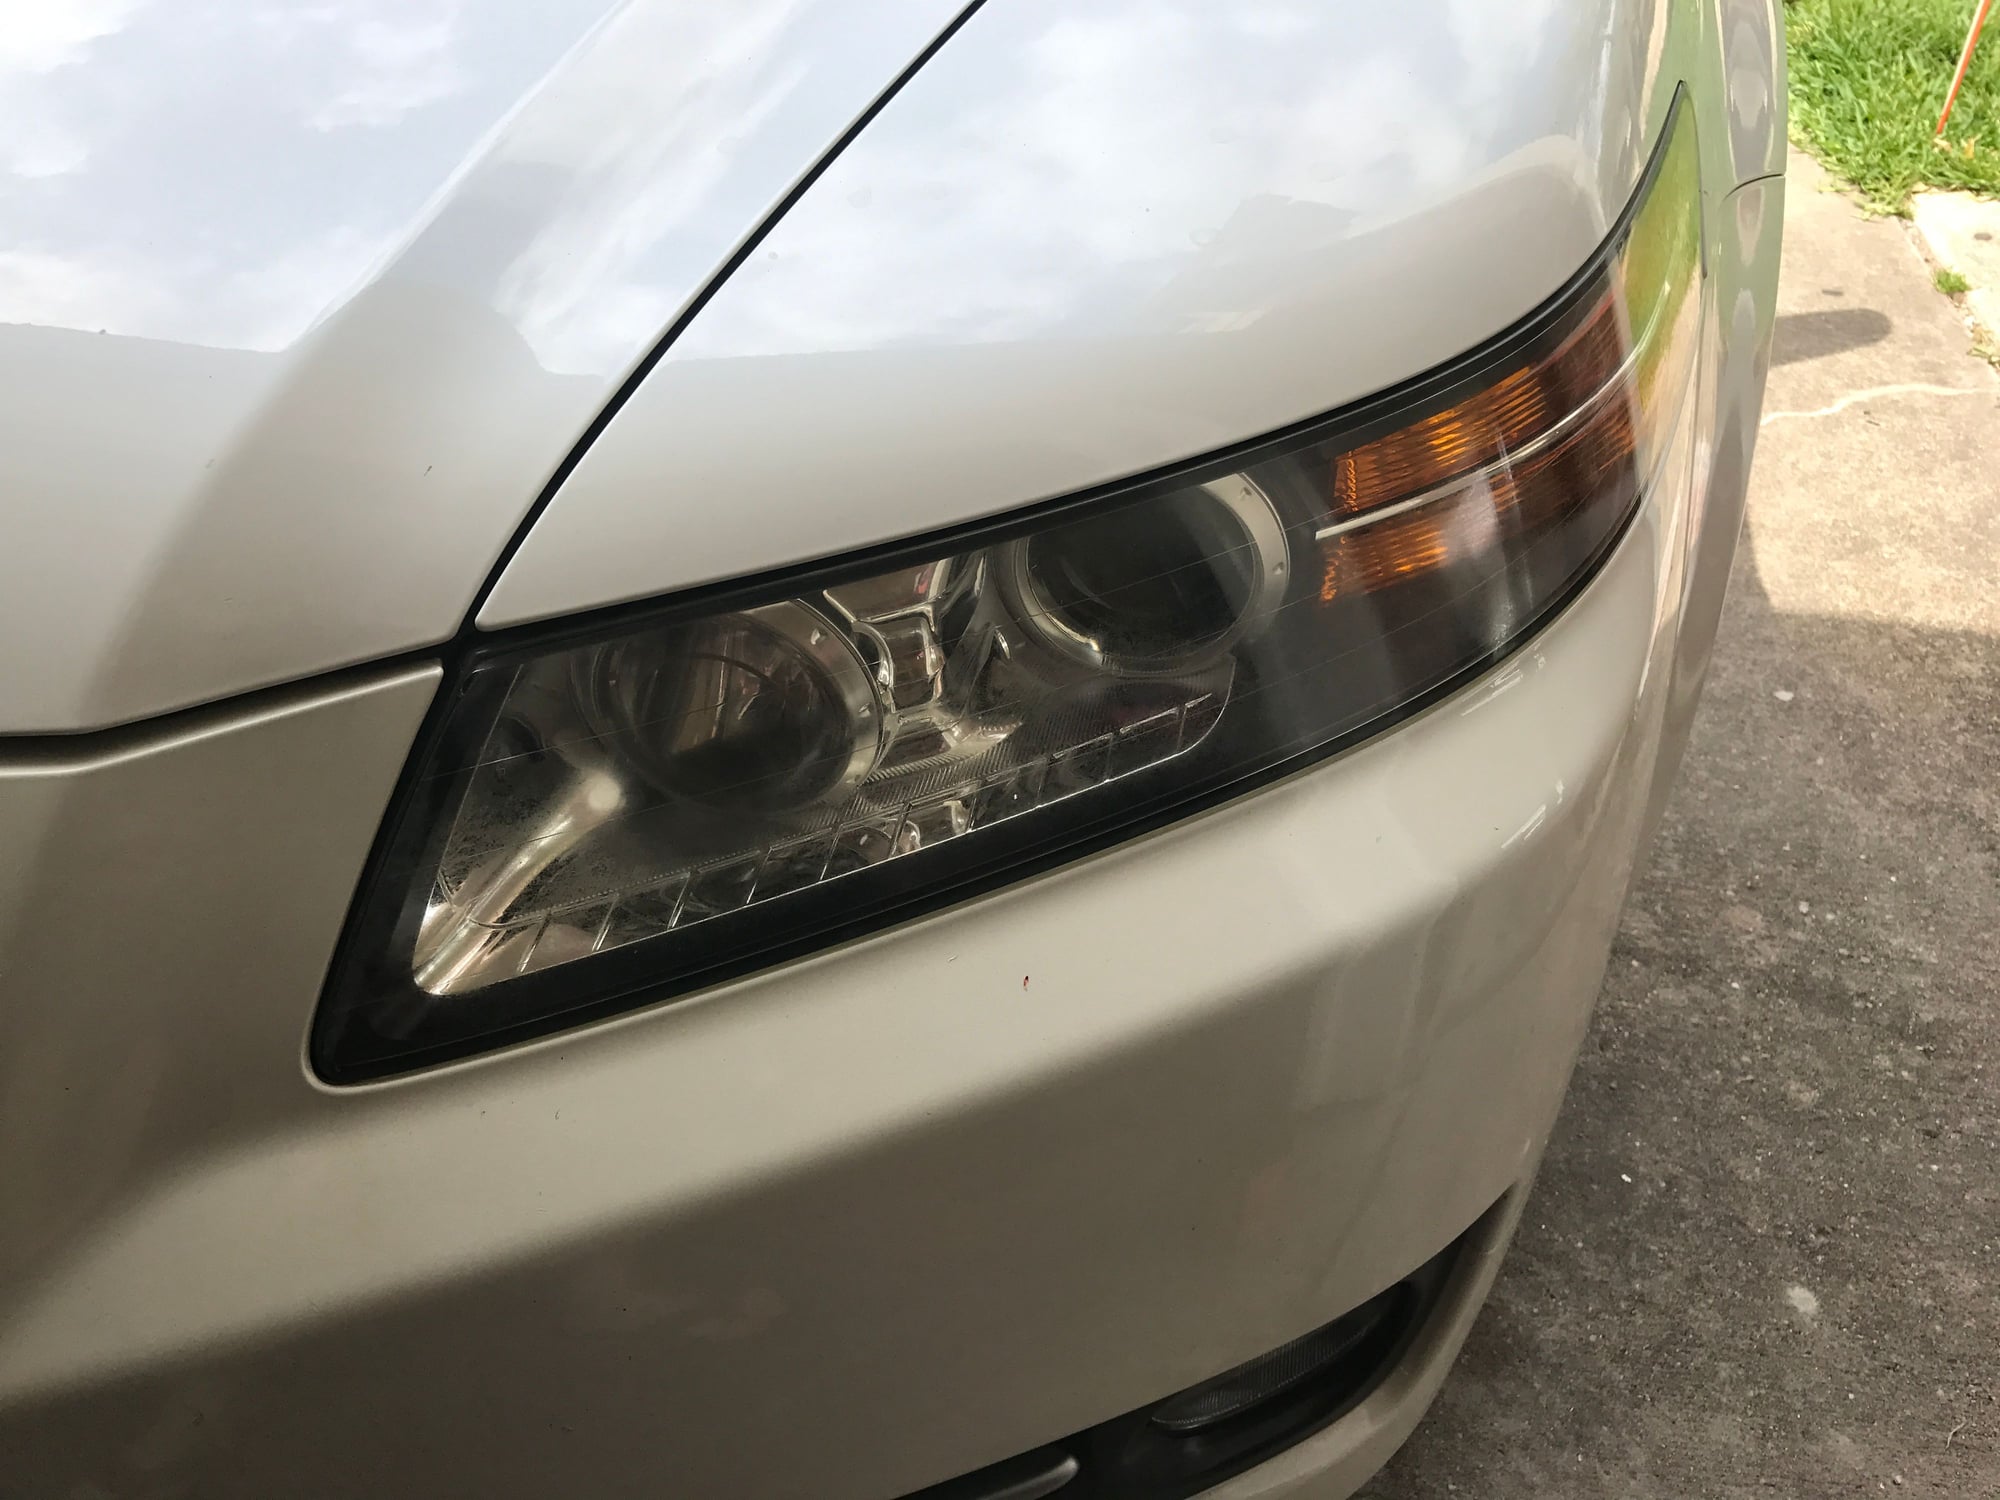
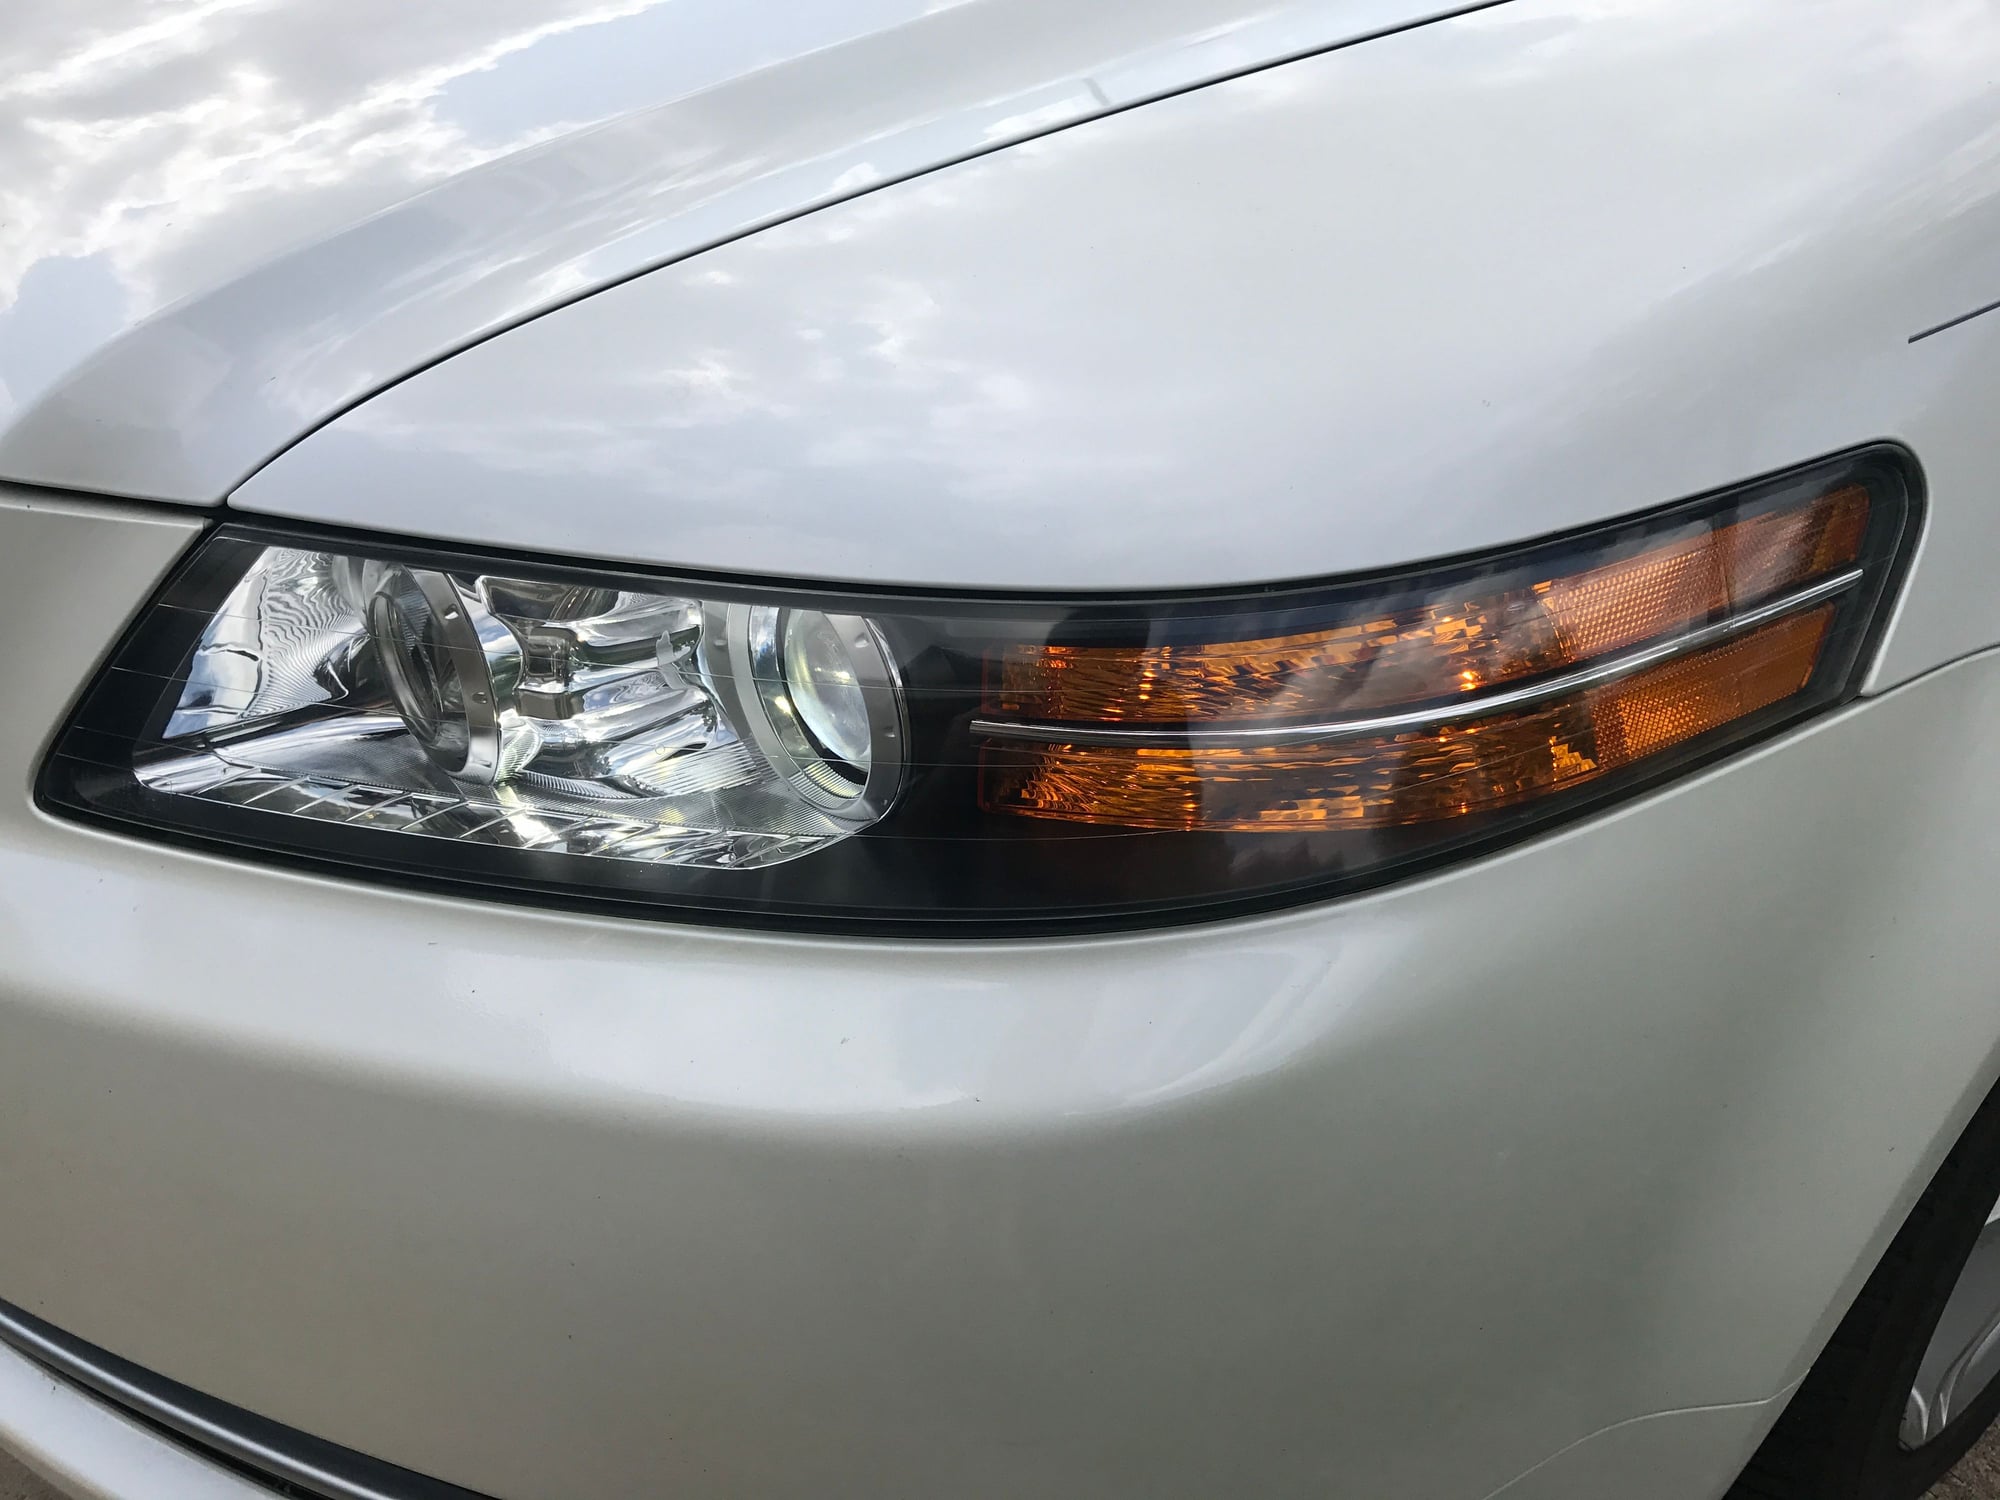
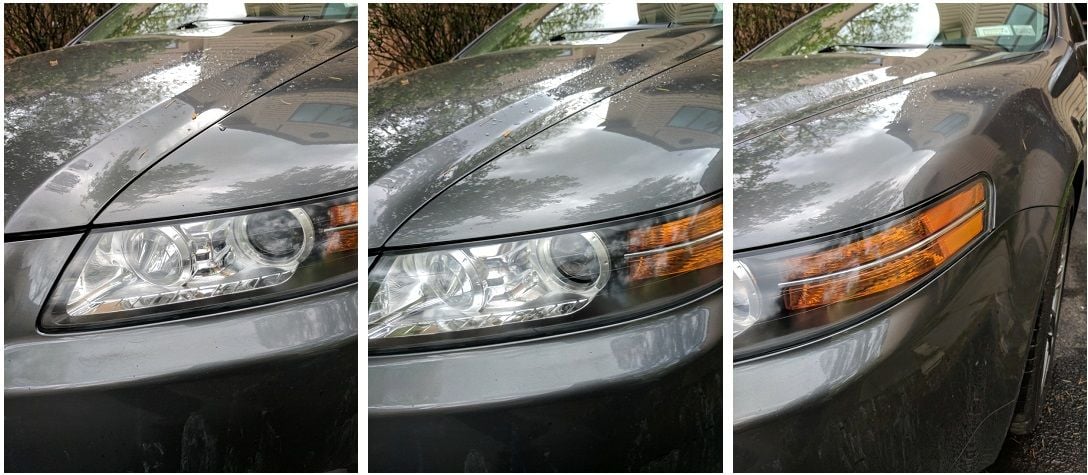
Finish product
Nice and fresh
So crips....
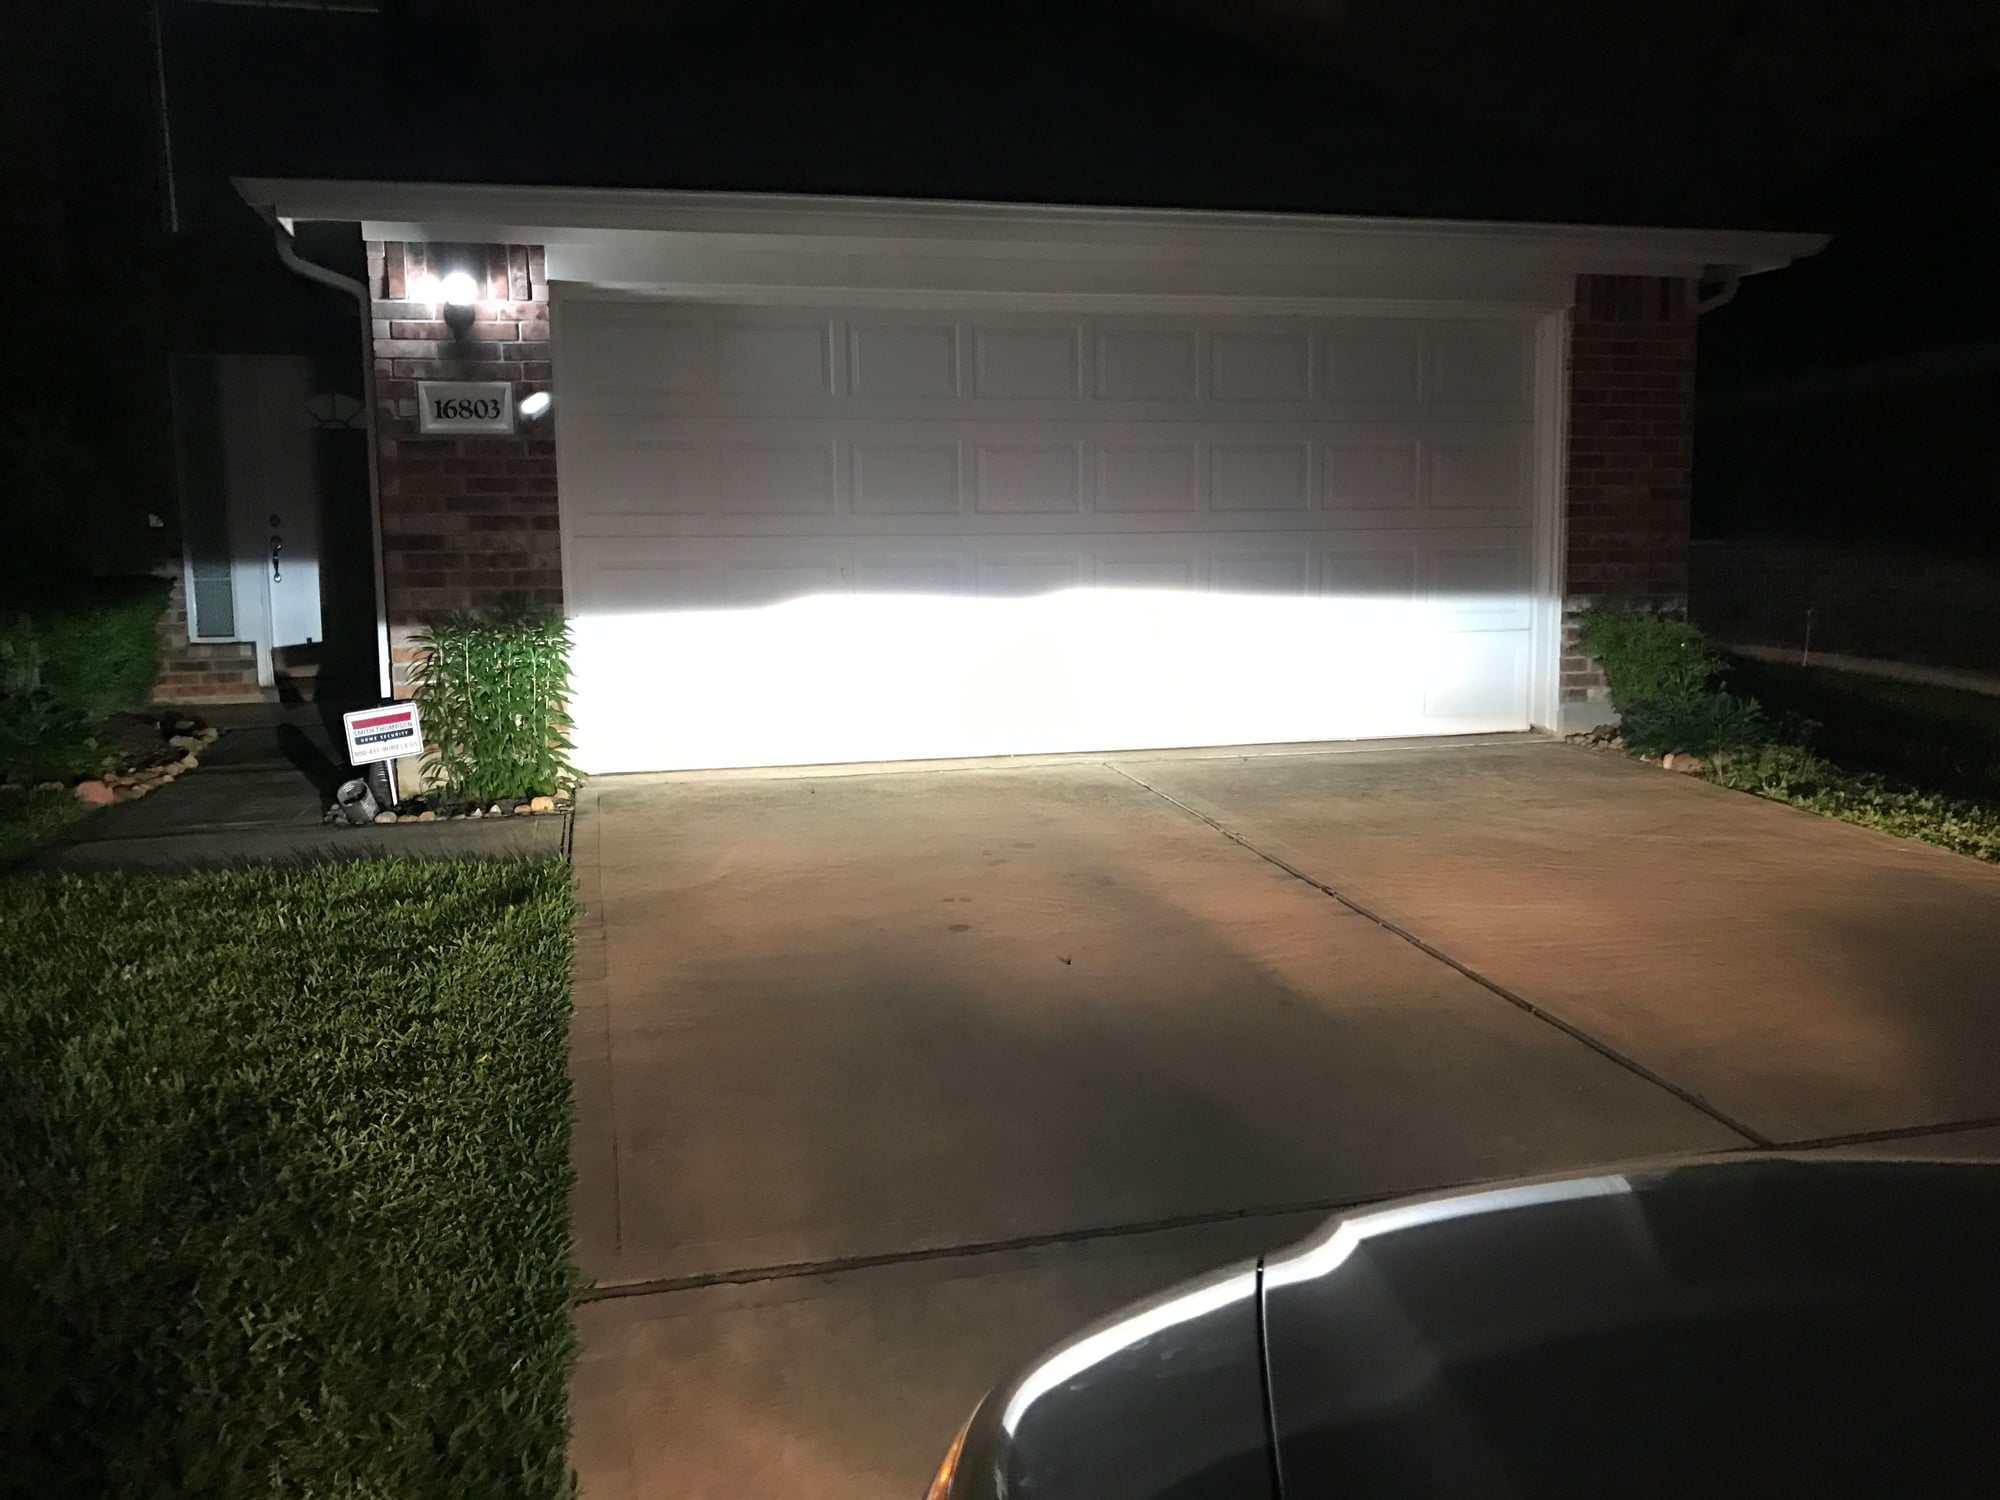
I can actually see the cut off line.
After 3000 grid sand down
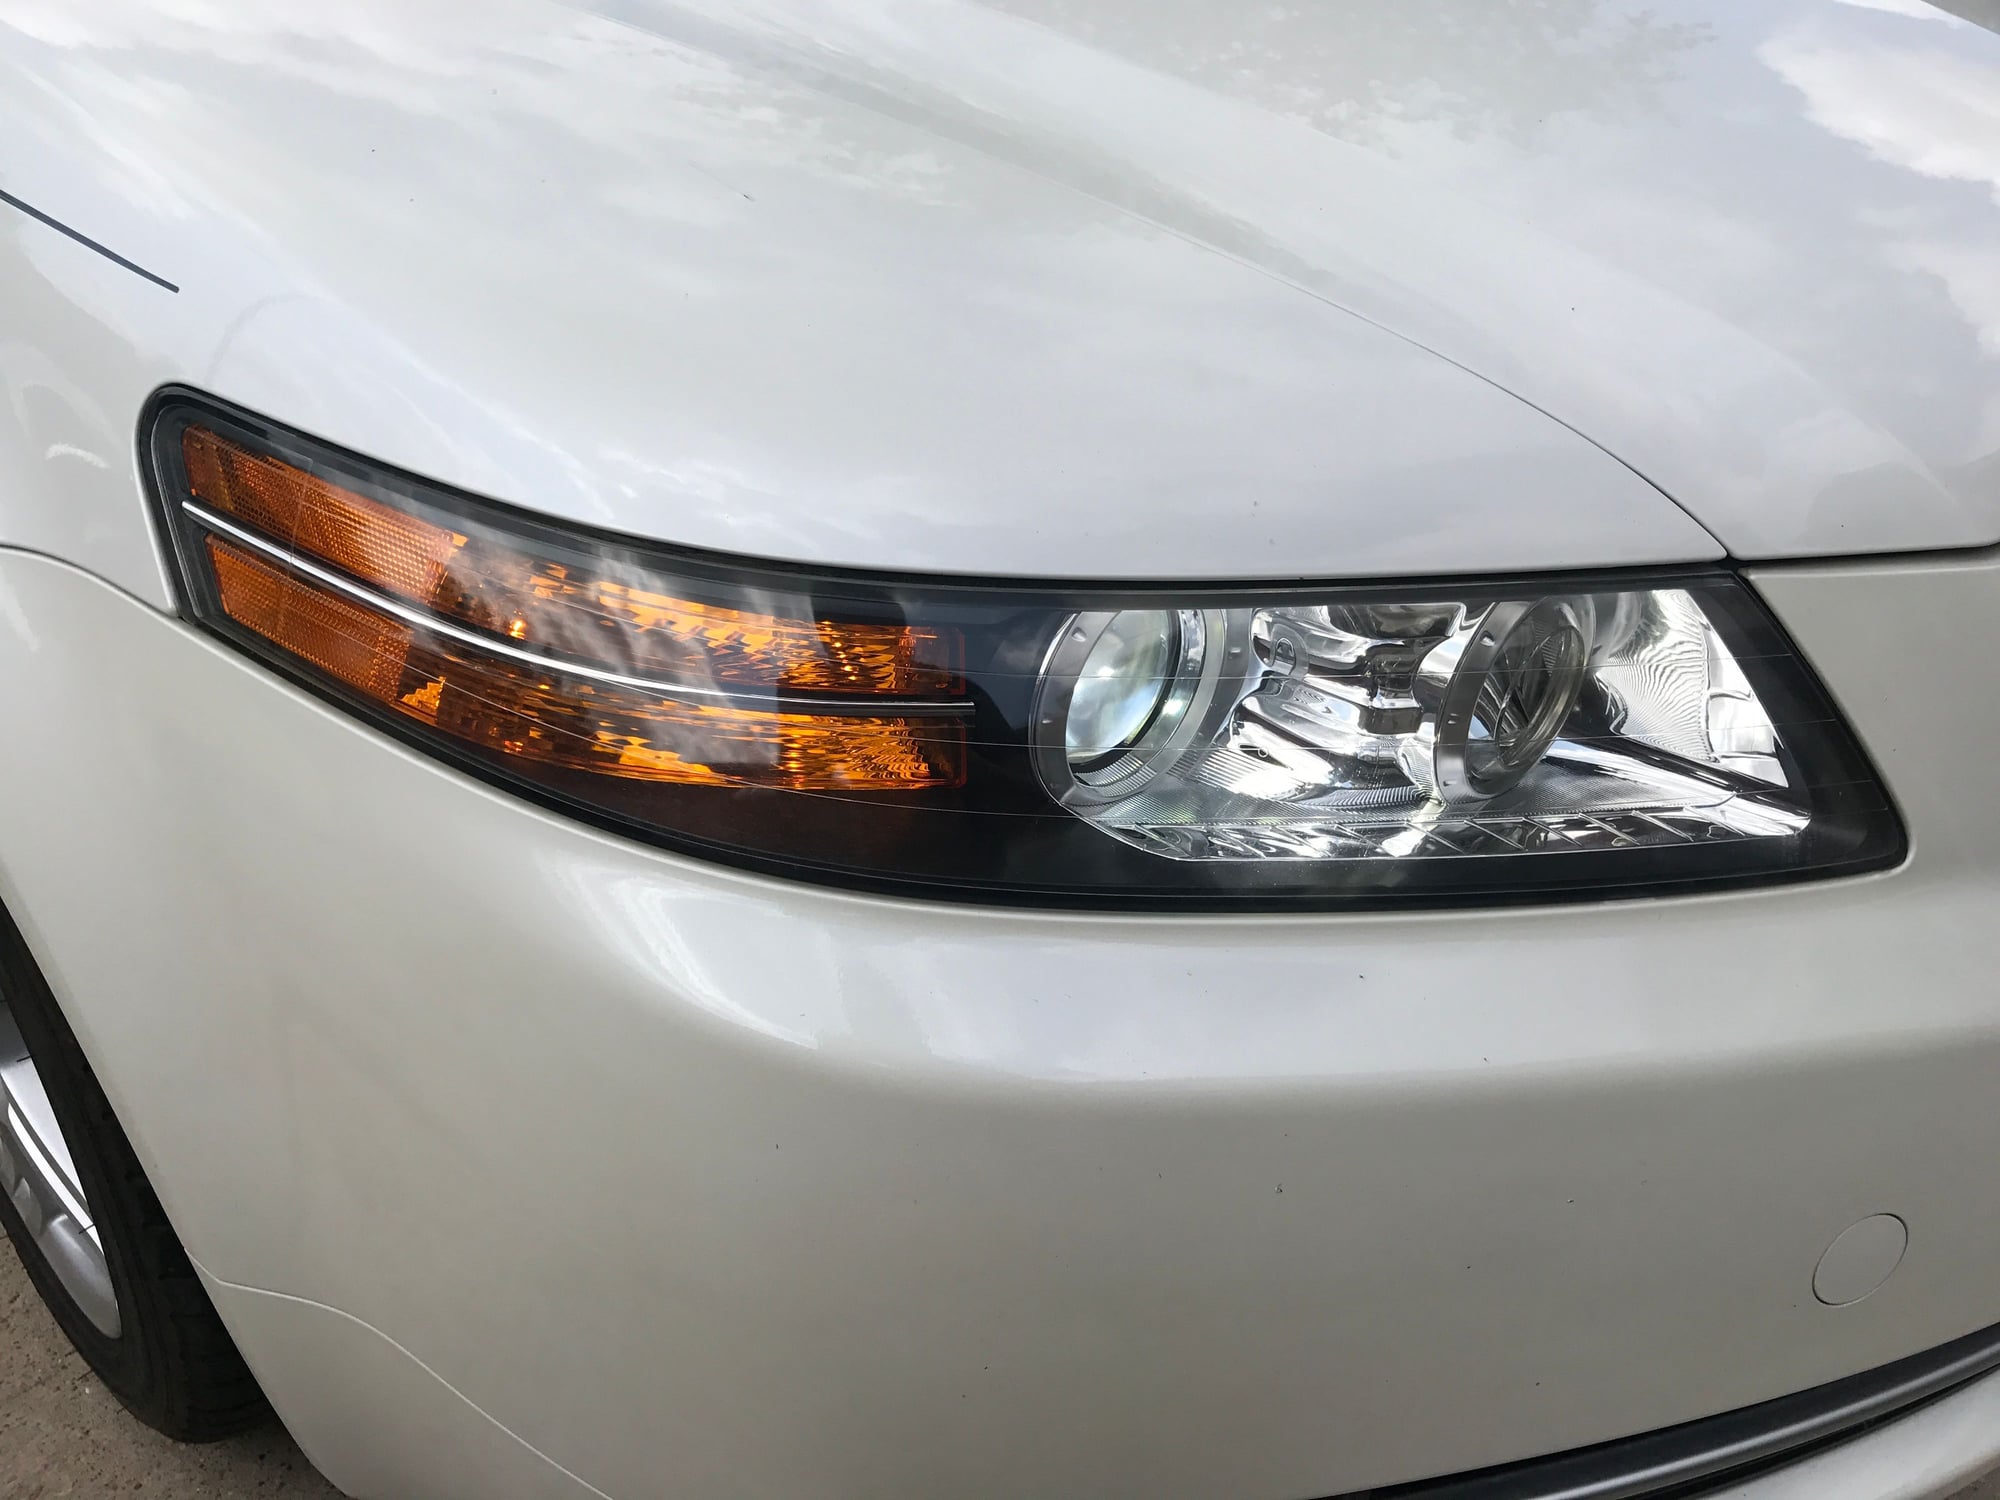
Right side...
so i recently just bought a base TL and notice the headlight need some
luv. I got it sand down from 1500-2500-3000 grid and polished the lense, i use opti coat to finishing up the touch. Lets the pictures For result.

Last edited by truonghthe; 04-06-2017 at 11:51 AM.
Old 04-06-2017, 12:49 PM
  #2  
Racer
 
NoTLoud's Avatar
 
Join Date: Oct 2016
Location: Charlotte, NC
Age: 29
Posts: 424
Received 58 Likes on 50 Posts
Very nice results!

I got do a quick restore on my headlights because they're torn up from rock chips and have a very slight haze.
Old 04-06-2017, 01:35 PM
  #3  
Burning Brakes
 
Yvuru's Avatar
 
Join Date: Dec 2008
Location: NYC
Posts: 999
Received 133 Likes on 99 Posts
looks great! i'd recommend a xpel pre-cut clear protection film for those headlights. keep that hard work protected (its what I did to mine and i've had no degradation since)
Old 04-06-2017, 02:13 PM
  #4  
Moderator
iTrader: (1)
 
justnspace's Avatar
 
Join Date: Feb 2010
Posts: 86,295
Received 16,260 Likes on 11,971 Posts
that Boi T puttin in WORK
Old 04-06-2017, 02:19 PM
  #5  
Suzuka Master
Thread Starter
 
truonghthe's Avatar
 
Join Date: Jun 2008
Age: 36
Posts: 7,952
Received 1,687 Likes on 1,303 Posts
Originally Posted by Yvuru
looks great! i'd recommend a xpel pre-cut clear protection film for those headlights. keep that hard work protected (its what I did to mine and i've had no degradation since)
Trust me no film gona last with Houston summer sun, I had clear coat spray on my lexus and its a PITA to remove (lasted me for 4 years). I went with Opti Coat instead, easy to remove and easier to restore.

Originally Posted by justnspace
that Boi T puttin in WORK
Speaking of the boi who offer me for assistance on detailing, where were you at boi?
Old 04-06-2017, 02:21 PM
  #6  
Moderator
iTrader: (1)
 
justnspace's Avatar
 
Join Date: Feb 2010
Posts: 86,295
Received 16,260 Likes on 11,971 Posts
well the job did lay me off for a month a half......but picked me back up this week.
Old 04-06-2017, 09:47 PM
  #7  
Team Owner
iTrader: (2)
 
Steven Bell's Avatar
 
Join Date: Jan 2008
Location: Kansas City, MO (Overland Park, KS)
Posts: 36,545
Received 6,470 Likes on 5,162 Posts
Old 04-13-2017, 01:00 PM
  #8  
Q('.')=O
iTrader: (1)
 
imj0257's Avatar
 
Join Date: Feb 2008
Location: DFW, TX
Age: 40
Posts: 23,508
Received 720 Likes on 520 Posts
Looks much better. But yea.. gotta put clearcoat or something on.. won't last in Houston.
Old 04-22-2017, 08:00 PM
  #9  
Advanced
 
PVD24's Avatar
 
Join Date: Apr 2011
Location: Bahhston
Posts: 57
Likes: 0
Received 4 Likes on 2 Posts
Amazing job... Can someone explain the step by step process. Do I need a sander or can I do it by hand? What products and shopping list do I need?
Thank you in advance.
Old 04-23-2017, 08:33 AM
  #10  
7th Gear
 
SuperBrianKlein's Avatar
 
Join Date: Aug 2016
Age: 42
Posts: 7
Received 0 Likes on 0 Posts
went with the 3m restoration kit this past week, worked out great
Old 04-23-2017, 06:02 PM
  #11  
Banned
 
Tlboo2's Avatar
 
Join Date: Feb 2017
Age: 43
Posts: 5
Received 1 Like on 1 Post
Geez well done.
Old 04-26-2017, 03:48 PM
  #12  
5th Gear
 
supertomcat's Avatar
 
Join Date: Jul 2007
Age: 41
Posts: 5
Likes: 0
Received 0 Likes on 0 Posts
looks great. If you don't mind me asking how long did it take to complete?
Old 04-26-2017, 10:39 PM
  #13  
Suzuka Master
Thread Starter
 
truonghthe's Avatar
 
Join Date: Jun 2008
Age: 36
Posts: 7,952
Received 1,687 Likes on 1,303 Posts
Originally Posted by supertomcat
looks great. If you don't mind me asking how long did it take to complete?
an hour.
Old 04-27-2017, 09:48 AM
  #14  
Safety Car
iTrader: (5)
 
sockr1's Avatar
 
Join Date: May 2008
Location: San Diego
Age: 41
Posts: 4,430
Received 1,158 Likes on 909 Posts
looks great!! i did the same a few years back and it makes such a huge difference
Old 04-27-2017, 09:32 PM
  #15  
Senior Moderator
 
4cruizn's Avatar
 
Join Date: Jun 2003
Location: Phoenix, AZ
Age: 42
Posts: 807
Received 412 Likes on 194 Posts
Great job on that!
Old 05-11-2017, 08:14 AM
  #16  
10th Gear
 
f1r3w0rK5's Avatar
 
Join Date: May 2017
Location: VA 757
Age: 35
Posts: 14
Likes: 0
Received 0 Likes on 0 Posts
Yes, you did a great job!! It does make a huge difference. . .
Old 05-14-2017, 04:16 PM
  #17  
Intermediate
 
She'sCalledDrGrey's Avatar
 
Join Date: Jan 2012
Posts: 28
Likes: 0
Received 6 Likes on 3 Posts
You inspired me to tackle mine this weekend.

Old 05-14-2017, 07:37 PM
  #18  
Instructor
iTrader: (1)
 
Ryan L21's Avatar
 
Join Date: Oct 2012
Location: Saint Louis
Posts: 94
Received 22 Likes on 18 Posts
^^^ What did you use to seal? Clear or just wax or some sort of sealant?

Last edited by Steven Bell; 05-15-2017 at 06:41 PM. Reason: No need to re-quote the previous post, especially if you're the next person posting.
Old 05-15-2017, 08:38 AM
  #19  
Intermediate
 
She'sCalledDrGrey's Avatar
 
Join Date: Jan 2012
Posts: 28
Likes: 0
Received 6 Likes on 3 Posts
Originally Posted by Ryan L21
What did you use to seal? Clear or just wax or some sort of sealant?
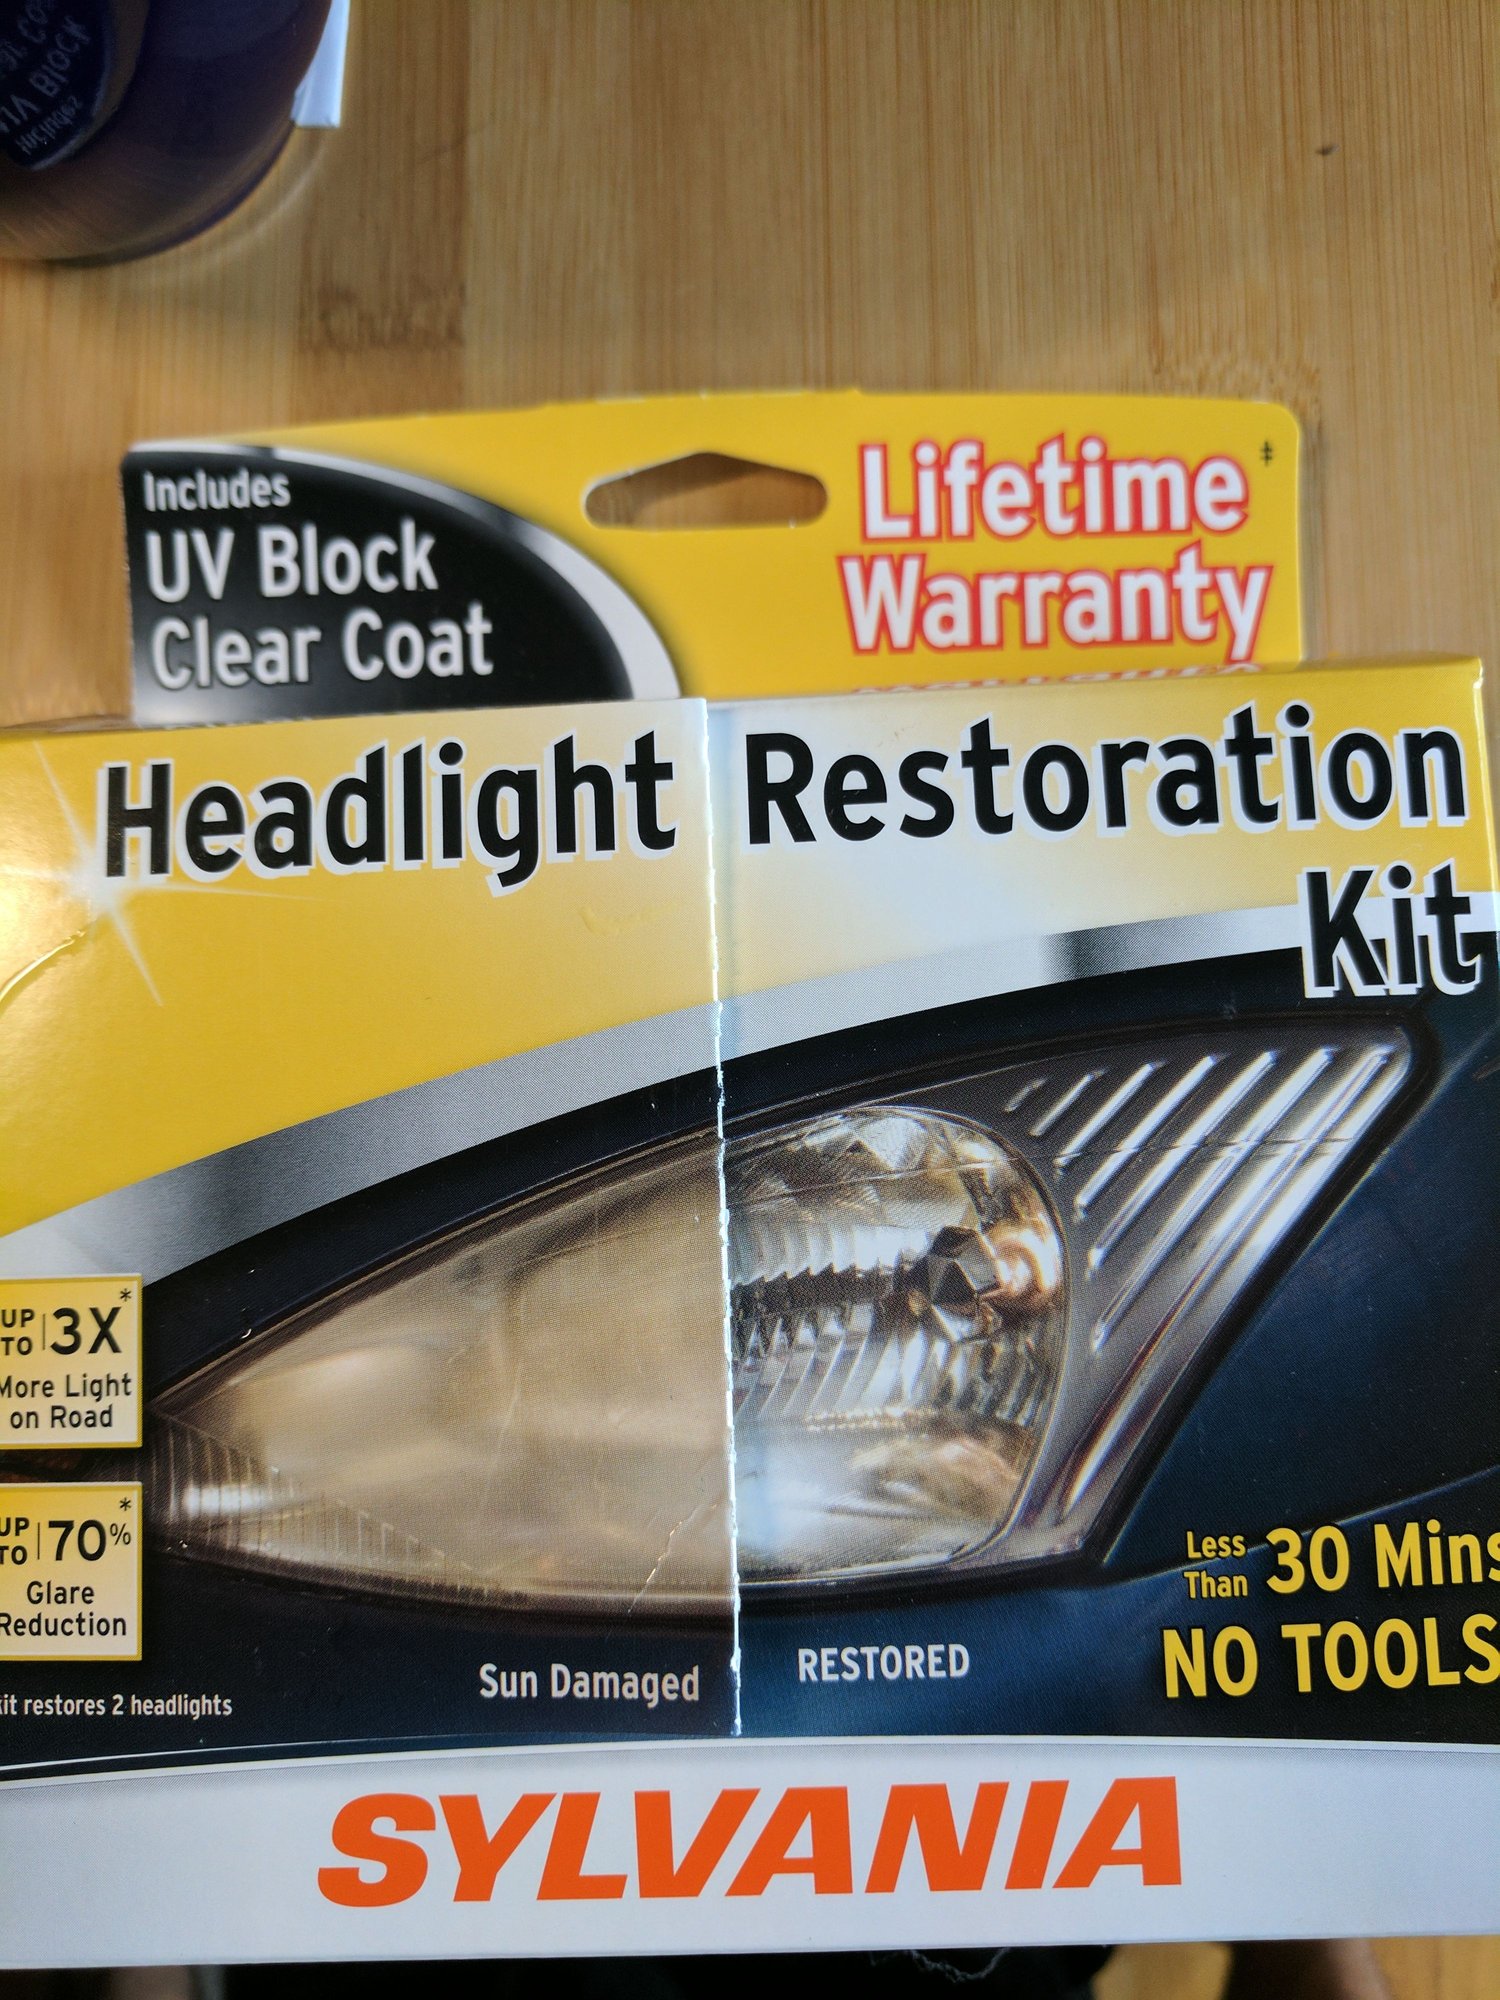
I used the sylvania kit. It comes with a uv clear coat/sealant.
Old 05-15-2017, 06:41 PM
  #20  
Team Owner
iTrader: (2)
 
Steven Bell's Avatar
 
Join Date: Jan 2008
Location: Kansas City, MO (Overland Park, KS)
Posts: 36,545
Received 6,470 Likes on 5,162 Posts
Looks good!
Old 05-16-2017, 01:41 PM
  #21  
Racer
 
mazen222's Avatar
 
Join Date: Aug 2013
Location: Montreal, Quebec, Canada
Posts: 284
Received 20 Likes on 17 Posts
very nice! mine is due as well!
Old 06-01-2017, 12:40 AM
  #22  
Instructor
 
tpz76's Avatar
 
Join Date: May 2017
Posts: 150
Received 10 Likes on 8 Posts
Nice! My pass side looks brand new, driver side,,, pretty ugly, Im thinking one was replaced. Driver side is taking on a lil internal moisture, not terrible, but not great either. Tried to restore with my turtle wax kit, but I think the pads are worn down pretty bad. Anyway, nice job!
Old 06-02-2017, 01:49 PM
  #23  
Three Wheelin'
iTrader: (1)
 
GhostTL09's Avatar
 
Join Date: Mar 2014
Location: Georgia
Posts: 1,948
Received 649 Likes on 349 Posts
that looks good. I need to do my wife's MDX headlights. Really need to get a good clean sand down.
Old 06-21-2017, 08:55 PM
  #24  
Intermediate
 
viperkorn's Avatar
 
Join Date: Jun 2017
Location: San Antonio
Age: 55
Posts: 37
Received 2 Likes on 2 Posts
I need to try the sanding because mine look like someone tried using way to hard a grit sandpaper on them. Not even sure I can get the scratches out.
Old 06-25-2017, 04:33 AM
  #25  
Instructor
 
DogP's Avatar
 
Join Date: Jun 2017
Location: VA
Posts: 127
Received 83 Likes on 28 Posts
I'll go ahead and pile on this thread... I did mine 08 Type S headlights today using the Meguiar's Heavy Duty Headlight Restoration Kit. The lights were really hazy, and it bugged me every time I looked at them. They look WAY better now... hopefully it lasts.

Overall, it was easy to do... the kit came with the sandpaper (1000 and 3000 grit), plus the polish and polishing pad, and a UV coating/sponge applicator. I cleaned the headlights, taped around them, then simply sanded down the headlights, polished with a drill, then coated them. It took about an hour... and the kit has WAY more than enough to do both TL headlights, so I did my 2000 Grand Caravan headlights too. They were horribly hazed, and turned out great as well (and I probably still have enough to do a few more headlights).

Pat
Attached Thumbnails Headlight restored-20170624_150217.jpg   Headlight restored-20170624_171027.jpg   Headlight restored-20170624_150230.jpg   Headlight restored-20170624_171019.jpg  
The following users liked this post:
LoveMyTL-S (06-29-2017)
Old 06-29-2017, 08:20 AM
  #26  
Senior Moderator
 
LoveMyTL-S's Avatar
 
Join Date: Mar 2005
Location: St. Cloud, FL
Age: 67
Posts: 11,995
Received 361 Likes on 316 Posts
Originally Posted by Yvuru
looks great! i'd recommend a xpel pre-cut clear protection film for those headlights. keep that hard work protected (its what I did to mine and i've had no degradation since)
How long have you had the film on?
Old 06-29-2017, 08:25 AM
  #27  
Senior Moderator
 
LoveMyTL-S's Avatar
 
Join Date: Mar 2005
Location: St. Cloud, FL
Age: 67
Posts: 11,995
Received 361 Likes on 316 Posts
Some nice looking headlights!! Great job. I need to do mine also.
Old 07-08-2017, 12:20 PM
  #28  
Three Wheelin'
 
WDPanda's Avatar
 
Join Date: Dec 2014
Posts: 1,451
Received 191 Likes on 174 Posts
How long have the results been lasting?
Old 07-08-2017, 02:28 PM
  #29  
Instructor
 
DogP's Avatar
 
Join Date: Jun 2017
Location: VA
Posts: 127
Received 83 Likes on 28 Posts
Originally Posted by WDPanda
How long have the results been lasting?
2 weeks and going strong here. :-P

Pat
Old 08-12-2017, 12:46 PM
  #30  
Cruisin'
 
CTucker's Avatar
 
Join Date: Jan 2016
Location: Daleville AL
Age: 39
Posts: 15
Received 0 Likes on 0 Posts
I am assuming you wet sand them? Or do you do it while dry?
Old 08-12-2017, 01:38 PM
  #31  
Senior Moderator
 
thoiboi's Avatar
 
Join Date: Apr 2010
Location: SoCal, CA
Posts: 46,887
Received 8,584 Likes on 6,630 Posts
Wet..
Related Topics
Thread
Thread Starter
Forum
Replies
Last Post
eastcoastguy
3G TL (2004-2008)
12
03-24-2018 12:06 AM
anx1300c
Member Cars for Sale
17
04-15-2017 07:39 PM
Dejan13
2G TL Tires, Wheels & Suspension
3
10-28-2016 10:50 PM
genuwinecassius
Car Parts for Sale
1
08-01-2002 11:32 AM


Quick Reply: Headlight restored


All times are GMT -5. The time now is 09:22 PM.