Custom Fog Lights! [mad tyt JDM yo]
 12-29-2009, 04:56 AM
#1
Rev High; Drive Happy
Thread Starter
iTrader: (2)
Join Date: Feb 2008
Location: Scarborough, Ontario
Age: 34
Posts: 4,076
Received 398 Likes
on
332 Posts
Custom Fog Lights! [mad tyt JDM yo]
This may become a type of progression thread...
Right now I can't sleep and I'm a little bored after working on the project a little so... yeah.
Long ago I was close to installing JDM Legacy Projector Foglights on the TL...
But it had a design flaw that I did not like. The outter lens was like a huge bubble... and when installed on the TL it looked like it had 'mosquito-bite-nipples'. I had purchased OEM Accord Fog Wiring harness, Switch, and Switch harness at this time as well [to use with the Legacy fogs].
So about 10 months later I purchased Honda Accord Foglights (from eBay).
I was going to perform a retro [for the first time, on my own] on them with the JDM Legacy Projectors that I had acquired... But then deemed it too difficult for what I wanted to do.
Sooo.....
I purchased Lexus ES300 Projector Foglights. I purchased a set for about 120Cad which arrived 3 days later. [Purchased on eBay on the 20th.. received item on 23rd]. Item came from Japan, dang that is the fastest shipping I ever got! Anyway, at that same time I had won an auction for a set of [yet another] Lexus ES300 Projector Foglights. Now I'll have a spare that I won't be doing anything with... [Willing to trade the projectors for Type-S Clear Diffusers (with the ambers corners)
  !
!
Anyway, after some quick brainstorming... I decided not to go with a retrofit with the ES300 fogs... but do other custom work to my Honda Accord fogs.
During the midst of all this.. I had purchased pre-cut lower grilles from "dwb993" whom also gave me a few pointers and advice on how I should cut/trim the fogs.
(Thanks a lot by the way!)
So my plans are now this:
Custom fabricate the "Accord Fog-Thing" to accomodate the ES300 projectors.
Swap the connection points on the HIDs from H3 to H11.
Use OEM Accord-Fog-Light Wiring.
-> Cut the H11 Pigtail... extend the pigtail and relocate the pigtail so that it sits inside the projectors [where it will be free from the elements].
Mount the Accord Fogs in a "different-way".
Now I'm not sure if I should use the OEM switch or use a small switch (purchased from Oznium. They look like the ones bforbrian has, but with a LED light) which will be located a more convienent location.
[I am also questioning the OEM switch because I will have a switch added to the TL for my DRLs (that will be converted to fogs---but more on that when work for that draws near)].
I have some progress pics... but I don't know where my USB cable is for my camera.
Sooo... I have like 2 pictures on my phone. This is before some of my work on fabricating the foglights started... just a quick look to see if things would work out. Here they are! (More pics coming soon)


fun fact: The TL is by Acura... but the foglights are branded "Toyota". haha... hope no one will see that =p
Right now I can't sleep and I'm a little bored after working on the project a little so... yeah.
Long ago I was close to installing JDM Legacy Projector Foglights on the TL...
But it had a design flaw that I did not like. The outter lens was like a huge bubble... and when installed on the TL it looked like it had 'mosquito-bite-nipples'. I had purchased OEM Accord Fog Wiring harness, Switch, and Switch harness at this time as well [to use with the Legacy fogs].
So about 10 months later I purchased Honda Accord Foglights (from eBay).
I was going to perform a retro [for the first time, on my own] on them with the JDM Legacy Projectors that I had acquired... But then deemed it too difficult for what I wanted to do.
Sooo.....
I purchased Lexus ES300 Projector Foglights. I purchased a set for about 120Cad which arrived 3 days later. [Purchased on eBay on the 20th.. received item on 23rd]. Item came from Japan, dang that is the fastest shipping I ever got! Anyway, at that same time I had won an auction for a set of [yet another] Lexus ES300 Projector Foglights. Now I'll have a spare that I won't be doing anything with...
[Willing to trade the projectors for Type-S Clear Diffusers (with the ambers corners) !Anyway, after some quick brainstorming... I decided not to go with a retrofit with the ES300 fogs... but do other custom work to my Honda Accord fogs.
During the midst of all this.. I had purchased pre-cut lower grilles from "dwb993" whom also gave me a few pointers and advice on how I should cut/trim the fogs.
(Thanks a lot by the way!)
So my plans are now this:
Custom fabricate the "Accord Fog-Thing" to accomodate the ES300 projectors.
Swap the connection points on the HIDs from H3 to H11.
Use OEM Accord-Fog-Light Wiring.
-> Cut the H11 Pigtail... extend the pigtail and relocate the pigtail so that it sits inside the projectors [where it will be free from the elements].
Mount the Accord Fogs in a "different-way".
Now I'm not sure if I should use the OEM switch or use a small switch (purchased from Oznium. They look like the ones bforbrian has, but with a LED light) which will be located a more convienent location.
[I am also questioning the OEM switch because I will have a switch added to the TL for my DRLs (that will be converted to fogs---but more on that when work for that draws near)].
I have some progress pics... but I don't know where my USB cable is for my camera.
Sooo... I have like 2 pictures on my phone. This is before some of my work on fabricating the foglights started... just a quick look to see if things would work out. Here they are! (More pics coming soon)
fun fact: The TL is by Acura... but the foglights are branded "Toyota". haha... hope no one will see that =p
Last edited by o4Komodo; 12-29-2009 at 05:01 AM.
 12-29-2009, 09:52 AM
#2
Moderator
iTrader: (3)
"mosquito-bite-nipples" 
They look good man! I'm looking forward to seeing the finished product on the car
They look good man! I'm looking forward to seeing the finished product on the car
12-30-2009, 12:01 AM
#4
Rev High; Drive Happy
Thread Starter
iTrader: (2)
Join Date: Feb 2008
Location: Scarborough, Ontario
Age: 34
Posts: 4,076
Received 398 Likes
on
332 Posts
They were just lumps.
Take a look:
And thanks! I think they look good already... hahah. I've made a mock up and now I am in the stage of fiberglassing the new Fog-Light-Holder-Thing-A-Ma-Bob-That-Is-Black.
Pics will come up very shortly. I think I saw my USB earlier today, going to see if it is the right one.
Do you mean my other pair of ES300 foglights?
Or my eBay Accord foglights?
Or my JDM Legacy foglights?
My ES300 are up for trades but I would be willing to sell...
eBay Accord foglights, with wiring harness+switch are available for sale as well...
They aren't for sale just yet though... I'll let you know when they are. Look out in the B.M when they are.
The Legacy fogs will not be for sale as I have a project for those coming shortly after I finish this fog mod.
12-30-2009, 12:38 AM
#5
Rev High; Drive Happy
Thread Starter
iTrader: (2)
Join Date: Feb 2008
Location: Scarborough, Ontario
Age: 34
Posts: 4,076
Received 398 Likes
on
332 Posts
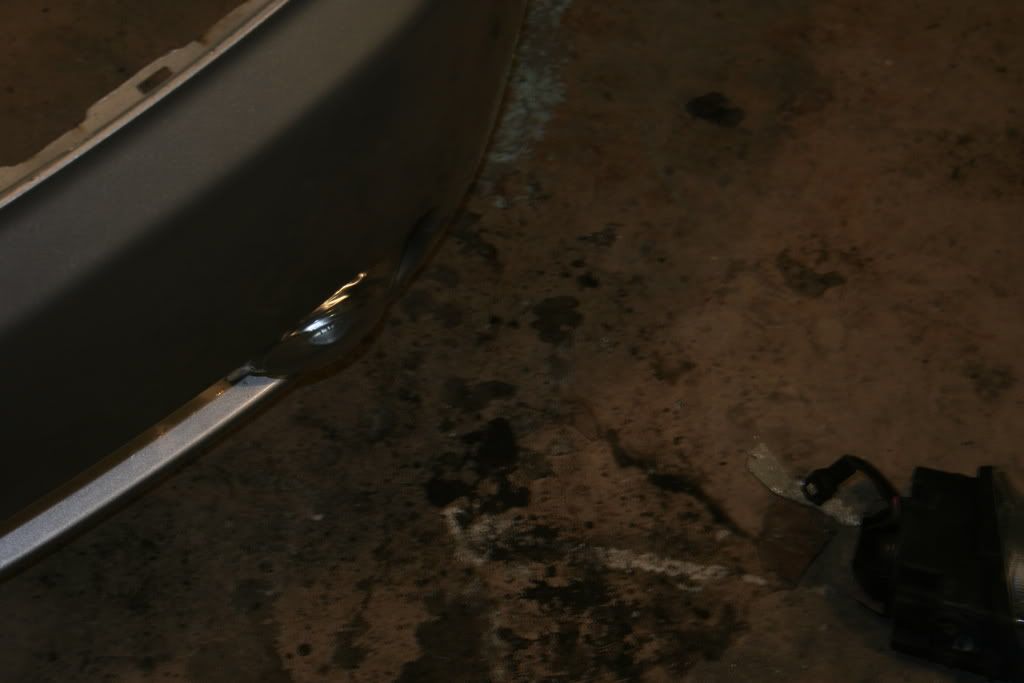
The foglight:

Templates:


Then made a few measurements:


Test fit:

With the fog thing:


Glassing work was done a bit sloppy... Mainly because I hate working with this type of FG. (I had left over FG mat and that crap is itchy as hell! I prefer working with FG cloth. The cloth is weaved... kinda like CF]
Yikes! Look slike it threw up on itself.

This one went a little wrong... [can be fixed though]


Templates:
Then made a few measurements:
Test fit:
With the fog thing:
Glassing work was done a bit sloppy... Mainly because I hate working with this type of FG. (I had left over FG mat and that crap is itchy as hell! I prefer working with FG cloth. The cloth is weaved... kinda like CF]
Yikes! Look slike it threw up on itself.
This one went a little wrong... [can be fixed though]
12-30-2009, 12:41 AM
#7
Rev High; Drive Happy
Thread Starter
iTrader: (2)
Join Date: Feb 2008
Location: Scarborough, Ontario
Age: 34
Posts: 4,076
Received 398 Likes
on
332 Posts
The FG is dry now... I might start sanding it down now. Might apply a second thin layer and sand that down again.
Buuut it's almost 2a.. Might sleep instead. hahah.
Once that stage is complete.. I'll be painting it with flat black paint [same flat black i used for my headlights].
Once that is complete... my next step is to do custom work on the HID connectors. That is.. switching H3 to H11.
Buuut it's almost 2a.. Might sleep instead. hahah.
Once that stage is complete.. I'll be painting it with flat black paint [same flat black i used for my headlights].
Once that is complete... my next step is to do custom work on the HID connectors. That is.. switching H3 to H11.
Trending Topics
12-30-2009, 04:44 AM
#9
Are you sure the FG resin will adhere to the plastic? I would have used some plastic panel material instead of cardboard, and fiberglassed it from the back side. Then some black silicone on the front face around the edge where the fog light opening and the plastic face plate met.
Just throwing ideas out there. Sanding will be a bitch to get them both looking identical. Keep going, curious to see the final result.
Just throwing ideas out there. Sanding will be a bitch to get them both looking identical. Keep going, curious to see the final result.
12-30-2009, 08:55 AM
#10
Rev High; Drive Happy
Thread Starter
iTrader: (2)
Join Date: Feb 2008
Location: Scarborough, Ontario
Age: 34
Posts: 4,076
Received 398 Likes
on
332 Posts
but 2 clean cut offs instead sure is indeed sweeeeeeet!
Are you sure the FG resin will adhere to the plastic? I would have used some plastic panel material instead of cardboard, and fiberglassed it from the back side. Then some black silicone on the front face around the edge where the fog light opening and the plastic face plate met.
Just throwing ideas out there. Sanding will be a bitch to get them both looking identical. Keep going, curious to see the final result.
Just throwing ideas out there. Sanding will be a bitch to get them both looking identical. Keep going, curious to see the final result.
Thanks for the idea though. I would have went that route but it is too late for me now.
I should have known to go to you first for any custom fabricating mods. Since, after all, you are the king at that!
Last edited by o4Komodo; 12-30-2009 at 08:57 AM.
12-31-2009, 02:25 PM
#11
Rev High; Drive Happy
Thread Starter
iTrader: (2)
Join Date: Feb 2008
Location: Scarborough, Ontario
Age: 34
Posts: 4,076
Received 398 Likes
on
332 Posts
So I got curious as to how it SHOULD look when it's completed and primered one of the fog-housing-thing.
Here's how it looked:

In comparison:


On the projectors:

Then real work began:
Sanded down:

Then worked on the other one...
I sanded both down considerably A LOT. I had to use filers to make sure everything was of the same level. Gosh that was a lot of work.
I then got curious as to how it would look when sanded down and painted...
Granted there are a lot of pits and some scratches from the filing... but that will be remedied =]


On the projectors:
Flash off:

Flash on:

Here's how it looked:
In comparison:
On the projectors:
Then real work began:
Sanded down:
Then worked on the other one...
I sanded both down considerably A LOT. I had to use filers to make sure everything was of the same level. Gosh that was a lot of work.
I then got curious as to how it would look when sanded down and painted...
Granted there are a lot of pits and some scratches from the filing... but that will be remedied =]
On the projectors:
Flash off:
Flash on:
12-31-2009, 02:28 PM
#12
Rev High; Drive Happy
Thread Starter
iTrader: (2)
Join Date: Feb 2008
Location: Scarborough, Ontario
Age: 34
Posts: 4,076
Received 398 Likes
on
332 Posts
Side note:
Willing to now sell ES300 fogs and eBay fogs [with eBay wiring+switch, excludes the black housing thing as I used them for this project] are for sale... but not posted in BM yet. Might not post it officially on the BM but it is for sale if anyone is interested.
Willing to now sell ES300 fogs and eBay fogs [with eBay wiring+switch, excludes the black housing thing as I used them for this project] are for sale... but not posted in BM yet. Might not post it officially on the BM but it is for sale if anyone is interested.
01-01-2010, 09:57 AM
#13
Moderator
iTrader: (3)
Props to you for doing all of that custom work man. No way in hell I would do that
01-01-2010, 10:32 AM
#14
200,000 mile club
Join Date: Jul 2007
Location: Charlotte, NC
Age: 49
Posts: 1,774
Likes: 0
Received 35 Likes
on
15 Posts
Yepp! The FG adheres to the plastic. The cardboard template I made will be removed once the FG work is done.
Hey, good try on this project but there is no way that you are going to be able to get the cardboard off of it without some layers sticking. I hope it stays but Fiberglass 101: You need to sand the surface on the plastic or anything else for that matter to make sure it sticks well to the product. It's only a matter of time before it seperate as you are driving. If the weight of the light is going to be supported by this, be careful. I commend you for trying this and I think it's a great idea......If you try again make sure you have at least a piece of wood in place of a 3 layer piece of cardboard. Use some of that fiberglass matting that you have in the backround as that is the strong stuff!
01-01-2010, 05:40 PM
#16
Rev High; Drive Happy
Thread Starter
iTrader: (2)
Join Date: Feb 2008
Location: Scarborough, Ontario
Age: 34
Posts: 4,076
Received 398 Likes
on
332 Posts
It is sort of a gutsy mod as I can't really go back now... Just hope it comes out fine.
Hey, good try on this project but there is no way that you are going to be able to get the cardboard off of it without some layers sticking. I hope it stays but Fiberglass 101: You need to sand the surface on the plastic or anything else for that matter to make sure it sticks well to the product. It's only a matter of time before it seperate as you are driving. If the weight of the light is going to be supported by this, be careful. I commend you for trying this and I think it's a great idea......If you try again make sure you have at least a piece of wood in place of a 3 layer piece of cardboard. Use some of that fiberglass matting that you have in the backround as that is the strong stuff!
Ah!!! That's what I forgot to do... Yeah I did not sand the fog-covers [the name just hit me this morning]. The FG and the resin seemed to have adhered very well to the plastic... But then it appears to adhere well to a lot of things. I hope it will last then
In terms of the lighting... It won't really have anything to do with the eBay Accord-fog-covers. The foglight projectors will be attached seperately from the covers.
The FG cloth I have is indeed strong stuff. I found it after I had began fabricating the covers. So far I only have one layer of FG mat [the one that is itchy as heck and rips like nothing]. I will use the cloth as a second layer as well as use the cloth to adhere the FG from behind as well. I'm going to try to make this thing not come apart.
Thanks for the advice.
I've taken a break today but will be back on the mod tomorrow. =]
 01-04-2010, 08:41 AM
#21
Rev High; Drive Happy
Thread Starter
iTrader: (2)
Join Date: Feb 2008
Location: Scarborough, Ontario
Age: 34
Posts: 4,076
Received 398 Likes
on
332 Posts
Thanks!~ Still in the process of getting rid of pit-holes. Is that what it is called?
I'm still going to do a little bit more work to make sure it won't just come apart somehow randomly... For the most part the covers are done. Just need to fill in the pit-holes and go forth to installing.
Thanks a lot!
I'm selling my Lexus ES300 fogs, Car Cover and Accord Fogs here, please take a look for more info on the item:
https://acurazine.com/forums/showthr...1#post11617041
Thanks a lot!
I'm selling my Lexus ES300 fogs, Car Cover and Accord Fogs here, please take a look for more info on the item:
https://acurazine.com/forums/showthr...1#post11617041
01-04-2010, 08:52 AM
#22
Rev High; Drive Happy
Thread Starter
iTrader: (2)
Join Date: Feb 2008
Location: Scarborough, Ontario
Age: 34
Posts: 4,076
Received 398 Likes
on
332 Posts
Will be resting from a long drive...
Continue working on the project when I wake up.
Work will include:
Finish filling in the minor pit-holes.
Add a layer of FG Cloth [the weaved one].. followed by more sanding.
Finish with thin layer of FG resin [with more sanding].
Repaint.
May include:
Relocated H11 pigtails to be more HID friendly [and more weather-proofed]
After all that will be:
Change pins on H3 HIDs to H11.
Purchase relays for fog-wiring.
Assemble on vehicle.
01-04-2010, 08:53 AM
#23
Rev High; Drive Happy
Thread Starter
iTrader: (2)
Join Date: Feb 2008
Location: Scarborough, Ontario
Age: 34
Posts: 4,076
Received 398 Likes
on
332 Posts
I'm still in debate if I should use the OEM Accord Fog-Switch or use the Oznium switch [I will be using one Oznium switch for my "custom-Aux-Fogs" in the headlights].
01-06-2010, 12:46 PM
#25
Intermediate
Join Date: Sep 2008
Posts: 34
Likes: 0
Received 0 Likes
on
0 Posts
I would suggest you use a satin black rather than a flat black. Flat will always look a little rough and will hold dirt more (look dirty all the time). I used satin black plastic paint because it has adhesion promoters and flex and also looks very close to the color, texture, and shine of oem plastic. I made fog light bezels out of a 4" PVC coupling for my 93 civic and it looked oem. Just a suggestion. Good luck.
01-06-2010, 05:00 PM
#26
Rev High; Drive Happy
Thread Starter
iTrader: (2)
Join Date: Feb 2008
Location: Scarborough, Ontario
Age: 34
Posts: 4,076
Received 398 Likes
on
332 Posts
Don't know what I will do with my spare Oznium switch now... probably sell that as well.
I would suggest you use a satin black rather than a flat black. Flat will always look a little rough and will hold dirt more (look dirty all the time). I used satin black plastic paint because it has adhesion promoters and flex and also looks very close to the color, texture, and shine of oem plastic. I made fog light bezels out of a 4" PVC coupling for my 93 civic and it looked oem. Just a suggestion. Good luck.
I repainted the covers with the left over paint and it looks fairly good.
I'm probably going to go back to the flat black that I have.
edit: I just searched 'satin black' on google images... and it looks fairly a lot like flat black. The example pics they had were just... smexxxyyy
Well, actually it's Acrylic Enamel... it's a bit off from flat-black.
01-08-2010, 04:11 PM
#27
Rev High; Drive Happy
Thread Starter
iTrader: (2)
Join Date: Feb 2008
Location: Scarborough, Ontario
Age: 34
Posts: 4,076
Received 398 Likes
on
332 Posts
It turns out that I'm missing some tools to continue my foglight mod...
So I got bored and came up with these really quick:
Before:

After:

Before:

After:


Thoughts??
I know the rear diffuser is agressive.... but I like agressive =]
I could probably try to fabricate these myself out of FG... Or I can have a CF company make it for me instead.
Only thing is that... my TL is a-spec-less. =[
So I got bored and came up with these really quick:
Before:
After:
Before:
After:
Thoughts??
I know the rear diffuser is agressive.... but I like agressive =]
I could probably try to fabricate these myself out of FG... Or I can have a CF company make it for me instead.
Only thing is that... my TL is a-spec-less. =[
01-14-2010, 05:26 PM
#29
Rev High; Drive Happy
Thread Starter
iTrader: (2)
Join Date: Feb 2008
Location: Scarborough, Ontario
Age: 34
Posts: 4,076
Received 398 Likes
on
332 Posts
Updates with no pictures! Hurrah!
Well, I was able to bolt the foglight to the bumper...
It was a lot of work considering how much "damage" I had caused a year back when I cut it for [larger housing] JDM Subbie fogs. The ES300 are smaller... So all that cutting left me with nothing to mount it on/onto.
There is only one issue with my foglights right now...
After installing it [no wiring yet] I realised that I had forggoten to aim the foglights forward... now it points at an angle between 10 and 11...
Oh well.
The forward facing foglight issue will be resolved with a foglight projector retrofit in the headlights.
01-14-2010, 07:34 PM
#31
Rev High; Drive Happy
Thread Starter
iTrader: (2)
Join Date: Feb 2008
Location: Scarborough, Ontario
Age: 34
Posts: 4,076
Received 398 Likes
on
332 Posts
Hahah. I'm starting school soon but when I get time I'll try to fabricate what I can from the sketches.
I'm a-spec-less... so that would mean I would most likely need to refabricate it when I do get a-spec.
I hit a dead end in my retrofit at the moment...
I thought I could remove the DRL area easily but it turns out that it's apart of the inner-guts that holds the bi-xenons as well---which is attached to the backing of the headlight.
I'm going to need to buy a circular-drill-bit that can drill through metal... hopefully I aim it correctly while drilling.
01-14-2010, 09:51 PM
#32
Moderator
iTrader: (3)
I really like the sketches! And I'm bummed that the fog lights are on hold as of right now
Hopefully you can get what you need to get them installed
Hopefully you can get what you need to get them installed

 01-15-2010, 04:42 PM
#36
Rev High; Drive Happy
Thread Starter
iTrader: (2)
Join Date: Feb 2008
Location: Scarborough, Ontario
Age: 34
Posts: 4,076
Received 398 Likes
on
332 Posts
Project retrofit is underway! Almost complete actually
Hahah, Sorry. Fogs are almost complete... Just some touching up to do on the 'fog light covers' and it's done.
I'm working on my retrofit right now though. Everything is going to be put back together at the same time though!
I would very much so like to bring the 'sketches to life'! I have a lot of time on my hands but I'm not 100% sure on how I could fabricate it alone.
I do know of some places that could help me 'bring it to life' though.
The only downside is that I would only want to create the front splitter and rear diffuser once I have the A-Specs.
Either that... or someone who is willing to bring their TL in for test fitting and what not.
Thanks! Rear diffuser was a bit inspired by the DB9.
Fogs are almost done, along with my projector-foglight-retrofit [in the headlights]!
Epoxy is indeed a PITA. I'm lucky I don't have to deal with it too much.
Hahah I've been taking my sweet time
It's been about a week or more now.
Everything is almost done. Once I complete the fog-covers and my retrofit I'll need to have everything wired up.
Will need to order another 3000k HID DDM Tuning kit for the retros though.
I'm working on my retrofit right now though. Everything is going to be put back together at the same time though!
I would very much so like to bring the 'sketches to life'! I have a lot of time on my hands but I'm not 100% sure on how I could fabricate it alone.
I do know of some places that could help me 'bring it to life' though.
The only downside is that I would only want to create the front splitter and rear diffuser once I have the A-Specs.
Either that... or someone who is willing to bring their TL in for test fitting and what not.
Fogs are almost done, along with my projector-foglight-retrofit [in the headlights]!
Epoxy is indeed a PITA. I'm lucky I don't have to deal with it too much.
Hahah I've been taking my sweet time
It's been about a week or more now.
Everything is almost done. Once I complete the fog-covers and my retrofit I'll need to have everything wired up.
Will need to order another 3000k HID DDM Tuning kit for the retros though.
01-15-2010, 05:36 PM
#37
Rev High; Drive Happy
Thread Starter
iTrader: (2)
Join Date: Feb 2008
Location: Scarborough, Ontario
Age: 34
Posts: 4,076
Received 398 Likes
on
332 Posts
Something to leave you folks with who is following along:
Test fitting the covers:


Both foglights are fully bolted up, unwired. Here is one of them...

The retrofit:


The lens that I shall be using:

Here's one of the shroud/covers that I'll be using. It's from the JDM Subaru Legacy. It's not on straight though.


ALMOST FINISHED! I'm excited!
Also going to push back the shield on the bixenons a bit.
Going to clean up the 'tracks' of the headlights... and reseal.
By tomorrow before 4pm I should have everything installed. I have a party to attend to tomorrow so I need my car fully operational.
Then sometime next week I'll be getting everything wired up.
I'm in need of 2 relays for my foglights though.
Test fitting the covers:
Both foglights are fully bolted up, unwired. Here is one of them...
The retrofit:
The lens that I shall be using:
Here's one of the shroud/covers that I'll be using. It's from the JDM Subaru Legacy. It's not on straight though.
ALMOST FINISHED! I'm excited!
Also going to push back the shield on the bixenons a bit.
Going to clean up the 'tracks' of the headlights... and reseal.
By tomorrow before 4pm I should have everything installed. I have a party to attend to tomorrow so I need my car fully operational.
Then sometime next week I'll be getting everything wired up.
I'm in need of 2 relays for my foglights though.
Last edited by o4Komodo; 01-15-2010 at 05:40 PM.
01-16-2010, 02:15 PM
#38
Rev High; Drive Happy
Thread Starter
iTrader: (2)
Join Date: Feb 2008
Location: Scarborough, Ontario
Age: 34
Posts: 4,076
Received 398 Likes
on
332 Posts
Everything is installed!
I came across an issue with my passenger headlight though...
Didn't seem to want to stay seeled all the way so now the inner housing is not aligned with the bixenon.... Also there is condensation in there that I can't seem to get rid of.
Oh, another issue is that the passenger foglight-shroud-reflector thing is not matched with the driver's. The alignment on that is a bit off... But I think it still looks good.
I'm going to wait for another day to fix all of that though...
My main concern now is to get the lower foglights and the new retrofitted foglights wired up.
Pics to come later. Now I go get ready for some partying
01-16-2010, 02:39 PM
#39
Rev High; Drive Happy
Thread Starter
iTrader: (2)
Join Date: Feb 2008
Location: Scarborough, Ontario
Age: 34
Posts: 4,076
Received 398 Likes
on
332 Posts
Just ran out to grab a few snapshots.
The headlights look MEAN with the new projectors!


Stupid condensation:


note: last night was a bit of a finished rush job. Fog covers will get reworked. on
note: left foglight-cover needs readjustment. It's "popping out" more than it should be.
The headlights look MEAN with the new projectors!
Stupid condensation:
note: last night was a bit of a finished rush job. Fog covers will get reworked. on
note: left foglight-cover needs readjustment. It's "popping out" more than it should be.

Thread
Thread Starter
Forum
Replies
Last Post
InFaMouSLink
Car Parts for Sale
7
10-27-2015 06:51 PM
sockr1
Car Parts for Sale
22
10-01-2015 01:31 AM
prox
5G TLX Problems & Fixes
6
09-01-2015 02:03 AM