Clearing headlights on an 07 TL-S
 08-18-2008, 08:28 PM
#1
#ForcedInductionFamily
Thread Starter
Clearing headlights on an 07 TL-S
So my boy Trevor stopped by on Saturday so we could clear out the headlights in his 07 TL-S. I've cleared out a bunch of headlights in different types of vehicles so I felt pretty comfortable doing it but none of them were as involved as this was. What retard designs a car where you have to remove the bumper to take out the headlights (or replace a burnt out bulb)?
Anyway, I'm not going to post a full tutorial because all the steps are pretty much the same as in the thread in the Garage, but there is ONE part that is different because the TL-S headlights are different than the standard TL ones.
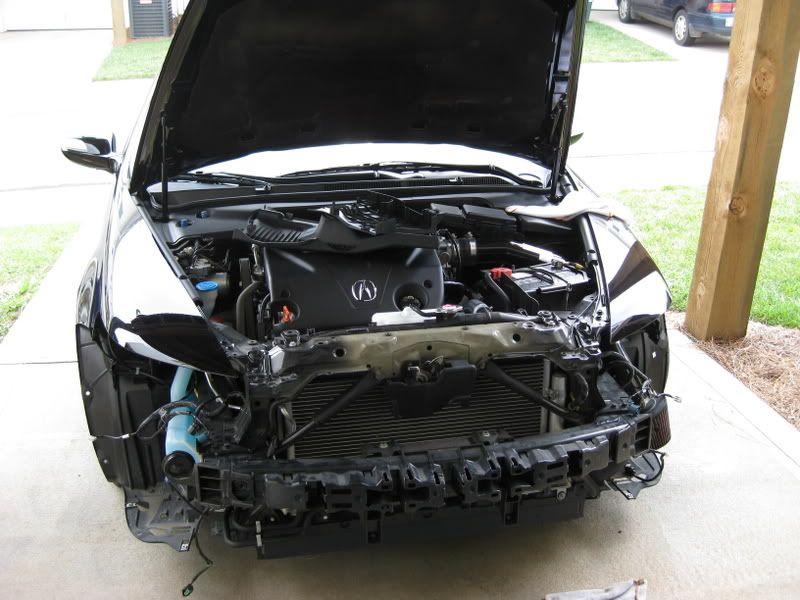
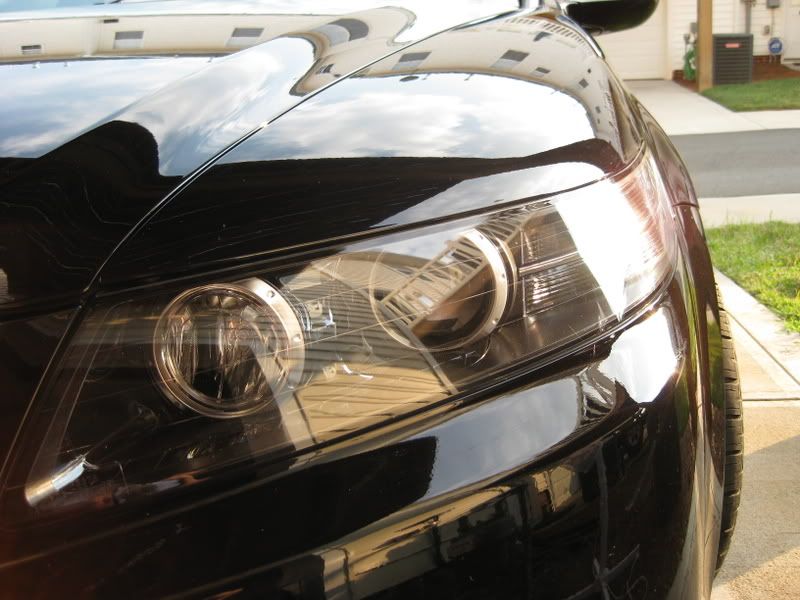
Bumper comes off:
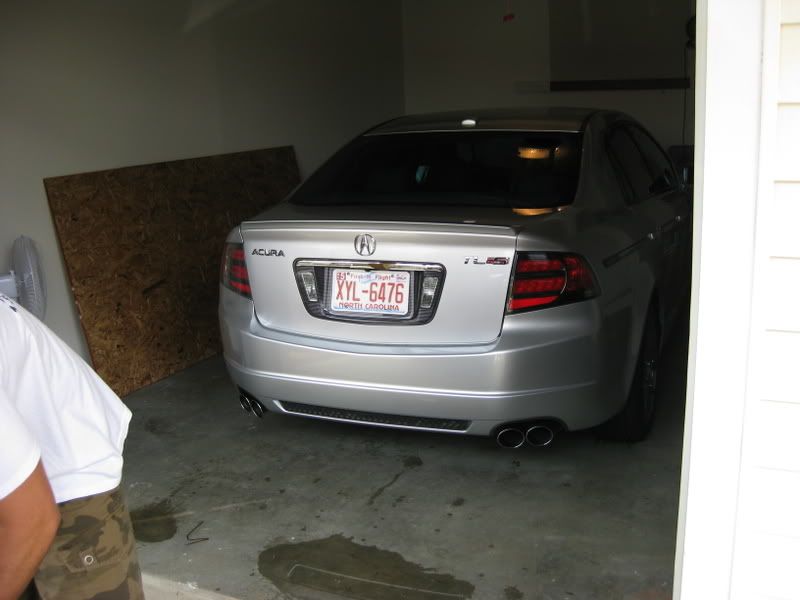
Shameless plug of my just-washed TL-S haha:
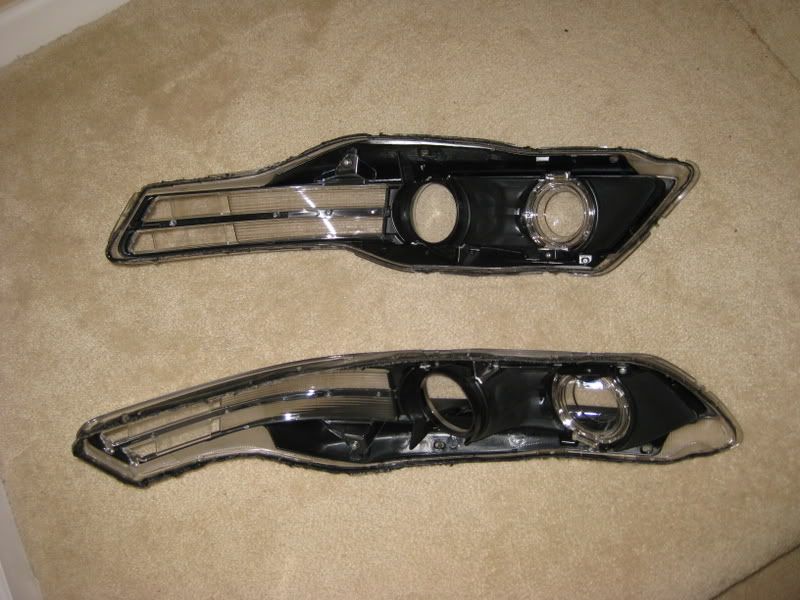
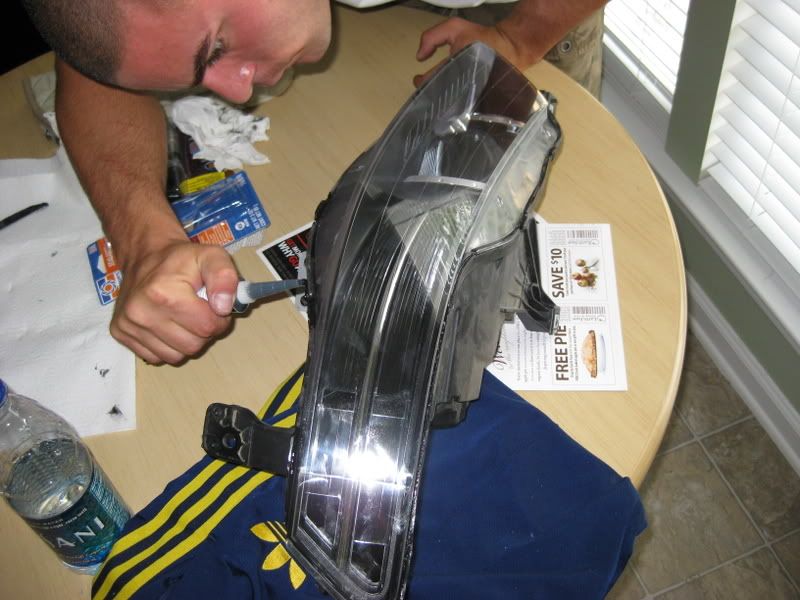
Headlight comes apart. We were surprised that there were bags of silicone inside of the light behind the chrome housings.. I've never seen that before. Maybe my oven isn't powerful enough, but we had better success with cooking the headlights for a few minutes longer than 20 minutes. It made a big difference in how soft the glue was.
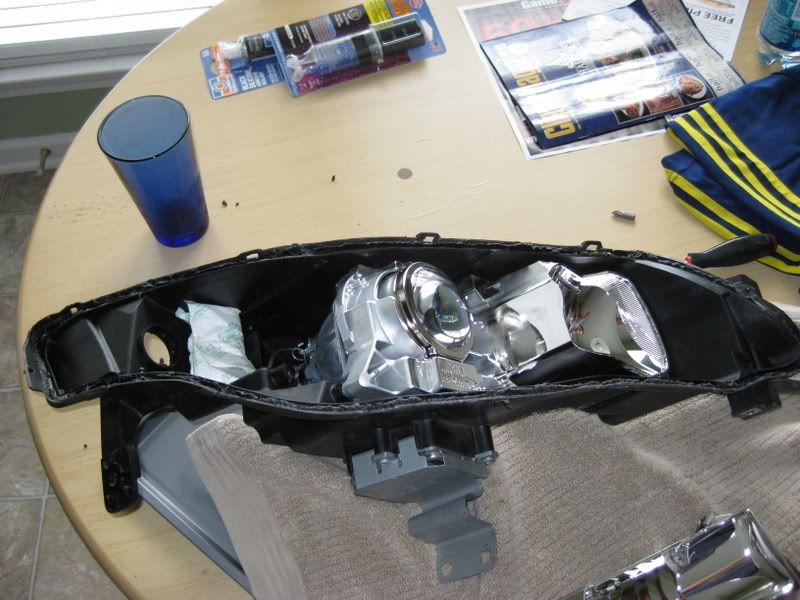
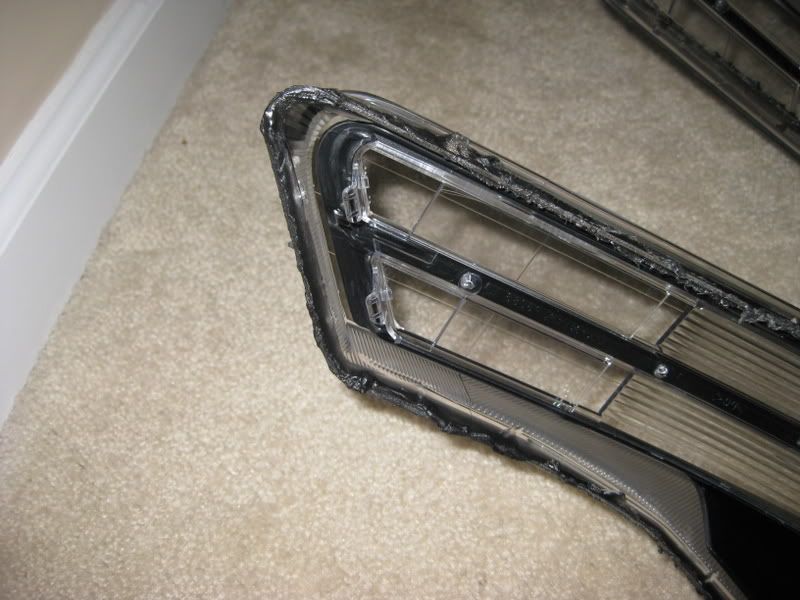
This is where it was different. The orange pieces in the headlights are held in by tabs, but you can break the tabs and literally just slide them out past the clear plastic that holds the chrome bar in the middle of the light. It's really easy and takes literally 2 seconds. The chrome bar stays in, we didn't need any epoxy. You can see in this pic how they look like they can slide right out... cuz they do!
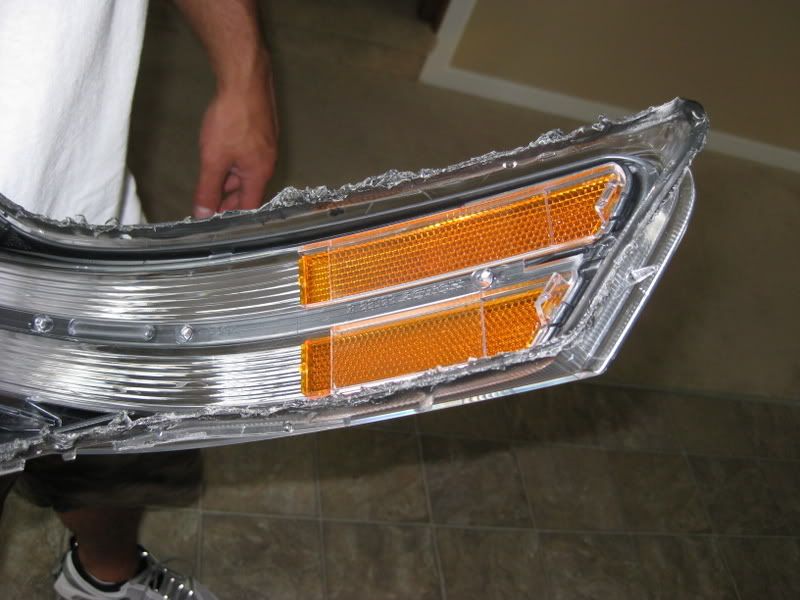
Closer shot of the clear plastic tabs that hold in the orange tabs that you have to break.
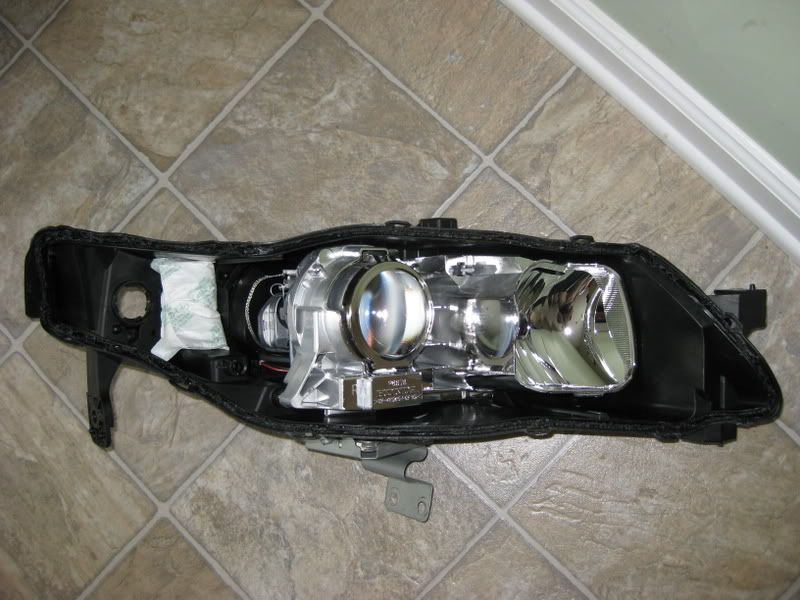
Trevor painted the chrome housings gloss black. They turned out sick even though some bugs got caught in them and fucked it up a little
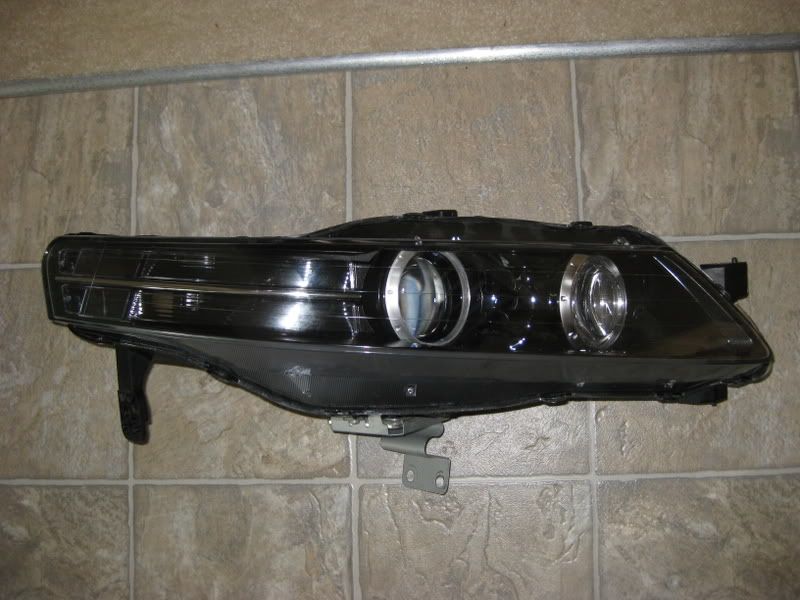
Sealing them up good just in case.
The finished product with bumper back on:
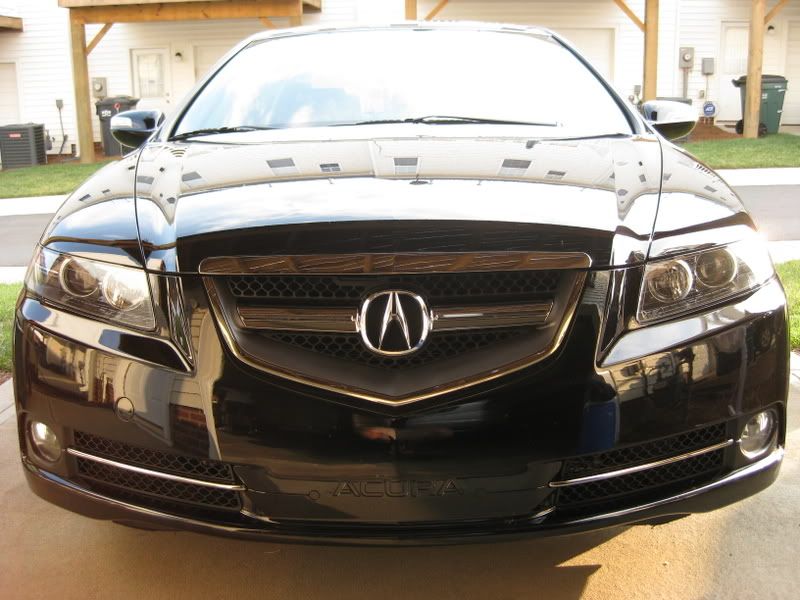
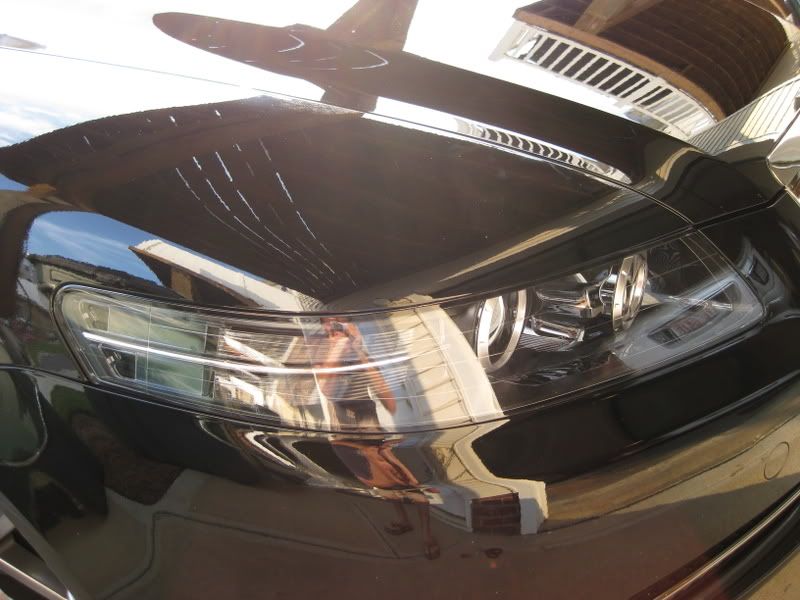
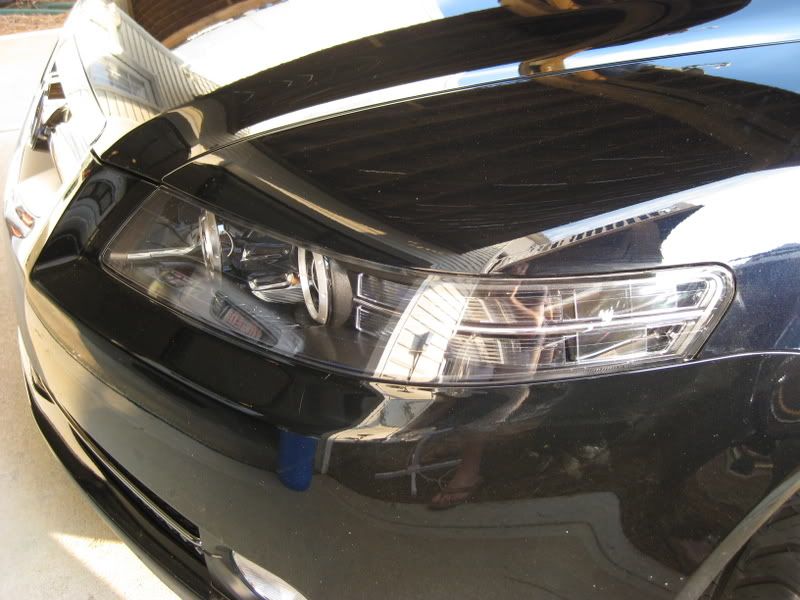
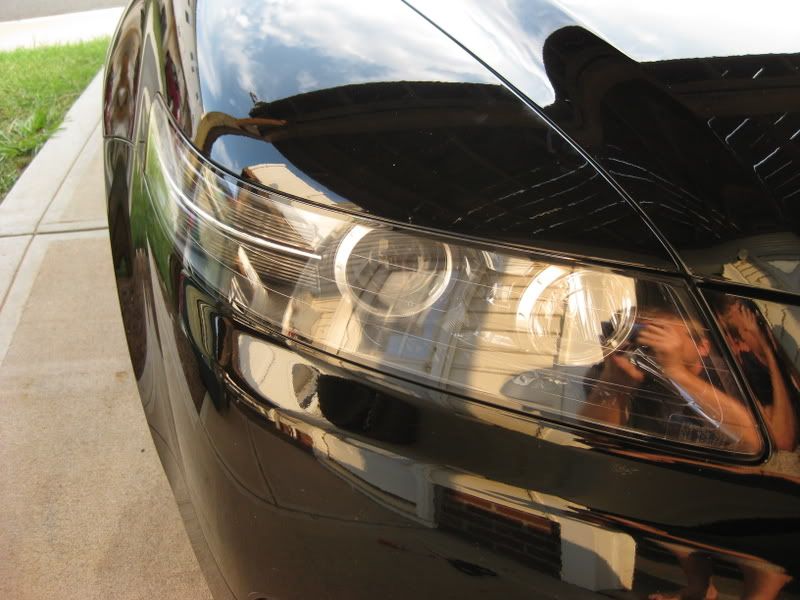
I think they turned out great. We'll probably do it to my headlights at some point in the near future. It took us about 4.5 hours mostly because we were being very careful... I think next time around we can probably do it in 2.5 hours.

Anyway, I'm not going to post a full tutorial because all the steps are pretty much the same as in the thread in the Garage, but there is ONE part that is different because the TL-S headlights are different than the standard TL ones.
Bumper comes off:
Shameless plug of my just-washed TL-S haha:
Headlight comes apart. We were surprised that there were bags of silicone inside of the light behind the chrome housings.. I've never seen that before. Maybe my oven isn't powerful enough, but we had better success with cooking the headlights for a few minutes longer than 20 minutes. It made a big difference in how soft the glue was.
This is where it was different. The orange pieces in the headlights are held in by tabs, but you can break the tabs and literally just slide them out past the clear plastic that holds the chrome bar in the middle of the light. It's really easy and takes literally 2 seconds. The chrome bar stays in, we didn't need any epoxy. You can see in this pic how they look like they can slide right out... cuz they do!
Closer shot of the clear plastic tabs that hold in the orange tabs that you have to break.
Trevor painted the chrome housings gloss black. They turned out sick even though some bugs got caught in them and fucked it up a little
Sealing them up good just in case.
The finished product with bumper back on:
I think they turned out great. We'll probably do it to my headlights at some point in the near future. It took us about 4.5 hours mostly because we were being very careful... I think next time around we can probably do it in 2.5 hours.
 08-18-2008, 09:36 PM
#2
Instructor
iTrader: (2)
Join Date: Sep 2007
Location: South Charlotte, NC
Age: 43
Posts: 197
Likes: 0
Received 0 Likes
on
0 Posts
Sweet dude! Damn bugs on my crap look like scratches in the pics. Everyone knows I keep my stuff super clean!!
Best part is I got the phone call I've been waiting 6 months for today!! Wheels will be here on Monday...yippeee!!!
Thanks for posting Lee!
Best part is I got the phone call I've been waiting 6 months for today!! Wheels will be here on Monday...yippeee!!!
Thanks for posting Lee!
 08-19-2008, 07:54 AM
#6
#ForcedInductionFamily
Thread Starter
We were a little concerned when the DRL's didn't come back on, but TrevorT gave me a call on the drive home and said they came back on. We guessed that the DRL module just reset itself after a few minutes of driving.... all of our connections were completely solid.
Trending Topics
08-19-2008, 11:12 AM
#8
tehLEGOman
Join Date: Dec 2004
Location: Charlotte, NC
Age: 41
Posts: 9,135
Received 1,982 Likes
on
1,335 Posts
Looks like a solid execution here guys...good work. 
Finally your wheels are coming in!! I know it's been a long and agonizing wait.
Finally your wheels are coming in!! I know it's been a long and agonizing wait.
 08-31-2008, 08:18 PM
#15
#ForcedInductionFamily
Thread Starter
Thanks for the comments guys, I'll post back in this thread when we do mine too so you can see it on an ASM... I'm also going to paint the housings black like T did.
shortdyboy I don't have the link to the thread to do it, but you can probably turn it up with a quick search. We actually didn't really consult that thread too much other than to see what the differences were between the standard TL and TL-S headlights. I've done a couple of Subarus and a Lancer and the baking process was pretty much the same for all of them... the only difference is how you have to take out the headlights.
shortdyboy I don't have the link to the thread to do it, but you can probably turn it up with a quick search. We actually didn't really consult that thread too much other than to see what the differences were between the standard TL and TL-S headlights. I've done a couple of Subarus and a Lancer and the baking process was pretty much the same for all of them... the only difference is how you have to take out the headlights.
08-31-2008, 11:05 PM
#16
Senior Moderator
looking good, here's a suggestion, next time you clear the lights why not try to "french" the lights by removing the text and lines inside the headlight lense (stanely, dot, etc.)
 09-02-2008, 11:44 AM
#17
#ForcedInductionFamily
Thread Starter
Nice idea, how? Wetsand? To be honest I'm afraid to touch anything on the inside of the lens if that's where they are... for fear of fingerprints or other oils I couldn't get out.

Thread
Thread Starter
Forum
Replies
Last Post
rp_guy
Member Cars for Sale
9
07-16-2017 07:33 AM
LogicWavelength
3G TL Photograph Gallery
33
11-01-2015 09:38 AM