

WOOT! Type-S Tails Arrived!
 07-18-2008, 12:42 AM
#1
Instructor
Thread Starter
Join Date: Jun 2008
Location: Seattle, WA
Age: 41
Posts: 124
Likes: 0
Received 0 Likes
on
0 Posts
WOOT! Type-S Tails Arrived!


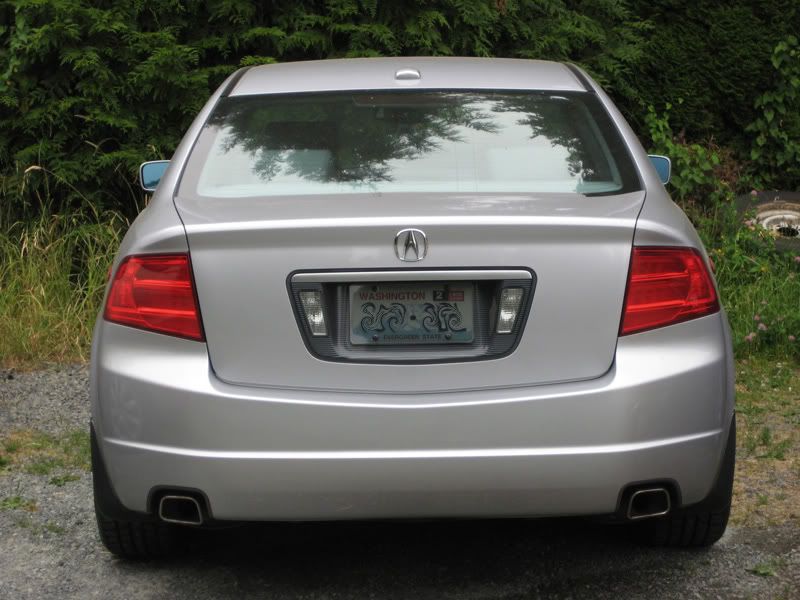
Pick these babies up on ebay for $120 + $24 s/h - $24 (20% cashback) = $120.
Can't wait to install them tomorrow. Look forward to more pictures of install.
 07-18-2008, 01:13 AM
#3
Instructor
Thread Starter
Join Date: Jun 2008
Location: Seattle, WA
Age: 41
Posts: 124
Likes: 0
Received 0 Likes
on
0 Posts
Originally Posted by gotxxe
Those look nice is the chrome part that dark of a color or is it just the pic!!
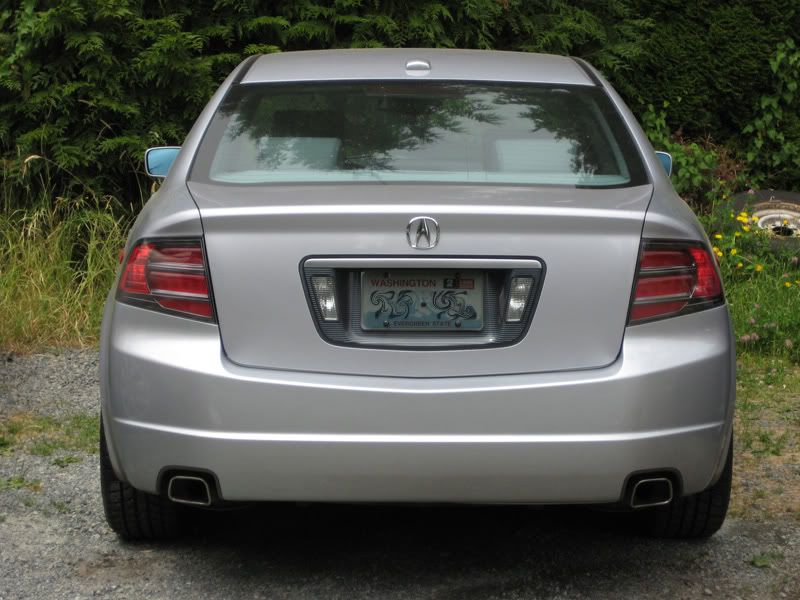
From side angle:
 07-18-2008, 01:34 AM
#5
Instructor
Thread Starter
Join Date: Jun 2008
Location: Seattle, WA
Age: 41
Posts: 124
Likes: 0
Received 0 Likes
on
0 Posts
Originally Posted by ricgrrarrow
damn, good buy!! haha is that at an online store? or a private seller? i've been looking everywhere for a good price on the type s lights
They have another pair available here: Ebay Tail Lights
Trending Topics
 07-18-2008, 10:08 PM
#10
Originally Posted by gotxxe
Those look nice is the chrome part that dark of a color or is it just the pic!!
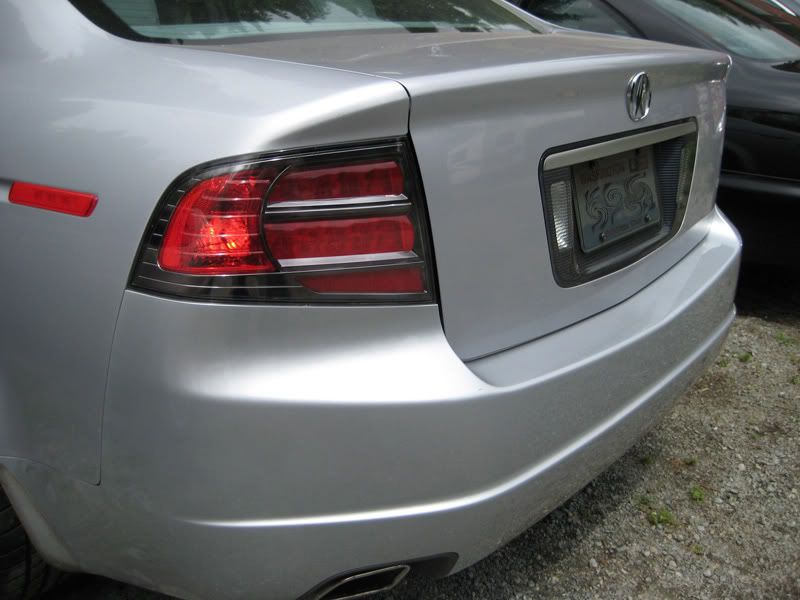
The Type-S tails dont have chrome, its actually a gunmetal/anthracite color
 07-18-2008, 10:22 PM
#12
Stuck in Vegas.
Join Date: Jul 2007
Location: Las Vegas, NV
Age: 35
Posts: 343
Likes: 0
Received 0 Likes
on
0 Posts
Originally Posted by HONgDA
From my experience with DEPO, The clearcoat from the outside is gonna start peeling. Report back if this happens.
07-19-2008, 06:12 AM
#14
Instructor
Thread Starter
Join Date: Jun 2008
Location: Seattle, WA
Age: 41
Posts: 124
Likes: 0
Received 0 Likes
on
0 Posts
I got the Type-S tails installed today and I was going to make a little DIY for tail lights installation, but looks like somebody already beat me to the punch: https://acurazine.com/forums/showpos...8&postcount=29
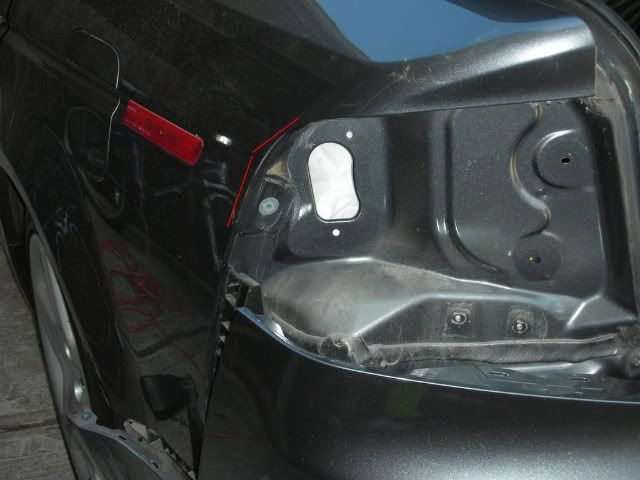
I guess I will not post the complete instructions, but instead just post up pics here and there. Overall, I think I did a pretty OK job. The scariest part was the bumper removal. Those two plugs hiding the 10mm bolts were a b*tch to remove. It took a little finess, but I think I over finessed it as you will see in the pictures below.
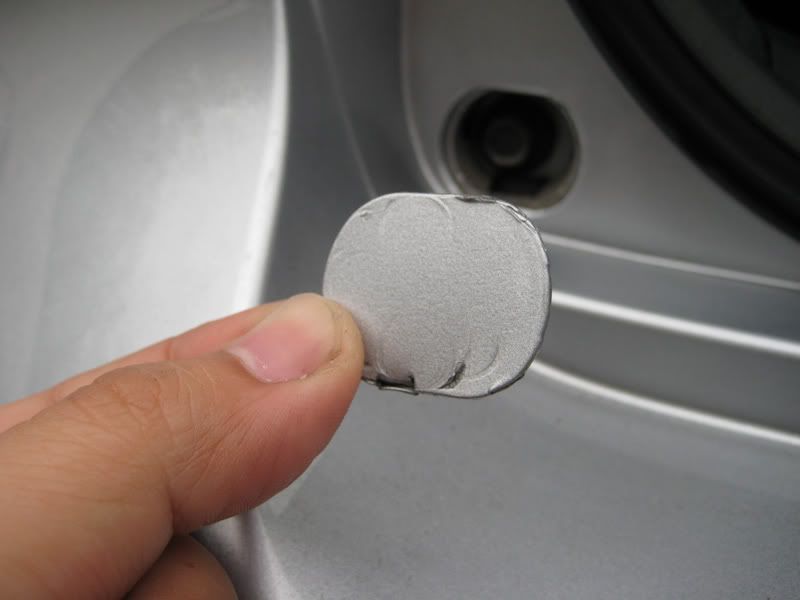
Bumper plugs remove did not go so well as you can tell from this picture.
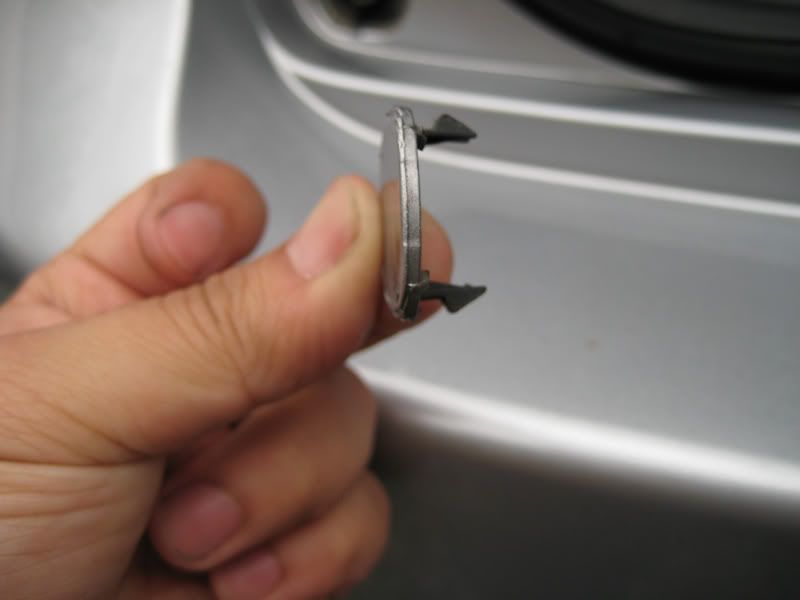
Here is a picture of the clips in the back of the plugs for others to see if you are wondering how they come off so that you don't make a n00b mistake like me.
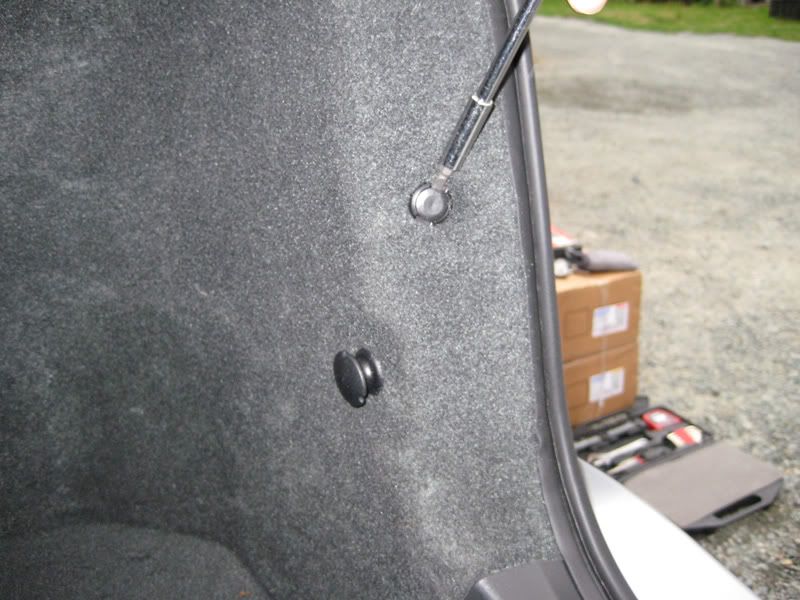
Trunk liner removal is easy, just use flat head to remove clip and unscrew the net anchor plugs on the side and at the bottom(not in picture).
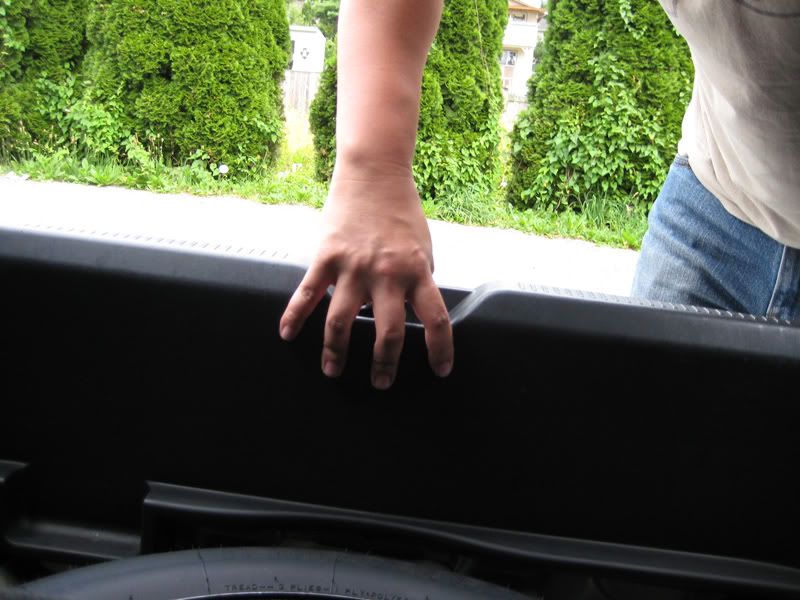
Also I noticed this plastic piece in the way which was never mentioned in previous instructions. I had to remove it to pull the trunk liner back. The plastic molding is held in place by clips, just pull upwards and you should be able to loosen it and move it out of the way.
Onto the splash guards. Those are some dirty splash guards!!
Removing the splash guards were incredibly annoying since there was so little room to work with. Sandiegodrive had some nice tips in his video on how to get some of the screws out. The problem was, I did not have anything small enough to reach in to get the bottom screw of the bracket out so I had to do it the ghetto way using a philips tip and a needle nose plier!
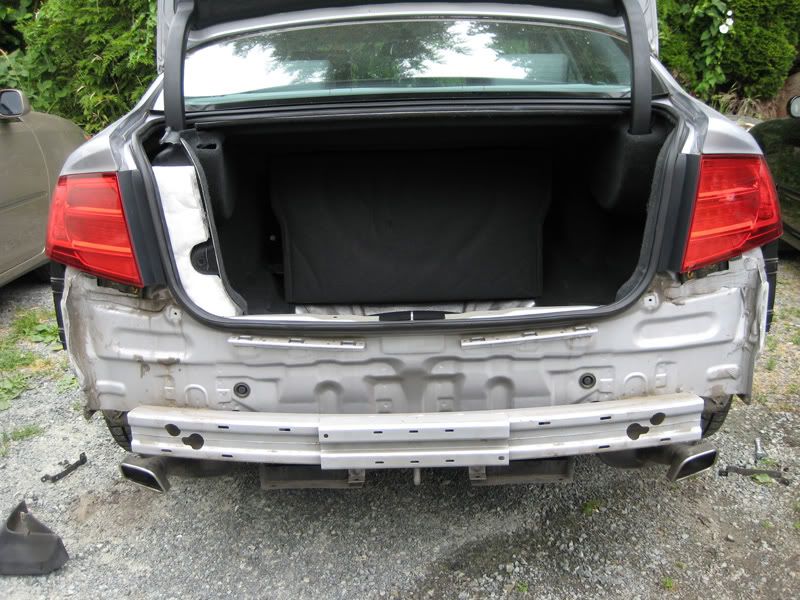
Pulling away the bumper.
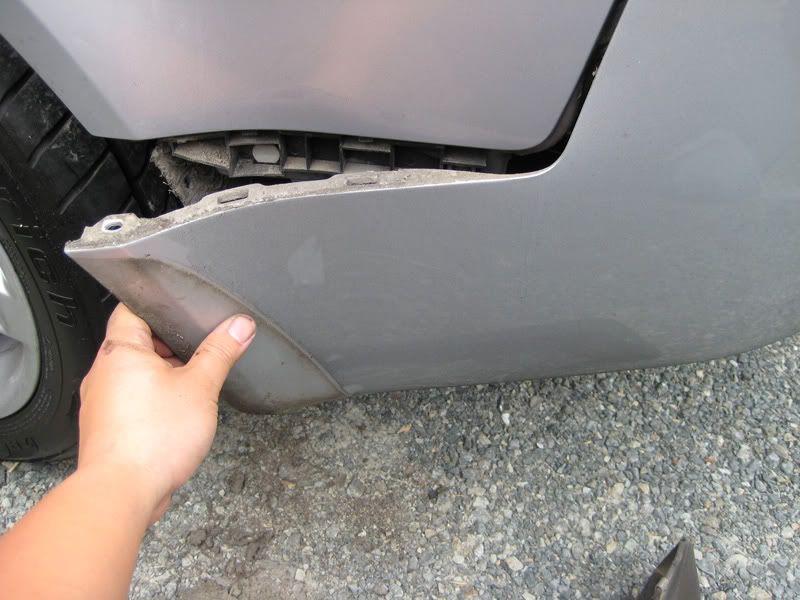
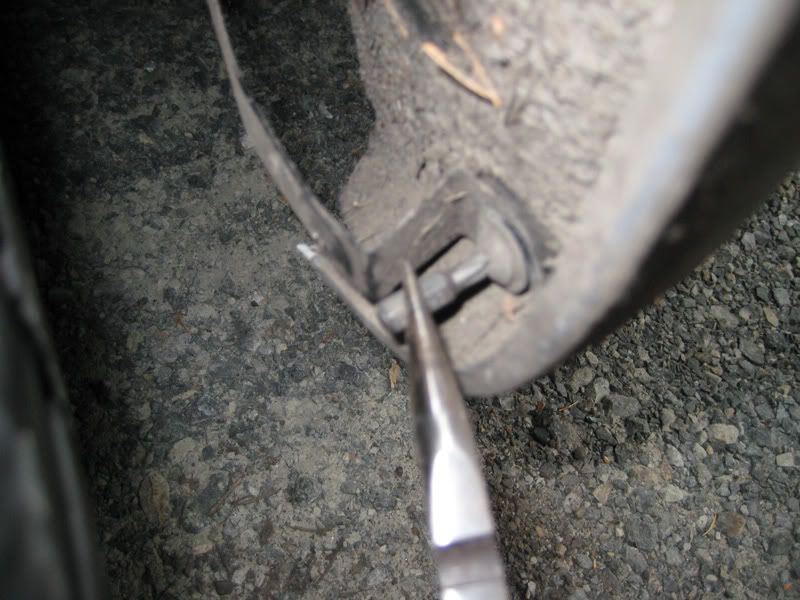
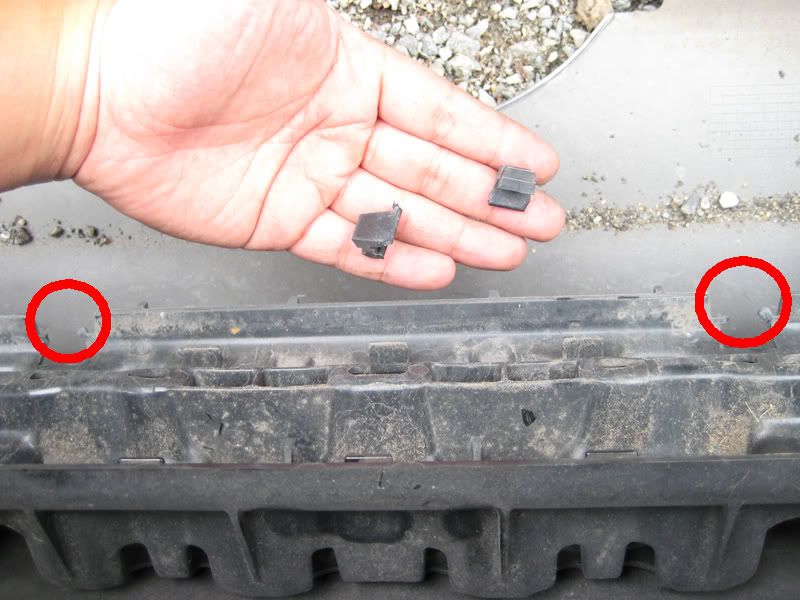
This part really sucked. You know how you are suppose to push down on those four clips and the bumper is supposely to come off? Well I pressed down on those clips and the bumper did not come off. I could not get it off no matter how much I tried. After awhile I went completely hulkster on the thing and got it off, but broke off two of the bottom clips.
OH MY! The TL's rear is nakely exposed, look away children.
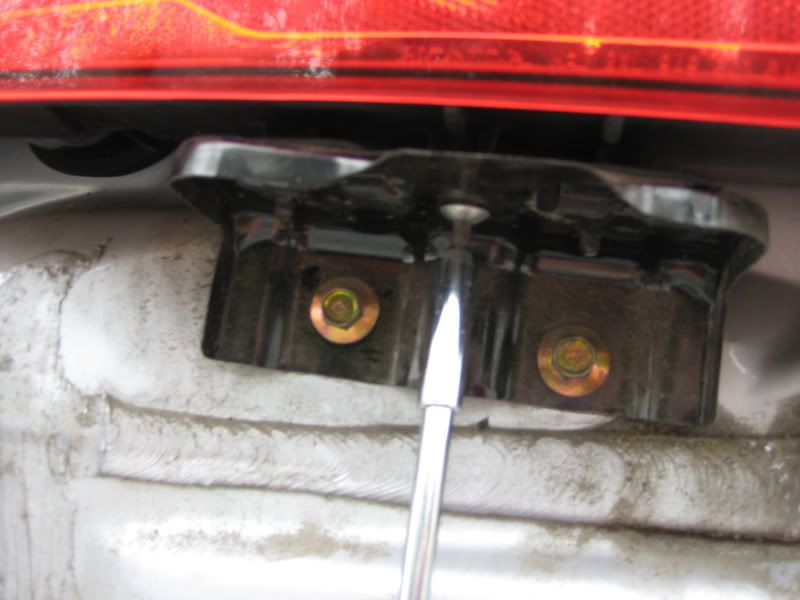
Tail bracket removal. One screw and two bolts. simple.
Bulb, twist and go!

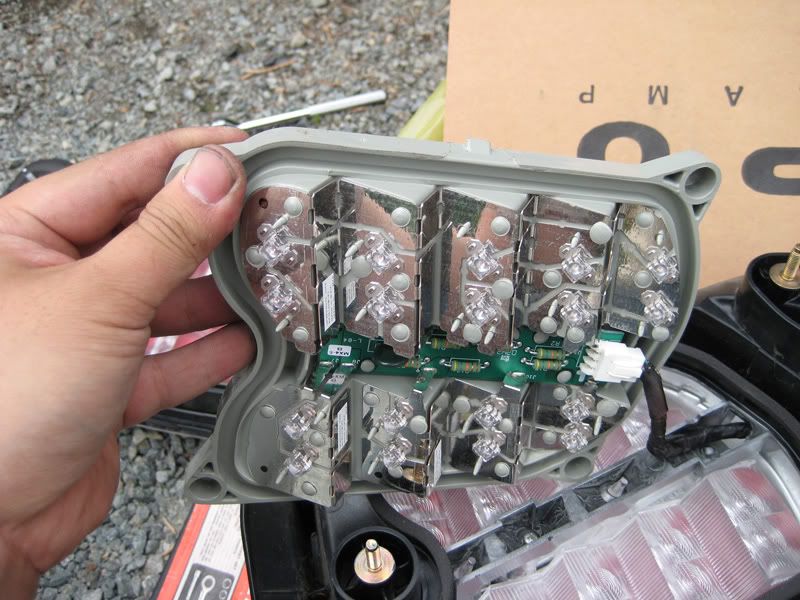
LED board.
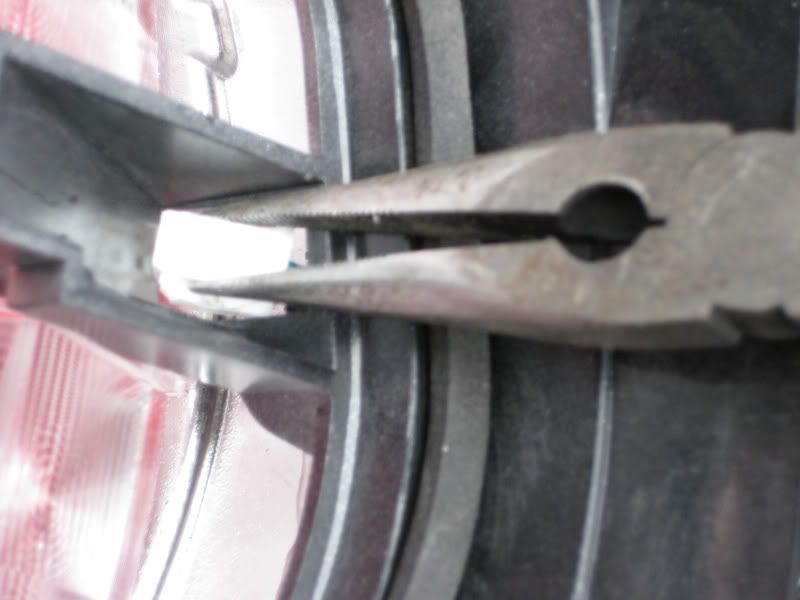
When rewiring the cables to the new tail lights it helps having a needle nose plier to get that cable head through that tiny hole.
Finished Product
Before:
After:

I guess I will not post the complete instructions, but instead just post up pics here and there. Overall, I think I did a pretty OK job. The scariest part was the bumper removal. Those two plugs hiding the 10mm bolts were a b*tch to remove. It took a little finess, but I think I over finessed it as you will see in the pictures below.
Bumper plugs remove did not go so well as you can tell from this picture.
Here is a picture of the clips in the back of the plugs for others to see if you are wondering how they come off so that you don't make a n00b mistake like me.
Trunk liner removal is easy, just use flat head to remove clip and unscrew the net anchor plugs on the side and at the bottom(not in picture).
Also I noticed this plastic piece in the way which was never mentioned in previous instructions. I had to remove it to pull the trunk liner back. The plastic molding is held in place by clips, just pull upwards and you should be able to loosen it and move it out of the way.
Onto the splash guards. Those are some dirty splash guards!!
Removing the splash guards were incredibly annoying since there was so little room to work with. Sandiegodrive had some nice tips in his video on how to get some of the screws out. The problem was, I did not have anything small enough to reach in to get the bottom screw of the bracket out so I had to do it the ghetto way using a philips tip and a needle nose plier!
Pulling away the bumper.
This part really sucked. You know how you are suppose to push down on those four clips and the bumper is supposely to come off? Well I pressed down on those clips and the bumper did not come off. I could not get it off no matter how much I tried. After awhile I went completely hulkster on the thing and got it off, but broke off two of the bottom clips.
OH MY! The TL's rear is nakely exposed, look away children.
Tail bracket removal. One screw and two bolts. simple.
Bulb, twist and go!
LED board.
When rewiring the cables to the new tail lights it helps having a needle nose plier to get that cable head through that tiny hole.
Finished Product
Before:
After:
07-19-2008, 01:12 PM
#18
Cruisin'

Join Date: Jun 2008
Location: Port Orange, FL; Chicago, IL
Age: 38
Posts: 16
Likes: 0
Received 0 Likes
on
0 Posts
RBP_04TL
Can you elaborate on that? If entire removal of the rear bumper isn't necessary, that'd be great. My lights are sitting in the closet. I might install them next week.
Can you elaborate on that? If entire removal of the rear bumper isn't necessary, that'd be great. My lights are sitting in the closet. I might install them next week.
07-19-2008, 01:27 PM
#19
You just leave all the fasteners on the bottom middle alone. Remove all the fastener on the sides, and top, pry/pull the sides. Angle the bumper back from the top, then you can get at the 2 bolts that attach the bracket from the opening, removing the assembly with the bottom bracket still attached.
Also check the edge of your quarter panel for worn away paint. The rear tails on 3rd gens rub against the paint sometimes. If the new tails rub or touch the paint, it can wear away the paint on the edge over time, you need to take a rubber mallet and tap the mounting area slightly outward, so you have a slight gap.
Also check the edge of your quarter panel for worn away paint. The rear tails on 3rd gens rub against the paint sometimes. If the new tails rub or touch the paint, it can wear away the paint on the edge over time, you need to take a rubber mallet and tap the mounting area slightly outward, so you have a slight gap.
07-19-2008, 01:57 PM
#21
My baby's name is Pearly!
Join Date: Aug 2007
Location: Seattle, WA (206)
Age: 39
Posts: 149
Likes: 0
Received 0 Likes
on
0 Posts
thomodachi, you should come out to this meet this friday 7-25 at 8pm at alki beach. here's the link https://acurazine.com/forums/showthr...59#post6100259

 07-19-2008, 06:28 PM
#23
Instructor
Thread Starter
Join Date: Jun 2008
Location: Seattle, WA
Age: 41
Posts: 124
Likes: 0
Received 0 Likes
on
0 Posts
Originally Posted by aznboi2424
Is it me or are you missing your foam absorbers? Or did you take those off already?
 07-22-2008, 11:12 PM
#25
Stuck in Vegas.
Join Date: Jul 2007
Location: Las Vegas, NV
Age: 35
Posts: 343
Likes: 0
Received 0 Likes
on
0 Posts
just finished installing my tails! i got them in today, got home from work and was eager to install haha. they look hot!! too bad it's dark here, or i'd post a few pics.
thanks OP for the link and DIY!
ps, i didn't even pull off my whole bumper -- just popped off the sides
thanks OP for the link and DIY!
ps, i didn't even pull off my whole bumper -- just popped off the sides
07-22-2008, 11:31 PM
#27
Instructor
Thread Starter
Join Date: Jun 2008
Location: Seattle, WA
Age: 41
Posts: 124
Likes: 0
Received 0 Likes
on
0 Posts
Originally Posted by ricgrrarrow
just finished installing my tails! i got them in today, got home from work and was eager to install haha. they look hot!! too bad it's dark here, or i'd post a few pics.
thanks OP for the link and DIY!
ps, i didn't even pull off my whole bumper -- just popped off the sides
thanks OP for the link and DIY!
ps, i didn't even pull off my whole bumper -- just popped off the sides
07-22-2008, 11:40 PM
#28
Stuck in Vegas.
Join Date: Jul 2007
Location: Las Vegas, NV
Age: 35
Posts: 343
Likes: 0
Received 0 Likes
on
0 Posts
Originally Posted by thomodachi
Nice! Glad you didn't have to take off the whole bumper. Post up them pics man whenever you get the chance. Your car is dying for an aspec body kit now.
07-23-2008, 12:21 AM
#29
Q('.')=O
iTrader: (1)
Originally Posted by ricgrrarrow
seriously!! acura says there are none at ANY warehouse! so i gotta find something somewhere.. i'm dying for aspec!!! its hard looking for dgp
and here's direct link from hondaacuraworld: http://www.hondacuraworld.com/Mercha...=08F0X-SEP-XXX
07-23-2008, 07:11 AM
#31
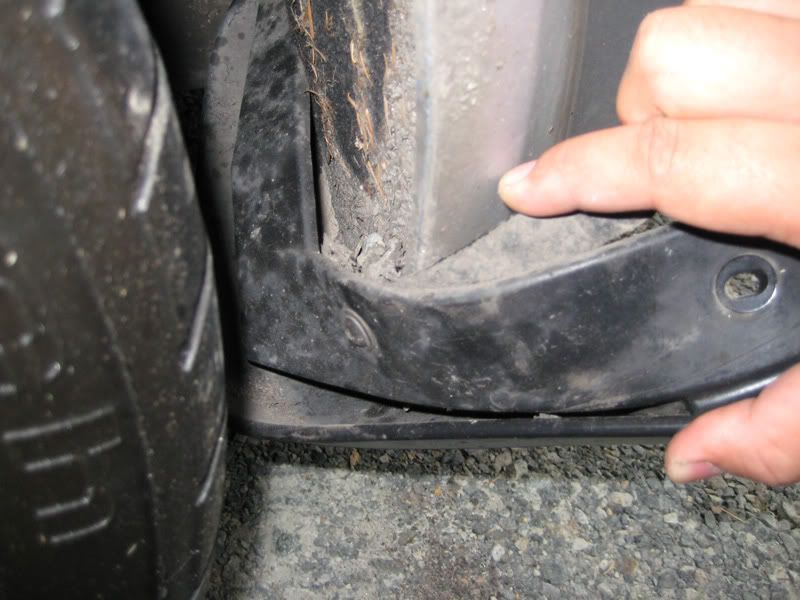
This is why you want a slight gap around the tail light. A few pics of when I did mine.
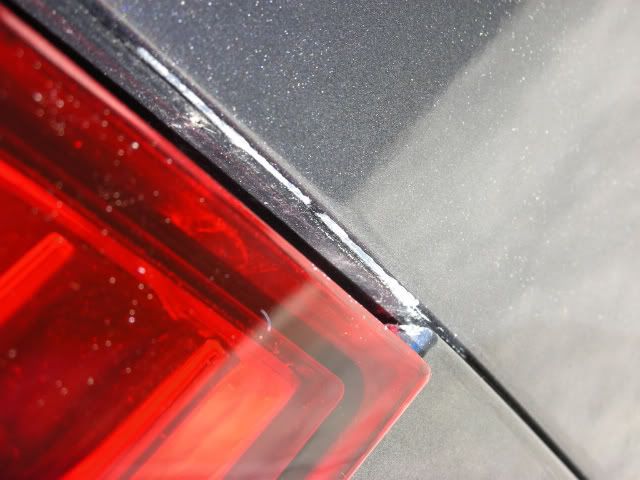
I taped the edge, and touched up the worn areas, after I cleaned it up. I've seen this on many TL's, some the tails are just touching, as its gets older it will wear away the paint. This is a 05 with 26,000 miles.
I taped the edge, and touched up the worn areas, after I cleaned it up. I've seen this on many TL's, some the tails are just touching, as its gets older it will wear away the paint. This is a 05 with 26,000 miles.

Thread
Thread Starter
Forum
Replies
Last Post