When you click on links to various merchants on this site and make a purchase, this can result in this site earning a commission. Affiliate programs and affiliations include, but are not limited to, the eBay Partner Network.
After redoing my seats, I'm kind of on this path on renewing some other parts of my interior that needed some attention. I was watching out for nice used steering wheels on ebay, but I wasn't ready to commit to spending $150-200+ for a decent to nice one. The fully custom ones are really nice, but they're like $500+.
I came across eastdetailing.com and it sparked my interest in rewrapping my current wheel. After watching a few reviews on youtube, I decided to go for it. On a scale of 1-10, I would put this at a 6 as far as difficulty goes. Some videos have people doing it with the wheel still in the car, I opted to remove it so I could fully disassemble everything and have the freedom to get around the wheel better. This also goes overtop the existing leather cover. The key to this is PATIENCE. I thought maybe 2-3 hours, it took me like 4-5. I only redid one section as I wasn't happy with the way the stitching was going as I was going to every other thread loop so I decided to stitch every loop.
I'm really happy with the results. It also makes the wheel a little thicker which I like more too. I only have pics of the end product but I pretty much followed the directions, using some pointers from some of the reviews I watched. Not 100% done but the cover is done and all stitched up, just need to work on the extra leather flaps. The directions say just to tuck, but I think I'm gonna trim some spots and glue them down. The kit did come with enough of everything. I just went with the all leather option so $47 all in + my time. I also have zero sewing experience so if you are thinking of doing it and are comfortable tedious work, go for it.
Looks really good, same as mine, but I opted for the suede on the top and bottom. It must have been why I couldn't tuck in the material around the emblem like you have yours.
The quality on eastdetailing covers are pretty good, I tried two different sellers on eBay for my ISF thinking they were all the same, but the quality on the ebay ones are trash. Going to try and sell one cover and get one from eastdetailing.
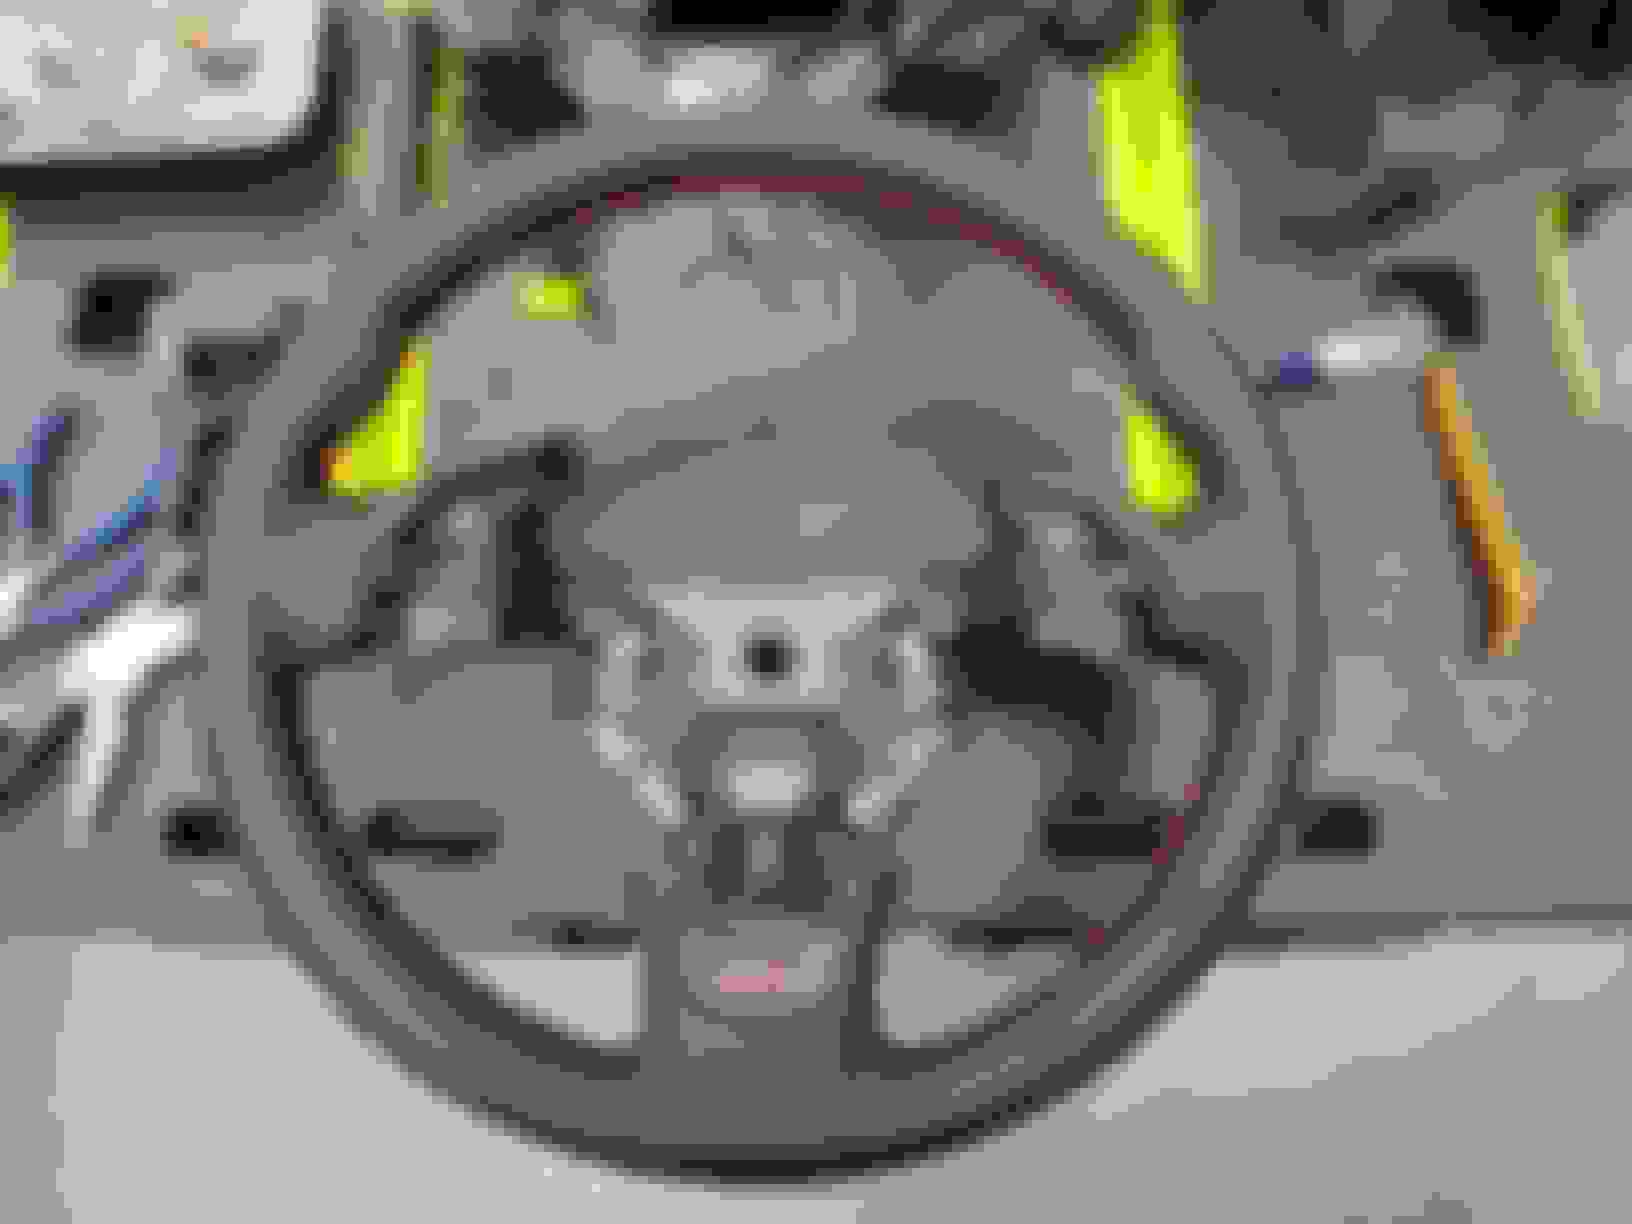
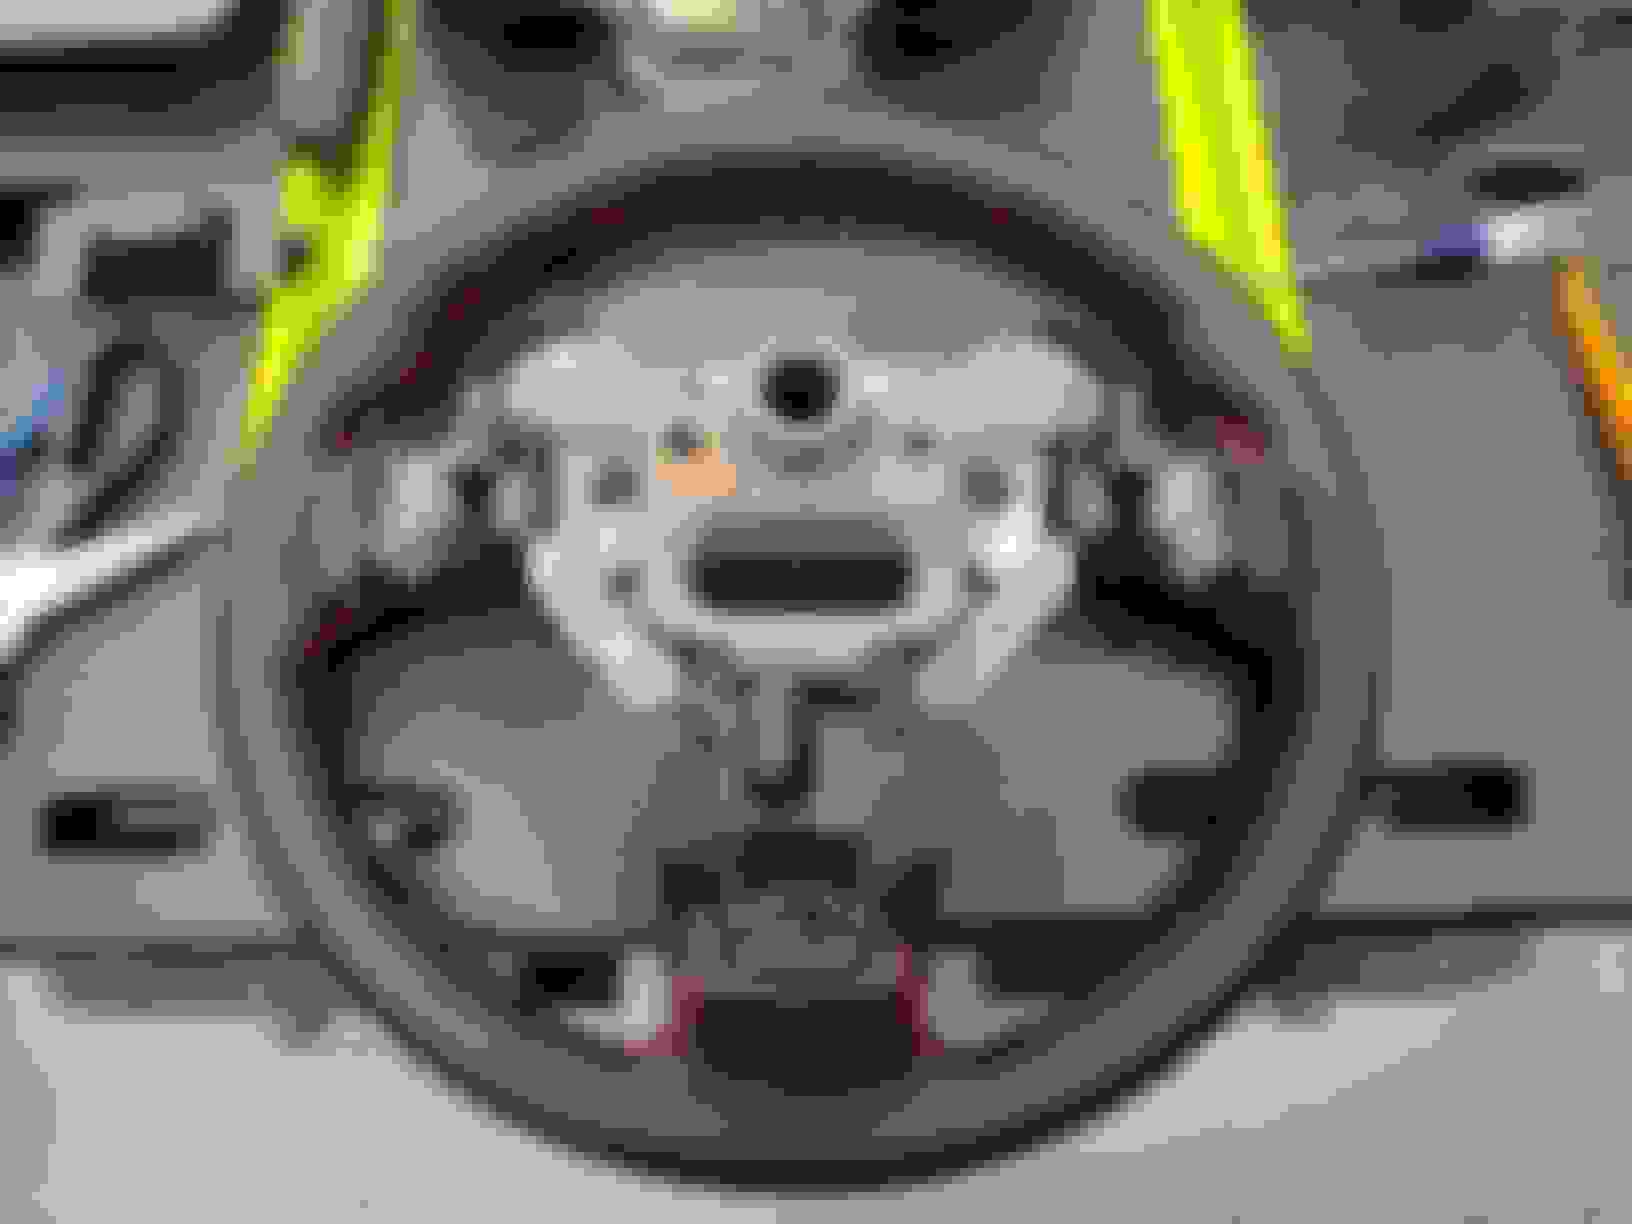
Just out of curiosity, one of the videos I watched was someone on youtube doing this to a TL with suede top and bottom, is that you? The only way to get it under the emblem is to unscrew it from the wheel, then tuck it, then put the emblem back on. The emblem screw is at the bottom of the wheel on the back. If you reference my pic if the back of the wheel, that is the screw holding it in.
Originally Posted by gatrhumpy
I just ordered one myself.
I don't think you'll be disappointed. This is just a slow going process. How did you option it? I got mine in like 3 weeks from ordering.
I found a new leftover steering wheel on ebaY for $49. A heck of a lot easier than performing the re-wrap thing, but you did a very nice job. It looks nice!
Paul said they used to save these after they installed the wood-grained wheel option and sell them on ebaY. Mine must be one of them.
.
.
Just out of curiosity, one of the videos I watched was someone on youtube doing this to a TL with suede top and bottom, is that you? The only way to get it under the emblem is to unscrew it from the wheel, then tuck it, then put the emblem back on. The emblem screw is at the bottom of the wheel on the back. If you reference my pic if the back of the wheel, that is the screw holding it in.
I don't think you'll be disappointed. This is just a slow going process. How did you option it? I got mine in like 3 weeks from ordering.
I did full leather with perforated leather on the sides.
Thanks for all the compliments. Here's the finished product. I'm really happy with the end result. I took my time trimming some of the excess and I used brush on gorilla super glue to secure the edges down.
I recently replaced the wheel in my car with a brand new one from the dealer, and so I have my old spare wheel that I'd let go for peanuts if it would be useful to someone to attempt this sort of rewrap. Its an 07 three spoke (like the one in this thread) with light wear on the top half.
That looks amazing! How long did it take you to take off the steering wheel?
Thanks. Steering wheel disassembly is relatively simple.
Disconnect battery, wait like a minute or so
Unscrew the airbag, It is a T30 Torx. I used that bit on a screwdriver
The airbag has 2 connectors, both kind of a pain cause of the tight quarters. The yellow one just pulls back, the ground one, you press in the clip to pop it out then set the airbag aside. There is a back access cover on the bottom of the wheel to get to these.
The white connector is plugged right into the clock spring.
The steering wheel bolt is a 14mm. This gets torqued to 29ft/lbs on reassembly
Once all that is disconnected and unbolted, the wheel will be in there pretty tight. I grabbed the top and the bottom of the wheel and rocked back and forth and it wiggled off. Before you do that, note the 12 o'clock mark on the wheel. there is a mark on the spline shaft that it should line up with. Also keep the clock spring and the reddish hub thing that goes into the notches on the steering wheel shaft lined up.
For the back cover, there are 4 screws that hold that on, for each of the side controls, each side has 2 screws on the front and 2 on the back. The emblem is held in by 1 screw on the bottom back of the wheel. At this point, you should be left with the wheel and the plastic cradle that holds the cabling. I would unclip the plastic cradling as it kind of digs in your hands while trying to sew the cover loops.
Most importantly, give yourself enough time, I grossly underestimated how long this would take me. The cover install took me about 4hrs, I would sew a few loops, and make sure things stayed lined up. Also, I would over exaggerate (within reason) how much thread you use for each section. My first go, I didn't have enough thread and redid the whole section after giving myself a really long piece of thread. I did the two lower sections first, then the top. The trimming, gluing, and reassembly took me about 1.5hrs.
I used these 2 vids as a reference as well as the directions
^ Do it you wont regret it. It really makes the interior pop.
I couldn't agree more. Something as simple as a steering wheel upgrade made such a difference. Plus it added a bit of thickness to the wheel which is nice when driving.
Here is a youtube video of someone wrapping their Evo steering wheel where part of it was carbon. I wasn't a fan of the look but that is just my opinion.
Thanks. Steering wheel disassembly is relatively simple.
Most importantly, give yourself enough time, I grossly underestimated how long this would take me. The cover install took me about 4hrs, I would sew a few loops, and make sure things stayed lined up. Also, I would over exaggerate (within reason) how much thread you use for each section. My first go, I didn't have enough thread and redid the whole section after giving myself a really long piece of thread. I did the two lower sections first, then the top. The trimming, gluing, and reassembly took me about 1.5hrs.
I used these 2 vids as a reference as well as the directions
Question, just because I have not done this yet. I will start this weekend, perhaps. How do you actually sew the thread? In other words, do you have to go through one loop and then go through the other loop on the other side, and then go back and forth? To me, before I really examine how to do this, looks like a criss-crossed mess.
Question, just because I have not done this yet. I will start this weekend, perhaps. How do you actually sew the thread? In other words, do you have to go through one loop and then go through the other loop on the other side, and then go back and forth? To me, before I really examine how to do this, looks like a criss-crossed mess.
Yes, criss-cross is the name of the game. When I started this, I tested doing every other thread loop to see and I was not happy with the results, so I backed that out and did every thread loop, the smaller lower sections took me like an hour, the big top one was easily almost 2, mostly cause I was taking my time, doing a few loops, pulling snug, and checking to make sure it stayed lined up. the double sided tape helps keep it in place.
This is just a super tedious job, a real lesson in patience, at least for me it was. I started by cutting small pieces of the double sided tape that they provide and lining them up on the inside edges just under loops, basically the way it says to in the provided directions. After my first thread eff-up cause I didn't have enough length, I started cutting my threads at about 3 times the length of the section that is was doing. Keep in mind that I did not double thread the needle, meaning that did not cut a piece of thread, loop it through the needle and tie both ends together so essentially double threads to sew with. I cut a piece, tied a triple knot on the needle side (this knot kept getting loose on me annoyingly) after going through the needle loop, and a triple knot on the other end, so a single thread to sew with. I hope that makes sense, I wish I would have taken more pictures during the install.
I just studied a lot of the videos that I found on YouTube, even referencing them while doing it as I was in the same boat as you, not something that I have ever done. I treated the first section with an idea of how and once I got into the groove of how I wanted to do it, I was comfortable with the rest. I will say that I would have lost my patience if I did this while the wheel was still in the car so kudos to those who have done it that way. I found it best for me to be able to hold the wheel and be able to manipulate it which ever way I needed to.
Just plan a huge chunk of time, grab your beverage of choice, line up some shows to watch, and dive in.
Got mine done today. I will take pictures soon. Couple of notes:
1.I started at the border between the regular leather and the perforated leather. This is because I initially started at the lower center, by the A-spec symbol, and the line up was off between the perforated leather and the regular leather when the two halves came together. So I started over.
2. I will have to see about using some kind of glue near the A-spec symbol because my leather is not staying tucked in.
It's OEM as part of my vandalism claim on my car. I told the shop I will not accept a used dash because they are already defective. So it will cost me $219. I'll have a New windshield , dashboard and refresh steering wheel once the cover comes in

 10-26-2020 | 11:14 AM