

My Best attempt to explain and show how to install Type-S Aspec Rear Lip kit
 01-16-2008, 05:10 PM
#1
My Best attempt to explain and show how to install Type-S Aspec Rear Lip kit
How to Install 2007 Type-S Rear Aspec Lip onto 04-06 TL
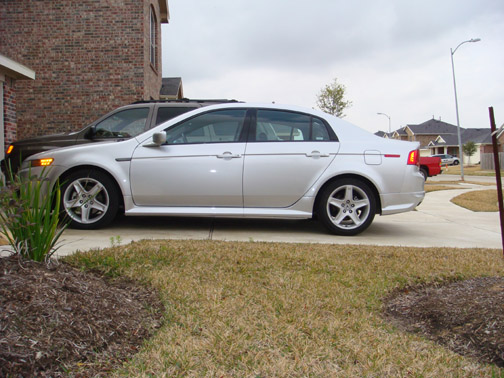
PS my car was DIRTY
OK, so this is my first attempt of explaining how to do something with pictures so please bare with me.
Tools Used:
Phillips Screwdriver
Flat screwdriver (to assist with clip removal)
Drill
Drill Bits: 3mm, 6mm, 12mm
Dremel with cutting bit
10mm Ratchet wrench
Pliers
Z shaped Phillips screwdriver (to get the screws out from the wheel well)
First was the removal of the stock bumper (didn�t take pictures). Those who have never removed it, remember that after you remove the three screws that hold on the rear splash guard, you HAVE to remove the mount, and then there is a screw that is vertical which holds the bumper onto the rear fender.
Remove this cover that you can get to once you open the trunk, behind it there is a 10mm bolt (one on each side).

Then, there are two clips that hold the exhaust outlet cover (the grey thing) on. Remove those and pull on it which will unclip from the bumper. Once you do that, you have six clips on the bottom (there is one above the exhaust on either side!!).
After you pull all the clips off, then slowly pull from each side of the bumper and it will slowly pull away. I recommend having two people, but if not like I didn�t it�s possible, just be careful.
Once removed, I was thinking of just cutting the opening out and leaving the rest. But then thought that it would be easier to just cut the whole bottom section off. I taped off, so that I would know what not to cut off. ( I used a dremel, with a dull cutting bit. Do not recommend using a dull cutting bit, lost control A LOT).


When you look at the bumper you see the clip which is right below the exhaust outlet, I taped off to that, you want to cut that clip hole off and run a straight line up from that to about 3 inches below where the bumper kicks out.
After cutting this is what I ended up with

As you can see I came VERY close to the edge of the tape�
After I had the bottom cut away from the bumper. I cut it so that the bottom portion which is attached via clips on the stock bumper was remaining.
I cut it so that there would be 4 clips which could secure to the underneath. (unfortunately didn�t take a picture of this).
I waited to the end to see where to drill the wholes on the bottom part of the bumper so that it would secure to the lip kit till the end.
Now that I got it cut apart it was time to cut the holes for the bolts and zip tie which is on the lip kit.
What I did was put two pieces of tape onto the bumper so that I could make markings. The depth of the three bolts was I believe 1 5/8�. What I did to determine exactly where was by placing the lip onto the bumper and guestimating, Was not too far off except for one which I had to redrill. (The center bolt will have to be dremeled shorter after you get the bolt installed).

Once those were drilled, I placed the lip kit on again, and tried to figure out where to drill the holes for the zip tie holds that are on the sides. For these it was approximately 2 5/8� down and from where the bumper kicks out (right by the wheel well) I forgot the measurement but I used that as a reference point, and measured on the lip the same kick out. I wanna say it was 1 7/8� (don�t hold me to it).


I taped the ends of the double sided tape onto the outside of the lip, so I could pull it when necessary.
After all the drilling was complete, I placed the lip kit on and put everything into their appropriate holes, and it fit flush! (this is where you tighten those bolts down, and cut the center bolt so it does not hit the bumper impact thing).

I then placed the nuts on the three bolts which were in the center, that way it wouldn�t move, I placed the five washers on each zip tie, and loosely installed the female zip tie clip.
Then I placed the bumper with the new lip onto the vehicle, and started snapping it in place.
Followed the instructions, (def recommend removing the wheels, will take more time to screw in the corners and new mounts).
After all was placed, except for the bottom, I attached the bottom of the stock bumper which I cut. Placed 4 clips on the underneath, and then drilled the holes as necessary. Unfortunately I cut too much off and could only use two of the holes, which was more than ample, as the bottom of the lip does not move at all.
Once everything was secured started pulling on the double sided tape, Unfortunately ripped one of those red tape covers and couldn�t get to it (hopefully doesn�t cause any problems).
Now its complete as the pictures show!!!


ATLP exhaust was delivered today, Waiting till Friday for install of ATLP, RSB, Comptech Springs, and Tokico HP Shocks
Hope this helps Somebody...
PS my car was DIRTY
OK, so this is my first attempt of explaining how to do something with pictures so please bare with me.
Tools Used:
Phillips Screwdriver
Flat screwdriver (to assist with clip removal)
Drill
Drill Bits: 3mm, 6mm, 12mm
Dremel with cutting bit
10mm Ratchet wrench
Pliers
Z shaped Phillips screwdriver (to get the screws out from the wheel well)
First was the removal of the stock bumper (didn�t take pictures). Those who have never removed it, remember that after you remove the three screws that hold on the rear splash guard, you HAVE to remove the mount, and then there is a screw that is vertical which holds the bumper onto the rear fender.
Remove this cover that you can get to once you open the trunk, behind it there is a 10mm bolt (one on each side).
Then, there are two clips that hold the exhaust outlet cover (the grey thing) on. Remove those and pull on it which will unclip from the bumper. Once you do that, you have six clips on the bottom (there is one above the exhaust on either side!!).
After you pull all the clips off, then slowly pull from each side of the bumper and it will slowly pull away. I recommend having two people, but if not like I didn�t it�s possible, just be careful.
Once removed, I was thinking of just cutting the opening out and leaving the rest. But then thought that it would be easier to just cut the whole bottom section off. I taped off, so that I would know what not to cut off. ( I used a dremel, with a dull cutting bit. Do not recommend using a dull cutting bit, lost control A LOT).
When you look at the bumper you see the clip which is right below the exhaust outlet, I taped off to that, you want to cut that clip hole off and run a straight line up from that to about 3 inches below where the bumper kicks out.
After cutting this is what I ended up with
As you can see I came VERY close to the edge of the tape�
After I had the bottom cut away from the bumper. I cut it so that the bottom portion which is attached via clips on the stock bumper was remaining.
I cut it so that there would be 4 clips which could secure to the underneath. (unfortunately didn�t take a picture of this).
I waited to the end to see where to drill the wholes on the bottom part of the bumper so that it would secure to the lip kit till the end.
Now that I got it cut apart it was time to cut the holes for the bolts and zip tie which is on the lip kit.
What I did was put two pieces of tape onto the bumper so that I could make markings. The depth of the three bolts was I believe 1 5/8�. What I did to determine exactly where was by placing the lip onto the bumper and guestimating, Was not too far off except for one which I had to redrill. (The center bolt will have to be dremeled shorter after you get the bolt installed).
Once those were drilled, I placed the lip kit on again, and tried to figure out where to drill the holes for the zip tie holds that are on the sides. For these it was approximately 2 5/8� down and from where the bumper kicks out (right by the wheel well) I forgot the measurement but I used that as a reference point, and measured on the lip the same kick out. I wanna say it was 1 7/8� (don�t hold me to it).
I taped the ends of the double sided tape onto the outside of the lip, so I could pull it when necessary.
After all the drilling was complete, I placed the lip kit on and put everything into their appropriate holes, and it fit flush! (this is where you tighten those bolts down, and cut the center bolt so it does not hit the bumper impact thing).
I then placed the nuts on the three bolts which were in the center, that way it wouldn�t move, I placed the five washers on each zip tie, and loosely installed the female zip tie clip.
Then I placed the bumper with the new lip onto the vehicle, and started snapping it in place.
Followed the instructions, (def recommend removing the wheels, will take more time to screw in the corners and new mounts).
After all was placed, except for the bottom, I attached the bottom of the stock bumper which I cut. Placed 4 clips on the underneath, and then drilled the holes as necessary. Unfortunately I cut too much off and could only use two of the holes, which was more than ample, as the bottom of the lip does not move at all.
Once everything was secured started pulling on the double sided tape, Unfortunately ripped one of those red tape covers and couldn�t get to it (hopefully doesn�t cause any problems).
Now its complete as the pictures show!!!
ATLP exhaust was delivered today, Waiting till Friday for install of ATLP, RSB, Comptech Springs, and Tokico HP Shocks
Hope this helps Somebody...
 01-16-2008, 05:20 PM
#2
94 DC4 RS LSV/Turbo
iTrader: (1)
Join Date: Jul 2007
Location: New York City | Stuck in Traffic
Age: 38
Posts: 11,734
Likes: 0
Received 11 Likes
on
11 Posts
dude you got a garage I woulda had my car on jackstand with a towel under that badboy WHAT... very nice write up, I didn't know bumper removal was necessary, but you had to make the cuts, much easier with the bumper removed anyway
is the rear bumper removal required?
is the rear bumper removal required?
01-16-2008, 05:24 PM
#3
I was too lazy!!! Just took my time, only scratches were from test fitting the lip, which is all covered up anyways...
You have to remove the bumper in order to get the three bolts which are located in the middle of the bumper, and also the side where the zip tie connections are ( that could be done without removal).
Plus the instructions http://photos.imageevent.com/astrobo.../07tlsrear.pdf said to remove it.
IDK... Just wish I took more pics.
 01-16-2008, 07:17 PM
#5
Senior Moderator
iTrader: (1)
Your thread is being moved from the Performance Parts & Modifications subforum into the main 3GTL forum. Please read the rules before posting in this particular subforum. The rules can be found here: https://acurazine.com/forums/announc...nouncementid=7
01-16-2008, 08:52 PM
#6
Instructor

Join Date: Dec 2007
Age: 47
Posts: 105
Likes: 0
Received 0 Likes
on
0 Posts
Dude, I have a spring compressor and a shop (not heated yet (need to hook up the wood stove) if you need it. Looks good, I always wondered how that stuff fitted up. I WANT to hear your car after you get the ATLP put on. That'll tell me if I need to sell a kidney to get everything else I want for the car.
Trending Topics
 01-18-2008, 01:57 AM
#10
.:KCCO:.
nice job. everything line up properly? good shit mang. told you you could do it.
what made you decide on cutting the whole thing rather then just a hole for the little opening?
what made you decide on cutting the whole thing rather then just a hole for the little opening?
01-18-2008, 03:12 AM
#11
wow, u are such a sav for cutting the whole thing.. But w/e tho, u're gonna drill holes in the bumper anywaym, so why not, lol.. Good write up man. I was planning on going this route, but since i just got the greddy exhaust, plans have changed..
01-18-2008, 12:25 PM
#12
Originally Posted by AcuraTLboi
wow, u are such a sav for cutting the whole thing.. But w/e tho, u're gonna drill holes in the bumper anywaym, so why not, lol.. Good write up man. I was planning on going this route, but since i just got the greddy exhaust, plans have changed..
Did you go with a quad tip exhaust? Congrats on the greddy exhaust!
The bumper is complete, no more holes to drill
01-20-2008, 12:50 PM
#14
Originally Posted by TL1999
man...u got balls cutting your bumper...good job and good write up...
I was freakin out at first but wasn't too bad, just dont cut more than 1.5 inches above the level of the stock outlets.
I'm the type of person who doesn't know how easy it is until I try. Wasn't bad AT ALL
 02-03-2008, 07:59 PM
#19
Ya I wanna get that gril put on as well. Though it doesnt look too bad on an NBP.
Did the directions help anybit? Hope they did.
You are saying bottom part. Do you mean the part you cut off? I took a sliver of it, so that the bottom of the lip would have something to secure to. Other than that trash it!!
Did the directions help anybit? Hope they did.
You are saying bottom part. Do you mean the part you cut off? I took a sliver of it, so that the bottom of the lip would have something to secure to. Other than that trash it!!
02-04-2008, 10:42 AM
#20
Originally Posted by Fulani has a TL
Ya I wanna get that gril put on as well. Though it doesnt look too bad on an NBP.
Did the directions help anybit? Hope they did.
You are saying bottom part. Do you mean the part you cut off? I took a sliver of it, so that the bottom of the lip would have something to secure to. Other than that trash it!!
Did the directions help anybit? Hope they did.
You are saying bottom part. Do you mean the part you cut off? I took a sliver of it, so that the bottom of the lip would have something to secure to. Other than that trash it!!
I did not cut emough the first time around so I got pretty frustrated because nothing was lining up. Then once I made an extra cut it slipped in nicely. I could do another one in an hour probably but this one took about 4.
I am still planning on taking it off and resecuring eventhing now that I know what I am doing.
Did yours line up to the point where you could used the bottom holes of the apsec rear? Mine was about an inch or so short.
The plastic I am refering to seems to cover the spare?
02-19-2008, 05:37 PM
#22
I wanted to bump Fulani's thread as it's a great write for anyone out there wanting to do this, and it has the 2007 TL-S lip install directions linked in (can't seem to find those anywhere)... Which are helpful, as this lip mounts differently than the 04-06 version.
This was a PITA mod in my opinion, only thing worse for me was headlight clearing... Working in the cold, rained out for part of Monday, and dealing with the flexible bumper covers kinda sucks. Test fit, cut, test fit cut, test fit, cut.... repeat incessantly. Get pissed off at why things aren't lining up. That was my experience, but I'm stupid meticulous, and cuss a lot while fighting with my car.
Noteworthy stuff:
- Instead of cutting the whole bottom section off, I cut a long rectangle along the bottom for the splitter section to fit through, hoping this would firm up the mounting. Not sure it made a difference, but I was happy with the results.
- I also left the "top section" of the OEM exhaust ports in place so I could use the mounting tabs there.
- If you're removing the 04-06 lip, the outer most drilled holes line up with the outer most holes on the 07 lip. I only had to drill one more hole in the center of the bumper, and widen the existing 2.
(You have to drill 4 more in the bottom section, and 2 slots for the side tabs to go through)

Glued a little mesh in the hole. Looks pretty good, matches my front grilles, which are in dire need of being repainted.

WDP paint match looks worse than it is... Car is filthy, lip is clean and new.
ATLP on the way soon I hope...
FS: One OEM 04-06 rear lip. Lightly used, with all hardware. $100 - local NoVA only.
This was a PITA mod in my opinion, only thing worse for me was headlight clearing... Working in the cold, rained out for part of Monday, and dealing with the flexible bumper covers kinda sucks. Test fit, cut, test fit cut, test fit, cut.... repeat incessantly. Get pissed off at why things aren't lining up. That was my experience, but I'm stupid meticulous, and cuss a lot while fighting with my car.
Noteworthy stuff:
- Instead of cutting the whole bottom section off, I cut a long rectangle along the bottom for the splitter section to fit through, hoping this would firm up the mounting. Not sure it made a difference, but I was happy with the results.
- I also left the "top section" of the OEM exhaust ports in place so I could use the mounting tabs there.
- If you're removing the 04-06 lip, the outer most drilled holes line up with the outer most holes on the 07 lip. I only had to drill one more hole in the center of the bumper, and widen the existing 2.
(You have to drill 4 more in the bottom section, and 2 slots for the side tabs to go through)
Glued a little mesh in the hole. Looks pretty good, matches my front grilles, which are in dire need of being repainted.
WDP paint match looks worse than it is... Car is filthy, lip is clean and new.
ATLP on the way soon I hope...
FS: One OEM 04-06 rear lip. Lightly used, with all hardware. $100 - local NoVA only.
03-19-2008, 03:19 PM
#23
Hey Kennedy,
Just saw your post since you linked it on one of your other posts. Good note on the outer edge bolts, I had no idea that it actually matched up, so i'm sure it will help people out.
I was just likely you, cussing up a storm by cutting, testing, cutting, testing, cutting.....
Car looks hot with the mesh, I decided to leave it empty as my car is NBP.
Great addition. Hope it helps people out in the future. Wish I could have taken more pics
03-19-2008, 03:29 PM
#24
Intermediate

Join Date: Mar 2008
Age: 42
Posts: 25
Likes: 0
Received 0 Likes
on
0 Posts
i had install my a spec kit this weekend it was from 10am to 3pm install i would say it is not hard .. but i made a BIG MISTAKE i drill 4 holes from lookin at the diagram because of the back up sensor which i didn't have so i had to use plugs and a can of spray paint that i brought from autozone and plugged the holes so becareful and beware
03-19-2008, 04:24 PM
#26
Originally Posted by Fulani has a TL
Hey Kennedy,
Just saw your post since you linked it on one of your other posts. Good note on the outer edge bolts, I had no idea that it actually matched up, so i'm sure it will help people out.
I was just likely you, cussing up a storm by cutting, testing, cutting, testing, cutting.....
Car looks hot with the mesh, I decided to leave it empty as my car is NBP.
Great addition. Hope it helps people out in the future. Wish I could have taken more pics
Just saw your post since you linked it on one of your other posts. Good note on the outer edge bolts, I had no idea that it actually matched up, so i'm sure it will help people out.
I was just likely you, cussing up a storm by cutting, testing, cutting, testing, cutting.....
Car looks hot with the mesh, I decided to leave it empty as my car is NBP.
Great addition. Hope it helps people out in the future. Wish I could have taken more pics
Haha... Yep.
I mounted the lip using the 2 existing holes, pushed hard, then drilled the scratch marks made the posts. Worked like a champ.
So ultimately, what are we hacking up our rear bumpers? Here's why... :bling:


Pittbull, I almost did the same thing. Ya gotta look twice before you cut. Now ya got a reason to spend the cheddar on the backup sensors... I love mine.
03-19-2008, 09:26 PM
#27
I'm your Huckleberry
Join Date: Jun 2007
Location: North Cackalackey
Age: 53
Posts: 431
Likes: 0
Received 0 Likes
on
0 Posts
Ackkk.  &$(#$% you guys are friggin killing me here.
It seems like every few days when I have gotten on with my life and the urge to mod has passed ....
somebody posts pics like Kennedy just did .... and I'm being pulled back in.
I guess I'd better save up the cash for my own birthday present.
&$(#$% you guys are friggin killing me here.It seems like every few days when I have gotten on with my life and the urge to mod has passed ....
somebody posts pics like Kennedy just did .... and I'm being pulled back in.
I guess I'd better save up the cash for my own birthday present.
03-19-2008, 11:11 PM
#28
haha, that was me. I got the ATLP for my birthday present, paid by me!!!! And then I told myself NO MORE MODS, but here I am just installed Kaixen 6000K HID, 3000K HID Fogs, some custom things (pics gonna come soon)  , NOW waiting for ATLP J-Pipe, then IM DONE!!!! I Hope, yet already thinkin about the CF rear spoiler... GRRRR
, NOW waiting for ATLP J-Pipe, then IM DONE!!!! I Hope, yet already thinkin about the CF rear spoiler... GRRRR
04-22-2008, 05:51 PM
#34
Rev High; Drive Happy
iTrader: (2)
Join Date: Feb 2008
Location: Scarborough, Ontario
Age: 34
Posts: 4,076
Received 398 Likes
on
332 Posts
Originally Posted by Kennedy
$12 off ebay... search "aluminum mesh"
Komodo... I paid about $260 I believe... then sold my 06 lip for $100.
Komodo... I paid about $260 I believe... then sold my 06 lip for $100.
04-22-2008, 06:01 PM
#35
Originally Posted by Vietnastee
I wonder if this mesh is the same stuff they sell at the home depot.
Komodo, yes, it come painted... but only in 2007 offered colors. Anthracite, DGP, and a few others gotta get custom paint too.
Totally worth it if you have to though...
04-22-2008, 06:16 PM
#36
Rev High; Drive Happy
iTrader: (2)
Join Date: Feb 2008
Location: Scarborough, Ontario
Age: 34
Posts: 4,076
Received 398 Likes
on
332 Posts
Originally Posted by Kennedy
No... The home depot stuff is galvanized steel. It'll rust on you.
Komodo, yes, it come painted... but only in 2007 offered colors. Anthracite, DGP, and a few others gotta get custom paint too.
Totally worth it if you have to though...
Komodo, yes, it come painted... but only in 2007 offered colors. Anthracite, DGP, and a few others gotta get custom paint too.
Totally worth it if you have to though...
edit: How different is ASM compared to SSM?
 Kennedy's exhaust...