
Headlight Mods and clean up 3G
 08-23-2010 | 03:23 PM
#1
Thread Starter
DGP
Joined: Feb 2010
Posts: 118
Likes: 0
From: Newmarket, NH
Headlight Mods and clean up 3G
I decided to do some work on the headlights. I am going to do
I did wrote up a summary of each process. The summary's are all based on other members DIY's. I take no credit for the info. This is not a complete DIY just my notes. Nevertheless, I thought I'd share it.
Supplies Needed:
� 10 mm wrench + Extension arm
� Flathead screwdriver
� Phillips screwdriver
� Tarp
� Gloves
Procedure:
� First tarp underneath and around front bumper
� Remove inside engine plastic pieces
� Disconnect battery and take out
� Start by removing two screws (Phillips) on the far left and far right of the radiator plastic shroud
� Then pop out the three clips (Using a flathead) closet to the front of the car on top of the radiator plastic shroud
� After the plastic shroud is taken off there will be two clips next to the grill on either side (black capped)
� Find the metal clips closet to the top of the grille and bend them up a bit
� Then undo two clips on the middle section underneath the bumper (on pillars)
� Undo two clips on the right and left side of the bumper right under the far side lower grille
� Then use a wrench with a 10mm and remove six bolts, Left right far corners and 4 on either side of the plastic bottom part of the bumper
� Then turn the wheel to get to the 2 clips (flathead) + screw hidden by fender and bumper break. Pull back plastic in wheel well (vertical) Both sides
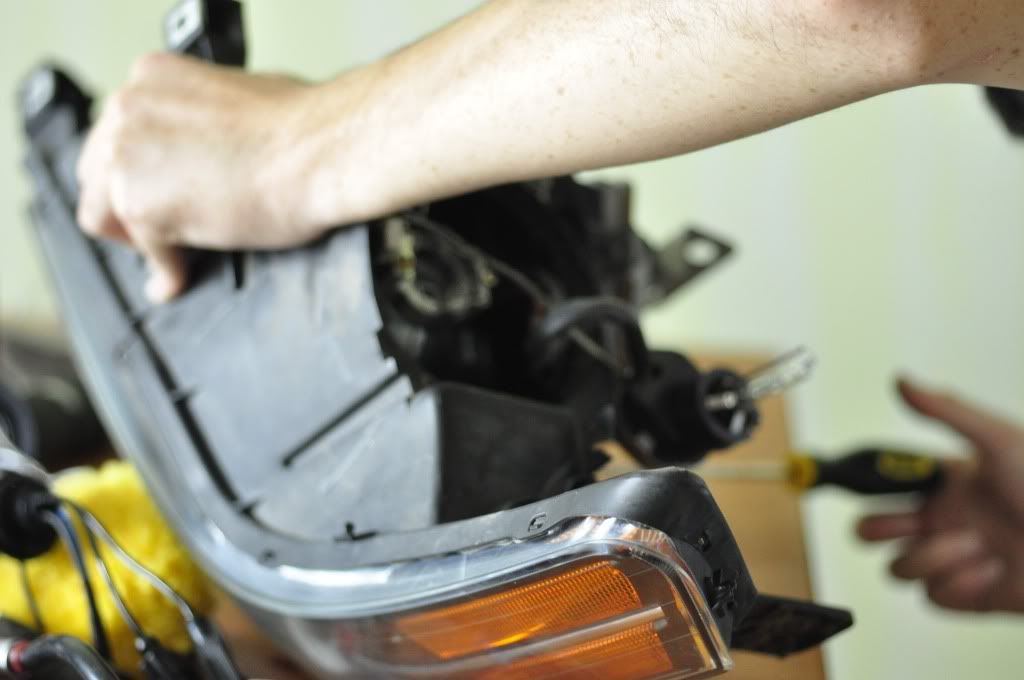
� Then from the sides start pulling off the bumper
� HEADLIGHT
� To get access to the right headlight you need to remove the wiper fluid reserve (two blots)
� From there remove the intake silencer to get access to two screws that need to be unbolted
Tools and Items Needed:
� Tin foil
� Oven
� Oven mitt (work gloves)
� Pan
Procedure:
� Line the oven with tin foil
� Put in the headlight housing on a baking sheet
� Then without preheating let the headlight sit for 20 mins
� Use gloves and take out the Headlight
Tools Needed:
� C-clamps
� Silica Gel Packs (5-6)
� Heat Gun
� Nissan rubber butyl
� Knife
� Flathead screwdriver
� RTV Black sealant
� Caulking gun
� Engine enamel paint
� CCFL Angel Eyes + Inverters
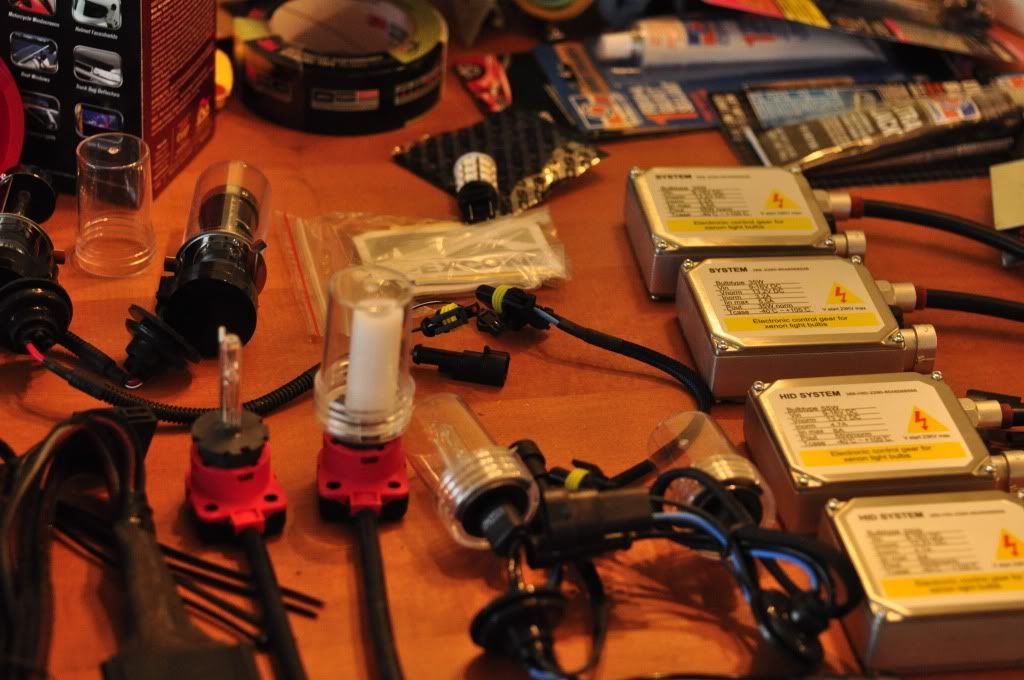
� 55 watt DDM Hid kit 9006
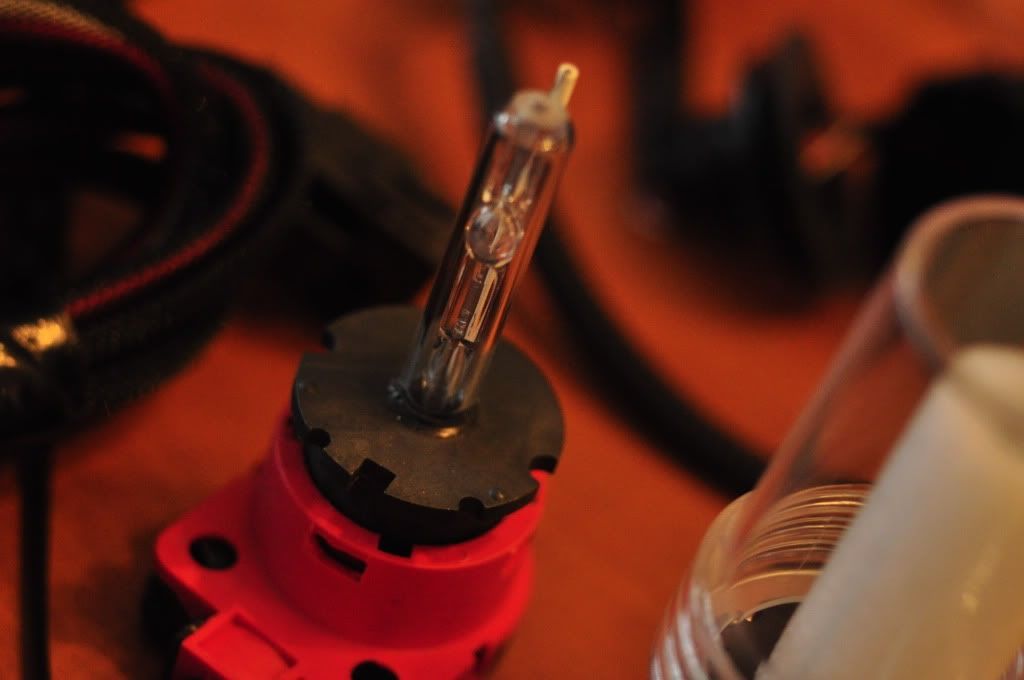
� 35 watt DDM Hid kit D2S
� ZKW-R lens
� 9006 Hid Relay Harness
� Plastic Welder
� Carbon fiber vinyl
Other Mods:
1. Angel Eyes
2. Switchback Bulbs
3. Hid Upgrade (DRL+Fog)
4. Lens Upgrade
Procedure:
� First unclip all the clips around the light housing
� Then take a flathead screwdriver and wedge in from the inner [art of the light (Foglight)
� Make sure to get all the silicon goo out as you go and to not let it touch the lens cover
� Do one complete headlight at a time let the other way one be your guide when putting back together
� After take the projector out by taking out two screws and pulling the projector out
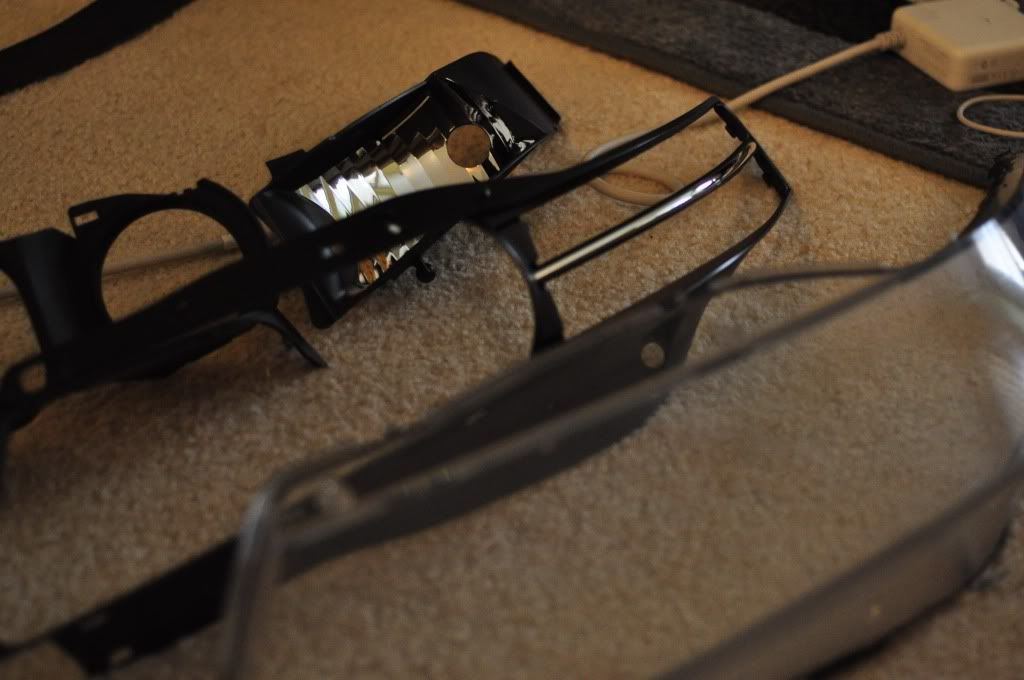
� Disassemble the rest of the headlight and place painted pieces onto a towel (Corner reflector bezel and foglight outer trim)
� Paint dark matte paint first 1-2 coats then paint gunmetal 5-6 coats after
� Let cure for two cours
� During this time do a Clean up of the headlight cover ~See Clean up Headlight~
� Take projector and unclip the metal shield surrounding the lens
� Take out lens and replace with ZKW-R
� ~ See other sheet for continuation in ZKW-R~
� To widen opening use the soldering iron and melt in a circle shape until bulb fits
� Put in the bulb and seal around using silicone
� To mount the angel eyes use Quik Grip, place the angel eye on the bezel and tape it with masking tape glue around the masking tape and let dry for 15 minutes then take off tape and tape that spot underneath.
� Drill a whole above projector large enough for two 22 gauge wire to fit
� Take lower amber diffuser and wrap the Carbon fiber vinyl around it
� Place everything back together by looking at the other headlight as a guide
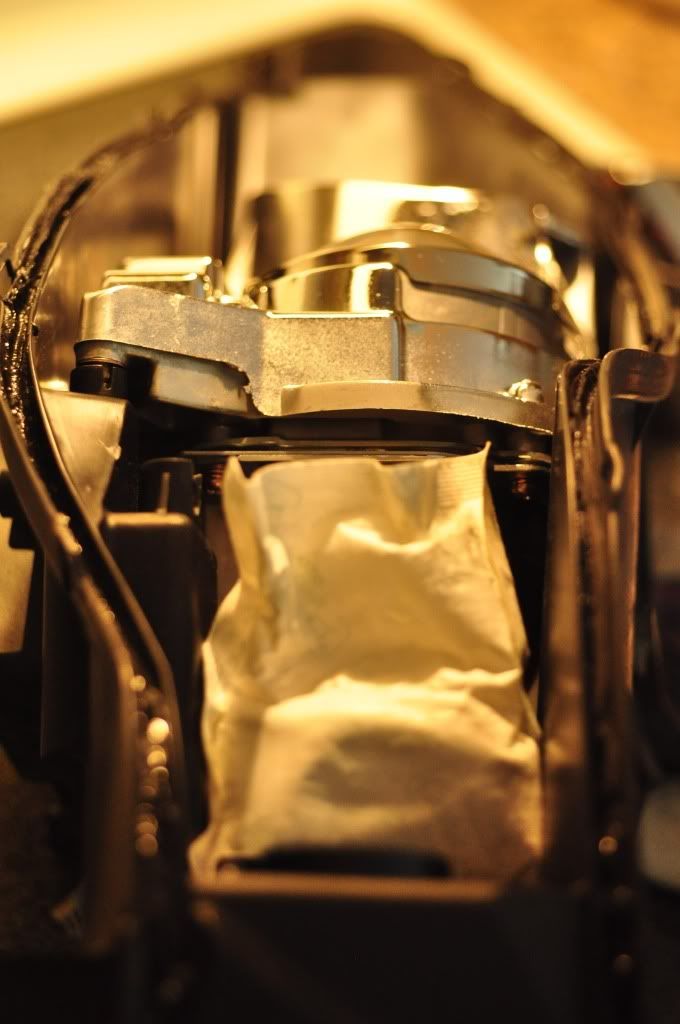
� Place 4-5 Silica gel packs in the headlight
� To seal back up take the Nissan rubber butyl and stretch it around the headlight housing
� Using a heat gun Heat the edges and place the top and bottom together
� Place C-clamps around the edge
� Using a caulking gun run a line around the whole headlight housing and make sure there are no gaps (Make sure to dab some on the opening for the angel eye wiring
� Let dry
Tools Needed:
� Quik Grip
� Masking tape (Thin)
� Power Drill
� 24 Gauge wiring
� Soldering Iron
� Soldering Lead
� RTV Silicone
Parts Needed:
� CCFL Angel Eyes
� *Two Waterproof Inverters
� Inline fuse (15-20amps)
� Switch
Procedure:
� Start by putting the angel eyes onto the bezel ~Clearout and Blackout~
� Drilling the hole for the wires
� Use two inverters connect at the positive and negative terminals
� Run the positive wire to a switch into the dash
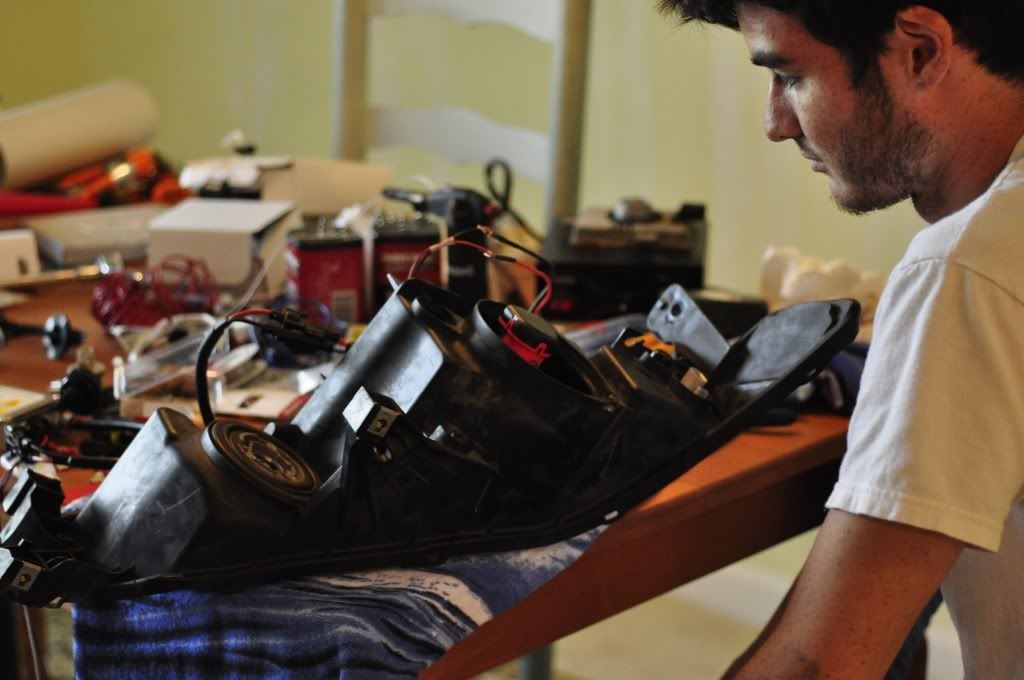
� Run a wire from the dash to the Wiper motor wire (see picture below) green wire, need to cut the tape to get access to it.
� Run the ground to the negative terminal on the battery and connect to the quick connects
Tools Needed:
� Restoration kit (For Power drill) 3M Rubbing Compound
� 1500 2000 2500 3000 Wet Sandpaper
� Plastic drop cloth
� Applicator pad and finishing cloth
� Bowl
� Sponge
� Soap
� Electric buffer
� Mother�s power ball (Attaches to power drill)
� Microfiber towels
� Spray bottle
Procedure:
� First clean off Headlight housing with soap and water
� Let the sandpaper soak in the soapy water for 8-10 minutes
� Then start to sand in one direction either horizontally or vertically in either way sandpaper 1500 for 10-20 minutes keep paper moist after rinse with the sponge and soap (Repeat step after every grit)
� As you continue change the direction of sanding
� Make sure to clean off hand, paper and headlight housing off a lot
� Switching up grit every 10-20 minutes (Also switching water every grit)
� After the highest grit has been done apply rubbing compound
� Work in for at least 10 minutes let sit
� Then after finish it off with a coat of Meguiar�s Mirror glaze and NXT Wax (NXT liquid)
- CCFL Angel Eyes
- 35 watt DDM Hid kit D2S
- 55 watt DDM Hid kit 9006
- ZKW-R
- Switchbacks
- Clearing
- Blackout
- Cleaning (Headlight Restoration)
I did wrote up a summary of each process. The summary's are all based on other members DIY's. I take no credit for the info. This is not a complete DIY just my notes. Nevertheless, I thought I'd share it.
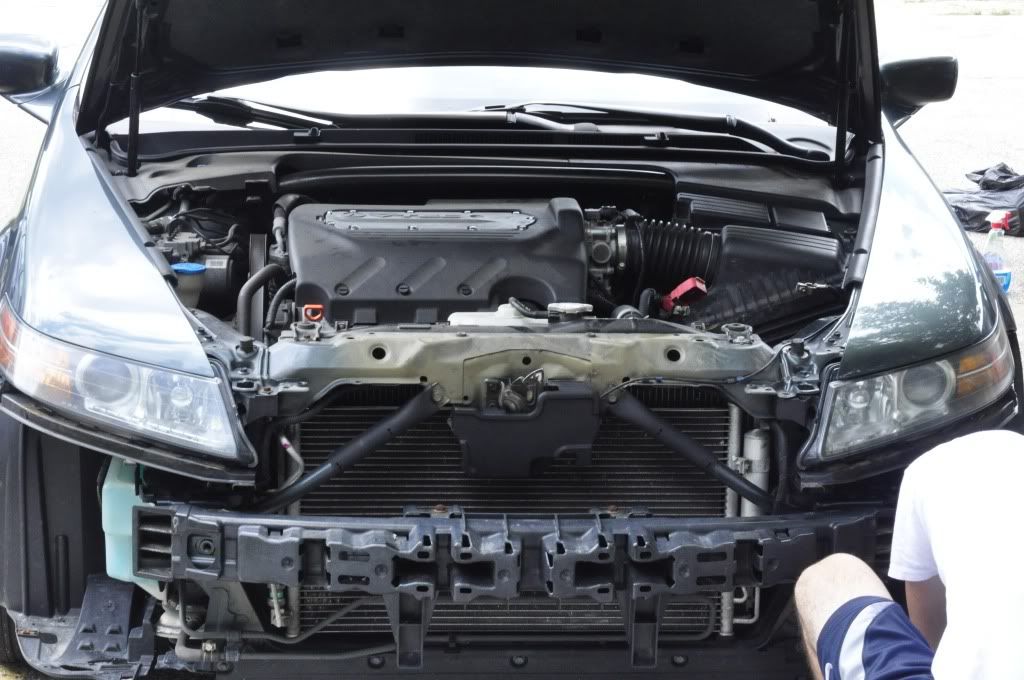
Bumper and Headlights
Supplies Needed:
� 10 mm wrench + Extension arm
� Flathead screwdriver
� Phillips screwdriver
� Tarp
� Gloves
Procedure:
� First tarp underneath and around front bumper
� Remove inside engine plastic pieces
� Disconnect battery and take out
� Start by removing two screws (Phillips) on the far left and far right of the radiator plastic shroud
� Then pop out the three clips (Using a flathead) closet to the front of the car on top of the radiator plastic shroud
� After the plastic shroud is taken off there will be two clips next to the grill on either side (black capped)
� Find the metal clips closet to the top of the grille and bend them up a bit
� Then undo two clips on the middle section underneath the bumper (on pillars)
� Undo two clips on the right and left side of the bumper right under the far side lower grille
� Then use a wrench with a 10mm and remove six bolts, Left right far corners and 4 on either side of the plastic bottom part of the bumper
� Then turn the wheel to get to the 2 clips (flathead) + screw hidden by fender and bumper break. Pull back plastic in wheel well (vertical) Both sides
� Then from the sides start pulling off the bumper
� HEADLIGHT
� To get access to the right headlight you need to remove the wiper fluid reserve (two blots)
� From there remove the intake silencer to get access to two screws that need to be unbolted
Headlight Baking
Tools and Items Needed:
� Tin foil
� Oven
� Oven mitt (work gloves)
� Pan
Procedure:
� Line the oven with tin foil
� Put in the headlight housing on a baking sheet
� Then without preheating let the headlight sit for 20 mins
� Use gloves and take out the Headlight
Clearing and Blacking out
Tools Needed:
� C-clamps
� Silica Gel Packs (5-6)
� Heat Gun
� Nissan rubber butyl
� Knife
� Flathead screwdriver
� RTV Black sealant
� Caulking gun
� Engine enamel paint
� CCFL Angel Eyes + Inverters
� 55 watt DDM Hid kit 9006
� 35 watt DDM Hid kit D2S
� ZKW-R lens
� 9006 Hid Relay Harness
� Plastic Welder
� Carbon fiber vinyl
Other Mods:
1. Angel Eyes
2. Switchback Bulbs
3. Hid Upgrade (DRL+Fog)
4. Lens Upgrade
Procedure:
� First unclip all the clips around the light housing
� Then take a flathead screwdriver and wedge in from the inner [art of the light (Foglight)
� Make sure to get all the silicon goo out as you go and to not let it touch the lens cover
� Do one complete headlight at a time let the other way one be your guide when putting back together
� After take the projector out by taking out two screws and pulling the projector out
� Disassemble the rest of the headlight and place painted pieces onto a towel (Corner reflector bezel and foglight outer trim)
� Paint dark matte paint first 1-2 coats then paint gunmetal 5-6 coats after
� Let cure for two cours
� During this time do a Clean up of the headlight cover ~See Clean up Headlight~
� Take projector and unclip the metal shield surrounding the lens
� Take out lens and replace with ZKW-R
� ~ See other sheet for continuation in ZKW-R~
� To widen opening use the soldering iron and melt in a circle shape until bulb fits
� Put in the bulb and seal around using silicone
� To mount the angel eyes use Quik Grip, place the angel eye on the bezel and tape it with masking tape glue around the masking tape and let dry for 15 minutes then take off tape and tape that spot underneath.
� Drill a whole above projector large enough for two 22 gauge wire to fit
� Take lower amber diffuser and wrap the Carbon fiber vinyl around it
� Place everything back together by looking at the other headlight as a guide
� Place 4-5 Silica gel packs in the headlight
� To seal back up take the Nissan rubber butyl and stretch it around the headlight housing
� Using a heat gun Heat the edges and place the top and bottom together
� Place C-clamps around the edge
� Using a caulking gun run a line around the whole headlight housing and make sure there are no gaps (Make sure to dab some on the opening for the angel eye wiring
� Let dry
Angel Eyes
Tools Needed:
� Quik Grip
� Masking tape (Thin)
� Power Drill
� 24 Gauge wiring
� Soldering Iron
� Soldering Lead
� RTV Silicone
Parts Needed:
� CCFL Angel Eyes
� *Two Waterproof Inverters
� Inline fuse (15-20amps)
� Switch
Procedure:
� Start by putting the angel eyes onto the bezel ~Clearout and Blackout~
� Drilling the hole for the wires
� Use two inverters connect at the positive and negative terminals
� Run the positive wire to a switch into the dash
� Run a wire from the dash to the Wiper motor wire (see picture below) green wire, need to cut the tape to get access to it.
� Run the ground to the negative terminal on the battery and connect to the quick connects
Cleaning Headlight Housing
Tools Needed:
� Restoration kit (For Power drill) 3M Rubbing Compound
� 1500 2000 2500 3000 Wet Sandpaper
� Plastic drop cloth
� Applicator pad and finishing cloth
� Bowl
� Sponge
� Soap
� Electric buffer
� Mother�s power ball (Attaches to power drill)
� Microfiber towels
� Spray bottle
Procedure:
� First clean off Headlight housing with soap and water
� Let the sandpaper soak in the soapy water for 8-10 minutes
� Then start to sand in one direction either horizontally or vertically in either way sandpaper 1500 for 10-20 minutes keep paper moist after rinse with the sponge and soap (Repeat step after every grit)
� As you continue change the direction of sanding
� Make sure to clean off hand, paper and headlight housing off a lot
� Switching up grit every 10-20 minutes (Also switching water every grit)
� After the highest grit has been done apply rubbing compound
� Work in for at least 10 minutes let sit
� Then after finish it off with a coat of Meguiar�s Mirror glaze and NXT Wax (NXT liquid)


 08-23-2010 | 04:14 PM
#6
Thread Starter
DGP
Joined: Feb 2010
Posts: 118
Likes: 0
From: Newmarket, NH

as for the direction I though I read somewhere I should start with sanding it to the right ------> in a straight line then with the higher grit switch to sanding it to the left <---- Then Switch to sanding up Then sanding straight down. Its probably completely unnecessary but o well haha

Trending Topics
 lol
08-23-2010 | 04:36 PM
lol
08-23-2010 | 04:36 PM
#9
Thread Starter
DGP
Joined: Feb 2010
Posts: 118
Likes: 0
From: Newmarket, NH
 08-23-2010 | 06:40 PM
#13
Thread Starter
DGP
Joined: Feb 2010
Posts: 118
Likes: 0
From: Newmarket, NH
I dont know exactly what color I want to paint the headlights, I might do a black matte back then go over with a dark shiny gunmetal paint or paint the gunmetal right on the chrome? Any ideas or comments?
 08-23-2010 | 10:31 PM
#18
+1. Looks to me like you have everything figured out though. I did my entire headlights in matte the other day, there's a thread in the Photo Gallery if you wanna get an idea of what it looks like.
08-24-2010 | 03:52 AM
#20
Thread Starter
DGP
Joined: Feb 2010
Posts: 118
Likes: 0
From: Newmarket, NH
 luckily I got the nissan rubber butyl and some gasket sealant
08-24-2010 | 03:59 AM
luckily I got the nissan rubber butyl and some gasket sealant
08-24-2010 | 03:59 AM
#21
Thread Starter
DGP
Joined: Feb 2010
Posts: 118
Likes: 0
From: Newmarket, NH
NIce looks like you had some serious condensation problems glad you got those lights back to normal. They look sick I might stick with matte now I' afraid glossy will be to shiny
08-24-2010 | 04:00 AM
#22
Thread Starter
DGP
Joined: Feb 2010
Posts: 118
Likes: 0
From: Newmarket, NH


 09-30-2010 | 08:33 AM
#31
Thread Starter
DGP
Joined: Feb 2010
Posts: 118
Likes: 0
From: Newmarket, NH
09-30-2010 | 08:42 AM
#32
Thread Starter
DGP
Joined: Feb 2010
Posts: 118
Likes: 0
From: Newmarket, NH
O ya all the parts I took out of the oem lights are for sale in the blackmarket, im willing to go lower on the price and do trades!!!!
Last edited by NHfastandfree; 09-30-2010 at 08:45 AM.
 09-30-2010 | 10:45 AM
#35
Thread Starter
DGP
Joined: Feb 2010
Posts: 118
Likes: 0
From: Newmarket, NH
09-30-2010 | 11:07 AM
#36
06 WDP/Ebony MT NAV ASPEC
Joined: Apr 2008
Posts: 282
Likes: 14
From: Coquitlam BC Canada
IMO there is no way a 45dollar ddm kit with bulbs and ballast is better than the oem one. IF it is brighter it is because the bulbs are new, and you have done the other work. I recommend keeping the oem ballasts and ignitors.
09-30-2010 | 03:20 PM
#39

Not sure why you went with a DDM kit, as OEM would be better unless its broke. How does that work now since the OEM kit was made to "seal" the under part of the tail light? You will get air in there and moisture which creates water. Get water in your bulbs or ballasts well then your shit out of luck for about $100-$120
09-30-2010 | 05:37 PM
#40
Thread Starter
DGP
Joined: Feb 2010
Posts: 118
Likes: 0
From: Newmarket, NH
Not sure why you went with a DDM kit, as OEM would be better unless its broke. How does that work now since the OEM kit was made to "seal" the under part of the tail light? You will get air in there and moisture which creates water. Get water in your bulbs or ballasts well then your shit out of luck for about $100-$120
I sealed the bottom with the nissan rubber butyl, it worked perfectly haven't had any condensation
and both ballasts are fine I just thought i might as well redo everything