
DIY instulation of Daytime running lights

Thread Starter
Pro
Joined: Mar 2006
Posts: 547
Likes: 3
From: Delaware/Philly
DIY instulation of Daytime running lights
This is to install the DesignTech DRL module Model # 20013 on the 3rd gen TL. I purchased it from Autobarn.com and it costs $29.95.
[IMG]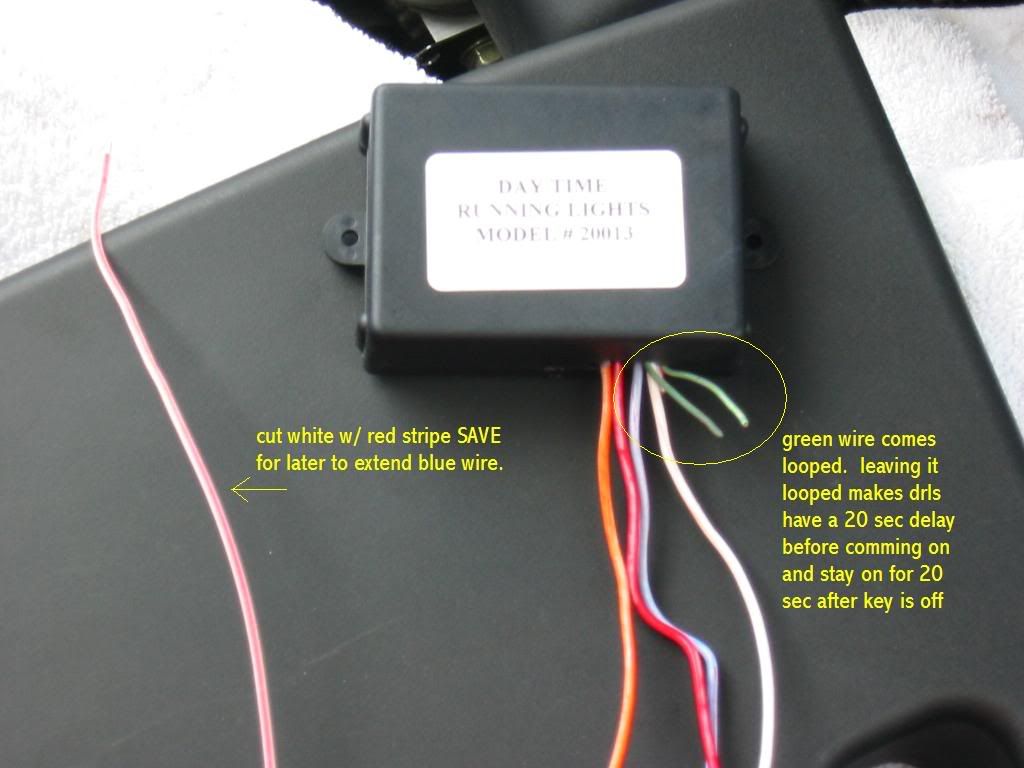
This is the Module
[IM G]
G]
These are the tools you will need along with a two connectors that the kit does not come with. I put di-electric grease at my connections, this is not nessesary but it helps to prevent any corosion of the connections.
[I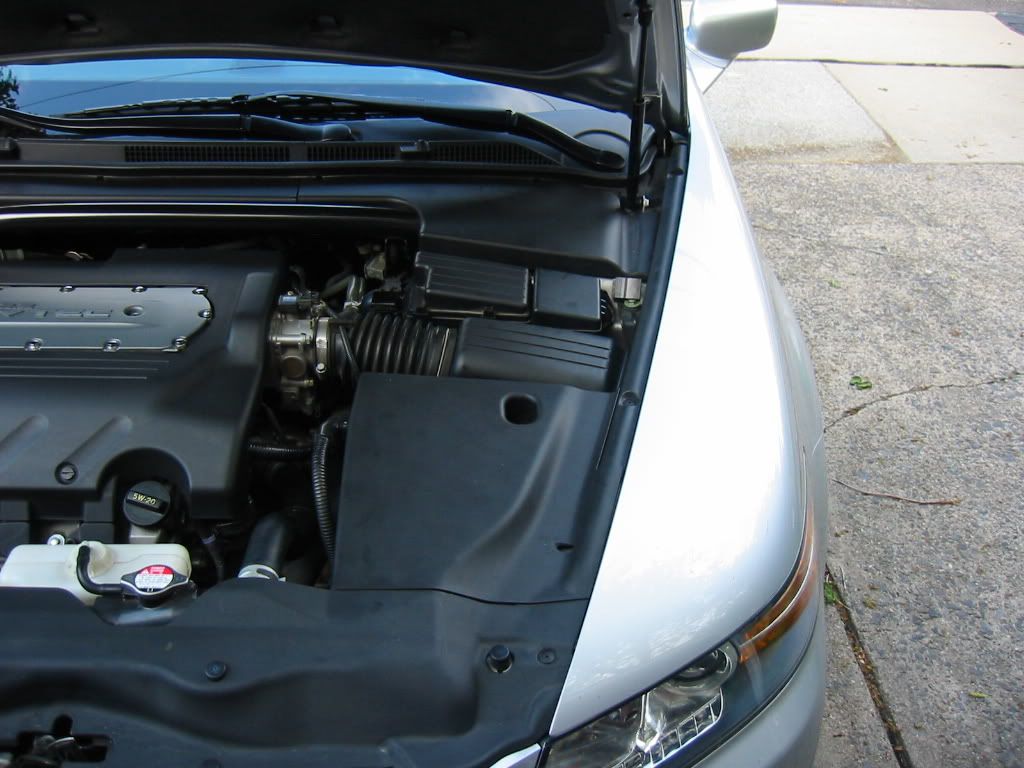 MG]
MG]
This is the area where you will be installing the module.
[/IMG]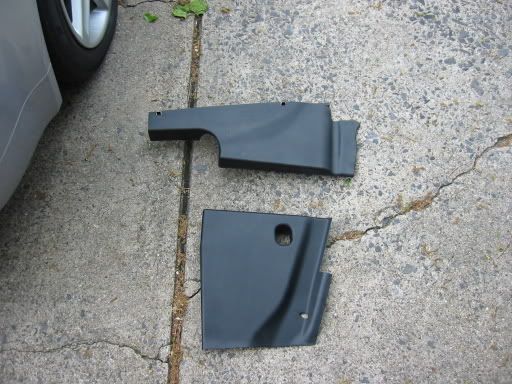
Remove the battery cover and Brake fluid cover.
[IMG]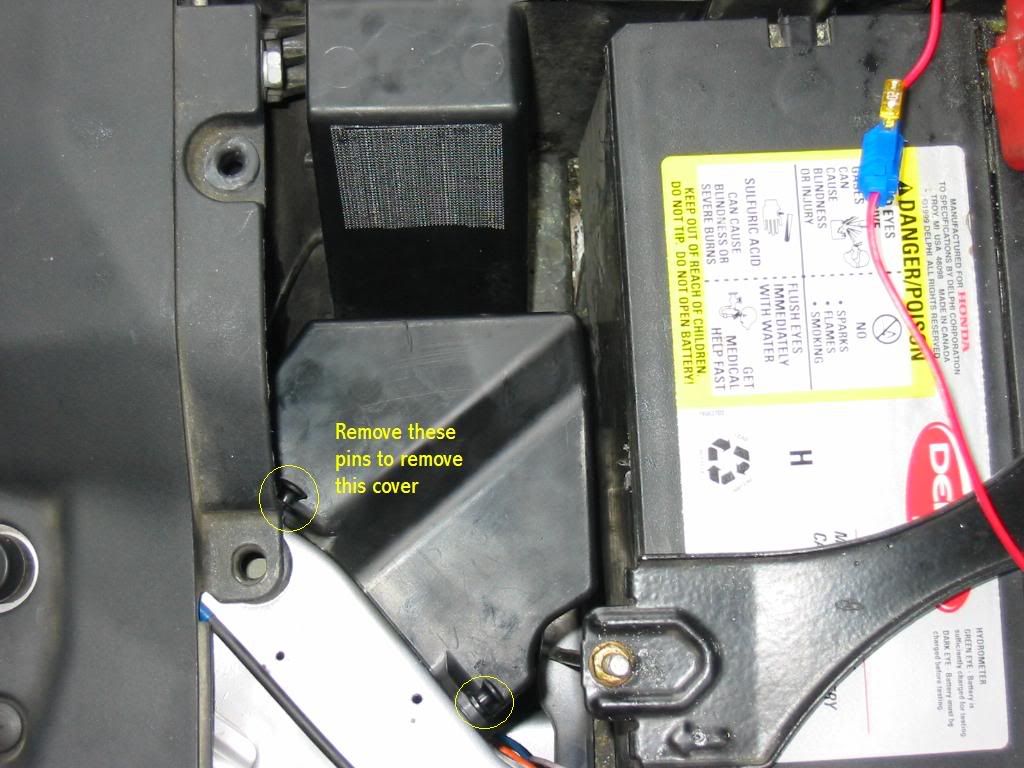
Remove this cover to access the fog light/ ballast connnectors. For easier access the battery may be removed. I didn't because I am an auto tech and I am used to working in tight quarters. NOTE: MAKE SURE YOU HAVE YOUR RADIO/NAVI CODES HANDY.
[IMG]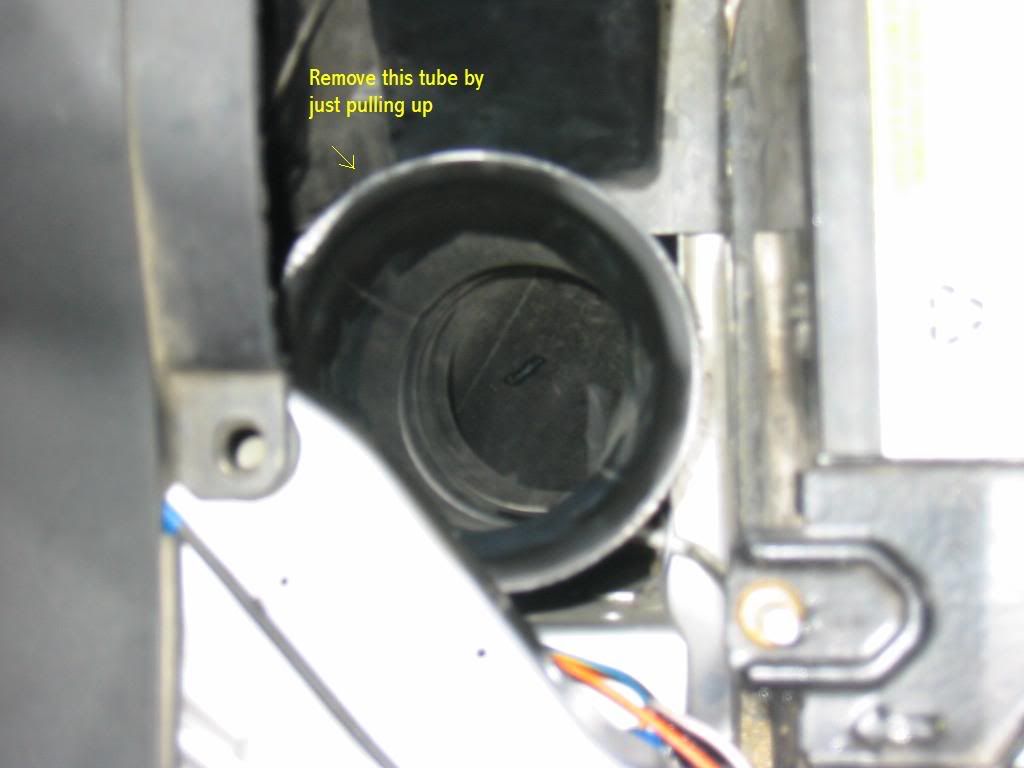 Remove this tube by pulling up on it. This tube is located under the cover that you just removed.
[/IMG]
This is the first connection. If you are using the DesignTech directions this is the "power +12 volt wire)MAKE SURE YOUR HEADLIGHTS ARE OFF!
[IMG]
This is the the area where you will find the wiper motor wire harness.
[IMG]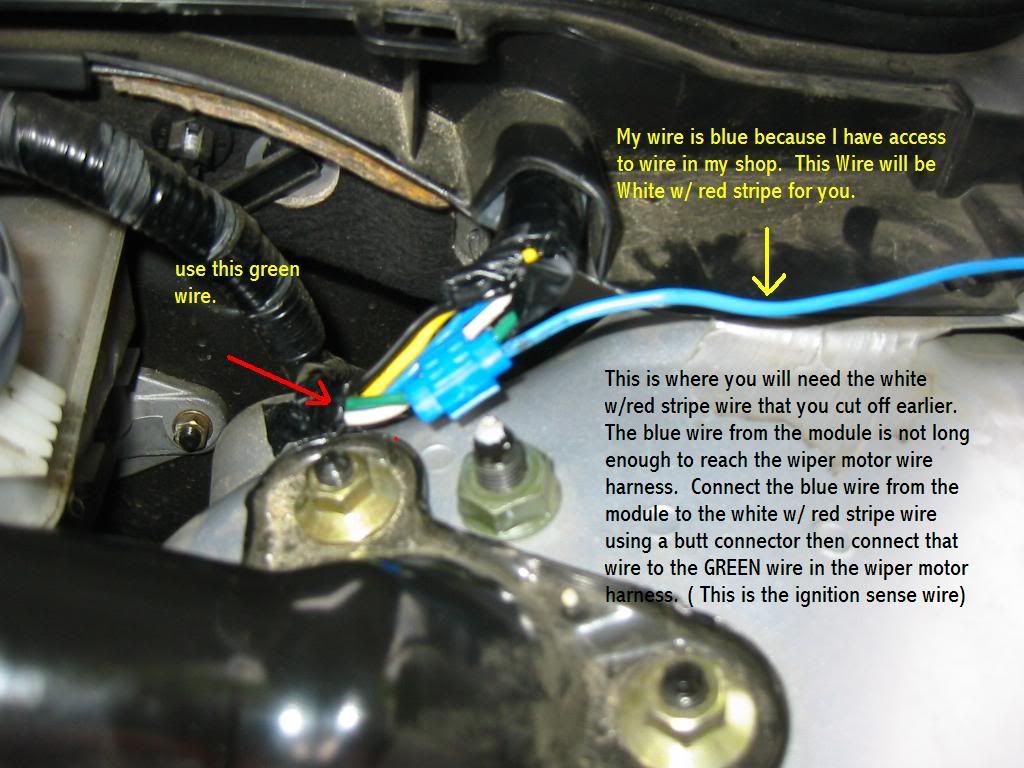
This is the connection for the "ignition sense wire" Use the Green wire from this harness. You will find that if you mount your module in the same place as me the blue wire will not reach. This is where you will use the white w/red stripe wire that you cut off the module earlier. Use a butt connector to connect it to the blue wire out of the module. After you have extended the blue wire with the white w/ red stripe wire you will then connect it to the GREEN wire in the wiper motor wire harness.
[/IMG]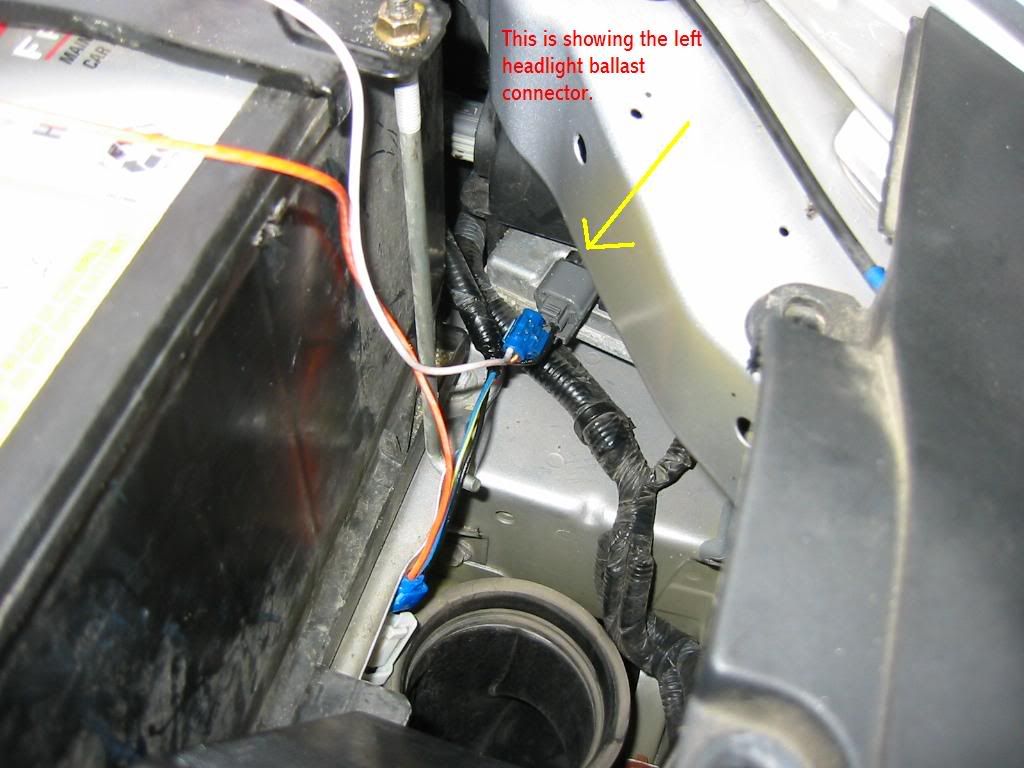
This is the location of the left headlight ballst connector
[IMG]

This is the left fog light connector once it is unplugged from bulb.
[IMG]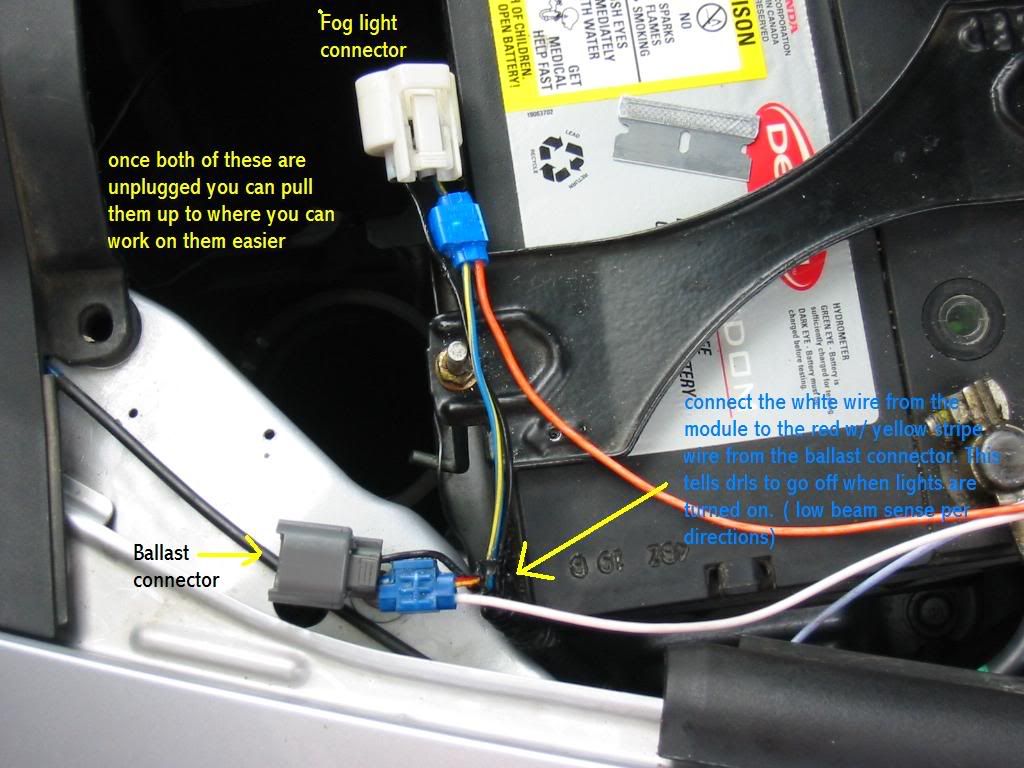
Once both connectors are unplugged you can pull them up to where you can work on them. You will need to remove some of the tape to access. First connect the white wire from the module to the Red w/ yellow stripe wire on the ballast connector(the grey one)(this will be called "low beam head light sense is the designtech directions. Now connect the orange wire to the blue w/yellow stripe wire of the fog light connector.(this will be called "high beam headlight output" in the designtech directions.) Once connections are made plug connectors back in and tidy up your wires.
[IMG]
This is installing the air tube. Make sure the white marks line up and the tube is pushed all the way into the rubber collar.
[IMG]
I chose this location because it is covered and cooled and for ease of the connections. There are also no moving parts to interfer with the wires. I purchased heavy duty outdoor velcro from the hardware store. I wanted to be able to move my module if I need to in the future.
[/IMG]
This is what is looks like before the battery cover is put back on. I Hope this is detailed enough, if anyone has any questions please ask.
[IMG]
This is the Module
[IM
G]These are the tools you will need along with a two connectors that the kit does not come with. I put di-electric grease at my connections, this is not nessesary but it helps to prevent any corosion of the connections.
[I
MG]This is the area where you will be installing the module.
[/IMG]
Remove the battery cover and Brake fluid cover.
[IMG]
Remove this cover to access the fog light/ ballast connnectors. For easier access the battery may be removed. I didn't because I am an auto tech and I am used to working in tight quarters. NOTE: MAKE SURE YOU HAVE YOUR RADIO/NAVI CODES HANDY.
[IMG]
Remove this tube by pulling up on it. This tube is located under the cover that you just removed.[/IMG]
This is the first connection. If you are using the DesignTech directions this is the "power +12 volt wire)MAKE SURE YOUR HEADLIGHTS ARE OFF!
[IMG]
This is the the area where you will find the wiper motor wire harness.
[IMG]
This is the connection for the "ignition sense wire" Use the Green wire from this harness. You will find that if you mount your module in the same place as me the blue wire will not reach. This is where you will use the white w/red stripe wire that you cut off the module earlier. Use a butt connector to connect it to the blue wire out of the module. After you have extended the blue wire with the white w/ red stripe wire you will then connect it to the GREEN wire in the wiper motor wire harness.
[/IMG]
This is the location of the left headlight ballst connector
[IMG]
This is the left fog light connector once it is unplugged from bulb.
[IMG]
Once both connectors are unplugged you can pull them up to where you can work on them. You will need to remove some of the tape to access. First connect the white wire from the module to the Red w/ yellow stripe wire on the ballast connector(the grey one)(this will be called "low beam head light sense is the designtech directions. Now connect the orange wire to the blue w/yellow stripe wire of the fog light connector.(this will be called "high beam headlight output" in the designtech directions.) Once connections are made plug connectors back in and tidy up your wires.
[IMG]
This is installing the air tube. Make sure the white marks line up and the tube is pushed all the way into the rubber collar.
[IMG]
I chose this location because it is covered and cooled and for ease of the connections. There are also no moving parts to interfer with the wires. I purchased heavy duty outdoor velcro from the hardware store. I wanted to be able to move my module if I need to in the future.
[/IMG]
This is what is looks like before the battery cover is put back on. I Hope this is detailed enough, if anyone has any questions please ask.

Thread
Thread Starter
Forum
Replies
Last Post
mada51589
3G TL Problems & Fixes
80
Jan 9, 2025 04:40 PM
cycdaniel
1G TSX Performance Parts & Modifications
8
Dec 17, 2019 10:58 AM
prox
5G TLX Problems & Fixes
6
Sep 1, 2015 02:03 AM