
DIY: Grill Mods

Thread Starter
I'm in
Joined: Jan 2005
Posts: 2,213
Likes: 20
From: Oregon
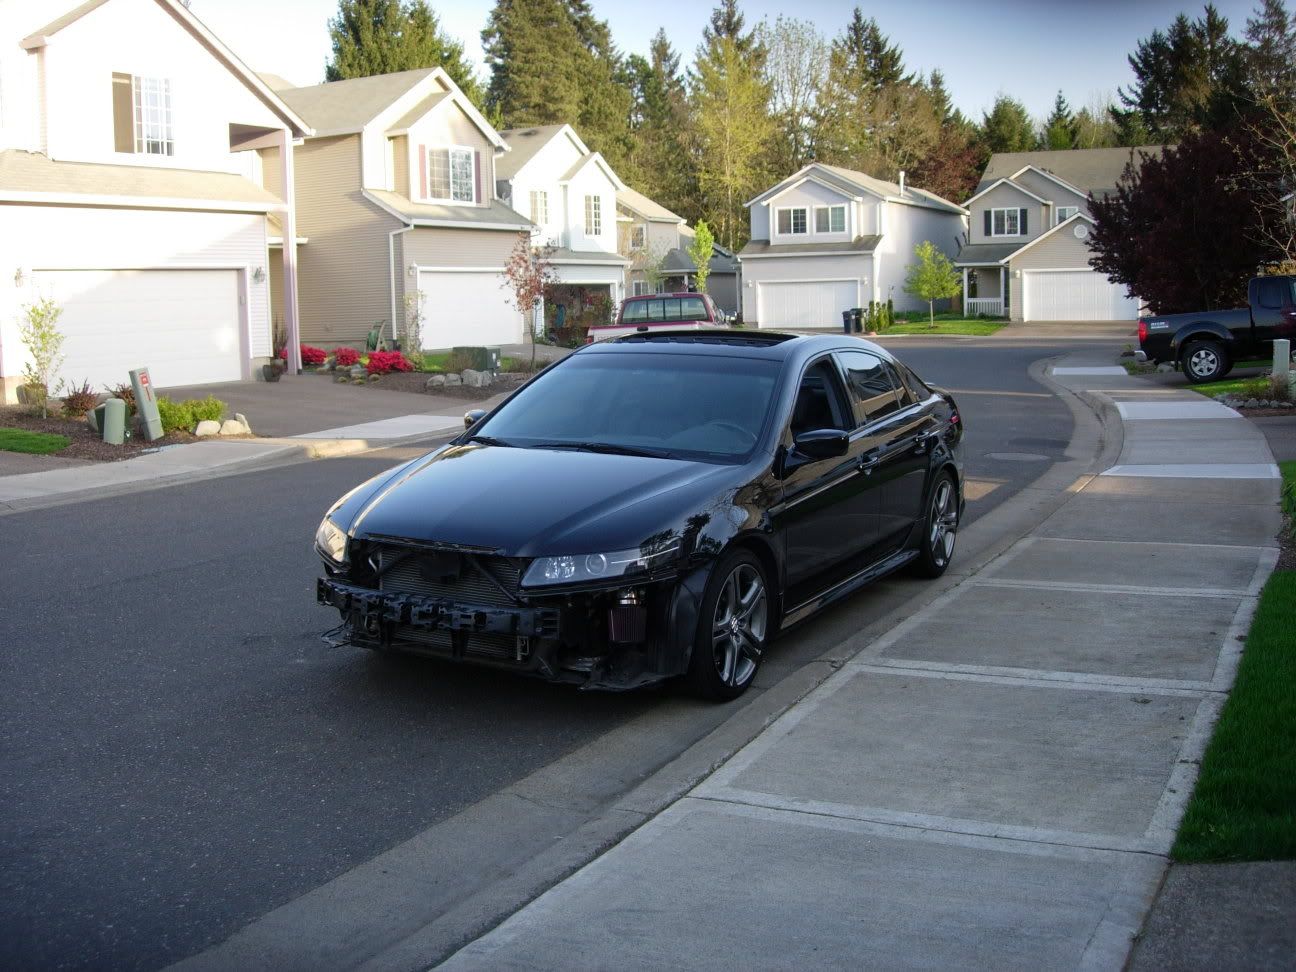
If you want to modify your grills to look like what ACCURATEin's then keep reading. Also I modded my lower grills similar to what 05TLTony did.
Things that you will need:
- Plenty of patience.
- Some skillz
- You need to remove your front bumper which you can find how to do that by looking here ..... https://acurazine.com/forums/showthr...e+front+bumper
- Bondo
- Dremel
- Hacksaw
- Spray paint or have a shop do it
- Mesh (grill) I purchased mine at a local import shop. You can also find it on ebay or the internet.
- Sandpaper from fine to rough
- ShopVac is nice
- A garage is nice too
- Another car to drive unless you finish it in a day
- A sheet of carbon fiber, the real stuff no vinyl....
- Some other things that will come to mind as I type this out.....
The first thing you need to do is remove the front bumper, for those that missed it here are the instructions.... https://acurazine.com/forums/showthr...e+front+bumper I have removed my bumper so many times that its a breeze! Just making sure its aligned well.
Once your bumper is you can begin to mod! I'll begin with the two lower grills. NOTE: If you have an Aspec lip you MUST remove it before you can remove the grills. For this you need a screw driver and 3M double sided tape to replace the tape you removed, you should do this when you are done with this part.
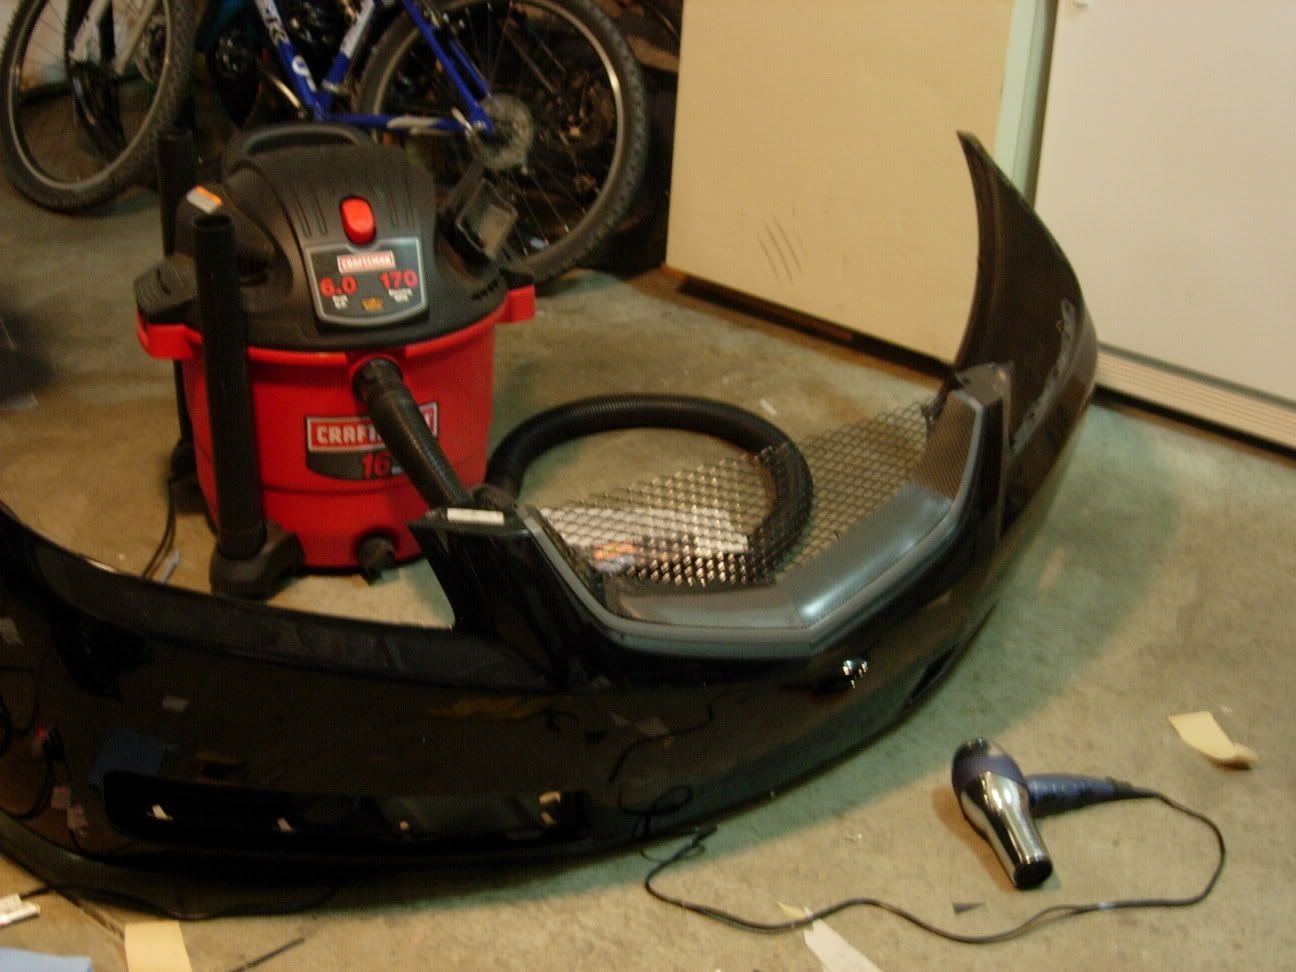
There are a total of 8 clips holding the grills. 4 on top and 4 on the bottom, you just squeeze and pull. Once you remove the grill you need to get your dremel. Make sure you have a cut wheel adapter for it. Make sure you ONLY cut the top and bottom portion of the grill like this....

As you can see you leave the outside and middle bar. Once you cut the bars you need to sand away. I sanded the entire thing. Where the bars where, make sure you leave it flush. It you have a sandpaper attachment for your dremel use that to sand it so you only sand a little by hand. Be careful the dremel is powerfull! It slipped on me a few times and I made dents in the plastic which I had to sand...
When you are done it will look like the picture above. You now have a sanded piece of plastic that needs to be painted. I wanted to retain the 'plastic' look so I painted it with a flat black. Before I painted I primed it. Just follow the cans instructions on painting. Once primed I painted. 3 coats of primer and 4 coats of paint. Its important to let them dry in a dry area, to speed of the process a little I shined some spot lights on them.
Once you have finished one work on the other, unless you did both at the same time. Once done your done with step one. Next thing you need to do is cut the grill to the size of the grill.

To measure the size all I did was place the grill on top of the mesh grill and with a sharpie I outlined the grill over the mesh. Then I used some heavy duty scissors to cut the mesh. Once cut I tested to see if the it fit. With my cut piece, you place it in the whole of the bumper and the you clip your grill in. If it fits paint it.

I painted and primed mine. 3 coats of primer and 4 of paint. For this I opted for glossy black. Once primed, painted, cured I install it. Its very simple. With my cut piece in hand I place it in the bumper hole and just clip in the grill. Thats it. Just place it and clip back in the grill. You need to really push the clips in. There enough pressure to hold it in. I feel like I lost some of you.... so in summary
1- remove stock oem grill
2- dremel out top and bottom grill section leaving middle bar and surrounding.
3- sand till smooth as baby's bottom
4- prime and paint
5- cut mesh to size of oem grill and test fit
6- prime, paint grill
7- Place mesh grill in the hole of bumper
8- then just clip in oem grill
9- DONE
When you finish make sure you do both sides Re-install Aspec lip for those that have it and then your done with the lower ones.
Top middle grill........
Here where you need to to some serious work. With your bumper still off the car you need to remove the middle bar, and trim (the one thats silver). When you have done this you will see a plastic bar running across the 'triangle' (the grill) You need to use your hacksaw cut away.
You cut as close as you can to the side of the 'triangle' There will be a hump left that needs to be flush. Here is where more sanding will be done. When you finish you will have two holes that need to be covered.
I did not take very many pictures, it might be hard to understand what I'm refering to, but ask away and I will answer all of the questions.
Here I used bondo, but what I did first is cut a piece of plastic from a storage box to use as backing. With the plastic i placed it behind the hole and epoxy'd it so I have as support for the bondo. Once the plastic is placed behind the hole I bondo'd till the hole was filled. I used lots of it so I can just sand till its flush with surrounding area.


It would be to have a mask, the bondo is pretty strong.
In summary:
1- cut middle bar
2- sand till flush
3- use plastic to fill hole for backing, support for the bondo
4- bondo the holes
5- sand till flush
Once you have sanded the bondo you need your sheet of carbon fiber.
Here is where you have some options. I did not realize that sheets of carbon fiber is not easy to work with. I assumed it would be cut and place, its like that but it won't come out perfect. So you put carbon fiber, or paint it.

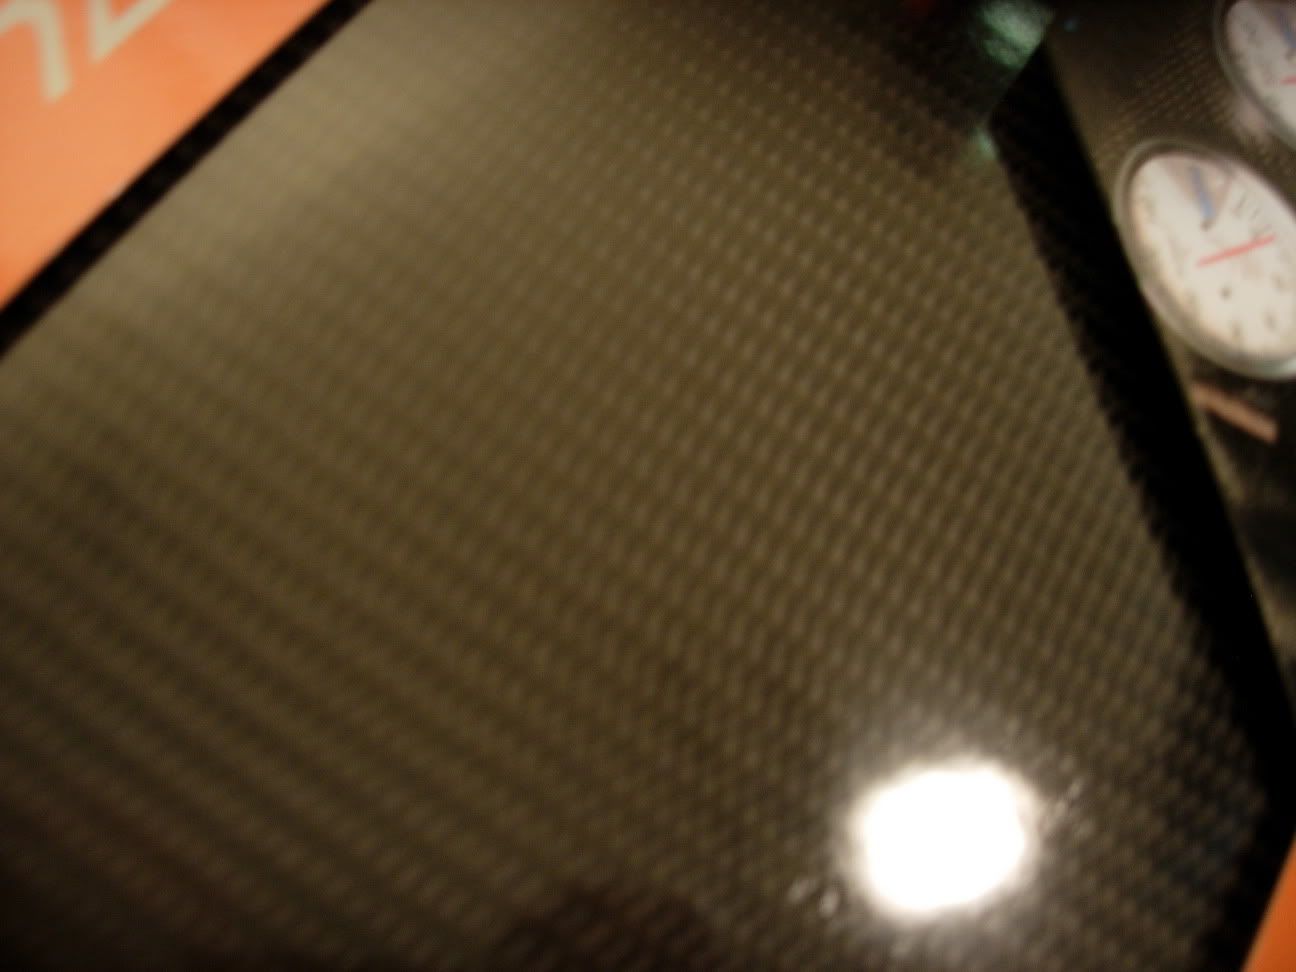
It can't really bend at 90 degrees with out cracking so you need to cut it to fit. The way I did it was use a piece of card board to make a template of the triangle area. Its important to make precise measurements since the carbon fiber will go here. When you have made your template you need to cut the carbon fiber to the size of your template. Its really abrasive and cutting is hard. I used a knife and just cut slow. Take your time you don't want to mess up.
When you have cut the carbon fiber you need to place on the triangle. If it fits, then peel the backing and stick! Hopefully your cuts were nice and it all fits. Your done with this part.
Now you need to get your mesh grill. To measure I made a template out of card board of the triangle area and with that I cut the mesh. Really simple. Just cut it and test fit it. I painted mine so I put 3 coats of primer and 4 of glossy black.
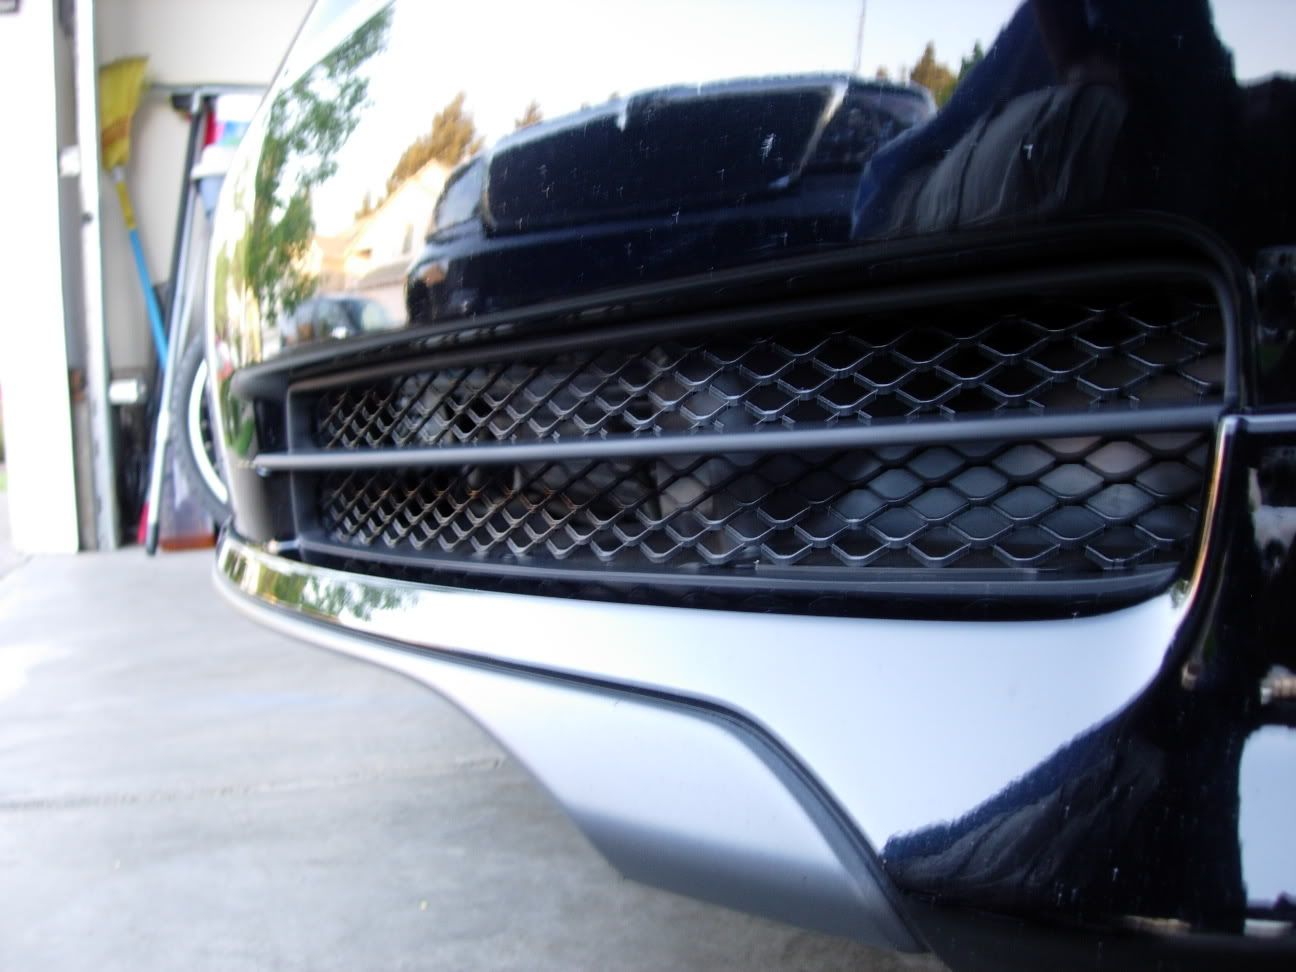
Once painted you need to attached it to the bumper. On the bumper there are two "poles" that stick out. They were there for the middle bar that you removed. Now there are just there sticking out. Using a washer and a bow type nut you attach it. Place the grill on the 'triangle' area, then behind the grill add the washer to the hole, then tighten the nut. This will hold it inplace. Thats it. This secures the bottom of the grill. The top will be attached when you reinstall the bumper. When it makes contact with the mounting points it will hold it in place. This is pretty much it........
It should all look like this.....
Make sure put everything back together, the bumper, aspec lip.....
Now the most PITA was the carbon fiber. Its starting to lift and its not as clean looking as I would want it. So when lifts off more, I will be painting that instead of the fiber.
Make sure you ask what was not understood, hard to explain, but hopefully the pictures help.

Things that you will need:
- Plenty of patience.
- Some skillz
- You need to remove your front bumper which you can find how to do that by looking here ..... https://acurazine.com/forums/showthr...e+front+bumper
- Bondo
- Dremel
- Hacksaw
- Spray paint or have a shop do it
- Mesh (grill) I purchased mine at a local import shop. You can also find it on ebay or the internet.
- Sandpaper from fine to rough
- ShopVac is nice
- A garage is nice too
- Another car to drive unless you finish it in a day
- A sheet of carbon fiber, the real stuff no vinyl....
- Some other things that will come to mind as I type this out.....
The first thing you need to do is remove the front bumper, for those that missed it here are the instructions.... https://acurazine.com/forums/showthr...e+front+bumper I have removed my bumper so many times that its a breeze! Just making sure its aligned well.
Once your bumper is you can begin to mod! I'll begin with the two lower grills. NOTE: If you have an Aspec lip you MUST remove it before you can remove the grills. For this you need a screw driver and 3M double sided tape to replace the tape you removed, you should do this when you are done with this part.
There are a total of 8 clips holding the grills. 4 on top and 4 on the bottom, you just squeeze and pull. Once you remove the grill you need to get your dremel. Make sure you have a cut wheel adapter for it. Make sure you ONLY cut the top and bottom portion of the grill like this....
As you can see you leave the outside and middle bar. Once you cut the bars you need to sand away. I sanded the entire thing. Where the bars where, make sure you leave it flush. It you have a sandpaper attachment for your dremel use that to sand it so you only sand a little by hand. Be careful the dremel is powerfull! It slipped on me a few times and I made dents in the plastic which I had to sand...
When you are done it will look like the picture above. You now have a sanded piece of plastic that needs to be painted. I wanted to retain the 'plastic' look so I painted it with a flat black. Before I painted I primed it. Just follow the cans instructions on painting. Once primed I painted. 3 coats of primer and 4 coats of paint. Its important to let them dry in a dry area, to speed of the process a little I shined some spot lights on them.
Once you have finished one work on the other, unless you did both at the same time. Once done your done with step one. Next thing you need to do is cut the grill to the size of the grill.
To measure the size all I did was place the grill on top of the mesh grill and with a sharpie I outlined the grill over the mesh. Then I used some heavy duty scissors to cut the mesh. Once cut I tested to see if the it fit. With my cut piece, you place it in the whole of the bumper and the you clip your grill in. If it fits paint it.
I painted and primed mine. 3 coats of primer and 4 of paint. For this I opted for glossy black. Once primed, painted, cured I install it. Its very simple. With my cut piece in hand I place it in the bumper hole and just clip in the grill. Thats it. Just place it and clip back in the grill. You need to really push the clips in. There enough pressure to hold it in. I feel like I lost some of you.... so in summary
1- remove stock oem grill
2- dremel out top and bottom grill section leaving middle bar and surrounding.
3- sand till smooth as baby's bottom
4- prime and paint
5- cut mesh to size of oem grill and test fit
6- prime, paint grill
7- Place mesh grill in the hole of bumper
8- then just clip in oem grill
9- DONE
When you finish make sure you do both sides
Re-install Aspec lip for those that have it and then your done with the lower ones.Top middle grill........
Here where you need to to some serious work. With your bumper still off the car you need to remove the middle bar, and trim (the one thats silver). When you have done this you will see a plastic bar running across the 'triangle' (the grill) You need to use your hacksaw cut away.
You cut as close as you can to the side of the 'triangle' There will be a hump left that needs to be flush. Here is where more sanding will be done. When you finish you will have two holes that need to be covered.
I did not take very many pictures, it might be hard to understand what I'm refering to, but ask away and I will answer all of the questions.
Here I used bondo, but what I did first is cut a piece of plastic from a storage box to use as backing. With the plastic i placed it behind the hole and epoxy'd it so I have as support for the bondo. Once the plastic is placed behind the hole I bondo'd till the hole was filled. I used lots of it so I can just sand till its flush with surrounding area.
It would be to have a mask, the bondo is pretty strong.
In summary:
1- cut middle bar
2- sand till flush
3- use plastic to fill hole for backing, support for the bondo
4- bondo the holes
5- sand till flush
Once you have sanded the bondo you need your sheet of carbon fiber.
Here is where you have some options. I did not realize that sheets of carbon fiber is not easy to work with. I assumed it would be cut and place, its like that but it won't come out perfect. So you put carbon fiber, or paint it.
It can't really bend at 90 degrees with out cracking so you need to cut it to fit. The way I did it was use a piece of card board to make a template of the triangle area. Its important to make precise measurements since the carbon fiber will go here. When you have made your template you need to cut the carbon fiber to the size of your template. Its really abrasive and cutting is hard. I used a knife and just cut slow. Take your time you don't want to mess up.
When you have cut the carbon fiber you need to place on the triangle. If it fits, then peel the backing and stick! Hopefully your cuts were nice and it all fits. Your done with this part.
Now you need to get your mesh grill. To measure I made a template out of card board of the triangle area and with that I cut the mesh. Really simple. Just cut it and test fit it. I painted mine so I put 3 coats of primer and 4 of glossy black.
Once painted you need to attached it to the bumper. On the bumper there are two "poles" that stick out. They were there for the middle bar that you removed. Now there are just there sticking out. Using a washer and a bow type nut you attach it. Place the grill on the 'triangle' area, then behind the grill add the washer to the hole, then tighten the nut. This will hold it inplace. Thats it. This secures the bottom of the grill. The top will be attached when you reinstall the bumper. When it makes contact with the mounting points it will hold it in place. This is pretty much it........
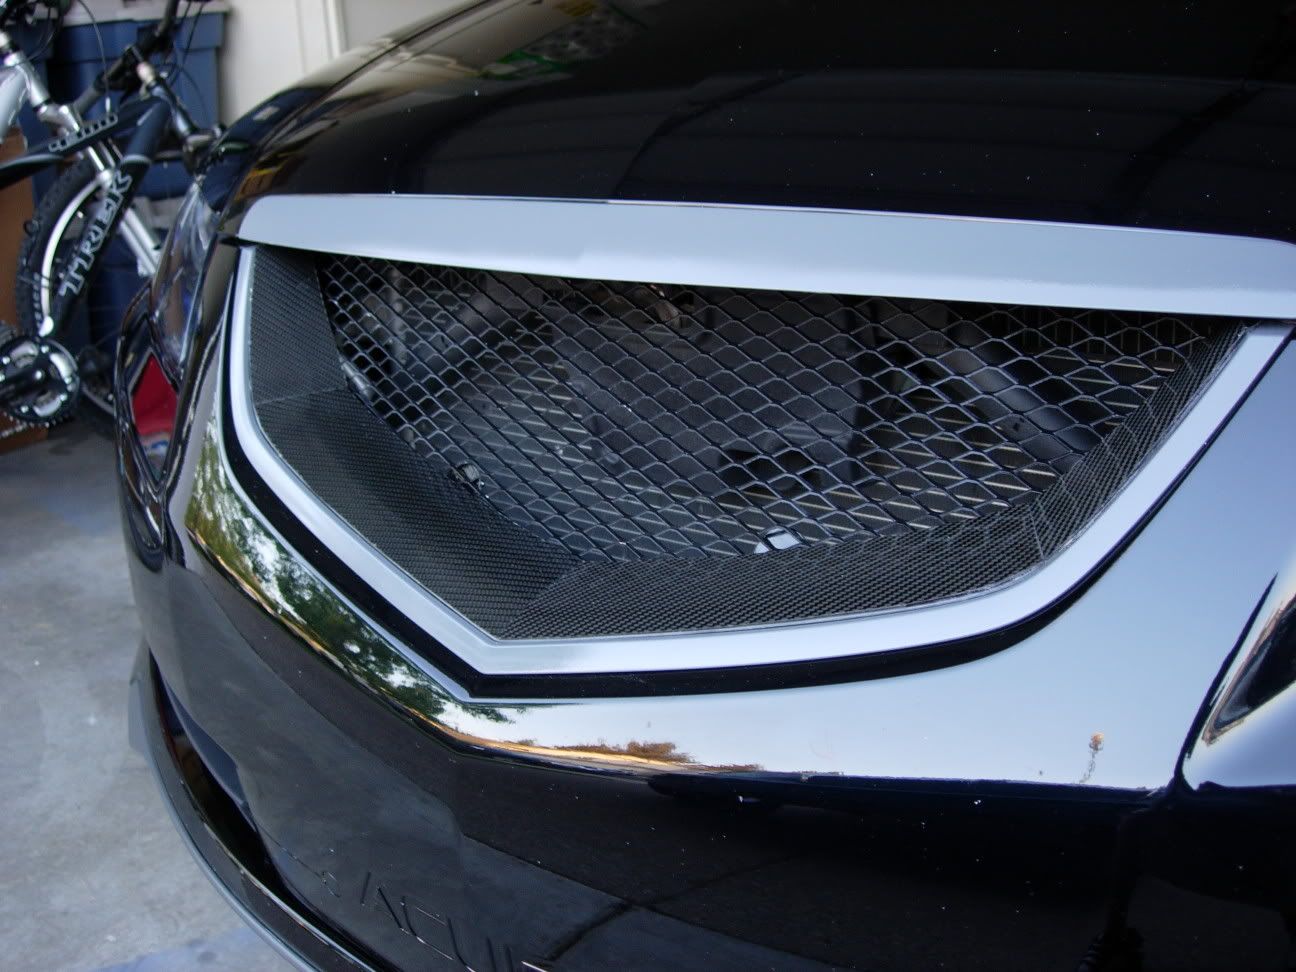
It should all look like this.....
Make sure put everything back together, the bumper, aspec lip.....
Now the most PITA was the carbon fiber. Its starting to lift and its not as clean looking as I would want it. So when lifts off more, I will be painting that instead of the fiber.
Make sure you ask what was not understood, hard to explain, but hopefully the pictures help.
Safety Car
Joined: Jan 2006
Posts: 3,827
Likes: 340
From: Sacramento area
Damn, that's a lot of work. Looks pretty cool too. It makes the front end look more aggressive 
Good write up, I don't think I'll even attempt this, waaaayyy to much involved for me. Can you post more pics with the car a little farther away?
Good write up, I don't think I'll even attempt this, waaaayyy to much involved for me. Can you post more pics with the car a little farther away?

Trending Topics
Thread Starter
I'm in
Joined: Jan 2005
Posts: 2,213
Likes: 20
From: Oregon
ding069: I didn't have to paint anything behind the grills.....
jmbnova: The lower grills, all I did was place the mesh grill in the opening and then just clipped back in the oem grill inserts. Just like that, there was enough pressure to hold the mesh in place......
jmbnova: The lower grills, all I did was place the mesh grill in the opening and then just clipped back in the oem grill inserts. Just like that, there was enough pressure to hold the mesh in place......
 its finally here

Ryan Christopher
Joined: Jul 2005
Posts: 1,230
Likes: 5
From: Alabama
Looks good man.
I think I am going to need to try and work on wraping the center piece in some CF and using a epoxy coat on it. Haven't had much time to work on the car lately, but this will give me a good reason to order the vacuum bag system I have been wanting. If anything, I may be able to make a mold off of one and create my own out of cf!! HHHMMMM Ideas!!!! Great work
I think I am going to need to try and work on wraping the center piece in some CF and using a epoxy coat on it. Haven't had much time to work on the car lately, but this will give me a good reason to order the vacuum bag system I have been wanting. If anything, I may be able to make a mold off of one and create my own out of cf!! HHHMMMM Ideas!!!! Great work
Ryan Christopher
Joined: Jul 2005
Posts: 1,230
Likes: 5
From: Alabama
Originally Posted by PPLAPW
I actually was going to ask you about working with fiber since I knew you have worked with it.... but I just winged it...
B A N N E D
Joined: Apr 2006
Posts: 209
Likes: 0
From: chicago
Alright, I am not a negative person when it comes 2 people doing what they want with there own style but my own perspective on this project is taht the bottom grills look awesome, the top grill I don't like much @ all in my perspective, your taking away from your whole car, if your going to throw down 35k$ for a car, why are you going to change the most important thing that represents your car? But all in all, you did a very good job, I am justn ot a fan of taking out the most important representation of a new car.
How may I help you.....?

Joined: Aug 2005
Posts: 1,932
Likes: 10
From: Northern VA
Originally Posted by holybear
Alright, I am not a negative person when it comes 2 people doing what they want with there own style but my own perspective on this project is taht the bottom grills look awesome, the top grill I don't like much @ all in my perspective, your taking away from your whole car, if your going to throw down 35k$ for a car, why are you going to change the most important thing that represents your car? But all in all, you did a very good job, I am justn ot a fan of taking out the most important representation of a new car.
Look at me!!! I waste my money on dumb clothes like Abercrombie & Fitch!!! I am an attention Whore....
Takinig the "A" out of the car does not make it a misrepresentation of a $35k car... The most important thing that represents HIS car is making it HIS OWN... Not everyone elses...
When you are out of High School, you might begin to understand that name brands and merchandising "status symbols' are NOT what life is about...
Thread Starter
I'm in
Joined: Jan 2005
Posts: 2,213
Likes: 20
From: Oregon
To each his own. I have gotten many complements. People are now really looking at the car to see what it is. Since I debaged I have a the Aspec badge just laying around. So I mounted it on the grill left centered. I'll post pics later on.
Thanks nontheless, I liked how it was before but this makes it even more aggresive in my opinion.
Thanks nontheless, I liked how it was before but this makes it even more aggresive in my opinion.
 Now if only I had a supercharger...
 I need that supercharger..... wife just doesn't understand
B A N N E D
Joined: Apr 2006
Posts: 209
Likes: 0
From: chicago
lol, i did ask for any bashing. And btw, I am not @ ALL........ a prep that wears clothes 4 the name. You obviosly judge people b4 hand. I gave my comment on it, you buy a new car and take off the WHOLE front grill? I can see the debadging which I had done also, but the whole front grill? I like the look, but if u pay 35 grand, you want to atleast show that you actually paid that much and are able to, its class n luxerious is what the TL basically is, and a little sporty. Your taking the representation of that n throwing it away and having other people thinking its a decent car that someone just "pimped out", now ill admit im going to do alot of modifications to my car, just not this one. And I don't live my life by if theres A&F on my shirt. But good writeup and everything.
Thread Starter
I'm in
Joined: Jan 2005
Posts: 2,213
Likes: 20
From: Oregon
I should have done that just in case the worse happened. but it didn't. Be careful the inserts get extremely flimsy and need to be sanded, cut with out stressing it out a lot.
Man, did this thread convince you so fast?!?!
Man, did this thread convince you so fast?!?!
Three Wheelin'
Joined: Jul 2005
Posts: 1,435
Likes: 0
From: Central NJ
your method of doing the lower grills seems a loooot easier than the other one. I had tried the other one, and got the epoxy on, but the epoxy didnt' work too well. I love what you did w/ the car though. Really wanting to do the upper grill, but too scared i'd mess up.
How may I help you.....?
Joined: Aug 2005
Posts: 1,932
Likes: 10
From: Northern VA
Originally Posted by PPLAPW
I should have done that just in case the worse happened. but it didn't. Be careful the inserts get extremely flimsy and need to be sanded, cut with out stressing it out a lot.
Man, did this thread convince you so fast?!?!
Man, did this thread convince you so fast?!?!
been wanting to do something with that lower grill sometime soon.... im just going to figure it out now, then add it when i remove the bumper to clear my lights....
Tint The Windshield
Joined: Jun 2005
Posts: 618
Likes: 2
From: Gaithersburg, MD
Looks really good. I don't think I'd have to the balls to try it, but I'll find someone else that could do it faster than me and that probably has some more experience doing that kinda stuff. Maybe the guy that will black out my headlights will be able to do it for me ...
Please post pics with a farther stance from the car ... thanks!
Please post pics with a farther stance from the car ... thanks!
not vtech... VTEC!!!
Joined: Nov 2005
Posts: 1,128
Likes: 9
From: DC/MD/VA
It looks great!
I have a comment - make sure you get either galvanized steel mesh or aluminum mesh - the regular metal mesh will rust eventually. (stone will chip off the paint on the mesh, and you will get rust)
I did this on the A4, twice. So learn from my mistakes.
I have a comment - make sure you get either galvanized steel mesh or aluminum mesh - the regular metal mesh will rust eventually. (stone will chip off the paint on the mesh, and you will get rust)
I did this on the A4, twice. So learn from my mistakes.
not vtech... VTEC!!!
Joined: Nov 2005
Posts: 1,128
Likes: 9
From: DC/MD/VA
Originally Posted by holybear
lol, i did ask for any bashing. And btw, I am not @ ALL........ a prep that wears clothes 4 the name. You obviosly judge people b4 hand. I gave my comment on it, you buy a new car and take off the WHOLE front grill? I can see the debadging which I had done also, but the whole front grill? I like the look, but if u pay 35 grand, you want to atleast show that you actually paid that much and are able to, its class n luxerious is what the TL basically is, and a little sporty. Your taking the representation of that n throwing it away and having other people thinking its a decent car that someone just "pimped out", now ill admit im going to do alot of modifications to my car, just not this one. And I don't live my life by if theres A&F on my shirt. But good writeup and everything.
Thread Starter
I'm in
Joined: Jan 2005
Posts: 2,213
Likes: 20
From: Oregon
Yeah if your gonna do this make sure you are POSITIVE cause' once you cut that center bar thats it! Its not easy.
Also on what Kennyc said, very true. Mine is aluminum, but it chips with rocks which sucks but I touch it up here and there. If it get worse I'll have a shop paint it so it can hold off a lil' better. But for now I'm happy.
I also caught a dragon fly in my grill....... I'll post some pics that I took of it...
Also on what Kennyc said, very true. Mine is aluminum, but it chips with rocks which sucks but I touch it up here and there. If it get worse I'll have a shop paint it so it can hold off a lil' better. But for now I'm happy.
I also caught a dragon fly in my grill.......
I'll post some pics that I took of it...
tehLEGOman


Joined: Dec 2004
Posts: 10,067
Likes: 2,058
From: Charlotte, NC
Nice write up!
The modification is substantial for those with NBP TL's. Whenever I see NBP TL's on the road the grille being aluminum sticks out and doesn't look right.
Now that your grille is completely black, it cleans the entire front of the car up and makes it much more aggressive...or atleast in my opinion.
Very nice and congrats on the clean and successful install.
Has anyone else done this mod?


Advanced
Joined: Jan 2005
Posts: 85
Likes: 0
From: Tampa, FL
Originally Posted by Black_05_TL_6SP
Looks good man.
I think I am going to need to try and work on wraping the center piece in some CF and using a epoxy coat on it. Haven't had much time to work on the car lately, but this will give me a good reason to order the vacuum bag system I have been wanting. If anything, I may be able to make a mold off of one and create my own out of cf!! HHHMMMM Ideas!!!! Great work
I think I am going to need to try and work on wraping the center piece in some CF and using a epoxy coat on it. Haven't had much time to work on the car lately, but this will give me a good reason to order the vacuum bag system I have been wanting. If anything, I may be able to make a mold off of one and create my own out of cf!! HHHMMMM Ideas!!!! Great work
A carbon fiber piece would have similar look as her TSX but with a material that ties to the interior of the car.
Let us know if you make somthing.