
DIY: CAI insulation (prevent rubbing and vibration) noob proof
 05-03-2011, 12:08 AM
#1
Burning Brakes
Thread Starter
DIY: CAI insulation (prevent rubbing and vibration) noob proof
Alot of people with the 3G's both base and type S have rubbing and vibrating issues with their intakes. Both of these problems can cause serious issues for both the intake and the engine. After doing a long search and talking to several AZ members, i have come to the conclusion that no one has a reliable solution or everyone DGAF. After walking around home deopt for and hour and and half i came up with the perfect inexpensive solution....copper pipe insulation. its cheap, strong, durable, and best of all it withstands heat.
ONTO THE IMPORTANT MATTER
you will need........
-Copper pipe insulator (size depends on if you have a AEM V2 or not. I have a V2 so i choose a 1/2" insulator. if you have a thinner intake choose a thicker one. its found in the pluming section of Home Depot costs $1.64)
-a strong adhesive (i choose the loctite 200 wights spray adhesive found in the paint section)
-rubber gloves (optional)
sorry for the crappy pic but it looked good at the time on the LCD screen

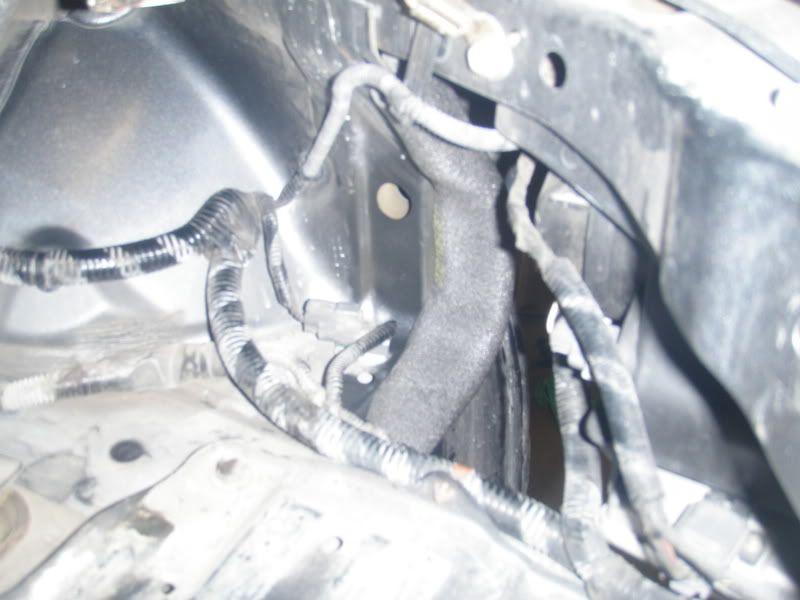
step one: wipe the painted metal surface of the car where the port is that leads from where the CAI filter rests and into the engine bay. it should be wiped down where that 90 degree bend is in the middle of the pic
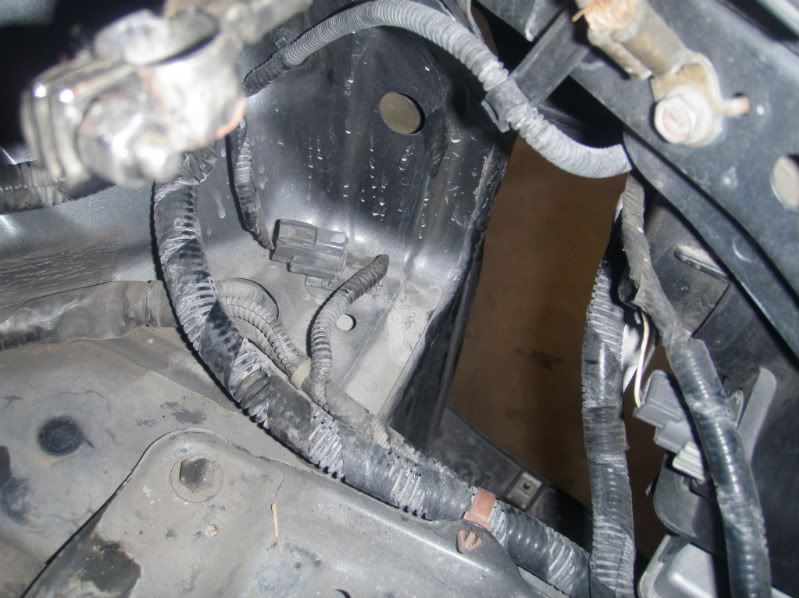
step two: take the whole piece of pipe insulator and fit it on the part of the car where it rubs the CAI going from the left and all the way up across the 90 degree bend and cut to size.
step three: spray the inside on the copper insulator and the edge with a generous amount of adhesive spray. this is where gloves are handy. quickly move to step four!!!
step four: attach insulator to car carefully and hold down for as long as your patience can let you. When the adhesive begins to dry it sticks even better so make sure you press down on every spot because the surface of the car is flat and the insulator is round. if and adhesive gets on the car wipe asap. dont bother getting a cleaning solution. you should have a microfiber towel handy in case it happens.

step five: install intake
should have a snug fit. you want to hear some squeaking when you feed the intake the into the engine bay. if still loose you can always glue on another layer of copper insulation as you should have plenty extra they are sold in 5 foot pieces
ONTO THE IMPORTANT MATTER
you will need........
-Copper pipe insulator (size depends on if you have a AEM V2 or not. I have a V2 so i choose a 1/2" insulator. if you have a thinner intake choose a thicker one. its found in the pluming section of Home Depot costs $1.64)
-a strong adhesive (i choose the loctite 200 wights spray adhesive found in the paint section)
-rubber gloves (optional)
sorry for the crappy pic but it looked good at the time on the LCD screen
step one: wipe the painted metal surface of the car where the port is that leads from where the CAI filter rests and into the engine bay. it should be wiped down where that 90 degree bend is in the middle of the pic
step two: take the whole piece of pipe insulator and fit it on the part of the car where it rubs the CAI going from the left and all the way up across the 90 degree bend and cut to size.
step three: spray the inside on the copper insulator and the edge with a generous amount of adhesive spray. this is where gloves are handy. quickly move to step four!!!
step four: attach insulator to car carefully and hold down for as long as your patience can let you. When the adhesive begins to dry it sticks even better so make sure you press down on every spot because the surface of the car is flat and the insulator is round. if and adhesive gets on the car wipe asap. dont bother getting a cleaning solution. you should have a microfiber towel handy in case it happens.
step five: install intake
should have a snug fit. you want to hear some squeaking when you feed the intake the into the engine bay. if still loose you can always glue on another layer of copper insulation as you should have plenty extra they are sold in 5 foot pieces
 05-03-2011, 01:08 AM
#2
Moderator
iTrader: (7)
uhhh...i dont have any rubbing issues. i went to walmart and bought a piece of padding that goes under chair leggings to prevent scratches. i bought a pack of 5 and shared it with my friends. the adhesive on it is strong and works VERY well. took me 30 seconds to pop the hood and slide it underneath the intake where it contacts the frame.
good DIY though.
good DIY though.
05-03-2011, 02:17 AM
#3
Burning Brakes
Thread Starter
Well after seeing some Members vibramount rails rip off i wanted to come up with something that would stop it from moving all together. I also belive that it shacking violently at high rpms can affect air flow. And thank you
05-05-2011, 11:35 PM
#5
Burning Brakes
Thread Starter

Thread
Thread Starter
Forum
Replies
Last Post
MrHeeltoe
1G TSX Tires, Wheels, & Suspension
20
02-23-2023 01:54 PM
MrHeeltoe
2G TSX Tires, Wheels & Suspension
3
09-29-2015 10:43 PM
MrHeeltoe
3G TL Tires, Wheels & Suspension
0
09-28-2015 05:43 PM