

*For those who've done Accord Fogs*
 04-17-2011, 10:14 AM
#1
Race Director
Thread Starter
iTrader: (8)
*For those who've done Accord Fogs*
Hey,
Just got my OEM Accord Fogs in and decided to give the mod a quick go.
The quick go ended up taking me hours, not even knowing how to put in the foglight housing.
Just wondering, where exactly do most people trim to get it to fit?
I've already started trimming the outside-upper corner, and the inside-upper corner.
I suppose I'm too chicken to grind some more off in case I mess up.
Thanks!

 04-17-2011, 10:57 AM
#3
Race Director
Thread Starter
iTrader: (8)
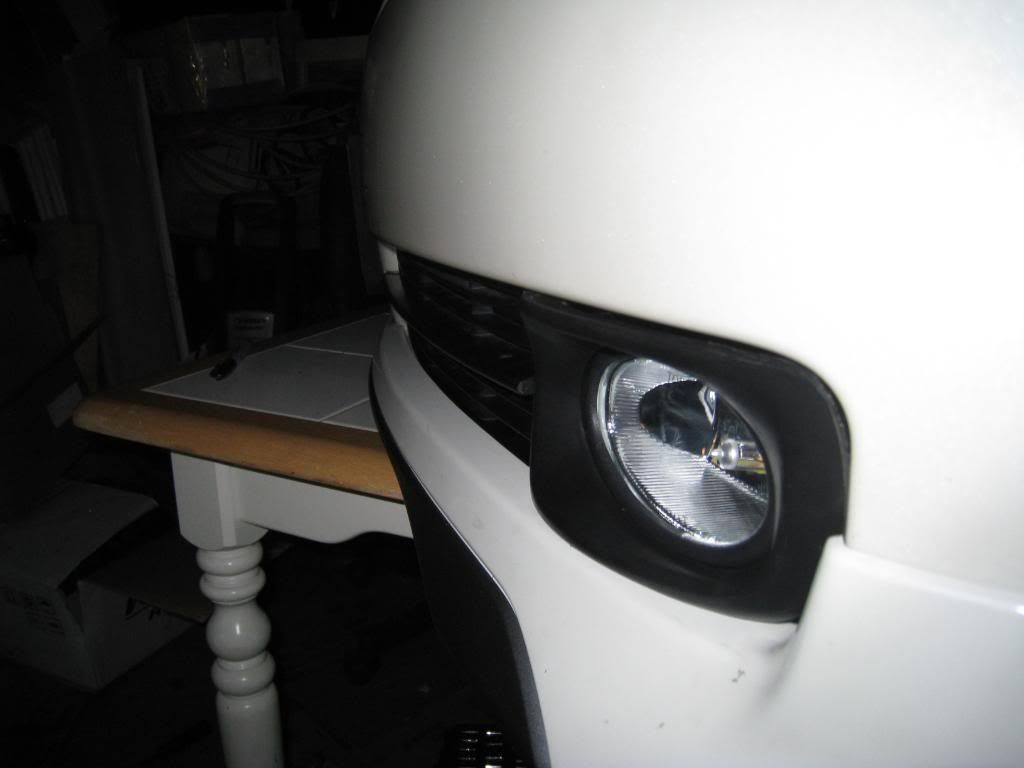
I'm just not sure where to grind down, though.
I mean, is the bottom supposed to be grinded down, or the top?
Right now I'm mainly focusing on making the housing fit inside the opening(up and down), then later I'll trim the sides (left and right).
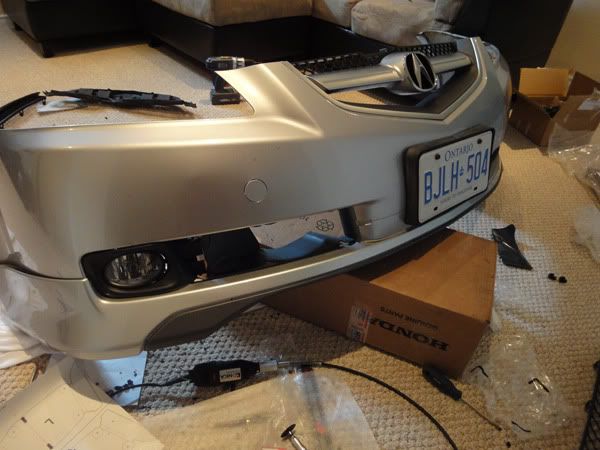
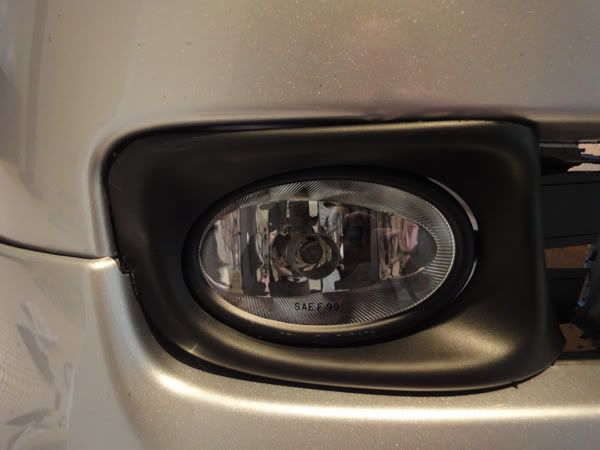
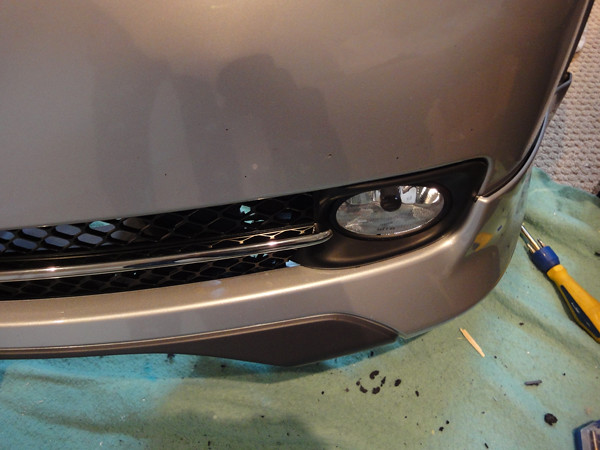
The bumper cut:
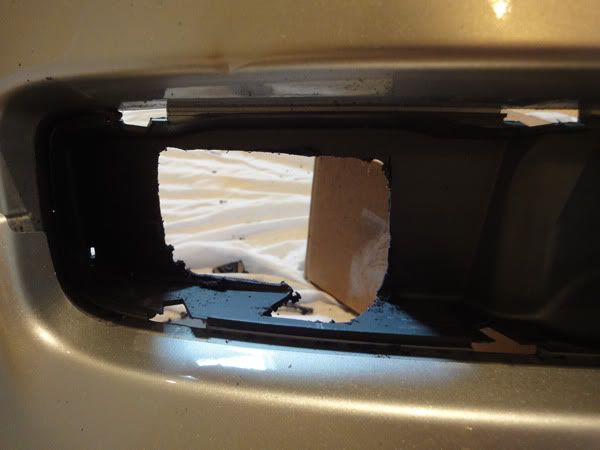
The headache:
 04-17-2011, 11:08 AM
#5
Omg i dealt with this nightmare, i put gorilla glue all through out the back and then i tapped it with heavy duty tape i belive this should hold for good, good luck brother, now the wiring shall be fun, i will try to look at peoples diy's but they hust havent made a clear enough wiring version imo
04-17-2011, 11:16 AM
#6
Fearless DIY Guy
iTrader: (2)
You're going to want to grind more of the section behind the grille area away to tuck the light back more. From there, remove the light and place your screws through the fog housing and the bumper...once you mounting holes are drilled, place the light back in to the housing, install the screws and enjoy.
04-17-2011, 12:35 PM
#7
Race Director
Thread Starter
iTrader: (8)
If I took off the lip and fit the fogs to the bumper, I'll have to do some MORE trimming after I add the lip on, so best have the lip on and trim according with the lip on LOL.
Omg i dealt with this nightmare, i put gorilla glue all through out the back and then i tapped it with heavy duty tape i belive this should hold for good, good luck brother, now the wiring shall be fun, i will try to look at peoples diy's but they hust havent made a clear enough wiring version imo
You're going to want to grind more of the section behind the grille area away to tuck the light back more. From there, remove the light and place your screws through the fog housing and the bumper...once you mounting holes are drilled, place the light back in to the housing, install the screws and enjoy.
It seems like I have to trim more of the housing though, too.
Do you trim the bottom of the housing or top?
Trending Topics
04-17-2011, 01:17 PM
#8
^I trimmed the top outter(towards outside of car) corner to get it flattened out and get a less angled side
The bumper part.... keep test fitting the fog and cut out whatever part of the bumper it touches.... there isnt an EXACT mounting spot for these... it IS a PITA to do.. so gotta be a lil creative when mounting the fogs lol hope this helps!
The bumper part.... keep test fitting the fog and cut out whatever part of the bumper it touches.... there isnt an EXACT mounting spot for these... it IS a PITA to do.. so gotta be a lil creative when mounting the fogs lol hope this helps!
 04-17-2011, 01:34 PM
#10
Race Director
Thread Starter
iTrader: (8)
Thanks =)
Is the outer corner the only thing you trimmed on the housing?
Is the outer corner the only thing you trimmed on the housing?
04-17-2011, 01:45 PM
#12
Race Director
Thread Starter
iTrader: (8)
I'll try it out =)
Something I noticed was the bottom outside curve is way rounder.
Did you do anything to it also?
I'm afraid my outside edge will be too short.
Last edited by guitarplayer16; 04-17-2011 at 01:48 PM.
04-17-2011, 02:18 PM
#14
Race Director
Thread Starter
iTrader: (8)
Ugh this is killing me.
I still can't even get the housing to actually sit nicely inside the opening.
Can anyone point out how big/where they cut the gray part behind the grill?
I still can't even get the housing to actually sit nicely inside the opening.
Can anyone point out how big/where they cut the gray part behind the grill?
04-17-2011, 02:55 PM
#15
Fearless DIY Guy
iTrader: (2)
If you're facing the backside of the bumper (as if you're in the driver seat), you can be agressive with the upper left hand corner (right for the passenger)...this should help level it out.
Keep up the confidence, man, it's tricky but you'll get it!
Keep up the confidence, man, it's tricky but you'll get it!


 04-17-2011, 05:26 PM
#19
Race Director
Thread Starter
iTrader: (8)
I'll keep working at it

I started this morning at like 10, and even now I'm still working on the one foglight.
Havn't even started the other side =(
Good thing there's the long weekend coming up.
Thanks for the pictures!
They'll definitely become helpful when I start my driver side =) (If I ever get there
 )
)Do you have any pictures of how you mounted them on the passenger side?
I think I'm at the point where I could just mount them and get them done...
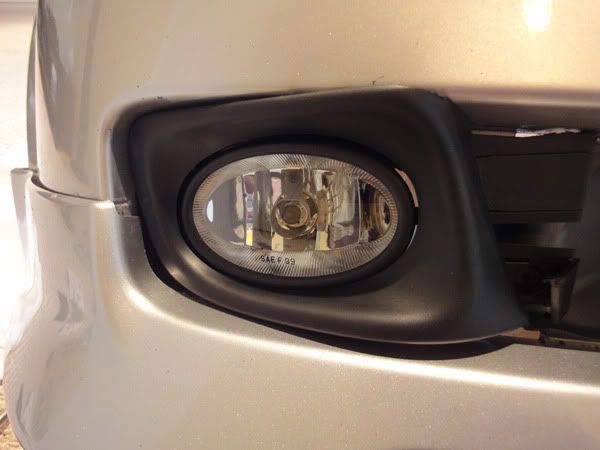
Does this look crooked or anything?
 04-17-2011, 05:40 PM
#21
Race Director
Thread Starter
iTrader: (8)
It's the only flaw and that's what I kept trying to do for like 5 hours! haha
Where I'm stuck at is, where should I trim to push that top inner side in more; the top, or the bottom?
What I suppose I'm "too worried" about is trimming down the top or bottom and it ends up showing on the outside =(
04-17-2011, 07:41 PM
#25
Race Director
Thread Starter
iTrader: (8)
Thanks =)
Same =)
I hope I can finish the whole thing by the end of the week.
04-22-2011, 04:39 PM
#26
Race Director
Thread Starter
iTrader: (8)
Today I started to work on them again.
I'd like to thank everyone in this thread that helped me out.
Without you guys, I would have probably gave up.
All I have to do is mount them to the bumper and wire them.
They're not mounted at all, so I hope you guys can help me with ideas to mount them.
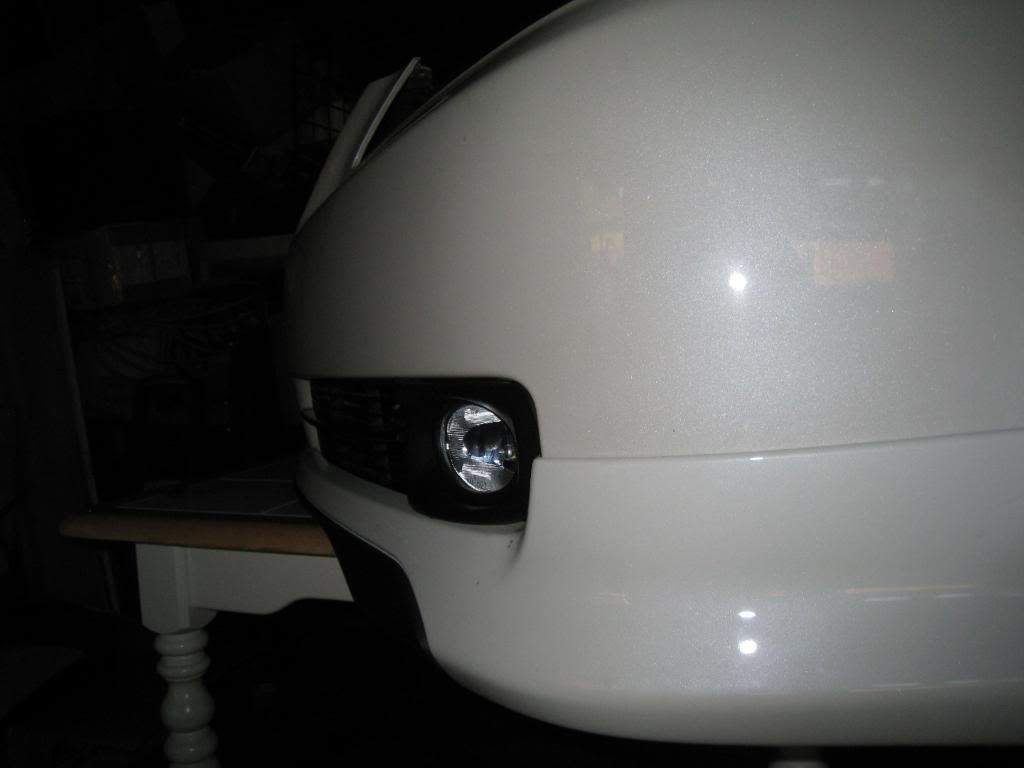
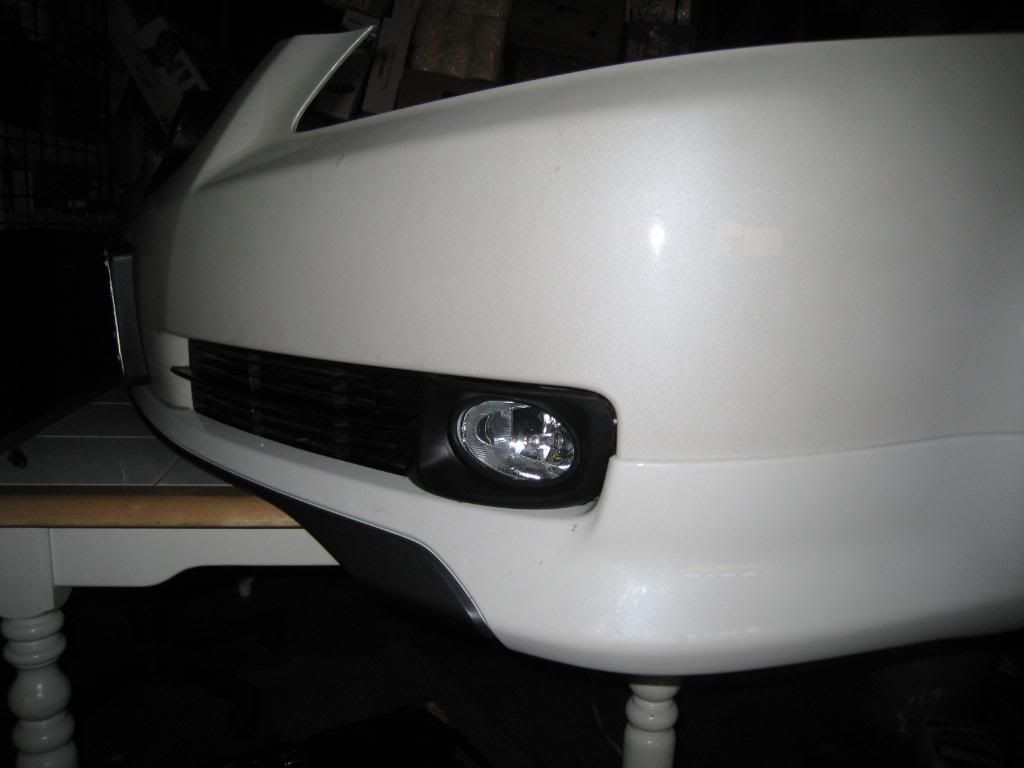
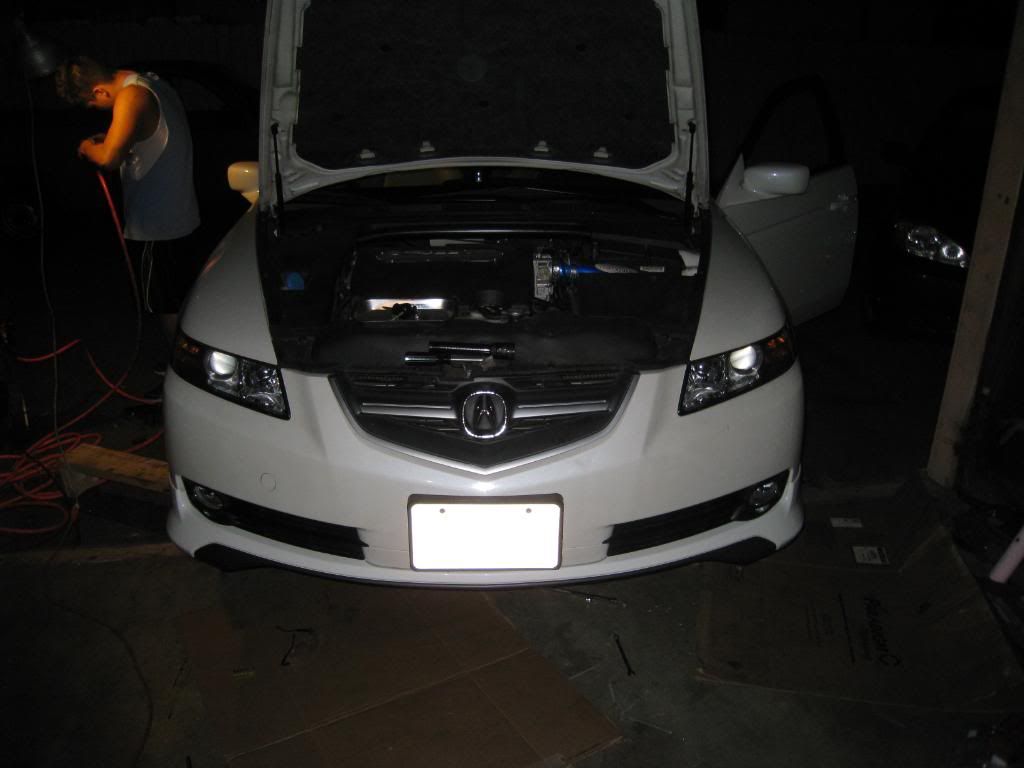
When I installed these, I tried to install them as close to the edge of the bumper as possible and facing in as much as possible.
(Just like how AckTL does it)
Oh, and I'll be sure to make a DIY for everything.


Where I need help: Mounting.


The beast who cleans up my mess:

Thanks for all the help guys!
I've been thinking of making my own custom brackets, but I'd like to hear what you guys think.
I'd like to thank everyone in this thread that helped me out.
Without you guys, I would have probably gave up.
All I have to do is mount them to the bumper and wire them.
They're not mounted at all, so I hope you guys can help me with ideas to mount them.
When I installed these, I tried to install them as close to the edge of the bumper as possible and facing in as much as possible.
(Just like how AckTL does it)
Oh, and I'll be sure to make a DIY for everything.
Where I need help: Mounting.
The beast who cleans up my mess:
Thanks for all the help guys!
I've been thinking of making my own custom brackets, but I'd like to hear what you guys think.
04-23-2011, 05:57 PM
#28
Race Director
Thread Starter
iTrader: (8)
I guess I'll have to hammer brackets and stuff.
I was wondering if just using gorilla glue and 3m double sided tape would work.
04-23-2011, 06:08 PM
#29

Wow, that looks amazing. Gosh I wish I could do this to my car. Or if someone was close enough I'd be willing to pay $$$ for someone to help.
Please do post a DIY later with step by step. I've never even used a dremel before.
What tools did you need to complete this?
Please do post a DIY later with step by step. I've never even used a dremel before.
What tools did you need to complete this?
04-23-2011, 06:23 PM
#30
Race Director
Thread Starter
iTrader: (8)
Wow, that looks amazing. Gosh I wish I could do this to my car. Or if someone was close enough I'd be willing to pay $$$ for someone to help.
Please do post a DIY later with step by step. I've never even used a dremel before.
What tools did you need to complete this?
Please do post a DIY later with step by step. I've never even used a dremel before.
What tools did you need to complete this?
I took lots of pictures so I plan on elaborating how I did this in the DIY.
To be honest, this was my first time ever using a dremel.
To do this, all I used was a dremel (with the sanding attachment, and cutting attachment), some screwdrivers, 3M mounting tape (if you have the A-Spec front lip), and LOTS of patience and courage.
I still havn't decided what I'll do yet for the mounting of the fogs, so I can't really explain what's needed there =(
I plan on using black silicone to seal everything up nicely after I mount them too.
I almost gave up trying to just fit the fogs (you can tell by my whining in this thread haha). The lower grills weren't so bad to cut.
04-24-2011, 12:11 PM
#32
Race Director
Thread Starter
iTrader: (8)

 04-24-2011, 04:26 PM
#34
Race Director
Thread Starter
iTrader: (8)
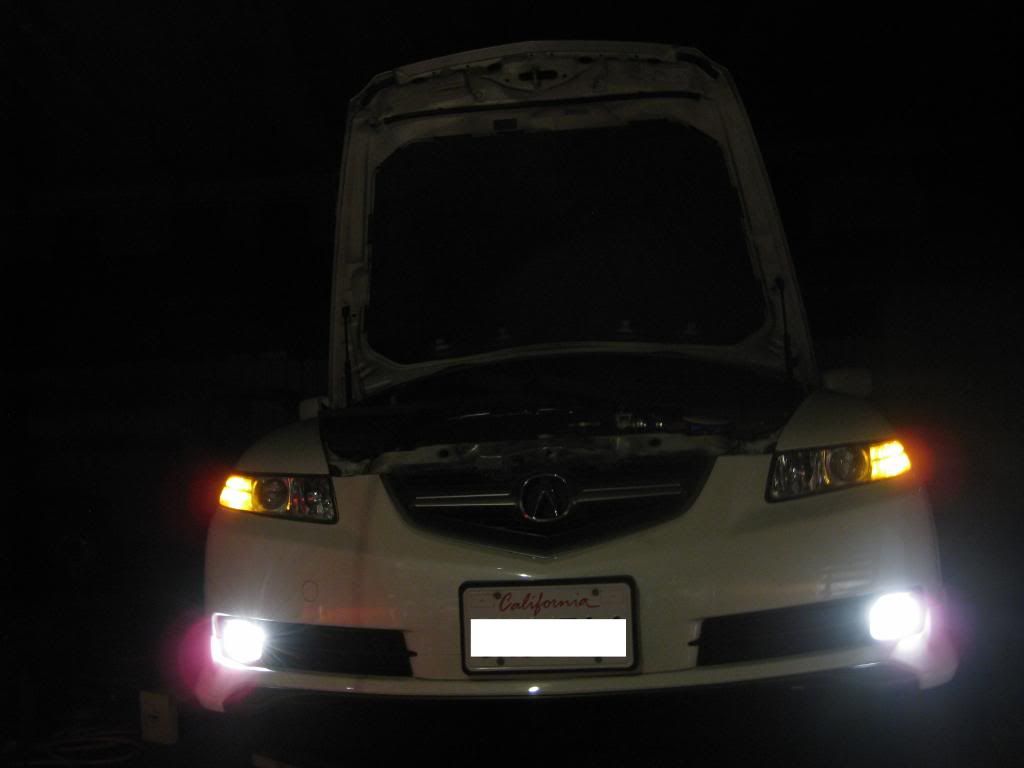
Good news - Everything is mounted on the bumper, and ready to go back on the car.
Just need to wire them up and I'm done =)
04-24-2011, 04:27 PM
#35
Wiring is the easy part lol
04-24-2011, 04:56 PM
#36
Race Director
Thread Starter
iTrader: (8)
04-24-2011, 05:13 PM
#37
I didnt use the accord switch, i went and got a switch from autozone. Cant rememebr if they have same backing.
I just wire it from the battery to the switch, switch to the foglight, and grounded it too. U shouldnt have to buy anything besides a wire connector to the battery if you do it this way
I just wire it from the battery to the switch, switch to the foglight, and grounded it too. U shouldnt have to buy anything besides a wire connector to the battery if you do it this way
04-24-2011, 05:51 PM
#38
Race Director
Thread Starter
iTrader: (8)
I didnt use the accord switch, i went and got a switch from autozone. Cant rememebr if they have same backing.
I just wire it from the battery to the switch, switch to the foglight, and grounded it too. U shouldnt have to buy anything besides a wire connector to the battery if you do it this way
I just wire it from the battery to the switch, switch to the foglight, and grounded it too. U shouldnt have to buy anything besides a wire connector to the battery if you do it this way
I think I'm going to get the power from the fuse box.
04-24-2011, 06:00 PM
#39
Ps...for permanent mounting...you can run two big regular screws through those two little doors the pop open on the front of the fog assembly...for directing, you can put a screw the through the sides/bottom of the bumper that basically screw and hit the fog housing to hold in place and point. That's what I did...worked like a charm. I have them aimed pretty far down now so the glare doesn't cross over my low beam cutoff.
Hopefully my wiring PM helps
Hopefully my wiring PM helps
04-24-2011, 10:49 PM
#40
