Greatness in the making... Acarlos33 build thread

Thread Tools
 
Search this Thread
 
Old 08-21-2012, 09:26 PM
  #121  
Instructor
Thread Starter
 
acarlos33's Avatar
 
Join Date: Jun 2012
Location: Miami
Posts: 183
Received 6 Likes on 6 Posts
Old 08-21-2012, 09:27 PM
  #122  
Instructor
Thread Starter
 
acarlos33's Avatar
 
Join Date: Jun 2012
Location: Miami
Posts: 183
Received 6 Likes on 6 Posts
Old 08-21-2012, 09:28 PM
  #123  
Instructor
Thread Starter
 
acarlos33's Avatar
 
Join Date: Jun 2012
Location: Miami
Posts: 183
Received 6 Likes on 6 Posts
disconnect your high beam. low beam. turning signal, and a green clip in the bottom that keeps the cables in place
Old 08-21-2012, 09:29 PM
  #124  
Instructor
Thread Starter
 
acarlos33's Avatar
 
Join Date: Jun 2012
Location: Miami
Posts: 183
Received 6 Likes on 6 Posts
Old 08-21-2012, 09:34 PM
  #125  
Instructor
Thread Starter
 
acarlos33's Avatar
 
Join Date: Jun 2012
Location: Miami
Posts: 183
Received 6 Likes on 6 Posts
so you guys are probably wondering, why did he take out the headlight?? lol
Old 08-21-2012, 09:34 PM
  #126  
Instructor
Thread Starter
 
acarlos33's Avatar
 
Join Date: Jun 2012
Location: Miami
Posts: 183
Received 6 Likes on 6 Posts
i am going to show you how to make your headlights clear aka reflector removal, with out an oven
Old 08-21-2012, 09:37 PM
  #127  
Instructor
Thread Starter
 
acarlos33's Avatar
 
Join Date: Jun 2012
Location: Miami
Posts: 183
Received 6 Likes on 6 Posts
all you need are a couple tools.

a heat gun.

some mechanic gloves.

Philips screw driver
Old 08-21-2012, 09:37 PM
  #128  
Instructor
Thread Starter
 
acarlos33's Avatar
 
Join Date: Jun 2012
Location: Miami
Posts: 183
Received 6 Likes on 6 Posts
once both headlights are off

Old 08-21-2012, 09:42 PM
  #129  
Instructor
Thread Starter
 
acarlos33's Avatar
 
Join Date: Jun 2012
Location: Miami
Posts: 183
Received 6 Likes on 6 Posts
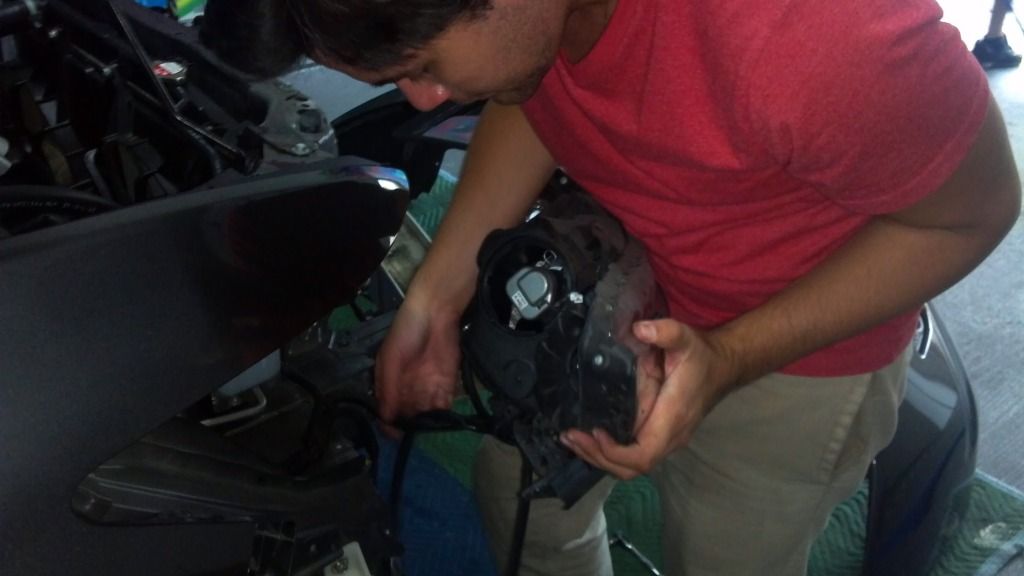
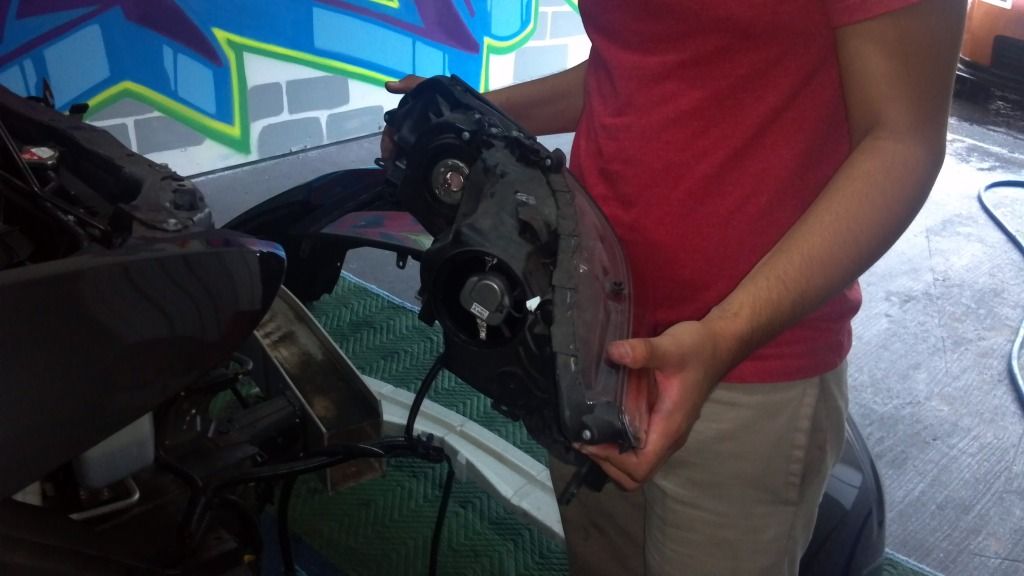
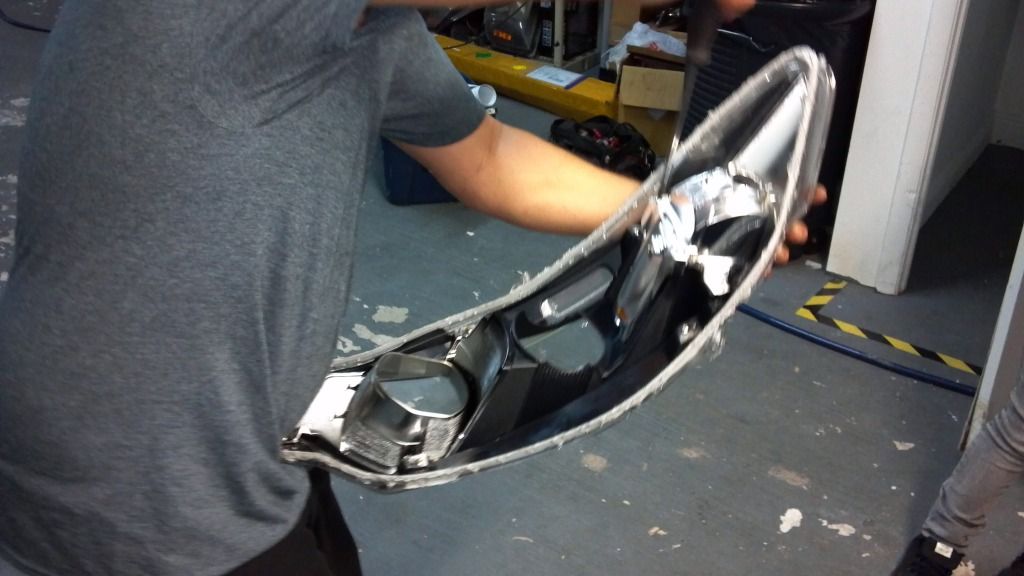
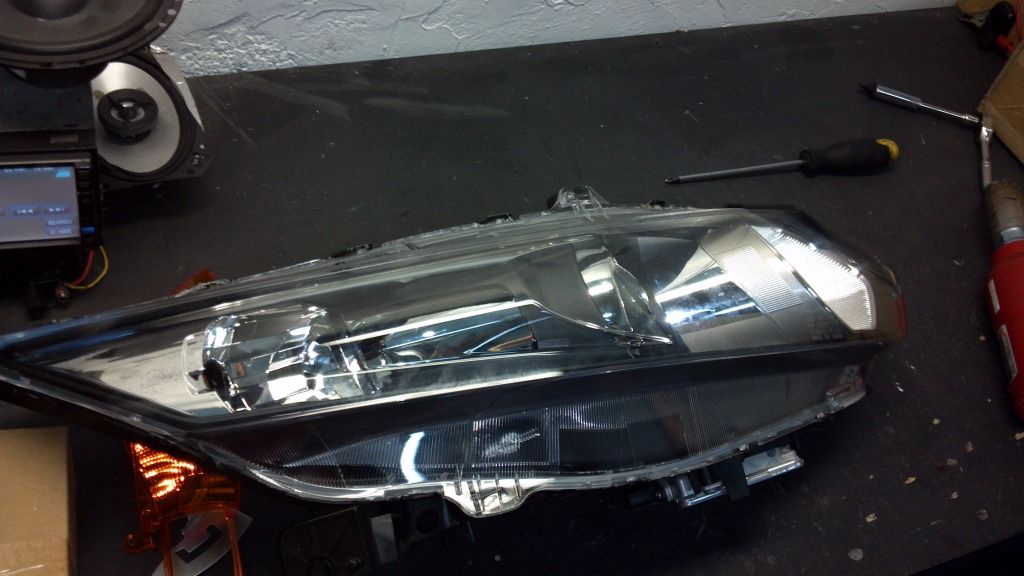
around the bezel and the housing of the headlight, start running the heat gun to begin warming up the compound that holds both piece in place.
do not hold the heat gun on the same spot for too much time, it can melt of your tabs or even warp your bezel
Old 08-21-2012, 09:43 PM
  #130  
Instructor
Thread Starter
 
acarlos33's Avatar
 
Join Date: Jun 2012
Location: Miami
Posts: 183
Received 6 Likes on 6 Posts
this is what your headlight bezel should look like
Old 08-21-2012, 09:43 PM
  #131  
Instructor
Thread Starter
 
acarlos33's Avatar
 
Join Date: Jun 2012
Location: Miami
Posts: 183
Received 6 Likes on 6 Posts
Old 08-21-2012, 09:44 PM
  #132  
Instructor
Thread Starter
 
acarlos33's Avatar
 
Join Date: Jun 2012
Location: Miami
Posts: 183
Received 6 Likes on 6 Posts
avoid touching the inner portion of the lens(bezel). the grease from your fingers will stay stuck on the lens and will show when your lights are on
Old 08-21-2012, 09:45 PM
  #133  
Instructor
Thread Starter
 
acarlos33's Avatar
 
Join Date: Jun 2012
Location: Miami
Posts: 183
Received 6 Likes on 6 Posts
the projector is held by the rear portion of the headlight

Old 08-21-2012, 09:45 PM
  #134  
Instructor
Thread Starter
 
acarlos33's Avatar
 
Join Date: Jun 2012
Location: Miami
Posts: 183
Received 6 Likes on 6 Posts
Old 08-21-2012, 09:48 PM
  #135  
Instructor
Thread Starter
 
acarlos33's Avatar
 
Join Date: Jun 2012
Location: Miami
Posts: 183
Received 6 Likes on 6 Posts
remove the reflectors by unscrewing the screws behind the middle portion of the headlight. 3 pictures above
Old 08-21-2012, 09:48 PM
  #136  
Instructor
Thread Starter
 
acarlos33's Avatar
 
Join Date: Jun 2012
Location: Miami
Posts: 183
Received 6 Likes on 6 Posts
once done. take out the reflectors and now reverse the process
Old 08-21-2012, 09:49 PM
  #137  
Instructor
Thread Starter
 
acarlos33's Avatar
 
Join Date: Jun 2012
Location: Miami
Posts: 183
Received 6 Likes on 6 Posts
screw back your headlight together. add a bit of fresh adhesive and heat it up a bit with the heat gun....

Old 08-21-2012, 09:50 PM
  #138  
Instructor
Thread Starter
 
acarlos33's Avatar
 
Join Date: Jun 2012
Location: Miami
Posts: 183
Received 6 Likes on 6 Posts
Old 08-21-2012, 09:51 PM
  #139  
Instructor
Thread Starter
 
acarlos33's Avatar
 
Join Date: Jun 2012
Location: Miami
Posts: 183
Received 6 Likes on 6 Posts
put them back on your car

Old 08-21-2012, 09:55 PM
  #140  
Instructor
Thread Starter
 
acarlos33's Avatar
 
Join Date: Jun 2012
Location: Miami
Posts: 183
Received 6 Likes on 6 Posts
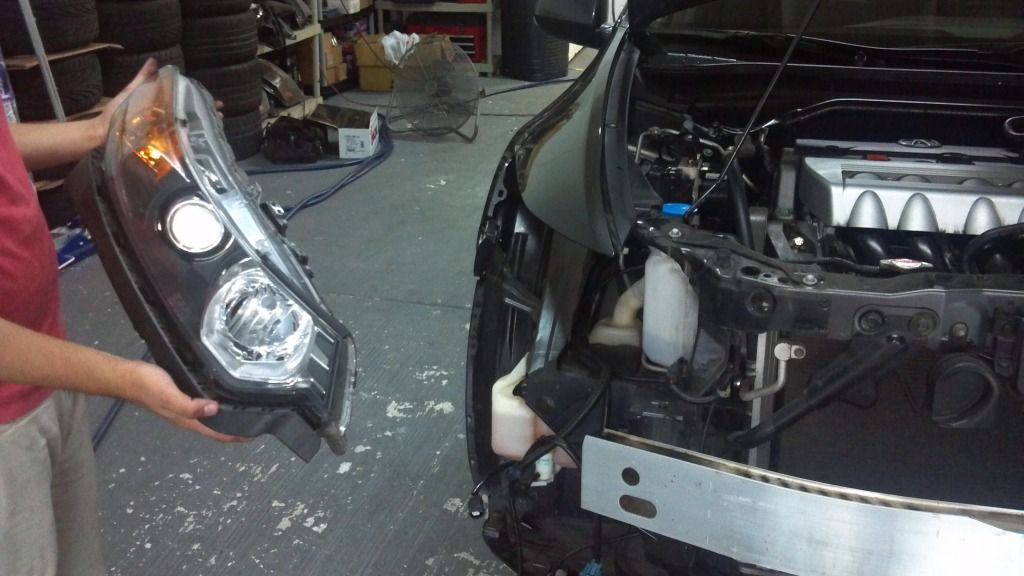
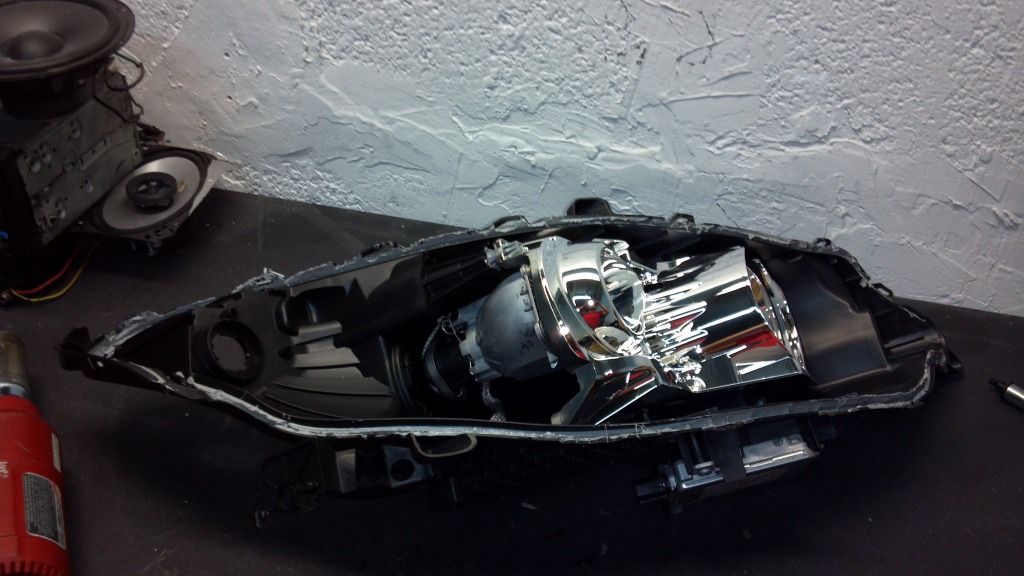
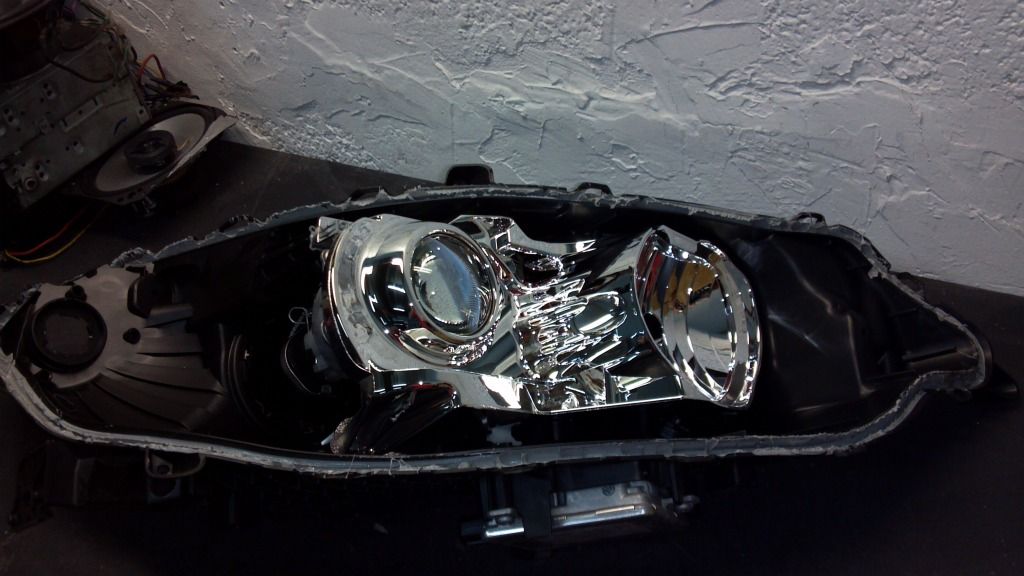
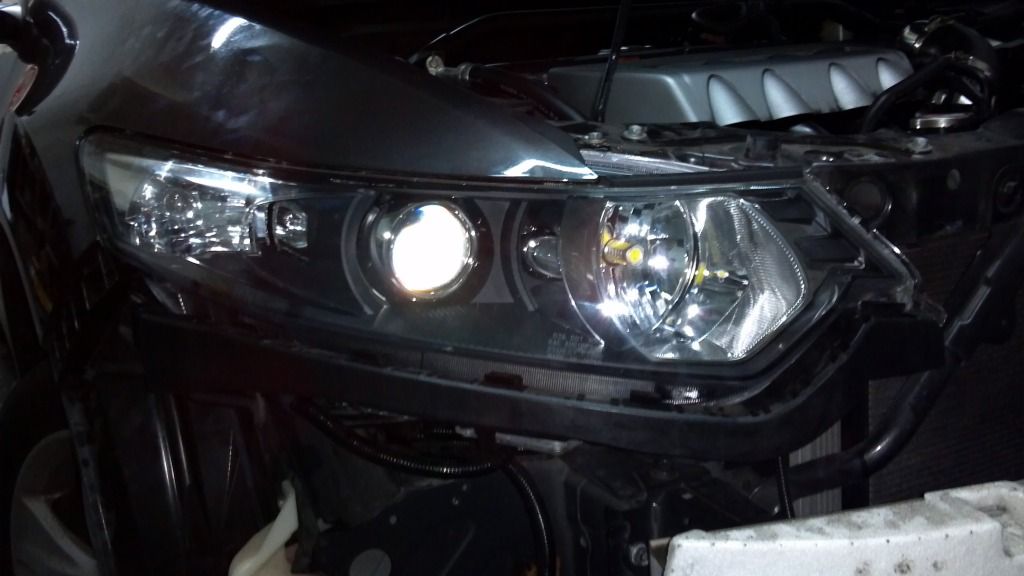
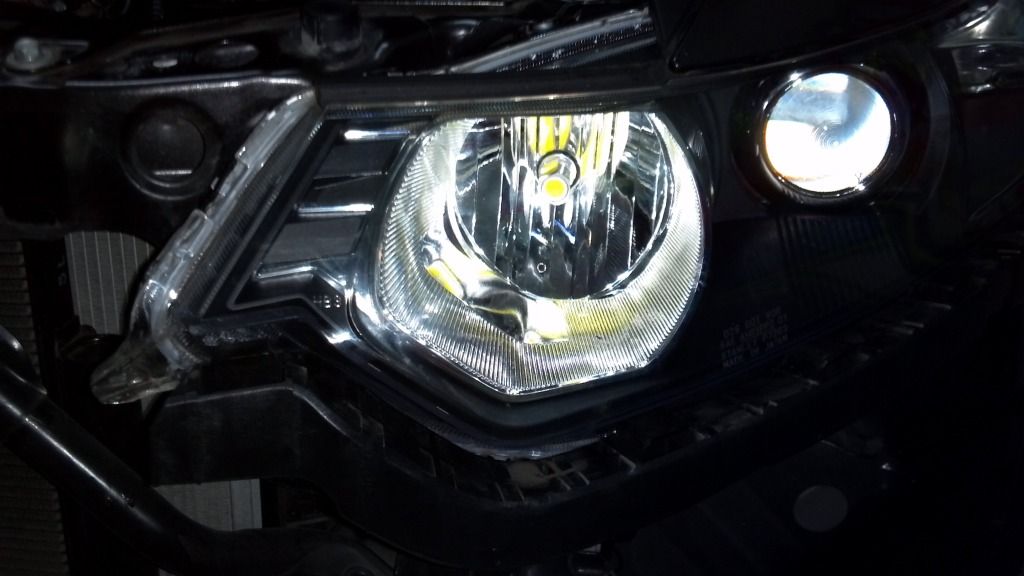
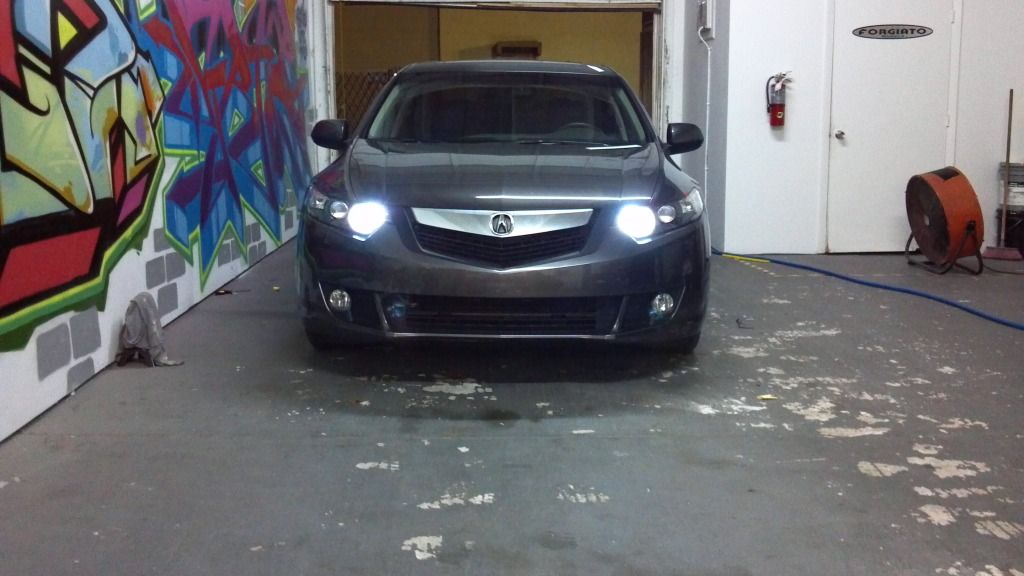
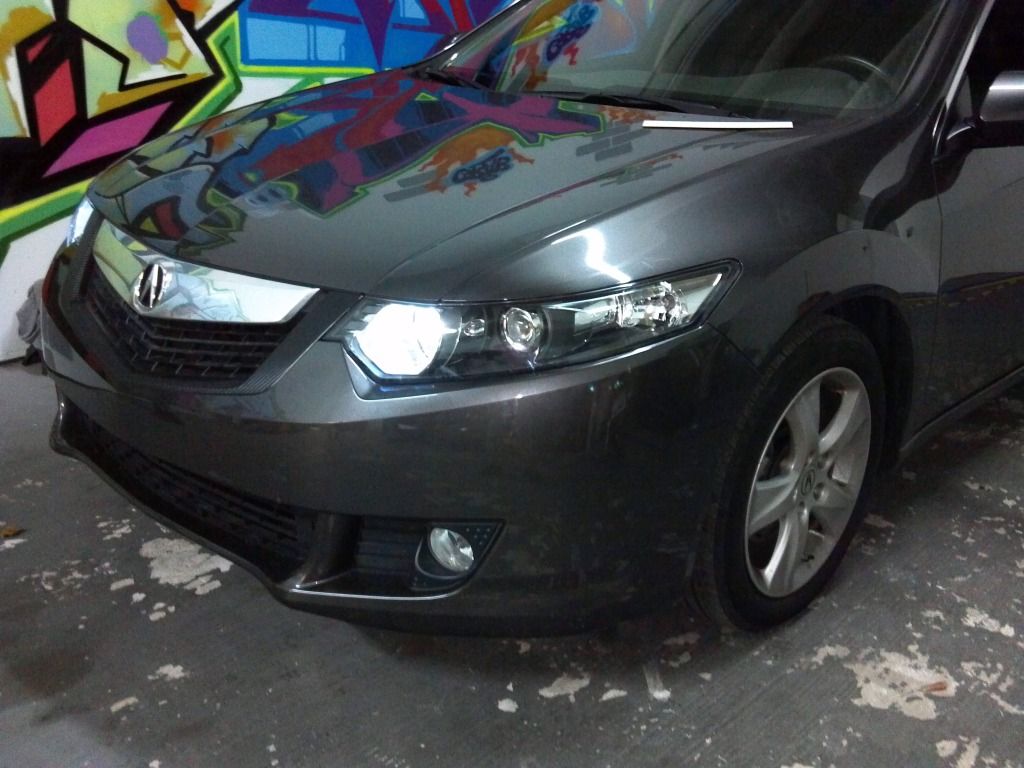
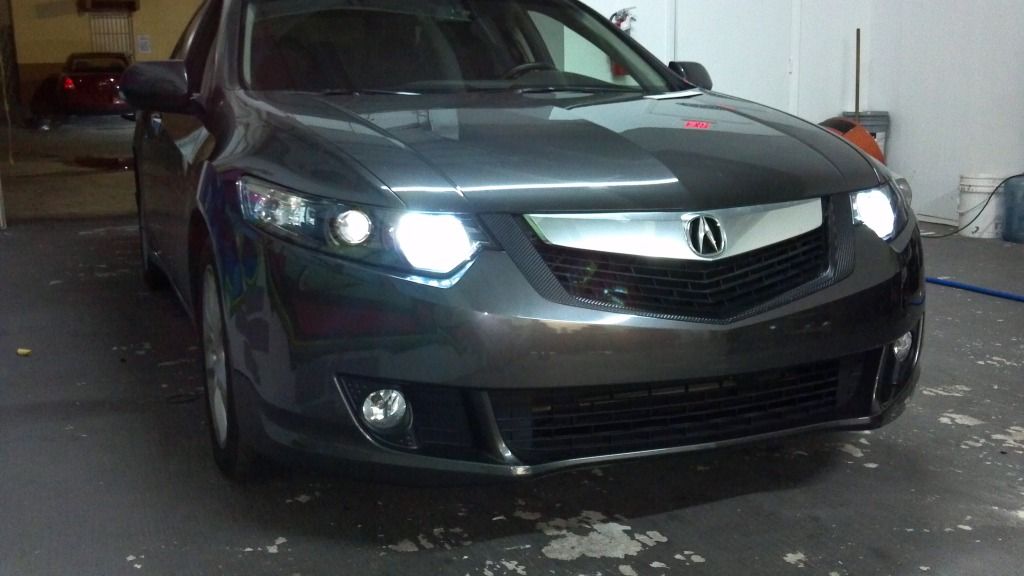
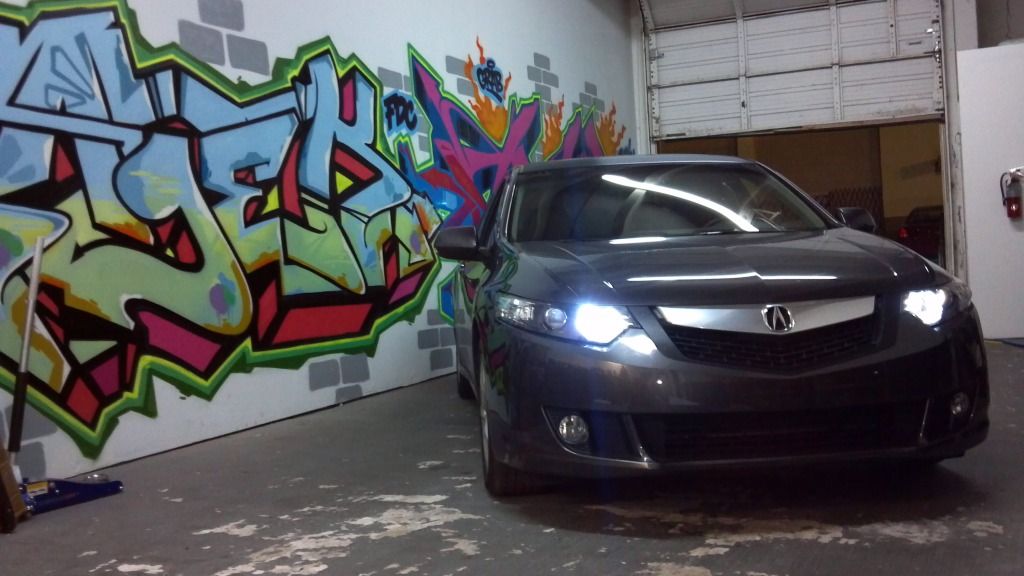
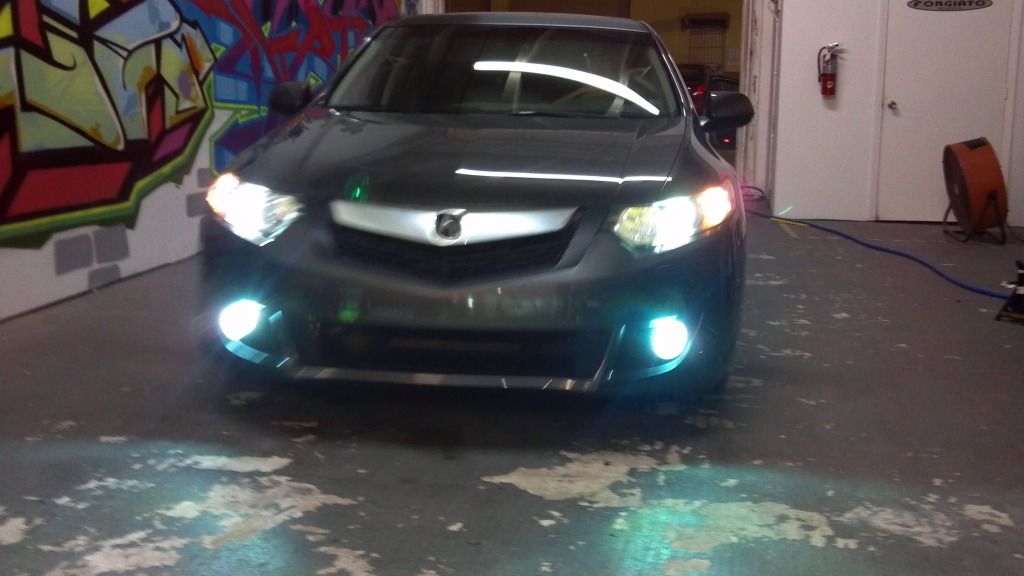
as you can see above, i added some SMD bulbs for the DRL with a HIGH beam feature as well. it was a last minute custom built bulb. how you ask?? well we got the base of a 9005 bulb, chopped off the actual bulb portion and soldered on a SMD bulb we had laying around. unfortunately we dont have any pictures to show the process. the bulb is about 1.5 inches in the length with 4 sides and a SMD on the tip too
Old 08-21-2012, 09:56 PM
  #141  
Instructor
Thread Starter
 
acarlos33's Avatar
 
Join Date: Jun 2012
Location: Miami
Posts: 183
Received 6 Likes on 6 Posts
Old 08-21-2012, 09:56 PM
  #142  
Instructor
Thread Starter
 
acarlos33's Avatar
 
Join Date: Jun 2012
Location: Miami
Posts: 183
Received 6 Likes on 6 Posts
Old 08-21-2012, 09:57 PM
  #143  
Instructor
Thread Starter
 
acarlos33's Avatar
 
Join Date: Jun 2012
Location: Miami
Posts: 183
Received 6 Likes on 6 Posts
after putting everything back together here is what it looks like. regular DRL not with high beam on
Old 08-21-2012, 09:57 PM
  #144  
Instructor
Thread Starter
 
acarlos33's Avatar
 
Join Date: Jun 2012
Location: Miami
Posts: 183
Received 6 Likes on 6 Posts
Old 08-21-2012, 09:58 PM
  #145  
Instructor
Thread Starter
 
acarlos33's Avatar
 
Join Date: Jun 2012
Location: Miami
Posts: 183
Received 6 Likes on 6 Posts
Old 08-21-2012, 09:58 PM
  #146  
Instructor
Thread Starter
 
acarlos33's Avatar
 
Join Date: Jun 2012
Location: Miami
Posts: 183
Received 6 Likes on 6 Posts
Old 08-21-2012, 09:59 PM
  #147  
Instructor
Thread Starter
 
acarlos33's Avatar
 
Join Date: Jun 2012
Location: Miami
Posts: 183
Received 6 Likes on 6 Posts
while at it, i also changed the low beam and fogs to 6k

Old 08-21-2012, 10:00 PM
  #148  
Instructor
Thread Starter
 
acarlos33's Avatar
 
Join Date: Jun 2012
Location: Miami
Posts: 183
Received 6 Likes on 6 Posts
the picture above looks like crap. a better photo shoot will be happening this week
Old 08-21-2012, 10:01 PM
  #149  
Instructor
Thread Starter
 
acarlos33's Avatar
 
Join Date: Jun 2012
Location: Miami
Posts: 183
Received 6 Likes on 6 Posts
a couple other things this weekend. pretty straight forward install....

Old 08-21-2012, 10:01 PM
  #150  
Instructor
Thread Starter
 
acarlos33's Avatar
 
Join Date: Jun 2012
Location: Miami
Posts: 183
Received 6 Likes on 6 Posts
Old 08-21-2012, 10:02 PM
  #151  
Instructor
Thread Starter
 
acarlos33's Avatar
 
Join Date: Jun 2012
Location: Miami
Posts: 183
Received 6 Likes on 6 Posts
Old 08-21-2012, 10:02 PM
  #152  
Instructor
Thread Starter
 
acarlos33's Avatar
 
Join Date: Jun 2012
Location: Miami
Posts: 183
Received 6 Likes on 6 Posts
i also did the resonator delete. ill post those pictures tomorrow
Old 08-21-2012, 10:04 PM
  #153  
Instructor
Thread Starter
 
acarlos33's Avatar
 
Join Date: Jun 2012
Location: Miami
Posts: 183
Received 6 Likes on 6 Posts
coilovers and wheel go on later on this week too
Old 08-21-2012, 10:45 PM
  #154  
Drifting
 
Italiano's Avatar
 
Join Date: Jul 2008
Location: North Carolina
Posts: 3,432
Received 486 Likes on 371 Posts
Do work....
The following users liked this post:
acarlos33 (08-22-2012)
Old 08-22-2012, 02:05 PM
  #155  
SeeYou2Crew #2
 
ed_423's Avatar
 
Join Date: Mar 2009
Location: Socal 626
Age: 32
Posts: 8,574
Received 825 Likes on 636 Posts
Looking good bro
The following users liked this post:
acarlos33 (08-22-2012)
Old 08-22-2012, 02:35 PM
  #156  
Drifting
 
iSeeYouTwo's Avatar
 
Join Date: Jun 2012
Location: City of Champs, MA
Age: 33
Posts: 2,969
Received 657 Likes on 478 Posts
Did you have to make so many seperate posts? Lol

Looking good...
The following users liked this post:
acarlos33 (08-22-2012)
Old 08-22-2012, 03:17 PM
  #157  
Pro
 
HondoGermany's Avatar
 
Join Date: Jul 2010
Location: Germany
Age: 60
Posts: 740
Received 140 Likes on 115 Posts
Very good Job,
we did it with a heatgun, too, on my car, my oven was to small for the headlight!LOL
The following users liked this post:
acarlos33 (08-22-2012)
Old 08-22-2012, 04:08 PM
  #158  
Burning Brakes
iTrader: (1)
 
Grigio09's Avatar
 
Join Date: Nov 2011
Age: 42
Posts: 764
Likes: 0
Received 103 Likes on 89 Posts
Awesome bro
The following users liked this post:
acarlos33 (08-22-2012)
Old 08-22-2012, 05:58 PM
  #159  
Instructor
Thread Starter
 
acarlos33's Avatar
 
Join Date: Jun 2012
Location: Miami
Posts: 183
Received 6 Likes on 6 Posts
Originally Posted by iSeeYouTwo
Did you have to make so many seperate posts? Lol

Looking good...

more points lol
Old 08-22-2012, 05:59 PM
  #160  
Instructor
Thread Starter
 
acarlos33's Avatar
 
Join Date: Jun 2012
Location: Miami
Posts: 183
Received 6 Likes on 6 Posts
Originally Posted by HondoGermany
Very good Job,
we did it with a heatgun, too, on my car, my oven was to small for the headlight!LOL
lol we don't have an oven at the garage so heat gun it is


Quick Reply: Greatness in the making... Acarlos33 build thread


All times are GMT -5. The time now is 01:54 PM.