throttle cable adjustment after p2r install on tlp
 10-05-2008, 06:30 PM
#1
bringin lead
Thread Starter
throttle cable adjustment after p2r install on tlp
alright, so i've searched and was not able to find an answer. long story short, i installed a p2r tb spacer, cleaned the plenum, manifold, egr, iacv, and tb and now i need to adjust my throttle cable and not sure how to know if i've done it right. i forgot to mark it clearly before i loosened it up (dumbass!!).........the cable is adjusted much further out (towards the driver side) than before (to maintain the idle rpm), but i still have a rough/inconsistent idle. the cruise control cable has not been tested yet, so it may need adjustment also.
can anybody help a brother out?
can anybody help a brother out?
 10-05-2008, 09:53 PM
#2

it simple, and I am going to assume you lubed the cables inside while they were off?!
Deep Creep- wd or silicone lube all work
the cables should not have ANY tension on them,
approx 1/2 inch of easy push on the cable with finger before it moves the throttle
Its very important the TB air plate is closed at idle- a tight cable will keep it slightly open and mess with the idle control
After confirming it closes, do a full throttle inspection (engine off-helper pushes pedal to floor) of the TB plate- it should be dead level for max airflow
If its not- the cable is probably too loose
A little freeplay is good
It wouldnt matter where it was before- the P2R is longer by 3/4 of an inch- that should be a hint how much farther the cable needs to be retracted from the old wear marks on the bolt
10-05-2008, 09:56 PM
#3
I am also assuming you cleaned the TB plate as part of the overall process?
so its free of grunge on the pin and plate edges
for others- make sure you clean and lube the throttle cable mechanism-spring return on the outside of the TB
It gets gunked up even with the engine cover in place!- road dust gets on the grease which gets stick instead of smooth
so its free of grunge on the pin and plate edges
for others- make sure you clean and lube the throttle cable mechanism-spring return on the outside of the TB
It gets gunked up even with the engine cover in place!- road dust gets on the grease which gets stick instead of smooth
10-06-2008, 11:37 AM
#5
recheck all your work- thats a lot of bolts to get back on spec torque!
and the wire connectors at the throttle are correct?
Call Josh- he knows everything about what he sells and can tell you - then you tell us!
did you google p0505?
and the wire connectors at the throttle are correct?
Call Josh- he knows everything about what he sells and can tell you - then you tell us!
did you google p0505?
10-06-2008, 02:13 PM
#7
then your cables are not adjusted properly
a change of 3/4" occurs with the P2r correct- thats how thick it is?
You should be able to push on the cables with a thumb pointed down- a gentle push should give about 1/2 inch of freeplay in the cable before it moves the throttle
Then you also check for full open of the air plate inside the TB, when the pedal is a full, is the air plate level? if not- more adjusting needed
It should have play so it does not pull the car off the normal idle system
Trending Topics
10-06-2008, 10:49 PM
#9
bringin lead
Thread Starter
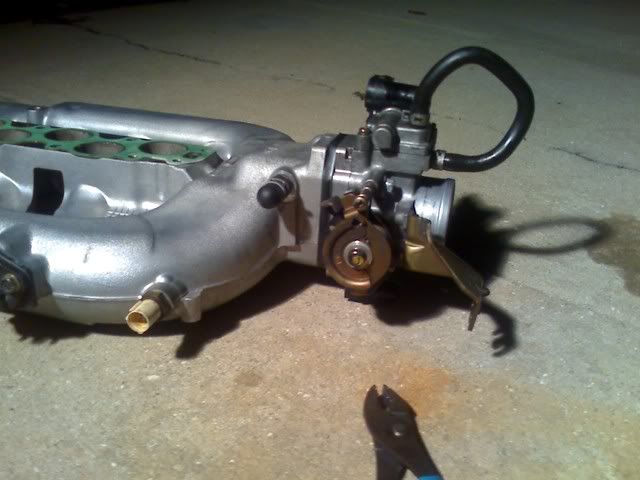
here's a photo courtesy of 6MTUA5 (NOT MY CAR - THIS IS A 1999) to show you what i mean...bracket and spring hook are upside down facing the camera:
 10-07-2008, 11:19 AM
#11
ahhh my 01 has the cable retaining bracket as a seperate item a few inches away- thats where I measure the freeplay at
You guys may need a bit tighter cable tension- 1/4 inch?-
sorry I was unaware of the differances in years
Not an acura tech~ just work on my car
You guys may need a bit tighter cable tension- 1/4 inch?-
sorry I was unaware of the differances in years
Not an acura tech~ just work on my car
10-07-2008, 03:53 PM
#13
sometimes I learn that I was WRONG~! yikes bummer
our cable systems are the same- I just checked my car and light finger pressure should depress the cable and just a little more finger pressure will move the throttle mechanism
sorry to those who got confused, I also know a pint is 16 oz now too~
our cable systems are the same- I just checked my car and light finger pressure should depress the cable and just a little more finger pressure will move the throttle mechanism
sorry to those who got confused, I also know a pint is 16 oz now too~
10-07-2008, 10:09 PM
#14
bringin lead
Thread Starter
haha - figured out the problem. it was an easy and logical fix once it was identified. i'm not quite 100% done, but close. i ended up bypassing the coolant lines in the tb, but plan on going back this weekend when i have more time and daylight to reverse the bypass.
throttle cable is now adjusted and seems to be working fine. thanks all for your help!
throttle cable is now adjusted and seems to be working fine. thanks all for your help!
10-08-2008, 04:41 AM
#15
note-- his fix was getting p2r to send the CORRECT LENGTH bolts-(or go to parts store) that are needed to install their product as it sits farther out-
needs longer bolts or massive air leak will occur - as demostrated in the above text
close but not long enough, ooops
the old wrong parts bag of bolts in the box trick~
needs longer bolts or massive air leak will occur - as demostrated in the above text
close but not long enough, ooops
the old wrong parts bag of bolts in the box trick~
10-08-2008, 05:23 AM
#17
they sent wrong length bolts- something like 60mm instead of 65 - so he got 70s at the hardware store and a few washers - until the right length bolts are supplied
It sometimes happens that a box of bolts- they often arrive from a foreign place already bagged up for each unit...if somewhere along the line a human was involved- there may have been an error
Josh from excelrate has spoken with the maker and working to correct the problem
Thats one of the reasons to buy from our sponsoring vendors- not only do they pay to make acurazine happen- they are right there for you if needed!
they want happy customers -who tell 2 friends!
10-08-2008, 08:52 AM
#18
bringin lead
Thread Starter
Josh was great at getting involved and helping me out - kudos to Excelerate! They sent 65 mm bolts - i needed 75 mm, but couldn't find them last night. I'm using 70mm bolts now as a temporary "back on the road" solution until the correct size are found or sent.
10-08-2008, 10:45 AM
#19
~another company~ had a similar prob when the bolt supplier sent the individual kit bags with the wrong lengths inside-- all it takes is one person-- drops a bag of 1000 bolts in a bin - the wrong bin or the wrong bag of bolts, and then the people bagging them up simply drop in what they are handed to work with~
Sad as it is to say-things happen- and always check every part before you install it!
Is it the same as what you are removing???
I always suspect the last work performed to be the cause of any new problems
Sad as it is to say-things happen- and always check every part before you install it!
Is it the same as what you are removing???
I always suspect the last work performed to be the cause of any new problems

Thread
Thread Starter
Forum
Replies
Last Post
cycdaniel
1G TSX Performance Parts & Modifications
8
12-17-2019 10:58 AM