fsttyms1
Senior Moderator
close


May 1, 2026
- Join DateAug 2002
- LocationAppleton WI
- Age51
- Posts:81,385
-
iTrader Positive Feedback0
-
iTrader Feedback Score(0)
-
Likes:1,548
-
Liked:3,068 Times in 2,123 Posts
I like the superflux4's but need a way to mount them

05 Acura TL: a-spec
Quote:
Thats what im trying to figure out.Originally Posted by fsttyms1
I like the superflux4's but need a way to mount them
bringin lead
Quote:
Originally Posted by fsttyms1
I like the superflux4's but need a way to mount them
I don't know the design of the door handle and holes behind it, but couldn't you use 2 of these at the top of this page - http://www.oznium.com/prewired-superflux - assuming they're not too big (never seen them in person) in each door, pointing toward the center and down toward the ground slightly? Make a grommet of sorts on the wire just inside the door panel with enough grip to hold it tight? You could probably figure something out from there when installing.
As for the bottom, are you thinking of drilling holes in the bottom of the door to install these, or affixing them to the metal with adhesive or something?
I think we're on to something here and I like how the superflux will be plug and play electrically speaking (from what I understand - everything built in the housing).
fsttyms1
Senior Moderator
close
May 1, 2026
- Join DateAug 2002
- LocationAppleton WI
- Age51
- Posts:81,385
-
iTrader Positive Feedback0
-
iTrader Feedback Score(0)
-
Likes:1,548
-
Liked:3,068 Times in 2,123 Posts
The supreflux 4 could probably be epoxied/hot glued in place under the door handle id have to take the handle housing out and see, but i think there is room.
Same could be said for the doors. I was thinking of drilling holes on the bottom of the door (if room between the frame and door) should be. sealing the hole with fresh paint and glued/epoxied in place as well. Humm, i think i need to order. I wonder how many it will take??
Same could be said for the doors. I was thinking of drilling holes on the bottom of the door (if room between the frame and door) should be. sealing the hole with fresh paint and glued/epoxied in place as well. Humm, i think i need to order. I wonder how many it will take??
bringin lead
Quote:
Same could be said for the doors. I was thinking of drilling holes on the bottom of the door (if room between the frame and door) should be. sealing the hole with fresh paint and glued/epoxied in place as well. Humm, i think i need to order. I wonder how many it will take??
Originally Posted by fsttyms1
The supreflux 4 could probably be epoxied/hot glued in place under the door handle id have to take the handle housing out and see, but i think there is room. Same could be said for the doors. I was thinking of drilling holes on the bottom of the door (if room between the frame and door) should be. sealing the hole with fresh paint and glued/epoxied in place as well. Humm, i think i need to order. I wonder how many it will take??
Why not seal it with silicone?
Meridian
Just a quick question, would you have to take off interior door panel to do this mod?
bringin lead
Quote:
I don't know how you could do it any other way on the door handles. Possibly on the bottom of the door depending on how you mount them.Originally Posted by VoLLy_1llusioNz
Just a quick question, would you have to take off interior door panel to do this mod?
fsttyms1
Senior Moderator
close
May 1, 2026
- Join DateAug 2002
- LocationAppleton WI
- Age51
- Posts:81,385
-
iTrader Positive Feedback0
-
iTrader Feedback Score(0)
-
Likes:1,548
-
Liked:3,068 Times in 2,123 Posts
Quote:
Yes, but that only takes 2 min to do. Thats very easy.Originally Posted by VoLLy_1llusioNz
Just a quick question, would you have to take off interior door panel to do this mod?
fsttyms1
Senior Moderator
close
May 1, 2026
- Join DateAug 2002
- LocationAppleton WI
- Age51
- Posts:81,385
-
iTrader Positive Feedback0
-
iTrader Feedback Score(0)
-
Likes:1,548
-
Liked:3,068 Times in 2,123 Posts
Quote:
?? You could, epoxy would just set up alot fasterOriginally Posted by FirePR2002
Why not seal it with silicone?
bringin lead
Quote:
I'm guessing 8 total for the door handles (2 each), and at least 6 for each door bottom, so at least 32? Sound right?Originally Posted by fsttyms1
I wonder how many it will take??
fsttyms1
Senior Moderator
close
May 1, 2026
- Join DateAug 2002
- LocationAppleton WI
- Age51
- Posts:81,385
-
iTrader Positive Feedback0
-
iTrader Feedback Score(0)
-
Likes:1,548
-
Liked:3,068 Times in 2,123 Posts
it would be a good starting point

Instructor
How about these for the bottom of the door?
http://www.customdynamics.com/hyper_...ent_lights.htm
http://www.customdynamics.com/hyper_...ent_lights.htm
fsttyms1
Senior Moderator
close
May 1, 2026
- Join DateAug 2002
- LocationAppleton WI
- Age51
- Posts:81,385
-
iTrader Positive Feedback0
-
iTrader Feedback Score(0)
-
Likes:1,548
-
Liked:3,068 Times in 2,123 Posts
they had something similar at the other site. I dont like how you can flush mount them Thats what im looking for so that nothing gets hit.
Instructor
Quote:
So basically you're looking to drill individual LED holes in the bottom of the door?Originally Posted by fsttyms1
they had something similar at the other site. I dont like how you can flush mount them Thats what im looking for so that nothing gets hit.
05 Acura TL: a-spec
What would be the best way to get these LEDs power?
I am thinking I should use the interior lights fuse, but should I go out and buy an add a fuse thing? I need some ideas. Thanks
I am thinking I should use the interior lights fuse, but should I go out and buy an add a fuse thing? I need some ideas. Thanks
Instructor
Probably like someone said earlier, to use the dome light circuit, that way the LEDs light up and dim as the dome light lights up and dims.
05 Acura TL: a-spec
Quote:
yea, but i need to know how to tap into that circuit.Originally Posted by xyrcncp
Probably like someone said earlier, to use the dome light circuit, that way the LEDs light up and dim as the dome light lights up and dims.
find the fuse that powers it... and tap into the fuse box.. so whenever that fuse is activated, it will activate ur leds as well.. and just power the leds like normal to 12V ... but make sure its tapped into the fuse box for the cabin light so when that is activated , it will work...
this is from my knowledge in installing side markers to my parking lights.. cabin light fuse might be different.. i 'm plannin to do this very soon.. so i will take pics when i do... GOOD LUCK!
this is from my knowledge in installing side markers to my parking lights.. cabin light fuse might be different.. i 'm plannin to do this very soon.. so i will take pics when i do... GOOD LUCK!
Sowi Roja u tiga now
fsttyms1 as far as the lights under the doors its not that hard the only think that may be an issue is to make sure that the led bars u use dont get crushed under the door.
http://superbrightleds.com/light_bars.htm
if u scroll down a lil bit you will see some flexible led light bars.

they should be pretty flat.
As far as the door handle mods. alot of places sell individual leds that are resisted and made to plug into 12v lines. if u find that and drill behind the handle. place them to point inline with the handle and it should illuminate pretty good.
or just find some lil led like 3 inch water proff ones and just run the wires to the parking lights.
twan
http://superbrightleds.com/light_bars.htm
if u scroll down a lil bit you will see some flexible led light bars.
they should be pretty flat.
As far as the door handle mods. alot of places sell individual leds that are resisted and made to plug into 12v lines. if u find that and drill behind the handle. place them to point inline with the handle and it should illuminate pretty good.
or just find some lil led like 3 inch water proff ones and just run the wires to the parking lights.
twan
05 Acura TL: a-spec
Im not done yet... i have two more doors to go(and wiring it all up), but it looks nice so far. The two doors took me roughly 4 hours.. yes I know a long time... mainly because I am figuring this out as I go. I will finish this when I get off work today at 6pm.

Driver side front

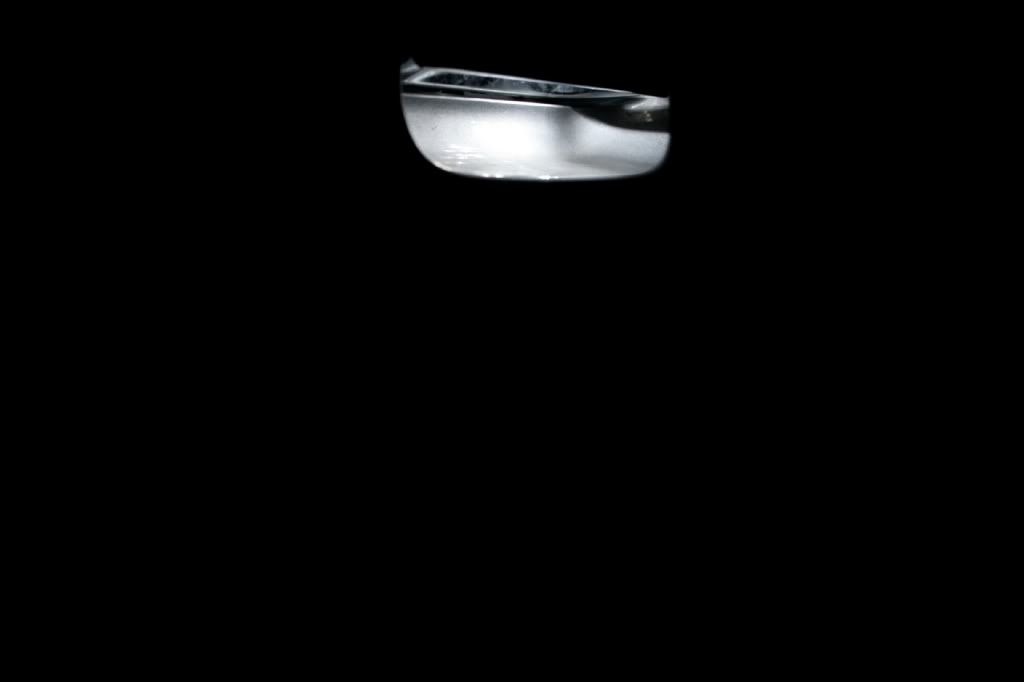
Driver side rear


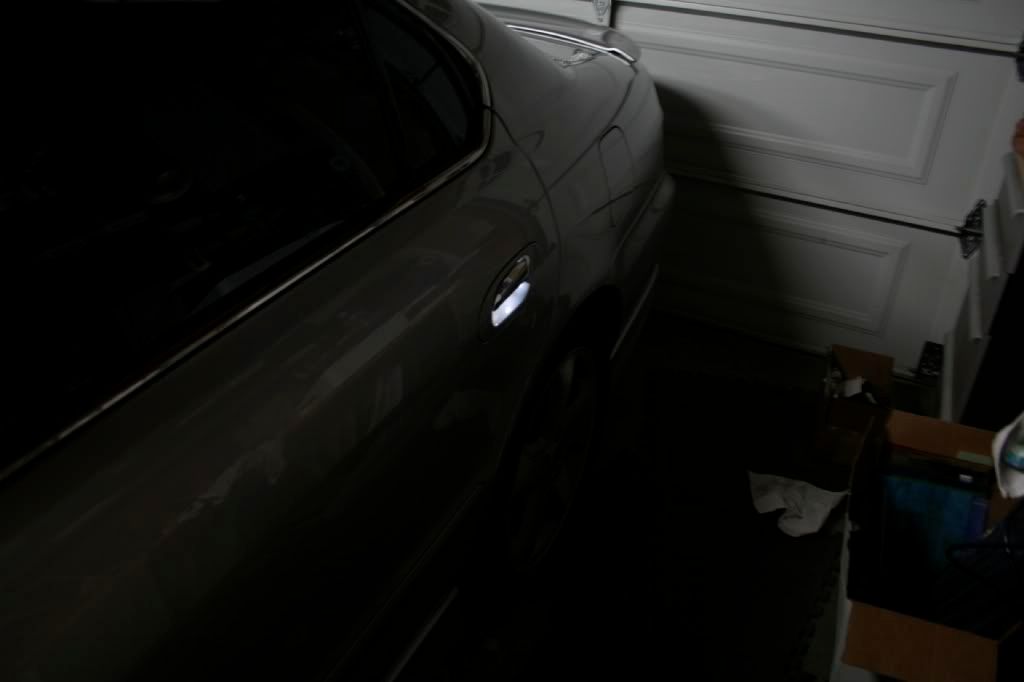
testing
Driver side front
Driver side rear
testing
Instructor
Quote:
Driver side front
Driver side rear
testing
That is SWEET!Originally Posted by CaliChris517
Im not done yet... i have two more doors to go(and wiring it all up), but it looks nice so far. The two doors took me roughly 4 hours.. yes I know a long time... mainly because I am figuring this out as I go. I will finish this when I get off work today at 6pm. Driver side front
Driver side rear
testing
You must do a write-up when you're done.
fsttyms1
Senior Moderator
close
May 1, 2026
- Join DateAug 2002
- LocationAppleton WI
- Age51
- Posts:81,385
-
iTrader Positive Feedback0
-
iTrader Feedback Score(0)
-
Likes:1,548
-
Liked:3,068 Times in 2,123 Posts
Quote:
http://superbrightleds.com/light_bars.htm
if u scroll down a lil bit you will see some flexible led light bars.
they should be pretty flat.
As far as the door handle mods. alot of places sell individual leds that are resisted and made to plug into 12v lines. if u find that and drill behind the handle. place them to point inline with the handle and it should illuminate pretty good.
or just find some lil led like 3 inch water proff ones and just run the wires to the parking lights.
twan
And thats Exactly what i dont want. I dont want any issues with them possibly getting pinched or crushed. I dont want to worry about bringing it to a car wash and having the guys drying the car wipe under the doors and rip them off with teh towel. I would much rather drill holes in the bottom of the door frame and mount them so they are closer to flush!Originally Posted by TwanPD4
fsttyms1 as far as the lights under the doors its not that hard the only think that may be an issue is to make sure that the led bars u use dont get crushed under the door.http://superbrightleds.com/light_bars.htm
if u scroll down a lil bit you will see some flexible led light bars.
they should be pretty flat.
As far as the door handle mods. alot of places sell individual leds that are resisted and made to plug into 12v lines. if u find that and drill behind the handle. place them to point inline with the handle and it should illuminate pretty good.
or just find some lil led like 3 inch water proff ones and just run the wires to the parking lights.
twan
fsttyms1
Senior Moderator
close
May 1, 2026
- Join DateAug 2002
- LocationAppleton WI
- Age51
- Posts:81,385
-
iTrader Positive Feedback0
-
iTrader Feedback Score(0)
-
Likes:1,548
-
Liked:3,068 Times in 2,123 Posts
CaliChris517
Looks great.
Looks great.
Lamborghini Aventador FTW
AMGala
Lamborghini Aventador FTW
close
Jan 28, 2025
- Join DateAug 2003
- LocationCT
- Age41
- Posts:7,597
-
iTrader Positive Feedback100
-
iTrader Feedback Score(4)
-
Likes:220
-
Liked:73 Times in 52 Posts
Quote:
Looks great.
x2 Good job Chris!Originally Posted by fsttyms1
CaliChris517 Looks great.
Instructor
Quote:
Ah, now that I read this your previous post makes much more sense to me... lolOriginally Posted by fsttyms1
And thats Exactly what i dont want. I dont want any issues with them possibly getting pinched or crushed. I dont want to worry about bringing it to a car wash and having the guys drying the car wipe under the doors and rip them off with teh towel. I would much rather drill holes in the bottom of the door frame and mount them so they are closer to flush!
I see what you're saying, the LEDs I linked to wouldn't work then...
fsttyms1
Senior Moderator
close
May 1, 2026
- Join DateAug 2002
- LocationAppleton WI
- Age51
- Posts:81,385
-
iTrader Positive Feedback0
-
iTrader Feedback Score(0)
-
Likes:1,548
-
Liked:3,068 Times in 2,123 Posts
Quote:
I see what you're saying, the LEDs I linked to wouldn't work then...
Originally Posted by xyrcncp
Ah, now that I read this your previous post makes much more sense to me... lolI see what you're saying, the LEDs I linked to wouldn't work then...
 thanks for trying though.
05 Acura TL: a-spec
Quote:
You must do a write-up when you're done.
Im not really sure a DIY is really needed... Its a pretty easy project that requires a lot of prep time.Originally Posted by xyrcncp
That is SWEET!You must do a write-up when you're done.
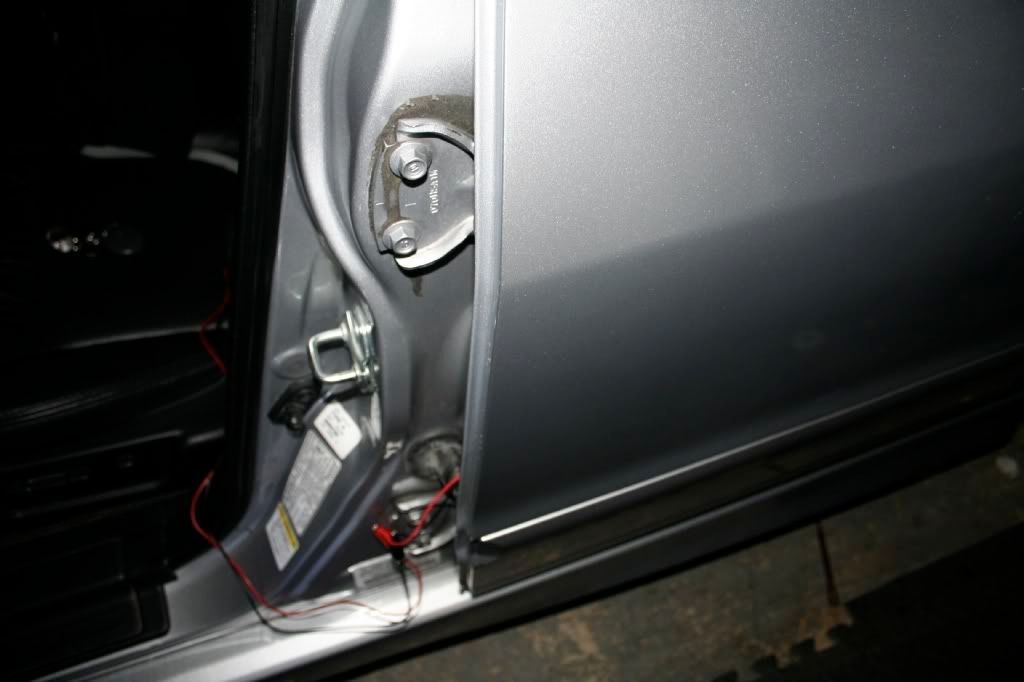
Each door handle has 1 flat head(grinded down 5mm hyper white LED (5000 mcd). At first I thought 5000 mcd and only 1 LED wouldn�t cut it, but it works out fine. Lucky for us, Acura designed the inside of the door handle with a half inch slot at the end, and that is where the LED sits. When I get home from work, I will post more info.
Thanks for all the comments, more pics to come tonight!

Instructor
Quote:
thanks for trying though.
Sounds like if I just lost at a game show...lolOriginally Posted by fsttyms1
thanks for trying though.
Instructor
Quote:
Each door handle has 1 flat head(grinded down 5mm hyper white LED (5000 mcd). At first I thought 5000 mcd and only 1 LED wouldn�t cut it, but it works out fine. Lucky for us, Acura designed the inside of the door handle with a half inch slot at the end, and that is where the LED sits. When I get home from work, I will post more info.
Thanks for all the comments, more pics to come tonight!
Well, not really a full blown DIY, but something like a pointer thread, like what to look for and avoid and which LEDs worked well.Originally Posted by CaliChris517
Im not really sure a DIY is really needed... Its a pretty easy project that requires a lot of prep time.Each door handle has 1 flat head(grinded down 5mm hyper white LED (5000 mcd). At first I thought 5000 mcd and only 1 LED wouldn�t cut it, but it works out fine. Lucky for us, Acura designed the inside of the door handle with a half inch slot at the end, and that is where the LED sits. When I get home from work, I will post more info.
Thanks for all the comments, more pics to come tonight!
Go Brewers!
just out of curiosity, are the wires and everything pretty protected. I'm a Wisconsin-er and we cat some pretty bad winters... along with winters, we get salt and corrosion... i wouldn't want these to go to crap after one winter, or on that note, a car washing.
fsttyms1
Senior Moderator
close
May 1, 2026
- Join DateAug 2002
- LocationAppleton WI
- Age51
- Posts:81,385
-
iTrader Positive Feedback0
-
iTrader Feedback Score(0)
-
Likes:1,548
-
Liked:3,068 Times in 2,123 Posts
Quote:
they would be inside the door so they would be pretty protected. Plus if you took the time to make sure any splices were properly covered every thing would be okOriginally Posted by jstahnke10
just out of curiosity, are the wires and everything pretty protected. I'm a Wisconsin-er and we cat some pretty bad winters... along with winters, we get salt and corrosion... i wouldn't want these to go to crap after one winter, or on that note, a car washing.
08 Civic SI
yea lets see a little wright up, looks great so far! cant wait to see the finished product 
FPR pimpin'
just run all wiring through the loom that the factory wires run through

Go Brewers!
I assume you took off the door panel and drilled a hole through the door handle from the back... then ran the wire down the inside of the door...

Looking good bro.. exactly how i want it.. and its nice to see that u have an SSM ... helps with the imagination hehehe...
I'm gonna start on this mod next week... just need to buy the LEDS and wiring... how many leds did u use? and wat type? thanks
I'm gonna start on this mod next week... just need to buy the LEDS and wiring... how many leds did u use? and wat type? thanks
FPR pimpin'
Quote:
Each door handle has 1 flat head(grinded down 5mm hyper white LED (5000 mcd). At first I thought 5000 mcd and only 1 LED wouldn�t cut it, but it works out fine. Lucky for us, Acura designed the inside of the door handle with a half inch slot at the end, and that is where the LED sits. When I get home from work, I will post more info.
Thanks for all the comments, more pics to come tonight!
Originally Posted by CaliChris517
Im not really sure a DIY is really needed... Its a pretty easy project that requires a lot of prep time.Each door handle has 1 flat head(grinded down 5mm hyper white LED (5000 mcd). At first I thought 5000 mcd and only 1 LED wouldn�t cut it, but it works out fine. Lucky for us, Acura designed the inside of the door handle with a half inch slot at the end, and that is where the LED sits. When I get home from work, I will post more info.
Thanks for all the comments, more pics to come tonight!