F-012: 09 wood console plate/cup holder installed in 05 RL
 03-20-2009, 02:46 AM
#1
Pro
Thread Starter

F-012: 09 wood console plate/cup holder installed in 05 RL
Ok, first off, this is not as easy as I expected.
Just finished this and I'm only going to only show these pics for now.
I'll post more details and pics later (prob next week sometime).
In short, I had to modify the 09 console in these areas:
1. Remove bottom half of underside aux cover and remove wire/connector that it came with.
2. Shave seat heater surrounds on under side of console to retrofit 05's seat heater chrome bezels.
3. Extend aux wire from OEM connector with bend 09 aux terminals and connector. This is to be able to open and close the aux. It's still not the way I want it but fine for now until I have more time to fiddle with it.
Also had to shave the center console wall about 2" on the drivers side. This is to accomodate the aux underside housing.
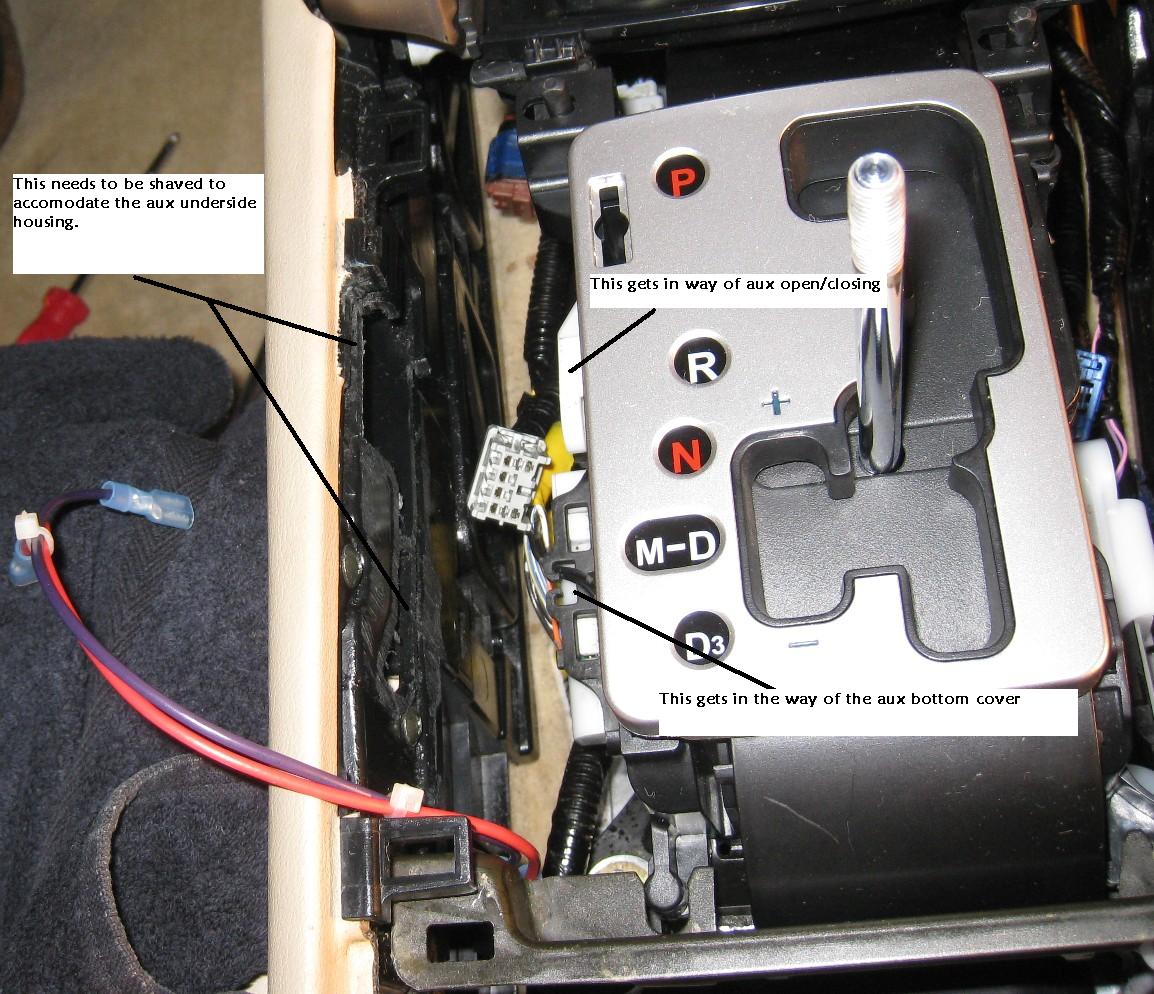
Not sure if these modifications will be needed for all 05-08 RL's but this is what I had to do to make it fit mine.
More details and pics to follow. Need to sleep now.
Thanks.
Just finished this and I'm only going to only show these pics for now.
I'll post more details and pics later (prob next week sometime).
In short, I had to modify the 09 console in these areas:
1. Remove bottom half of underside aux cover and remove wire/connector that it came with.
2. Shave seat heater surrounds on under side of console to retrofit 05's seat heater chrome bezels.
3. Extend aux wire from OEM connector with bend 09 aux terminals and connector. This is to be able to open and close the aux. It's still not the way I want it but fine for now until I have more time to fiddle with it.
Also had to shave the center console wall about 2" on the drivers side. This is to accomodate the aux underside housing.
Not sure if these modifications will be needed for all 05-08 RL's but this is what I had to do to make it fit mine.
More details and pics to follow. Need to sleep now.
Thanks.

The following 2 users liked this post by socal28:
joncole818 (05-10-2015),
Ratheruneeq (01-05-2017)
03-20-2009, 07:42 AM
#4

I'm in the middle of this project as well, and so far I've only shaved the console piece to get the Wood Console trim to fit properly. I haven't had time to proceed any further...
It's good to know I'll have to shave the heated seat mounts as well. Why can't they leave this stuff alone between model years
I have the same problem as you; the 12V connector is too big to work with the '05-'08 shift gate. I am going to cut that connector off and use the same connector you show in your pictures.
Still, for the money, it looks really nice and is worth the effort. Like you I noticed the color is a little off from the trim on the dash, but since one is real and the other is fake its not surprising.
Chris
 03-20-2009, 12:16 PM
#7
Pro
Thread Starter
That's one of the reasons I went this route.
Will probably keep it in case I get rid of the car later.
Trending Topics
03-20-2009, 07:57 PM
#10
Pro
Thread Starter
03-20-2009, 08:35 PM
#11
Senior Moderator
Niiiiiice. That really sounds like a lot of work. Good job!
03-24-2009, 05:14 PM
#12
Pro
Thread Starter
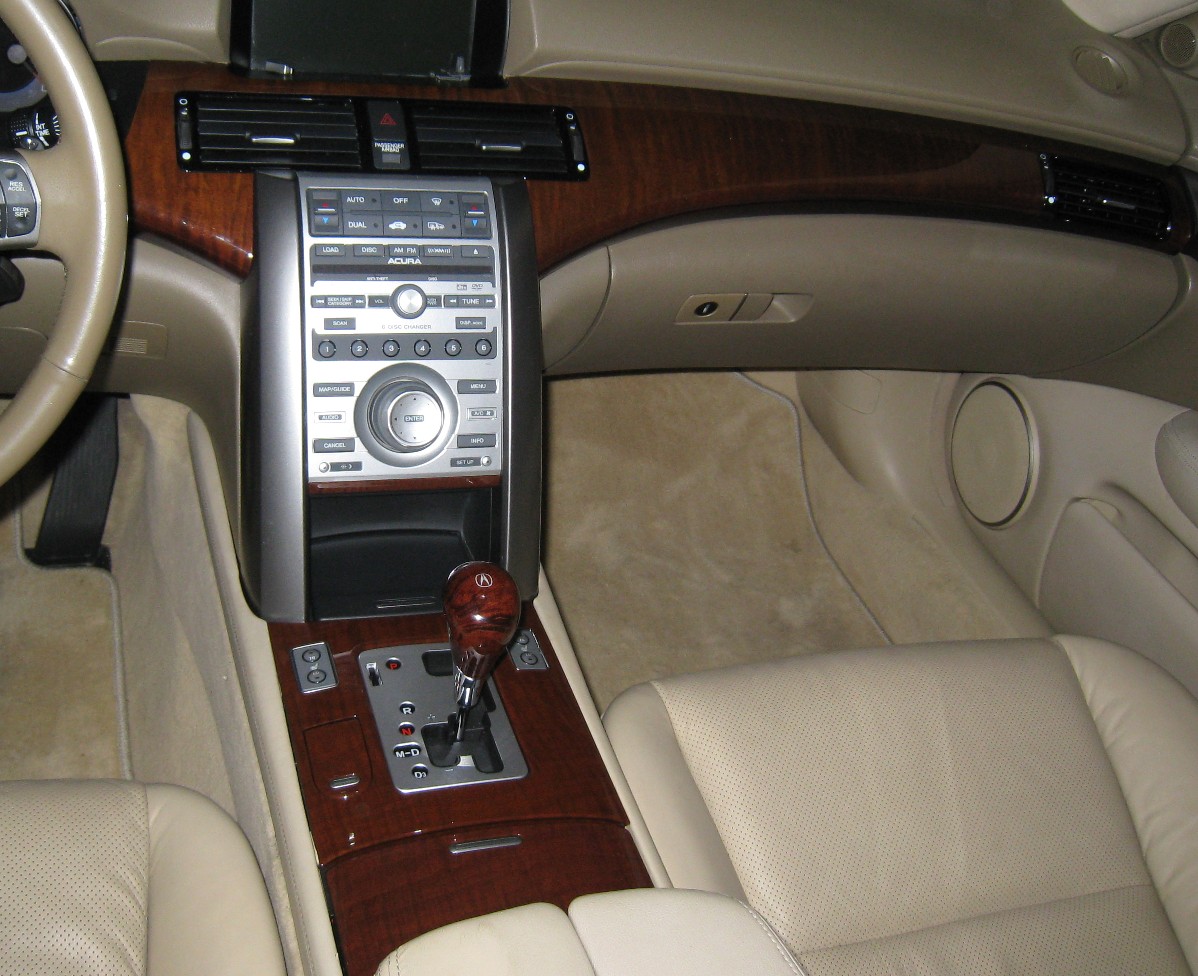
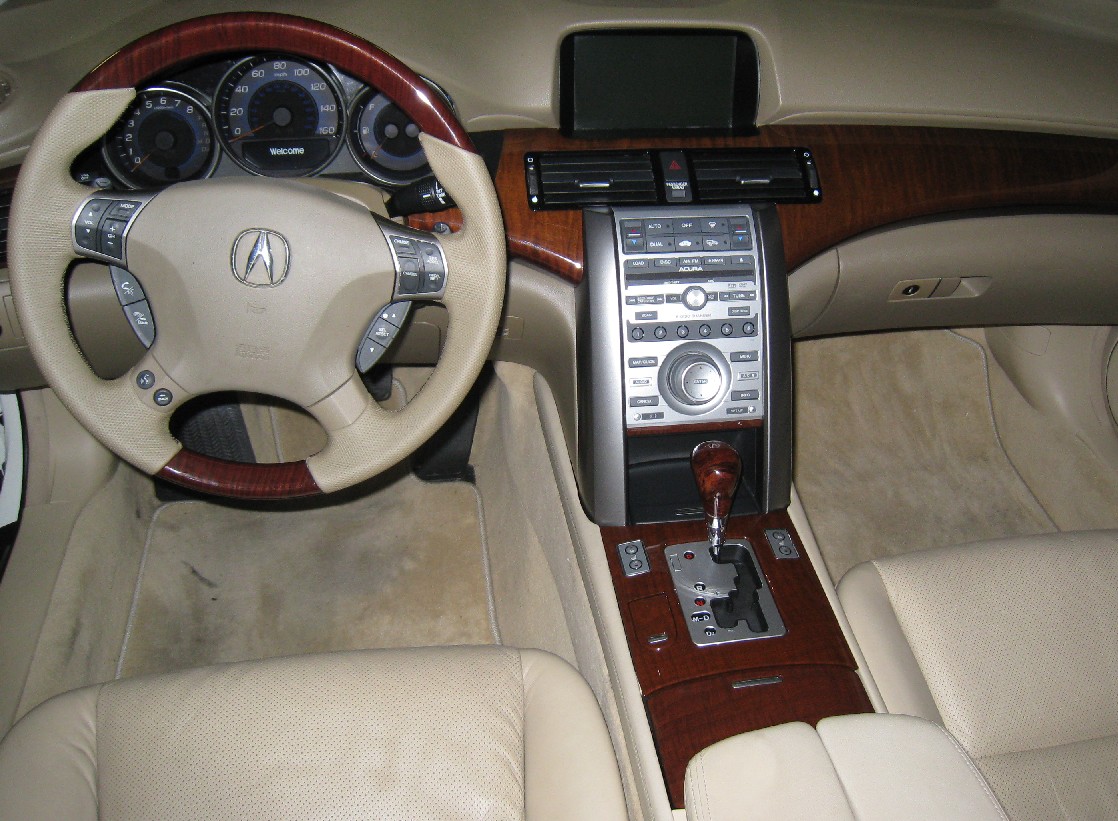
Here's a couple of pics in the sun of the different constrast of the 05 wood (real?) versus the 09 wood console. Not sure if the 06-08 would be different.

The 09 wood matches pretty well with the wood shift knob accessory.
Even my OEM door versus center wood looks different...

The 09 wood matches pretty well with the wood shift knob accessory.
Even my OEM door versus center wood looks different...
03-24-2009, 05:15 PM
#13
my OEM door and center wood are different as well. Looks about the same as yours.
03-24-2009, 05:22 PM
#14
Pro
Thread Starter
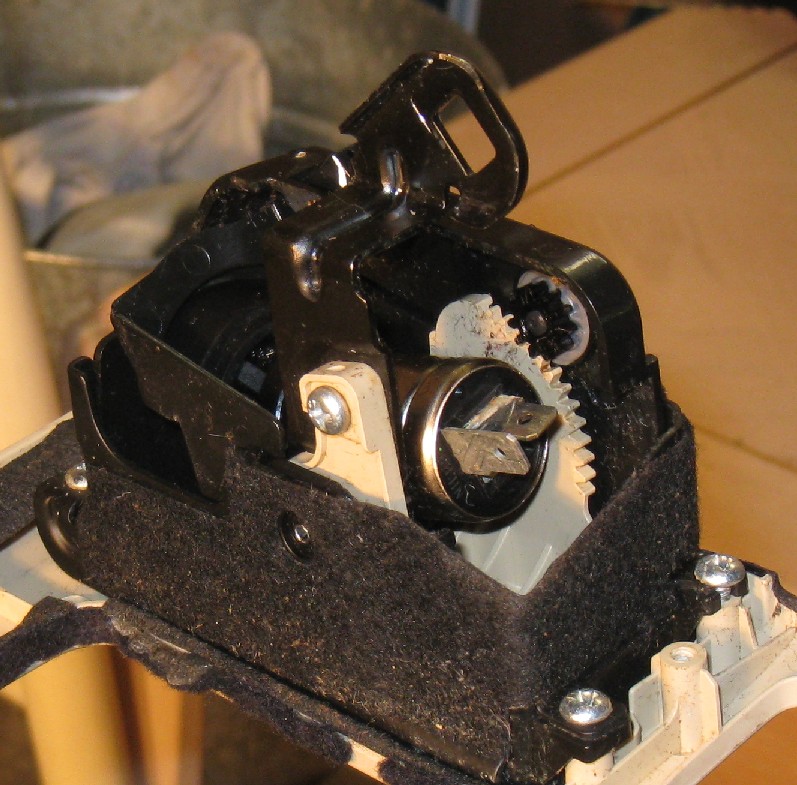

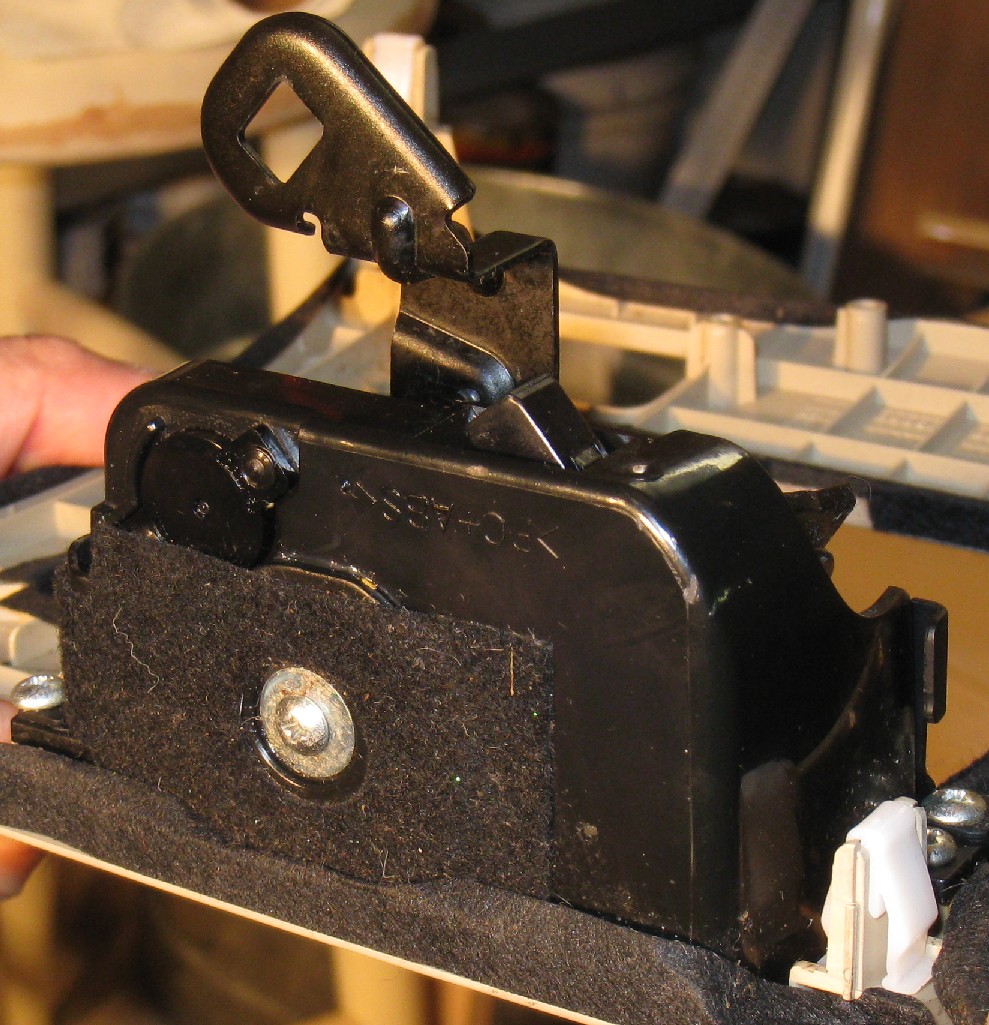
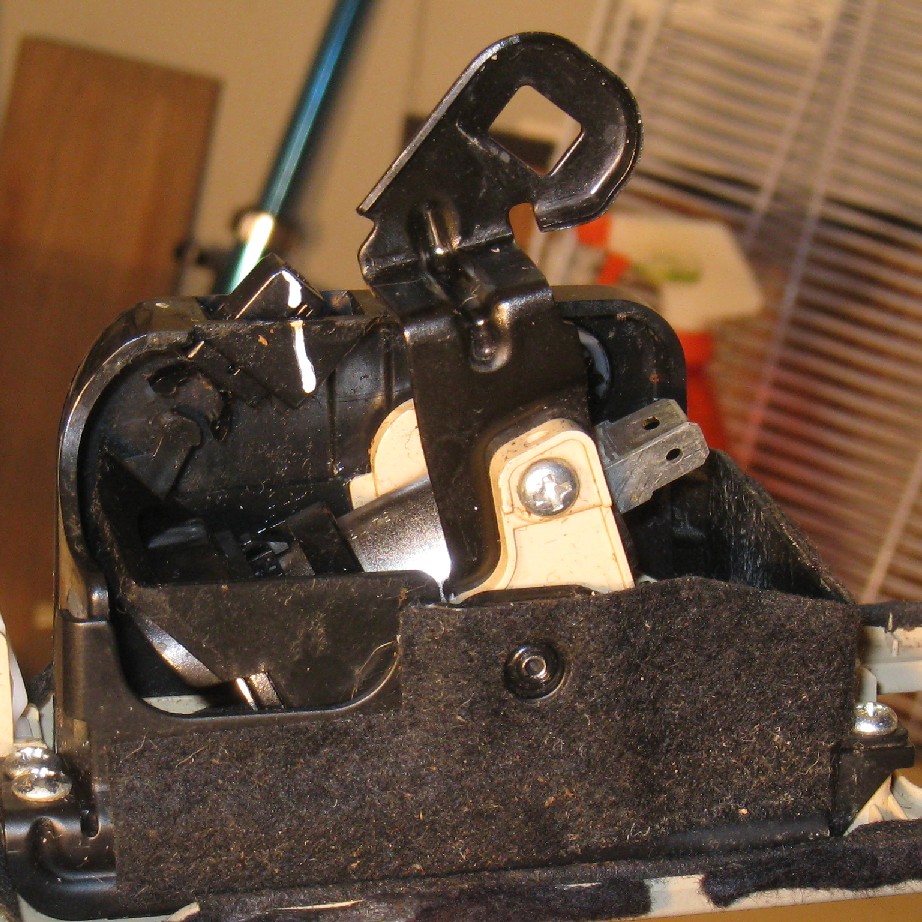
You can see in the pic below in the upper left corner of the unit is the locking mechanism (i purposely held it right before lock for this picture).
 03-24-2009, 10:14 PM
#17
Senior Moderator
Great photos, thanks!
 03-25-2009, 06:20 AM
#19
Steve,
Nicely done! It really does look awesome. I am going to work on this when I get home today....what exactly did you do to get the silver trim pieces around the heated seat switches to fit? Did you trim the console piece or did you trim the actual silver trim pieces?
Beyond that I also have to change out the wiring for the 12V and then I should be good to go....and finally have my car back together!
Thanks for the help,
Chris
03-25-2009, 07:46 AM
#20
unofficial HONDA rep
nice work, but i am not a big fan of wood interiors even though i have the steering wheel and shift knob lol, but does anyone know if the 09 RL's black wood can fit? doors, dash, steering wheel etc
03-25-2009, 10:50 AM
#22
Pro
Thread Starter
Steve,
Nicely done! It really does look awesome. I am going to work on this when I get home today....what exactly did you do to get the silver trim pieces around the heated seat switches to fit? Did you trim the console piece or did you trim the actual silver trim pieces?
Beyond that I also have to change out the wiring for the 12V and then I should be good to go....and finally have my car back together!
Thanks for the help,
Chris
Nicely done! It really does look awesome. I am going to work on this when I get home today....what exactly did you do to get the silver trim pieces around the heated seat switches to fit? Did you trim the console piece or did you trim the actual silver trim pieces?
Beyond that I also have to change out the wiring for the 12V and then I should be good to go....and finally have my car back together!
Thanks for the help,
Chris
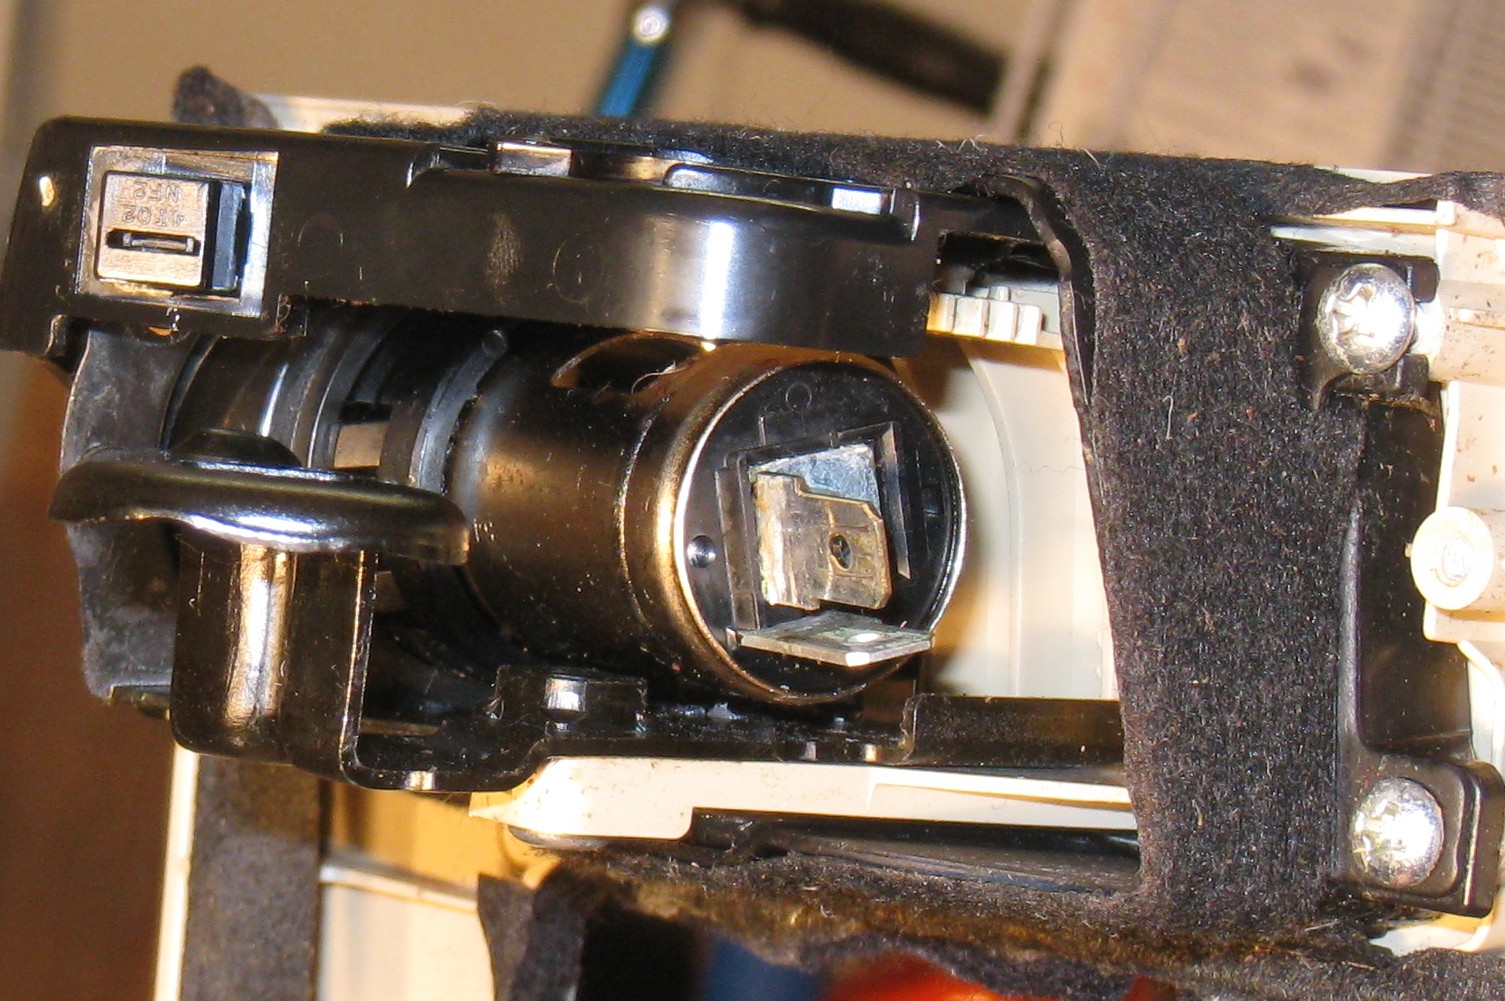
I trimmed the underside console piece to fit the silver heated seat bezels. I just used some wire cutters to cut off some tabs.
03-25-2009, 10:56 AM
#24
Pro
Thread Starter

I mostly did this upgrade to replace worn out pieces.
Shift knob and steering wheel leather showed significant wear, console plate around the shifter had stains and aux was dirty from previous smoker, cup holder door would intermittently not close, etc.
Figured that this was a good opportunity for this project.
03-25-2009, 03:18 PM
#25
 03-27-2009, 03:35 PM
#27
Pro
Thread Starter
There is a vendor that sales them here...
https://acurazine.com/forums/2g-rl-2005-2012-76/cup-holder-console-trim-special-713207/
But I got mine from Clint at Findlay Acura as I purchased other items from as well.
https://acurazine.com/forums/2g-rl-2005-2012-76/cup-holder-console-trim-special-713207/
But I got mine from Clint at Findlay Acura as I purchased other items from as well.
03-28-2009, 04:45 PM
#28
Just thought I'd mention that I finished this project today  It looks great and I personally feel it really adds to the interior of the car. Well worth the effort.
Steve has outlined the tasks that need to be done, so if you follow his advice and read through this thread you should have no problem doing this project.
Now I'm curious if those pieces from the '09 door panels will fit the previous models so that you don't have to use those awkward door handles to close the door.
Chris
It looks great and I personally feel it really adds to the interior of the car. Well worth the effort.Steve has outlined the tasks that need to be done, so if you follow his advice and read through this thread you should have no problem doing this project.
Now I'm curious if those pieces from the '09 door panels will fit the previous models so that you don't have to use those awkward door handles to close the door.
Chris
03-28-2009, 06:42 PM
#29
Instructor

Just thought I'd mention that I finished this project today It looks great and I personally feel it really adds to the interior of the car. Well worth the effort.
Steve has outlined the tasks that need to be done, so if you follow his advice and read through this thread you should have no problem doing this project.
Now I'm curious if those pieces from the '09 door panels will fit the previous models so that you don't have to use those awkward door handles to close the door.
Chris
It looks great and I personally feel it really adds to the interior of the car. Well worth the effort.Steve has outlined the tasks that need to be done, so if you follow his advice and read through this thread you should have no problem doing this project.
Now I'm curious if those pieces from the '09 door panels will fit the previous models so that you don't have to use those awkward door handles to close the door.
Chris

 04-02-2009, 06:27 PM
#33
Pro
Thread Starter
http://techinfo.honda.com/rjanisis/pubs/AI/BII31183.pdf
Last edited by socal28; 04-02-2009 at 06:29 PM.
04-02-2009, 08:02 PM
#34
Advanced

Join Date: Jul 2002
Location: Allentown, PA
Age: 43
Posts: 81
Likes: 0
Received 0 Likes
on
0 Posts
Perfect. Thanks SoCal28...
Any other hints or tips (other than what you've posted here) I should know before I begin?
I'll be sure to snap some pics during my install, too. Add to the thread.
Any other hints or tips (other than what you've posted here) I should know before I begin?
I'll be sure to snap some pics during my install, too. Add to the thread.
04-03-2009, 08:03 AM
#35
As Steve mentioned, you need to remove a few pieces from the center console trim piece with regards to the 12V power outlet.
-- Remove the wiring harness / plug from the actual cigarette lighter;
-- In order to do the above you'll need to remove the black trim piece that surrounds the cigarette lighter underneath.....remove it and throw it away, the piece won't fit with it installed.
-- Trim the center console as Steve outlined in his pictures
-- You might want to make your own wiring harness (as Steve did) for the 12V power outlet.
It's a somewhat complicated project, but it looks really good.
I would post pictures, but I have the exact same color combo as Steve, so there's not much of a point....I even had the wood steering wheel and shift knob, so it really is an exact copy of my interior
Chris
05-19-2009, 12:57 AM
#36
Pro
Thread Starter
Finally created my own page for this install...
http://www.socal28.com/rl/09centerconsole.htm
http://www.socal28.com/rl/09centerconsole.htm
 05-19-2009, 01:34 PM
#38
Pro
Thread Starter
Here's a copy of it on my site...
http://www.socal28.com/rl/RL_05_WoodWheelInstall.pdf
It's fairly simple, just make sure to handle the airbag unit carefully and remember what position you took off the wheel at.

You also don't need a steering wheel puller. At least I didn't need one for the multiple times I changed mine. Just gently pull and wiggle back and forth.
Last edited by socal28; 05-19-2009 at 01:37 PM.
The following users liked this post:
joncole818 (05-10-2015)

