
DIY Advance Running Boards Install

Thread Starter
The Original Shawdy
Joined: Jan 2010
Posts: 1,984
Likes: 432
From: Seattle, WA
DIY Advance Running Boards Install
As promised I decided to make up a "Do it yourself" guide for installing the advance running boards on 2013-2016 Acura RDX. Mine is a 2016 but everything is the same.
<b>Tools needed:</b>
Ratchet with 10mm, 12mm and 13mm sockets
Torque Wrench
Drill with 3mm (1/8), 6mm (1/4), 8mm (5/16) and 10mm (3/8) drill bits
30mm Hole saw (I could only find 29mm and 32mm so I went with 29mm)
Eye Protection
Pushpin
File
Floor Jack
Jackstands
Air saw (I didn't have one so I used some brand new box cutter/X-acto knives)
<b>Parts Included:</b>
(2) running boards
(4) brackets A
(2) brackets B (short)
(2) brackets C (long)
(32) falange bolts, 8x20mm
(4) falange bolts, 8x65mm (for bracket B)
(4) falange bolts, 8x80mm (for bracket C)
<b>Installation Directions</b>
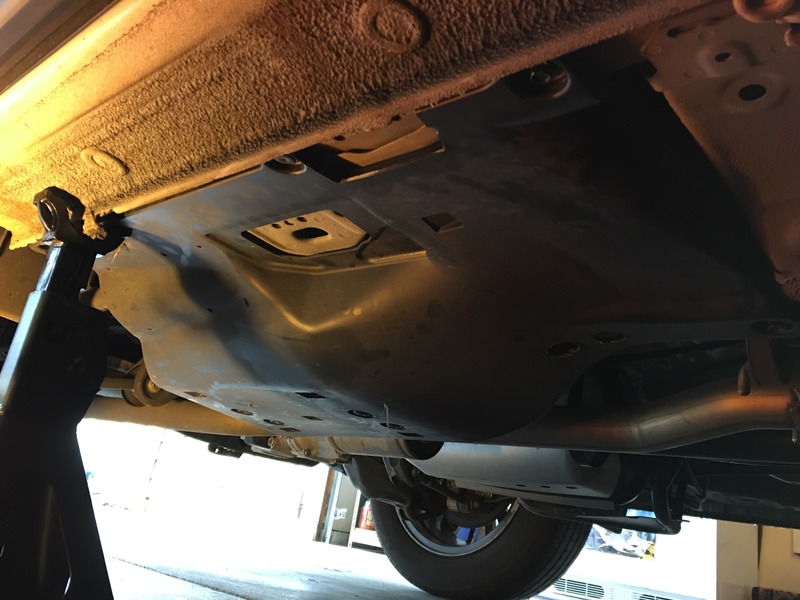
1. Raise the vehicle and place on jack stands.
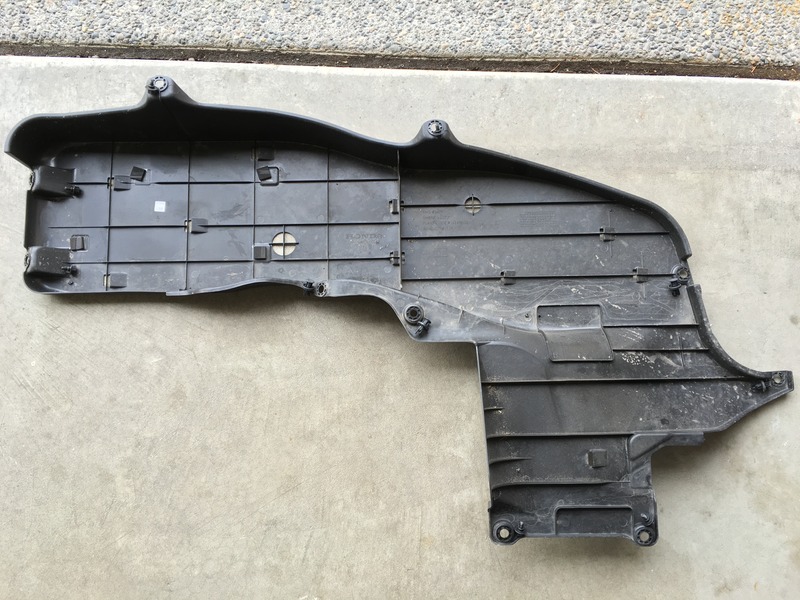
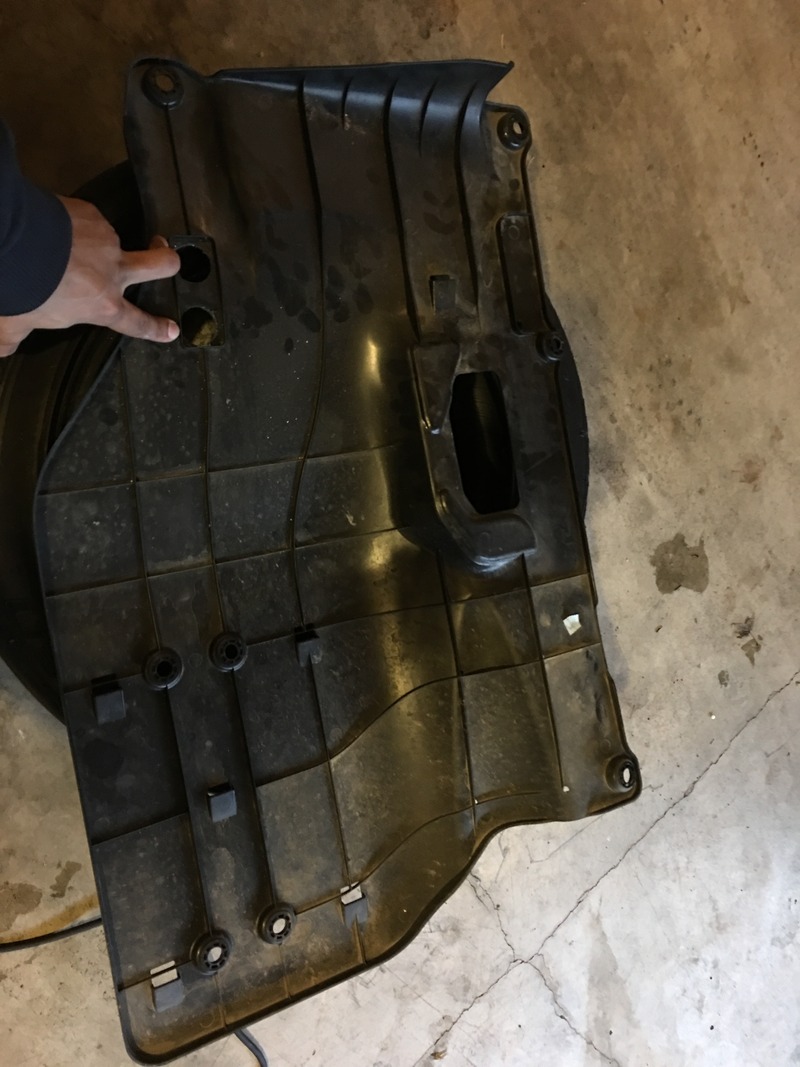
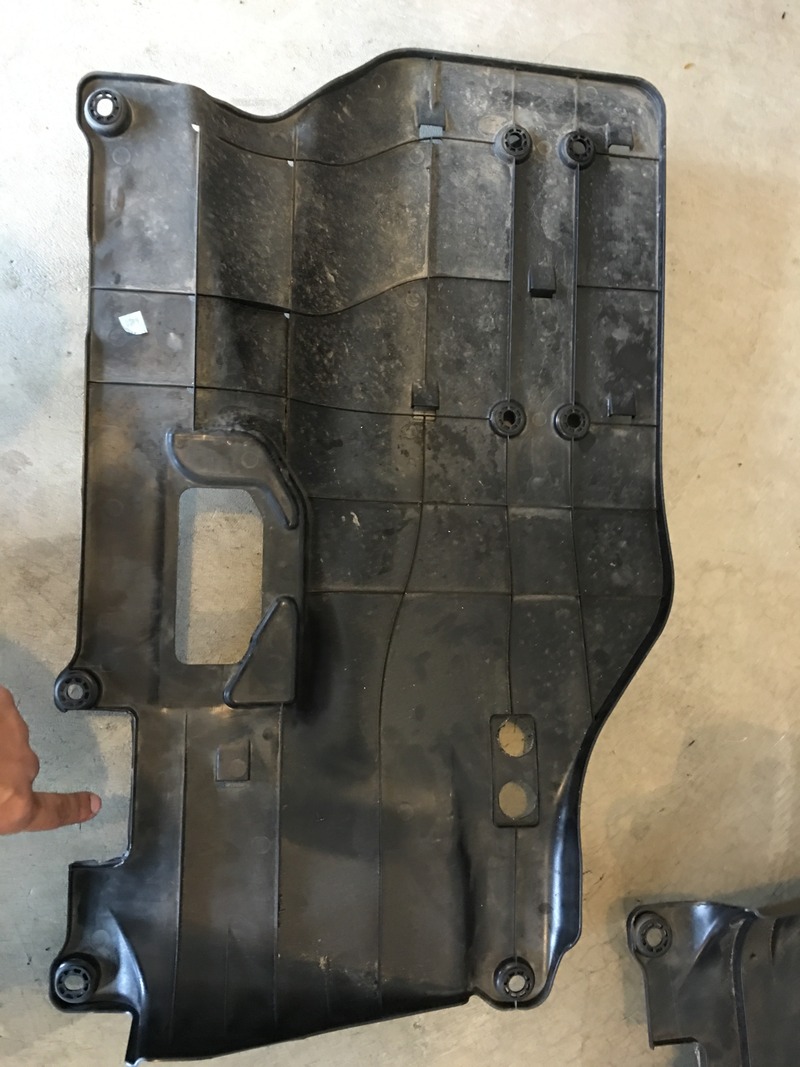
2. Remove 6 (10mm) bolts and 4 clips from the left (driver side) under cover.
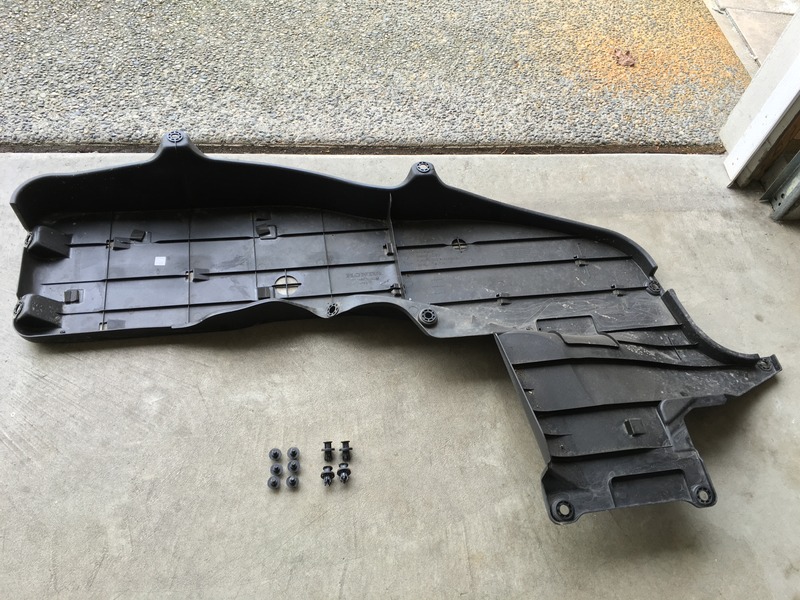
This picture shows where each bolt and clip go.
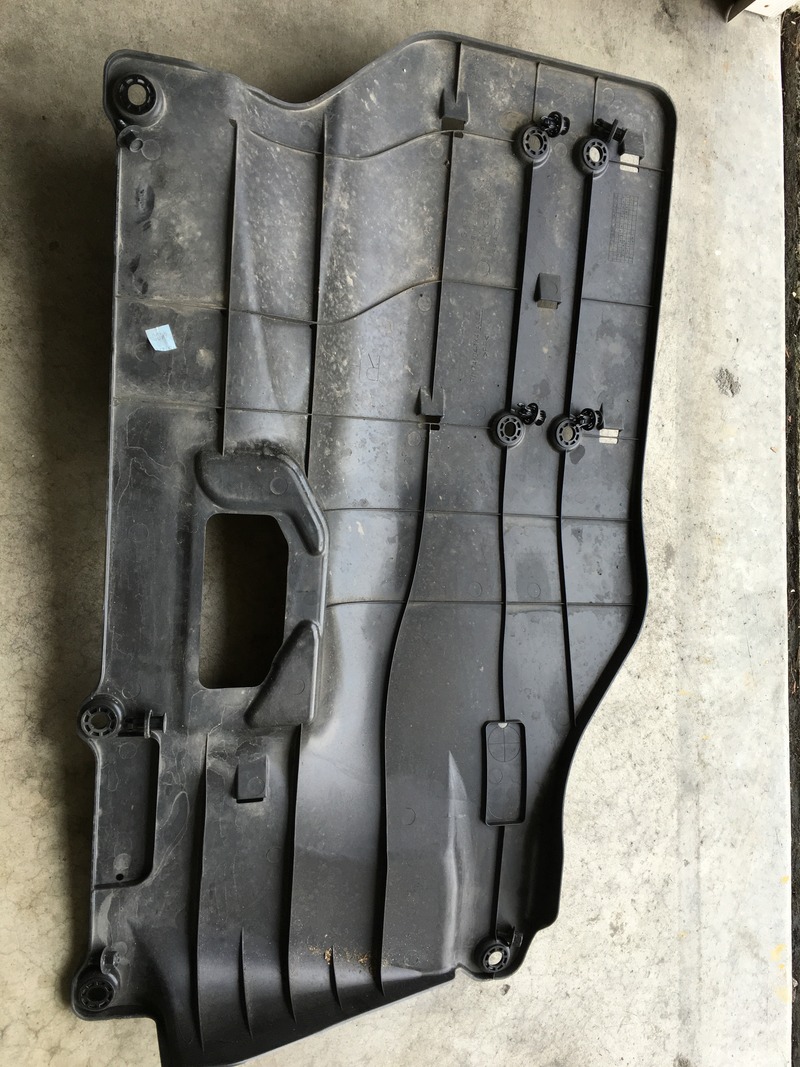
3. Remove 2 (10mm) bolts and 6 clips from the right (passenger) under cover.
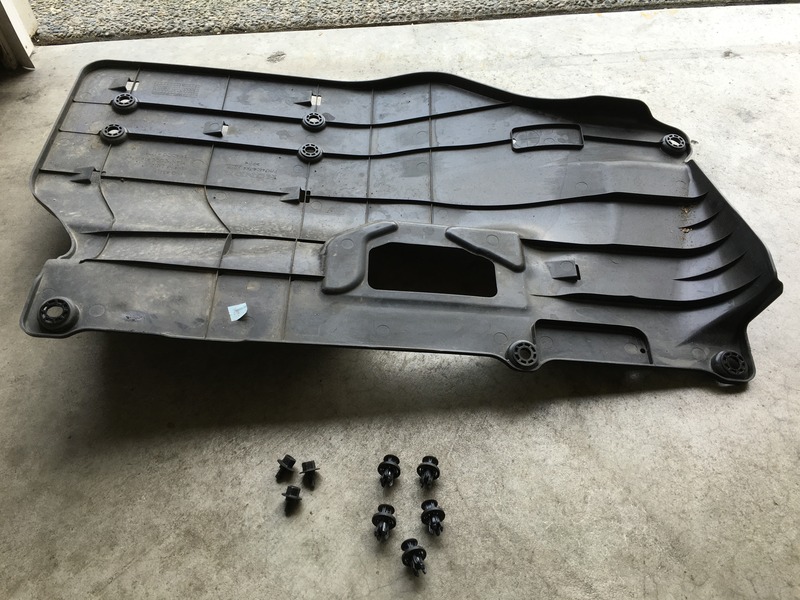
This picture shows where each bolt and clip go.
4. On the left cover use push pin to puncture the remarked circles. (they have a plus sign on them. There is 6 small circles and the two big ones. (sorry no pictures of these but you'll see in further picture).
5. Using the 3mm (1/8) drill bit, drill all 8 holes.
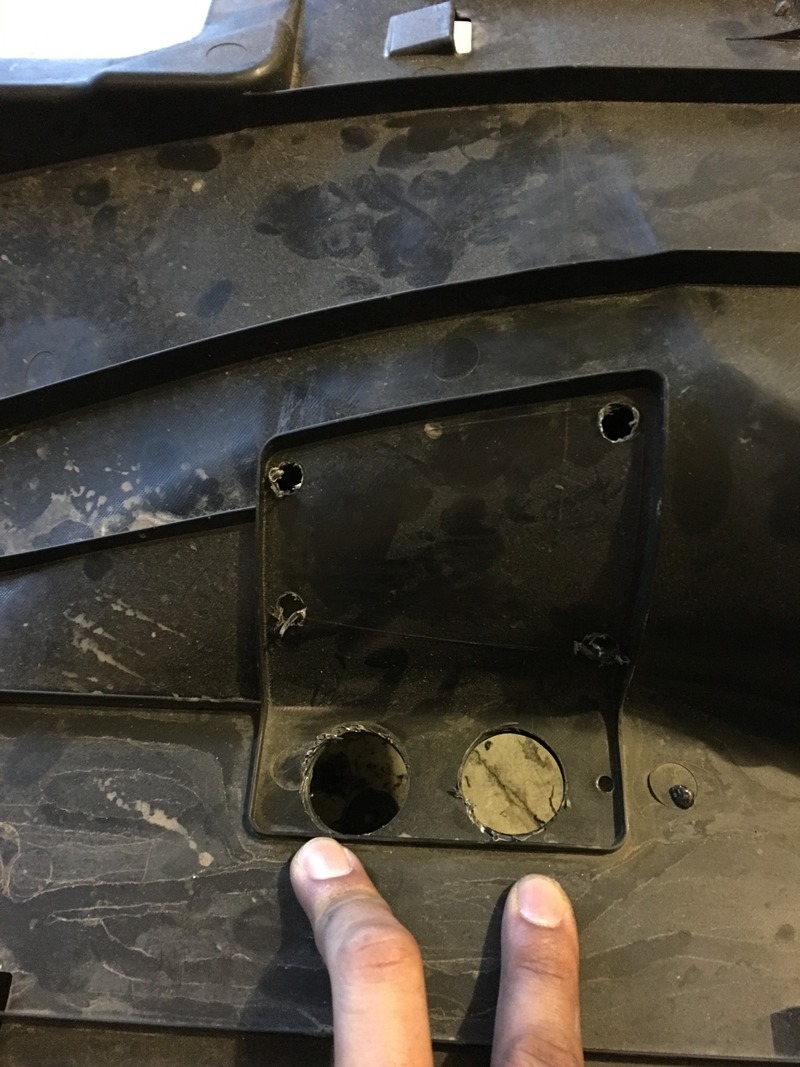
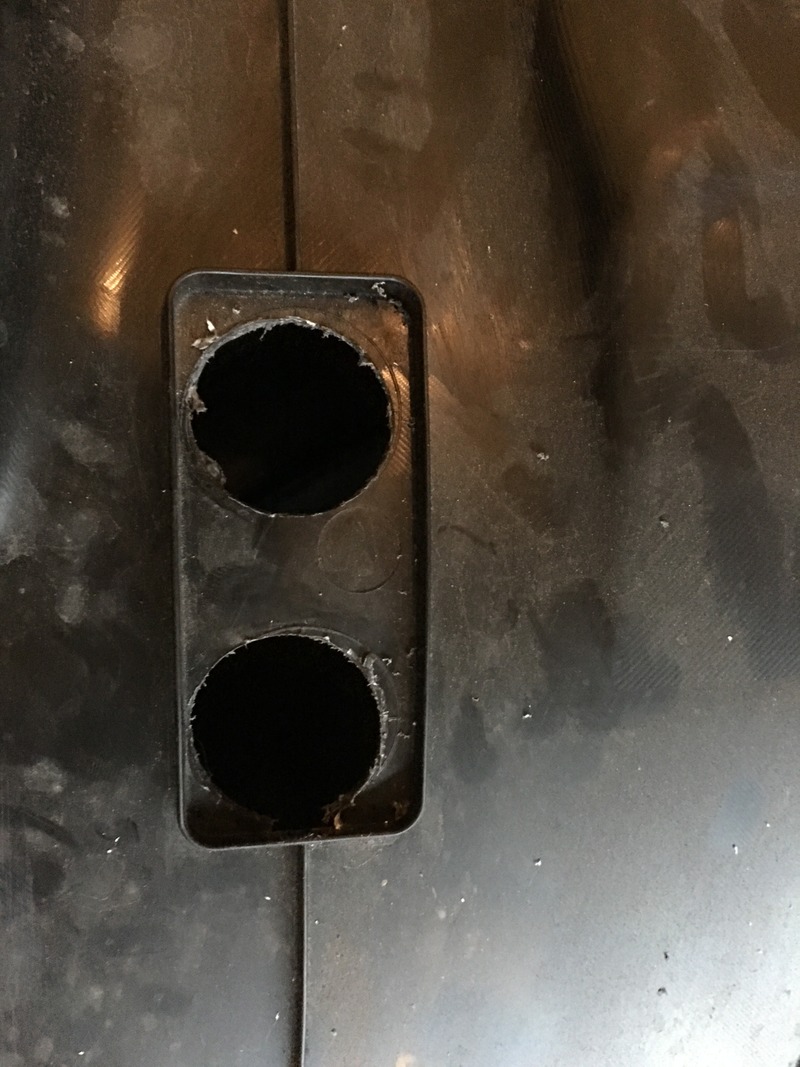
6. Next step is to widen the 6 small holes with the 6mm (1/4), 8mm (5/16) and 10mm (3/8) drill bits. <b>Do not largen the big circles.</b> Clean the burrs with a file.
7. Using the 29mm hole saw, drill out the large circles. (you can also see the other 4 holes that were previously drilled out. Clean the burrs with a file.
8. On the right cover use push pin to puncture the remarked circles. (they have a plus sign on them. There is 2 small circles and the 2 big ones. (sorry no pictures of these but you'll see in further picture).
9. Using the 3mm (1/8) drill bit, drill all 4 holes.
10. Next step is to widen the 2 small holes with the 6mm (1/4), 8mm (5/16) and 10mm (3/8) drill bits. <b>Do not large the big circles</b> Clean the burrs with a file.
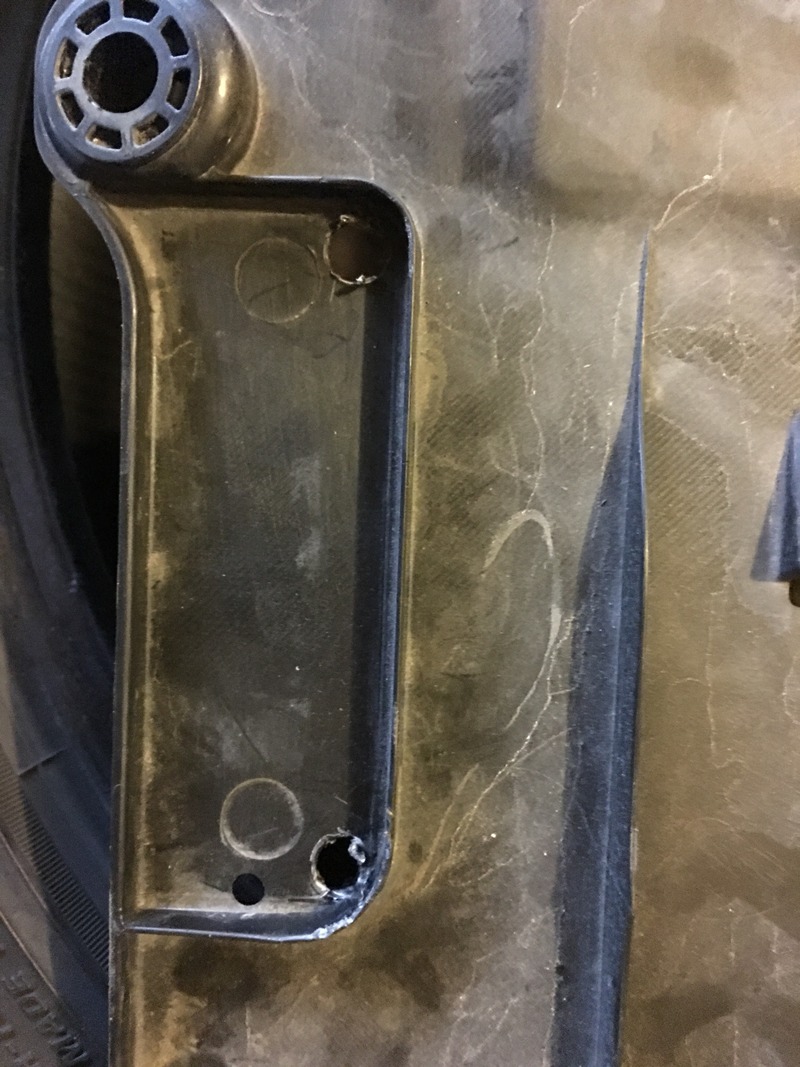
11. Using the 29mm hole saw, drill out the large circles. Clean the burrs with a file.
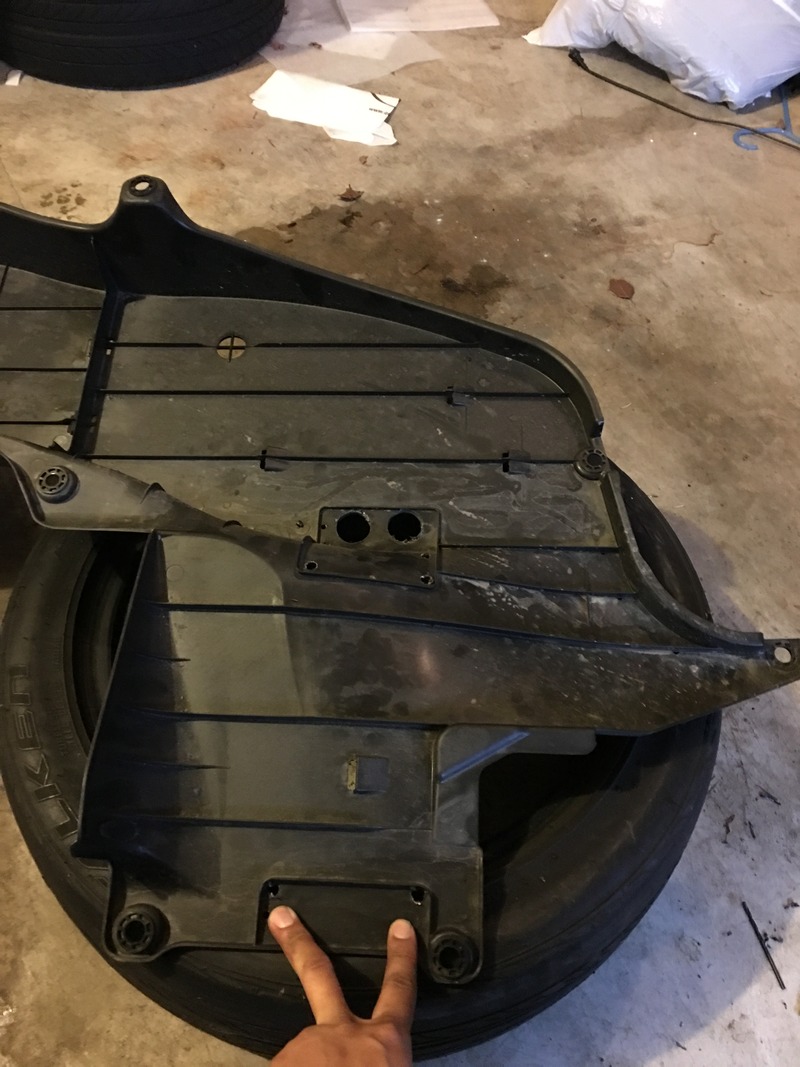
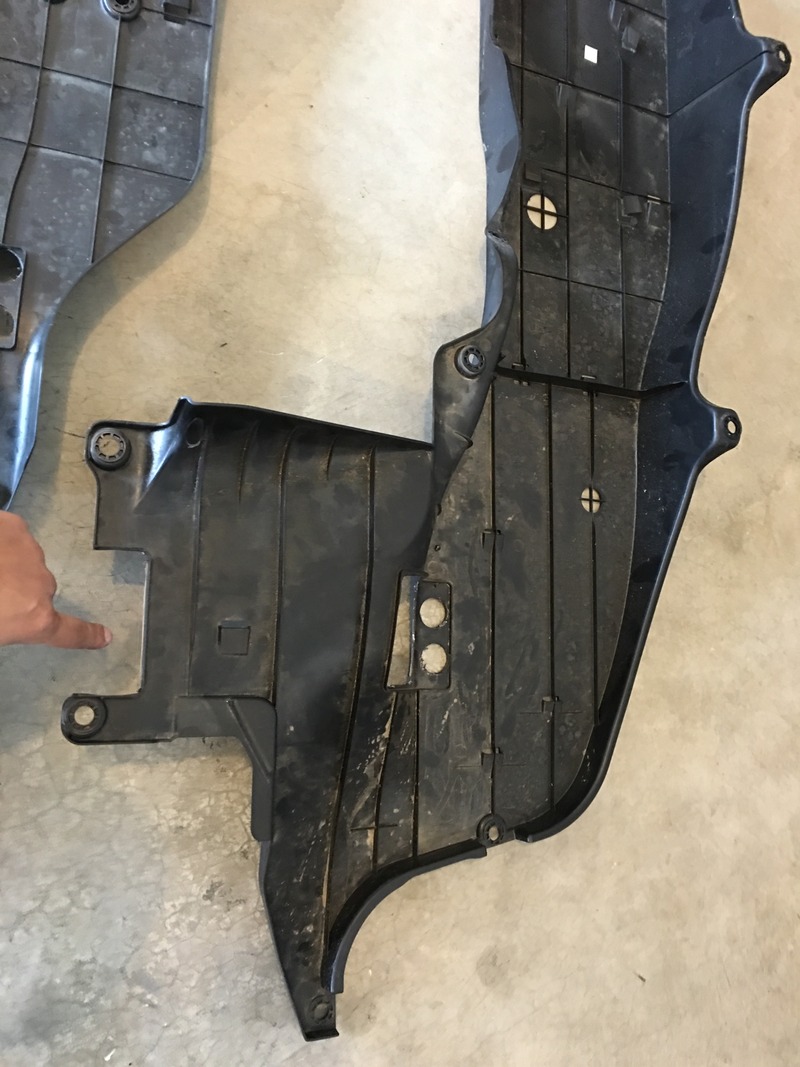
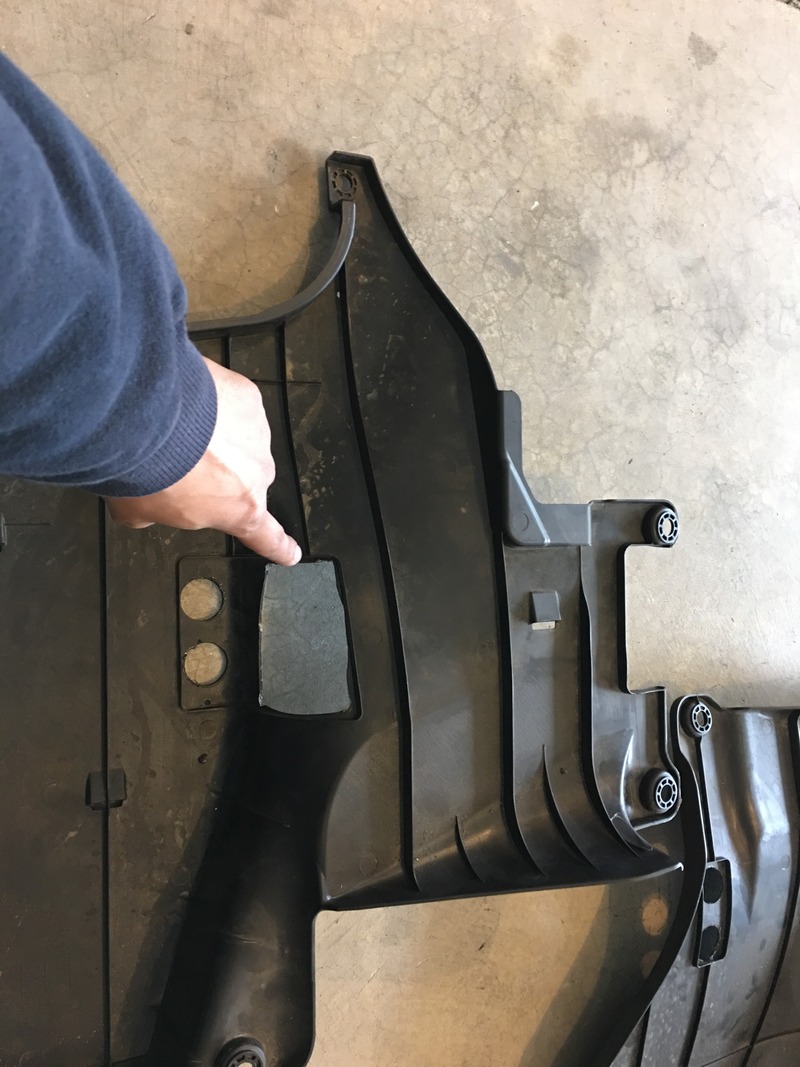
12. The next step is to cut out the the end pieces from the left cover with the air saw (I used box cutter/ x-acto knife) from the spots you drilled out. Clean up the cuts so they are nice and smooth. I snapped these pictures before.
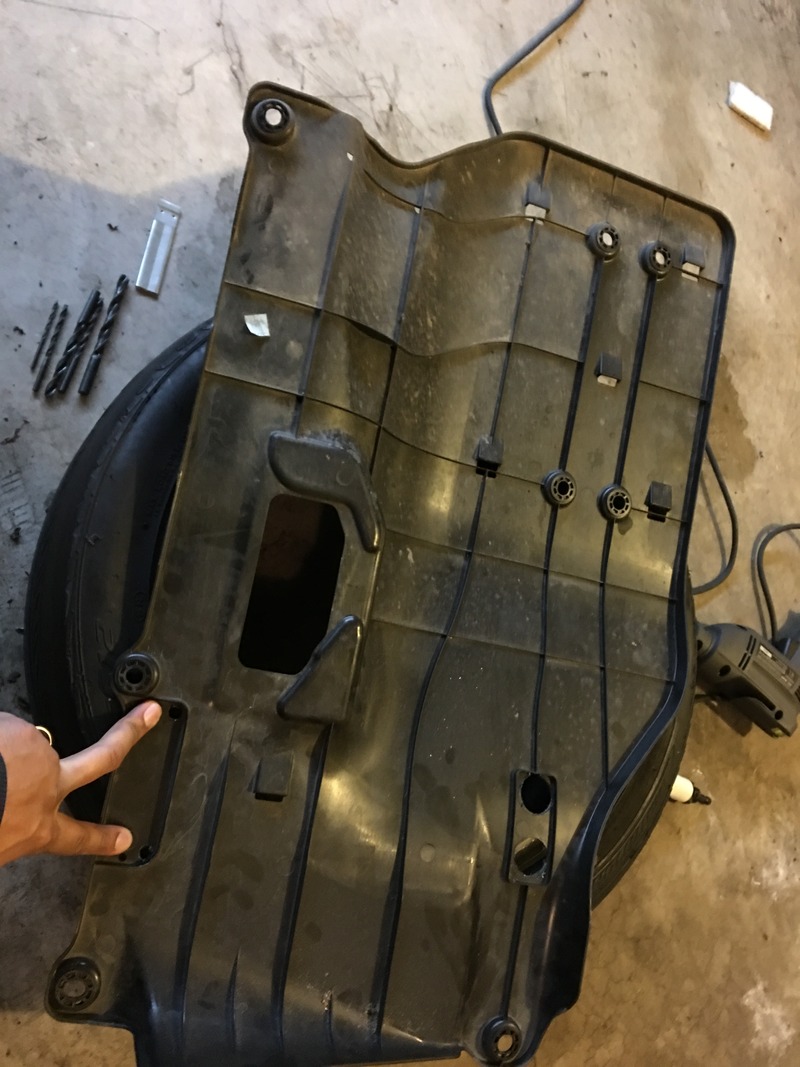
13. The next step is to cut out the the end piece from the right cover with the air saw (I used box cutter/ x-acto knife) from the spots you drilled out. Clean up the cuts so they are nice and smooth. I snapped these pictures before.
14. You are now done with prepping the panels. Re install both panel covers with the 10mm bolts and clips.
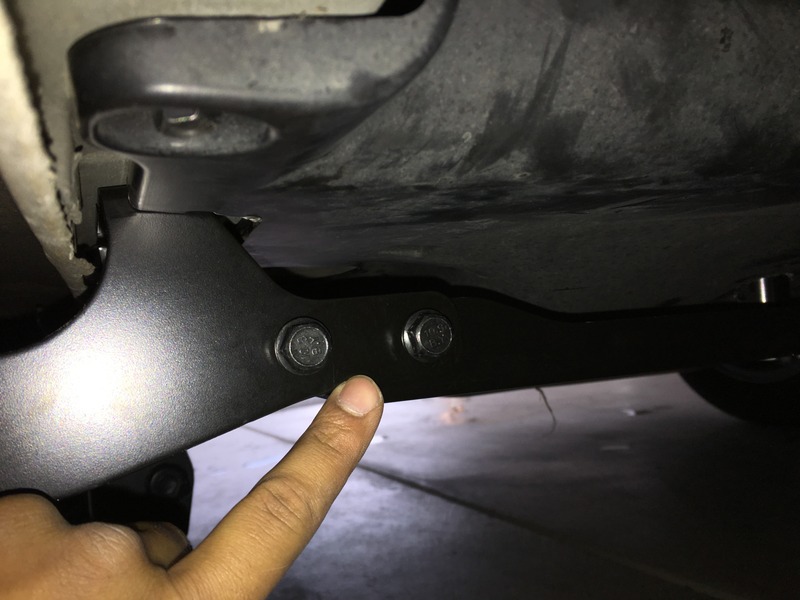
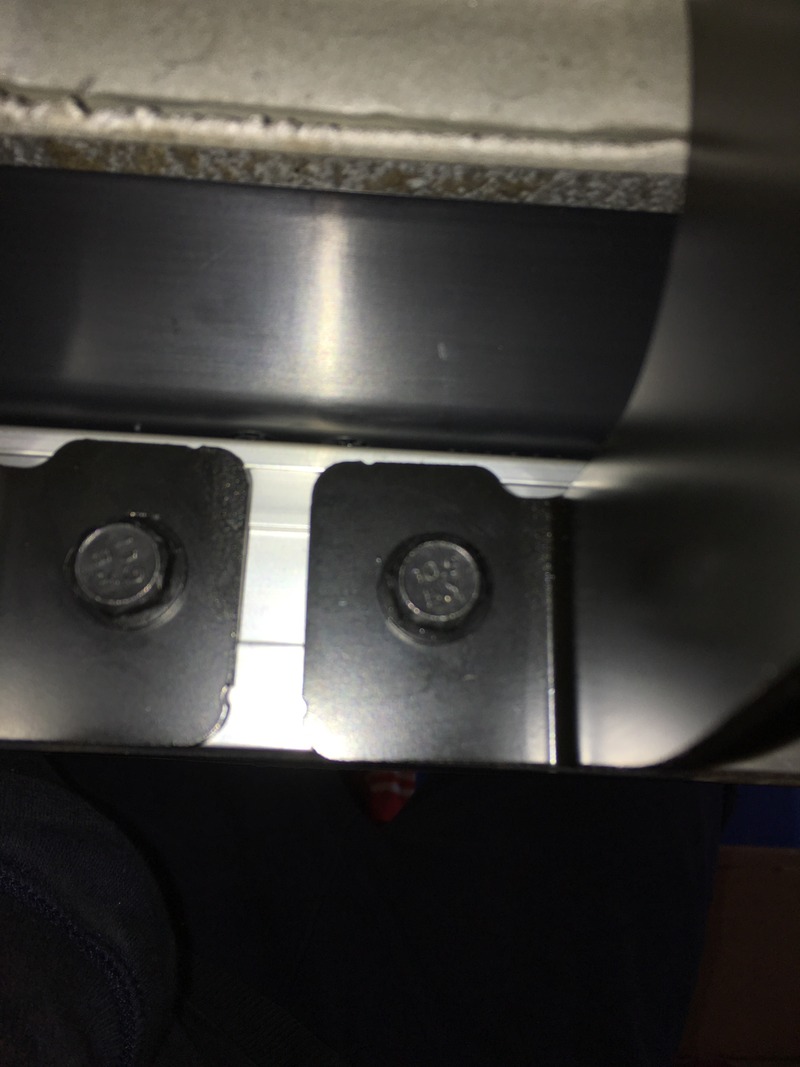
15. Now it is time to start bolting up the brackets starting with the A brackets. There is 2 per side and they are all the same. Make sure you install them with the open end facing inward. Install two 8x20mm bolts (loosely) using a 13mm socket thru the bracket to the underside of the car. <b>Note: I recommend threading all bolt holes first before mounting brackets to make them go in smoother as they were pretty tough the first time.</b>

16. Next step is to bolt up brackets B (short) which is closest to the front of the vehicle with two 8x65mm bolts using a 12mm socket (loosely).
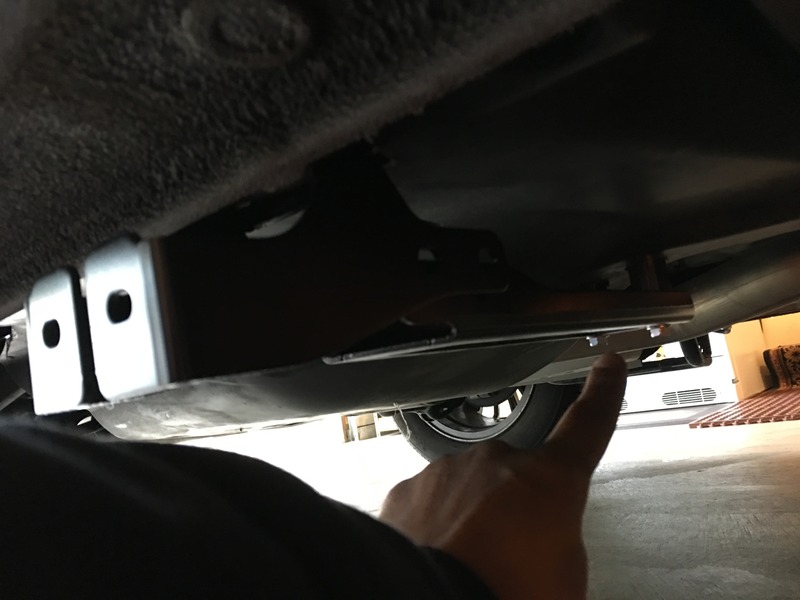
17. Install bracket C (long) which is the the one closest to the rear using 8x80mm bolts (loosely) using a 12mm socket thru the precut square for the left side. Right side just goes thru the precut large holes.
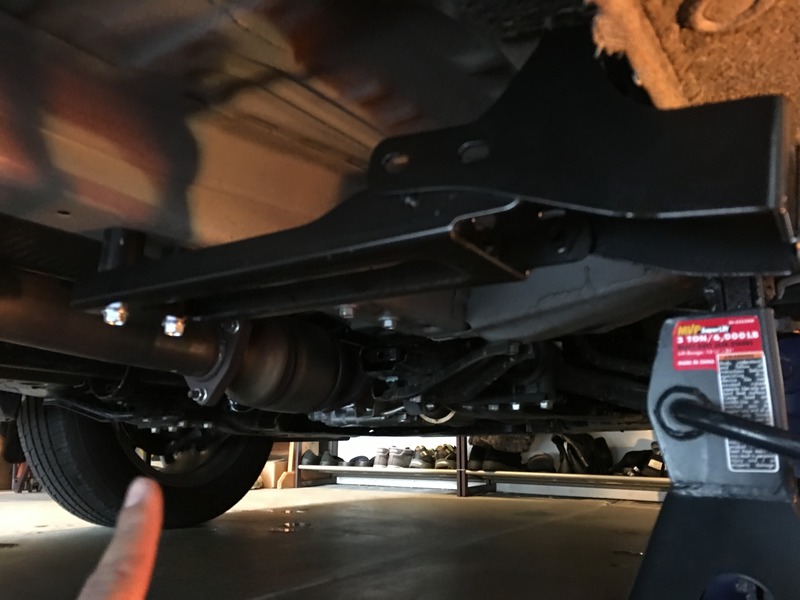
18. Using four 8x20mm bolts (loosely) using the 13mm socket connect brackets A and B and A and C together.
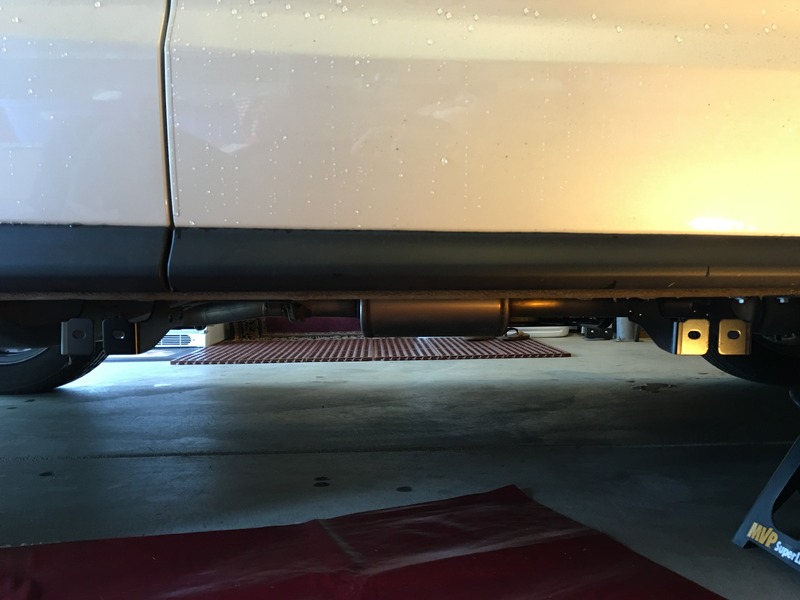
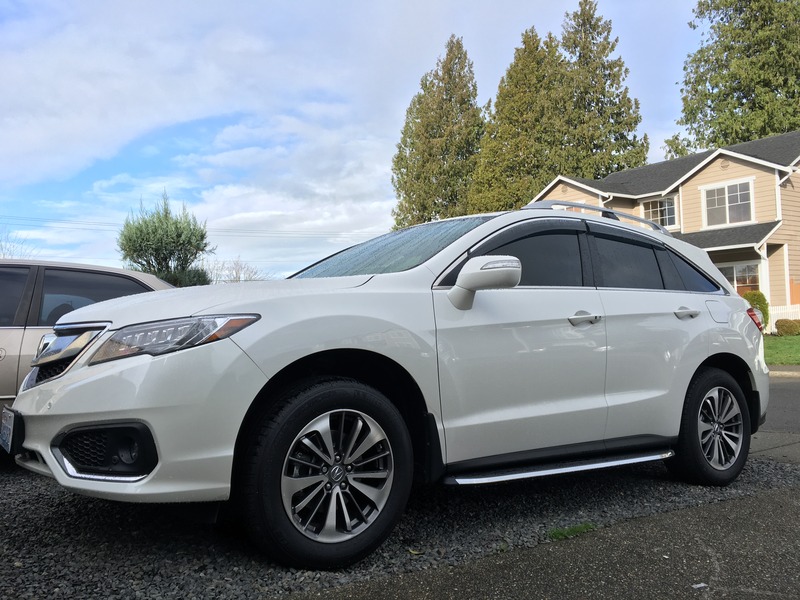
19. Next step is to mount the running boards. I did this part solo. You'll need to pull the running boards to bolt them up to both bracket A's with four 8x20mm bolts using the 13mm socket. I tightened these all the way down while pushing up on the running boards to secure them firmly. Makes sure they are parallel with the vehicle.
20. Lastly tighten all bolts to 16 lbs/ft using a torque wrench, take off protective tape and wipe down with alcohol to remove any excess tape residue. You are all finished! Enjoy!
<b>Tools needed:</b>
Ratchet with 10mm, 12mm and 13mm sockets
Torque Wrench
Drill with 3mm (1/8), 6mm (1/4), 8mm (5/16) and 10mm (3/8) drill bits
30mm Hole saw (I could only find 29mm and 32mm so I went with 29mm)
Eye Protection
Pushpin
File
Floor Jack
Jackstands
Air saw (I didn't have one so I used some brand new box cutter/X-acto knives)
<b>Parts Included:</b>
(2) running boards
(4) brackets A
(2) brackets B (short)
(2) brackets C (long)
(32) falange bolts, 8x20mm
(4) falange bolts, 8x65mm (for bracket B)
(4) falange bolts, 8x80mm (for bracket C)
<b>Installation Directions</b>
1. Raise the vehicle and place on jack stands.
2. Remove 6 (10mm) bolts and 4 clips from the left (driver side) under cover.

This picture shows where each bolt and clip go.

3. Remove 2 (10mm) bolts and 6 clips from the right (passenger) under cover.

This picture shows where each bolt and clip go.

4. On the left cover use push pin to puncture the remarked circles. (they have a plus sign on them. There is 6 small circles and the two big ones. (sorry no pictures of these but you'll see in further picture).
5. Using the 3mm (1/8) drill bit, drill all 8 holes.
6. Next step is to widen the 6 small holes with the 6mm (1/4), 8mm (5/16) and 10mm (3/8) drill bits. <b>Do not largen the big circles.</b> Clean the burrs with a file.

7. Using the 29mm hole saw, drill out the large circles. (you can also see the other 4 holes that were previously drilled out. Clean the burrs with a file.

8. On the right cover use push pin to puncture the remarked circles. (they have a plus sign on them. There is 2 small circles and the 2 big ones. (sorry no pictures of these but you'll see in further picture).
9. Using the 3mm (1/8) drill bit, drill all 4 holes.
10. Next step is to widen the 2 small holes with the 6mm (1/4), 8mm (5/16) and 10mm (3/8) drill bits. <b>Do not large the big circles</b> Clean the burrs with a file.


11. Using the 29mm hole saw, drill out the large circles. Clean the burrs with a file.


12. The next step is to cut out the the end pieces from the left cover with the air saw (I used box cutter/ x-acto knife) from the spots you drilled out. Clean up the cuts so they are nice and smooth. I snapped these pictures before.


13. The next step is to cut out the the end piece from the right cover with the air saw (I used box cutter/ x-acto knife) from the spots you drilled out. Clean up the cuts so they are nice and smooth. I snapped these pictures before.

14. You are now done with prepping the panels. Re install both panel covers with the 10mm bolts and clips.

15. Now it is time to start bolting up the brackets starting with the A brackets. There is 2 per side and they are all the same. Make sure you install them with the open end facing inward. Install two 8x20mm bolts (loosely) using a 13mm socket thru the bracket to the underside of the car. <b>Note: I recommend threading all bolt holes first before mounting brackets to make them go in smoother as they were pretty tough the first time.</b>


16. Next step is to bolt up brackets B (short) which is closest to the front of the vehicle with two 8x65mm bolts using a 12mm socket (loosely).

17. Install bracket C (long) which is the the one closest to the rear using 8x80mm bolts (loosely) using a 12mm socket thru the precut square for the left side. Right side just goes thru the precut large holes.

18. Using four 8x20mm bolts (loosely) using the 13mm socket connect brackets A and B and A and C together.

19. Next step is to mount the running boards. I did this part solo. You'll need to pull the running boards to bolt them up to both bracket A's with four 8x20mm bolts using the 13mm socket. I tightened these all the way down while pushing up on the running boards to secure them firmly. Makes sure they are parallel with the vehicle.

20. Lastly tighten all bolts to 16 lbs/ft using a torque wrench, take off protective tape and wipe down with alcohol to remove any excess tape residue. You are all finished! Enjoy!

Last edited by carbonTSEX; Feb 18, 2016 at 03:43 PM.

Cruisin'
Joined: Jun 2016
Posts: 16
Likes: 1
i installed the advanced running boards. and a week later when to put on the splash guards but it looks like there is no room for the front splash guards with the running boards in the way. Do u have any clearance issues at the front splash guards?
Thread Starter
The Original Shawdy
Joined: Jan 2010
Posts: 1,984
Likes: 432
From: Seattle, WA
Not at all. I had the splash guards on prior to the install of the running boards. No clearance issues for me.
Wow carbonTSEX... nice DIY thread! This would explain why I paid almost $300 to install my Advance Running Boards! It's a pretty intricate install but I like the look though so it was worth it.
Bruin
Joined: Nov 2011
Posts: 67
Likes: 9
From: Los Angeles, CA
Good write up. 
My wife just texted me some photos of the driver's side running board on our RDX with the chrome trim all bent/mangled (middle of the car). Now I have to find out what she drove/parked into and get it replaced...
A little late to the party, but like carbonTSEX said, there shouldn't be any interference issues with the splash guards. The Advance Running Boards can be moved (slightly) forward or rear when you're installing them, prior to tightening up the bolts.

Thread Starter
The Original Shawdy
Joined: Jan 2010
Posts: 1,984
Likes: 432
From: Seattle, WA
Acura sells two styles of running boards. There's the sport, which to me seem useless as the only offer a step for the rear passangers and are silver and black. Then there's the Advance running boards like the ones I installed above. They span the entire side of the vehicle and are black plastic with chrome trim. They are useful for kids, getting access to the roof for a roof box or bike attarchments. I haven't made it that far but makes it easy to clean and dry the roof while washing the vehicle. Also work for getting in and out but the RDX isn't very tall.
Some people have complained about not using the step and getting their pants dirty. I haven't experienced that but can see it as a possibility if you don't use them and step over.
Overall I am happy with my purchase and it adds a nice tough to the over all appearance.
Some people have complained about not using the step and getting their pants dirty. I haven't experienced that but can see it as a possibility if you don't use them and step over.
Overall I am happy with my purchase and it adds a nice tough to the over all appearance.