When you click on links to various merchants on this site and make a purchase, this can result in this site earning a commission. Affiliate programs and affiliations include, but are not limited to, the eBay Partner Network.
I just wanted to know what dash cam you use currently for the front and back? If you recommend a dash cam please provide a link to the site . Also is hard wiring easy to do? Is there a easy guide I could follow? Are 2 cameras necessary?
I just wanted to know what dash cam you use currently for the front and back? If you recommend a dash cam please provide a link to the site . Also is hard wiring easy to do? Is there a easy guide I could follow? Are 2 cameras necessary?
Thanks
There are some local shops that will do it for you. There are quite a few different models and like everything else, you get what you pay for. I am subscribing to this thread because I am interested in a dash cam too. Too much stupidity out there.
I just wanted to know what dash cam you use currently for the front and back? If you recommend a dash cam please provide a link to the site . Also is hard wiring easy to do? Is there a easy guide I could follow? Are 2 cameras necessary?
I have a number of dash cams. The one I like the most is the A118-C. I have capacitor models because they hold up to heat better and it gets pretty hot in Texas. For Canada, this should not be as big an issue, but a capacitor model is still a good idea because they won't wear out.
I run a T-splice from the cig lighter power cable because this comes on only when the ignition is on. Then I route it inside the dash and up the roof pillar. I tuck it into the headliner and then drop it down near the rear view mirror. I zip tie right there for support and then plug it into the camera.
I purchased the Power Magic Pro to cut camera power if the voltage gets below either 12v or 11.8v (depending on what you want) in parking mode. I took it down to the local Audio install place to have them do it since the front/rear camera are connected and you have to run the single power/coax cable from the front to the rear facing camera. I think they charged about $100-$125 for the install.
I've installed it back in May/15 and it operated flawlessly during the summer heat of +100 degrees in the southwest and high humidity of deep south (road trip to FL from NM).
The only con is you have remove the mini SD card if you need to save an incident. Then you have to connect to a PC's USB port to download the data using the free Blackvue software viewer. You can only view using the built-in wifi module and a smartphone live or recorded events.
I only wish Blackvue made a 4-channel to get the side view also.
I have Papago GS200 in the front, none for the back yet. With hardwiring kit and fuse tap, install took about 10 minutes.
I've got this one flagged on Amazon right now. I'm hesitating to pull the trigger until I know for sure the install wil be clean. I'm just not too sure of the rearview clip-on thing.
I purchased the Power Magic Pro to cut camera power if the voltage gets below either 12v or 11.8v (depending on what you want) in parking mode. I took it down to the local Audio install place to have them do it since the front/rear camera are connected and you have to run the single power/coax cable from the front to the rear facing camera. I think they charged about $100-$125 for the install.
I've installed it back in May/15 and it operated flawlessly during the summer heat of +100 degrees in the southwest and high humidity of deep south (road trip to FL from NM).
The only con is you have remove the mini SD card if you need to save an incident. Then you have to connect to a PC's USB port to download the data using the free Blackvue software viewer. You can only view using the built-in wifi module and a smartphone live or recorded events.
I only wish Blackvue made a 4-channel to get the side view also.
I have a Blackvue also. It does not have a screen, but I like the size. It hides behind the rearview mirror.
I've got this one flagged on Amazon right now. I'm hesitating to pull the trigger until I know for sure the install wil be clean. I'm just not too sure of the rearview clip-on thing.
Thanks everyone for their opinion and pictures of dash cam and sorry for the late reply!!
Plus the hardwire cable kit is $40 and is coming with this model for free.
The only problem is I never hardwired anything and am afraid of screwing up , though I'm pretty sure their is a manual but if someone here personally knows how to hardwire dash cam and if they all have similar procedures , it would be nice if someone showed a step by step with pictures on how to hardwire. Or even make a thread for hardwiring or direct me to a useful source.
I appreciate the help and advice in this community
I have been running a GoPro in my UTV, boat and car. I just use an adhesive mount on the dash board and it works rock solid without any issue. Given that it is very visible I have to remove it every time I get out of the car. The GoPro is an unmatched product for all outdoor sports like UTV and boating.
To day, Santa delivered a PaPaGo GS 200 unit to me. I am trying to figure out how it works and where to mount it. If it is not too visible on the mirror for thieves, I may leave it on permanently.
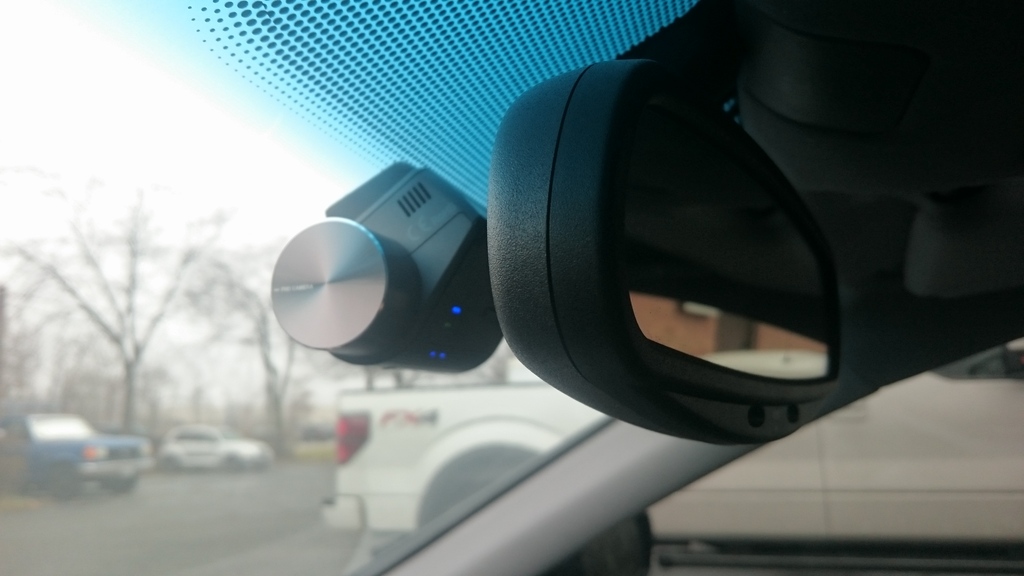
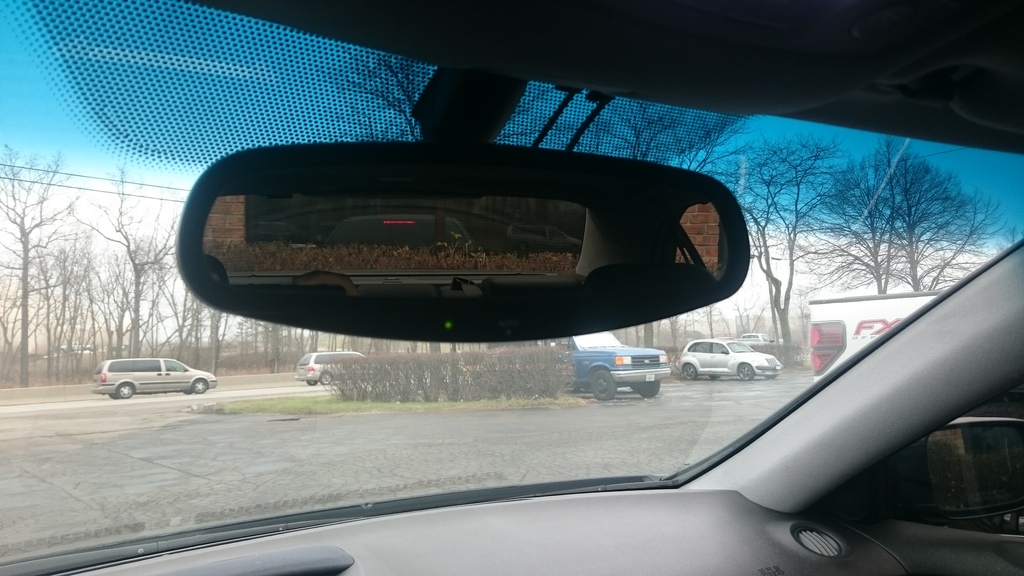
I actually hardwired it into my car, so far so good. I like that I don't have to think about turning it on. I have parking mode enabled on it, but it is nice that you can set voltage parameters for when it turns off for good in order to protect the battery. I have a celllink backup battery installed as well just in case. Here are some pics of the install and video footage as well. I don't even notice the rear camera, all I see from the front camera are the two wires that come down to power it and the rear camera. The first video is front footage and the second is rear. If you go to 1:00 minute, it will show nightime footage
I actually hardwired it into my car, so far so good. I like that I don't have to think about turning it on. I have parking mode enabled on it, but it is nice that you can set voltage parameters for when it turns off for good in order to protect the battery. I have a celllink backup battery installed as well just in case. Here are some pics of the install and video footage as well. I don't even notice the rear camera, all I see from the front camera are the two wires that come down to power it and the rear camera. The first video is front footage and the second is rear. If you go to 1:00 minute, it will show nightime footage
Did you remove a pillar or just stuff the wires under the mirror?
Also if you had step by step instructions on how to hardwire and open the fuse please post it would be helpful to not only me but other members as well
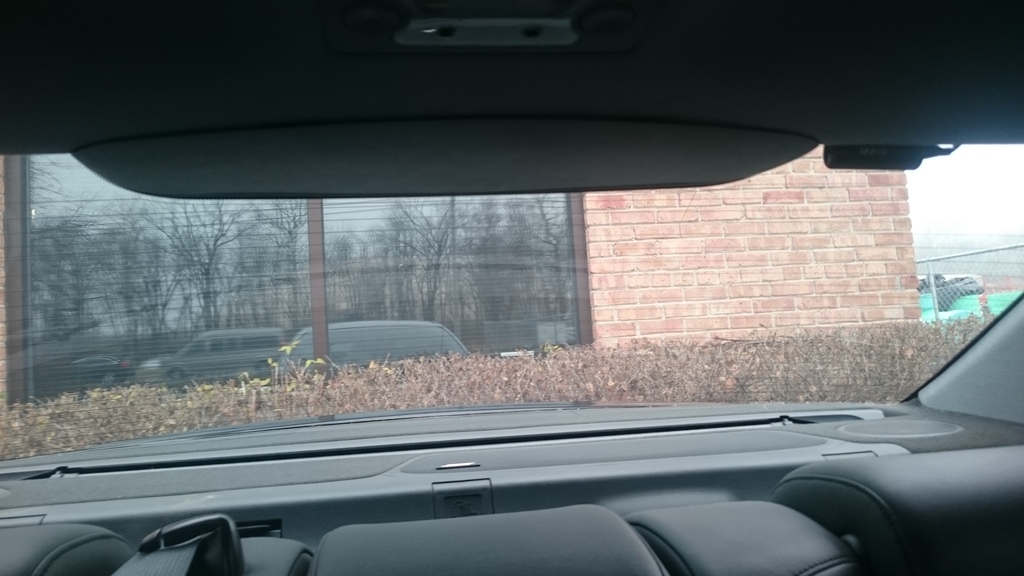
Pull rubber seal out and tuck wire inside the pillar
route wire thru here
plug into fuse box. Don't forget to ground the wire too.
THANK YOU MAN UR A LIFE SAVER , IT SEEMS LIKE A SIMPLE INSTALL BUT IF IM CORRECT THE FUSE BOX IS UNDER BENEATH THE STEERING WHEEL ADJUSTER , AND HOW DO I REMOVE THE PLASTIC COVERING THE FUSE WITHOUT BREAKING ANYTHING? Sorry for the caps..
Also how do you know which cords to put into where? There is a red and yellow and the black is the ground cord? Do I just unscrew the bolt and wrap the ground cord and then screw tightly in .?
If you still have questions check out blackboxmycar.com. They have tons of info regarding hardwiring, and other dashcam stuff.
What you'll do is wrap the wire around the prong on the fuse, then plug it in. No need to disassemble the fuse in any way.
You'll have three wires: One for constant power (something that has power even when the car is off, key out of ignition), one for accessory power (for when key is on) and a ground wire. Use a cheap little multimeter to check which fuses have power when the key is off, and plug in the corresponding wire. Do the same for fuses that have power with the key on (there is usually an ACC fuse), and ground the ground wire. Blackboxmycar.com has plenty of video walkthroughs to guide you along the way.
I'll do a walkthrough with installing in the coming week or two if you haven't installed yours yet. Hardwiring is pretty much the same across all the models with parking mode with the wire for always-on power, accessory power for when the car is on, and ground wire.
For my Blackvue DR650gw-2ch, I need to re-format my SD card about every 2 weeks per instructions. If I don't re-format, I get the "check SD card" audio message until I do. I just have to press and the hold button by power/antenna plugs for 10 seconds, takes about 20-30 seconds to complete. I am suppose to replace the card about every 3-4 months because of the constant writing and damage from extreme temps (mostly summer compared to winter I figure).
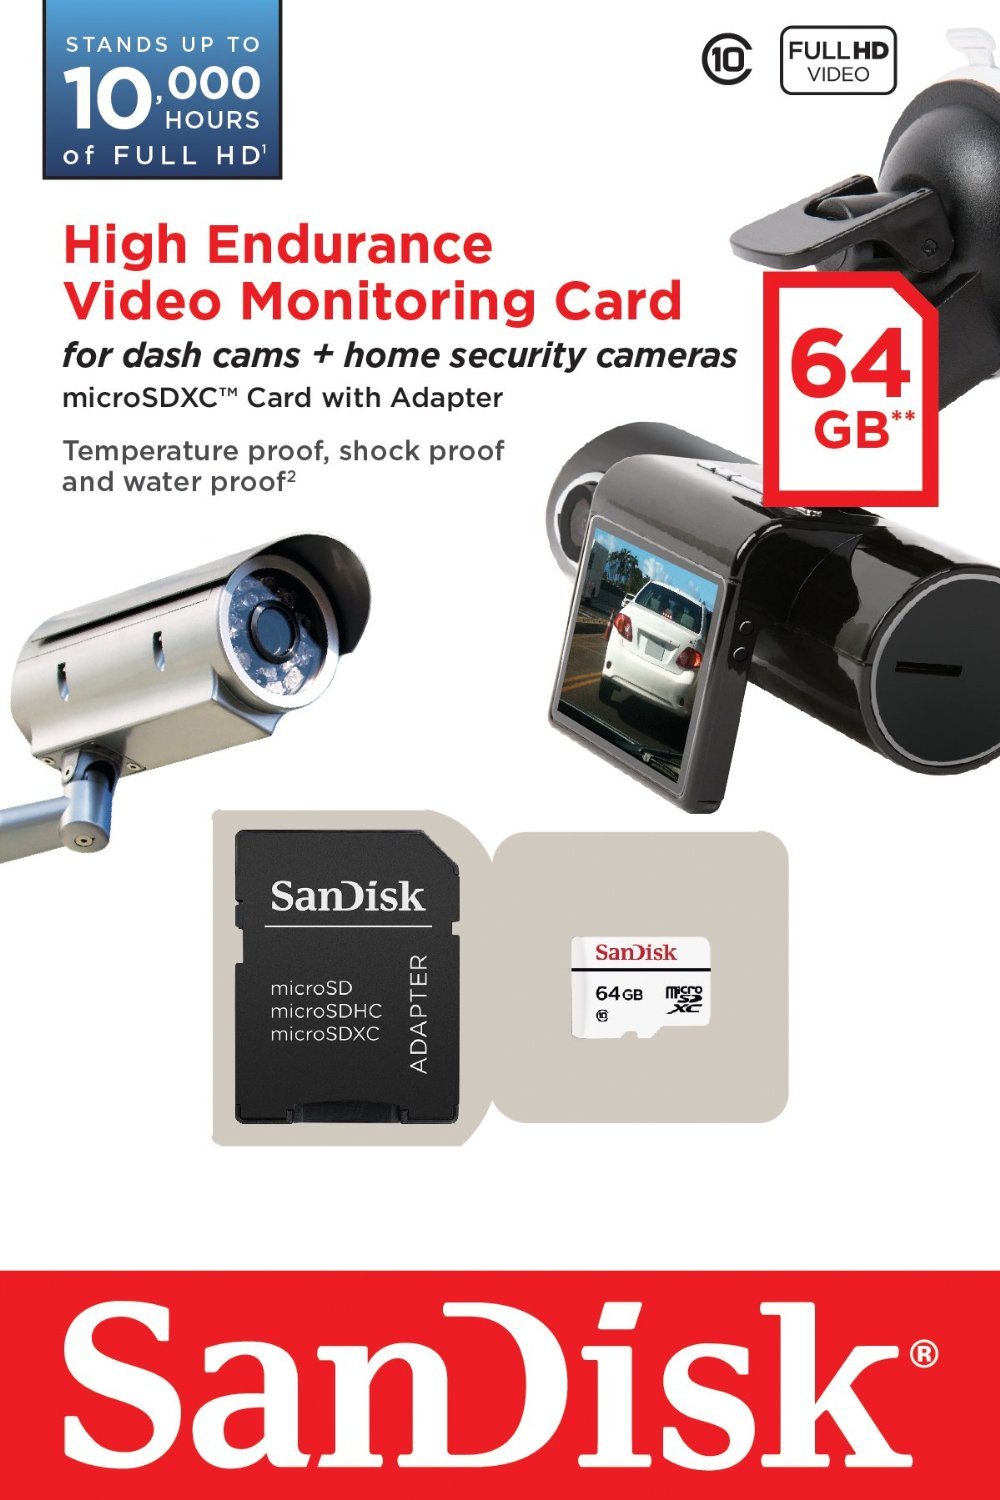
I recently upgraded my SD card to SanDisk High Endurance Video Monitoring 64GB (SDSDQQ-064G-G46A), $35- $45, depending on site like Newegg or Amazon. Its suppose to be made for devices like our Dashcams and home video systems. I'm going to give it a try to see if I can get 6-12 or more months from the card instead of 3-4 months from cheaper brands. I still have my 16GB and 64GB SanDisk Ultra UHS-I/Class 10 Micro cards as back-up in the glovebox if the new card dies at anytime. The card comes formatted in exFat, you have to download any number of free programs to re-format to FAT32 like 2Tware Fat32Format 1.13:
I have a Blackvue also. It does not have a screen, but I like the size. It hides behind the rearview mirror.
I had the Blackvue DR650 2CH Front and View camera. I had to return it after the second replacement died on me. It went glitchy after sitting in the Ohio sun where there's a high pitch sound and no audio when it boots up. I do have the DR750 which is bulkier (not discreet) and doesn't glitch like the 650. I haven't been able to hardwire it since replacing my TL with the MDX. The LKAS camera box is taking most of the space on the windshield and there's no clean angle.
Any photos of dashcam installs where the LKAS camera taking the space? I wish Auto manufacturers integrate dash cams into the vehicles.
Here's my Dash Cam. Works like a charm. Has front and rear. I didn't hardwire it, I just go a really long cigarette charger and ran it through the trim into my armrest. It's small and it hides behind the rearview mirror. You can't even tell it's there unless you look from underneath. Video and audio quality is decent.
Since I bought my 2014 legacy I have both a B40 (capacitor) aka A119C camera with GPS for the front window and a Rexing V1 for the rear window. I like the B40 cam as it does 1440p and has GPS built in to the mounting base for the same price as the V1
Pull rubber seal out and tuck wire inside the pillar
route wire thru here
plug into fuse box. Don't forget to ground the wire too.
njry000,
I did somewhat similar to what you did but for some reason, my stays on even when I turn off the car. I use the same add a fuse and tapped it to the middle console cigarette lighter fuse. Do you have to do anything else? For my setup, I actually added a cigarette light socket inside the glove box with the add a fuse tap. Plug both fuses in the add-a-fuse link where the positive goes to the positive of the cigarette lighter socket and the ground for the socket goes to the body chasis. There is a few time I forgot to unplug it over night and luckily it didn't drain out the battery.
Hi, can you tell me, there's three wires to connect Black (ground) and the other two Yellow and Red where do you tap in to? which fuse? TIA
Where you connect the red and yellow depends on the harness and the instructions that came with it. Mine (Thinkware) sells some with the red to constant on while others require yellow to constant on. Here's the kicker. My cable was labeled backwards. So, you may have to experiment a little.
As for which fuses, the 'accessory' fuse is usually a good one for switched power (camera comes on and records full time while engine is running) while circuits that are typically hot all the time (dome light) are good for the 'while parked motion and impact' power.
Strong suggestion. Use add-a-fuse for both wires. It makes connections much simpler and certainly a lot safer.
You just wire it the exact same way if you were going to install the camera into the fuse box. You can set this device to cut camera power if the battery gets below a certain level, set the camera to turn off on a timer, and/or have the camera turn off if the cabin gets too hot. I upgraded from my BlackVue Power magic Pro to this. We are going to break 100 degrees all this week in the southwest and I have it set to turn off the BlackVue DR650 camera when it gets too hot in the cabin (and if volts drop below 12.2).
Where you connect the red and yellow depends on the harness and the instructions that came with it. Mine (Thinkware) sells some with the red to constant on while others require yellow to constant on. Here's the kicker. My cable was labeled backwards. So, you may have to experiment a little.
As for which fuses, the 'accessory' fuse is usually a good one for switched power (camera comes on and records full time while engine is running) while circuits that are typically hot all the time (dome light) are good for the 'while parked motion and impact' power.
Strong suggestion. Use add-a-fuse for both wires. It makes connections much simpler and certainly a lot safer.
Cheers!
Mine also Thinkware F750, the wiring kit that I just got, Red labelled as ACC and Yellow mark as Battery, thank for the help.
I would install someting like the VicoVation Plus Batter Discharge Prevention Device for Parking Mode.
MG,
He's installing a Thinkware brand camera. They have battery protection built in (a big selling point when I purchased mine). Settings in the camera allow you to specify at what voltage the camera will shut down preventing excess battery drain while parked. Users can also set a timer that shuts parking recording down after a certain amount of time. Thinkware also uses a capacitor instead of a battery which helps prevent high cabin heat issues. It's a couple of things to look for when shopping for dashcams.
You just wire it the exact same way if you were going to install the camera into the fuse box. You can set this device to cut camera power if the battery gets below a certain level, set the camera to turn off on a timer, and/or have the camera turn off if the cabin gets too hot. I upgraded from my BlackVue Power magic Pro to this. We are going to break 100 degrees all this week in the southwest and I have it set to turn off the BlackVue DR650 camera when it gets too hot in the cabin (and if volts drop below 12.2).
Hi, yes mainly for Parking Mode, and the Hard wiring Kit one I bought is also from Thinkware already have some kind of low voltage protection.
I've noticed my 4 year old OEM battery would fail to start my MDX a few times even with the low voltage protection module for my Dashcam. I figured it was my alternator, bluetooth module, bad Dashcam voltage module, or bad relay and it was just my weak OEM battery in the end. I upgraded to an Interstate AGM battery and I haven't had the problems since I installed +2 years ago. I've never got over 4 years with the OEM battery of all three of my Acura vehicles (downside of hot southwest living).
I've never got over 4 years with the OEM battery of all three of my Acura vehicles (downside of hot southwest living).
I hear that! I'm in the Phoenix area where we'll be topping out around 120 degrees (F) here today. You can forget that 'dry heat' crap, it's HOT and death for batteries. I feel fortunate to get 3 years out of one which is why I always purchase batteries with really decent warranties. Walmart sells highly rated batteries designed specifically for southern or northern climates. Northern clime batteries feature more cold cranking amps while southern batteries have better reserves. They're a 'no cost to you' 3 year warranty, prorated after that to 5 years which is pretty darned good these days. Something to think about next time you need a replacement.
Pull rubber seal out and tuck wire inside the pillar
route wire thru here
plug into fuse box. Don't forget to ground the wire too.
Can you please just tell where should I tap for the Red (ACC) and Yellow (Battery) to which fuse #?, I am soo confused after reading so many instructions..2013 RDX Tech. TIA ..
Can you please just tell where should I tap for the Red (ACC) and Yellow (Battery) to which fuse #?, I am soo confused after reading so many instructions..2013 RDX Tech. TIA ..
You're really over thinking this. Just attach the red and yellow wires to an add-a-fuse and pop a 5 amp fuse in for each. Remove fuse 12 (Accessory power socket center console 20amp) or 27 (accessory socket front) and pop the fuse into the red (acc) add-a-fuse then insert the add-a-fuse into the empty #12 or 27 socket. The yellow (battery) add-a-fuse goes into any always hot socket. There are several to choose from including all the power door lock fuses (8, 9, 10) and power seat (16, 17, 18). Again, use a 5 amp fuse for the camera side of the add-a-fuse and the fuse you've removed from the fuse box for the other side. Pop the add-a-fuse into the empty socket. You should be done unless, like mine, the harness was labeled backward. If so you'll find the camera goes into parking mode when you start the engine. If that happens just reverse the wiring (don't forget to swap the original fuses) and you're good to go. If everything is connected properly (and assuming you haven't turned the camera audio off) you'll hear something like "continuous recording will now start" when you start the engine and, when you shut the car down, "parking mode will now start."
One last thing, the traffic camera alert, while well intentioned, is probably going to drive you nuts. The good news is, you can easily turn it off.
Cheers!
Y I know I am bit over thinking about this wiring thing, anyway thank soo much for your explanation, now I have confidence to do it myself..perfect
One more question about Fuse Tap kit, I got 10A ATM Dual Fuse Tap (atleast that what it says in the box) can I safely use this to tap in on 15A in the fuse box? TIA

 12-06-2015 | 04:22 PM