I recently painted the the calipers on my 2003 SSM CL-S black. They turned out great and looked better than I expected.
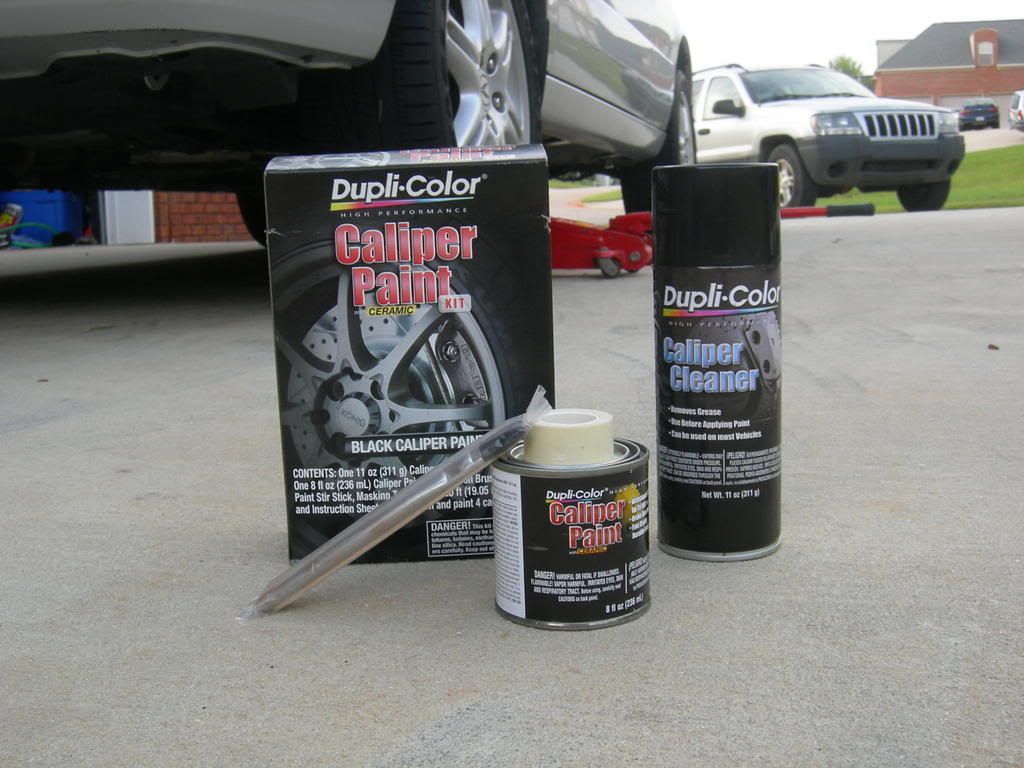
Here is the kit I used. It is the Dupli-Color caliper paint kit. I purchased it at AutoZone for $16.99.
First step it to jack the car up and put it on jack stands. Then remove both front wheels.
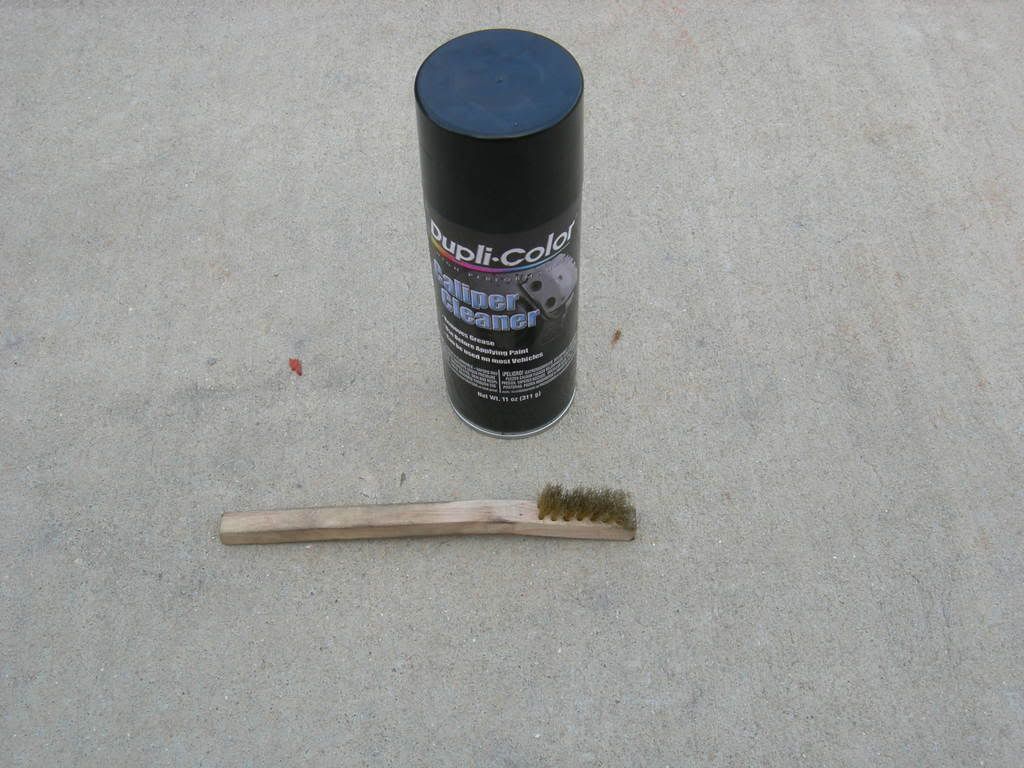
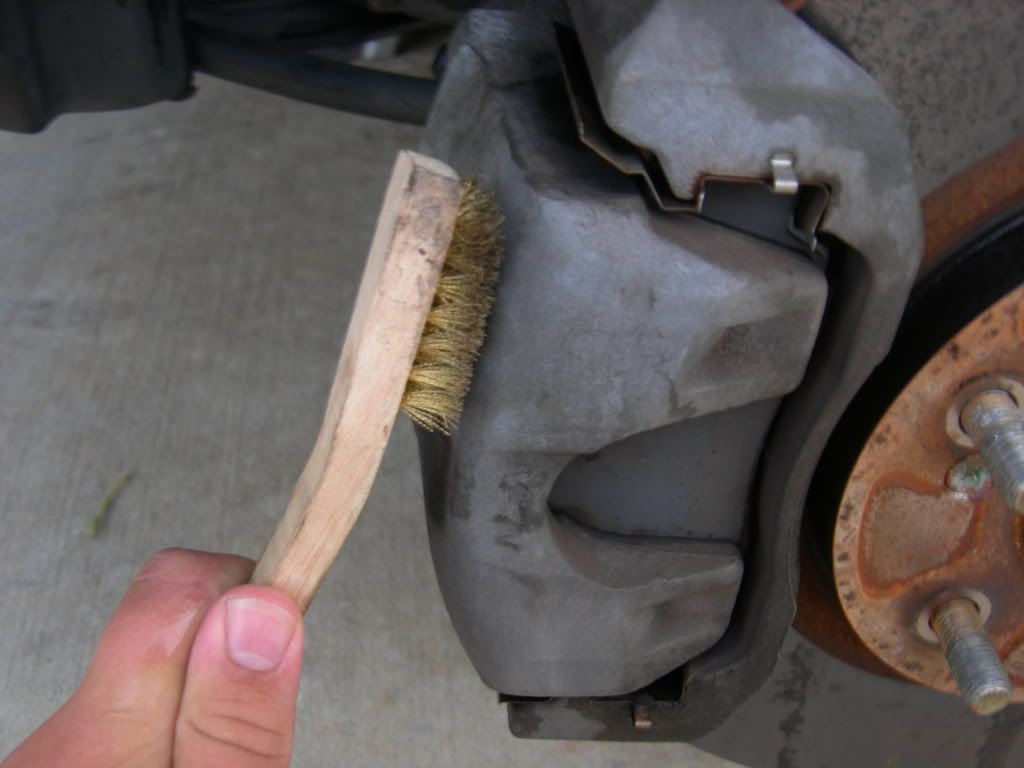
Second, you will need to clean the calipers using the caliper cleaner and a brush of some time. I chose to use a wire bush.
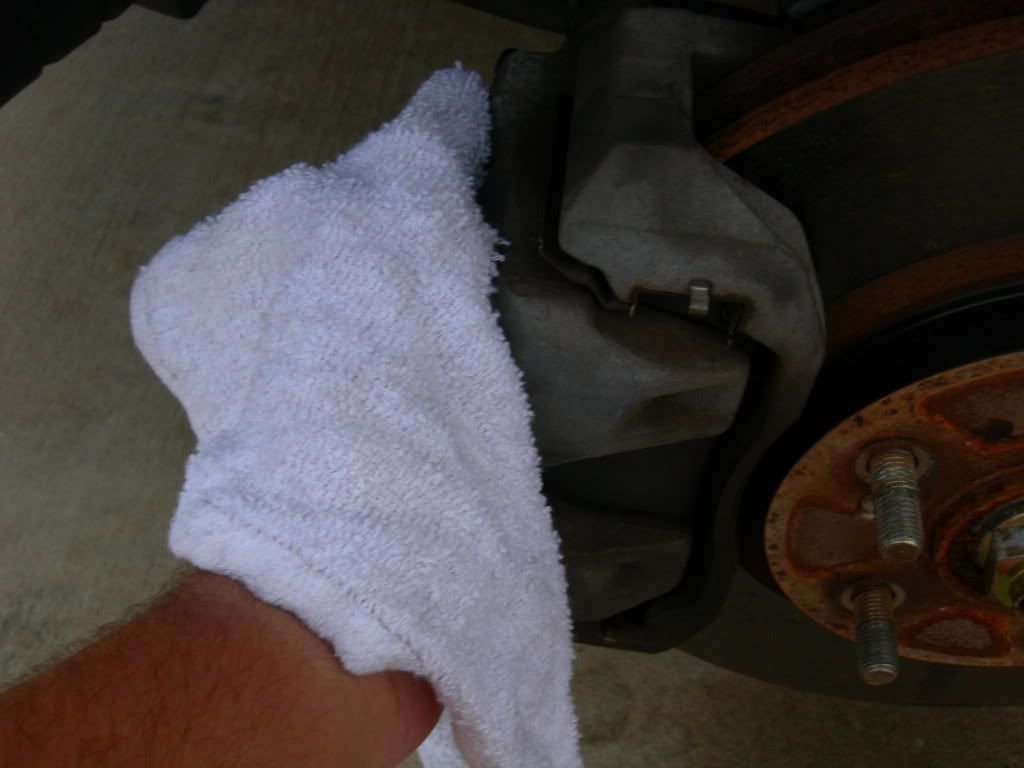
After scrubbing the calipers with the brush, spray them again with the cleaner and wipe them down with a rag.
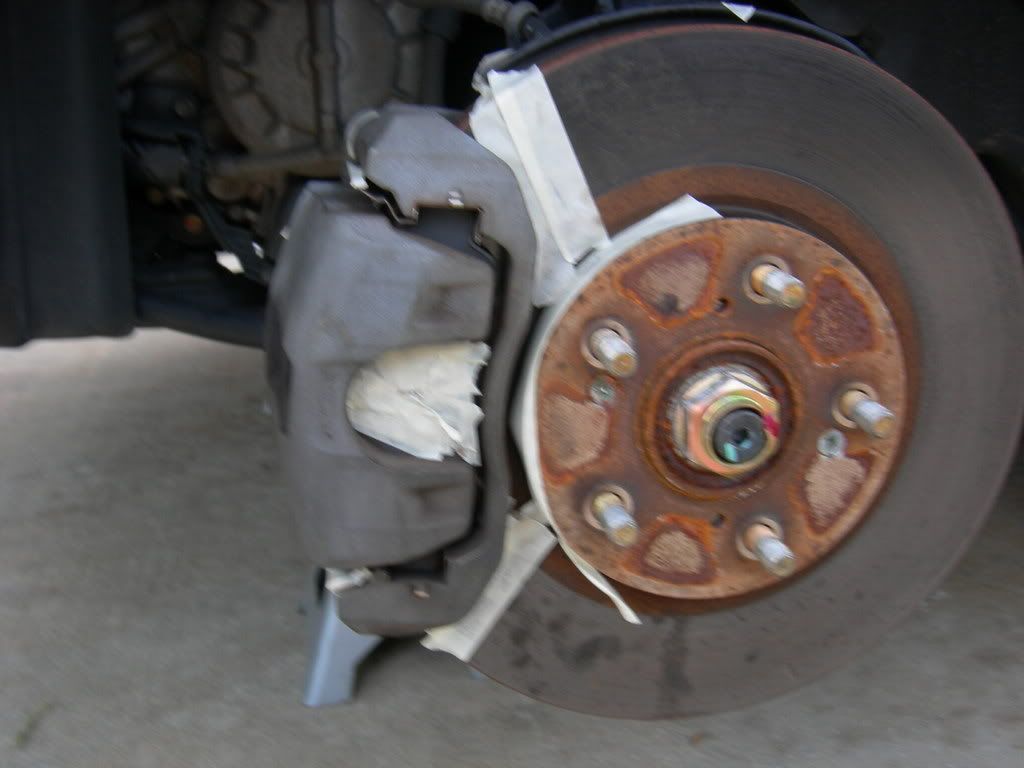
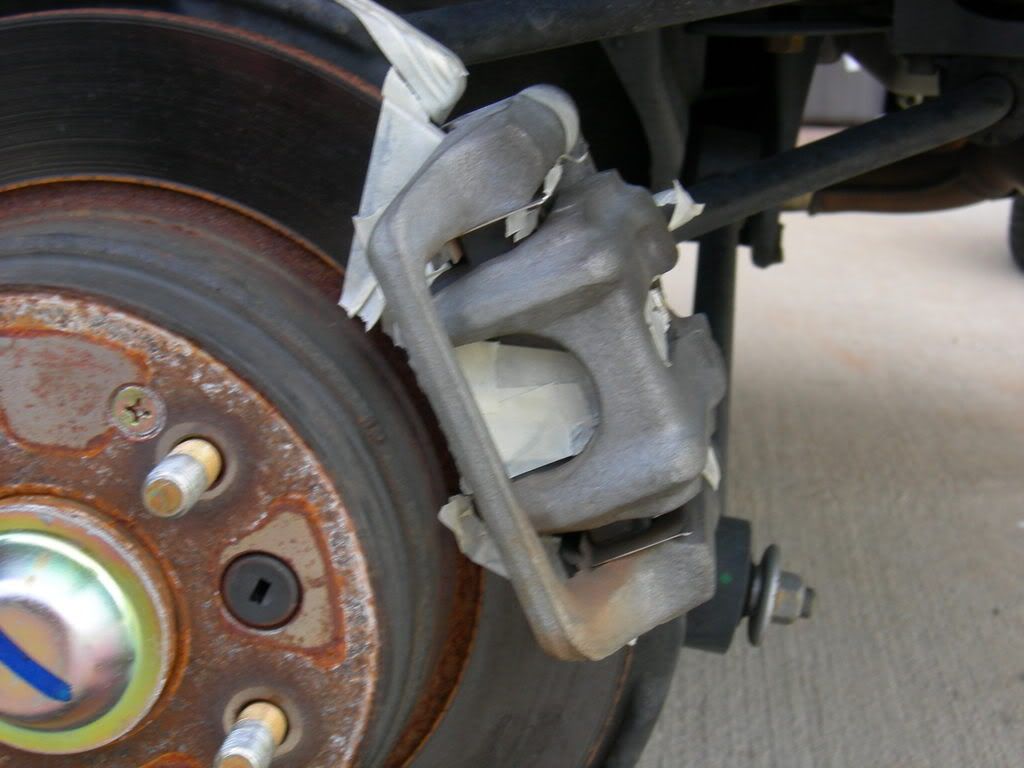
Third, you now need to begin masking off the brakes with the included tape. You need to mask off the pads, caliper boots, rotor, and brake bleeder valve.
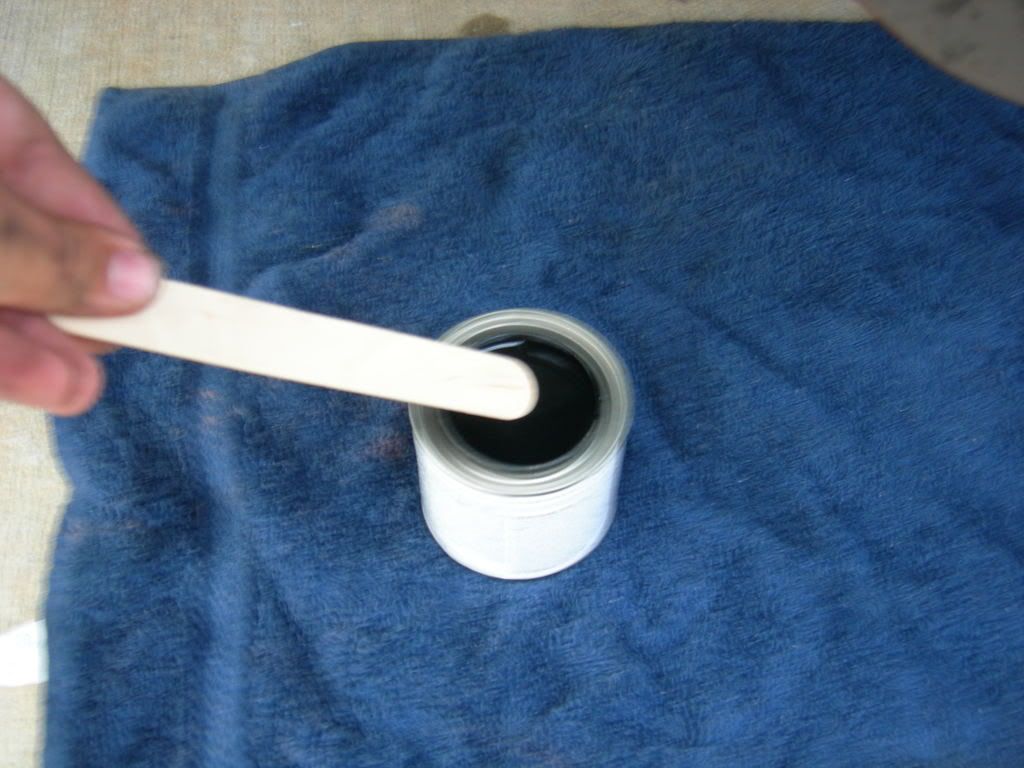
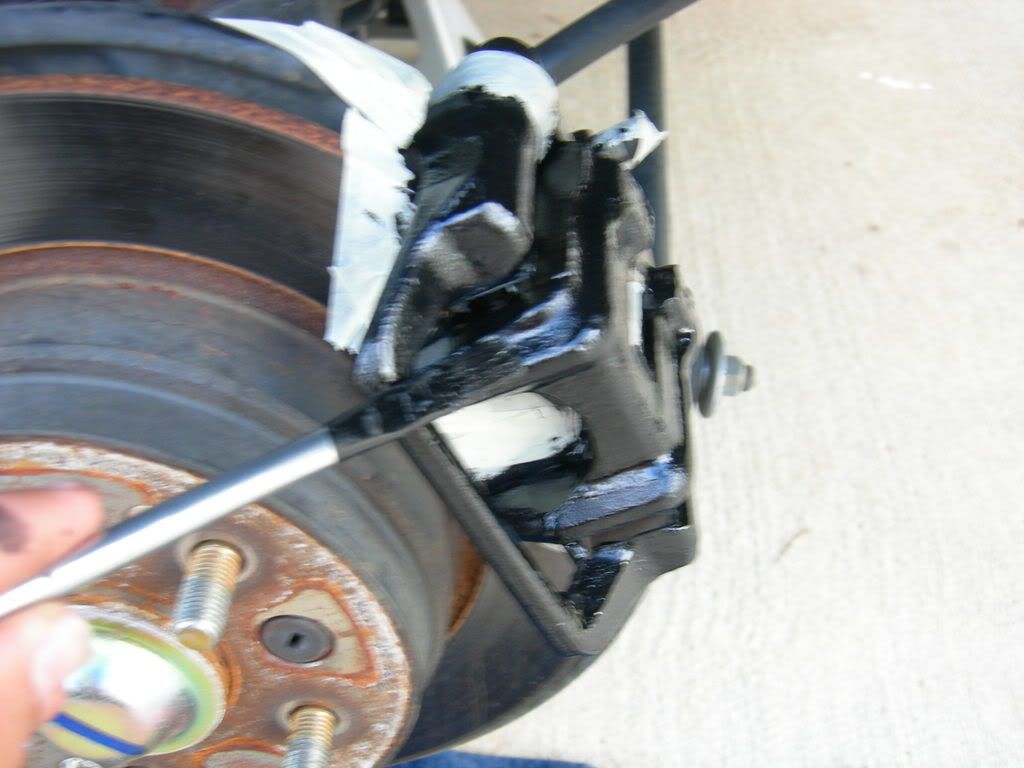
Fourth, you can now begin the painting process. Place the can of paint on the towel. I say this because the paint is filled to the brim of the paint can. Pry open the paint can with a screw driver. Now you will need to stir the paint well with the stirring stick included in the kit.
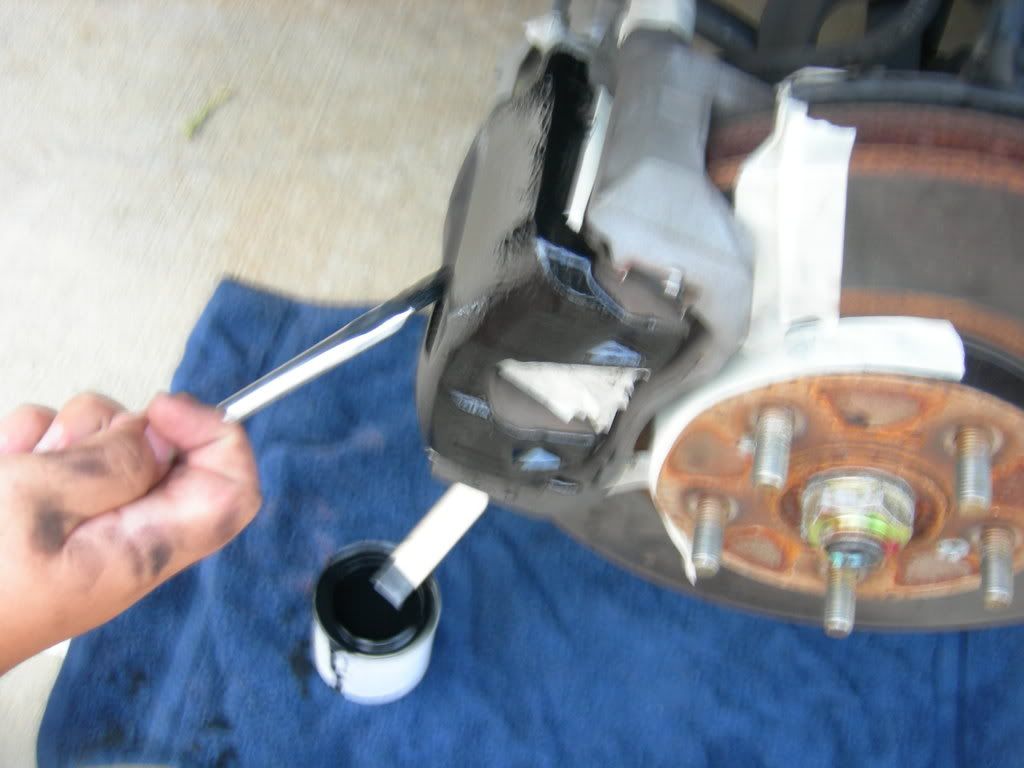
Now you can begin painting. The kit includes a brush, but I recommend going to a hobby store and purchasing a better one. The one that comes in the kit sheds bristled in the paint. Remember to keep the paint stirred through out the job.
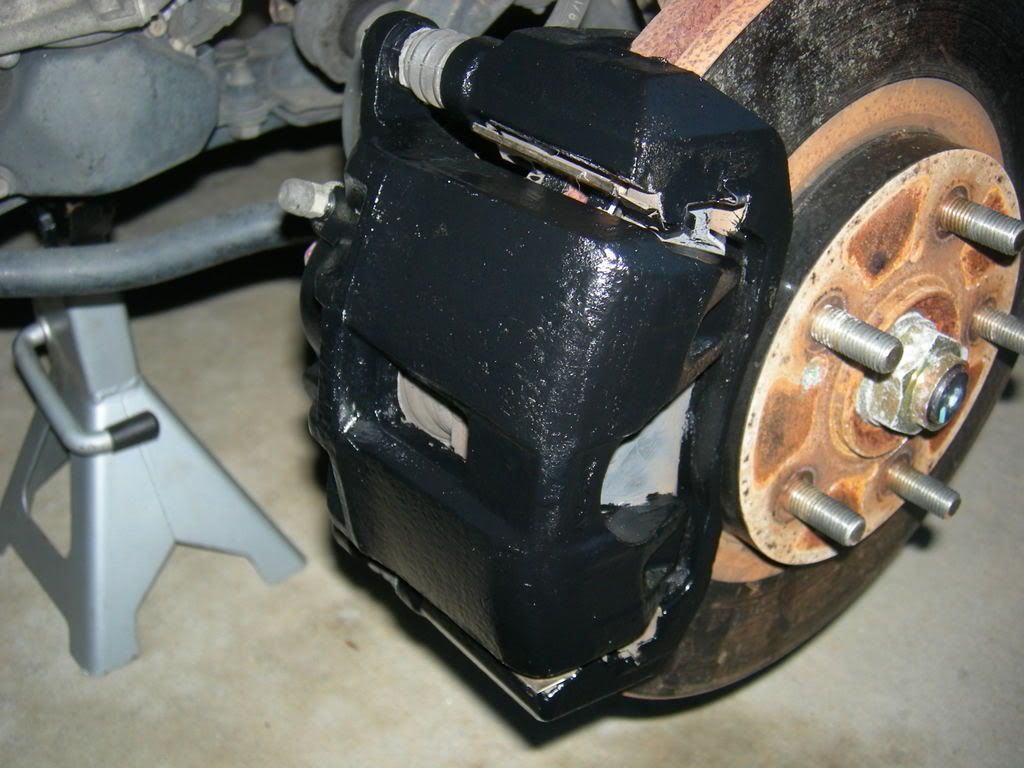
Fifth, Now that you are finished painting one side, repeat all of the steps above for the other side. This will allow the first coat of paint to dry. After both sides have the first coat of paint, give them both a second coat.
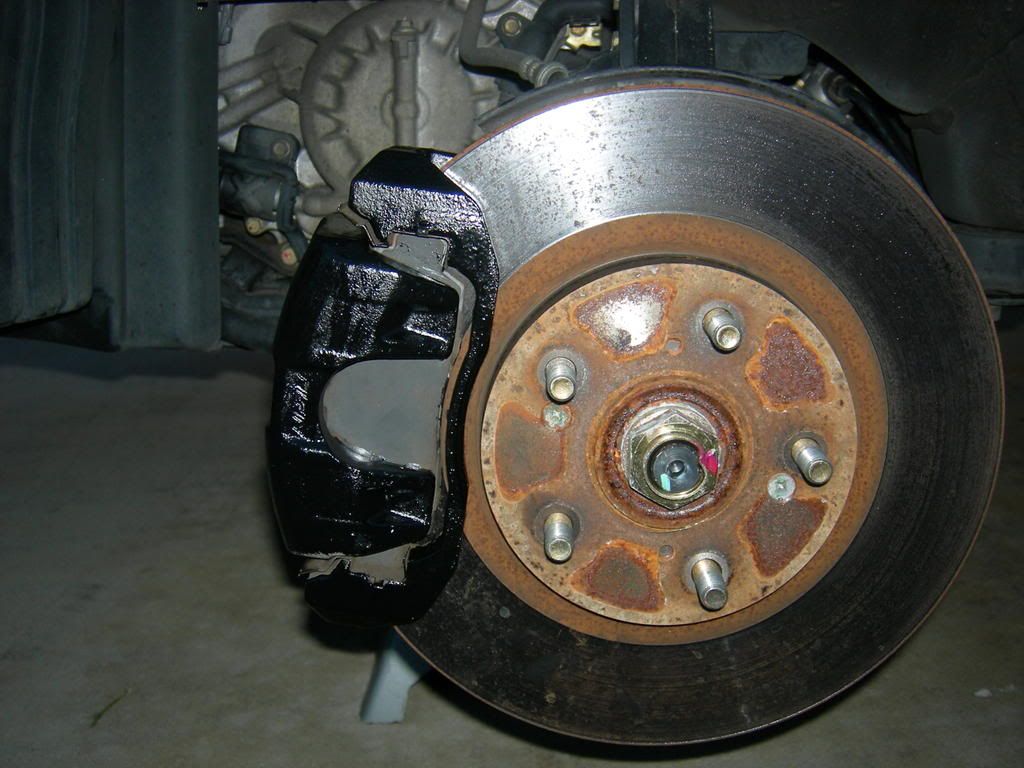
Here are the end results of the front calipers:
Now for the back, Follow the steps above. First cleaning the caliper, then masking them off.
Then begin painting following the steps above. Remember, keep the paint stirred and apply two coats to each side.
Here is the finished product for the rear calipers:
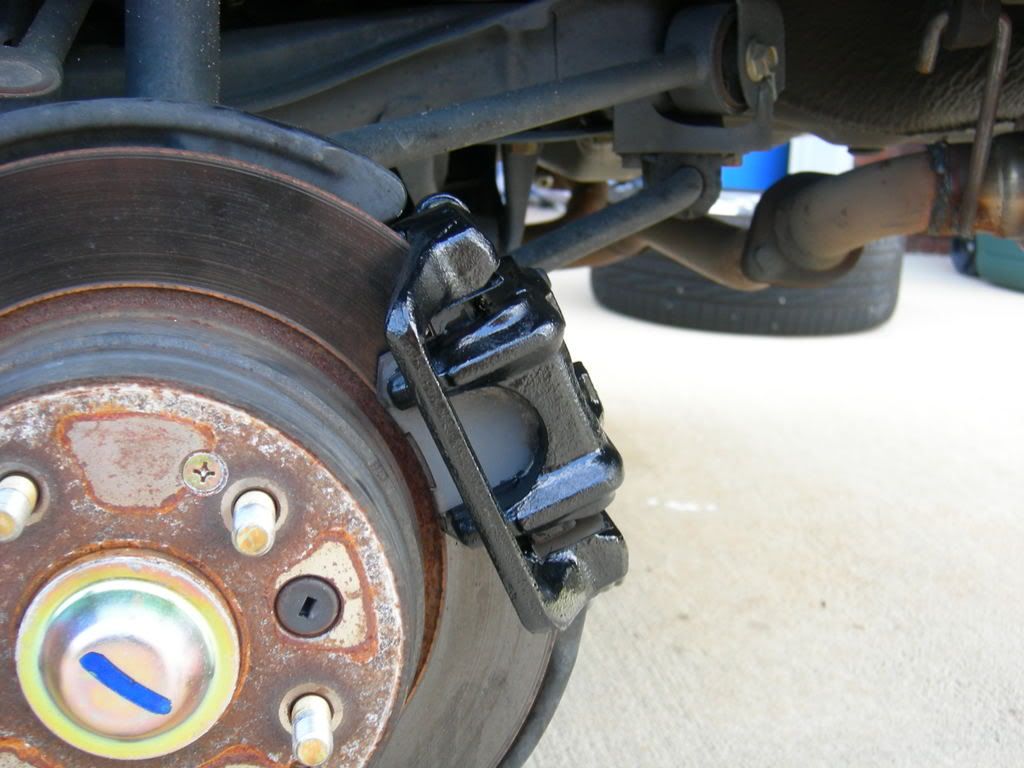
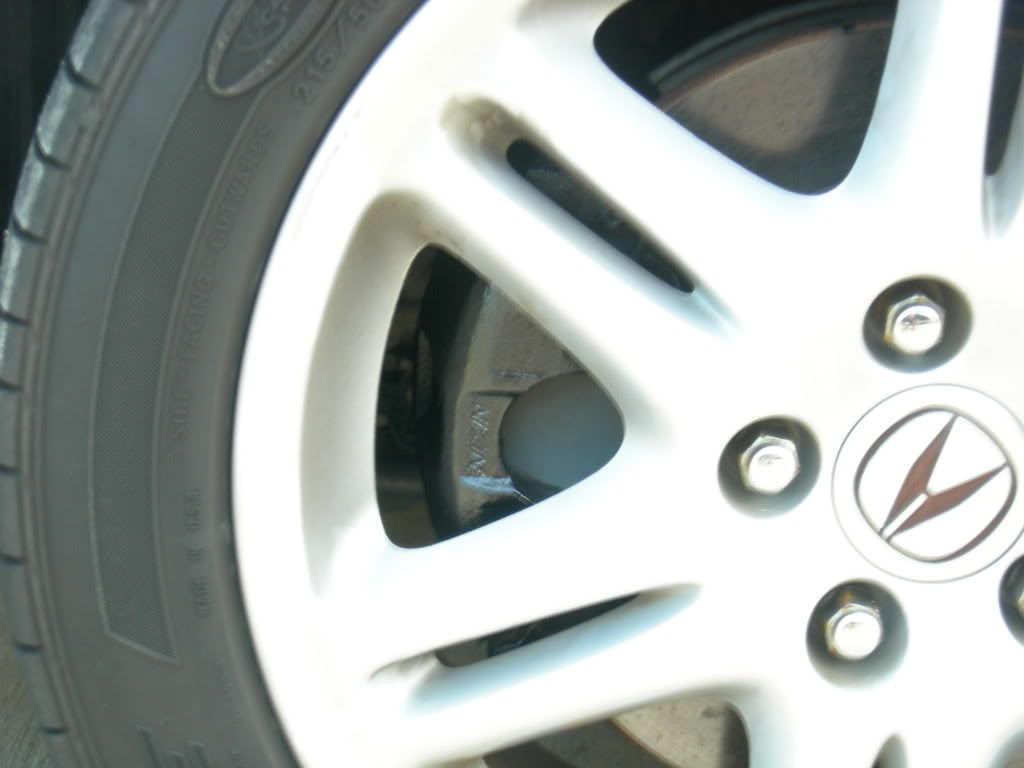
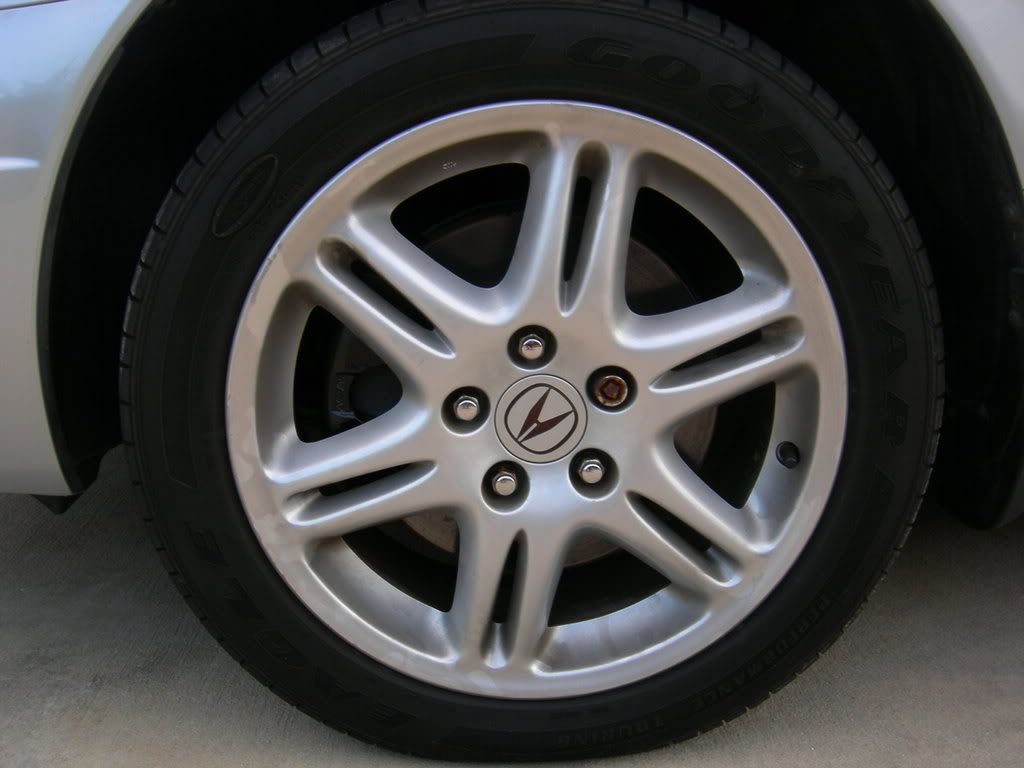
Here is the calipers with the wheels back on the car:
Here is the kit I used. It is the Dupli-Color caliper paint kit. I purchased it at AutoZone for $16.99.
First step it to jack the car up and put it on jack stands. Then remove both front wheels.
Second, you will need to clean the calipers using the caliper cleaner and a brush of some time. I chose to use a wire bush.
After scrubbing the calipers with the brush, spray them again with the cleaner and wipe them down with a rag.
Third, you now need to begin masking off the brakes with the included tape. You need to mask off the pads, caliper boots, rotor, and brake bleeder valve.
Fourth, you can now begin the painting process. Place the can of paint on the towel. I say this because the paint is filled to the brim of the paint can. Pry open the paint can with a screw driver. Now you will need to stir the paint well with the stirring stick included in the kit.
Now you can begin painting. The kit includes a brush, but I recommend going to a hobby store and purchasing a better one. The one that comes in the kit sheds bristled in the paint. Remember to keep the paint stirred through out the job.
Fifth, Now that you are finished painting one side, repeat all of the steps above for the other side. This will allow the first coat of paint to dry. After both sides have the first coat of paint, give them both a second coat.
Here are the end results of the front calipers:
Now for the back, Follow the steps above. First cleaning the caliper, then masking them off.
Then begin painting following the steps above. Remember, keep the paint stirred and apply two coats to each side.
Here is the finished product for the rear calipers:
Here is the calipers with the wheels back on the car:
They will look on SMR, especially with black rims like yours.
�baCon?
black looks good, im sick of people painting theirs red... (fake brembos) 
looks like they give you way more paint than you need lol.
looks like they give you way more paint than you need lol.
Sure did. If they chip or fade later on I can just give them I nice new coat!
User Awaiting Email Confirmation
Nice write up.
Thanks.
I can't wait to get a garage so I can do this too.
Thanks.
I can't wait to get a garage so I can do this too.

My AutoZone only had red and black, but I think there are other colors. Try Dupli-Colors website and see.
Wide Body 3.2 CL-S
or try napa, i got mine at napa and they had more than just red and black. THey had blue, red, black, i think yellow, and silver, etc
Senior Moderator
I don't like the pad back showing like that. Makes it stick out. When I spray painted mine I sprayed the back of the pads as well.
But this does look less messy.
Good job!
But this does look less messy.
Good job!
........
Nice writeup man, I'm going to do mine black as well, when I actually have some time , your car just needs a rim and a drop now, haha.
Pro
nice. I decided not to wait for your DIY since it was self explanitory. I went with red instead of black or silver...
I've only done the front calipers so far taking my time and putting on MANY coats. Tonight I am going to do the rear calipers. I did 5 coats per caliper....it looks so good IMO. I painted the top part of the brake pad, but left the middle unpainted
I'll get some pics up later tonight.
BTW, in between coats I waited 15-20 minutes, but there was little waiting b/c I went one side back to the other. The longest I had to wait was after the 4th coat
thanks for all of the comments guys. I might go back a paint the back of the pads like fuzzy said. Rims and drop I hope are coming soom. I'd like some Tein basics or some coilover along with some gunmetal Ron Jon Legends.


Brush, but like the write up says get a better one.
p.diddy
Suzuka Master
close


Today
- Join DateMar 2008
- LocationMaryland
- Age41
- Posts:5,732
-
iTrader Positive Feedback100
-
iTrader Feedback Score(3)
-
Likes:275
-
Liked:728 Times in 422 Posts
Quote:
sorry i meant 02cltype-s. what did he use brush or spray can.Originally Posted by CL-Slick
Brush, but like the write up says get a better one.
Burning Brakes
There is a FAR better paint for 3x the price. The difference is that they look powder coated when done instead of like painted calipers. These pics are certainly better than the tarnished stockers, but they do not have the powder coat look, which gets rid of hte sand cast roughness ofthe calipers. I did mine in 2001 and they look flawless still. 5 coats on 1 can. Search for G2. It is a 2 part epoxy with 1hour cure time.
Oh yeah, the car has not been driven in RAIN OR SNOW since new.
Oh yeah, the car has not been driven in RAIN OR SNOW since new.
Pro
I used the Duplicolor paint kit just like CL-Slick. I would have gotten the G2 if I would have known before I bought the Duplicolor. I am really happy with the duplicolor though. Mine does have a nice thick and glossy look. I am currently awaiting my 4th coat to dry on then will be doing my final coat on the rear calipers. Most people choose to only do 2-3 coats, but I decided to go for five...I think that makes a huge difference in appearence
The main difference between the G2 and Duplicolor is G2 is an Epoxy and DC is an Enamel
However, G2 does not give you a full can like Duplicolor. They give you 1/3 can and you have to have it shipped.
I'll post some pics up tomorrow...of all four wheels done. I put the wheels back on the front and they look sick!