6-speed engine torque damper installed
 02-24-2007, 12:20 AM
#81
Stand Up , Stand Out

Join Date: Feb 2007
Location: Calgary, Alberta
Age: 39
Posts: 61
Likes: 0
Received 0 Likes
on
0 Posts
I found it is vibrating a little. But so little you can hardly notice it and no rattle or anything. Definitly worth it, A true must have. IMO

 02-24-2007, 11:23 AM
#83
i am currently in the middle of this little project. i noticed that the OE damper bottom bushing is a lot wider than the NRG. did anyone else use sleeves as spacers so that the bottom of the NRG damper stays centered? i'll post pics of my install later.
02-24-2007, 01:01 PM
#84
alright. done with the front. if you have any suggestions or comments let me know.
here is a blown up sketch of my assembly. i used the 2 nuts to hold the lower bushing and washer tight to the bracket. i also noticed how tight the new damper is; i can't even compress it with my all my weight (stock is just sloppy).

here is a picture of the sleeves i cut to fit on either side of the bottom ball joint.

the overall top portion.

here is a blown up sketch of my assembly. i used the 2 nuts to hold the lower bushing and washer tight to the bracket. i also noticed how tight the new damper is; i can't even compress it with my all my weight (stock is just sloppy).
here is a picture of the sleeves i cut to fit on either side of the bottom ball joint.
the overall top portion.
02-25-2007, 11:46 PM
#85
MP90 uninstalled
Thread Starter
That looks good! Only thing I did different was the bolt used for the mounting of the bottom end of the damper. I used only one side of the bottom bracket with a smaller blot. look at my pics in the first or second page in this thread.
03-03-2007, 07:12 PM
#87
the rear one was a bitch to install due to the lack of space. when i replaced just the front one it didn't help the hop much at all. now that i have complete both there is a great reduction in the amount of wheel hop. definitely is a requirement to do both, not just one!
03-05-2007, 09:15 AM
#91
I Heart 6 Gears.
Join Date: Aug 2004
Location: Jerzy.
Age: 38
Posts: 621
Likes: 0
Received 0 Likes
on
0 Posts
Originally Posted by Allout
Did you try weaksauceparts.com?
03-06-2007, 08:17 PM
#92
Stand Up , Stand Out
Join Date: Feb 2007
Location: Calgary, Alberta
Age: 39
Posts: 61
Likes: 0
Received 0 Likes
on
0 Posts
So get this,
I installed the front one a few weeks ago and wheel hop greatly reduced...
then it came back a few days ago.....WTF i thought
I felt the damper and it was all loose.
Took it apart and guess what the little washers that hold the bushings in place were PULLED right through the bushing lol now that torque.
So since only of the bushing were messed up I switch em around and put in some bigger washers(2) and put everything back together.
Works perfect
Just an FYI in case it ever happens to one of you. or maby do some preventive maintance
03-07-2007, 06:43 PM
#93
MP90 uninstalled
Thread Starter
you must tighten the internals before installation. something similar happened to me in one of my posts above. dissasemble it and tighten everything!
03-08-2007, 08:35 PM
#94
I'll put you in the wall
Join Date: Mar 2007
Location: Bowie, MD
Age: 41
Posts: 150
Likes: 0
Received 0 Likes
on
0 Posts
install: bolt too long, had to customize install
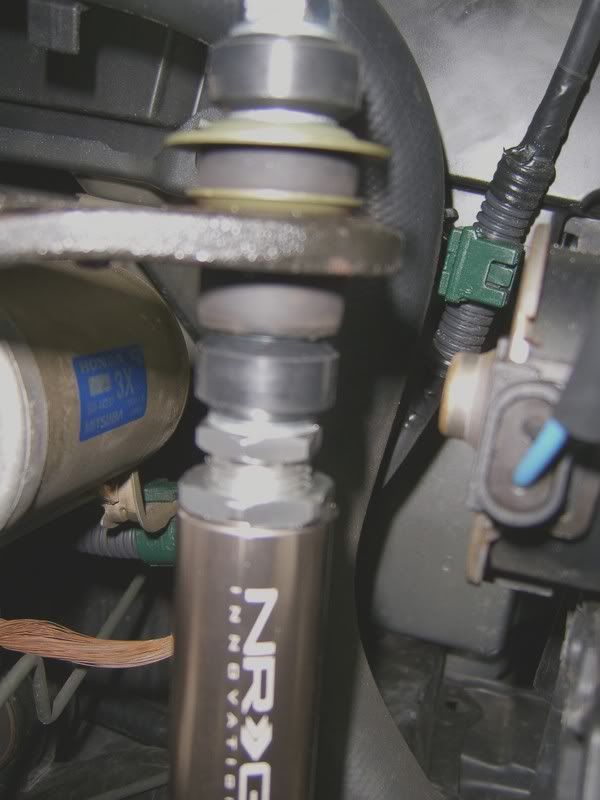
Well, I got mine in. It didnt take too long, but the bolt i used was way too long, and it only had about an inch of threading...so i had to put some extra bushings in to make the bolt tight. I used the 2 factory ones and the 2 NRG ones. It looks kind of funny, and there is no reason why it should need 4 rubber busings, but it was late and i didnt feel like going back to home depot or lowes. i had enough trouble finding the metric crap there anyway. I love this mod, I have asked the guy that i got mine from on ebay to get me another at a good deal since it took him 2 weeks to get it to me, and NRG told him they were out of stock (titanium). Can't wait to do the back one too, anyone have any rear install pics? here is how mine looks, don't laugh...it works!!
Here's how it looks. Not bad except for that stupid long bolt and extra bushings. I bought (2) 1/2 inch (what i thought were perfect) spacers for the bottom bolt, only to find out that they were a hair too big, so i only used one and i used some washers on the other side.. you can see it here

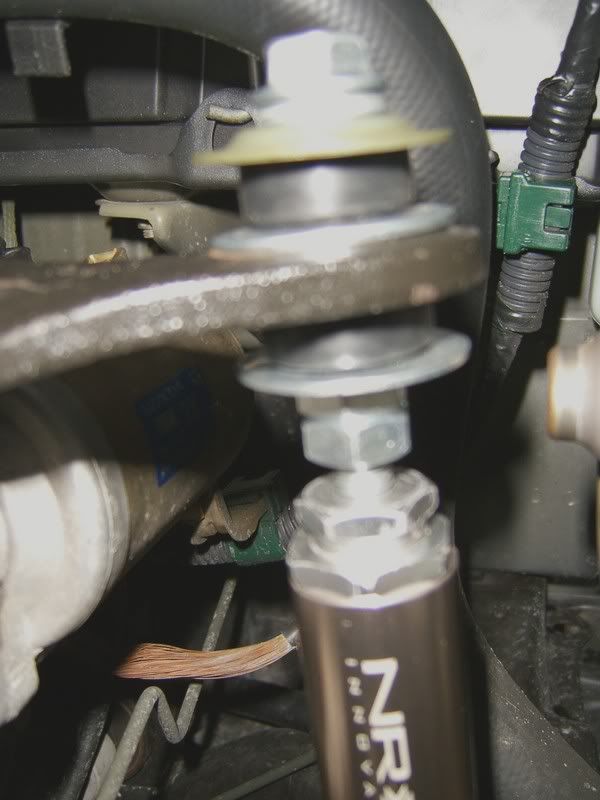
Here is the profile with all the bushings. I have a small washer in between them, you just can't see it. I had to do something to make the bolt pull tight and there is no threading on the stupid thing...but it works...
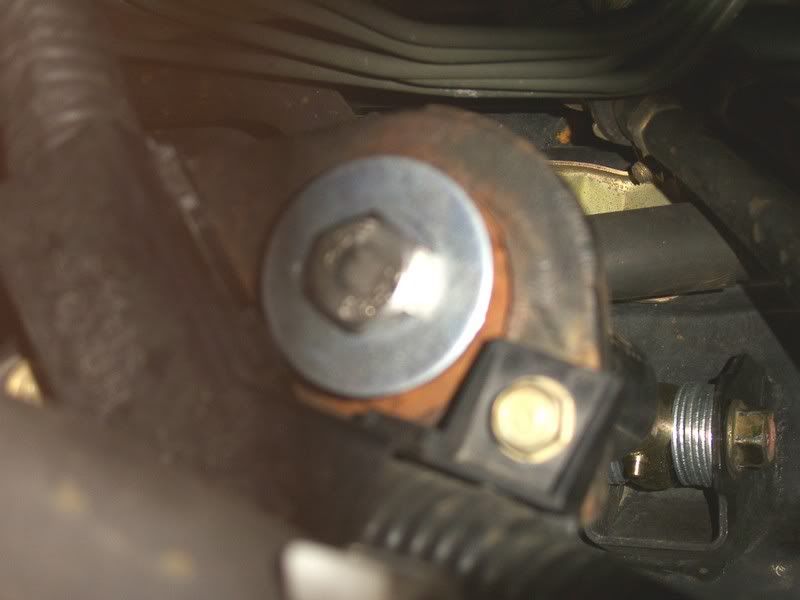
heres a shot of the 2 small washers on the other side of the bottom bolt, at least it wont slide around...
Thanks JPROY for figuring this one out, very nice MOD. and thanks for the diagram distortedolskool. DOES this look stupid or should i just leave it? if i can find a shorter bolt with full threading i might change it and get rid of 2 of those bushings.
Here's how it looks. Not bad except for that stupid long bolt and extra bushings. I bought (2) 1/2 inch (what i thought were perfect) spacers for the bottom bolt, only to find out that they were a hair too big, so i only used one and i used some washers on the other side.. you can see it here
Here is the profile with all the bushings. I have a small washer in between them, you just can't see it. I had to do something to make the bolt pull tight and there is no threading on the stupid thing...but it works...
heres a shot of the 2 small washers on the other side of the bottom bolt, at least it wont slide around...
Thanks JPROY for figuring this one out, very nice MOD. and thanks for the diagram distortedolskool. DOES this look stupid or should i just leave it? if i can find a shorter bolt with full threading i might change it and get rid of 2 of those bushings.
03-09-2007, 08:45 AM
#95
i used the exact bolt referenced in my sketch...3". i would swap the bolt if it were mine.
been thinking about my install though. the black bushings that came with it were for the damper internals i believe.?.?.? i used them to replace the stockers. o well.
been thinking about my install though. the black bushings that came with it were for the damper internals i believe.?.?.? i used them to replace the stockers. o well.
03-09-2007, 10:55 AM
#96
MP90 uninstalled
Thread Starter
J32A26MT,
I am concerned your NRG bushings rigged on that long bolt will break from fatigue and render the damper useless. The washers are too small and the bushings will probably tear and slide over them or break off. I don�t know exactly as I cant put my hands on your installation. Think about it though. If I were you I would get the right length bolt and lose the OEM bushings and replace them with the NRG bushings like ONEUPYOU did.
Take a look at the pics of mine on the first page of the thread. The bottom bolt does not need a sleeve. Just use one side of it with a shorter smaller bolt. I guess either way will work though. Nice work guys!
03-09-2007, 12:43 PM
#97
Originally Posted by jproy
J32A26MT,
I am concerned your NRG bushings rigged on that long bolt will break from fatigue and render the damper useless. The washers are too small and the bushings will probably tear and slide over them or break off. I don�t know exactly as I cant put my hands on your installation. Think about it though. If I were you I would get the right length bolt and lose the OEM bushings and replace them with the NRG bushings like ONEUPYOU did.
Take a look at the pics of mine on the first page of the thread. The bottom bolt does not need a sleeve. Just use one side of it with a shorter smaller bolt. I guess either way will work though. Nice work guys!
I am concerned your NRG bushings rigged on that long bolt will break from fatigue and render the damper useless. The washers are too small and the bushings will probably tear and slide over them or break off. I don�t know exactly as I cant put my hands on your installation. Think about it though. If I were you I would get the right length bolt and lose the OEM bushings and replace them with the NRG bushings like ONEUPYOU did.
Take a look at the pics of mine on the first page of the thread. The bottom bolt does not need a sleeve. Just use one side of it with a shorter smaller bolt. I guess either way will work though. Nice work guys!
not to argue but my only concern with using just a shorter bolt at the bottom and not the spacers is the angle of the damper. The original bottom location is centered with the top mount bracket. i was concerned with creating an angle and the added directional forces.
03-09-2007, 02:29 PM
#99
I'll put you in the wall
Join Date: Mar 2007
Location: Bowie, MD
Age: 41
Posts: 150
Likes: 0
Received 0 Likes
on
0 Posts
thanks guys...it works great, but i agree with the concerns. its too many bushings. you know what i had a problem with...one of those factory washers for the bushing would not fit on my bolt at all, it doesn't have a circular hole, there is a flat part to it. I guess i'll go get a smaller bolt and whip out the dremel. I will post pics of the reinstallment, and maybe do something different with the bottom bolt...thanks for opinions!
03-11-2007, 07:57 PM
#100
I'll put you in the wall
Join Date: Mar 2007
Location: Bowie, MD
Age: 41
Posts: 150
Likes: 0
Received 0 Likes
on
0 Posts
new install
Ok, i reinstalled it, got some good washers, only used the NRG bushings, and used a couple bolts to lock the bottom bushing in place. i wish there was enough room for another bolt to lock down to the damper, i'm kinda worried it could move around or loosen over time. What do you think? This took me so much time as again i couldnt find a bolt that was threaded all the way up. Thats why i have a couple small washers at the top of the bolt, so the threading will stay higher and the 2 bolts in the middle will actually hold that bushing tight. what a pain in the neckthis has been. Still need the rear one though. thanks for your help everyone
03-14-2007, 12:33 AM
#102
Blown is Best

Have you tried:
http://www.weaksauceparts.com/store/...p?cat=311&js=n
Looks horsepowerfreaks pulled their page but it still shows the item available through Amazon:
http://www.amazon.com/exec/obidos/tg...EBP1B&v=glance
http://www.weaksauceparts.com/store/...p?cat=311&js=n
Looks horsepowerfreaks pulled their page but it still shows the item available through Amazon:
http://www.amazon.com/exec/obidos/tg...EBP1B&v=glance
03-15-2007, 04:30 PM
#104
I'll put you in the wall
Join Date: Mar 2007
Location: Bowie, MD
Age: 41
Posts: 150
Likes: 0
Received 0 Likes
on
0 Posts
Nrg Seller
QUICKLY!!! they're going up in price again...70$ shipped here from this seller...
Automall Incorp
Automall Incorp
03-27-2007, 02:45 PM
#105
I'll put you in the wall
Join Date: Mar 2007
Location: Bowie, MD
Age: 41
Posts: 150
Likes: 0
Received 0 Likes
on
0 Posts
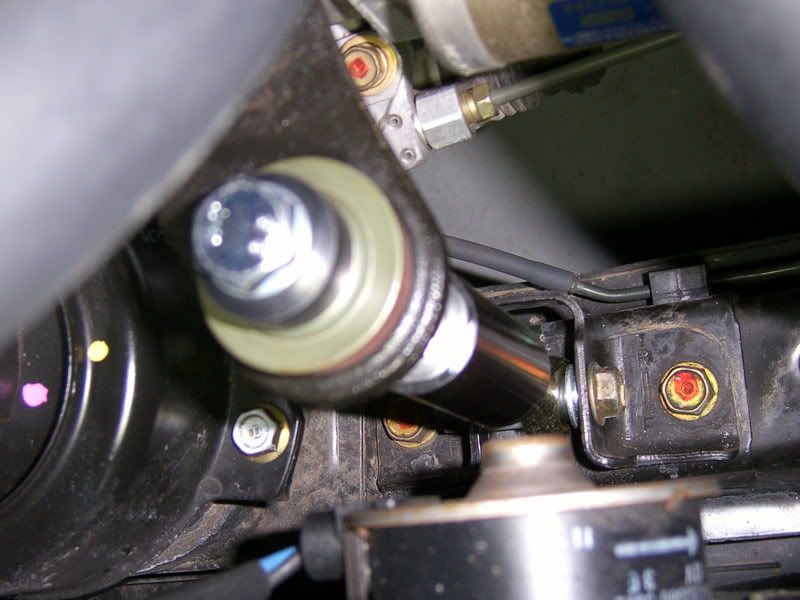
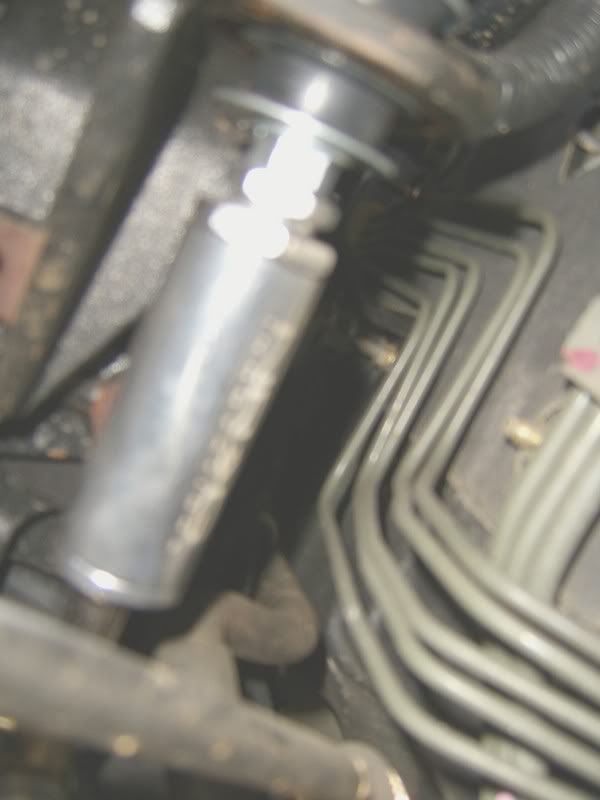
Rear damper installed...pics. What a difference!!
WOW! The car feels totally different now. The front end feels so solid. The engine really has no back and forth motion with both of these on. I would say you definetly need both of these if you're going to do it. I had problems with my front one becoming loose before, no matter how tight or how many nuts were on there, but now it stays still. I think installing the rear one took a lot of stress off of the front one. For some strange reason i had less trouble getting this one on. It was a pain in the butt to get the stock one off though. It was definetly harder to take good pictures of this one...but you can see it. I ended up using washers on both sides of the bottom bolt for this one. That was fun trying to get them on with one hand while stretching as far as i could behind the engine. 
03-27-2007, 09:34 PM
#106
Lives in Boost
Originally Posted by J32A26MT
WOW! The car feels totally different now. The front end feels so solid. The engine really has no back and forth motion with both of these on. I would say you definetly need both of these if you're going to do it. I had problems with my front one becoming loose before, no matter how tight or how many nuts were on there, but now it stays still. I think installing the rear one took a lot of stress off of the front one. For some strange reason i had less trouble getting this one on. It was a pain in the butt to get the stock one off though. It was definetly harder to take good pictures of this one...but you can see it. I ended up using washers on both sides of the bottom bolt for this one. That was fun trying to get them on with one hand while stretching as far as i could behind the engine.
03-27-2007, 09:39 PM
#107
Originally Posted by CL-Future
Nice install. I just ordered another for the rear. Did you have to buy any bolts or washers for the rear install or did they come with the kit?
03-28-2007, 06:56 AM
#109
I'll put you in the wall
Join Date: Mar 2007
Location: Bowie, MD
Age: 41
Posts: 150
Likes: 0
Received 0 Likes
on
0 Posts
For the rear one, it seems that there is a little less space in between the bracket and the damper. I could only fit one nut in between the bottom bushing and the NRG damper...but its a tight fit. You can probably see what i am talking about by looking at the picture. if you look at the picture of my front one on the previous page, i have two nuts in between the bushing and the Damper. Other than that difference that i noticed, it was the same install, just a little harder to reach. If you are going to use washers for the bottom cross bolt like i did, try using a small piece of tape to hold the ones on the far side together as you try to fit them in while sliding the cross bolt through. I don't think i could have done it any other way. What a difference these make with both of them in there
03-28-2007, 11:37 AM
#110
Missing my
Originally Posted by jproy
I will do a full DIY for the front after the new year. I think I may do the rear also if you can wait. Thanks and enjoy. Have a great safe new year. Jim
03-28-2007, 12:23 PM
#111
MP90 uninstalled
Thread Starter
I will do it sooner than later. I have a full work load at the moment. Trying to get rich and all. I dont even have my car a t the moment. I have a Supercharger and dampers just sitting in front of me at my house like expensive paper weights. My mom is getting a new LS460 and hasnt had a car so I gave her the CLS for a month. I bought a 2000 Nissan Pathfinder which I am driving now. I will do it. As soon as I am through modding the car I will get it up. Jim
03-28-2007, 01:23 PM
#112
Missing my
Originally Posted by jproy
I will do it sooner than later. I have a full work load at the moment. Trying to get rich and all. I dont even have my car a t the moment. I have a Supercharger and dampers just sitting in front of me at my house like expensive paper weights. My mom is getting a new LS460 and hasnt had a car so I gave her the CLS for a month. I bought a 2000 Nissan Pathfinder which I am driving now. I will do it. As soon as I am through modding the car I will get it up. Jim
03-28-2007, 03:51 PM
#114
not to butt in but print out that goofy sketch i drew up and posted. the guy doing the install should be able to figure out the removal and installation from it and a few pictures others have taken. it's not that hard because all these other people have accomplished it without an exact DIY. good luck and enjoy!
03-28-2007, 04:01 PM
#115
I'll put you in the wall
Join Date: Mar 2007
Location: Bowie, MD
Age: 41
Posts: 150
Likes: 0
Received 0 Likes
on
0 Posts
Originally Posted by distortedolskool
not to butt in but print out that goofy sketch i drew up and posted. the guy doing the install should be able to figure out the removal and installation from it and a few pictures others have taken. it's not that hard because all these other people have accomplished it without an exact DIY. good luck and enjoy!