


JDM Puddle Light DIY


Thread Starter
Bye TSX, hello domestic?
Joined: Jan 2004
Posts: 8,552
Likes: 0
From: NOVA
just updating w/ my switch install instructions
Purchased a 3-way switch from mouser.com, 540-CRE24F2HBBNE so that you can set the puddle lights to always on (good for photoshoots), always off (good for work on your car w/ the door open, or taking to dealership), or normal where it comes on w/ fob or door opening
here's a writeup on my switch install
took out a blank switch plate after trying the switch panel out. I measured the switch I was putting in and cut it out (rather poorly). painted the switch plate and pushed the switch into the hole. the switch is a little off center, and isn't quite flush against the plate because the place is curved. overall it came out satisfactory


pic before painting


Purchased a 3-way switch from mouser.com, 540-CRE24F2HBBNE so that you can set the puddle lights to always on (good for photoshoots), always off (good for work on your car w/ the door open, or taking to dealership), or normal where it comes on w/ fob or door opening
here's a writeup on my switch install
took out a blank switch plate after trying the switch panel out. I measured the switch I was putting in and cut it out (rather poorly). painted the switch plate and pushed the switch into the hole. the switch is a little off center, and isn't quite flush against the plate because the place is curved. overall it came out satisfactory
pic before painting
Rep'n Taxbrain.com
Joined: Aug 2004
Posts: 7,075
Likes: 3
From: N. Cali-forn-i-a

...And nice update on the switch. I like that setup. Was it hard to wire up the power for it? So for the always on, do you have that hooked up to constant power, so that the puddle lights are on regardless of ignition position?




Moderator
Regional Coordinator (Southeast)
Regional Coordinator (Southeast)


Joined: Dec 2003
Posts: 44,126
Likes: 4,434
From: Mooresville, NC
Originally Posted by EuRTSX
Just pay D to do it for you  :troutslap
:troutslap
Thread Starter
Bye TSX, hello domestic?
Joined: Jan 2004
Posts: 8,552
Likes: 0
From: NOVA
Originally Posted by CCColtsicehockey
maybe but I want to try to inset plexi panels in the holes so that the bottom of the side skirt stays smooth.
Thread Starter
Bye TSX, hello domestic?
Joined: Jan 2004
Posts: 8,552
Likes: 0
From: NOVA
Originally Posted by EuRTSX
Just pay D to do it for you :troutslap
:troutslap
Moderator
Regional Coordinator (Southeast)
Regional Coordinator (Southeast)
Joined: Dec 2003
Posts: 44,126
Likes: 4,434
From: Mooresville, NC
Originally Posted by xizor
and for the record, i would charge a whole lot of money, this is an extremely time consuming install (at least the first time)

Instructor
Joined: Mar 2006
Posts: 192
Likes: 0
I plan on doing this mod also, but i'm probably going to make custom lights. I have no real plan yet, but I ordered a bunch of led's and i'll figure something out when they get here. I bought blue and white, the my idea is to have some combination of them, maybe white with a blue halo in each light, or alternate blue and white lights, but i'll have to see how it looks.
But great how-to you wrote I wouldnt even attempt it if I didnt read this thread. How does that switch panel come out? does it pop right out, or is there a trick?
But great how-to you wrote
I wouldnt even attempt it if I didnt read this thread. How does that switch panel come out? does it pop right out, or is there a trick?
Thread Starter
Bye TSX, hello domestic?
Joined: Jan 2004
Posts: 8,552
Likes: 0
From: NOVA
Originally Posted by CCColtsicehockey
how much cause you could have the side skirts for like 2 months i dont care the car just sits over the winter.
Thread Starter
Bye TSX, hello domestic?
Joined: Jan 2004
Posts: 8,552
Likes: 0
From: NOVA
Originally Posted by intensity2x
But great how-to you wrote I wouldnt even attempt it if I didnt read this thread. How does that switch panel come out? does it pop right out, or is there a trick?
I wouldnt even attempt it if I didnt read this thread. How does that switch panel come out? does it pop right out, or is there a trick?
Moderator
Regional Coordinator (Southeast)
Regional Coordinator (Southeast)
Joined: Dec 2003
Posts: 44,126
Likes: 4,434
From: Mooresville, NC
Originally Posted by evo_to_tsx
the wiring will probably give you another headache, even if D mounts the light on the skirts for you
Moderator
Regional Coordinator (Southeast)
Regional Coordinator (Southeast)
Joined: Dec 2003
Posts: 44,126
Likes: 4,434
From: Mooresville, NC
Originally Posted by evo_to_tsx
CCC: I see.. I am deciding either to follow xizor's method of wiring around the rear bumper, or through the engine bay... any suggestions?
Thread Starter
Bye TSX, hello domestic?
Joined: Jan 2004
Posts: 8,552
Likes: 0
From: NOVA
Originally Posted by evo_to_tsx
CCC: I see.. I am deciding either to follow xizor's method of wiring around the rear bumper, or through the engine bay... any suggestions?
Moderator
Regional Coordinator (Southeast)
Regional Coordinator (Southeast)
Joined: Dec 2003
Posts: 44,126
Likes: 4,434
From: Mooresville, NC
Originally Posted by xizor
in hindsight, I'd probably suggest going through the engine bay for both sides. routing around the rear was a lot of work. post some pics when you or CCC do that method
無限 本田 CL9
Joined: Aug 2005
Posts: 643
Likes: 0
From: Oakland, California
I just placed an order on those $40 lights and my euro R kit is coming in this week (certainly feels the pain to drill into some brand new sideskirts) but i will post pics as Im doing it.. thanks for the great write up
無限 本田 CL9
Joined: Aug 2005
Posts: 643
Likes: 0
From: Oakland, California
also the 3 stage switch is a brilliant idea.. before u posted that up I was wondering what if a passenger turns the interior lights on while the car is in motion and a highway patrol happens to be behind you 
Moderator
Regional Coordinator (Southeast)
Regional Coordinator (Southeast)
Joined: Dec 2003
Posts: 44,126
Likes: 4,434
From: Mooresville, NC
Originally Posted by evo_to_tsx
I just placed an order on those $40 lights and my euro R kit is coming in this week (certainly feels the pain to drill into some brand new sideskirts) but i will post pics as Im doing it.. thanks for the great write up
also i feel ya on the drilling the euro r kit. i dont even want to drill mine and its a year and a half old.
Thread Starter
Bye TSX, hello domestic?
Joined: Jan 2004
Posts: 8,552
Likes: 0
From: NOVA
Originally Posted by evo_to_tsx
also the 3 stage switch is a brilliant idea.. before u posted that up I was wondering what if a passenger turns the interior lights on while the car is in motion and a highway patrol happens to be behind you
Moderator
Regional Coordinator (Southeast)
Regional Coordinator (Southeast)
Joined: Dec 2003
Posts: 44,126
Likes: 4,434
From: Mooresville, NC
question about your 3 way switch. can you turn them on when the doors are all closed and then turn them on only when they doors are opened and then completely off.

Advanced
Joined: Mar 2006
Posts: 72
Likes: 0
From: Birmingham, MI
Originally Posted by xizor
just updating w/ my switch install instructions
Purchased a 3-way switch from mouser.com, 540-CRE24F2HBBNE so that you can set the puddle lights to always on (good for photoshoots), always off (good for work on your car w/ the door open, or taking to dealership), or normal where it comes on w/ fob or door opening
here's a writeup on my switch install
took out a blank switch plate after trying the switch panel out. I measured the switch I was putting in and cut it out (rather poorly). painted the switch plate and pushed the switch into the hole. the switch is a little off center, and isn't quite flush against the plate because the place is curved. overall it came out satisfactory
Purchased a 3-way switch from mouser.com, 540-CRE24F2HBBNE so that you can set the puddle lights to always on (good for photoshoots), always off (good for work on your car w/ the door open, or taking to dealership), or normal where it comes on w/ fob or door opening
here's a writeup on my switch install
took out a blank switch plate after trying the switch panel out. I measured the switch I was putting in and cut it out (rather poorly). painted the switch plate and pushed the switch into the hole. the switch is a little off center, and isn't quite flush against the plate because the place is curved. overall it came out satisfactory

Moderator
Regional Coordinator (Southeast)
Regional Coordinator (Southeast)
Joined: Dec 2003
Posts: 44,126
Likes: 4,434
From: Mooresville, NC
Originally Posted by Agent11br
Could you draw up a quick wiring diagram including the switch in paint for us all
ps: i found my answer to my above post earlier in the thread.
Thread Starter
Bye TSX, hello domestic?
Joined: Jan 2004
Posts: 8,552
Likes: 0
From: NOVA
Originally Posted by Agent11br
Could you draw up a quick wiring diagram including the switch in paint for us all

Advanced
Joined: Mar 2006
Posts: 72
Likes: 0
From: Birmingham, MI
Originally Posted by xizor
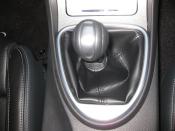
the blue thing is the switch, up makes the lights come on w/ the door, middle turns of the lights off entirely, down makes the lights always on


The Short-Bus Pirate
Joined: Sep 2006
Posts: 10
Likes: 0
From: Utah
I did this mod...
I did this mod, thanks to Xizor's excellent instructions. I just want to point out some of the differences in my installation.
First of all, I purchased the Illumina puddle lights from JLeviStreetWerks.com. I decided to do this because they were only about half the cost of what Umnitza was selling them for. They had the same brand name, so I thought I was getting the same item. As it turns out, the lights that I got from JLeveStreetWerks are pretty different than those used in Xizor's install. The primary differences are in the number of LEDs each light has. My set came with one LED per puddle light. Xizor's appear to have 5 each. Also, my lights came pre-wired.
Other than that, they seem to be the same size so the directions all worked very well for me.
I did have to splice in additional wire to cross from the left to right side, the pre-wired lights didn't have enough wire between the two sets to run the wire under the rear fender.
I used two types of glue to attach the PVC pipe to my body kit. I was afraid that an under-carriage wash at an automatic car wash might knock a hot glued light loose. I used a quicky drying super glue to hold them in place, then applied a second coat of Gorilla Glue. I don't think they're going anywhere. Be carefull using Gorilla Glue, though, it runs.
I found running the wires through the rear tire well very easy. I used a bent wire hanger that I stole from my wife's closet. I just bent a small loop on one end, bent the length of the wire more or less to match the tire well, then it easily passed under the lining of the tire well so that I could attach wires. This was definately easier than removing the lining.
When it came time to connect the wiring to the fuse box, I made some changes. I didn't have enough wire left to run the wire through the engine area and I was too impatient to go buy more. Instead, I ran the wire from my under body kit to my Acura kick panel. From there, I ran the wire under the rubber door lining and into the car. I went directly from the door lining into the interior plastic lining and from there ran the wire all the way to the fuse box.
This isn't as clean of an install, because I actually have about .75" of exposed wire from the body to the kick panel. I put a small piece of white duct tape over it, and you can hardly notice it...still, I know it's there. You might want to invest in some extra wire so you can avoid having any exposed wire.
I HIGHLY recommend getting your hands on an Add-A-Fuse, like the one Xizor used prior to starting this. I just tapped into the #6 fuse using some extra pieces of wire, and I'm a little worried that this will short out. I will be replacing this tap with an Add-A-Fuse as soon as I can get one.
Finding the Green/Red wire really is difficult. I got lucky and unplugged it on my first try. Attaching the wire splice is hard because you only have enough room to use one hand.
Plugging the wire back in was a nightmare. It actually took me over an hour just feeling around before I got it back into it's socket. Thank heavens my splice was secure. I dread the thought of having to pull that plug again for any reason. I didn't have one, but I think a small angled mirror with a light (think dental mirror) would have really helped out. Either way, make sure you feel around and get an idea of where the plug goes before you pull it out. It could save some time.
Because I had to splice additional wire in to cross over the back of the car, I took the time to double check all of my connections and test the lights before I re-attached all of the body kit parts.
Start to finish, this install took me 9 hours. It could have been reduced with a lighted angled mirror because the electrical connection actually took a lot of time. Cutting the PVC pipe, drilling the screw holes, attaching the lights, removing the body kit, measuring, drilling the holes and glueing the lights in place took about three hours. If I had not spent so much time tapping in to the fuse box it probably could have been done in under five hours.
Eventhough my lights only have one LED each, they create a fun spotlight effect. It is plenty bright at night. I LOVE the way they look.
Good luck to anybody trying this mod. Feel free to contact me with any questions. I'm no pro, but I do have one instance of experienc.
Many thanks to Xizor for publishing such great instructions. Without them I never would have attempted this mod.
First of all, I purchased the Illumina puddle lights from JLeviStreetWerks.com. I decided to do this because they were only about half the cost of what Umnitza was selling them for. They had the same brand name, so I thought I was getting the same item. As it turns out, the lights that I got from JLeveStreetWerks are pretty different than those used in Xizor's install. The primary differences are in the number of LEDs each light has. My set came with one LED per puddle light. Xizor's appear to have 5 each. Also, my lights came pre-wired.
Other than that, they seem to be the same size so the directions all worked very well for me.
I did have to splice in additional wire to cross from the left to right side, the pre-wired lights didn't have enough wire between the two sets to run the wire under the rear fender.
I used two types of glue to attach the PVC pipe to my body kit. I was afraid that an under-carriage wash at an automatic car wash might knock a hot glued light loose. I used a quicky drying super glue to hold them in place, then applied a second coat of Gorilla Glue. I don't think they're going anywhere. Be carefull using Gorilla Glue, though, it runs.
I found running the wires through the rear tire well very easy. I used a bent wire hanger that I stole from my wife's closet. I just bent a small loop on one end, bent the length of the wire more or less to match the tire well, then it easily passed under the lining of the tire well so that I could attach wires. This was definately easier than removing the lining.
When it came time to connect the wiring to the fuse box, I made some changes. I didn't have enough wire left to run the wire through the engine area and I was too impatient to go buy more. Instead, I ran the wire from my under body kit to my Acura kick panel. From there, I ran the wire under the rubber door lining and into the car. I went directly from the door lining into the interior plastic lining and from there ran the wire all the way to the fuse box.
This isn't as clean of an install, because I actually have about .75" of exposed wire from the body to the kick panel. I put a small piece of white duct tape over it, and you can hardly notice it...still, I know it's there. You might want to invest in some extra wire so you can avoid having any exposed wire.
I HIGHLY recommend getting your hands on an Add-A-Fuse, like the one Xizor used prior to starting this. I just tapped into the #6 fuse using some extra pieces of wire, and I'm a little worried that this will short out. I will be replacing this tap with an Add-A-Fuse as soon as I can get one.
Finding the Green/Red wire really is difficult. I got lucky and unplugged it on my first try. Attaching the wire splice is hard because you only have enough room to use one hand.
Plugging the wire back in was a nightmare. It actually took me over an hour just feeling around before I got it back into it's socket. Thank heavens my splice was secure. I dread the thought of having to pull that plug again for any reason. I didn't have one, but I think a small angled mirror with a light (think dental mirror) would have really helped out. Either way, make sure you feel around and get an idea of where the plug goes before you pull it out. It could save some time.
Because I had to splice additional wire in to cross over the back of the car, I took the time to double check all of my connections and test the lights before I re-attached all of the body kit parts.
Start to finish, this install took me 9 hours. It could have been reduced with a lighted angled mirror because the electrical connection actually took a lot of time. Cutting the PVC pipe, drilling the screw holes, attaching the lights, removing the body kit, measuring, drilling the holes and glueing the lights in place took about three hours. If I had not spent so much time tapping in to the fuse box it probably could have been done in under five hours.
Eventhough my lights only have one LED each, they create a fun spotlight effect. It is plenty bright at night. I LOVE the way they look.
Good luck to anybody trying this mod. Feel free to contact me with any questions. I'm no pro, but I do have one instance of experienc.
Many thanks to Xizor for publishing such great instructions. Without them I never would have attempted this mod.
Thread Starter
Bye TSX, hello domestic?
Joined: Jan 2004
Posts: 8,552
Likes: 0
From: NOVA


I'd like to see how you went from the sideskrit directly into the fusebox, I didn't know how to do that hence the reason I went through the engine bay, which just adds more time. i want to see some pics of the jlevi puddle lights too!
The Short-Bus Pirate
Joined: Sep 2006
Posts: 10
Likes: 0
From: Utah
Pics coming....
I had a hunch people would want to see some pics...
It has been raining since I put the puddle lights in, so I haven't wanted to take my camera out to do it yet. Additionally, I wanted to post my comments before I forgot how the install went. I PROMISE to get some pics up as soon as the weather clears up.
In the mean time, I believe I have a request for how the lights acutally look when they are on and something that shows how I went from the skirt into my car. If anybody else wants to see something specific, let me know and I'll make sure I include that pic as well.
It has been raining since I put the puddle lights in, so I haven't wanted to take my camera out to do it yet. Additionally, I wanted to post my comments before I forgot how the install went. I PROMISE to get some pics up as soon as the weather clears up.
In the mean time, I believe I have a request for how the lights acutally look when they are on and something that shows how I went from the skirt into my car. If anybody else wants to see something specific, let me know and I'll make sure I include that pic as well.
The Short-Bus Pirate
Joined: Sep 2006
Posts: 10
Likes: 0
From: Utah
Got some pics...
Okay...it stopped raining long enough for me to snap some pics with my camera phone. Here they are:
This photo shows the drivers kick panel (I guess that's what its called) that I passed the wires under. The black pen is pointing to the wire, which is covered with a piece of white tape:

This next picture is a little closer:

The photo below shows where the wire passes from the kick panel, under the door insulation. From there I just ran the wire under the interior molding to the fuse box:

This next picture shows how I tapped in to the #6 fuse...not good. I will be replacing this tap with an Add-A-Fuse the first chance I get:

Here is how the lights look. This picture was taken at dusk, so you can't really see how they look in the dark:

This is a close-up of the spot, taken at dusk:

This picture is of my car at night. I used a flash so you could compare it to the next two pictures:

This is how the lights look in the dark...I did an LED interior light mod as well:

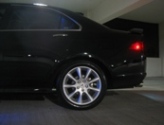
And finally, a picture with the driver's door open:

I really do like the way these lights look. Even though I have only had them for a few days, I have already had a lot of comments on them. Thanks again to Xizor for leading the way!
This photo shows the drivers kick panel (I guess that's what its called) that I passed the wires under. The black pen is pointing to the wire, which is covered with a piece of white tape:
This next picture is a little closer:
The photo below shows where the wire passes from the kick panel, under the door insulation. From there I just ran the wire under the interior molding to the fuse box:
This next picture shows how I tapped in to the #6 fuse...not good. I will be replacing this tap with an Add-A-Fuse the first chance I get:
Here is how the lights look. This picture was taken at dusk, so you can't really see how they look in the dark:
This is a close-up of the spot, taken at dusk:
This picture is of my car at night. I used a flash so you could compare it to the next two pictures:
This is how the lights look in the dark...I did an LED interior light mod as well:
And finally, a picture with the driver's door open:
I really do like the way these lights look. Even though I have only had them for a few days, I have already had a lot of comments on them. Thanks again to Xizor for leading the way!