DIY: convert Fog Light into DRL's
 09-12-2008, 02:29 PM
#1

Guys this is my first DIY so please avoid any mistake in write-up
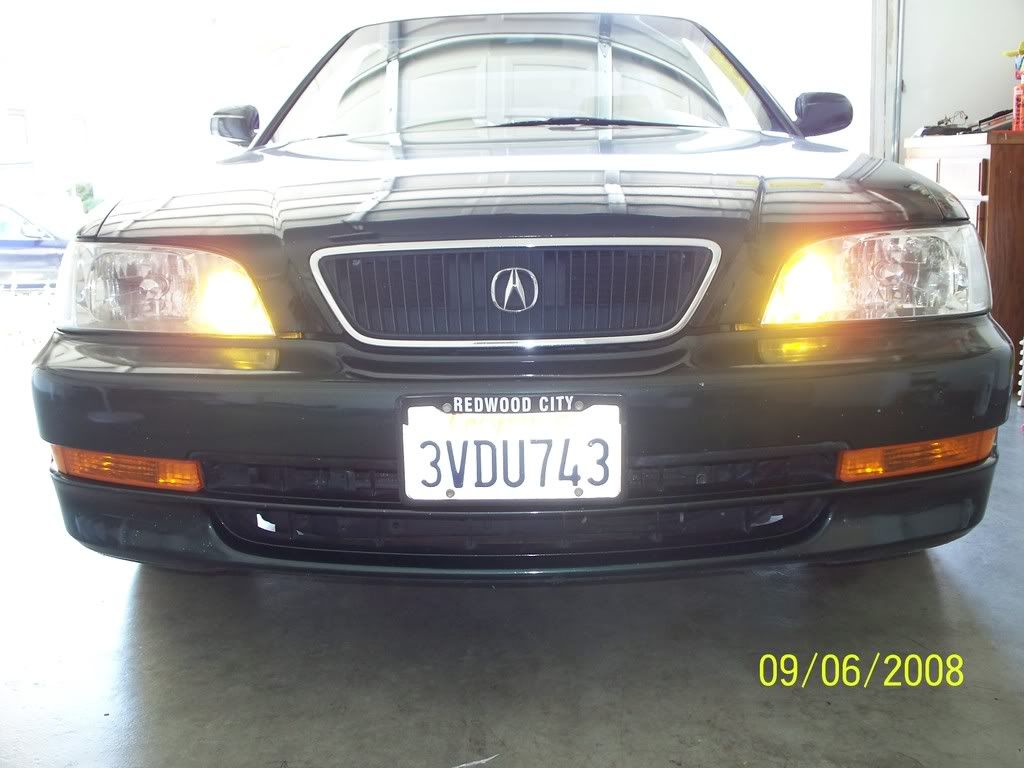
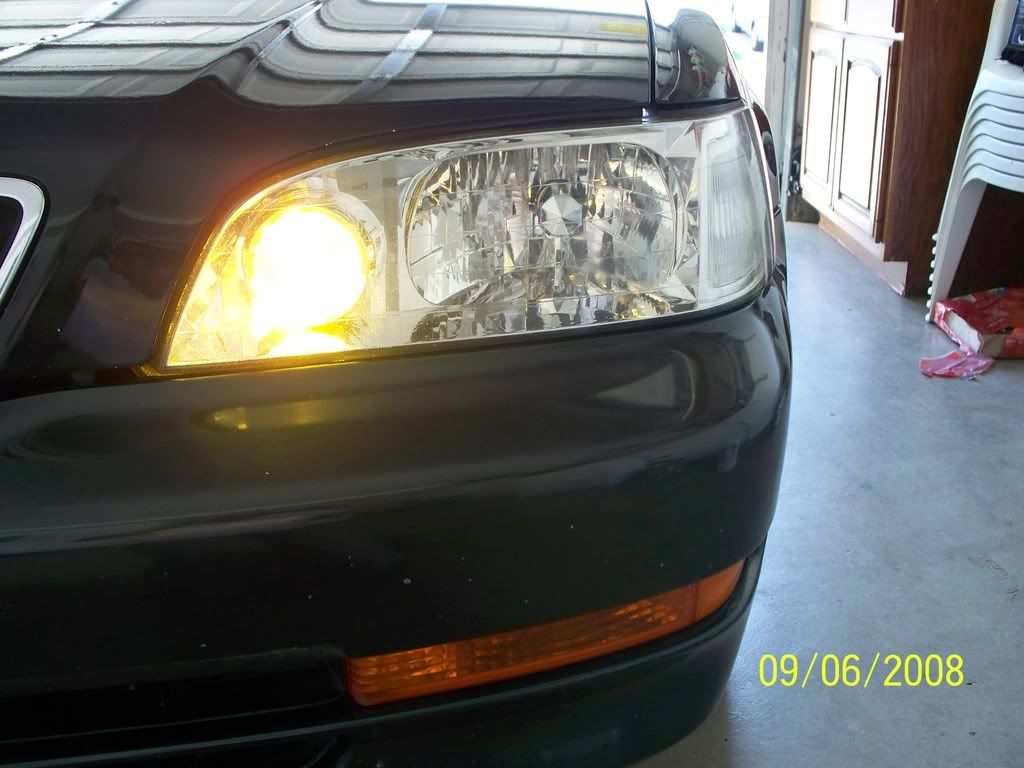
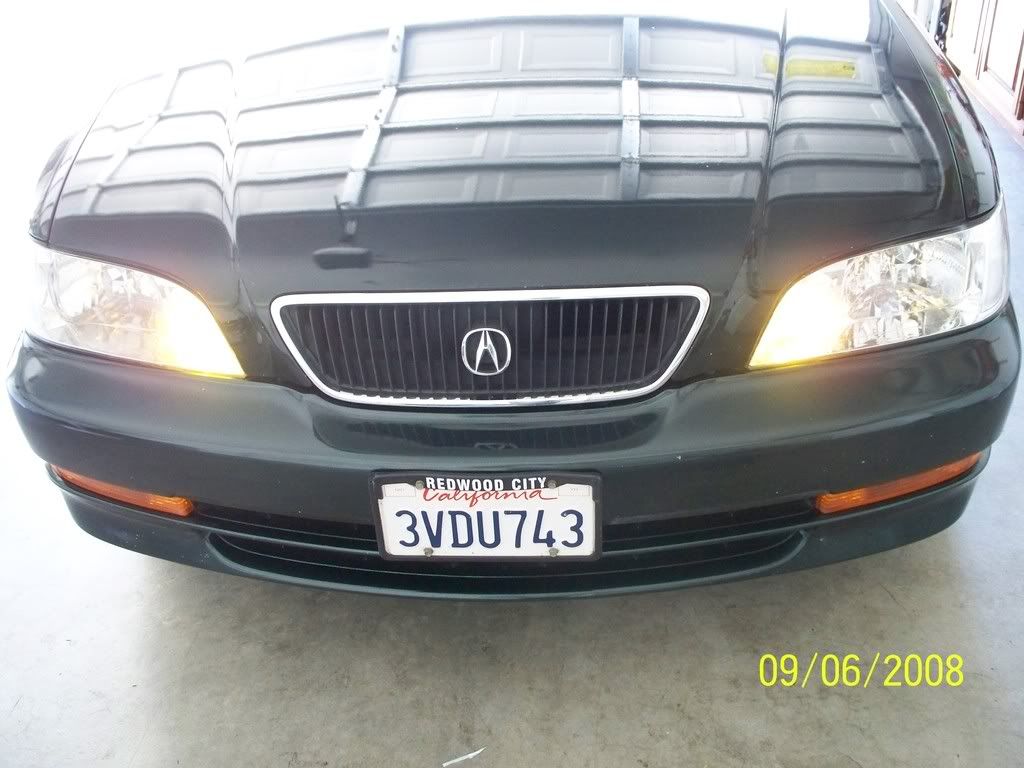
OK do it at your own risk. This mod will make your lights work like DRL's(as soon as your ignition is on, lights will come ON and OFF as you turn your ignition off but you still be able to turn them ON/OFF from fog light switch) and you don't need to turn parking lights ON. Here we go
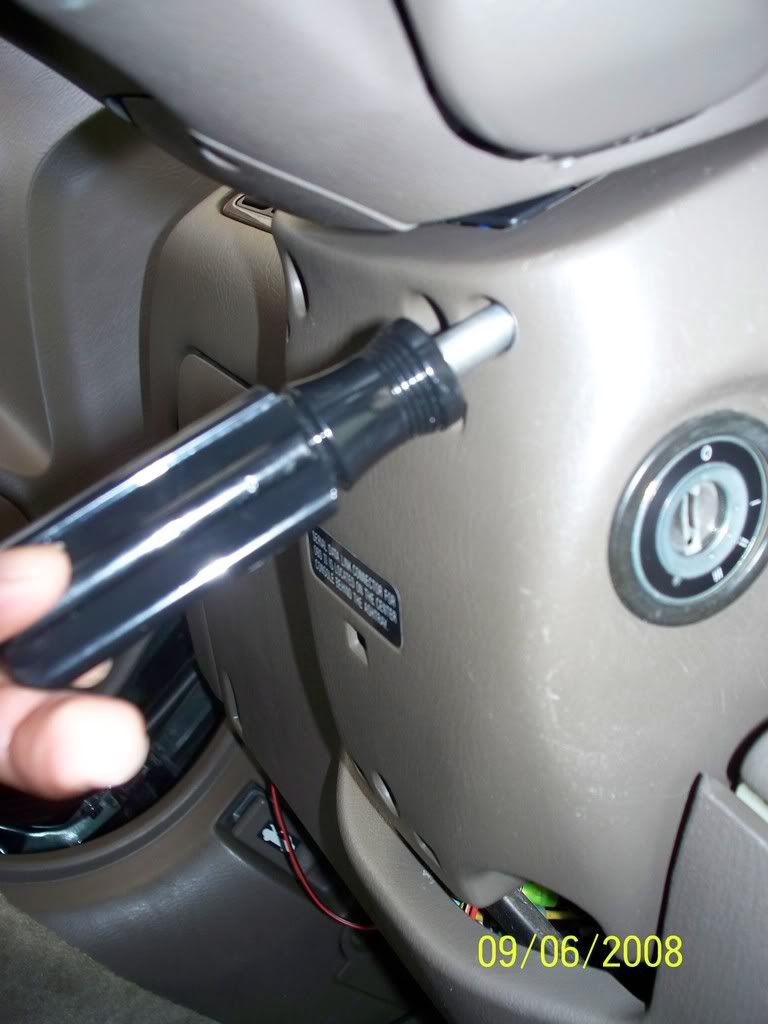
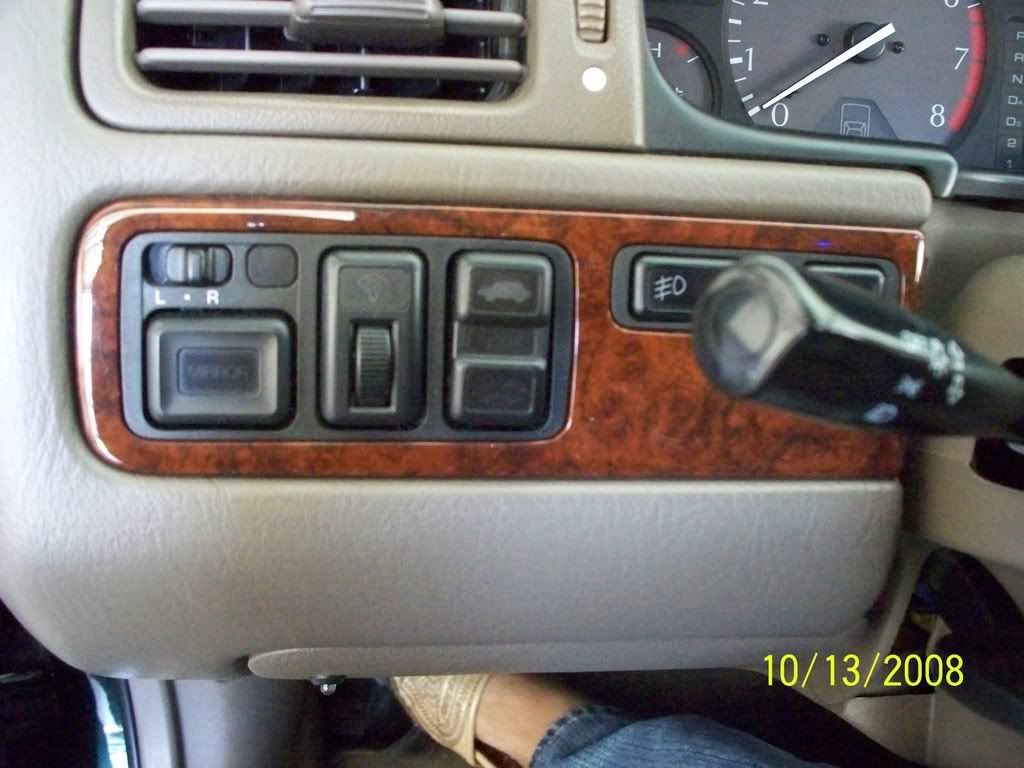
Start off by taking steering cover off by taking 6 screws out.
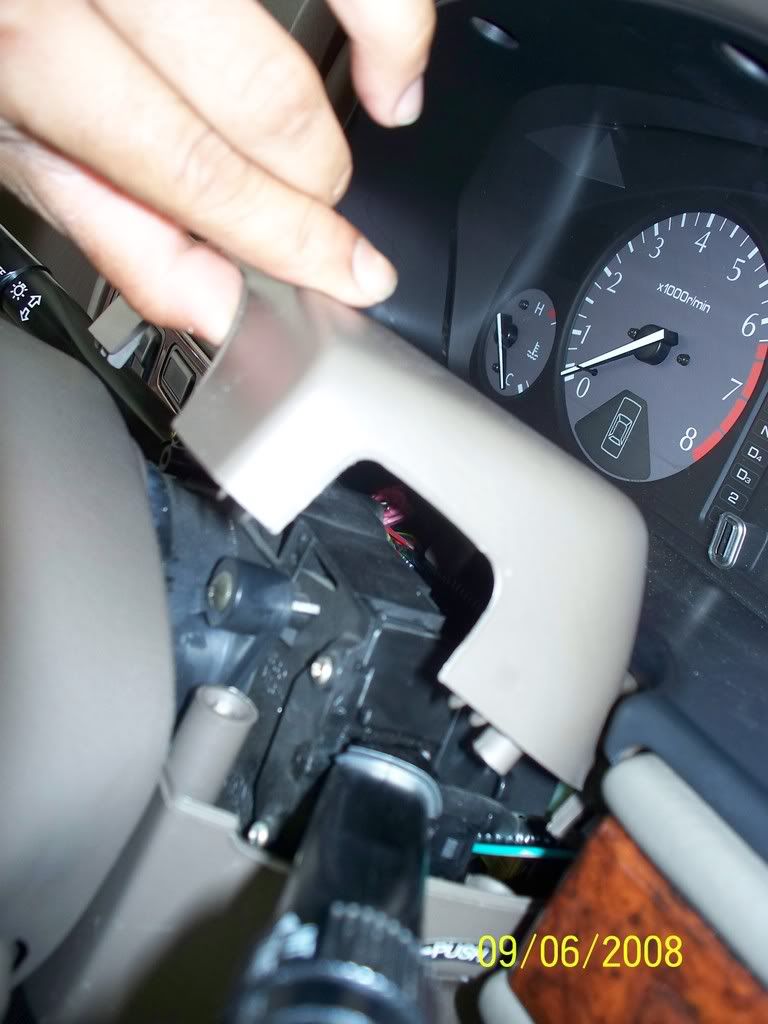
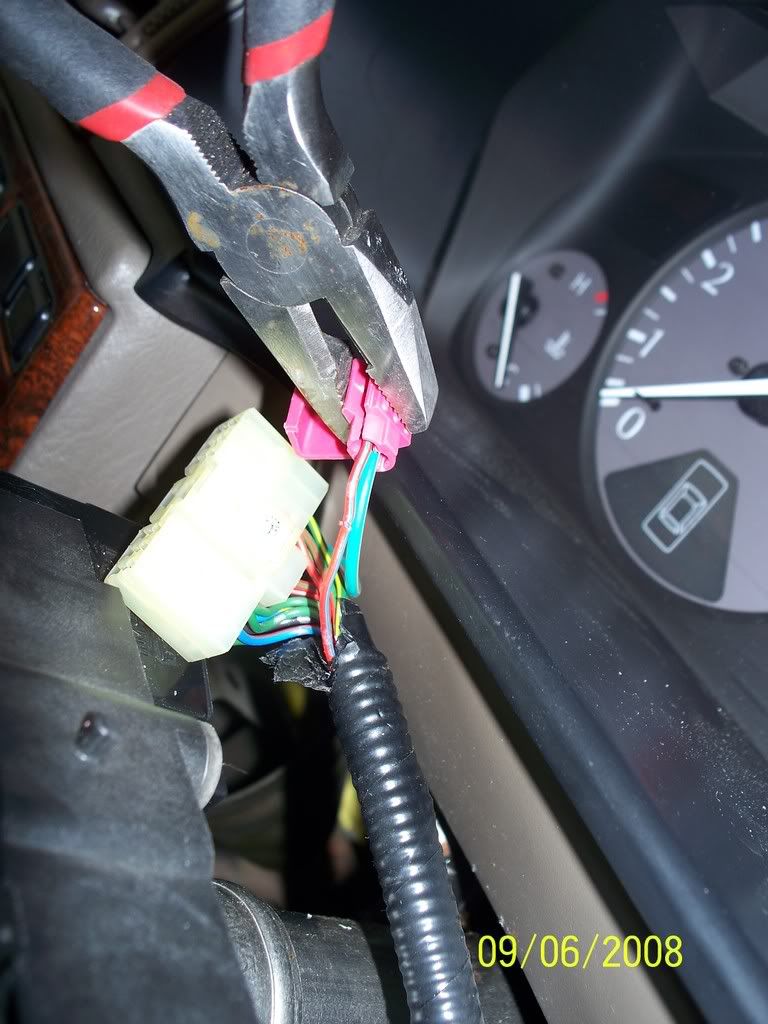
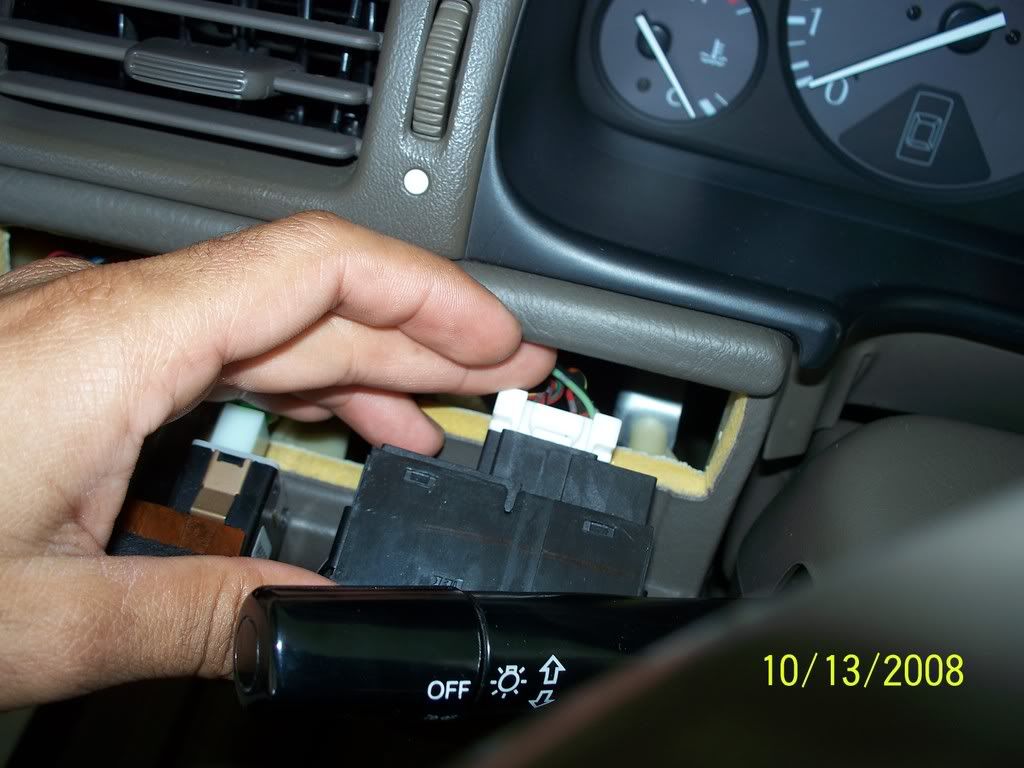
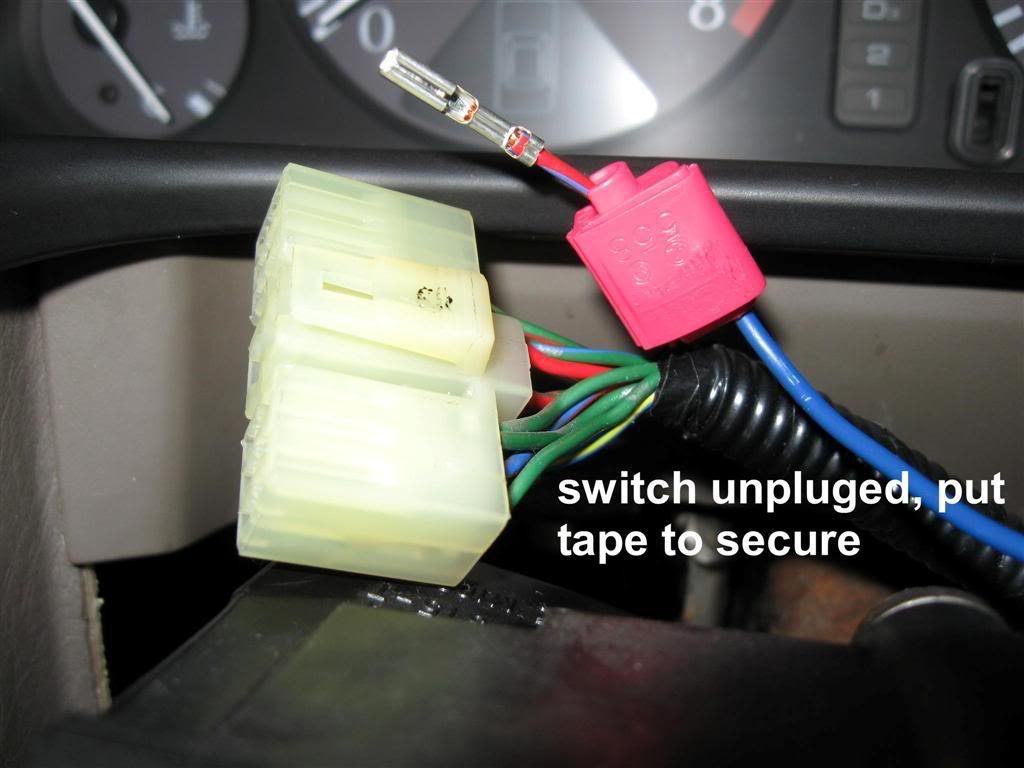
Follow the light switch and take that white connector out..
Look for RED/BLUE(red wire with blue strips, don't get confused with red/black and red/green)
You will need a piece of wire about 10 inches and splice connect it with that RED/BLUE wire(its upto you if you want to cut and connect it or try little and take out the pin cuz if in future you change your mind you'll be able to simply PLUG-N-PLAY)
Here how it looks
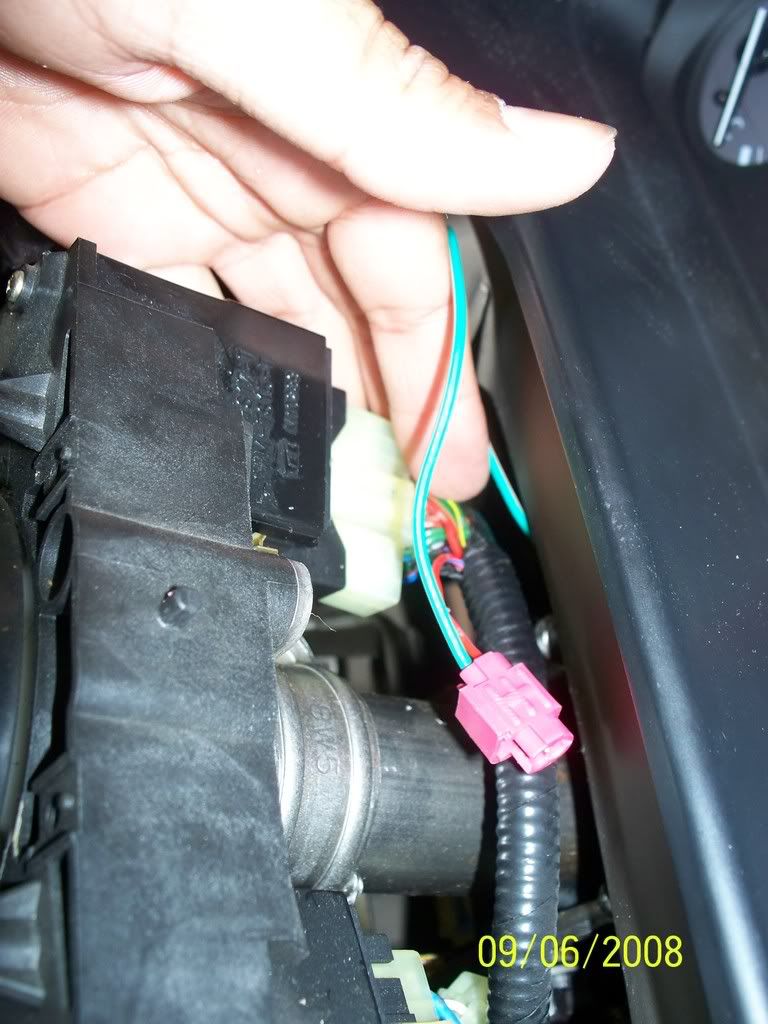
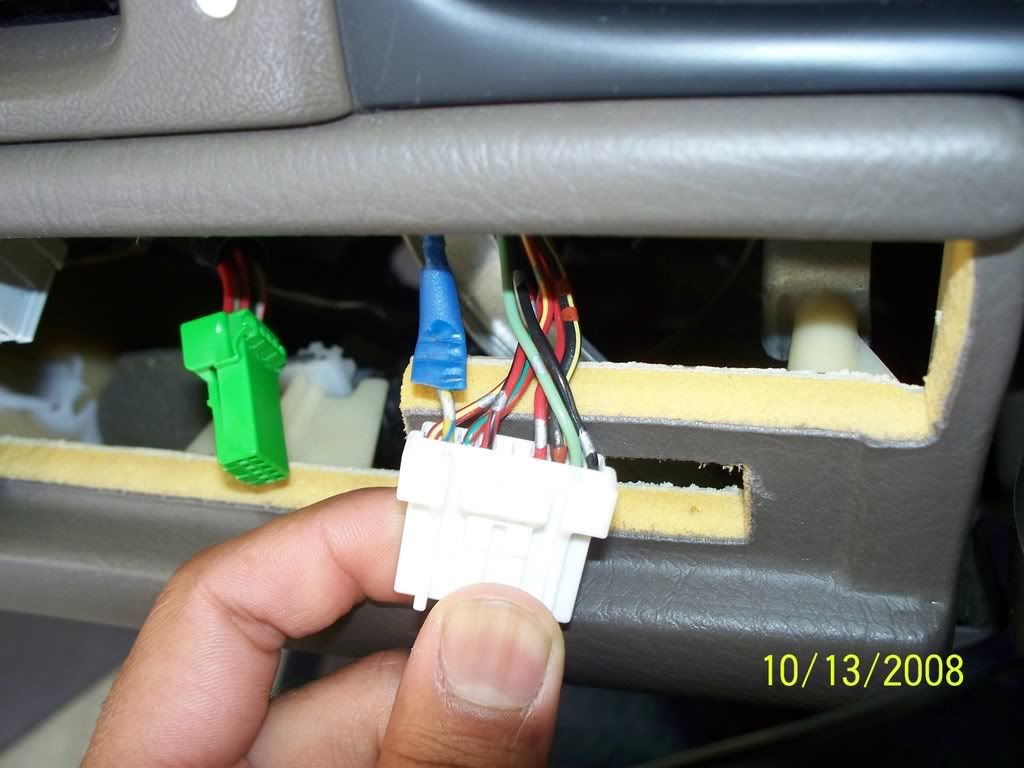
Now take the bottom cover off..
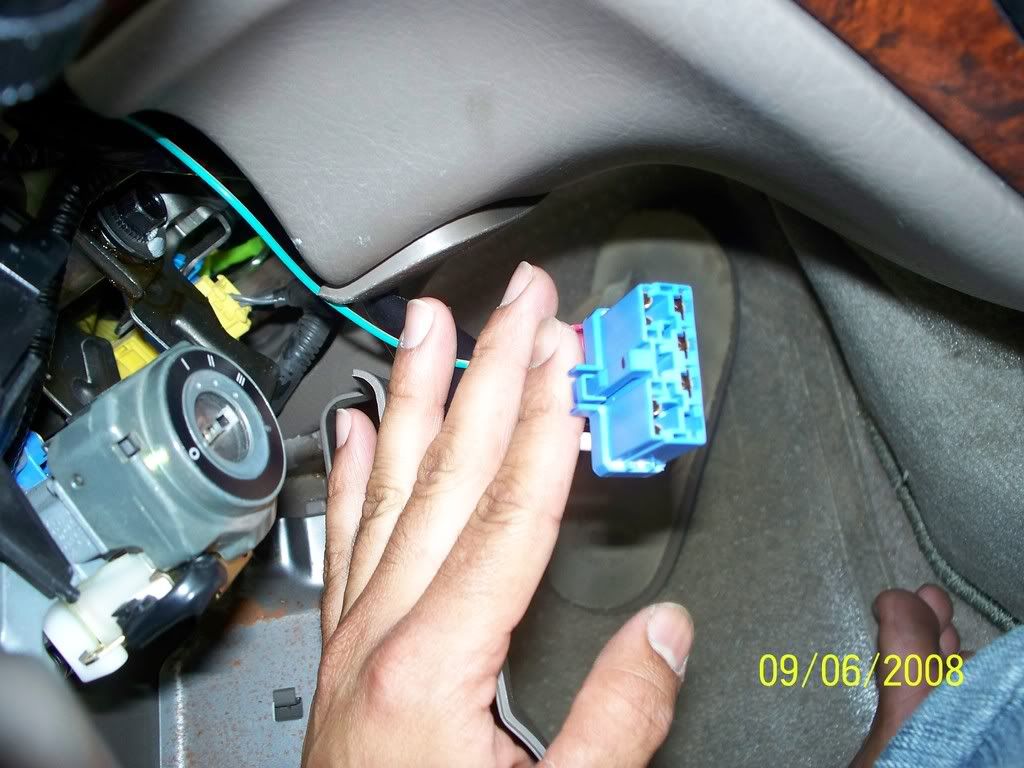
Take the green connector out and LEAVE IT ALONE UNTIL YOU ARE DONE..
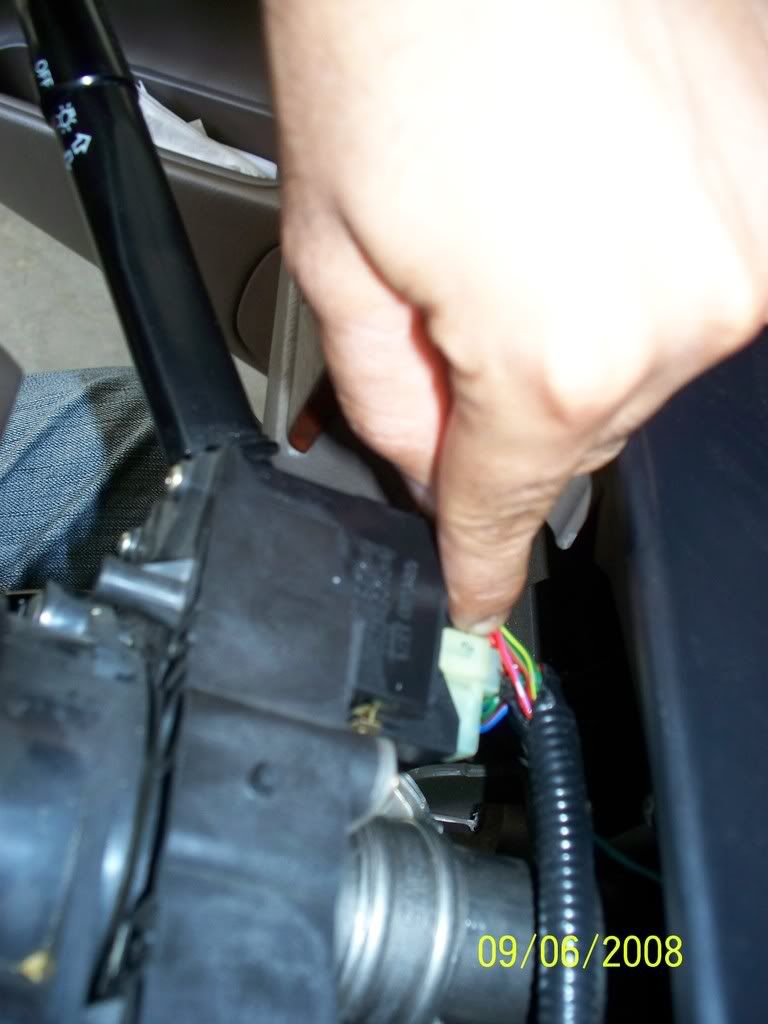
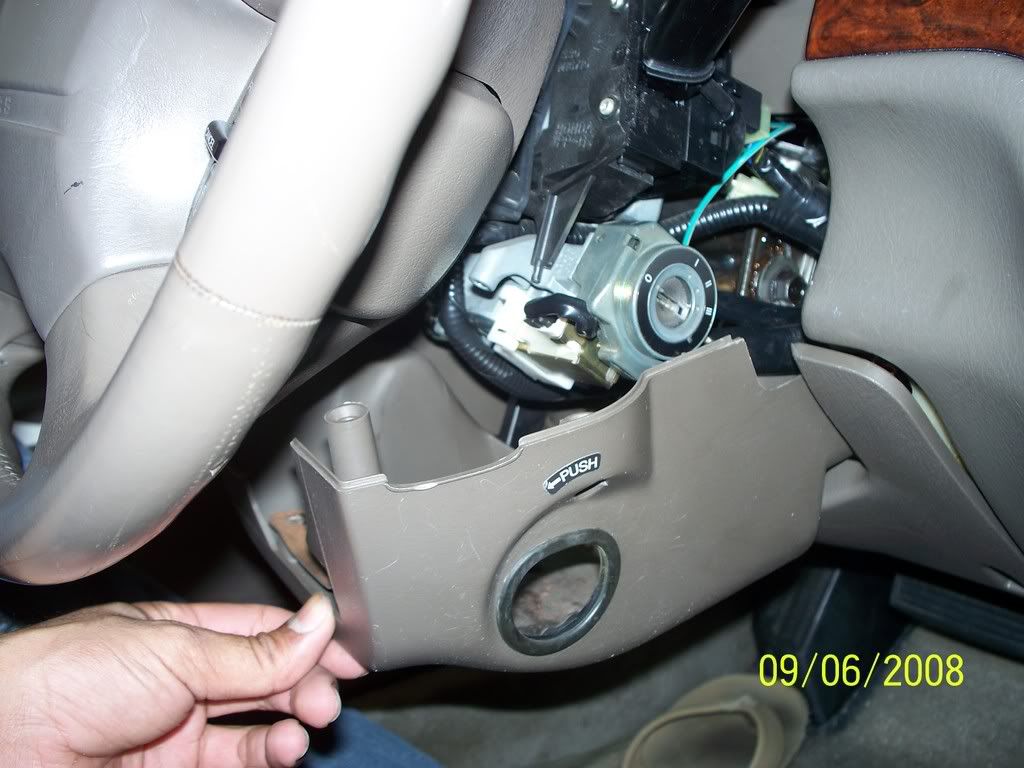
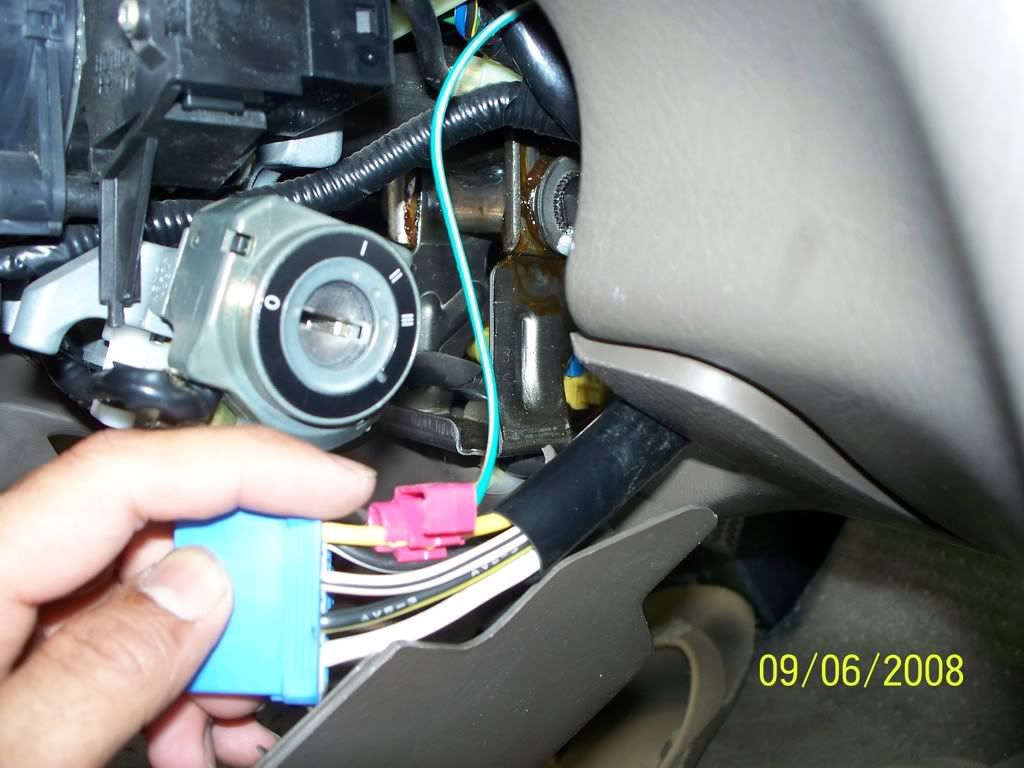
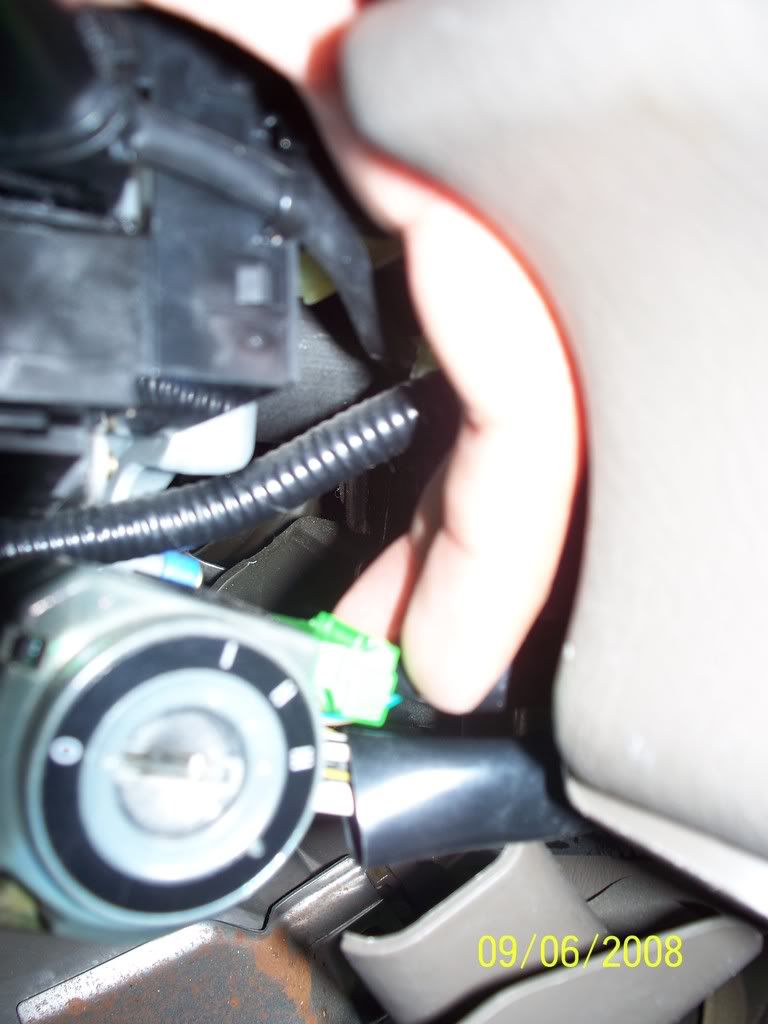
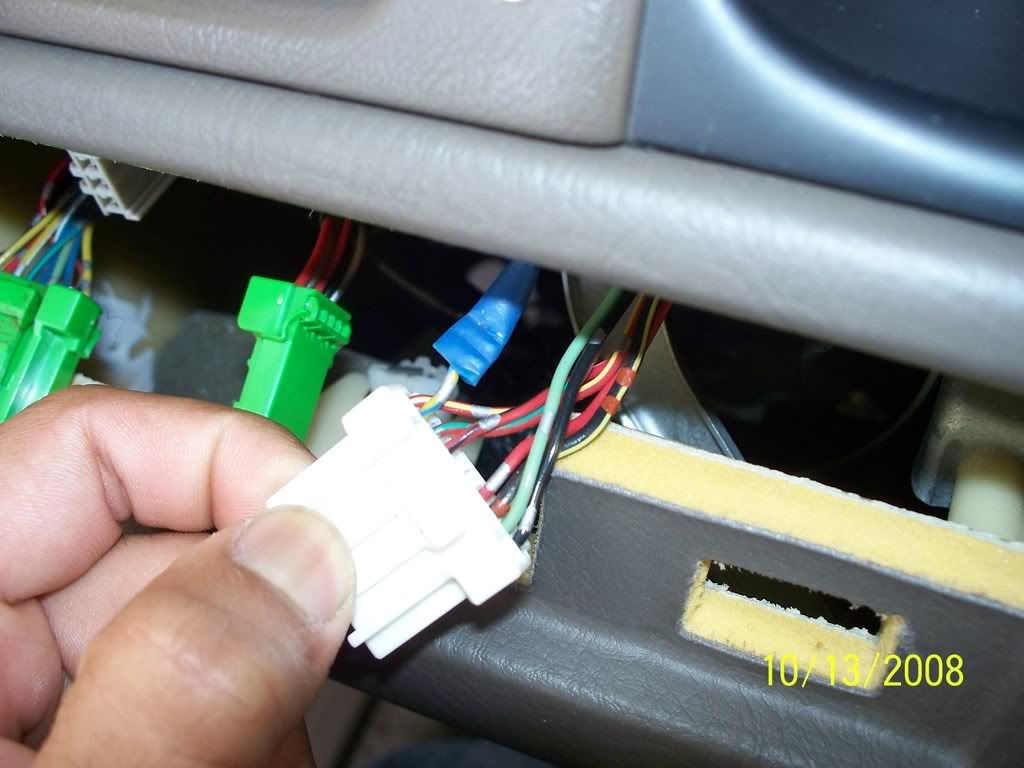
Follow these wires and take out the BLUE IGNITION CONNECTOR..
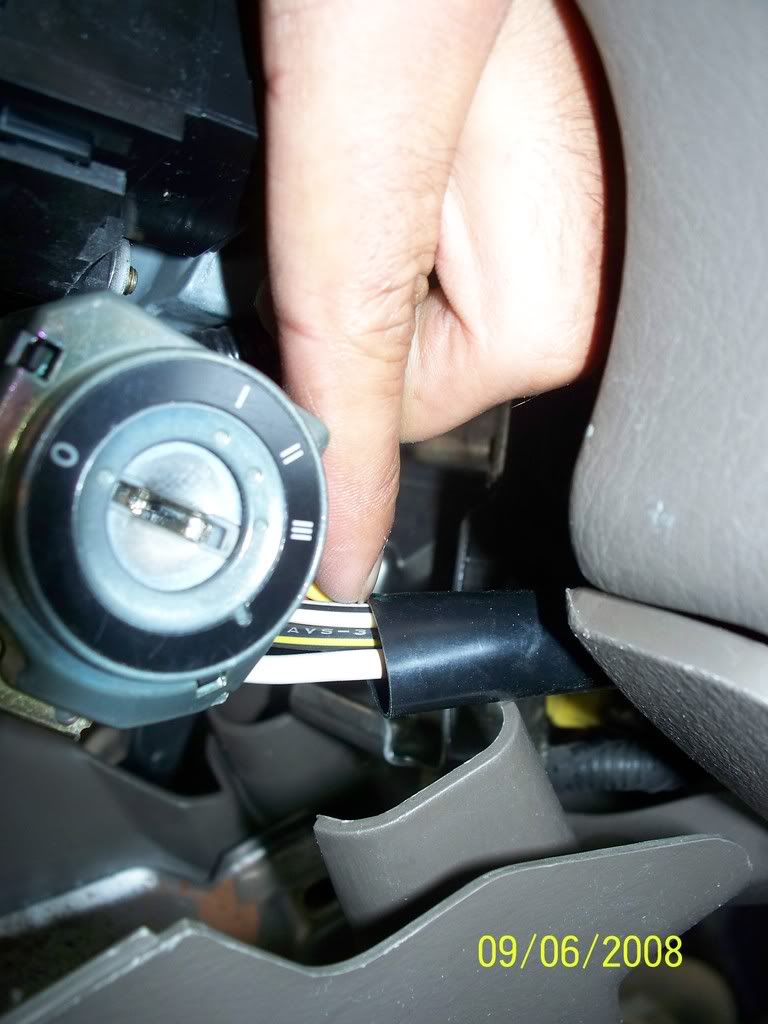
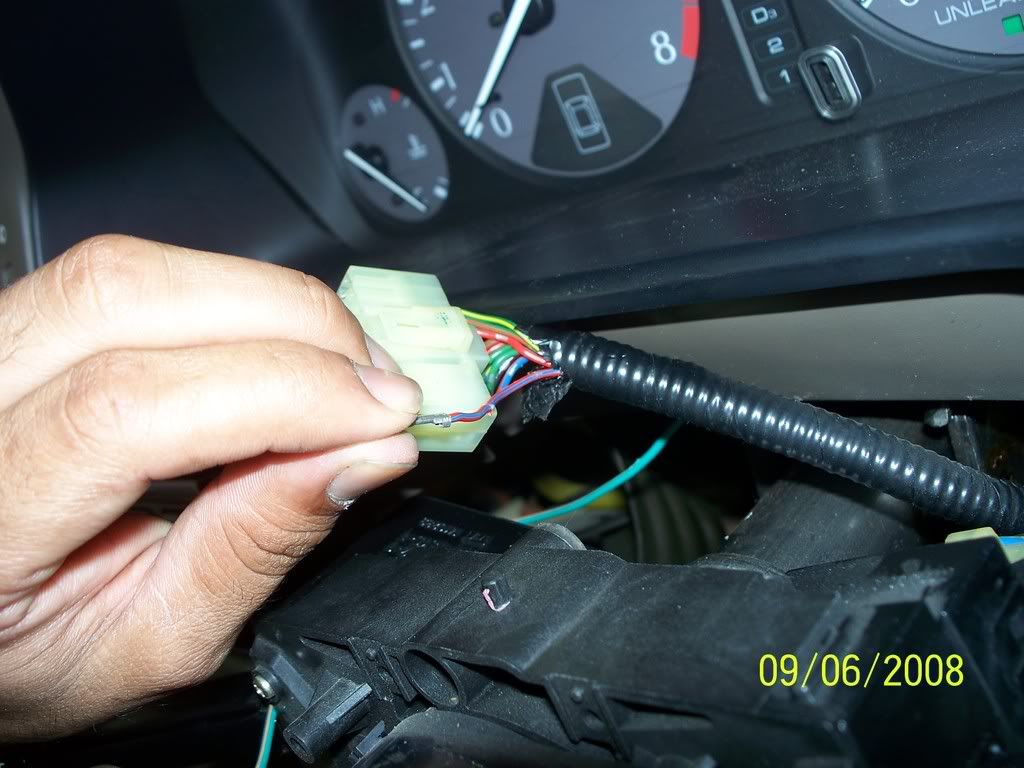
Here's how Ignition connector looks..
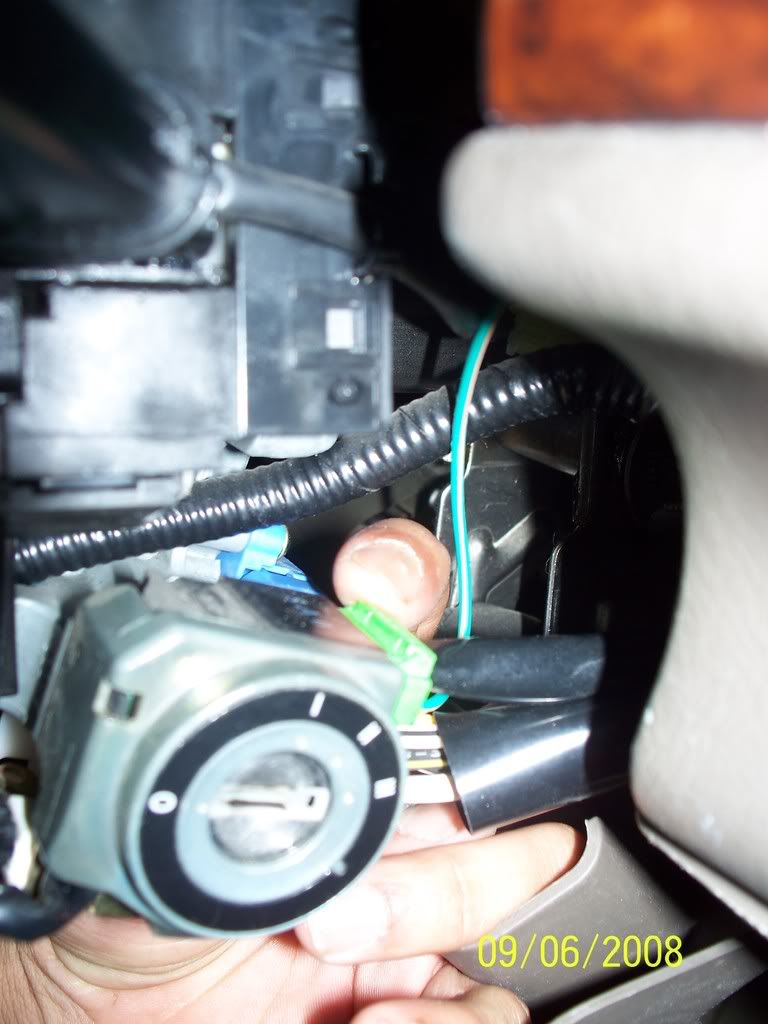
Look for thick YELLOW wire and splice connect that wire you connected with RED/BLUE with this one...
Plug everything back in..
Put steering cover back and pack up here is the result...
I will post second part of this ASAP(to make fogs totaly independent, I mean to make them work with high's ON)
OK do it at your own risk. This mod will make your lights work like DRL's(as soon as your ignition is on, lights will come ON and OFF as you turn your ignition off but you still be able to turn them ON/OFF from fog light switch) and you don't need to turn parking lights ON. Here we go
Start off by taking steering cover off by taking 6 screws out.
Follow the light switch and take that white connector out..
Look for RED/BLUE(red wire with blue strips, don't get confused with red/black and red/green)
You will need a piece of wire about 10 inches and splice connect it with that RED/BLUE wire(its upto you if you want to cut and connect it or try little and take out the pin cuz if in future you change your mind you'll be able to simply PLUG-N-PLAY)
Here how it looks
Now take the bottom cover off..
Take the green connector out and LEAVE IT ALONE UNTIL YOU ARE DONE..
Follow these wires and take out the BLUE IGNITION CONNECTOR..
Here's how Ignition connector looks..
Look for thick YELLOW wire and splice connect that wire you connected with RED/BLUE with this one...
Plug everything back in..
Put steering cover back and pack up here is the result...
I will post second part of this ASAP(to make fogs totaly independent, I mean to make them work with high's ON)
Last edited by tmnhs81; 09-12-2008 at 02:33 PM.

 09-22-2008, 03:34 PM
#4
98 3.2 Flamenco Black

Hey tmnhs81, did you ever do the 2nd phase of your DIY? Turning the fogs on on high beam? If you have, tell us how you did it!
I am still debating which way to go, park lights plus fogs? Or actually DRL style. Bit I wonder about the high beam + fogs.
Now, maybe it is me, did you not post a video of such work?
I am still debating which way to go, park lights plus fogs? Or actually DRL style. Bit I wonder about the high beam + fogs.
Now, maybe it is me, did you not post a video of such work?


Trending Topics
10-13-2008, 11:35 AM
#8
98 3.2 Flamenco Black
Do not forget to disconnect the battery before you do any of these type of connections...you can die of a 12V if conditions are right (your ground location, how wet, etc.). I just had training on electrical hazard.....better be safe than sorry.
10-13-2008, 06:32 PM
#9
^^ Agree , Thanks for the tip.
10-13-2008, 06:49 PM
#10
Allright guys here is the second part you waiting for, sorry for taking so long was so lazy to take pic's..
1> Take off the small dash panel on left of steering..
2> Take all connectors out for better room, look for white connector (1st on right side)..
3> Look for a YELLOW wire with BLUE strip on it, remember YEL/BLU..
(I was already done with this mod thats why there's a butt connector there)
4> Cut that wire and ground the connector side of wire, make sure to cover the other side with electrical tape to prevent any kind of short..
You are done after that Put everything back in and go check the results..

 11-06-2008, 11:24 AM
#13
No, you don't need to do both mods to make it work. (You only need first, second is your choice you wanna do it or not.) This was done on a 3.2TL. I think wiring for lights is same for 2.5 and 3.2 . or I can check and get back to you.
01-04-2009, 01:10 PM
#17
98 3.2 Flamenco Black
DRL's done
Finally got it done.
Pointers and some pics:
1. There are 3 screws which hold the top cover.
2. There are 3 machine bolts that hold the bottom cover.
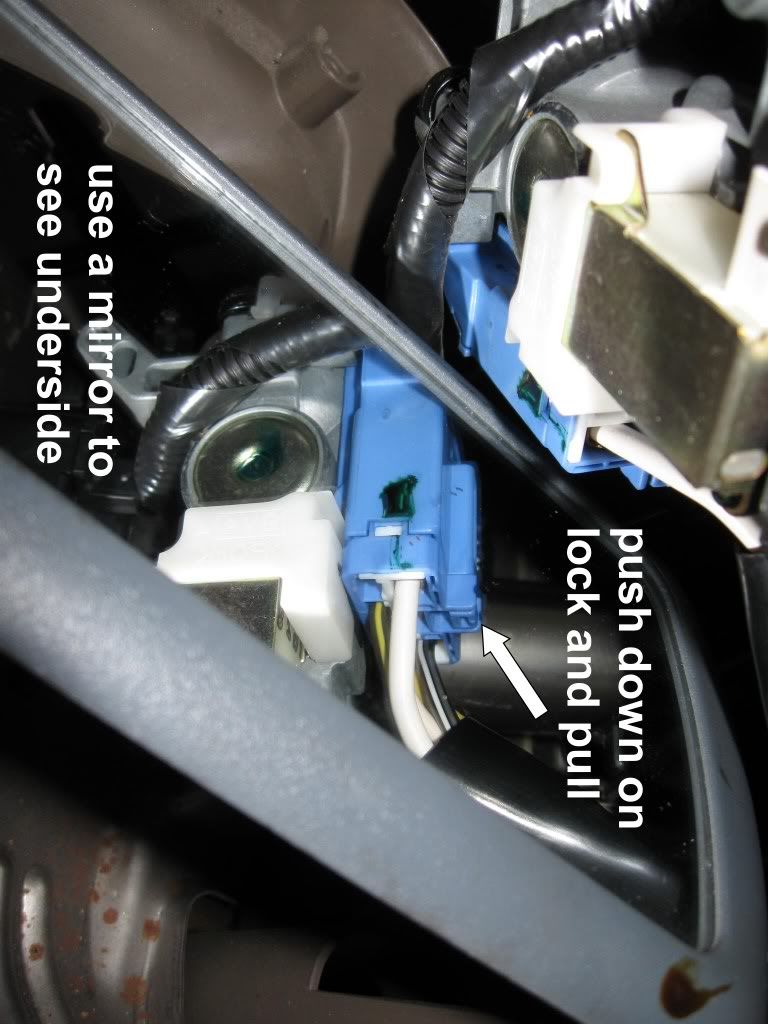
3. Use a mirror to see the underside.
4. The connectors are snug fit, will require some dexterity and patience.
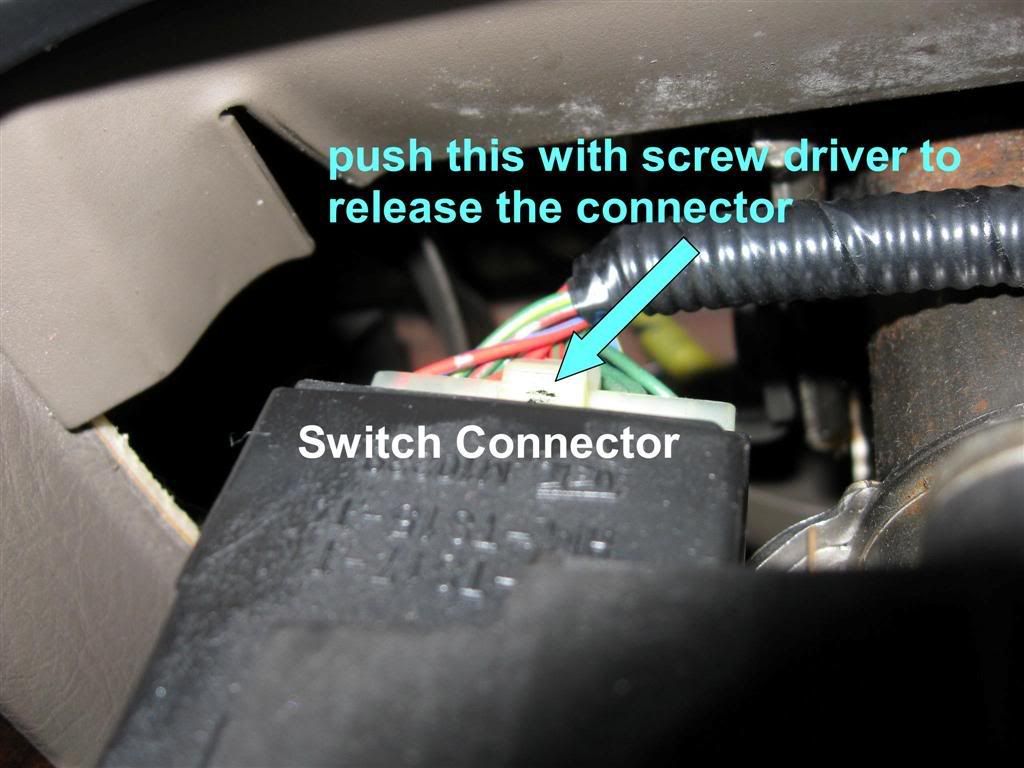
5. Use a small flat screw driver to push down on the lock for the switch connector.
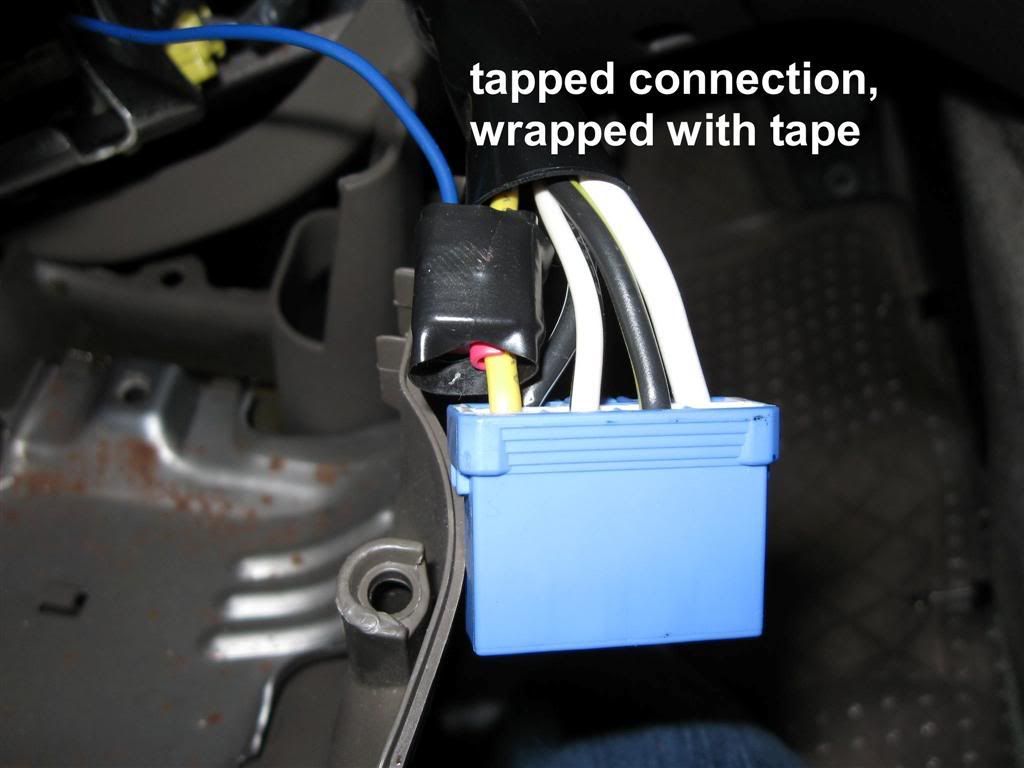
6. Tape everything to make sure no potential for open wires.
7. Use a bigger gage wire tap for the main power tap. Mine was at least one size too small, so I had to force it to make it work.
8. Take your time, there's not much space to work with.
Pics to follow.
Thanks for the write up!
Pointers and some pics:
1. There are 3 screws which hold the top cover.
2. There are 3 machine bolts that hold the bottom cover.
3. Use a mirror to see the underside.
4. The connectors are snug fit, will require some dexterity and patience.
5. Use a small flat screw driver to push down on the lock for the switch connector.
6. Tape everything to make sure no potential for open wires.
7. Use a bigger gage wire tap for the main power tap. Mine was at least one size too small, so I had to force it to make it work.
8. Take your time, there's not much space to work with.
Pics to follow.
Thanks for the write up!
 01-04-2009, 01:20 PM
#20
98 3.2 Flamenco Black
Finally got it done.
Pointers and some pics:
1. There are 3 screws which hold the top cover.
2. There are 3 machine bolts that hold the bottom cover.
3. Use a mirror to see the underside.
4. The connectors are snug fit, will require some dexterity and patience.
5. Use a small flat screw driver to push down on the lock for the switch connector.
6. Tape everything to make sure no potential for open wires.
7. Use a bigger gage wire tap for the main power tap. Mine was at least one size too small, so I had to force it to make it work.
8. Take your time, there's not much space to work with.
Pics to follow.
Thanks for the write up!
Disconnect the battery....make sure you know your radio code.....!!!!
 01-04-2009, 01:38 PM
#21
98 3.2 Flamenco Black
01-07-2009, 11:08 PM
#22
 01-09-2009, 03:47 PM
#25
98 3.2 Flamenco Black
I would do the 2nd part, except that I hate taking off trim, I might damage them. I will really not have a purpose of fogs and high beam on at the same time.
What else to do with out cars...
Pre-wired 12V for a GPS...now, I have to have one.
I will post my GPS set up....
I would have been a mechanic in my other life....
What else to do with out cars...
Pre-wired 12V for a GPS...now, I have to have one.
I will post my GPS set up....
I would have been a mechanic in my other life....
01-09-2009, 03:48 PM
#26
98 3.2 Flamenco Black
01-12-2009, 10:52 AM
#29
01-14-2009, 11:42 AM
#30
98 3.2 Flamenco Black
To be able to provide a 12V power to your GPS without using your cigarrette lighter source.
Hide the wire. Where to tap and what to put in (like a fuse, etc).?
Hide the wire. Where to tap and what to put in (like a fuse, etc).?
01-22-2009, 05:39 PM
#31
10th Gear

Join Date: Jan 2009
Location: Houston, TX (3rd Coast)
Age: 45
Posts: 10
Likes: 0
Received 0 Likes
on
0 Posts
Thank you for posting this DIY step by step, I bought the necessary supplies and did it at work, prior to clocking in; in the employee parking lot. Quick, simple and clean.
01-24-2009, 01:46 AM
#33
'13 Hyundai Sonata
01-24-2009, 01:57 AM
#34

 . He needs alot/a lot of help.
01-24-2009, 01:58 AM
. He needs alot/a lot of help.
01-24-2009, 01:58 AM
#35
Instructor
Join Date: Dec 2008
Location: Toronto, On, Canada
Posts: 194
Likes: 0
Received 0 Likes
on
0 Posts
OMG big balla man you answering all my annoying questions thanks man. At this rate ill catch up lool jokes, so basically this a thread to make the fog lights work all the time??
01-24-2009, 02:01 AM
#36

 01-28-2009, 09:50 PM
#38
Aaaargh! I broke the blue/red wire when I tried to pull it out.
Tried to run the lights with and without the red/blue wire plugged in.
As soon as I reconnected the battery, the headlights only came on without the light switch even being on.
Wow.
Tried to run the lights with and without the red/blue wire plugged in.
As soon as I reconnected the battery, the headlights only came on without the light switch even being on.
Wow.
01-29-2009, 12:14 AM
#39

 01-29-2009, 01:24 AM
#40
Everything still works but the mod did not. 
How the hell did you get the pin out of the wire clip?
Was I supposed to leave the wire disconnected after I jumped it to the thick yellow one?
Or was I to reinsert the wire back into the wire clip after I made the splice?
I tried both and the headlights would come on as soon as I reconnected the battery, WITHOUT the headlight switch even being on!
I'd like to get this done so any input is appreciated. Thanks.