Front End Restoration (Plenty of Photos!)
 07-08-2013, 10:36 AM
#1
Racer
Thread Starter
Front End Restoration (Plenty of Photos!)
Little bit of a background before I get going into details. This car was originally my Grandma's and she drove it for about 6 years. Her driving isn't as great as it used to be and the car shows that. She had a knack for hitting curbs, fences, poles you name it. For a graduation present my parents were awesome enough to pay for all the supplies for the entire restoration. The only things I paid for were one chrome molding, and some bonuses that haven't come in yet.
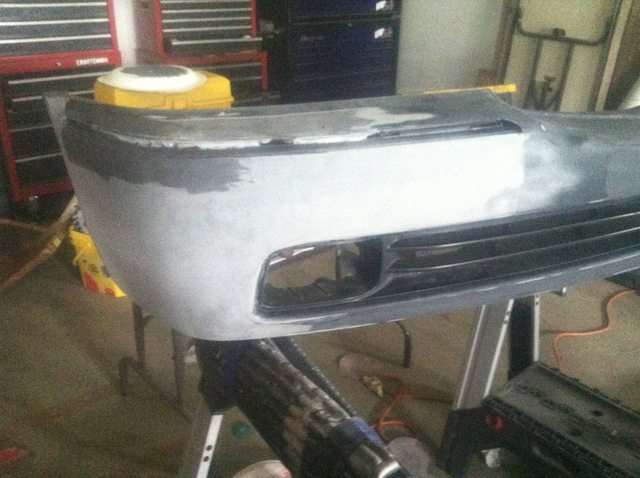
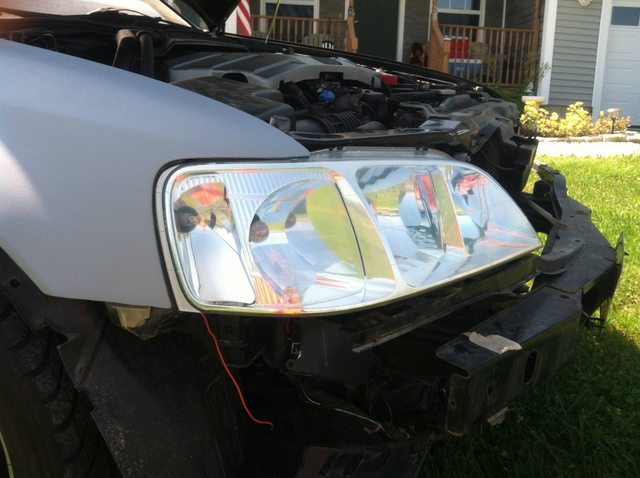
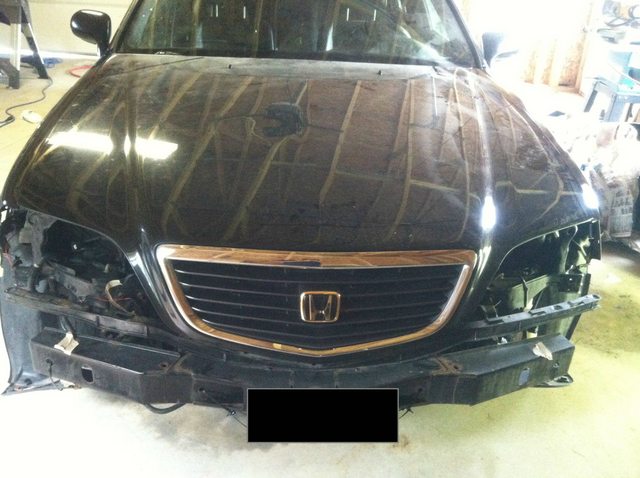
Original look:
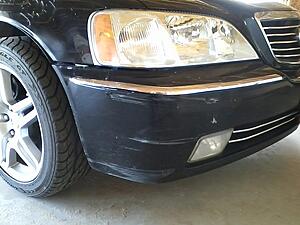
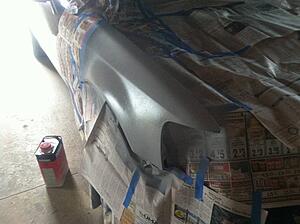
The bumper is unhooked in that corner, beneath the chrome the bumper is literally bowed out and the front is pushed in. Chrome piece is also bent out of shape. The fender was pushed in behind the headlight by about .5cm along with a crease dent that looks as if a cane hit it (not pictured).
Sanded, and first layer of epoxy to fill the holes and repair a crack.
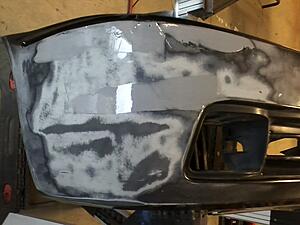
Using a flexible body filler we built up the front edge that had been pushed it. For the bowed out corner we used a heat gun to pull it back in them created metal brackets to hold the bumpers form.
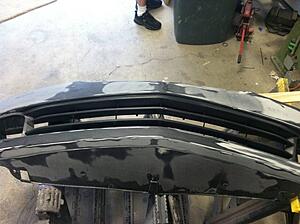
Finally sanding done, and shape finally recreated.
Here's a little tidbit of the bottom: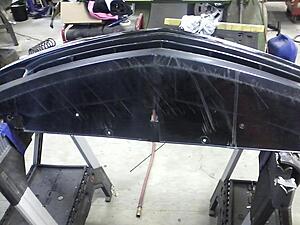
Finished bottom
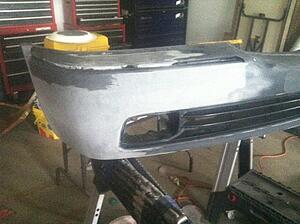
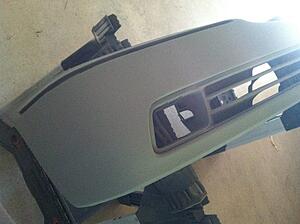
Primer:
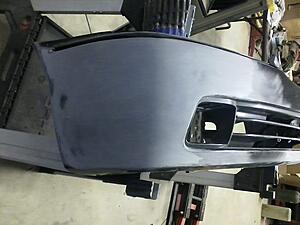
Other side
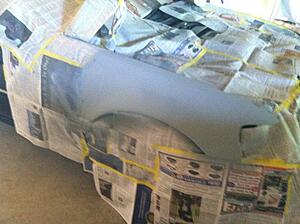
After the bumper was done we began the fender. It didn't take us nearly as long to fix up the fender.
Sanded down, dent filled in and bad corner behind the headlight has been reworked and reshaped to how it should look:

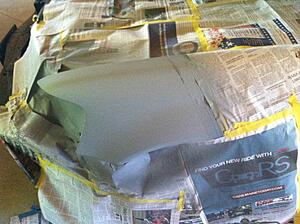
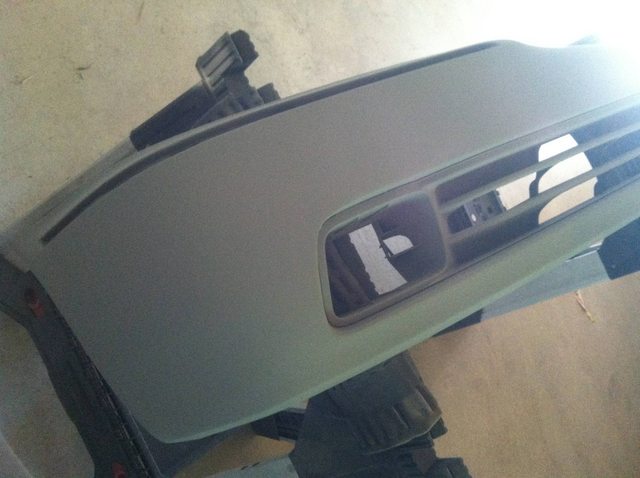
Primed
Test fit of headlight

Sanded down one last time
Final coat of primer
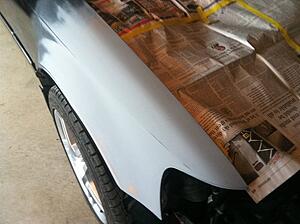
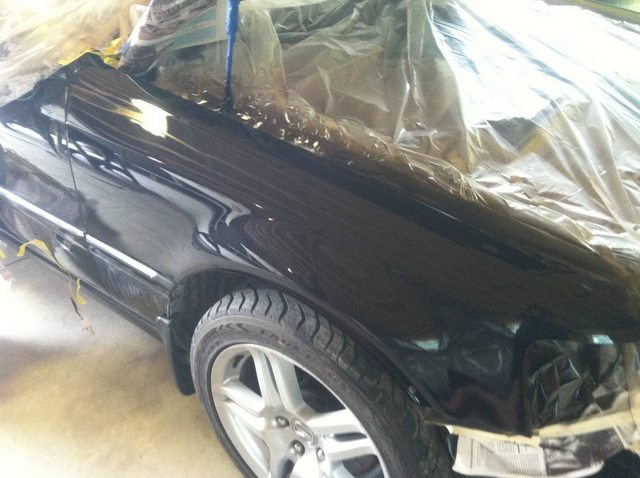
The drivers side fender was not nearly as bad. It did have chips in the paint and a fair amount of scratches but they sanded out nicely and didn't require any bodywork. I forgot to take a before photo of this side sorry.
After sanding and feather edging.

Primed. We built up the primer over the part that was sanded to counter the missing paint.
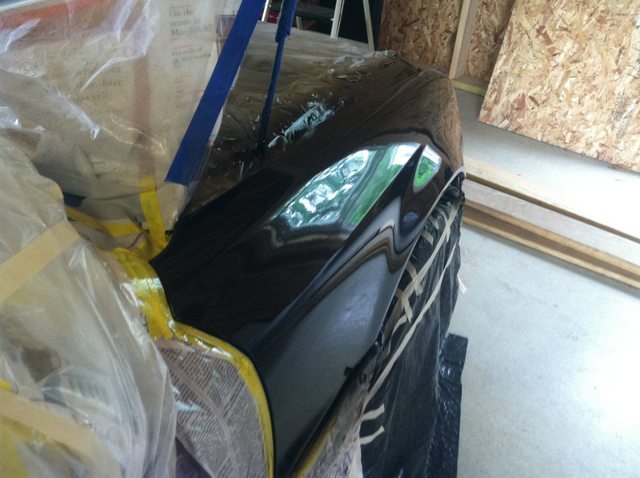
At the same time we gave the entire rear bumper a touch up as each corner had ugly scratches that literally chipped paint along with multiple dents from miscellaneous collisions.
Sanded and all holes filled.
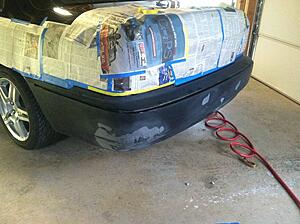
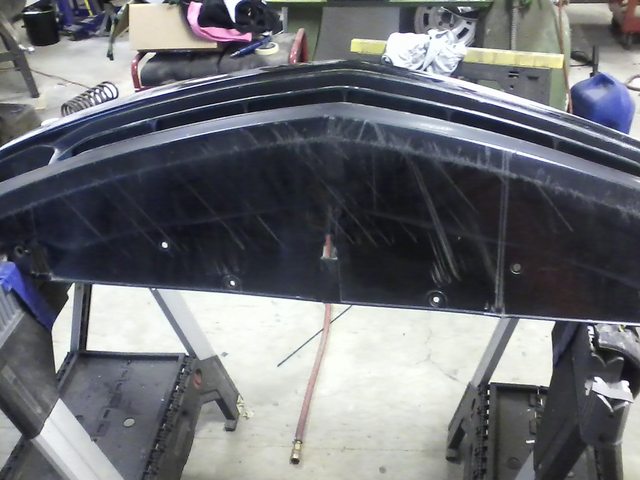
Entire rear bumper primed

I did not take many photos of the remaining processes as they weren't very noticeable changes. Between primer and paint we did do a few extra steps. We began with wetsanding using 800 grit and 15 minutes before paint we used an adhesion promoter to ensure a good paint job.
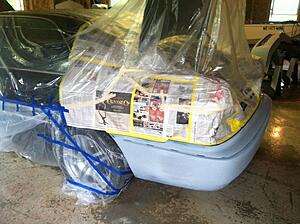
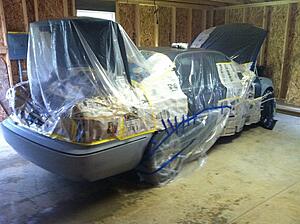
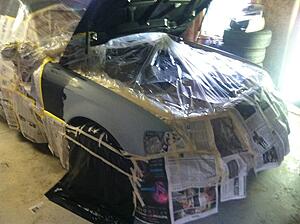
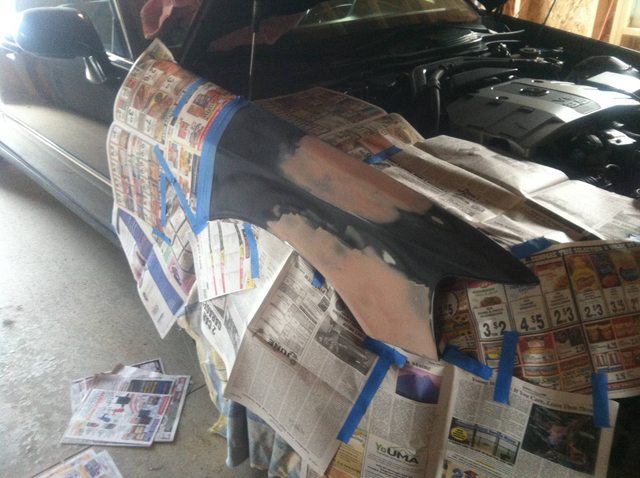
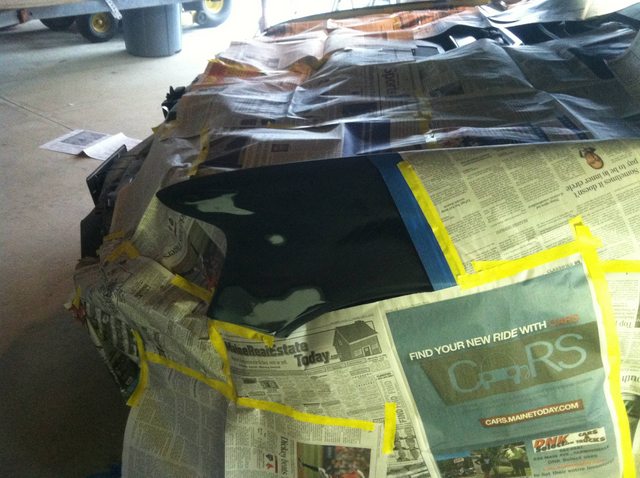
All taped for paint:
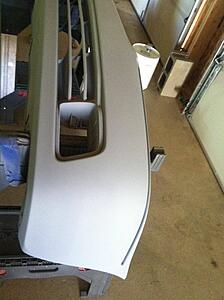
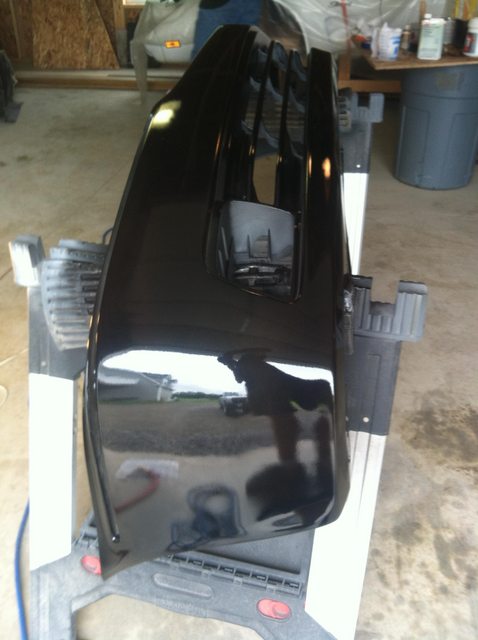
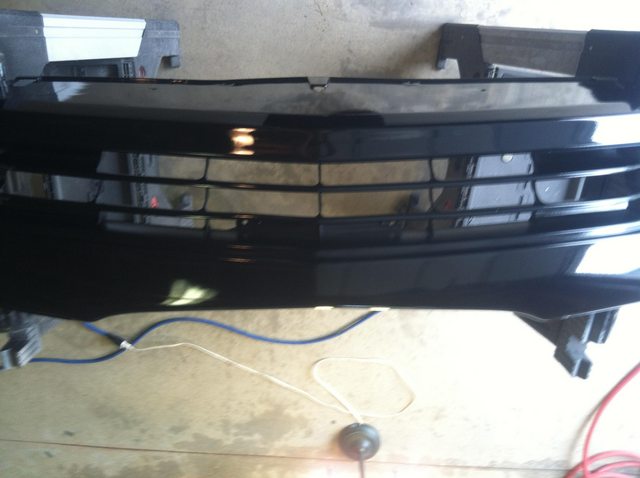
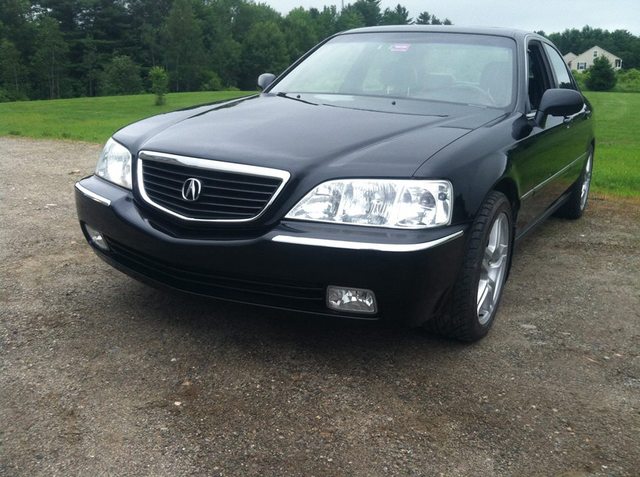
And of course the best for last! Fresh Paint!
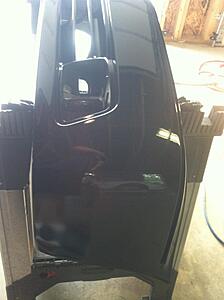
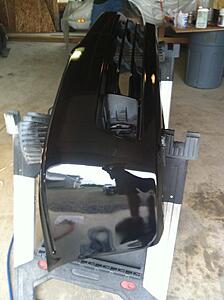
Upside down haha, (yes we painted the lower grill to match)
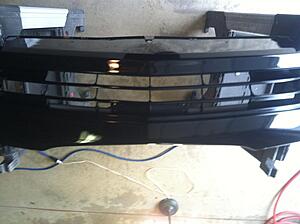


We used Chromapremier paint and clear coat. 1 pint of paint was used along with 1 quart of clear coat. 2 coats of paint on everything and 4 coats of clear. I'm very happy with the final results, and think they came out awesome. My dad did all of the painting.
Tonight we are pulling all the tape off. The front bumper will be put back on tomorrow along with the headlights.
Original look:

The bumper is unhooked in that corner, beneath the chrome the bumper is literally bowed out and the front is pushed in. Chrome piece is also bent out of shape. The fender was pushed in behind the headlight by about .5cm along with a crease dent that looks as if a cane hit it (not pictured).
Sanded, and first layer of epoxy to fill the holes and repair a crack.

Using a flexible body filler we built up the front edge that had been pushed it. For the bowed out corner we used a heat gun to pull it back in them created metal brackets to hold the bumpers form.
Finally sanding done, and shape finally recreated.

Here's a little tidbit of the bottom:
Finished bottom

Primer:
Other side

After the bumper was done we began the fender. It didn't take us nearly as long to fix up the fender.
Sanded down, dent filled in and bad corner behind the headlight has been reworked and reshaped to how it should look:
Primed

Test fit of headlight
Sanded down one last time

Final coat of primer

The drivers side fender was not nearly as bad. It did have chips in the paint and a fair amount of scratches but they sanded out nicely and didn't require any bodywork. I forgot to take a before photo of this side sorry.
After sanding and feather edging.
Primed. We built up the primer over the part that was sanded to counter the missing paint.

At the same time we gave the entire rear bumper a touch up as each corner had ugly scratches that literally chipped paint along with multiple dents from miscellaneous collisions.
Sanded and all holes filled.

Entire rear bumper primed
I did not take many photos of the remaining processes as they weren't very noticeable changes. Between primer and paint we did do a few extra steps. We began with wetsanding using 800 grit and 15 minutes before paint we used an adhesion promoter to ensure a good paint job.
All taped for paint:


And of course the best for last! Fresh Paint!

Upside down haha, (yes we painted the lower grill to match)

We used Chromapremier paint and clear coat. 1 pint of paint was used along with 1 quart of clear coat. 2 coats of paint on everything and 4 coats of clear. I'm very happy with the final results, and think they came out awesome. My dad did all of the painting.
Tonight we are pulling all the tape off. The front bumper will be put back on tomorrow along with the headlights.
 07-08-2013, 12:42 PM
#2
2004 Carbon Gray 3.5RL
Great job. How does the new paint compare to the rest of the car if it wasn't maintained as well.

07-08-2013, 12:57 PM
#3
Racer
Thread Starter
Thanks. The new paint shines much better than the old stuff. The color is spot on but the clear coats are in different conditions and it really shows. The old stuff has light scratches everywhere all over the car. I'm hoping a wet sanding will get rid of most of the marks and reduce the little bit of orange peel on the fresh stuff.
07-08-2013, 02:18 PM
#4
2004 Carbon Gray 3.5RL
That was my main concern about doing all of it and not blending it into the old stuff. can't wait to see what else you have planned for the old girl.
07-08-2013, 02:30 PM
#5
Racer
Thread Starter
I'll try not to disappoint haha. One of the extras I bought came in today I wasn't even expecting it yet!
Last edited by Not_So_Fast_Eddie; 07-08-2013 at 02:33 PM.

Trending Topics
07-08-2013, 10:21 PM
#9
DawgWitDa1stGen98TL3.2
07-08-2013, 11:12 PM
#10
I had a friend of mine do my rear bumper for $250. He works for one of those mobile paint companies. Did an excellent blending job and still can't see any problems even now (2 years later). The original owner had been in a small accident and the replacement paint they used started to peel off....blah. Gotta get my front bumper done now.
07-09-2013, 03:24 PM
#11
Racer
Thread Starter
I had a friend of mine do my rear bumper for $250. He works for one of those mobile paint companies. Did an excellent blending job and still can't see any problems even now (2 years later). The original owner had been in a small accident and the replacement paint they used started to peel off....blah. Gotta get my front bumper done now.
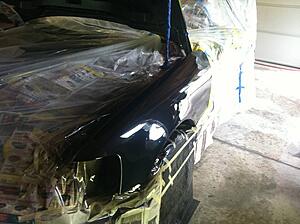
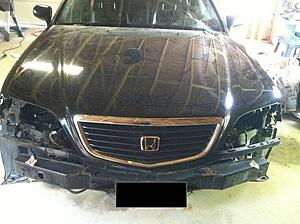
Just gonna squeeze this in. I test fitted the bumper hence no fogs and the wheel well cover hanging. I think I may vinyl wrap the chrome that goes under the headlights black as I really like this look.
 07-10-2013, 05:14 PM
#13
2004 Carbon Gray 3.5RL


I need to throw on my rear "H" and the LEGEND emblem and I'll be done with the exterior. Now... to fix those headlights you have...
 07-10-2013, 06:52 PM
#14
Racer
Thread Starter

But on the bright side it's all done!
 07-11-2013, 07:46 AM
#16
2004 Carbon Gray 3.5RL
That sucks that the grill came in beat up and tattered.
Still looks good to me!
Did you restore your headlights or did you buy replacements and then took them apart?
Still looks good to me!
Did you restore your headlights or did you buy replacements and then took them apart?
07-11-2013, 10:02 AM
#17
Racer
Thread Starter
I opened them up and removed the diffusers over the blinker and running light along with adding chrome blinker and running bulbs to blend the bulbs better. Kind of a cheap version of the clear corner mod. They are still the same headlights I just gave them a wetsanding. The next thing I should look into is a way to protect them from fogging again.
Thanks for the compliment Pro.
Thanks for the compliment Pro.
07-11-2013, 03:22 PM
#18
2004 Carbon Gray 3.5RL
Fogging on the inside or hazing on the outside?
Clear coat i heard is a great way to clean them up and prevent the hazing for a long time... just an idea.
I need to wet sand and do the same to my Legend headlights finally... cleaning them up every 2-3 months is annoying.
keep up the good work! I like the progress
Clear coat i heard is a great way to clean them up and prevent the hazing for a long time... just an idea.
I need to wet sand and do the same to my Legend headlights finally... cleaning them up every 2-3 months is annoying.
keep up the good work! I like the progress
08-16-2013, 03:29 AM
#19
6th Gear
That RL looks SO sweet. I have a 2003 TL - P and I loeyand where did you get them ifve it but if was wrecked beyond repair then I would SERIOUSLY consider buying a black RL just like yours. Nice rims and tires; what kind are they and where did you get them if you don't mind me asking?
08-16-2013, 04:00 AM
#20
6th Gear
The second sentence was supposed to say I have a 2003 TL premium and I love it in fact if it wore a skirt and had 2 C cups I would marry it but if it
was wecked beyond repair I would seriously consider buying a black RL just like yours.
was wecked beyond repair I would seriously consider buying a black RL just like yours.

Thread
Thread Starter
Forum
Replies
Last Post
TLDude876
Car Talk
134
12-28-2016 03:18 PM
Oakes
Wash & Wax
10
10-12-2015 11:17 AM