DIY: FXR projector retrofit (99-04)
 03-21-2014, 04:15 PM
#1
Racer
Thread Starter
DIY: FXR projector retrofit (99-04)
Alright so I know there is already a DIY on LS430 projectors but unlike most projectors LS430s mount differently. This DIY is to help show how a more common projector can be mounted using JnC's method. I went with FX-R 3.0's the 3" variant from The Retrofit Source, you don't need to pick them but be careful when it comes to the size (mainly depth). At 140mm long these projectors barely fit with almost no play behind the lens. You may be able to squeeze bigger ones in but it will leave you with a very small mounting region. I really recommend avoiding any of the Ebay projectors out there as the ones I had were horrible. Stick with OEM or morimoto.
Please note I cannot be held responsible for any damages that may occur to your headlights. This is something that you must be careful with and these headlights aren't exactly cheap $250+ apiece. Proceed at your own risk.
Supplies NeededPlease note I cannot be held responsible for any damages that may occur to your headlights. This is something that you must be careful with and these headlights aren't exactly cheap $250+ apiece. Proceed at your own risk.
Screw driver set
socket set
thin gloves (to be worn when handling reflector / projector)
thick gloves for working with the heat gun
4 long bolts
6 short bolts
lock nuts all around
some thin aluminum for brackets
aluminum flashing
lock tight
hot glue gun
silicon
dremel
projectors
shrouds
New D2S bulbs (OEM phillips work great)
some microfibers
air compressor or can of compressed air
sand paper for lens restoration
rubbing compound
For more info on the mounting method go here to do some reading:
http://www.hidplanet.com/forums/show...-Capability%29
Also if you want now is the time to do any mods to your projectors such as color modding the cut off:
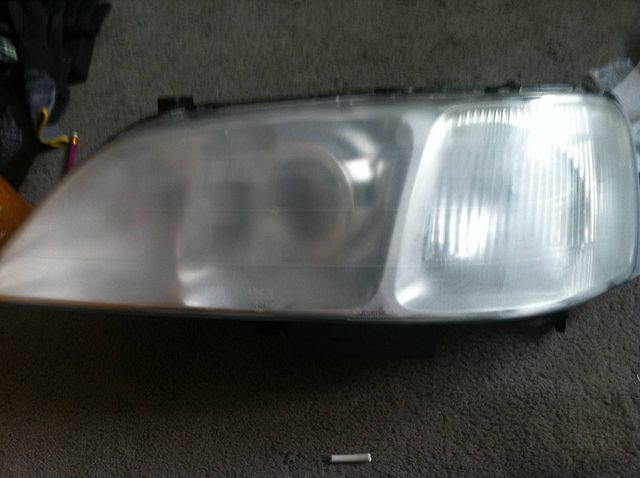
The first step is to remove the headlights from your car, if you don't know how you should refer to the service manual as it explains this best. It shouldn't take you more than 30-40 minutes if its your first time.
With your headlights out of the car you should remove every bulb (Do not touch the HIDs) Put all of these bulbs in a safe place where they will not fall or be touched.
Opening the headlights
Now to open the headlights you can either use the oven method or heat gun method. I prefer the heat gun method because I did not remove the ballast from the housings. If you use a heatgun start at the pointed end of the headlight and warm up the seam of the lens and housing on each side about a foot down from the point. Do not leave the heat gun in a single spot so it doesn't melt anything and just work it back and forth until you think the glue will begin to soften.
Take a flat head and wedge it into the seam on the point. Lightly pry and see if you can get any leverage. Don't push till the point that the plastic begins to deform. If it does and the head light isn't opening it means the glue isn't warm enough. Keep working the heat and testing some pry spots until you can begin to get them to seperate. When you do finally begin to seperate the two use a knife to cut the stretching glue. Continue to heat the seam especially where the lens and housing are meeting. If you put just a bit of tension to seperate them and heat the meeting point it will slowly separate the two further until you reach the end. When you finally have the lens removed take it and put it in a safe spot. Now repeat this for the second one.
Taking apart the housings
TIP: Be gentle working with the reflectors the chrome will peel if you rub it too roughly, or tape (even painters tape).
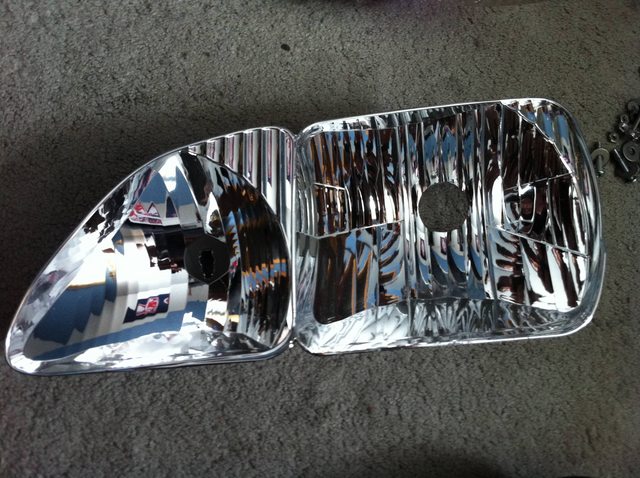
With the lenses now removed we can take the reflective housings out. Grab a phillips screw driver and remove the reflector by turning the alignment screws. For the vertical screw go CCW, and for the horizontal screw go CW. When each screw is about halfway off make sure to pop the ball joint mount behind the reflector out of place. It will resist you so give enough force but not enough to break anything. Once the joint pops go ahead and finish undoing the screws. You should be down to this:
Mounting the projector
Here's where you need to be careful. We need to do some cutting to the reflector. You want to find the perfect cutting amount where the projector will just fit as deep as you need but still have some room to move around.
This is the amount I cut.
It was actually a little too much as the bottom didn't need to be cut all the way down. As long as you use a good sized shroud it will hide all of this mess.
Here's the part your probably dreading. You need to make the cut. Use a dremel as it creates a nice clean edge and makes it easy work. Also don't do this somewhere you don't mind dusting after. It creates a big mess.

Be careful wiping off the dust. Do not use any chemicals. Anything more than a gentle wipe with a microfiber or compressed air will run the risk of stripping chrome. (Unless your painting the reflector of course)
With the cut made test fit your projector. You want it to easily fit about 1/2 of the way in. If any of your edges are touching go back and expand the cut a little bit.
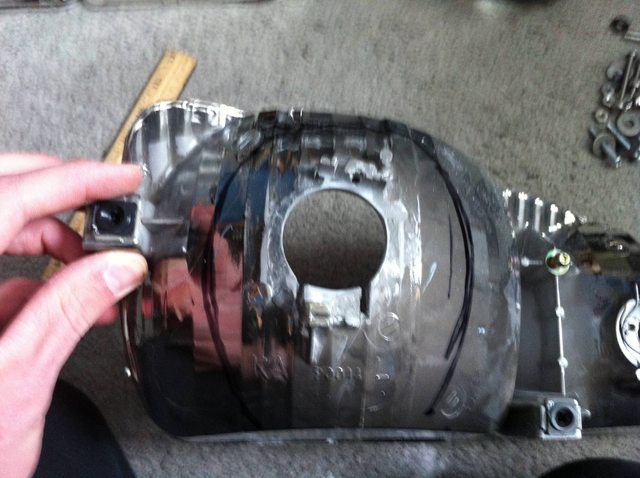
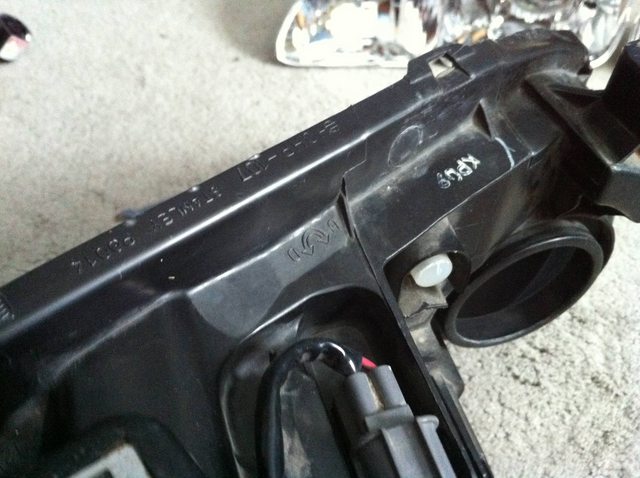
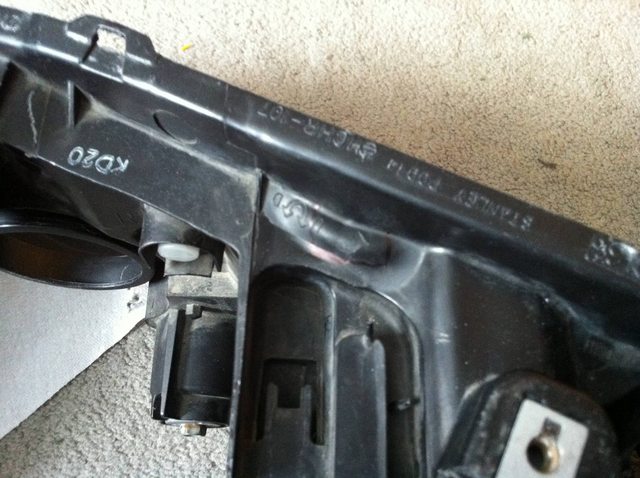
Flip over your reflector on the bottom you'll notice a square in the corner. We will use this for aligning.

Extend the lines of the square using a ruler and keep them as similar to the originals as possible. Take your ruler and decide where you want the projector center to be. I spaced mine 1 cm away from the vertical line (the one labeled "center").
Next we need to make the line for which the screws will be on. This will vary by projector. Too far forward and the projector will hit the lens. Too far back and the bulb ignitor will hit the rear cap. With that line drawn you want to pick where your lower screws will mount. For mine the left one in the photo was spaced 1.5cm from center line and right was 2.5cm away. Repeat all the steps for the other side. Try to get the screw holes in the same spot on each as if they aren't both headlights may look slightly different.
Go ahead and drill the holes slightly bigger than your bolts. They should have no grip on the housing as they need to spin freely.
Put the screws through in this order. The rubber washers help keep the metal from excessively rubbing against the chrome. Tighten the lock nut enough to where there still is slack and add on a second set of lock nuts like this.

(By having slack under the lower set of nuts you can use a socket to tighten the tops down). Tighten all 4 lock nuts to be as low as possible. The lower two should now have a firm grip and hold the bolts in place. Do not tighten the top two firmly as these are for aligning the projector.
Using some thin aluminum make some mounting brackets for the projectors.
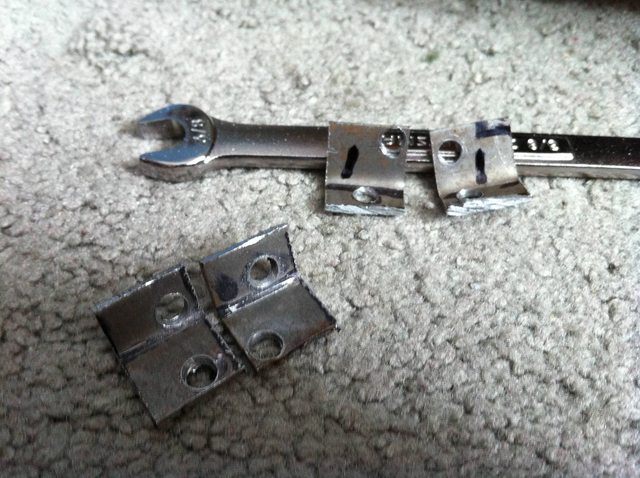
It's not really an exact science science but you want these to be as small as possible. Notice that on each one one of the screws is as close as possible to the edge. This is the one that attaches to the projector these need space to rotate so try to keep them as close to the edge as possible. Dimensions for the ones photo'd are 1cm long, 1cm tall, and 1cm wide.
Mount your brackets to the lower screw holes on the projector. Use a lock nut on the back but keep it loose enough to be able to turn the bracket with a bit of force. (Disregard that they are plastic).
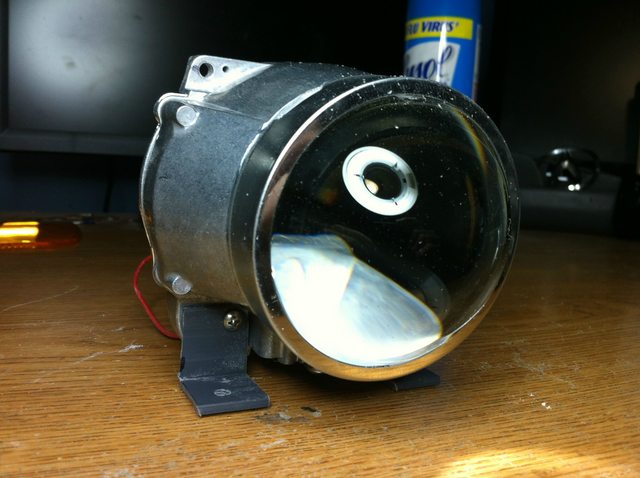
Now its time to mount the projectors in place. Be careful to not scratch the reflector, its very expensive to re chrome them. Place the projectors on their spots on the bolts. If your bolts are too long you may need to pull some tricks to get them on such as loosening them. You should have your reflectors looking like this now.

We need to make one final bracket for the top of each projector. This is not an easy task as its hard to be exact. Temporarily put your high beam bulbs back into place. Put the reflector on a flat surface and look at how the high beam appears to go out at a straight angle. We need the projectors to shoot out at a slightly downward angle if you want to keep your high beam halogens. When you find an angle that looks good you need to make a bracket that will keep the projector there. This is how mine looked:
Make the bracket for the side closest to the high beam. The projector has more space to rotate this way.
It's not that complex to make the bracket. I used a hammer, hand saw, and vice grips to bend and cut mine. Try to get it so everything is flush, and keep it as close as possible to the reflector.
When you build your brackets go ahead and mount them. I used a short bolt to hold them onto the reflector. (If you don't have a lock nut use some lock tight like I did.)
The bolt will be seen inside the headlight but it is on the top so unless someone gets inches away they will not see it.
There is a small mod we need to do to the housing. The top bracket will hit the black housing, the easiest way to fix this is to use your heat gun and slowly warm up the plastic till it is flexible. When it finally is push with your finger (WEAR GLOVES) to create a small bulge.
Before
After
With the small mod made to your housing go ahead and re mount the reflector into the stock housing. Do not try to close the rear cap but take the ignitor and hook them up. Its time for a test alignment!
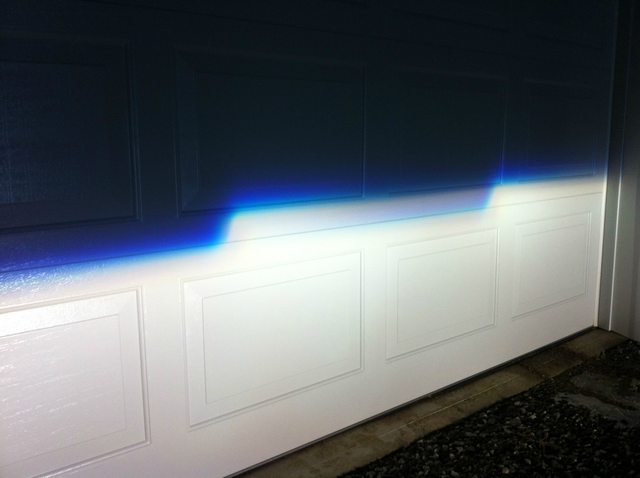
Remount your housings onto your car. We do not need any lenses or anything else as long as the bulbs are connected as normal. Find a wall with a relatively flat surface infront of it. Park 25+ feet away from the wall and turn your headlights on.
Don't worry if they aren't perfect to start. Mine weren't even close as one was on the roof!

First work with the alignment screws on the back of the housing to level out your projectors. When you get them closely leveled work with the bolts on the projector mounts to fix the angle of the cut off. Only turn the one where the top mount isn't above until everything looks good on the wall.
When you get them looking good you can take the headlights back out again and bring them in.
Creating more space in the headlight housing
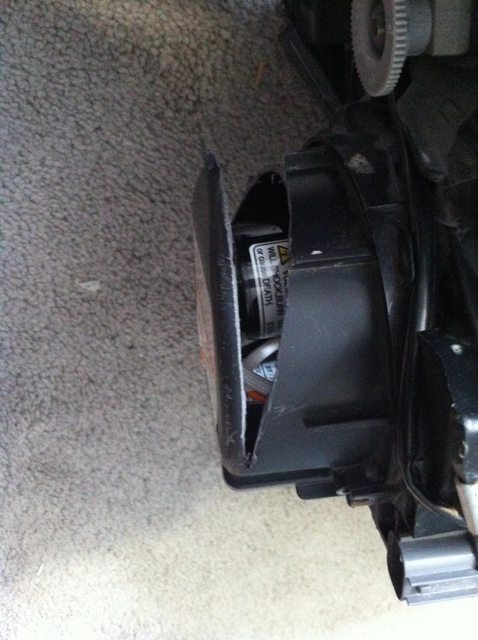
If you try to close your rear bulb caps you may notice they don't fit. (Well they might if you have small projectors). But if they don't we need to do some cutting.
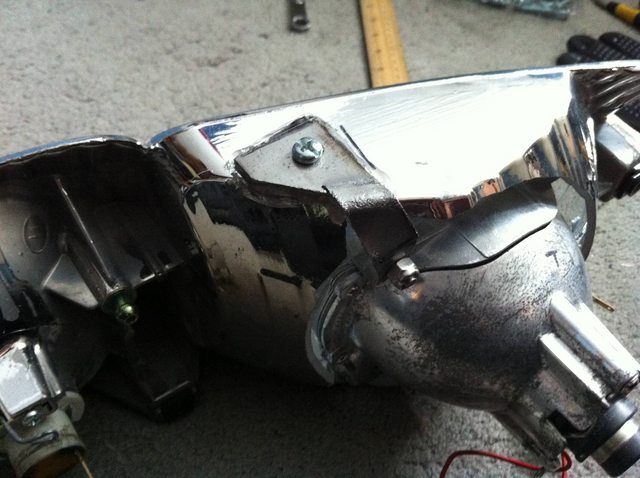
Cut along the edge of the angled portion like below. To pull the top back a bit use a heat gun and heat the plastic until you can reform it higher up and it will not try to pull back down.
Test fit them to make sure you have the spacing you need. You will want to cut out the two straight poles on the inside of the cap but leave the center one for holding the igniter. Use JB weld to re create the missing part.
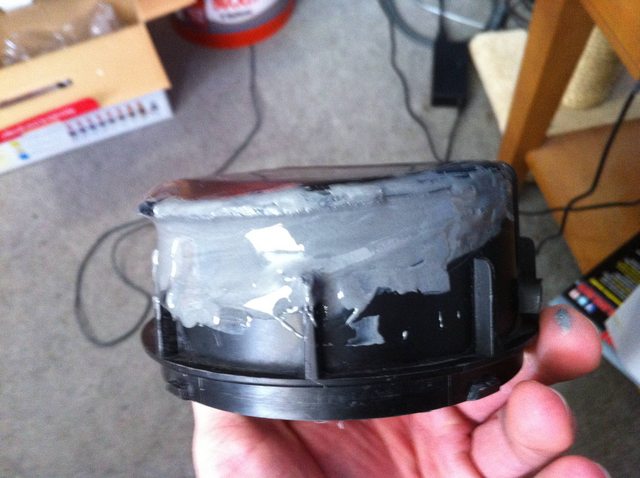
With a bit of sanding, bondo, and paint we can make them look better.

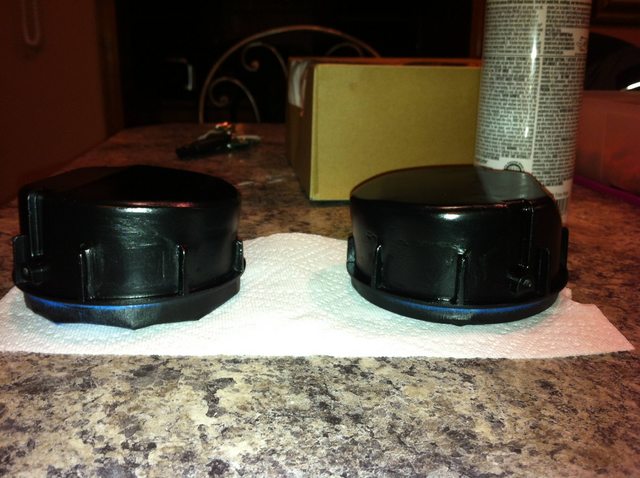
I wouldn't really bother making them perfect as its the back of the headlight no one will ever look there.
Now we have all the spacing needed and you can put these back on the housings to seal up the back. If your projectors are bi xenon cut a small hole somewhere in the back to run the wires through. Use T taps on the high beam wires to send power to the projector solenoid so it will open up when highs are engaged. Use silicon to fill the hole and prevent water from leaking in.
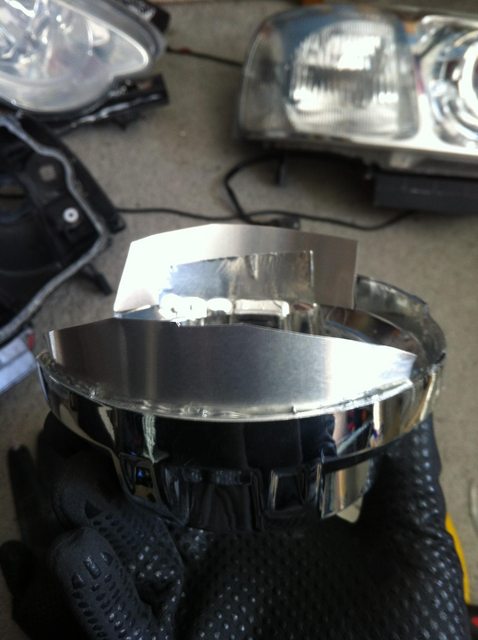
Cutting the shrouds
If your shrouds are too big you will have to do some cutting. It's really just guess and check over and over. It is much better to under cut than over cut so just keep that in mind and work in small steps. I went with the Apollo shrouds as they covered a lot and didn't take much cutting. Notice how my cars aren't perfect. As long as they are close no one will ever notice.
If you notice the odd piece of metal in there that is called a shroud extension. It's just aluminum flashing cut to fit and glued into place. I really recomend it as it hides anything behind and isn't hard to make. This is how mine looked:
When your shrouds look how you want them to JB weld them to your projector you don't want them to ever fall off when driving. This is how my apollos came out:
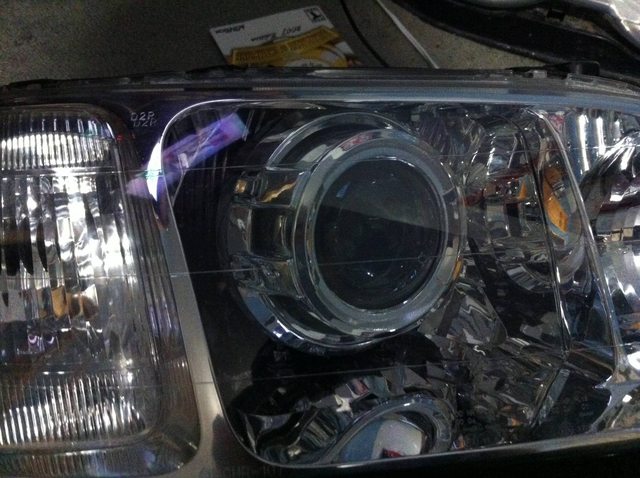
You can still see the mounting screws but its not as noticable when they are in the car. Defects may look huge when off the car but when they are in place everything looks less noticable. Don't worry about anything small. (My projector lenses have chips in them but you can't really notice)
Resealing the headlights
You made it to the end of the journey! It's time to seal up your headlights. Make sure you have cleared out all the dust and everything looks as good as you want it too. The OEM glue may be enough but you should add on some new glue to it. The retrofit source sells some good butyl I highly recommend it. If you choose to add butyl cut it off the roll and stretch it out good by rolling it in your fingers. It shouldn't be an excessive amount but enough to create a good seal. I used a little over 2 feet off the roll to seal both headlights so you should have similar results. To re close the headlight take your heat gun and heat all of the edge where the two halves meet until everything is very warm. Place the lens on top and squeeze them tight. If the lens does not go far enough to reclip the clips heat that area for a bit and squeeze it together. You do not want any moisture in your headlgihts! It may take a bit to get everything perfect but its worth the struggle.
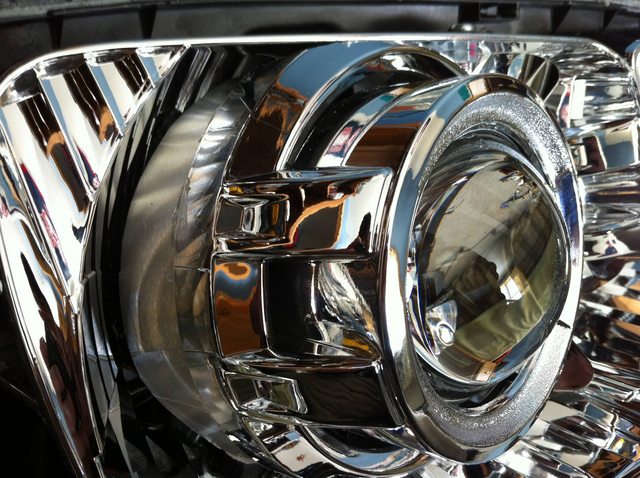
Restoring the lens
Now whats the point of having a great looking projector without a clear lens? It's very easy to restore them with a bit of wet sanding. A process that works great is start with either 500 or 800 grit depending on how bad your lens is. If you start with 800 use it wet and work it until the lens turns from a yellow to a rough white.
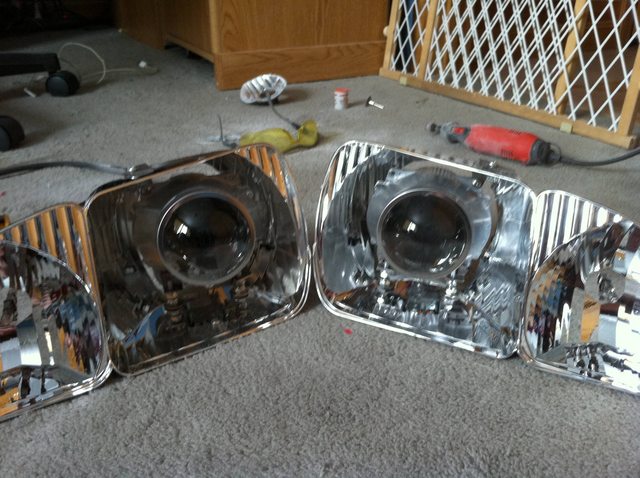
After 800 go with 1500 followed by 2000 and lastly 3000. When the 3000 is done you need to polish the lenses with a rubbing compound. (Do this step twice just to be sure they are as good as they get). If you follow this properly your headlights will look like this:

Don't forget to use a headlight sealant or vinyl wrap them! (Also a side note the clearer your lenses are the better the cutoff of light)
Last step is to enjoy your new lights!
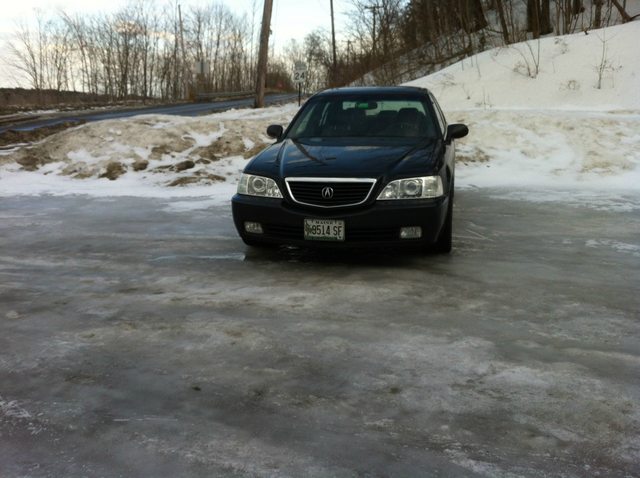
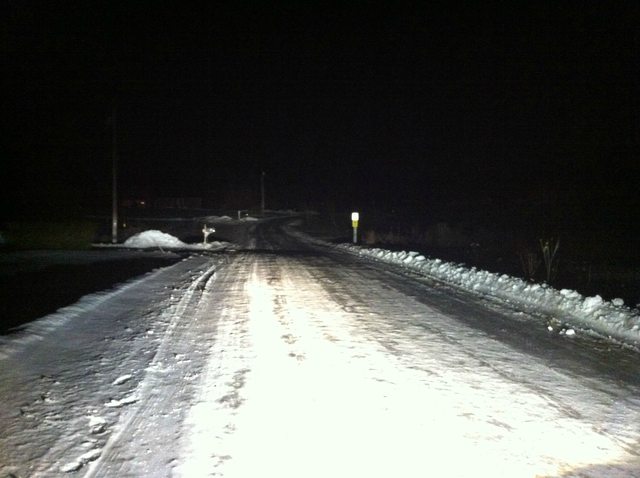
Lows:
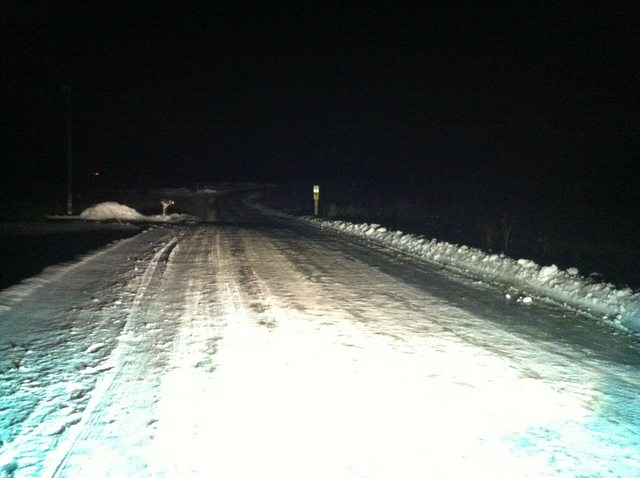
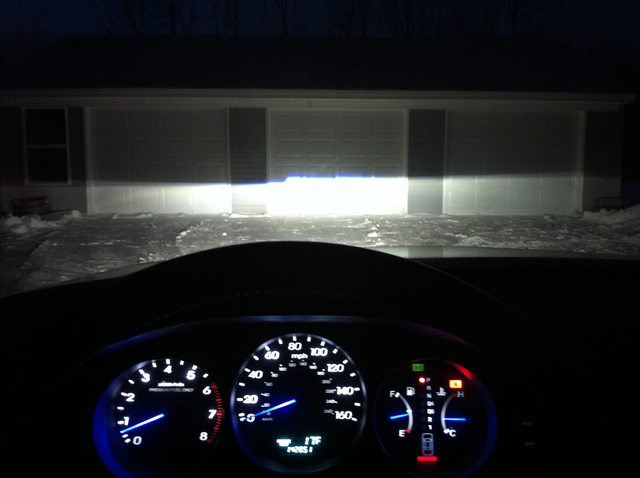
Highs:
You may notice in my high beam photo you can clearly see one of my halogen high beams hitting the ground 20ft in front of the car. This is because I didn't properly angle my driver side projector. It's not a big deal though as the projectors are better high beams and are awesome at distance. The halogen high beams are good to keep for warning other drivers.
Hope this helps someone out there wanting to do a retrofit!
Last edited by Not_So_Fast_Eddie; 03-21-2014 at 04:20 PM.
 03-21-2014, 07:50 PM
#3
Racer
Thread Starter
Don't worry I'm not trying to one up you. I ran into a lot of problems doing these headlights and I want to try to help anybody else who tries it. These things took me almost 4 months to complete. And besides your DIY is what got me interested!
03-21-2014, 09:36 PM
#4
Don't worry! I'm just giving you a hard time. I must admit, if I may say so myself, our headlights did come out pretty spectacular. You're just lucky you didn't have to abuse your arm with all that sanding.
I think one of the next projects I might tackle in the summer is ambient lighting like the somewhat newer Audi A8s have. With the lights on the ceiling, but trust me it doesn't look tacky. If don't right, I think I can make it very classy.
Or on second thought, I could just put a chandelier in my car....
(Just kidding, I would NEVER.)
03-21-2014, 11:06 PM
#5
Racer
Thread Starter
Haha sanding was the least of my worries. Didn't you already do an ambient lighting mod though? Whats the difference? And a mod I want to play around with next is led lighting under the mirrors for when the doors are unlocked.
03-22-2014, 07:02 PM
#6
I have done my ambient lighting already, remember I made a DIY? I would definitely recommend that one for you. It would look good with your setup. Just remember to watch out for the resistances.
https://acurazine.com/forums/1g-rl-1996-2004-77/diy-ambient-lighting-moonlight-effect-902460/
03-23-2014, 05:53 PM
#7
Racer
Thread Starter
No I remember the DIY I just wasn't sure why you wanted to do the audi ambient lighting if you already had ambient lighting. The door handle idea is pretty cool but I understand what you mean by being a bit unsure about doing it due to having to do it perfectly 5 times. The only reason I haven't done the ambient lighting mod yet is I'm unsure of what to do up there. My sun glasses holder is broken so I want to put something in its place but I have no clue what yet.

Thread
Thread Starter
Forum
Replies
Last Post
pistacio
2G TL (1999-2003)
10
09-26-2015 09:45 AM