
1st gen RL A-Spec pics

 01-06-2010, 09:52 PM
#42
Senior Moderator
Join Date: May 2003
Location: Better Neighborhood, Arizona
Posts: 45,641
Received 2,329 Likes
on
1,309 Posts
If you post it, I'll make it a sticky thread.
01-07-2010, 08:12 AM
#43

And I would LOOOOOOOVE the how to on that. I can't really find any suspension for this RL.
 01-08-2010, 11:53 AM
#46
Three Wheelin'
Thread Starter
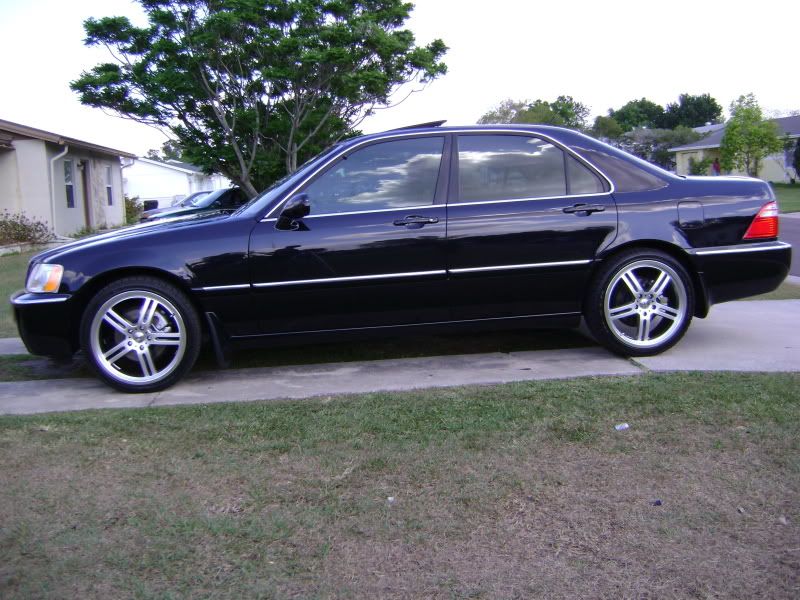
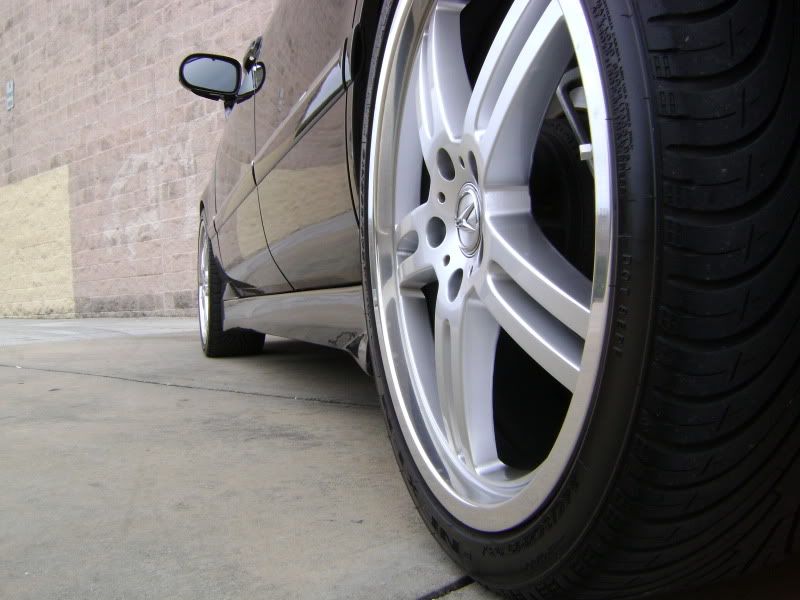
yes they are TSW Indys. They're 19x8 40+ offset and it's running 245/35 tires.
as far as the drop it just requires the oem shocks off a Legend from a junkyard (need bracket parts) and front pinchfork. Some 40 dollars worth of quick machining and it's done. I'll do a full write up later.
the RL is very closely related to the 91-95 Legend. So some parts will interchange with ease. Like CAI,s and headers will bolt up like stock on the RL. O2 sensor wires might need a little lengthening depending on header model. Suspension is pretty similar as well. Again I'll go into further detail tonigh when I'm at a pc.
t
01-08-2010, 03:14 PM
#48
The boaty ride of 96 - 98 RL was fixed up a bit for 99. However for 02+ RL the revision to suspension and other changes gave it a ride more close to TL-S which made the RL quite sharp.
01-08-2010, 04:36 PM
#49
Senior Moderator
Join Date: May 2003
Location: Better Neighborhood, Arizona
Posts: 45,641
Received 2,329 Likes
on
1,309 Posts
 01-08-2010, 05:13 PM
#50
Three Wheelin'

 01-13-2010, 10:21 AM
#53
Three Wheelin'
Thread Starter
From what Ive read from those who have owned a pre 02 and and 02-04 say the difference in handling is night and day.
I personally would like to help the RL in the body roll department so when I have the chance i'm going to be looking into poly sway bar bushings. That should definately help with body roll being the endlinks are a ball joint type with very little play.
As far as the koni thing, here is a little write up I did and posted on acuralegend.org
Its not quite completed to be a complete how to since it needs pictures, but if I can I will make a complete how to with pictures.
Now for the RL there are actually other options as far as suspension.
1. You can go super baller and get some KA9 JIC (or the like) coilovers etc shipped in from Japan. This is $2,000.00+.
2. you can get lowering springs shipped in From companies in Japan. This is about $400.00+
3. You can get lowering springs from Europe shipped in. H&R actually has an application on theyre Europe site. Lowers the RL 1.5 inches with H&R quality. Found on Ebay with shipping from Europe for about $365.00+
4. You can use 91-95 Legend coilovers (ksports etc) you just have to find the front pinchforks fro the fronts out of a Legend from a Junkyard etc. This usually runs in the $800.00 range
5. You can use 1st gen TSX coilovers as well. I believe from what I read the rears need a slight spacer on the bottom through bolt and the fronts should bolt in no probs. You also have to use your own top hats as in the lower model teins etc. This usually runs in the $800.00 dollar range as well.
6. You can always do custom air setups or hydraulics but usually alot more money is involved depending on what systems you choose and does the customizing for you.
So as far as lowering your RL these are your options. :thumbs up
I personally would like to help the RL in the body roll department so when I have the chance i'm going to be looking into poly sway bar bushings. That should definately help with body roll being the endlinks are a ball joint type with very little play.
As far as the koni thing, here is a little write up I did and posted on acuralegend.org
Its not quite completed to be a complete how to since it needs pictures, but if I can I will make a complete how to with pictures.
Well guys after much debating on what exactly I was going to do, to try and lower my 1st gen RL I came up wih this.
Since the G2 Legends struts will physically bolt onto the RL I figured this would be the easiest and net be the best results. I personally did not want to go full coilover since I need comfort. Not to say you cant get a comfortable ride with coilovers but I need a softer ride. I didnt want to go full airbag cause I need my trunk space and didnt have that kind of cash either.
I wanted to use my stock 2002-04 springs since the ride was comfortable, yet sporty. So basicly after 40 dollars of machining, a pair of new konis for a G2 Legend, and a pair of oem G2 Acura front shocks I achaived my desired result with a good ride.
So parts needed are:
G2 Legend Koni struts (all four)
G2 Legend front picnchforks
G2 Legend OEM Acura front struts ( dont need all of it but will explain later)
Good machinist for a small machining job (Koni will also machine if bought straight from them)
For anyone who doest know, Koni shocks are height adjustable. Basicly there is a small snap ring in a groove on the strut body that the spring perch sits on top of. There are several of these grooves to allow to adjust ride height. Usually only 2 grooves in the front (normal and sport) and three grooves in the rear.(towing/normal/sport)
Lets start with the rear Konis.
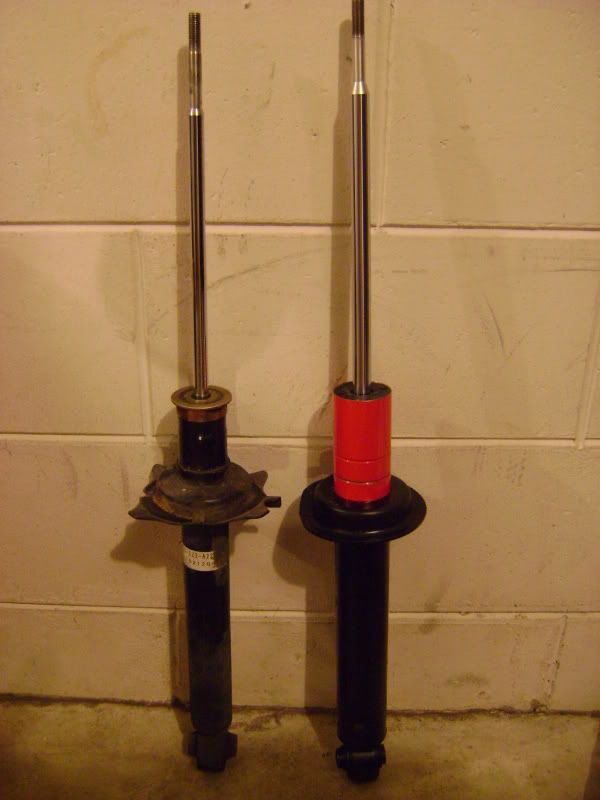
They will bolt up to the RL no problems. You simply use your RL springs and tophats. Here is the deal though. If you use the lowest spring perch position (sport) of the G2 konis it will only lower the rear of the RL about a 1/4" instead of the 5/8" it does on the G2 Legend. Heres a quick comparison pic.
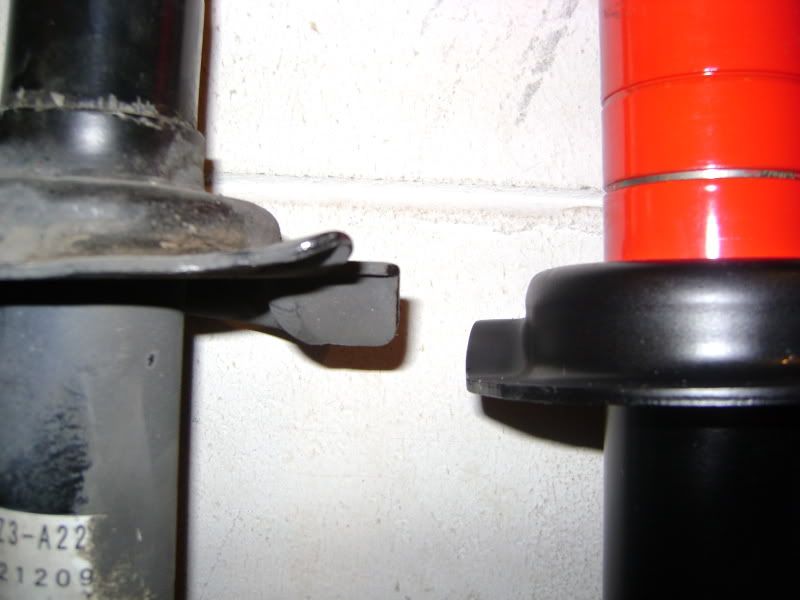
The actual strut body is almost exactly the same size between the RL and the G2 Legend. Theres only a slight difference. The G2 has about 3/8" more travel on the shaft, and about 1/8" taller from mounting point to the top of the strut body. Very slight difference and nothing to worry about.
So now I didnt want to lower my car 1/4" in the rear so here is where a good local machinist comes in. You basicly decide how much lower you want your RL to sit from the lower mark and have a machinist make another groove or multiple grooves depending if you are unsure. I personally wouldnt go much more than what I did since anything over say 1.25" lower will cause the spring to be loose when the suspension is fully decompressed.
Here is a picture of the grooves that I had added
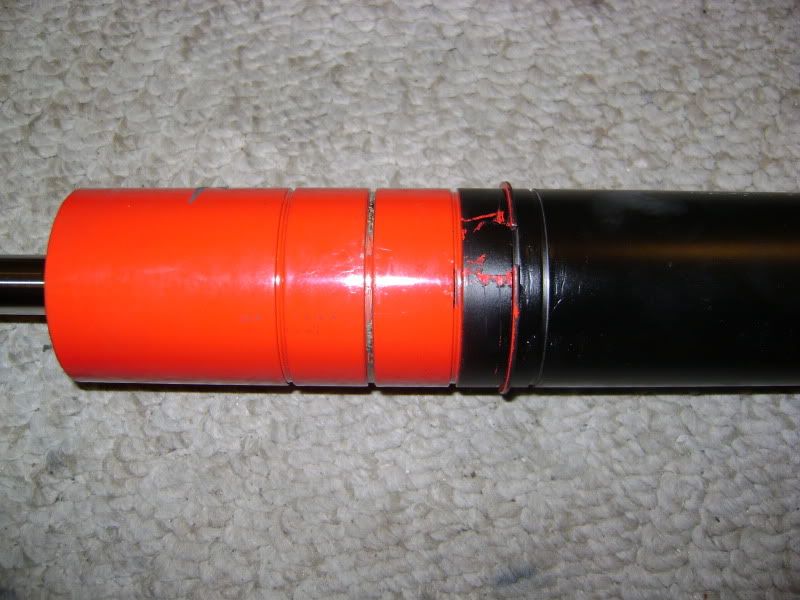
The 3 grooves spaced far apart towards the left are the original grooves on the koni rear and the 2 close grooves (one has snap ring in it) towards the right are the ones I had a machinist do. One is 1/2" and the other is 3/4" from the lowest original groove that only lowers the rear 1/4". So I effectively made marks that would lower the rear of the car 3/4' and 1" on the rear.
So after you decide where you want your perch to be, its reassembly as stock. There is only one thing extra that needs to be done. The bumpstops need opened up in the middle since the shaft on the G2 konis is thicker than the OEM RL rear struts. The rear bottom mount is the same size as the RL. No need to purchase or swap bushings.
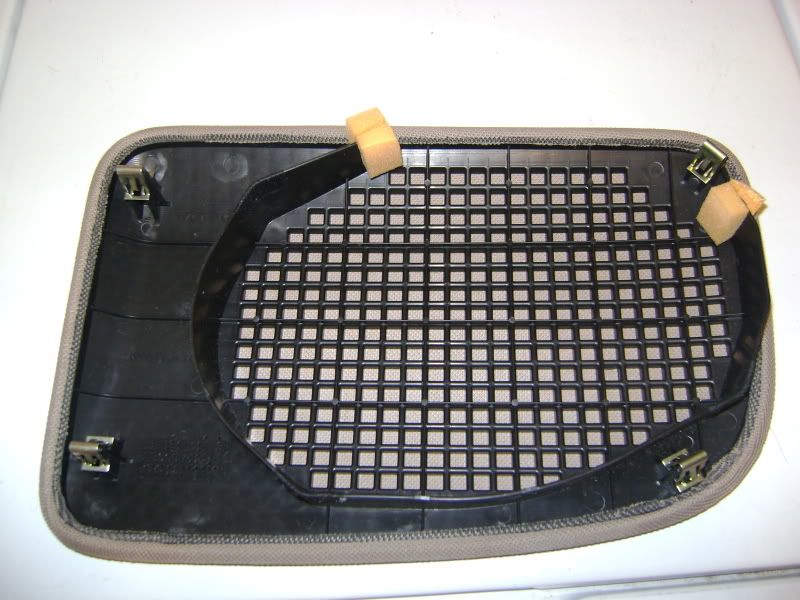
One extra tidbit of info and Thanks go out to onebadna1nsx for verifying this. Contrary to what the PDF manual says you do NOT need to take off the rear seat to remove the rear struts. You CAN infact only remove the speaker covers since they simply pop off to give you access to the top of the struts.(after you remove the speakers also) Here is a quick pic to see where the clips are.
Now onto the fronts.
The fronts are a little more complicated since you need to source a set of OEM Acura G2 Legend front struts to get pieces off of. The G2 Legend front struts a physically the same exact size as the RL struts minus the fact the G2's are thicker along with having a beefier pinch fork. The brake line bracket is exactly the same as are the vertical dimensions.
That being said using the "Normal" perch on the front Konis will have your RL sitting at the correct stock height. Using the sport perch will indeed lower your front an inch as advertised by Koni for the G2 Legend.
Now for the hard part. The front Konis do not come with the spring perch or brake line bracket. (hate this design) So these need to be had off the OEM G2 Legend front struts along with the pinchforks. If you can you can just go to the j/y and remove the brackets and pinchfork instead of buying the whole struts. (usually more expensive but need to take a spring compressor)
The Konis come with cheesy instructions on how to remove the oem Legend brake line and spring perch off the oem strut. Here is the basic jist of it though.
After the spring is removed and you only have the oem Legend strut in your hand.
Place the strut upright and hammer the brake bracket down off of the strut.
Place the strut upside down and hammer the spring perch down off the strut.(theres a small gold cap that gets hamered off too)
After that you can put these on the Konis. I personally had more grooves machined in my front Konis since i didnt want just an inch of drop. You also need to bore out the bumpstop again.
Reassemble everything using the RL parts and there you go. That is it.
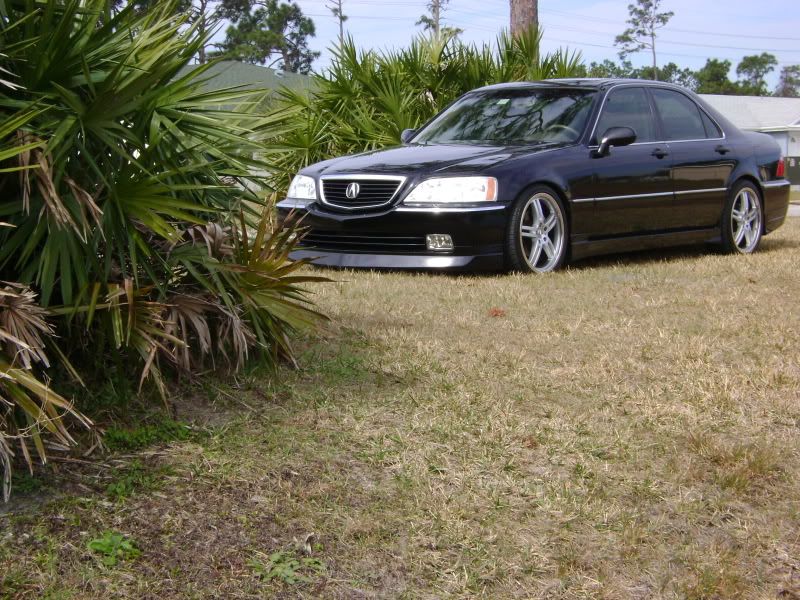
I personally lowered the rear 1" and the front 1-1/2".
Here is a before:
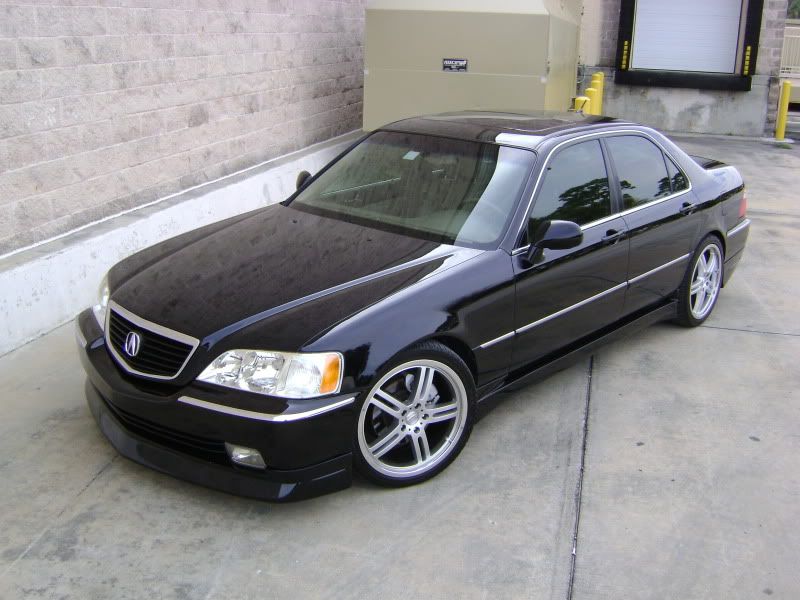
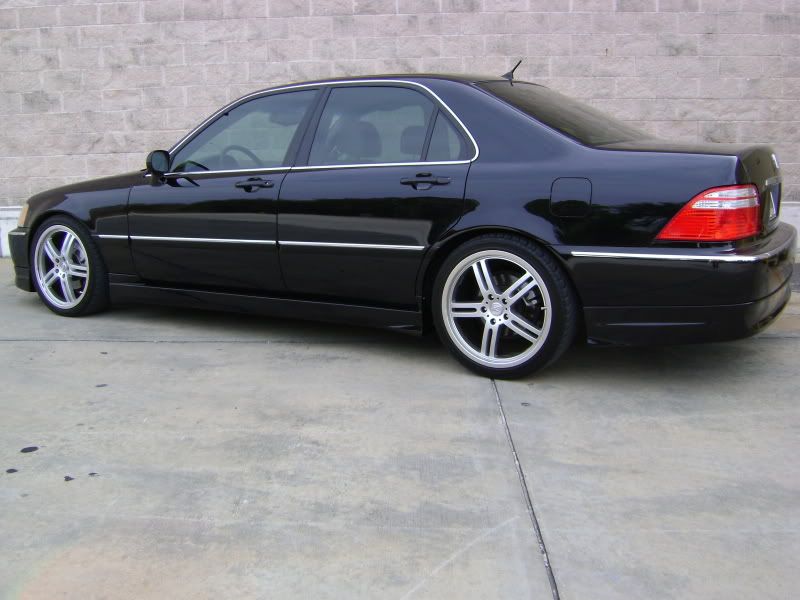
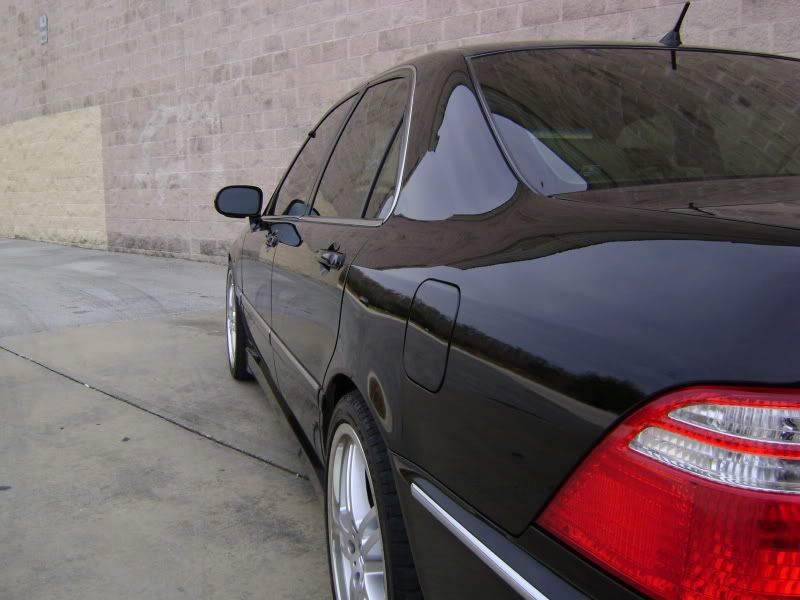
and heres a quick after using my cell phone:

I wil lget better pics once the car is washed since its been raining everyday and its extremely dirty right now.
Well thats it. The ride is good, a little stiffer than OEM 2002-04 struts but a smooth ride none the less.
The body by itself was only lowered 1" front and 3/4" rear when measure from the side jack points.
I dont know if anyones done this before but since my searches turned up nothing I figured I would share.
Since the G2 Legends struts will physically bolt onto the RL I figured this would be the easiest and net be the best results. I personally did not want to go full coilover since I need comfort. Not to say you cant get a comfortable ride with coilovers but I need a softer ride. I didnt want to go full airbag cause I need my trunk space and didnt have that kind of cash either.
I wanted to use my stock 2002-04 springs since the ride was comfortable, yet sporty. So basicly after 40 dollars of machining, a pair of new konis for a G2 Legend, and a pair of oem G2 Acura front shocks I achaived my desired result with a good ride.
So parts needed are:
G2 Legend Koni struts (all four)
G2 Legend front picnchforks
G2 Legend OEM Acura front struts ( dont need all of it but will explain later)
Good machinist for a small machining job (Koni will also machine if bought straight from them)
For anyone who doest know, Koni shocks are height adjustable. Basicly there is a small snap ring in a groove on the strut body that the spring perch sits on top of. There are several of these grooves to allow to adjust ride height. Usually only 2 grooves in the front (normal and sport) and three grooves in the rear.(towing/normal/sport)
Lets start with the rear Konis.
They will bolt up to the RL no problems. You simply use your RL springs and tophats. Here is the deal though. If you use the lowest spring perch position (sport) of the G2 konis it will only lower the rear of the RL about a 1/4" instead of the 5/8" it does on the G2 Legend. Heres a quick comparison pic.
The actual strut body is almost exactly the same size between the RL and the G2 Legend. Theres only a slight difference. The G2 has about 3/8" more travel on the shaft, and about 1/8" taller from mounting point to the top of the strut body. Very slight difference and nothing to worry about.
So now I didnt want to lower my car 1/4" in the rear so here is where a good local machinist comes in. You basicly decide how much lower you want your RL to sit from the lower mark and have a machinist make another groove or multiple grooves depending if you are unsure. I personally wouldnt go much more than what I did since anything over say 1.25" lower will cause the spring to be loose when the suspension is fully decompressed.
Here is a picture of the grooves that I had added
The 3 grooves spaced far apart towards the left are the original grooves on the koni rear and the 2 close grooves (one has snap ring in it) towards the right are the ones I had a machinist do. One is 1/2" and the other is 3/4" from the lowest original groove that only lowers the rear 1/4". So I effectively made marks that would lower the rear of the car 3/4' and 1" on the rear.
So after you decide where you want your perch to be, its reassembly as stock. There is only one thing extra that needs to be done. The bumpstops need opened up in the middle since the shaft on the G2 konis is thicker than the OEM RL rear struts. The rear bottom mount is the same size as the RL. No need to purchase or swap bushings.
One extra tidbit of info and Thanks go out to onebadna1nsx for verifying this. Contrary to what the PDF manual says you do NOT need to take off the rear seat to remove the rear struts. You CAN infact only remove the speaker covers since they simply pop off to give you access to the top of the struts.(after you remove the speakers also) Here is a quick pic to see where the clips are.
Now onto the fronts.
The fronts are a little more complicated since you need to source a set of OEM Acura G2 Legend front struts to get pieces off of. The G2 Legend front struts a physically the same exact size as the RL struts minus the fact the G2's are thicker along with having a beefier pinch fork. The brake line bracket is exactly the same as are the vertical dimensions.
That being said using the "Normal" perch on the front Konis will have your RL sitting at the correct stock height. Using the sport perch will indeed lower your front an inch as advertised by Koni for the G2 Legend.
Now for the hard part. The front Konis do not come with the spring perch or brake line bracket. (hate this design) So these need to be had off the OEM G2 Legend front struts along with the pinchforks. If you can you can just go to the j/y and remove the brackets and pinchfork instead of buying the whole struts. (usually more expensive but need to take a spring compressor)
The Konis come with cheesy instructions on how to remove the oem Legend brake line and spring perch off the oem strut. Here is the basic jist of it though.
After the spring is removed and you only have the oem Legend strut in your hand.
Place the strut upright and hammer the brake bracket down off of the strut.
Place the strut upside down and hammer the spring perch down off the strut.(theres a small gold cap that gets hamered off too)
After that you can put these on the Konis. I personally had more grooves machined in my front Konis since i didnt want just an inch of drop. You also need to bore out the bumpstop again.
Reassemble everything using the RL parts and there you go. That is it.
I personally lowered the rear 1" and the front 1-1/2".
Here is a before:
and heres a quick after using my cell phone:
I wil lget better pics once the car is washed since its been raining everyday and its extremely dirty right now.
Well thats it. The ride is good, a little stiffer than OEM 2002-04 struts but a smooth ride none the less.
The body by itself was only lowered 1" front and 3/4" rear when measure from the side jack points.
I dont know if anyones done this before but since my searches turned up nothing I figured I would share.
Now for the RL there are actually other options as far as suspension.
1. You can go super baller and get some KA9 JIC (or the like) coilovers etc shipped in from Japan. This is $2,000.00+.
2. you can get lowering springs shipped in From companies in Japan. This is about $400.00+
3. You can get lowering springs from Europe shipped in. H&R actually has an application on theyre Europe site. Lowers the RL 1.5 inches with H&R quality. Found on Ebay with shipping from Europe for about $365.00+
4. You can use 91-95 Legend coilovers (ksports etc) you just have to find the front pinchforks fro the fronts out of a Legend from a Junkyard etc. This usually runs in the $800.00 range
5. You can use 1st gen TSX coilovers as well. I believe from what I read the rears need a slight spacer on the bottom through bolt and the fronts should bolt in no probs. You also have to use your own top hats as in the lower model teins etc. This usually runs in the $800.00 dollar range as well.
6. You can always do custom air setups or hydraulics but usually alot more money is involved depending on what systems you choose and does the customizing for you.
So as far as lowering your RL these are your options. :thumbs up


 03-04-2010, 01:18 PM
#62
Three Wheelin'
by the way, those new pics look stunning.
 03-04-2010, 02:46 PM
#63
Three Wheelin'
Thread Starter
what year is your RL?
I'm pretty sure the 99-02 used a bigger emblem than the 03-04.
that's the only reason I can think of for your not being the same size.
thanks. It would have been nice if I had a real camera though.
I'm pretty sure the 99-02 used a bigger emblem than the 03-04.
that's the only reason I can think of for your not being the same size.
thanks. It would have been nice if I had a real camera though.
03-04-2010, 02:52 PM
#64
Three Wheelin'
i have a 2002; so you're saying the center caps from the '03-04 RLs are smaller than mine? i never knew that.
03-04-2010, 03:18 PM
#65
Three Wheelin'
Thread Starter
yeppers. That exactly what I'm saying.
I actually bought a set of centercaps for an 02 so that I could use them to put in my aftermarket rims and found out the emblems were slightly bigger. I think by about 3/8ths or so.
the 2003-04 RLls also got a bigger front grille emblem.
why Acura decided to make the emblems on the rims slightly smaller and the emblem on the grille slightly bigger from 03 on is a mystery. Lol
 03-09-2010, 08:44 AM
#68
Three Wheelin'
Thread Starter
2002 Acura symbol measured top to bottom - 53mm(2.1")
As far as adding backup camera there are plenty of how tos around. Its basicly pretty much the same for all.
Basicly you get yourself a navtool/nav2go, or another brand video interface module. Theres tons of different nodels around, but theyre all basiclly the same thing.
it gets plugged in between the plugs of the nav unit in the trunk
install your back up camera and run the cables to the navtool.
connect a couple of wires to where they go and thats pertty much it. every time you shift into reverse your video will go to the back up camera and overide the regualr screen video.
03-10-2010, 09:54 PM
#69
.... .... .... ... ....
03-20-2010, 09:19 PM
#71
That's what she said!
Loving the new pics. Your RL is inspiration! I need a drop and wheels. Was thinking OEM 18" 350z or Maxima Wheels, or even the 18" BBS Wheels that were Toyota Dealer adds on the Camry and Avalon.
 07-05-2010, 10:34 PM
#75
Three Wheelin'
Thread Starter
sooooooo 
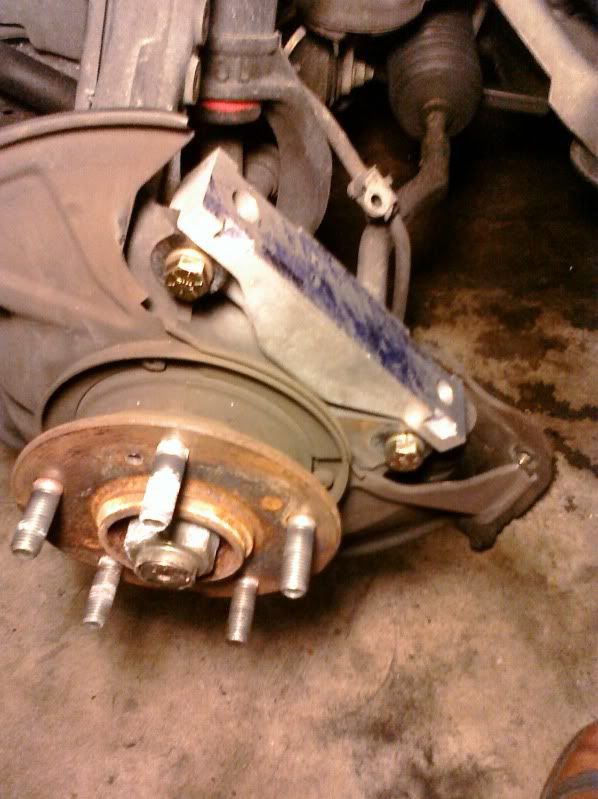
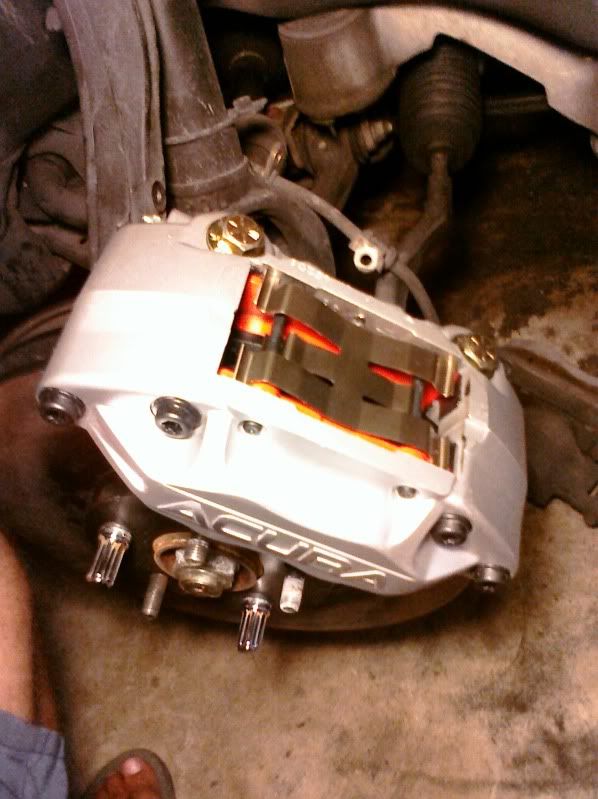
Stopped slacking on some brake upgrades Ive been planning.
EBC red pads all around
SS braided lines all around
4 Pot RL caliper with custom bracket
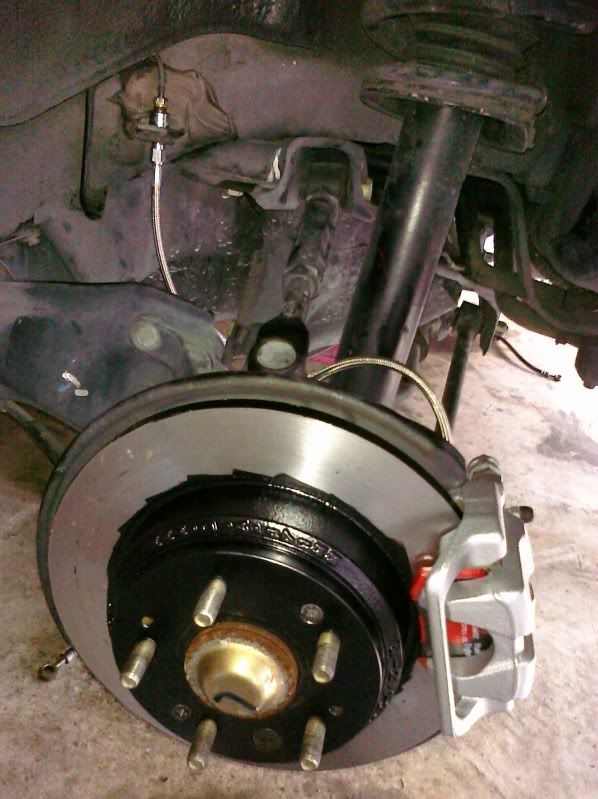
thoughts?
Stopped slacking on some brake upgrades Ive been planning.
EBC red pads all around
SS braided lines all around
4 Pot RL caliper with custom bracket
thoughts?
 Hahha glad they're finally on!
07-06-2010, 11:06 AM
Hahha glad they're finally on!
07-06-2010, 11:06 AM
#78
That's what she said!
 07-06-2010, 11:38 AM
#79
Three Wheelin'
Thread Starter
Well Eric you havent been on aim lately so no updated pics for you. lol
Thanks guys.
as far as working with the oem rotors, that is a no.
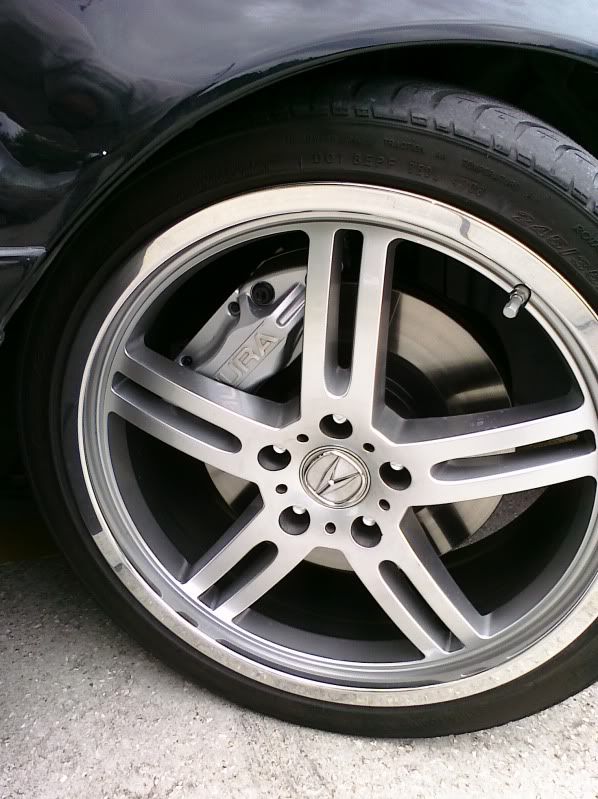
First things first is you will need rims that will clear the calipers. These things are huge.
Second is you will need to buy 12.75" rotors for another car and have them machined slightly.
Third is you will need to modify the caliper a little. (machine a couple mm off the mounting surface
after that its as simple as making the bracket, and getting the correct length hardware.
If your interested I can send you dimensions etc. PM me for details.
Thanks guys.
as far as working with the oem rotors, that is a no.
First things first is you will need rims that will clear the calipers. These things are huge.
Second is you will need to buy 12.75" rotors for another car and have them machined slightly.
Third is you will need to modify the caliper a little. (machine a couple mm off the mounting surface
after that its as simple as making the bracket, and getting the correct length hardware.
If your interested I can send you dimensions etc. PM me for details.
07-06-2010, 12:48 PM
#80
That's what she said!
Well Eric you havent been on aim lately so no updated pics for you. lol
Thanks guys.
as far as working with the oem rotors, that is a no.
First things first is you will need rims that will clear the calipers. These things are huge.
Second is you will need to buy 12.75" rotors for another car and have them machined slightly.
Third is you will need to modify the caliper a little. (machine a couple mm off the mounting surface
after that its as simple as making the bracket, and getting the correct length hardware.
If your interested I can send you dimensions etc. PM me for details.